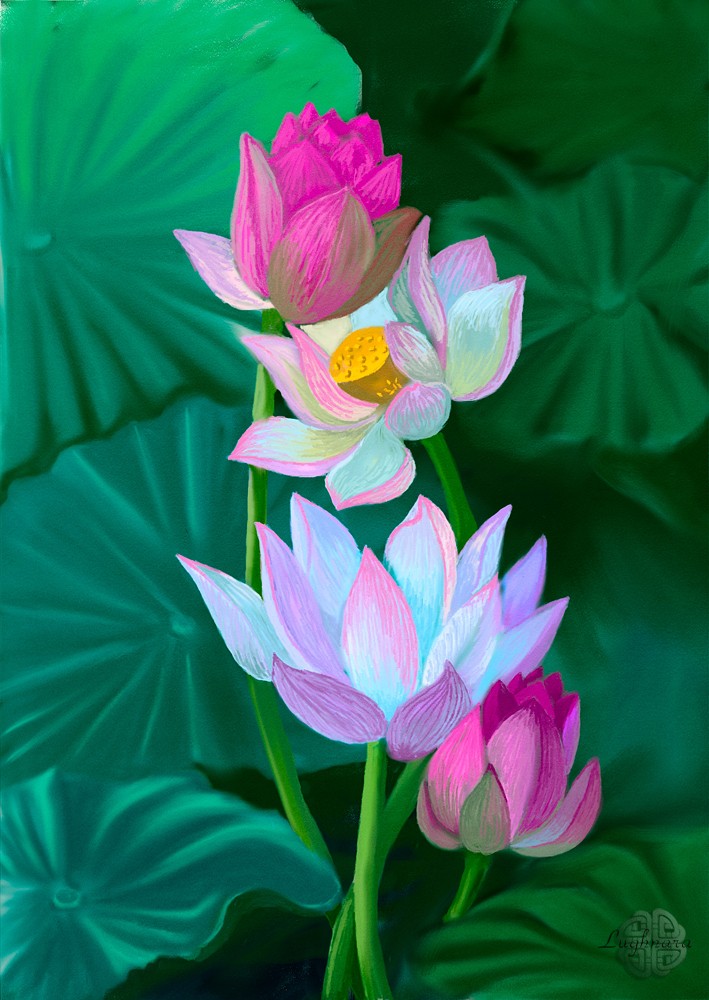
Digital art_2021. Chionodoxa
Hi friends!
Continuing to study the program **Realistic Paint Studio**, I chose a pretty spring flower as an object for the image named Chionodoxa.
It's one of the first flowers to bloom in spring.
This beautiful flower is worthy to be painted!
So, my favorite graphic program **Realistic Paint Studio** has tools to help me get my creative idea into reality.
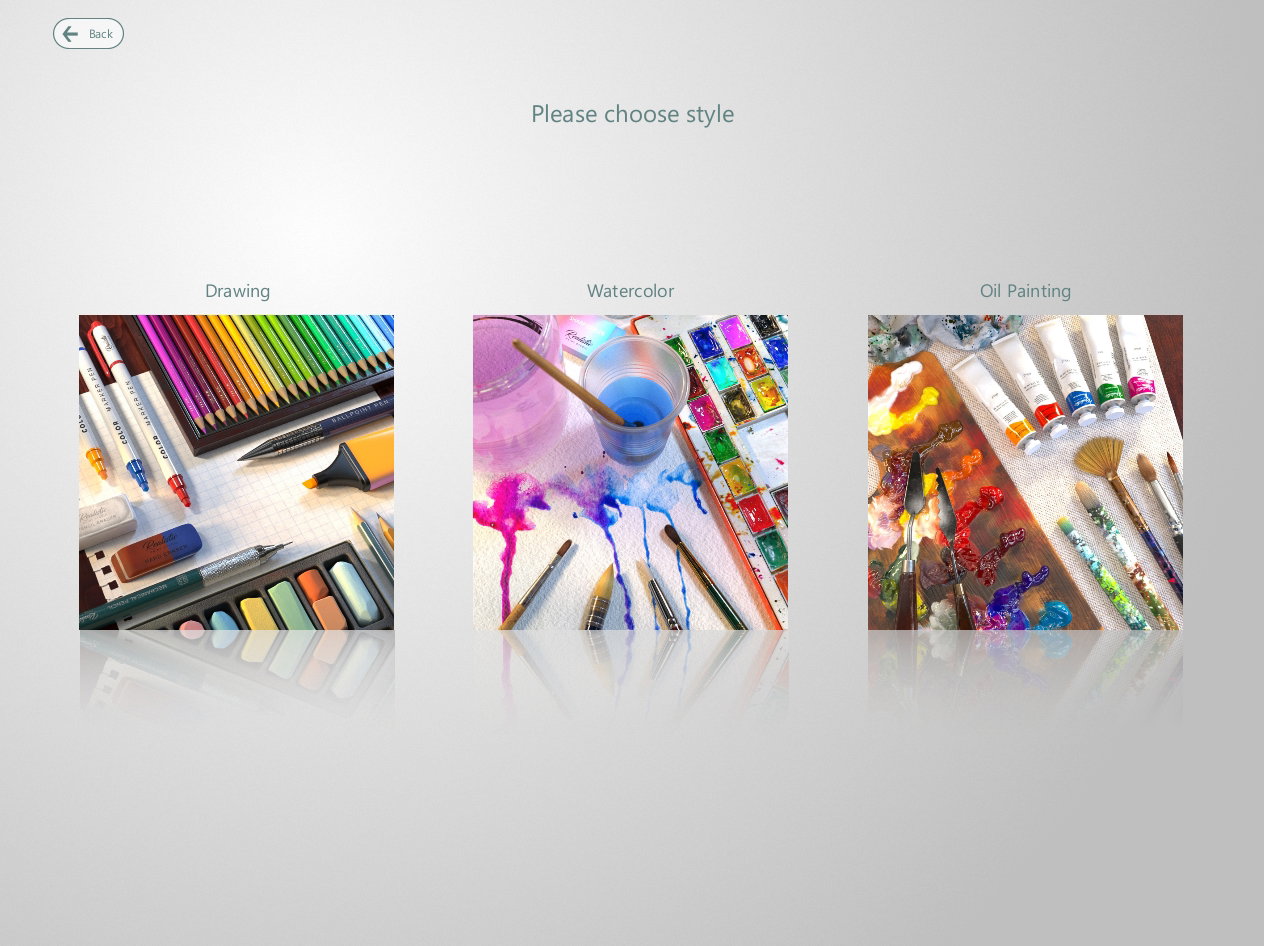
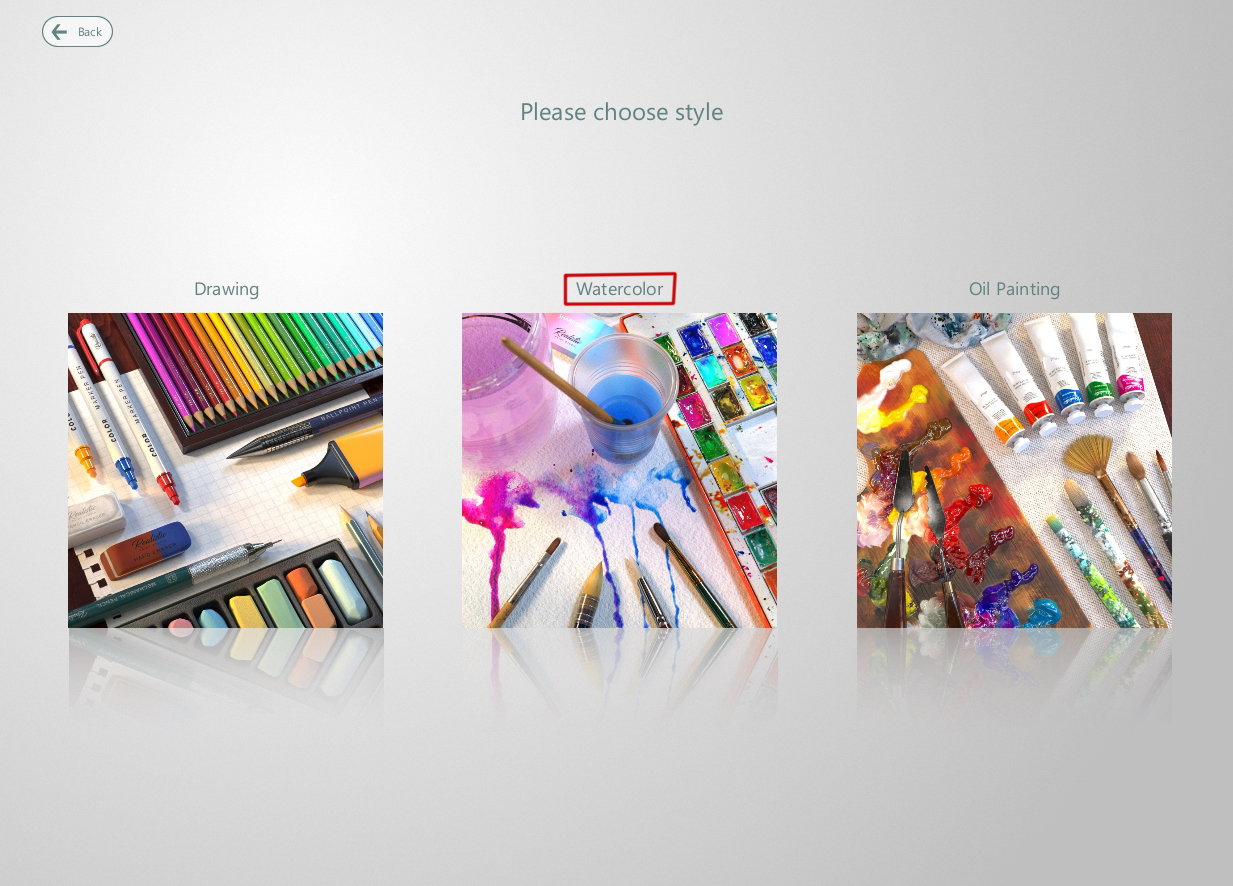
I lunch the program and choose a style **"Drawing"**
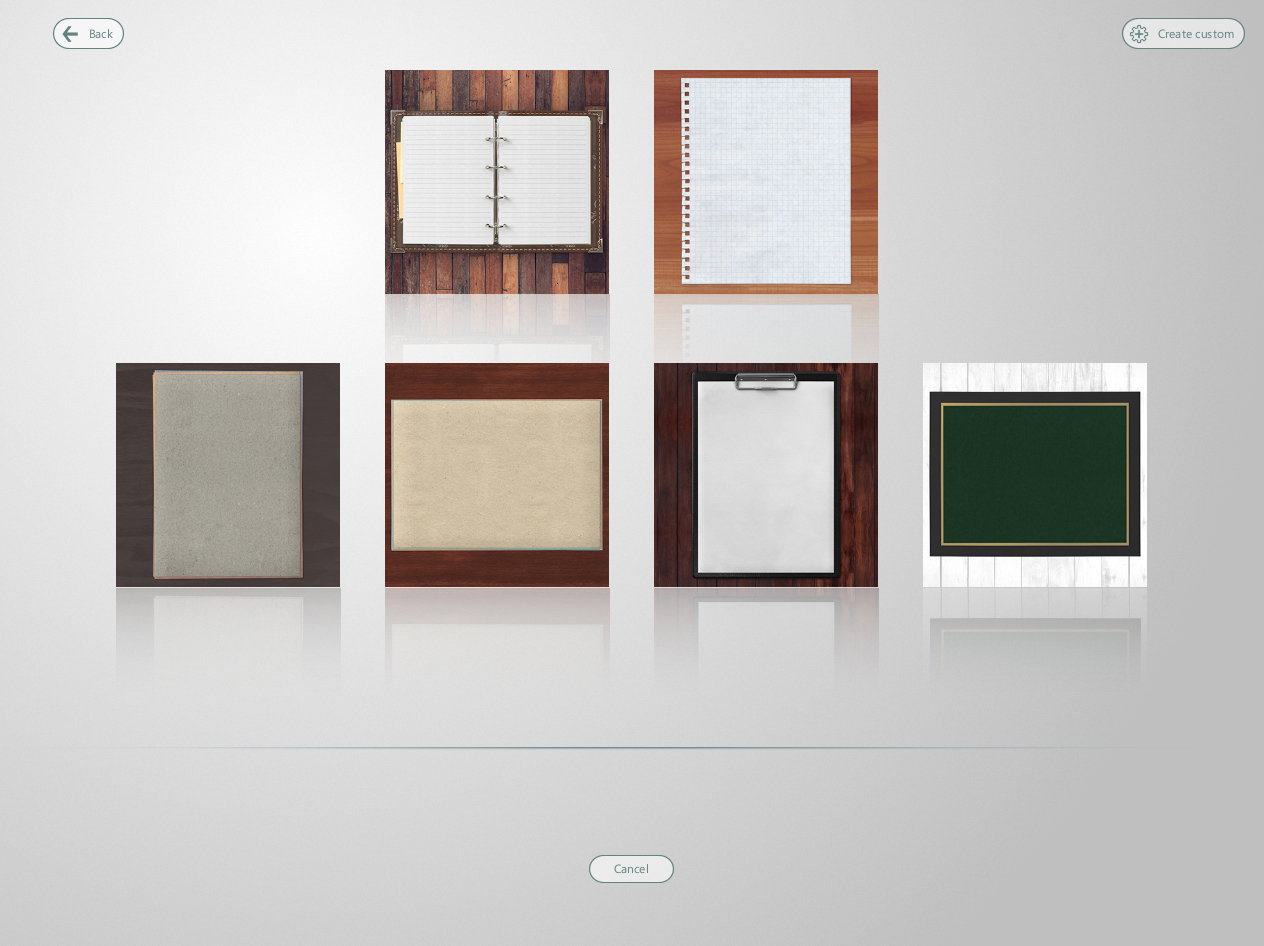
Then I choose a canvas.
The paid version of the program has an ability to create a custom canvas, and I will use this.
Choosing a color and texture of canvas
With button at the top (marked with red) can open tool box
I choose a graphit pencil with a hardness of 2B
Sketch
I looked at several photos to come up with my own story.
As I wrote in past l tutorial, here you can use a tools from a boxes for other styles.
In this case, I want to use a watercolor brush now and choose a brush for create beautiful texture strokes named **Little drops** https://read.cash/@daring-celt/digital-art-2021-tree-on-the-winter-sunset-d81f3cd8t
In my idea, a flower grows between two stones. This brush helps me create a porous texture for them.
In this step I try to draw a foliage on background so ( I will adjust its shape and location later)
Then I choose a basic brush **Draw and Blur**
to draw a drop shadows from flower on a stones (on new layer)
Then I choose another brush from watercolor box - **Wet blender**
to blur a shadows a little
And now all the fun begins!
The fact is that the paid version of **Realistic Paint Studio** includes an exclusive set of tools for calligraphy and design.
This is what the box with these tools looks like.
I choose the fourth brush for painting a petals **- Glass brush**
Yes, I want to say I create a new layer to each element of my picture
Choosing a brush for drawing a leaves - **Artistic brush**
I also want to add: if some toolbar interferes with drawing, you can remove it at any time or open it again using the buttons at the top
The foliage on background I draw with basic watercolor brush
Then I erase a little and blot the edges of the area with a sponge (also from a watercolor box)
Then I return an exclusive set box and choose a pen - **Fountain pen**
to detail a texture of the stones
With the same pen I refine a shape of the petals and leaves of a flower
For the cores of the flowers, I choose the **Glitz Pen** tool which draws in gold.
This element brings a little beauty and magic to the picture.
Then I choose a **Fountain pen** again.
I slightly modify the color of a petals depending on the lighting (according to my plan, a light falls from the right)
So they look much more expressive, right?
So, only the background remains.
I want to make it a color that makes the flowers stand out better.
I soften the strokes with blur brush
And with **Mechanical Thin Line**
I draw a texture on background in the form of many small strokes
and soften the boundaries near an edges of picture
Then I copy background layer and replace a layer of foliage below both background layers
Here's what happened in the end!
And two variants of presentations
Many thanks to all who come to my blog and read drawing tutorials!))
I hope you enjoy looking at spring flowers in the middle of winter too! ;)
With Love...
Lotuses in Realistic Paint Studio, drawing tutorial - https://read.cash/@daring-celt/digital-art-2020-lotuses-57832e78
#art #drawing #digital #tutorial #readcash
Digital art_2020. Lotuses
Hi friends!
This is another drawing from the series **"Magic flowers"**
I have long wanted to draw lotuses. There is, perhaps, no more mysterious and magical flower than they! And when I bought **Realistic Paint Studio,** I realized that the time has come to implement my long-term plan!
So, I create a new project and see next window, when can choose a painting style.
I choose **"Drawing".**
Then I need choose a kind of canvas
Here you can choose other color for canvas - with arrows at the bottom
I choose usual white canvas
and slate pencil for sketches (*marked with a red circle*)
To open tool box you need select an icon on the top
or touch a tool out the box set
So... I find a beautiful photo of lotuses I'll draw and making a sketch https://i.pinimg.com/564x/4a/e0/69/4ae0693b79ce6dd8d0e454ddc4e365ea.jpg
Then I create a new layer to add color on drawing
For painting I choose a set of soft pastel
With two buttons you can choose another color set
Painting looking on colors in reference
So you can choose a color of tool with color palette circle (as in Photoshop or Corel Painter) in top right angle.
Or use **Eyedropper** (*with* ***ALT*** *button on keyboard*)
This is what the preliminary painting of flowers looks like.
Then I add two new layer below the flowers - for the leaves and base background.
In this step I use a Shading set tools to make a leaves more blurring
Background is ready
So I choose a soft Pastel set again to continue drawing flowers
Then I blur the hard strokes with Shading set tools too.
Note - at any time, if you need to leave drawing, you can save the project by clicking on this button in the upper left corner
and so you can open the project in that step where you stopped last time
So, for make a details I choose a Color Pencil set
And drawing with them on new top layer
The ready art
And that's not all!
The program provides the ability to save a drawing, export it to .jpg or .png format...
or create a spectacular presentation (*by clicking on top middle button*)
...and keep your work that way
or that
Do you like this viwes of art?
So, I hope you'll like my tutorial and this program.
If someone wants to buy it (or install trial version), it's here https://realisticpaint.com/index.html
Have a nice and creative day!
With Love...
Digital art_2019. Golden Lilies
Hi friends!
I continue my drawing series named **"Magic Flowers"**
Today I tell and show you how I drew one of most beautiful july flowers - golden lillies
I hope that a view of these joyful flowers will warm you a little if you are cold in winter.
I've always many flowers in my garden in summer, because I hadn't a reference to draw them
Sketch in **Paint Tool SAI 2**
Color palette
Steps
In version 2 of **SAI** you can fill an background with gradient.
Chose a color of lilies
Lilies have very beautiful petals - golden color turns into dark red
I wanted to draw it as a real flowers (*even though I draw in the style of illustrations*)
Yes, in this time I use a new brush
On this step I decided what color of background too light and I copy this layer & made it darken to selected shining petals of lilies.
Details
More deep shadows in the center of flowers
I assumed that the flowers are lit with diffuse light, so there are no harsh shadows.
Then I wanted to add a shine to edge of petals.
I added a new layer, painted on it yellow in petal contours.
Blurred it with **Gaussian blur** filter
I replaced this layer under layer with lillies and changed blending mode to **Shine**
It turned out to be a beautiful soft glow
It seemed to me not enough, and I made a copy blurred layer, replace it above the layer with flowers and changed blending mode to **Hard Light**.
This view is better!
I made a center shadow one more darken.
Finally I added a beautiful bokeh behind the flowers (on new layer) and changed blending mode on **Linear Light**
Some color correction and final sharpen in Photoshop.
I's ready!
Thank you for your attention to my drawings!
Even if you never pick up a pencil and an electronic pen, it doesn't matter... ;))
After all, inspirational things can be created in any area of life.
I wish you've an Ocean of Inspiration for all occasions!
Regards
Hi friends!
Winter days continue to delight with good weather and stories that inspire you to draw them.
Oil painting imitation in digital drawing program Realistic Paint Studio
#art #drawing #digital #DigitalArt
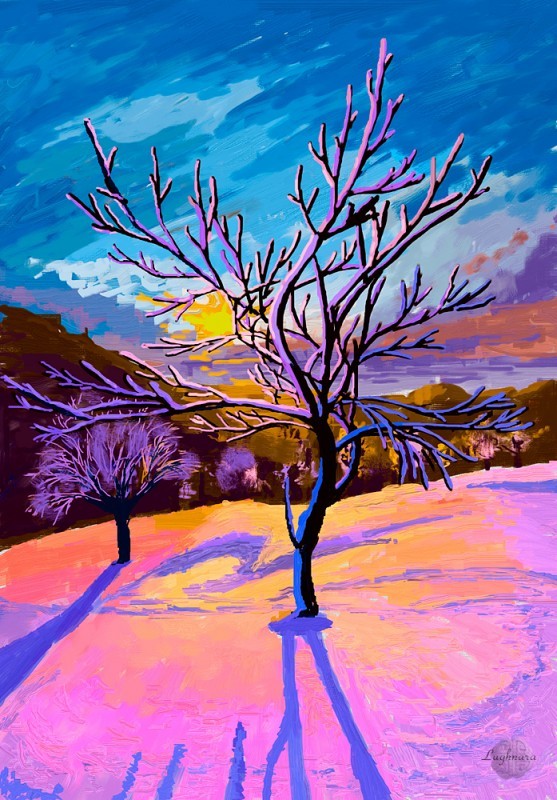
Digital art_2021. Tree on the Winter Sunset
Hi friends!
I continue to learn my new favorite graphic program **Realistic Paint Studio**
And today I told you how I drew a beautiful winter tree.
One time I found wonderful photo and decided make a painting copy of it https://vk.com/bookmarks?from_menu=1&z=photo-34892498_456242102%2Fwall-155980377_1466
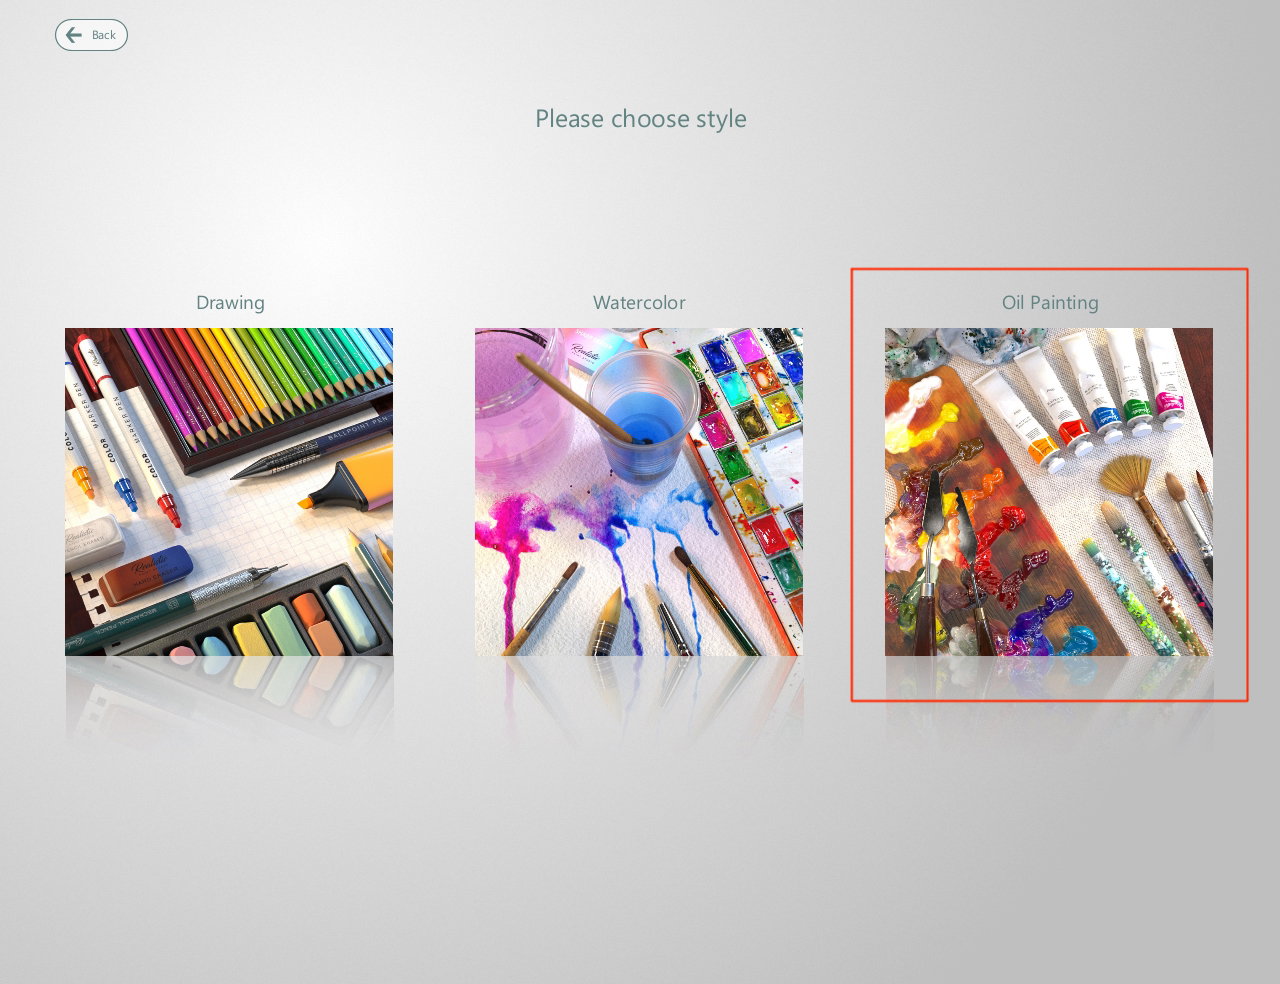
This time I chose imitation oil paints
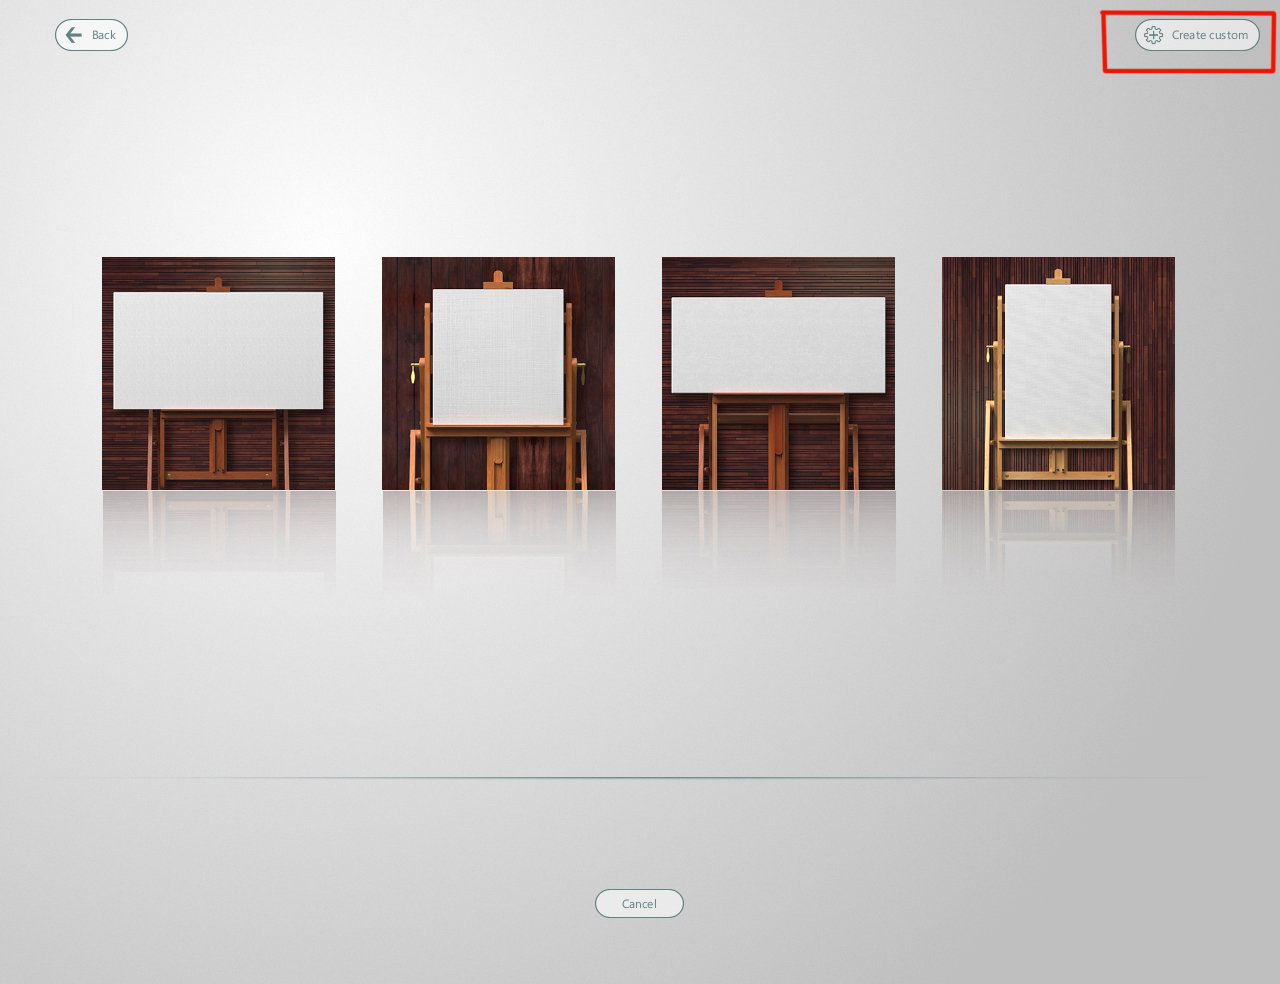
In start my work I chose a canvas (Custom as in last tutorial) https://read.cash/@daring-celt/digital-art-2021-winter-sunset-dfd7f35a
When I opened a window of custom canvas creation, we see the canvas opened by default.
This, in my opinion, is too extreme
So I chose a custom size and changed DPI to 90
So let's get to work
I chose a brush for initial oil paint layer from a box of brushes - **Flat Brush**
Using the up and down buttons, you can select paint colors
I started my work with sketch
Then it seemed to me that I chose the wrong color for the sky ... but don't worry!
In this program, even oil paint can be erased ... with the usual eraser from the sketch tool box.
Then I chose matching colors and painted the sky on new layer.
Sometime I used an another brush - **Big Flat Brush** - to make a blur paints
Closer to the horizon I add sunset colors, outline the location of the setting sun
With the same two brushes on new layer I paint a far mountains and trees
And a beautiful color snow on a foreground (on new layer). I turned off a layer with the tree for a while so that it wouldn't interfere with my work with the snowy surface.
To add a texture of snow I chose this brush - **Filbert Brush**
Well, the background is almost ready - snowdrifts look quite realistic
For painting a main tree (and one more on the left) I chose a brush mads subtle delicate strokes named **Round Medium**
Trees
The last step is left - snow on the branches.
I chose lighter and more saturated colors so that they don't blend in with the background colors.
I used four shades of color to contrast with the background.
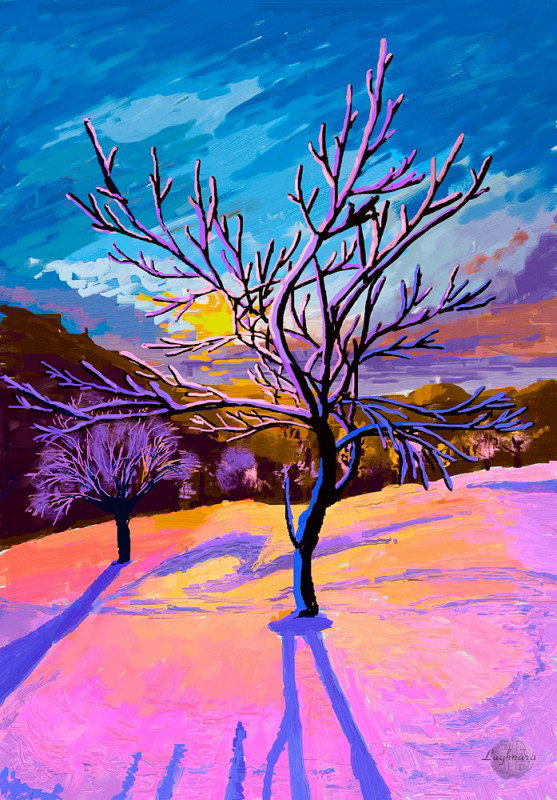
A few small touches in different places ... and a picture is ready!
Of cause, presentation - one of three
Many thanks for your attention to my tutorials!
I hope you have fun during your winter afternoons and you are not cold at all! ;)
With Love...
Winter Sunset, digital drawing and step by step tutorial in Realistic Paint Studio - ://read.cash/@daring-celt/digital-art-2021-winter-sunset-dfd7f35a
#art #drawing #digital #readcash
Fruit City, digital drawing and tutorial - https://read.cash/@daring-celt/digital-art-2019-fruit-sity-2ff20691
#art #drawing #digital #readcash
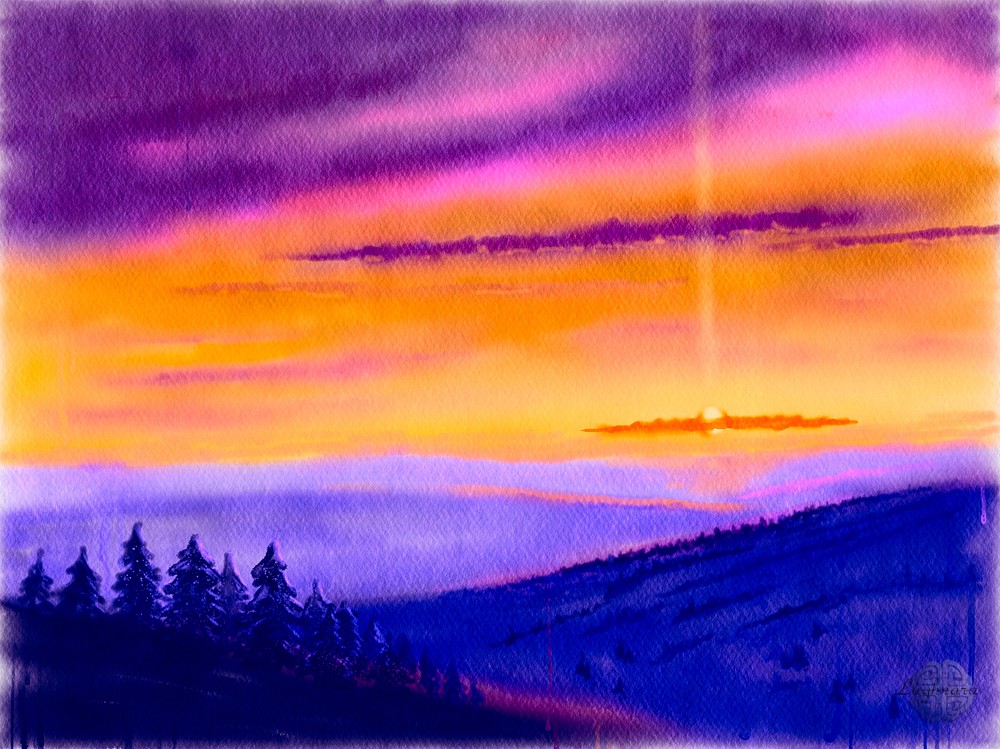
Digital art_2021. Winter Sunset
Hi friends!
As you already know, I really like digital drawing and therefore from time to time I test new graphics programs. Last year I learned about a wonderful program named **Realistic Paint Studio** from Russian developers Komarov brothers.
It has a unique interface that resembles an art toolbox and all of her tools are set to simulate realistic painting.
I did several works in it and I want to introduce you to them.
I took a shot of my Livejournal friendin I was take as a reference https://ic.pics.livejournal.com/katya_kch96/65975172/2904602/2904602_800.jpg
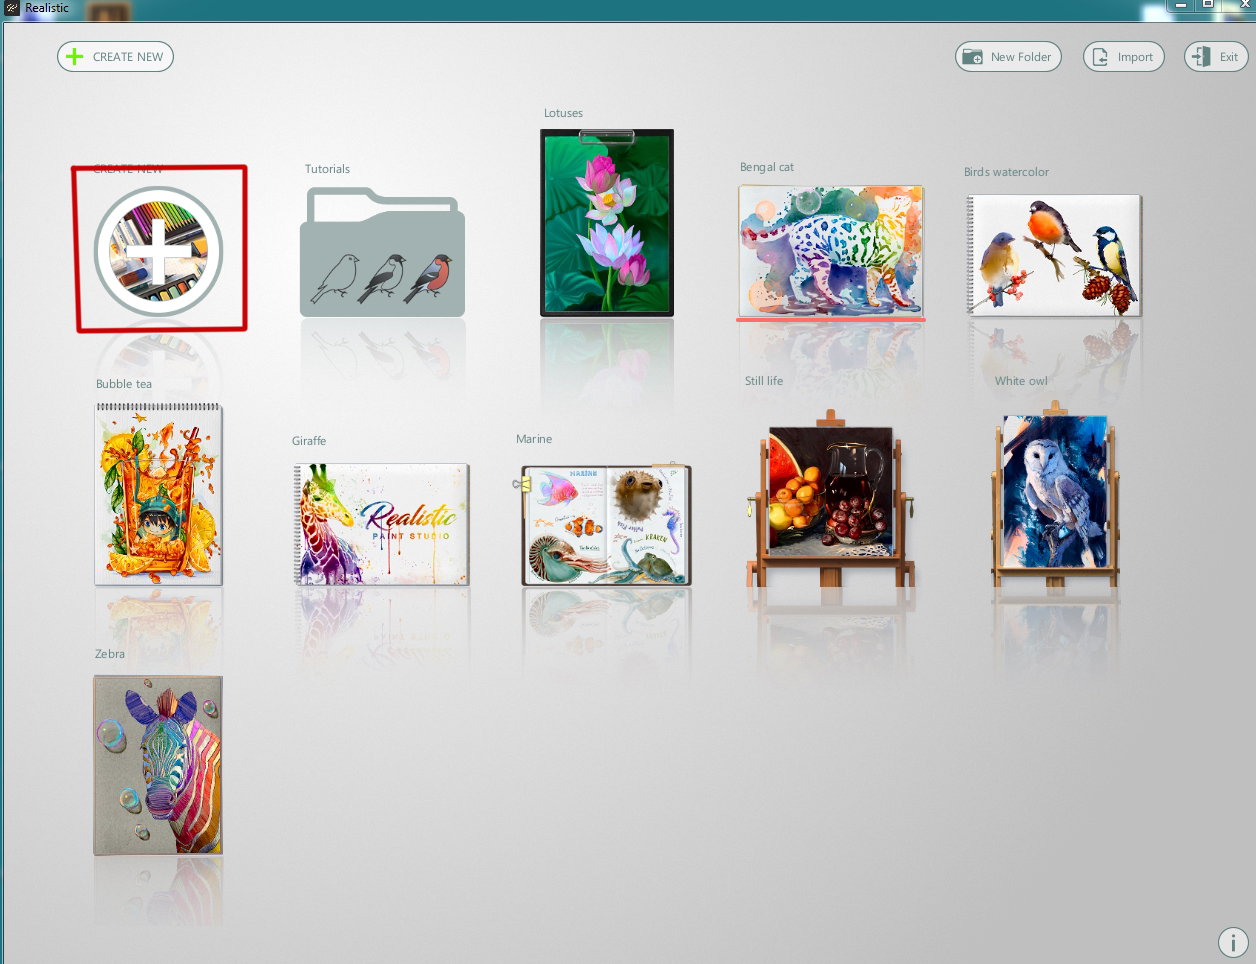
I started my work with lunch a program and create new project (marked with red square)
Then I chose a kind of painting - **"Watercolor"**
and chose a sort of canvas
So I can set a name of my artwork here
In license version the program has an advanced settings to create a new artwork
(top right button "**Create custom"**)
Here I can select a custom work size,
canvas texture and background
So I started to work
With green select top button I choose a sketching tools
If the palette interferes with drawing, you can remove it (to select button with palette view)
Making a sketch
Then I started a watercolor painting.
Created new layer and chose a basic brush
Painting the evening winter sky
Choosing a blending brush
So colorful sky I drew
Earth is deep blue on foreground and more light as far away
For drawing the sun I chose a brush with very thin and delicate stroke
Drawing the sun, some clouds near it and a light pole on new layer
Then I created another new layer and chose a brush for trees
I decided to draw a spruce forest
Using a sponge tool, I made a back trees blurry a little
In this step I painted a details - the forest on middle distance
and on foreground
To save a intermediate step of artwork I select this button in top left angle
Duplicated sky layer to make it more colorful
Detalized a separate clouds
And finish way - I chose a special tool "container with water" and added to drawing some paint drips (as real in watercolor picture)
And changed an opacity of earth layer to 66%
To save artwork as simple picture (*without painting decoration*) you can choose an option you want
I chose this time an option with frame
Final artwork
And two presentation for Instagram and etc.
I hope you enjoyed my creative experiments with the new graphics program!
Have a nice winter day!)))
With Love
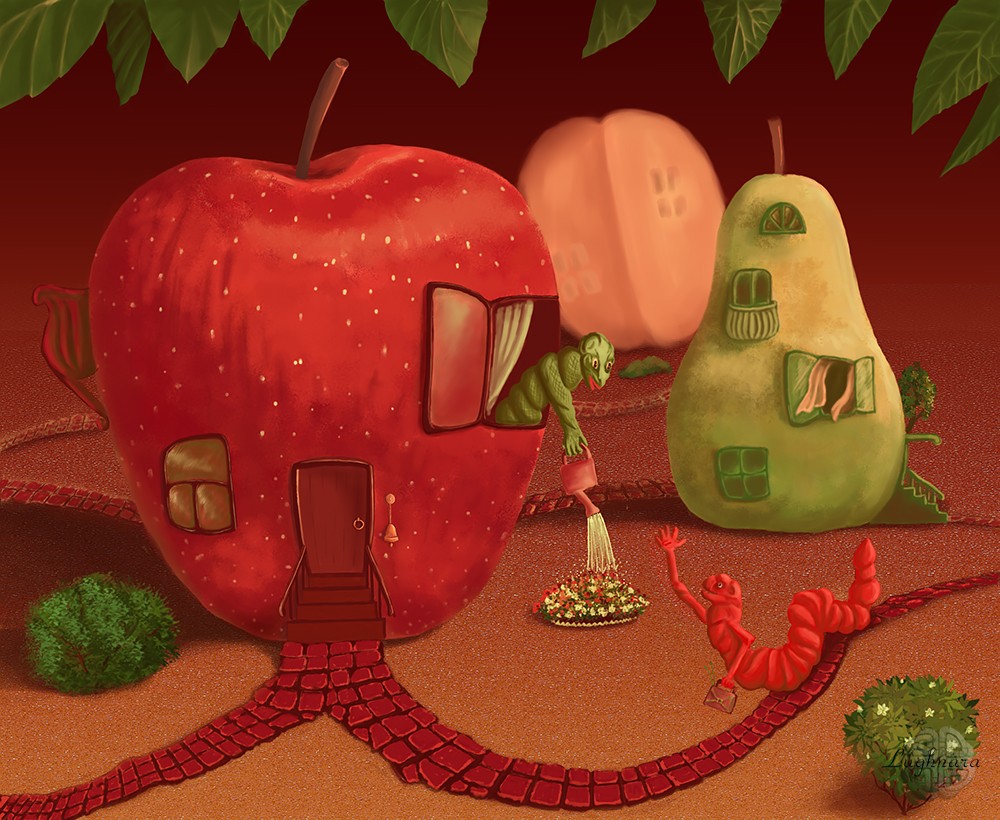
Digital Art_2019. Fruit Sity
Hi friends!
Today I have a humorous drawing again
This is my new art idea on one Steemit contest.
Theme's title was **"Fabulous Fruit"**.
I imagined such a picture that this magic fruit city is located somewhere... https://hive.blog/foodstorm/@daring-celt/foodstorm-contest-6fruit-sity
Sketch in **Photoshop**
Yes, I came up with such a fantastic city, where houses are fruits, and residents ... well, see for yourself)))
Choosing a color palette
I wanted to choose such colors so that the fruit looks realistic, and at the same time, so that there are contrasting motives.
Steps
I drawing with simple round brush and reduced opacity
Sketching base colors
Immediately I decide on the background color.
I want the fruit houses to stand out from the background but blend in with it.
So I made a gradient background from dark red to sandy yellow.
I add details - mark the location of windows and doors and flower beds.
I am looking for a harmonious composition so that no one interferes with anyone
I added a realistic apple texture to my painting (from my photos), lowered the opacity and made a hand-drawn texture on top on new layer.
But I made pears with texture brushes.
At the same time I draw elements of the house and gardens
At this stage, I temporarily turned off the texture layer to make realistic highlights on the fruit.
Then I decided to make a brick road between the houses, and not just a path to the ground
Finally there will be funny residents in fruits houses.
Yes, can live in such a cozy house!
Finally, I decided to make a decorative frame on top too, as in my drawing about a herring in a fur coat.
This time it became apple leaves https://read.cash/@daring-celt/digital-art-2019-herring-in-a-fur-coat-bdefa819 https://www.publish0x.com/daring-celt-inspiration/digital-art-2019-herring-in-a-fur-coat-xxypzpx
It's ready, but...
Now I didn’t like that the land was too boring - it’s not clear where the horizon is.
I found a suitable texture in the Photoshop library and added a fill layer with this texture (so that it can be adjusted)
Yes, now I think a great result!
I hope you enjoyed the process of giving birth to the magical story of the fruit city too.
Have a nice and creative winter day!
Herring in a fur coat, digital art and step by step tutorial - https://read.cash/@daring-celt/digital-art-2019-herring-in-a-fur-coat-64b0e456
#art #drawing #digital #humor #readcash
Digital art_2019. Herring in a fur coat
Hi friends!
Sometimes I like to draw stories with humor)))
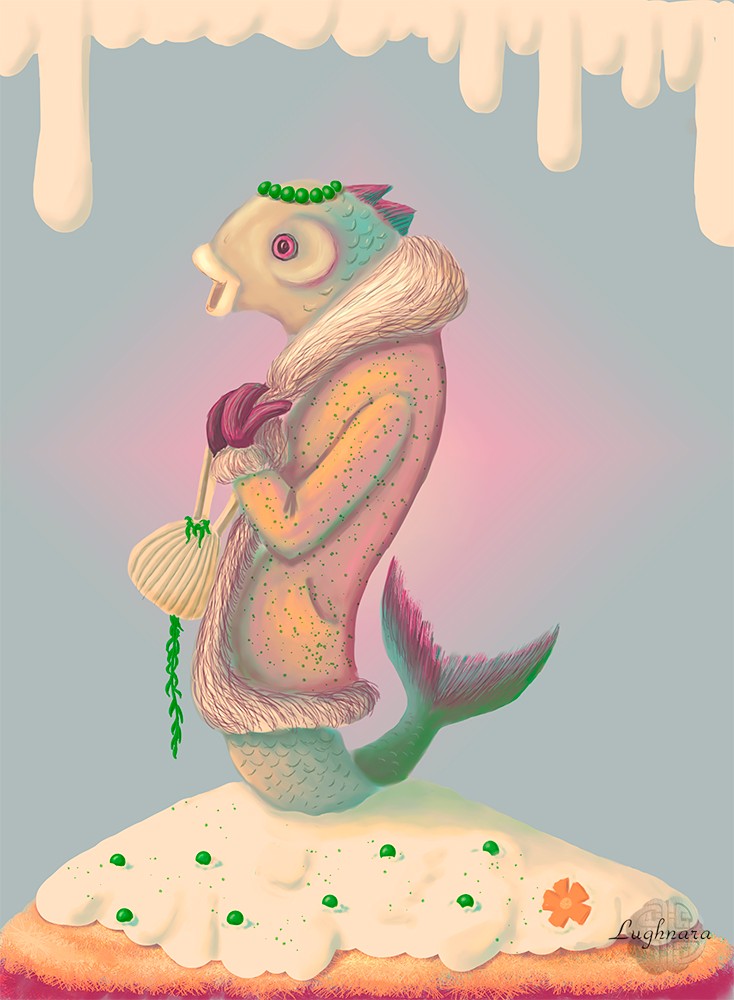
This character came about when I was thinking about the topic of New Year's food. It seemed to me too boring to draw the appearance of an ordinary dish.
Why not add a version of a humanized dish, I thought!
This is a comic scene on the theme of a popular New Year's dish that people like to cook in Russia.
Sketch in Photoshop
I select a palette of colors.
I would like to depict the scene in contrasting colors, but in soft pastel colors, reminiscent of a winter salad
I start by choosing colors for the character.
The real color of the herring is not very expressive, so I choose a nice green color for her coat.
Then I sketch out the salad base colors underneath.
I detail the character and the top layers of the salad with mayonnaise and elements of vegetable decor on top
At this step I modify the character - I change the color of her coat to a more attractive one and add accessories - green on the bag, a wreath of green peas
Only the background remains.
I select a square gradient from the prepared palette so that it makes the character stand out.
And I also decided to humorize further and added an impromptu curtain of mayonnaise drips from above.
The final touch is drop shadows and color correction.
That's all.
If this picture made you smile. it means that the artist has achieved his target!
I hope you had fun!))
Happy New Year to everyone and delicious salads without unexpected surprises!
With Love...
Sleeping Christmas Ange, animation tutorial - https://read.cash/@daring-celt/sleeping-christmas-angel-df7f3451
#art #digital #animation #readcash
Sleeping Christmas Angel (animation art)
Hi friends!
Since not everyone has moved away from the Christmas theme (and soon the New Year, the time of miracles and gifts), I decided to show you haw I make a photomontage & animation in **Adobe Photoshop**.
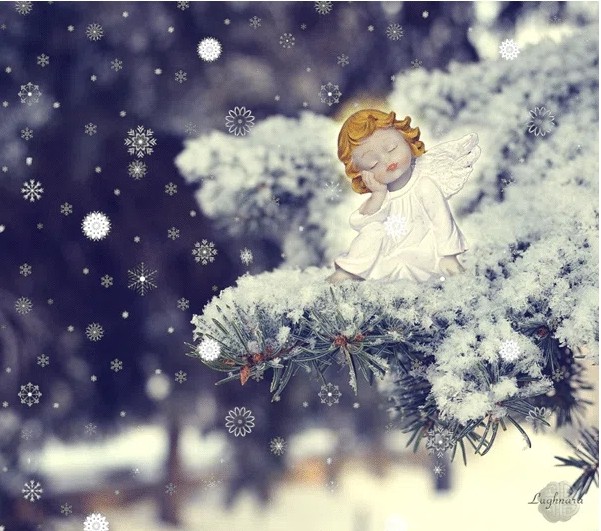
It was a picture with little angel sleeping on pine-tree's brunch.
You'll make an original digital postcards and send them to your friends.
So...
I had a very nice photo with a pine-tree's brunch in a snowflakes.
For my photomontage's idea I made a photo an angel's figurine.
Next step will be a cutting angel from background with **Pen Tool**
Then choose in menu **Selection - Refine Edge**
(*I've a Russian version of Photoshop, therefore I'm sorry... I'll use many words beside a screenshots.*)
Choose value of **Edge Detection** (*marked by red line*) about **7,2** pxl and **Feather** about **3,3** pxl.
Choose **OK** and **Delete** button on keyboard.
Then place an angel into photo with brunch with **Move Tool**
Change a size if it need.
With adjustment layer **Hue/Saturation** making delicate shades to angel and golden his hair.
Value in **Yellow color** option must move to right (**H +5; S +41; B +24**)
To make an angel's nimbus I make a copy layer of angel and move it behind.
Then choose **Filter - Blur - Gaussian Blur** with radius of blur as **51,4** pxl
To make a strongest glow I change a layer mode option to **Linear Dodge(Add)**
With an **Eraser Tool** I delete a bottom side of nimbus layer.
Then I create a mask to angel's layer and with soft **Brush Tool** & black color erase a little bottom's part to make a view like angel sitting in a snow.
To make a really drop shadow I create e new layer above others and create an clipping mask to lower layer (*angel with mask*). Then I choose light gray color (like a pleat of angel's chiton) & paint with **Brush Tool** to hands and lower edge of chiton touching a snow.
Change a layer mode of shadow's layer to **Multiply** and **Opacity** option as **70%**
This is the result.
Still, the picture seems to me not realistic enough.
Therefore I choose **Brush Tool** again (named "spray 24 pxl" with checked options **Shape dynamics** & **Scattering** (*like on screen*) & paint some snowflakes above angel's hands and clothes.
And I make once again angel's color correction with adjustment layer **Selective Color** so change a shades of **white** color: **Blue -22; Magenta +6; Yellow + 11; Black-43**)
Then I crop my picture like I want.
Then I'd like to make color correction on all art picture to take it as whole one view.
On new adjustment layer **Channel mixer** choose a **blue channel** & move value: **blue +63; Constanta + 29**
And add adjustment layer **Curves** to make a contrast.
It's time to create magic - that is add an animation!
I have some beautiful snow glitters in my photo archives.
Choose on of them and open in **Photoshop**
(*gif-files if you don't know opens in photo editor as a multy-layered file*)
There are nine layers in this file.
I make each other layer like a pattern.
Choose first layer, selected all and then **Edit - Define Pattern**
In opened window named a new pattern & save in program's pattern library.
So I do it with all nine layers.
Then I need change size of angel's picture to reduce file's weigh for animation.
I do it **800** pxl by lenght
In this step can merge all layers - angel, adjustment & pine-tree's brunch - together.
And make **Unsharp Mask** with value: **Amount - 50 %**, **Radius - 0,7** pxl
Then create nine new layers above merged.
Now each new layer needs to be filled with a snow pattern.
**Edit - Fill - Pattern**
To black background disappeared change layer mode to **Lighten**
By this way filling all nine layers.
Then disable layers visibility except most bottom pattern layer
So open animation's panel (**Window - Animation**)
Make frame delay time **0,2 sec** & looping option as **Forever**
Create a new frame.
And then choose a new upper layer, at the same time disable visibility of first layer.
And do the same with all frames & layers.
Finally I save my animation as a gif-file (**File - Save for Web**)
**Optimized fike format - GIF**
**Color reduction algorithm - Selective**
**Dither algorithm - Noise**
And **Image Size - 600** pxl by **width**
Voila!
I hope my art and this nice angel will prolong your festive mood!))
Thanks a lot for your attention to my tutorials my friends!
With Love...
Hi friends!
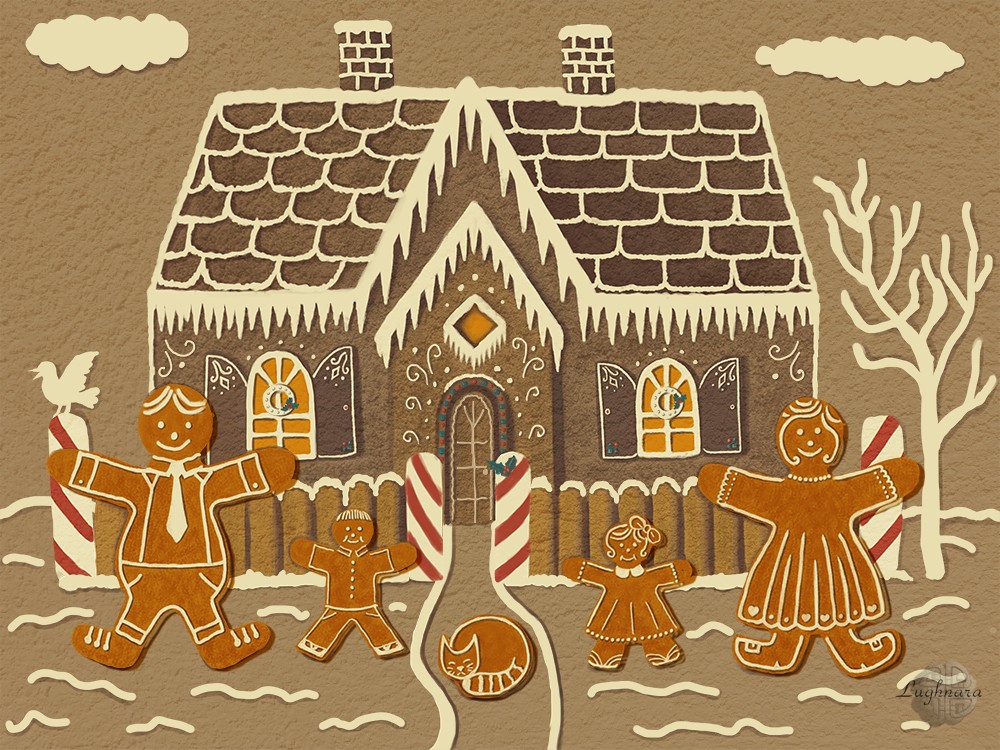
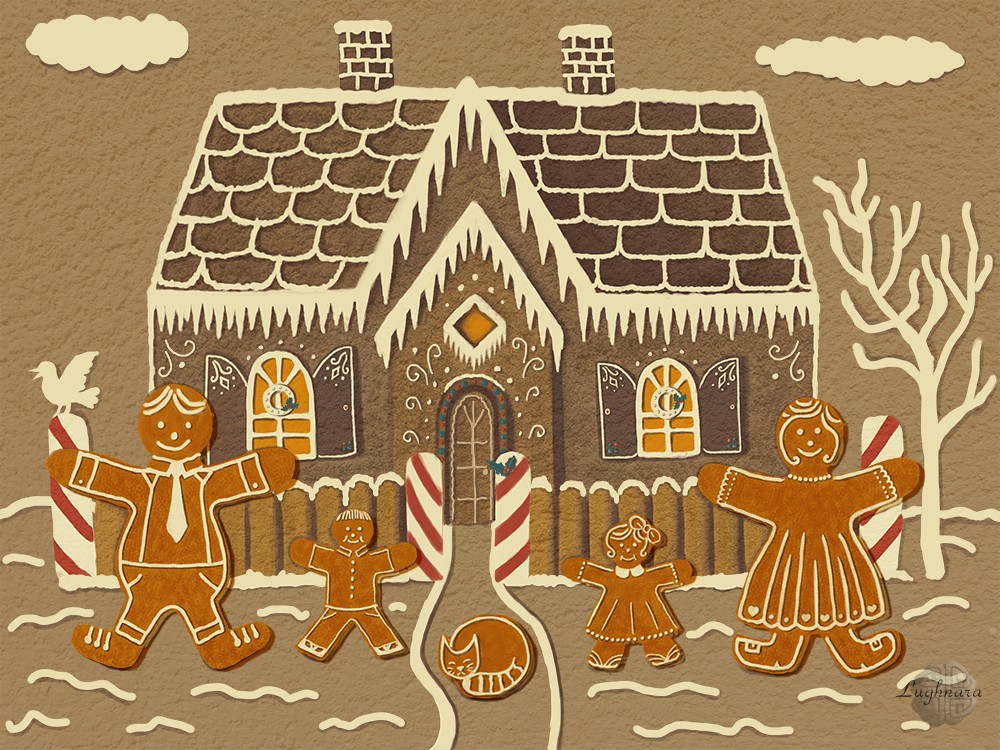
Have you ever seen a whole family of gingerbread men?
Who live in a gingerbread house, just like an ordinary family, and they even have a cat ... If you look at these smiling faces, painted with icing, you want to meet them, and certainly not eat)))
#art #drawing #Christmas
Gingerbread Family, drawing tutorial on Read.cash - https://read.cash/@daring-celt/digital-art-2019-gingerbread-family-82cf58aa
#art #drawing #digital #readcash #Christmas
Digital art_2019. Gingerbread Family
Hi friends!
My Livejournal frendin living in Wiskonsin (USA) give the cue to an idea to one art contest
She posted a few photos from the festive evening held in their city for Christmas.
In one shot I saw a nice story - the gingerbread family
It seemed to me very interesting to draw a picture on New Year Meal's contest..
The fact is that: *in Russia on the New Year you can't eat meat and dairy dishes (until Christmas time coming 7th January ).*
But baking is possible if the dough is free of butter and eggs.
And this is also very tasty! https://ic.pics.livejournal.com/marawarren/67905920/872235/872235_1000.jpg
I had to review many photos to choose a form of gingerbread house for big family.
It must be beautiful & comfortable for living.
Sketch in Photoshop
Chose a nice color palette as a gingerbread and sweet decor
Then I choose a hues & shades for house.
Work with colors, make a foreground warmer & colorful.
Choose a color shade for gingerbread family
Decorate gingerbread people (and cat) with glaze.
Add a shadows
and cookie's texture
Then I decorate a house by texturing
Add a glaze, berry & pieces of marmalade
Final steps - replace color background, add details of environment, shadows & adde a cookies' texture for whole picture.
It's ready!
I hope you'll like this idea too.
It would be interesting to meet such a family, find out how they live, and most importantly, what will they cook for Christmas?))))
Have a nice and creative day my friends!
Christmas window (part 2), drawing tutorial on Read.cash - https://read.cash/@daring-celt/digital-art-2021-christmas-window-part-2-a3cb1ceb
#art #drawing #digital #readcash
Digital art_2021. Christmas Window (part 2)
Hi again my friends!
So, I continue to draw a Christmas window started here https://read.cash/@daring-celt/digital-art-2021-christmas-window-part-1-a9e4c5ff
Today I show how I how I decorated the window with beads, light bulbs and such figures of nutcrackers
Well... let's go!
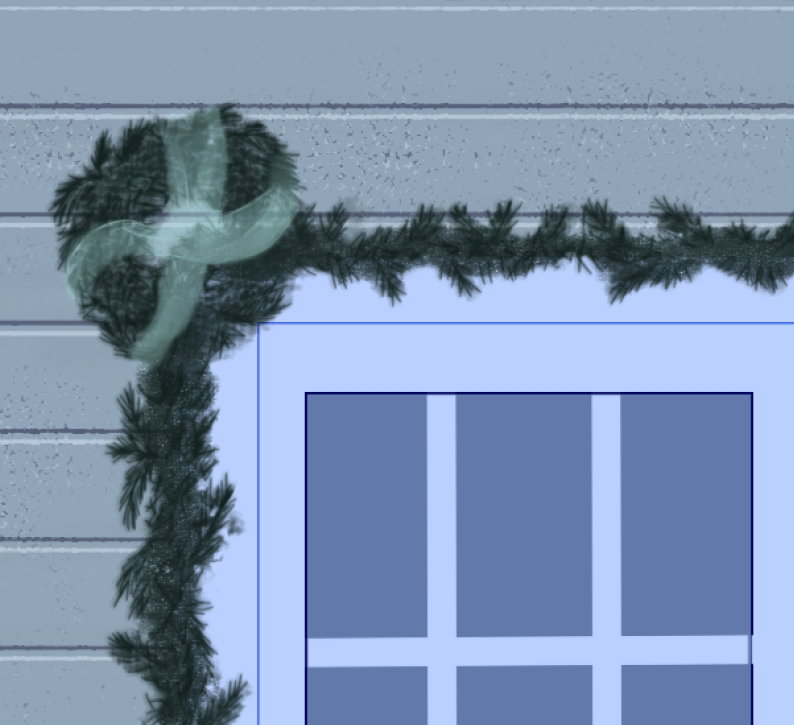
To paint the bows, I use my regular **Oil Brist 2** brush.
I can to draw beautiful transparency strokes with it
For the bottom bow, I select a motley brush form from **SAI** library, something like this
Very colorful!
To draw a garland of lights, I had to turn on the guides again, but this time in the form of ellipses.
Resize (with **ALT**) and move (with **CTRL**) to need place and draw a base of garland with hard brush (for example, **Ink Pen**)
With the same hard brush I draw a light bulbs (*both elements of garland are on two different layers*).
Then I duplicate both layers and go to menu **Layers - Revers Layer Horizontal**
Already two parts of the window are decorated!
The fragment on the middle window is very small, so I paint it freehand with the same hard brush
In the same way, I draw glowing garlands around the perimeter of the window.
Here and there I add red beads (also on a new layer)
Then I wanted to make highlights for individual beads.
I duplicated the layer and put it in **Burn** blend mode.
And erased a part of dark color to create a highlights from a light bulbs
It won't be noticeable in the big picture, but I wanted to do this
So, the window is decorated.
Now I need to create realistic reflections in the windows.
First, I place all three copies of the glass and a separate folder and move it above the glass folder.
Then on the left window I draw simple landscape - a fragment of a building, a lamppost and a few trees
To make it easier to paint on the filled area, I lock the transparent pixels of the layer with this button
Right reflections
It is difficult to understand what is there in the house.
I filled a middle ares with dark orange color and painted a large faux fir tree, decorated with a glowing garland, candles on the window and interior blinds (with the same brush that I used to paint the texture of the wall)
In order for the crosshairs of the frames to appear and the reflections to become realistic, I change for the entire folder to **Soft light** blend mode.
Yes, blue reflections look great!
But the fragment with a part of the interior had to be moved out of the folder and separately set the blending mode **Lighten color** for this layer
Wow!
The candles on a window have turned blue!
But it's even more interesting!))))
Here and there I erase unnecessary highlights on the crosshairs of the frames and add a layer effect to the orange fragment.
On a new layer (*in the folder with decoration*) I paint in bright yellow the glow from the individual bulbs on the frames and the reflections from them on the windows.
Then I duplicate this layer and blurred it with **Gaussian blur** (*in Filter menu*) and change blend mode to **Linear Light**
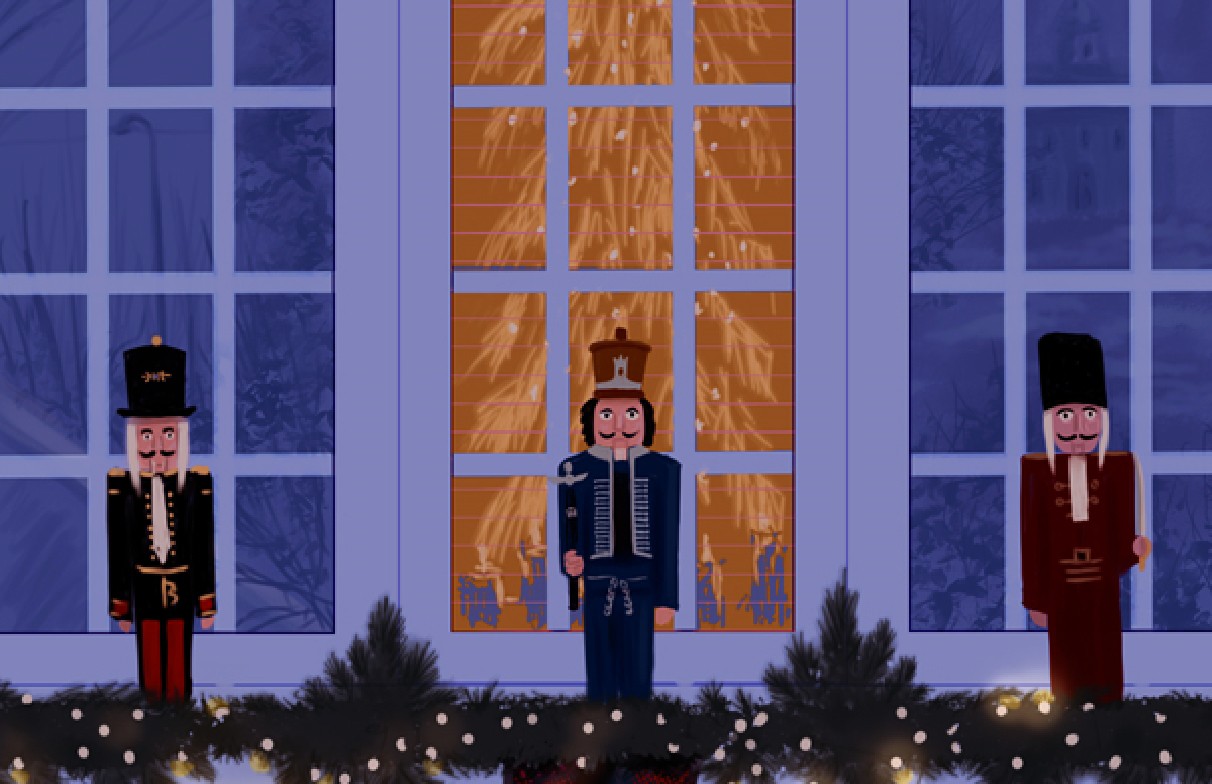
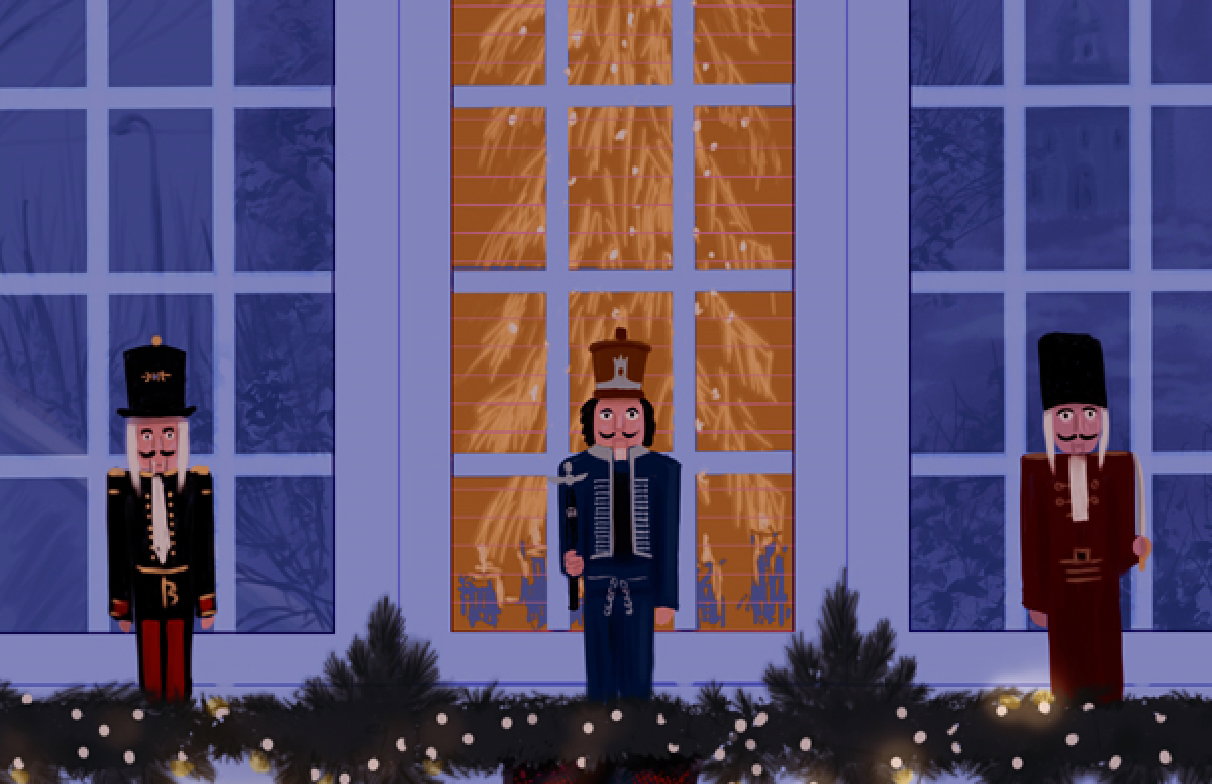
Now I create another layer (below the fit garland) and draw symbolic figures of nutcrackers on it.
Already looks joyful and festive!
But I want to add more Christmas atmosphere to my drawing!
I merge all layers and make color correction with **Filters - Hue/Saturation**
Yes, I add a drop shadows from the window sill and from the wreaths
And so, I create new layers, set to it blend mode **Shine** and with golden yellow color and with soft brush I apply bright spots of light where there are many bulbs
And finally, I wanted to add warm colors to the picture.
I created a new layer, filled it with bright pink and put it in **Soft Light** blend mode.
Great!
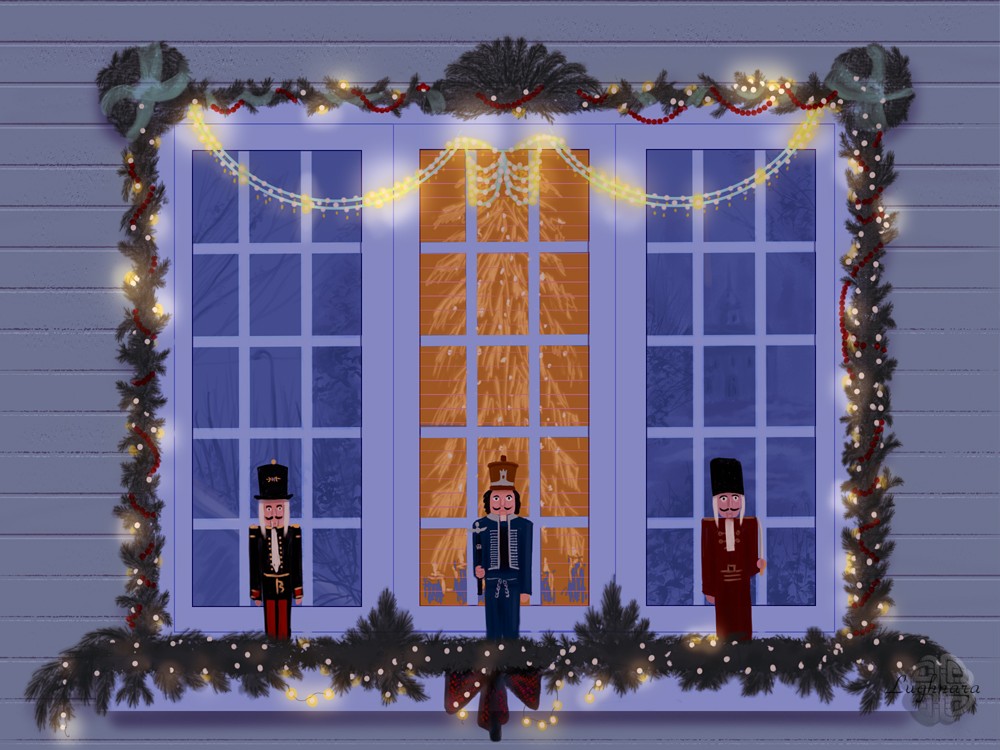
I did it!
It was first of my Christmas drawings series.
I hope you'll like it!
Regards and with Love!
Merry Christmas!
Christmas window (part 1), drawing tutorial on Read.cash - https://read.cash/@daring-celt/digital-art-2021-christmas-window-part-1-a9e4c5ff
#art #drawing #digital #Christmas #readcash
Hi friends!
To create a festive mood, I came up with an art challenge for myself
Until the New Year, I want to draw pictures on the theme of Christmas in different graphic programs
This is the first picture of the "Christmas window", made in Paint Tool SAI 2
Have a nice and creative day!))
#art #digital #Christmas
Digital art_2021. Christmas Window (part 1)
Hi friends!
Some days ago I wanted to draw a picture dedicated by Christmas.
December is a special month. The streets of cities are beginning to be decorated with New Year's garlands, and Christmas gifts appear in stores.
The spirit of the holiday is everywhere...
Artists can catch him in the first place to embed in their paintings.
I chose for the image an ordinary window of a residential building decorated for Christmas. https://cf.ltkcdn.net/christmas/images/orig/189654-850x800-Nutcracker-Christmas-Window.jpg
I painted it in a slightly different style than usual. I also want to show you how to work with some of the special tools in **Paint Tool SAI 2**
And, yes... I wanted to try doing all the work in **SAI** without the help of **Photoshop**
I started my work with drawing a wall texture.
I customized usual brush by giving it a striped texture
and draw with this brush on new layer
Then I fill a background layer with blue color as on a reference
To create a volumetric effect, I copied the stripes layer, changed the blending mode to **Screen** and moved it **1** pixel down.
So... I need draw a main frame for window.
Select **Rectangle selection tool** and select an area on new layer and fill it bright blue color
Duplicate this layer and reduce a size
To make a little shading around the edges, I use the **Layer Effect** function for duplicate layer with this option
This is how it looks.
So far so good!
In the next step, I'll need to turn on the guides to split the window into three equal areas
So I turn on a option to drawing strait line.
I move the guideline with **CTRL** and draw along it.
Making a selection for the first window
Filling with dark blue on new layer and applying the same layer effect
Then I choose a hard brush **Ink Pen** with this options to draw the crosshairs of the window frame (*on new layer again*)
Drawing with guideline again.
For drawing horizontal stripes I rotate a guideline with **ALT**
Then I choose an **Eraser tool** with this options (not so hard)
and erase some of the stripes where they overlap the shading at the edges
Yes, very realistic window!
On this step I make a copy dark blue glass layer and make in invisible (we need it to draw reflections).
Then I merge a layers with glass and cross stripes
Copy this layer two and replace in window area (with guidelines)
Yes, it's all I need!
So, I make one more rectangle selection (along supporting verticals) to create a middle frame
I fill it with light blue color on new layer and can delete a layer with supporting verticals
Well, the window is ready!
Now I'm starting to decorate it for Christmas...
But first, I arrange all the layers in the layers palette so as not to get confused in them.
The easiest way to put them in separate named folders is to select each layer with **SHIFT** and click the icon in the form of a folder
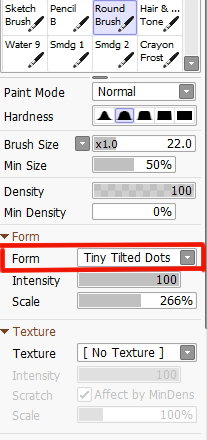
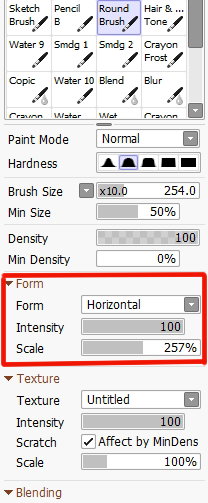
So... I chose a brush from my set named **Crayon Frost** with this options form and texture
It resembles a garland of fir branches
Then I turned on straight line drawing button and draw the vertical stroke along the frame on a new layer
Changing the size of the brush and the scale of the texture, I paint other parts of the garland
To draw the bottom of the garland, I draw first the window sill (in the frames folder, on a new layer)
Here and there I add details with another brush, which I usually use to paint hair for characters, but it came in handy for me now!
With this brush I can draw several strokes at once, similar to fir needles.
Yes, it's as Christmas fir garland!
To be continue... tomorrow ;)
Have a joyful Christmas mood to all my friends!
With Love...
Magic Anemone, drawing and step by step tutorial on Read.cash - https://read.cash/@daring-celt/difital-art-2019-magic-anemone-c8b9279e
#art #drawing #digital #readcash
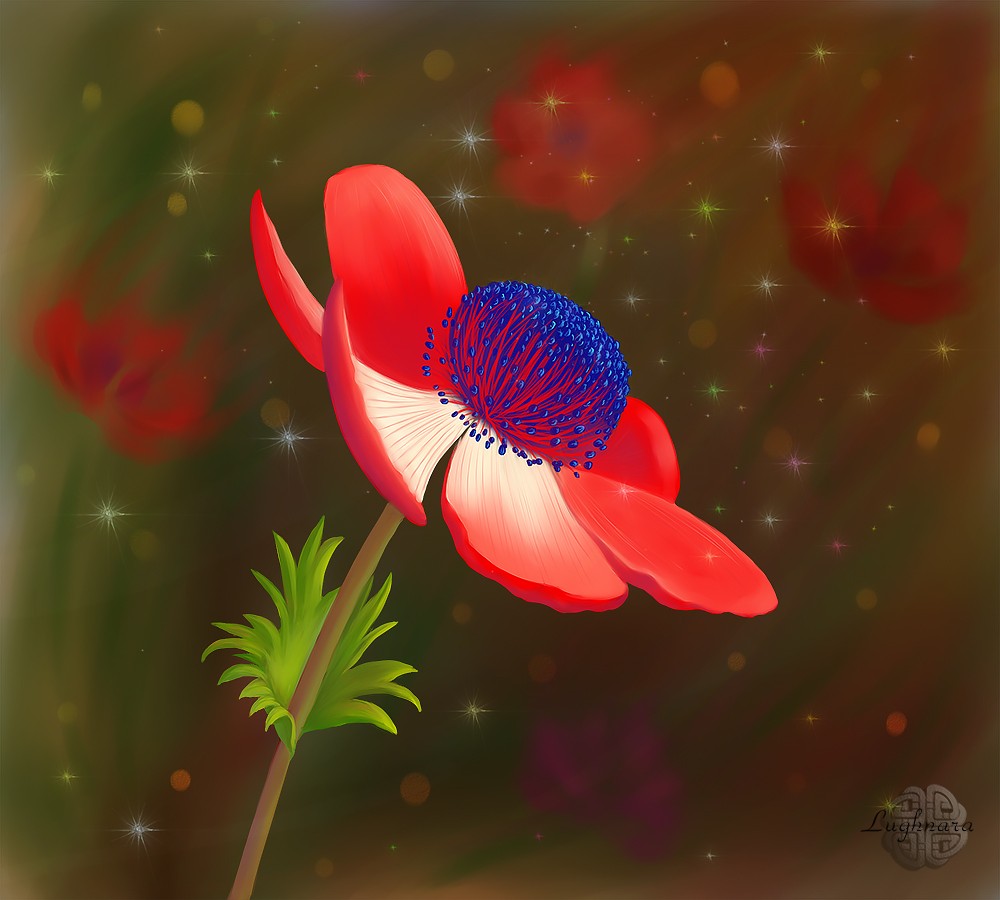
Difital art_2019. Magic Anemone
Hi friends!
Well, you know a flowers are my lovest photo-models, so I guess to make a drawing series of theme.
First artwork of it - "White Protea" - you already saw https://read.cash/@daring-celt/digital-art-2019-white-protea-c32ec15d
This excellent exemplar I found in @sardart's blog from Whaleshares - her flowers photo are consistently awesome! https://whaleshares.io/@sardart
Sketch
In this one time I draw in **Paint Tool SAI**
Choose a colors (as on original photo)
I use only some brushes - **Oil Brist**, **Round Brush** & **Watercolor** (for blending).
Yes, and a **Pencil** for sketch.
The form of a core
Base color of background
Drawing a stamens
I wanted to make a motion effect behind a flower
Then I decided to draw some other flowers on a background, as though whole field of anemones there.
And some magic... I very like it in my drawings))))
Strengthen motion effect a little (copy layer with back flowers, blur and transform)
And finally color correction in Photoshop and some sharpen.
Well, second magic flower is ready!
I hope that this flower will warm you on a cold winter evening and remind you of a hot summer days that will soon return.
Regards
Gera
Yule Cat, digital drawing and step by step tutorial - https://read.cash/@daring-celt/digital-art-2020-yule-cat-448ad548
#art #drawing #readcash
Hi friends!
I try to post my art here, it is possible...
I digital painter and I create an artworks in illustration style
Most of all, I love drawing fairy-tale scenes and magical characters.
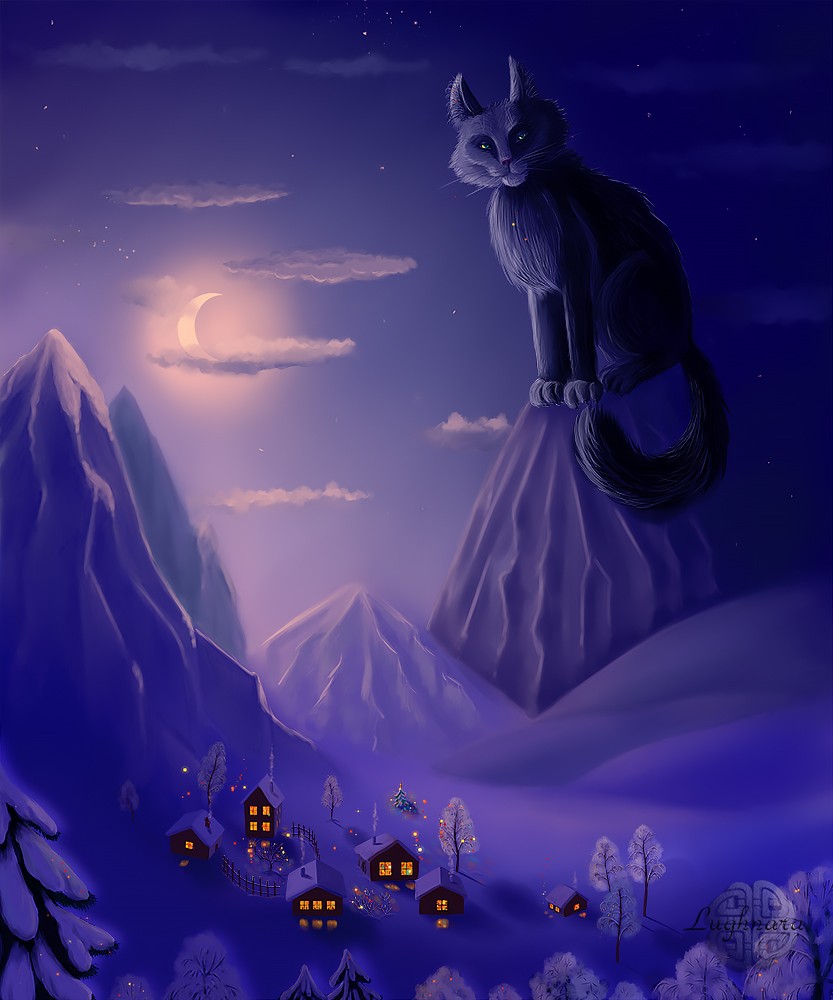
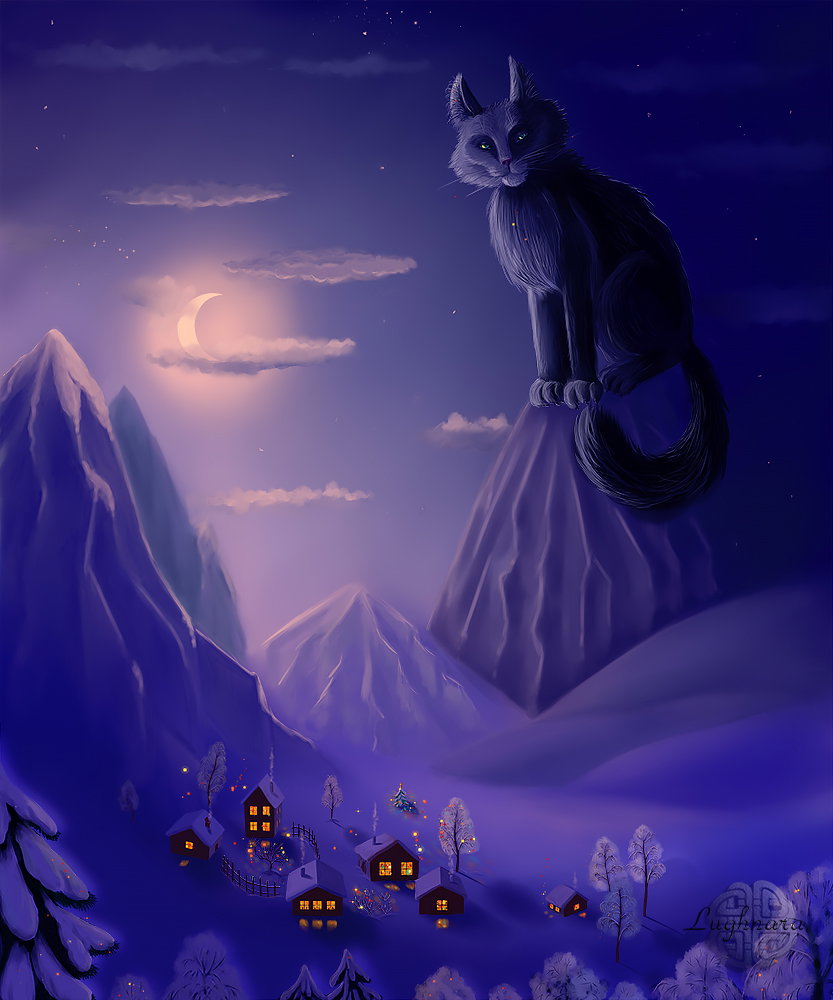
This is one of them - Yule cat
If I violate the community rules, then I apologize to the moderator. :)
#art #digital #Christmas
Digital art_2020. Yule cat
Hi friends!
On the eve of the ancient pagan holiday Yule (Winter Solstice), celebrated in many northern countries, I want to tell you how I drew the legendary creature Yule cat
Don't ask me how such an idea came to my head, I don't know how and where they come from)))
I just sit down at my tablet, pick up a pen and draw...
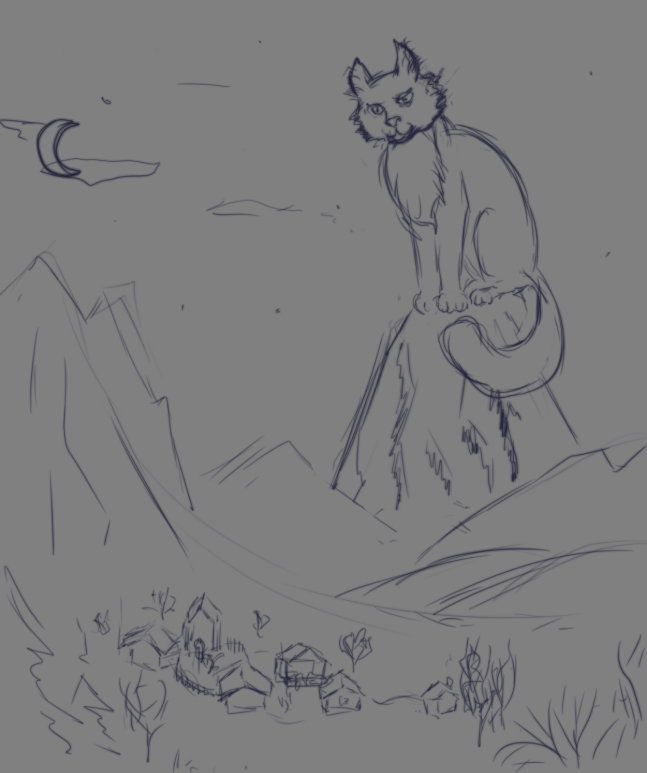
Sketch in **Paint Tool SAI 2**
For this artwork, I chose such a colorful palette.
I choose my favorite cold blue-violet shades as the base colors and paint over the background with a soft **Old Rough** brush
I sketch the figure of the cat in a dark color, even darker than the background
Gradually I introduce other objects into the drawing.
First, the moon as a source of illumination, then bright highlights on the edges of the mountains.
I also sketch out a small village at the foot of the mountains - several houses and trees
All this with its main working brush **Old Brist 2,** which perfectly blending colors
At this step, I add clouds to the night sky and put the falling shadows from mountains and houses in the snow.
Simultaneously working on the figure of the cat in detail
I enliven the village - I paint illuminated windows and reflections in the snow with a bright orange color, as well as make long dark shadows from trees.
I decorate tree branches with hoarfrost
Add snow to the top of a nearby mountain
A little Christmas mood - colored lights in the windows and on the trees
To enhance the feeling of a frosty winter night, I paint a snowy forest in the foreground, and bright stars in the sky.
Finally I opened a file in **Paintstom Studio** (*I'll tell you more about this awesome graphics program*) and added festive lights in the village
And highlights in the cat's eyes.
The picture is almost ready, color correction is remains.
Yes, it;s ready now!
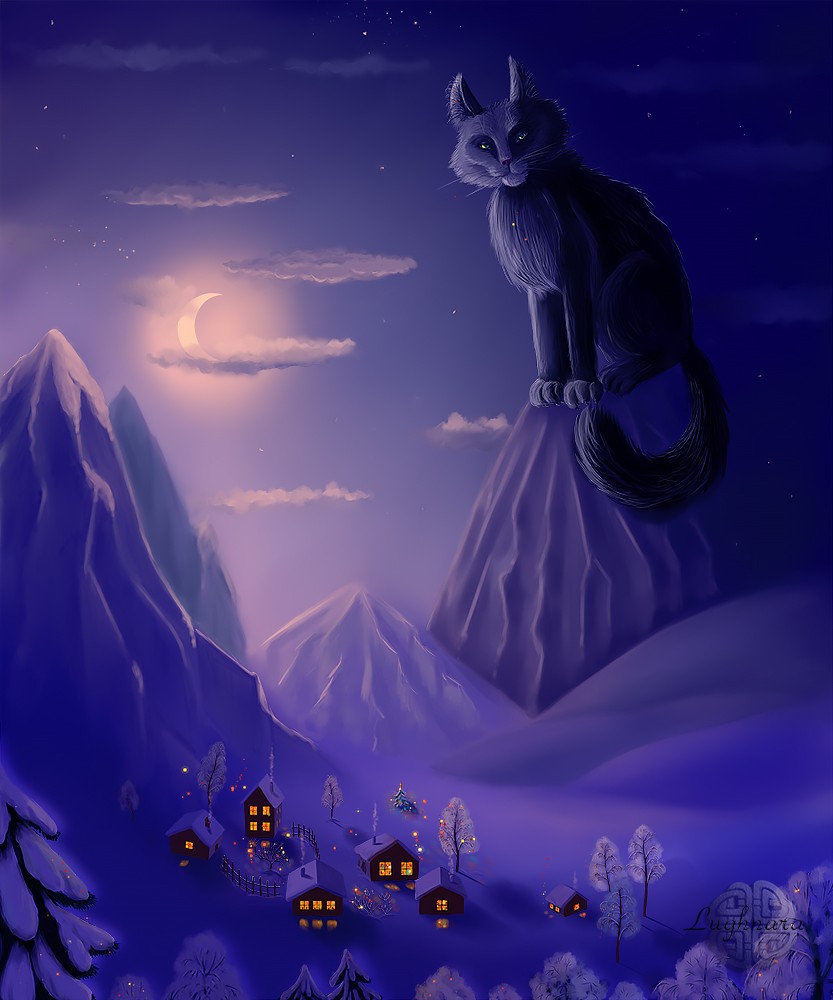
My fabulous cat turned out to be kind and wise.
He doesn't want to eat anyone, he came to guard the village, so that people can calmly and carefree rejoice, celebrating the New Year
I hope you'll like my drawing idea and it bring to you my friends some Christmas mood and you will find the strength to be happy in any of the most hopeless circumstances!
And remember that Good Forces (even if you don’t believe in them) invisibly protect you always!
Thanks so much for all!
Regards and with Love...
Hi everybody!
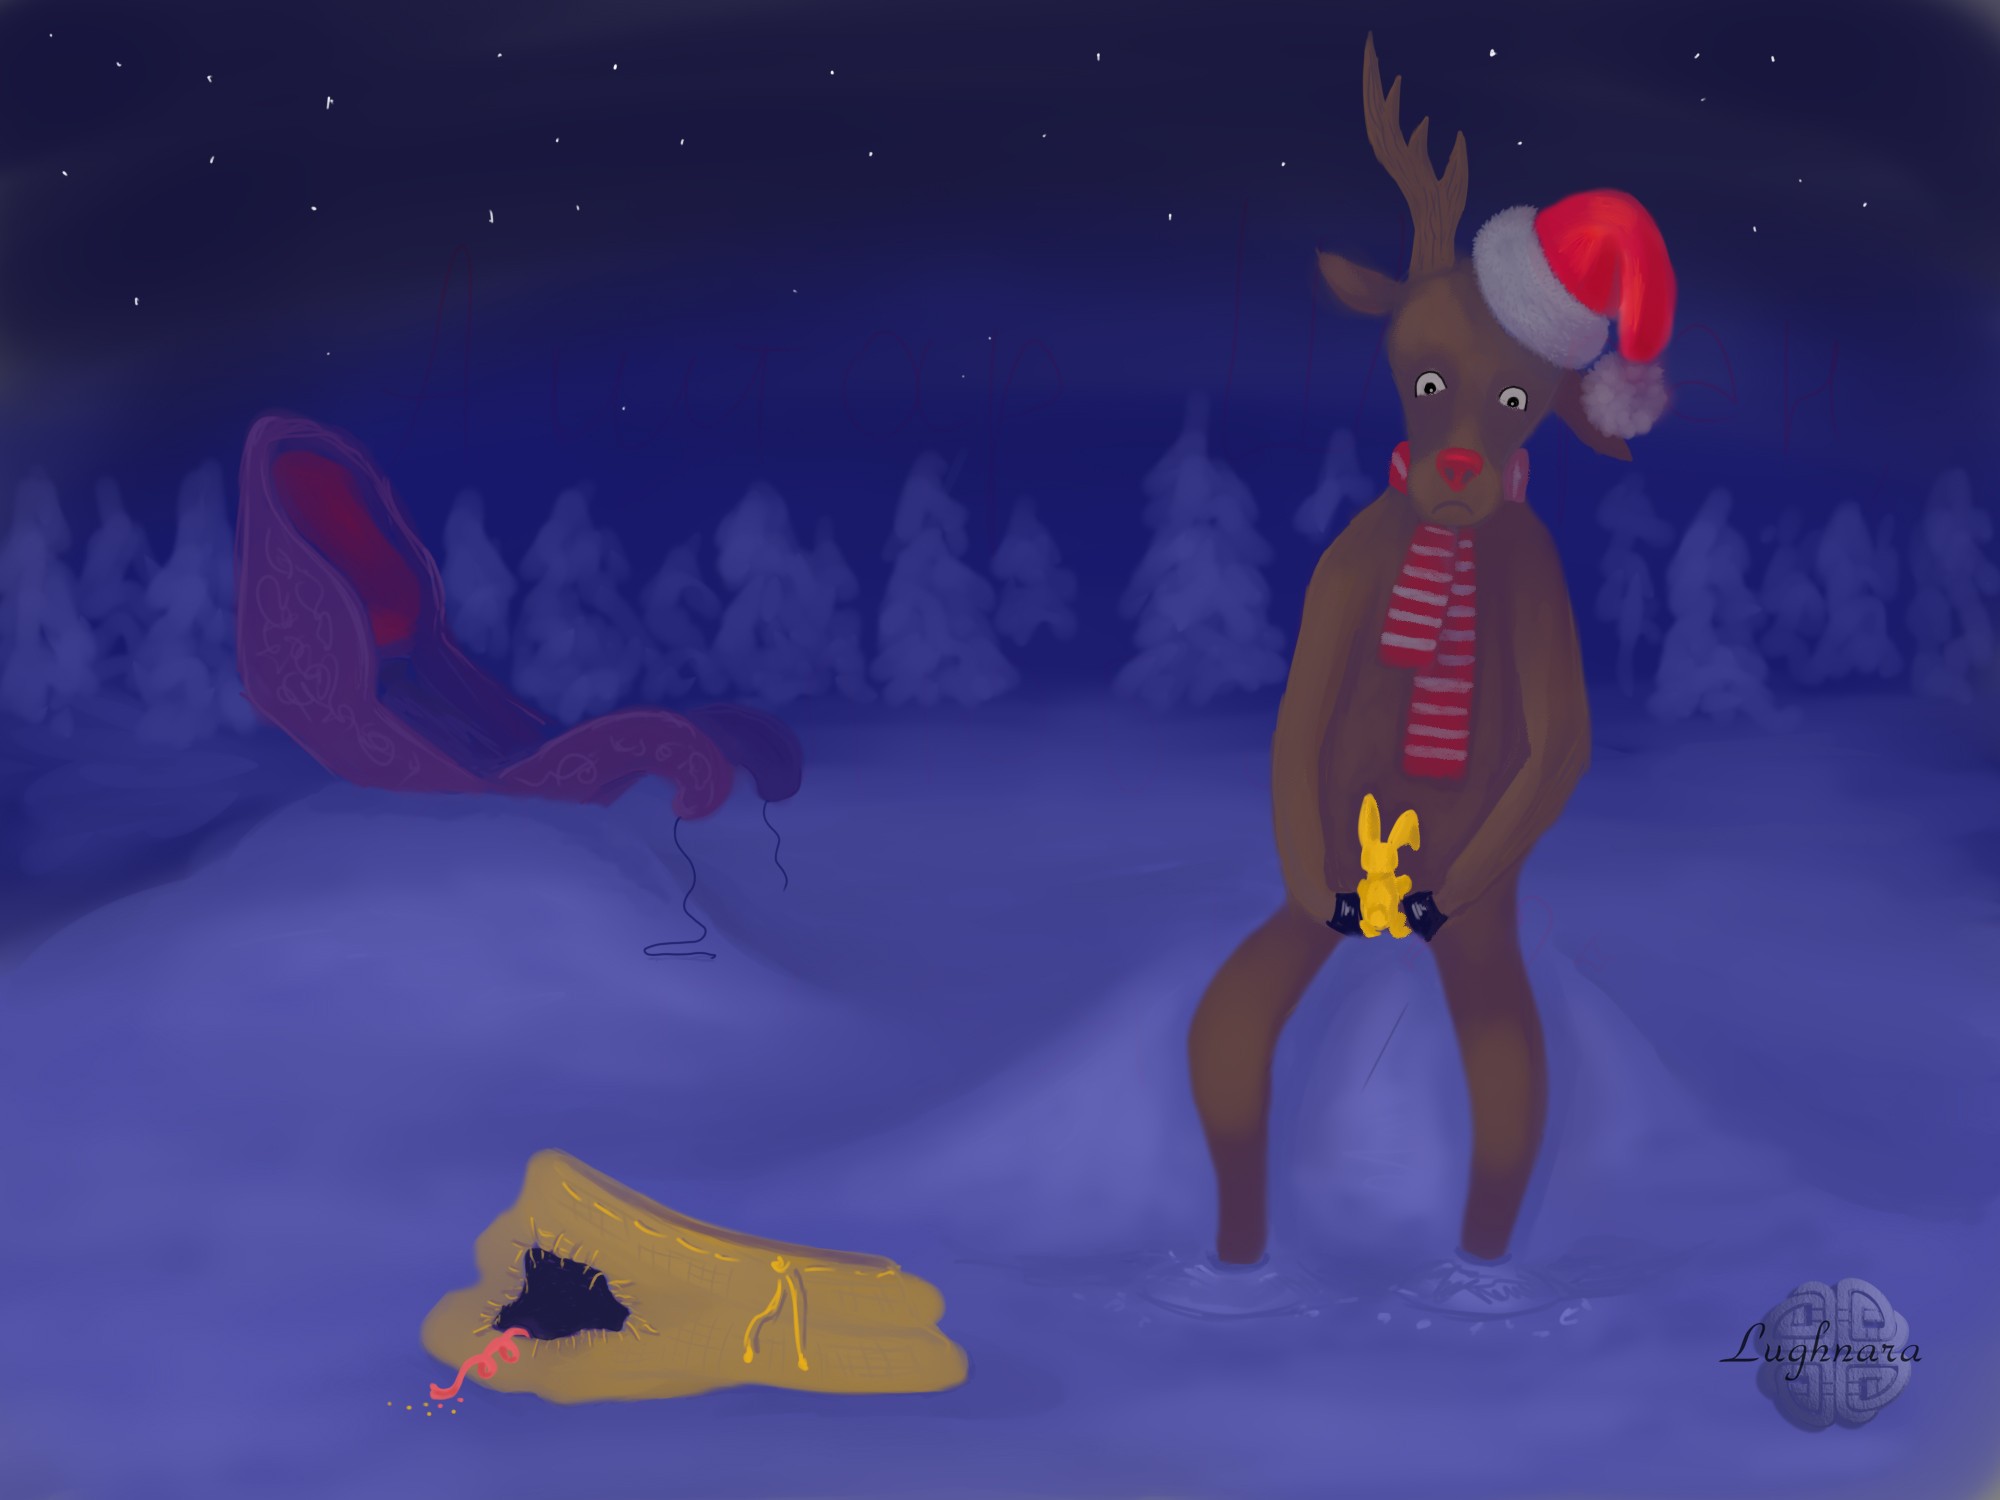
It my entry for art challenge #dtiys24 + #ArtParkWeekly
The story is this: Rudolph wanted to replace Santa, but it did not work
Sledge in a snowdrift, gifts lost on the way ... what to do?
Cat and Bird (graphic with pens-brushes) - https://read.cash/@daring-celt/cat-and-bird-graphic-with-pens-brushes-723ad066
#art #drawing #tutorial #readcash
Cat and Bird (graphic with pens-brushes)
Hi friends!
I keep exploring the possibilities of my new pens Bruynzeel Marrakesh which which I bought recently.
I made a drawing Oriental house with pots with this pen set and want to drawing with it again https://read.cash/@daring-celt/oriental-house-with-pots-drawing-with-pen-brushes-0cd2ab75
On this time I want to use it with usual white paper for drafting.
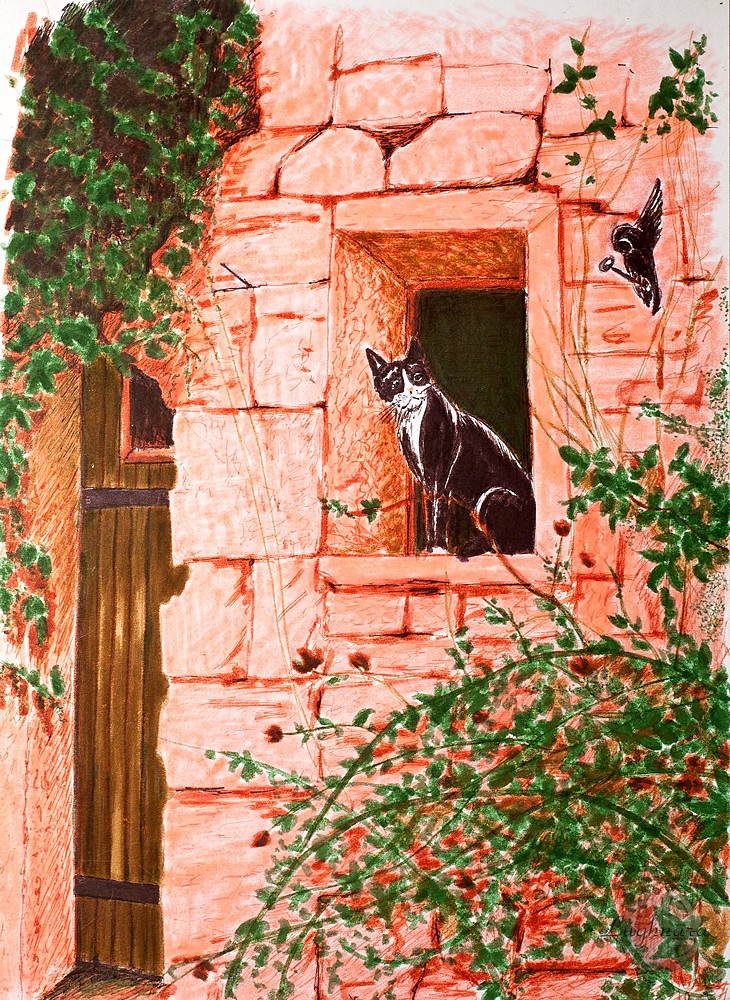
I liked this photo from Pinterest. I decided to draw it with a slight change in the scene.
Let the cat looking at... for example, at the bird! https://www.pinterest.ru/pin/60798663709643940/
Sketch
The bird sat down on the bar in the wall and cleans the feathers
The cat is watching her
I started my work with drawing the main outlines with a brown rod (*as you remember, these handles are double-sided*)
In the next step, I outline the branches of greenery on the left and right.
Ivy greens on the left, I spend a lot of time above the door
There is a gap in the wall, so the space behind the leaves will be very dark (using a black and brown brush).
I paint ivy leaves in two shades of green.
Here I paint the door in a swamp color and part of the wall next to it.
I shade the inside with brown to make it look more shaded, and the outside with pink peach brush.
Now the window behind the cat...
I mix green, swamp and brown colors to get very dark color, but so that the black cat does not merge with it.
I paint the inner planes of the window with a pink peach rod with a strong brown shading (this makes a shadows and texture of a stone at the same time)
Now the main characters!
They are both, according to my intention, black, and they will have all the attention.
First, I outline with a black rod where the highlights will be.
Cats have a shiny coat, so even a black cat is light in places.
Then I paint over the rest of the shape with a brush.
I paint the bird the same way
Now I am finishing the right section of the greenery.
Sometimes I apply leaf-shaped strokes, and somewhere I do just a chaotic set of strokes.
These are climbing roses that have already faded.
Dry buds will be brown
Shadows under the foliage I paint in brown and swamp and make a texture of stones with brown rod.
And the last step.
I paint the front piece of the wall peach pink brush.
With black and brown rods I mark deep cracks and holes in the stones.
I also sharpen the break in the wall above the door, which is partially obscured by ivy.
I tint the door in green and darken the inner planes of the window with strokes with a swamp brush color.
And here's what in the end
Yes, I liked how this pens drawing on white smooth paper too!
Thanks a lot for your attention (and donation))) ) to my drawings!
I hope If art pleases someone, but it was not done in vain))
Have a nice and creative day!
Regards
 @daring-celt