My latest music video: Cesar - Seremos uno (Making of)
*It's been a long time a haven't write anything because i didn't have any time to do anything else besides working, but now that i have the flu, i have a bit of time, so i'm going to publish two articles. Both about my projects. I hope you enjoy it.*
A few days back i published a new music video on my Youtube and Gaze.cash channels (yes, i do music too, or at least i try), and it wasn't easy to make, not because it was hard, it was because i didn't have any time between my work and the project i was finishing.
It's a Cueca (Traditional Chilean Folk music), and it's about a person that fell in love, and tries to win her heart, convincing her that they will be one. It's a very beautiful musical piece, so i tried to make it as beautiful as i could.
So today, i'll show you i i made this, which tools i used, in other words, the making of, and the final video. I hope you enjoy this beautiful journey, dedicated to the noise community.
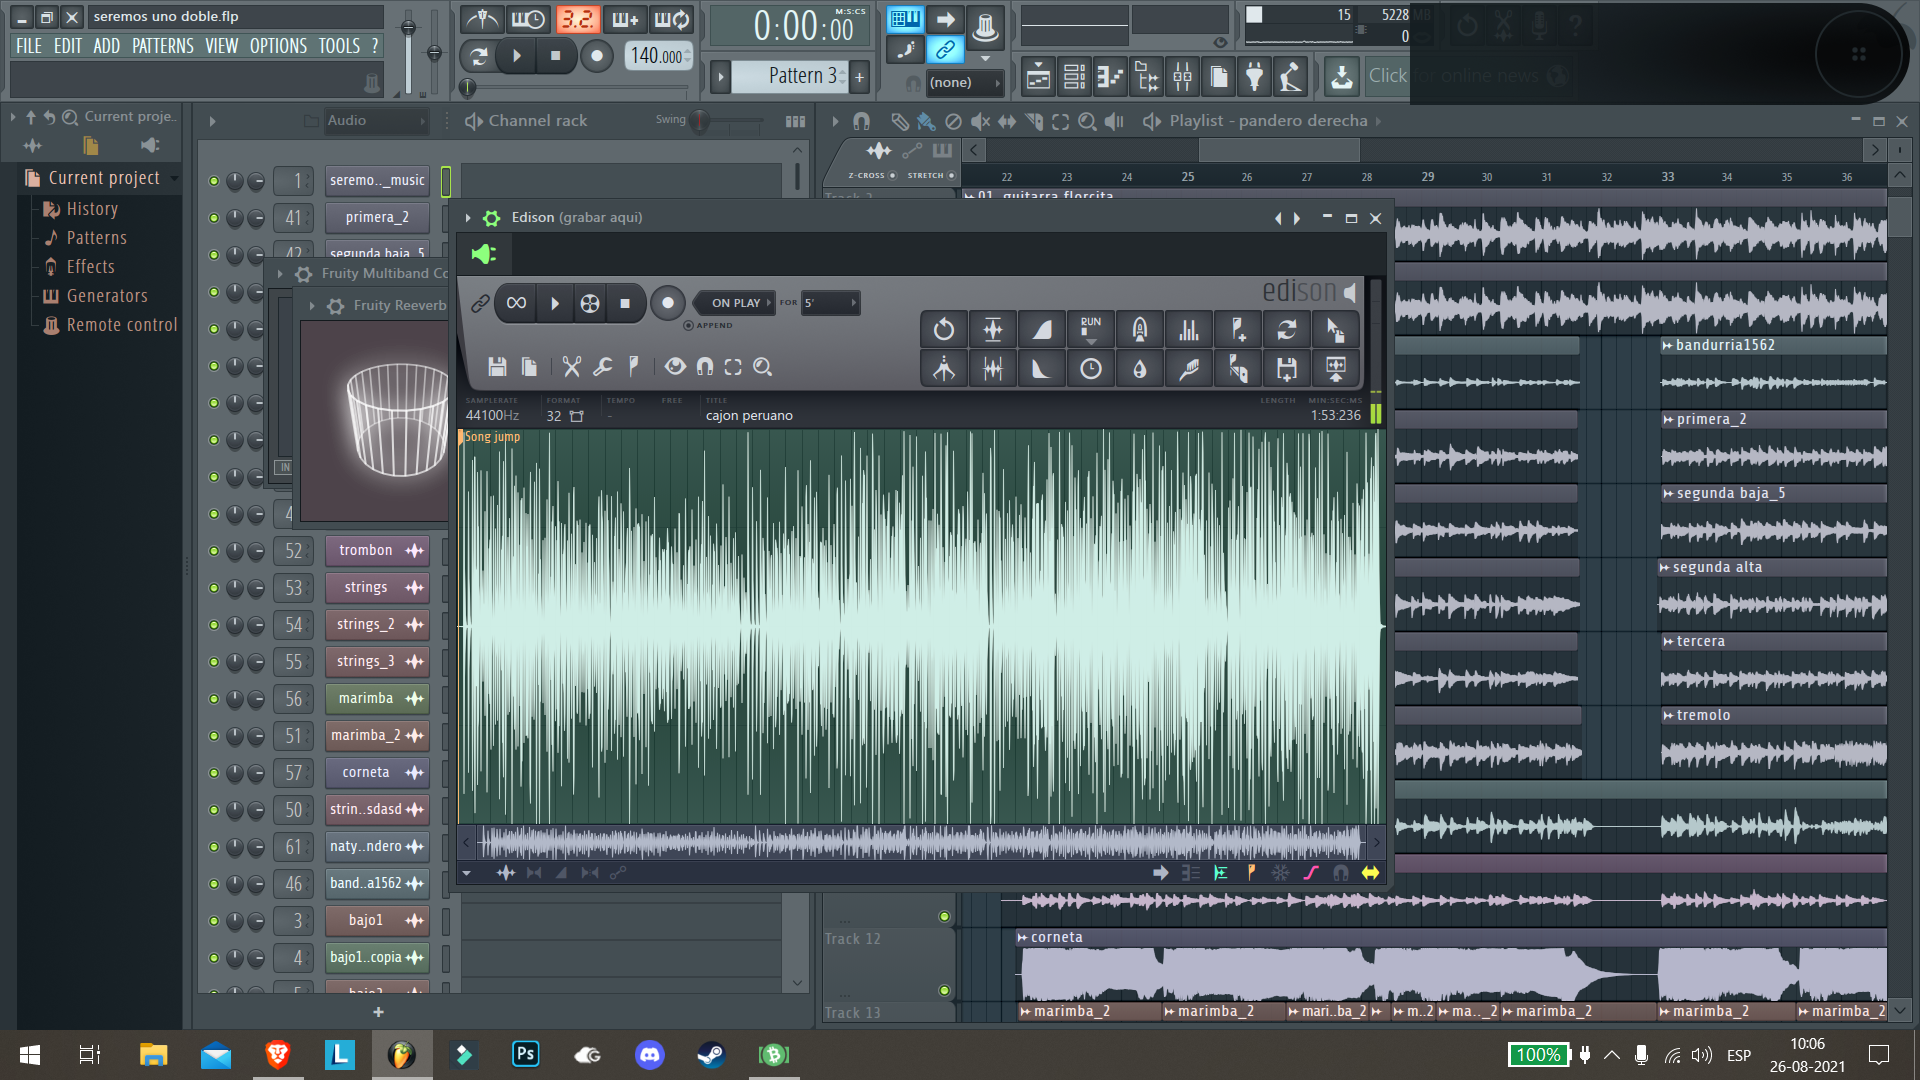
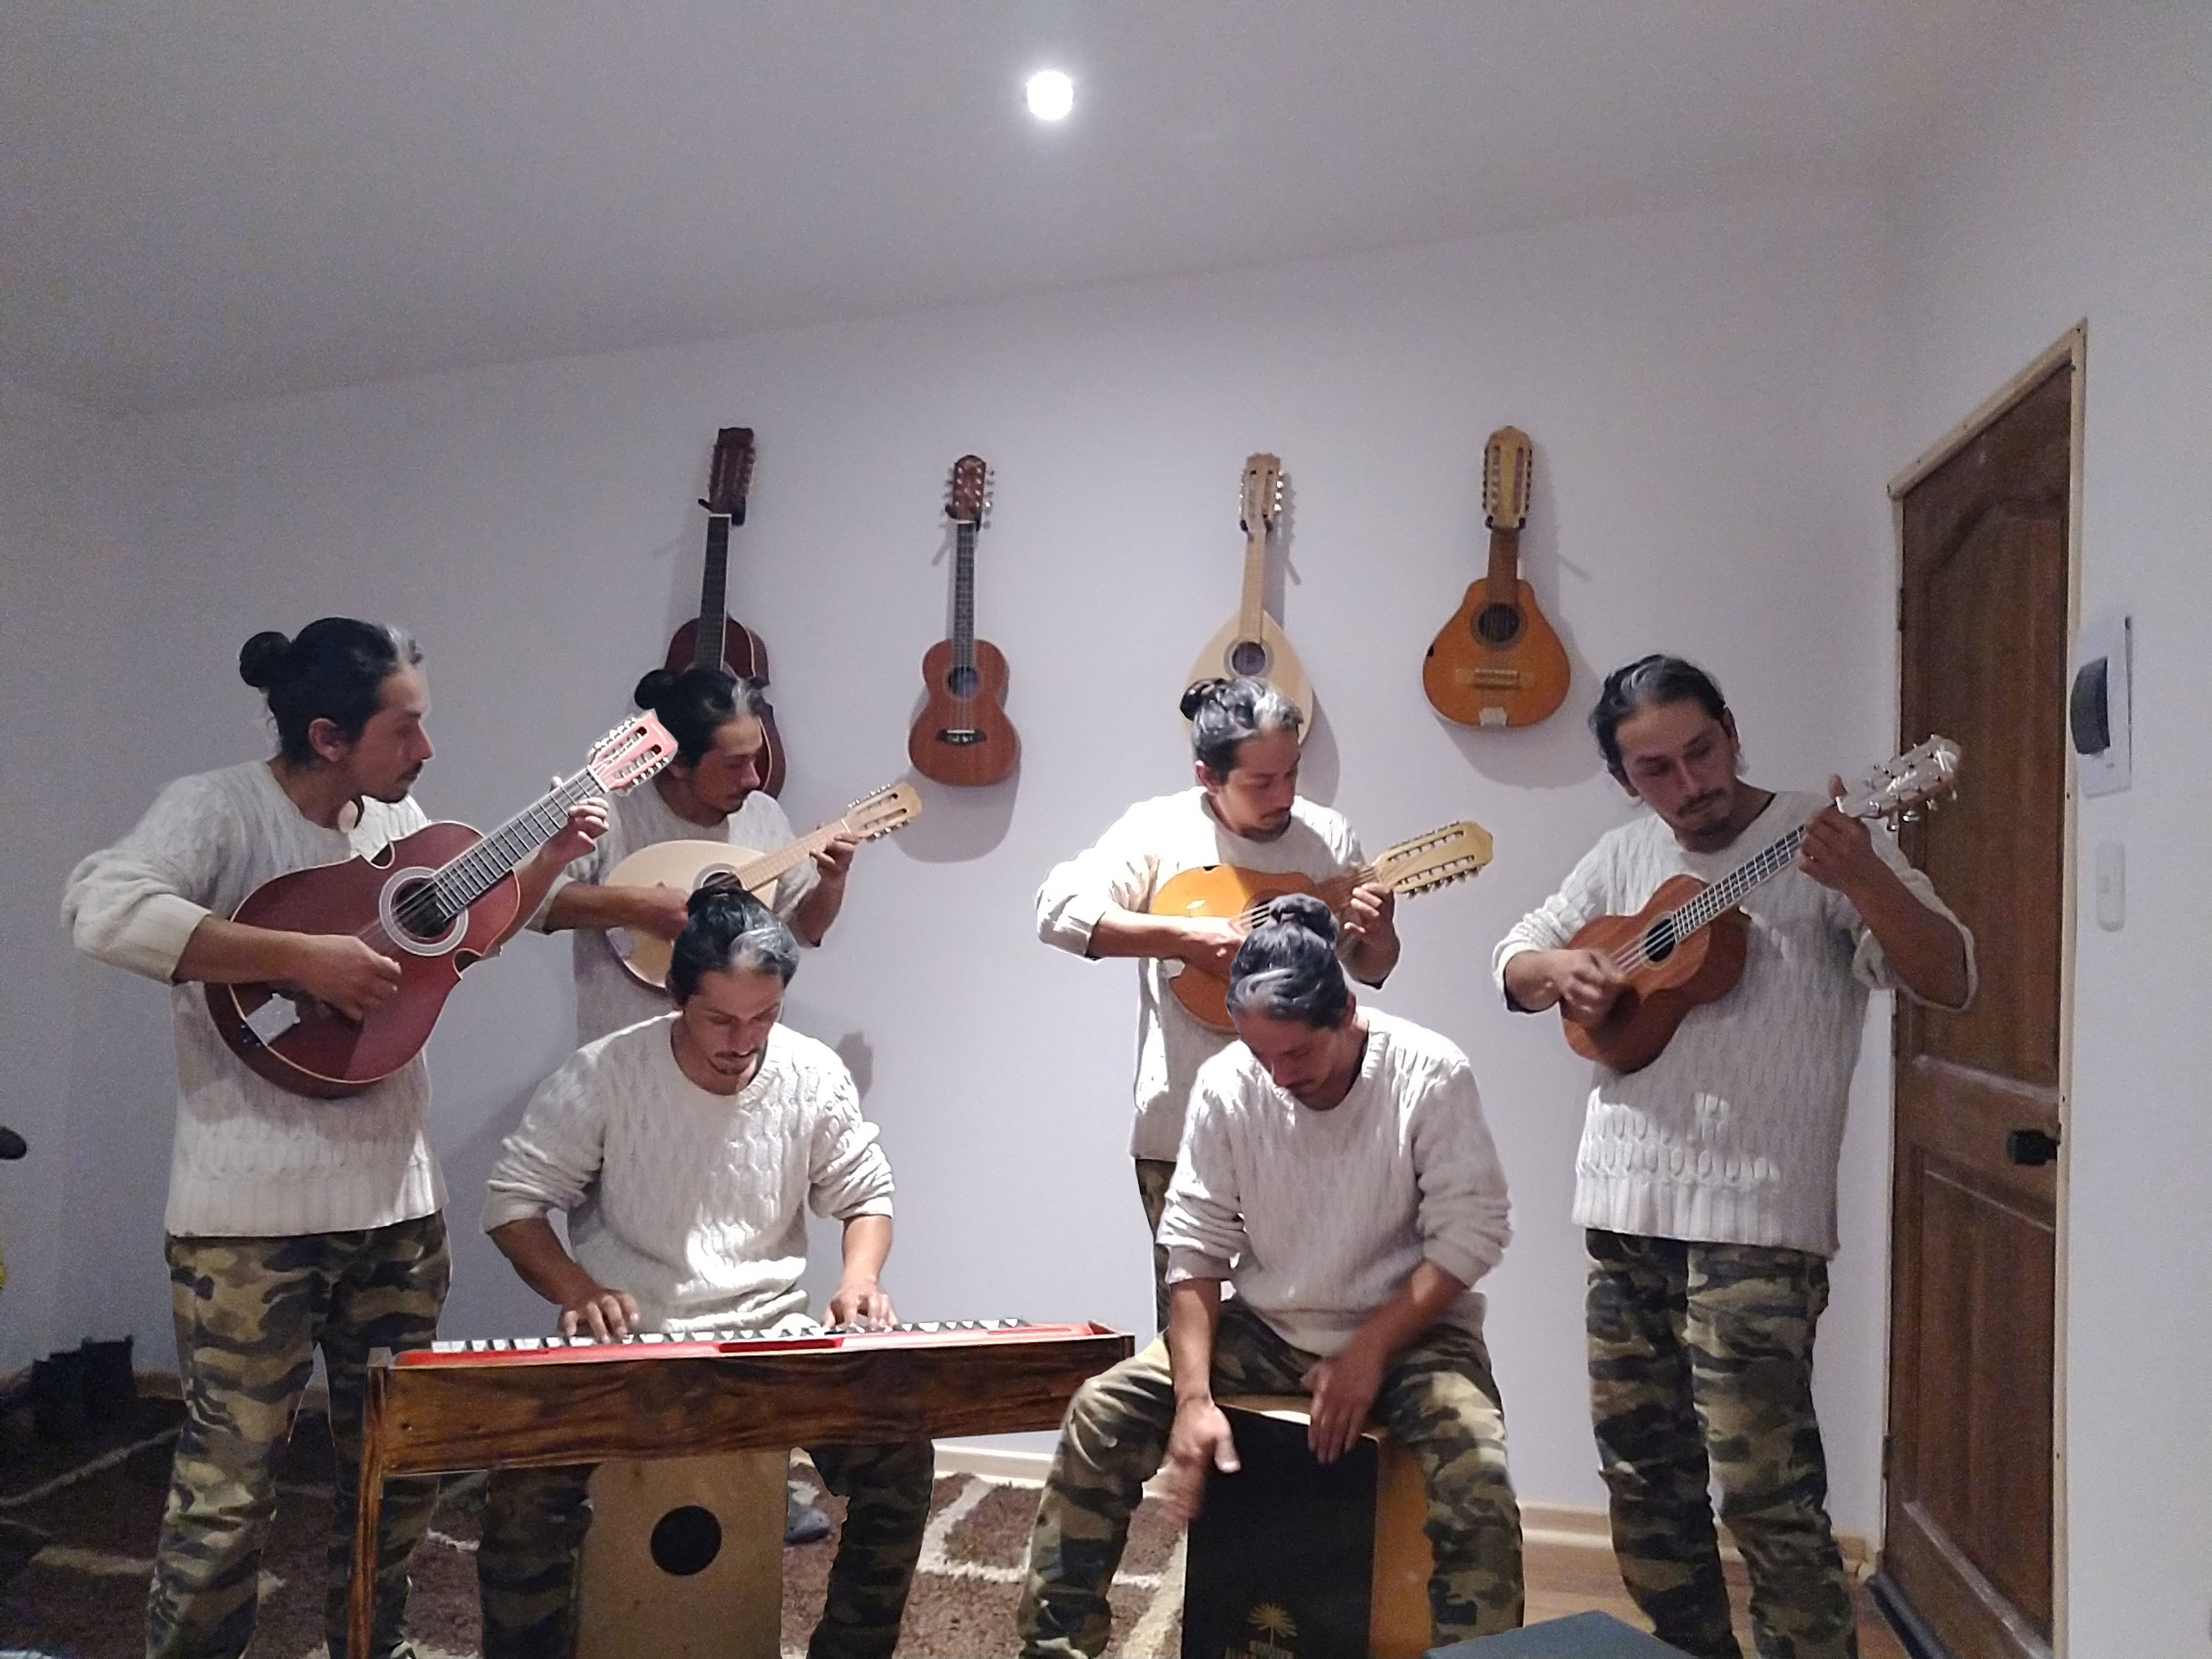
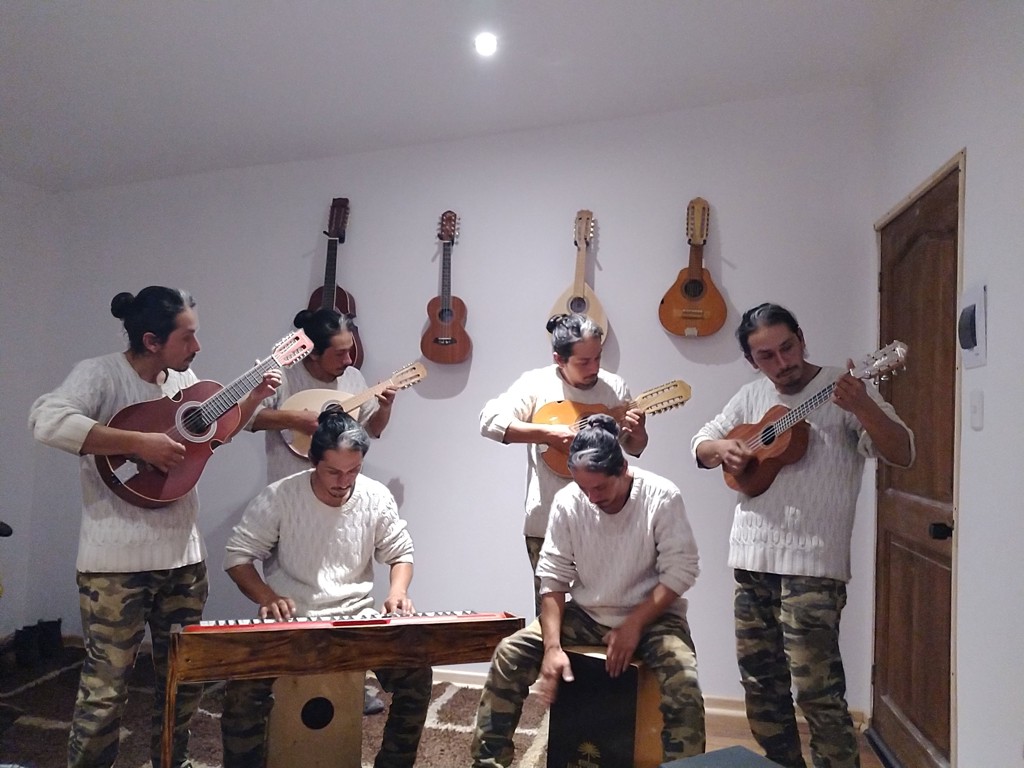
This took me Several weeks to make, because i played most of the instruments, such as the Bandurria, Mandolin, Keyboard (with several sounds like strings, trumpets, among others), Peruvian Cajón, Spoons, 8 strings Ukulele, Puerto Rican cuatro; and then it was time to play my voices, and i did a lot of them, all of them recorded twice to give it the Stereo effect (that's why it sounds better with earphones). I made 14 voices of each frequency variation, including Bass, Baritone and Tenor voice registers. i'm not really good with some voice registers that are not natural for me (I'm a Baritenor), but merged they sounded great, in my not so humble opinion.
Those 14 voices ended in 28 recordings, so that's a lot of time invested in this, and that0s only voices. In total (including instruments) i did 64 recordings. Crazy, right?
Well, Then it was time to equalize that monstrosity. Most of it was easy, because for each voice and instruments i've classified them in groups, for example Low pitches, mid pitches, high pitches, percussions, etc. And then, i've used some tools like Multiband Compressor, Parametric EQ and Reeverb. Then, i divided the recordings into Left - Mid - Right channels.
The hardest part was to Check the individual sound gain, because i don't have a monitor, so it was a challenge to get all the sounds to a similar gain (not surpassing the -6dB, but still i did it, kinda. it wasn't perfect, but i did a pretty good job on that, at least for headphone levels.
Then, it was time for the video
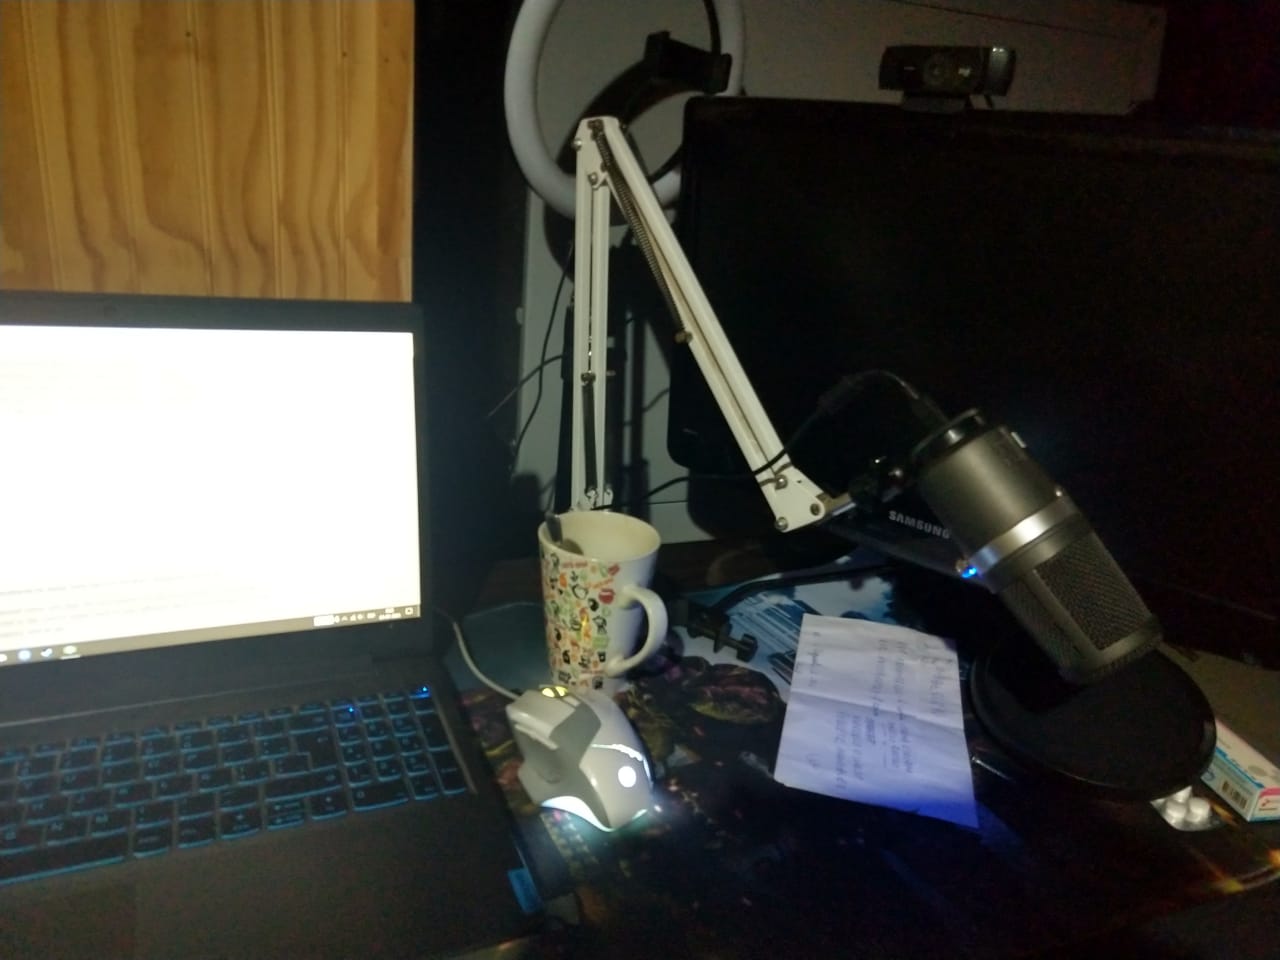
That was A crazy full day of video shooting, considering i just had the room's lights and a lamp to remove the shadows of the green screen.
I chose for the shootings my nephew's bedroom, because it has a good aestetic, and there i don't bother anyone.
It took me a whole day to record all the videos, leaving some of them out of the final take, because i didn't have any space to place them, it as a nightmare, but i got it done.
The process was simple: I just recorded myself playing all the parts, all of them... Every single one of them. My hands were in pain after the shootings, and also my voice. i gave everything in those shootings, although nothing can fix my ugly face.
Then, it was time to Edit this bad boy.
This i made it step by step. First i put the videos in groups like strings, voices, etc, and then in every group i made a different video, and in each one i synchronize all of the videos in the part on where they starts and where they finish. And then, i remove the green screen using the Chroma key tool of the video editor. Also i resize and cut some parts of the video, so only can be seen the person playing.
After all that, i merge all the videos, syncing all so it can be seen as a whole piece, and i added the credits and all the things i want to share.
And that's it, All the processes were made for this moment. I hope you all enjoy this, it took me a lot of hard work, so i'm pleased to finally share with you this song:
Cesar - Seremos uno
https://www.youtube.com/watch?v=vFn5pvi4xfs
*I suggest to listen it with headphones.*
Well, this was the whole process of this music video. What do you think? Did you like the song? Which song should i do next? Let me know in the comments, and i'll be happy to answer and check each and every one of your comments and suggestions.
On other note, hopefully, if i have any time left today, i'll write the Final chapter of the project "A bedroom for my Nephew", to give it a good closure.
Thank you all for reading my article, and i'll see you in the next one.
My Social sites:
My gaze cash Channel (like youtube but with BCH): https://gaze.cash/channel.html?chan=137d35a6-2a9b-46bf-8be4-606cfb5a2750
My Youtube Channel: https://www.youtube.com/channel/UC8G5AN32nVDPH6Nv9pFklAg
My Noise Profile: https://noise.cash/u/cesar.cantante
Music i like to listen while i'm building.
When you are working in any area, like office, cooking, attending patients, or in my case, building, there's pleanty of musical options to listen specifically for that job, and there's also some other songs that you can listen in all kinds of work, it will all depend on various things, like your mood, your co-workers taste in music (if you work with others), or even the type of work you are doing, in short words, it will fit depending of the situation.
For people who work in office with co-workers, generally there's a mix of music that everyone listens (unless you listen music way too extreme for the rest), for people who work in places that needs a lot of focus on what you are doing, you can listen some lo-fi music or even none, what fits you more. In my case, i work on a building company with a lot of co-workers, and luckily for me, they all listens my type of music (yeah, i introduced them to the rabbit hole what i call "my taste in music").
Now, why is this important? **Productivity**.
Its is known music can help to improve the chances of working well with others, and to create a sort of music-driven working rithm, that you might not notice, but it makes you work like if you are a piece in a serial factory, where all play their part in time to take the product to the next step.
This is very real, in fact, decades ago, workers usually sang songs that helped them to increase productivity, and it worked, increasing productivity to at least 25%. Actually in the serie The Big Bang Theory, they joke about this.
https://www.youtube.com/watch?v=_yXGxL7dfSg
So it is important to know which music you need for your working environment. This time, i'll show you mine. As i said earlier, i work in construction, so there's a lot of music instances i hear while i'm at it.
1. Metal
Not just Heavy Metal, but almost the whole genre.
This genre is really good for a really specific type of work, and that is the strength related work, for example nailing, demolishing, heavy lifting, between others. The effects that this genre does to me, is the surge of energy, which makes sense because i'm using a lot of energy doing heavy work, so i need that thing that impulses me to do my best, and this genre of music does the trick for me.
Some of my favourite bands for this type of work are Meshuggah, Sepultura, Slayer, Carnal Forge, The Haunted, Death, Strapping Young Lad, Soilwork, Carcass, Children of Bodom and others.
https://youtu.be/quPliK3eAy4
2. Reggae and Electronic music
Yeah, Reggae is not just to enjoy the green glory, you can use Reggae (specially Dub) and Electronic music (specially house) to work in repetitive work, for example, in the project i used this type of music when i had to cut the squares of isolating polyester and install them in every square in the walls and ceiling. What makes those genres great for repetitive work, is that you won't notice the time passing by, so you won't notice either when your tasks are finished, this is great, because sometimes, repetitive work can be perceived as an eternal and a royal pain ~~in the ass~~, so this helps a lot.
https://www.youtube.com/watch?v=CuNJ5j2fybo
3. Folk accoustic music
Let me explain this one, this is kinda tricky for me. There's a lot of music we (Latin Americans) don't actually consider as "folk", because is really common here in latin america but for those who live on Europe or north America, i'll label it as Folk, ok? good.
This genre of music is really nice and versatile, because depending of the subgenre, i use them for several types of work, been Precision-related type of works where i use them the most, and there's a lot of styles, for example the *Cumbia, Cueca, Chamamé, Boleros, Zambas, Polka*, and others. And Each subgenre sounds different in every latin american country, and they sound great in every one of them.
https://youtu.be/eVh8s0NorMA
I love this song, i usually sing it while i'm working here.
In case you like this song, i'll leave the lyrics in english for you.
*"Stay in me*
*Don't let this love to end, little one*
*Stay in me*
*I'm asking it to you for God.*
*Stay in me*
*I'm asking it to you with tears in the eyes*
*That this dream of loving each other don't die*
*Like autumn leaves do*
*That rolling they leave to the world*
*From forgetfulness without light nor God*
*Stay*
*No, don't look out the autumn*
*No, Your cannot leave with April sorrow*
*No, you can't leave me*
*Like a no one's old portrait*
*Stay in me*
*I'm asking it to you for God.*
*Stay, stay, stay,*
*Stay, stay in me*
*I'm asking it to you for God.*
*No, you can't leave me*
*Like a no one's old portrait*
*Stay in me*
*I'm asking it to you for God.*
*Stay, stay, stay,*
*Stay, stay in me*
*I'm asking it to you for God."*
Well, this is the end of the article, what do you think? Are you agree with the statements? Which music do you like to listen while you are working? Let me know in the comments, and i'll be happy to answer each and every one of your comments.
Hopefully, tomorrow i'll write the followup for the project "A bedroom for my Nephew", so you all will know how that is going, because that article will get us up to date. We are close to finish it, we only have to finish with the wall paste, to paint the walls and ceiling, to install the floating floor, install the details for the bedroom, and to build the furniture, so that's not much work left.
Thank you all for read my article, and i'll see you in the next one.
Project idea to fuel with BCH: "A Music Recording Studio room for Cesar"
The last days i've gave you a full up to date on my latest project, that is something for someone else, i like to do things for others, but i haven't do something for myself, so i was thinking about it, and if i wanted to give a present to myself, that would be something i really need to improve my music editing skills, and help others in the same manner. I don't really care to be famous, and i'm not either a top tier musician (i just do it because i love it), but one of the things i'm really pasionate about is music, and i'd like to have a place to myself. Some people wants to have a game room, others some place to share with friends, i would love to have a place to practice without bothering with the noise to my family, and considering i'm having the skills to pull this off, why not doing it fueled by BCH?
I was looking some plans today for Recording rooms, and you don't really need a big room, i can do one as big as the bedroom i'm doing to my nephew, with extra steps, that i'll explain now:
1. Same space, but with a smaller room inside the room.
You have to separate ambiences, one will be a control room, and the other will be the sound room:
In the control room, you can record what happens in the sound room and edit the music produced by using tools such as software, monitors, and so on.
In the sound room, you play the instruments or sing using the periferals that are connected to the control room, such as microphones, direct boxes for electric music instruments, and so on.
2. Reinforced isolation.
Now we are talking in a more professional manner, because i will have to calculate how much sound cancellation will i use on walls and the ceiling, because if you use too much, or too low, it can be problems. In the case of too much sound absorption, you can have a lack of breathing air, and that can be an issue, because you's need to install extra things of the air, and that's expensive. and in case of too low sound absorption, the sounds will bounce and it can be a problem on the recording phase, causing problems such as echo on the mics, ruining the recording process.
What materials will i use?
Well, you might think you need extra expensive materials for that matter, but actually not. Most of the materials needed i can do them by myself, and it isn't expensive at all. Most people think you need the accoustic foam that you can purchase on sites like *Amazon* or *aliexpress,* but, it's expensive, it doesn't worth the money you are paying, and most of all, you can do it by yourself, and it will cost you almost nothing.
The material list is the same i used to the project "A bedroom for my nephew", but with some others (on a budget mode), such as:
**Bass traps**, that you can fabricate them by yourself if you follow the proper instructions.
**Skyline diffusers**, this is a wooden pannel with wood pieces of different sizes in it. You can do this with a mathematical equation to fit the room.
**Carpets**, lots of them.
Some **wooden Bookshelves**, with books on them. Yeah, books can absorb sounds
**Thick Courtains**.
**Thermopanel sliding windows** and **sliding doors**. This type of items has great sound absorption properties.
Double amount of **Isolating Polyester,** the same i used on the last project, but double.
**Ventilation Grills,** you need this, so you can have oxygen in the sound room**.**
There's other materials needed, but i need to do more research about it, because there's a lot of things i can do, but as i said before, i need to install the exact amount of sound absorption, and sometimes less is more.
The good thing about this, is that the place i think i can do it has already a rooftop, so i don't need to do a new one, i just have to assimilate it to the building process, so i can save a good amount of money.
So, what do you think? did you like my idea? It is exciting to me, to be able to create it with my hands, sounds really exciting. I can't wait to see it done, if you are agree with me, of course.
I estimate i can have it done before my birthday (considering i only work on my projects when i'm not working, so it will be a slow process, just as my latest project), so it would be a nice birthday present to me. Now, it can be done sooner depending of the lockdowns, if that goes back to the city i'm working on, i can spend more time to the projects.
I believe this can be done by a fair budget, and with the support of the BCH community, and of course, to purchase all the materials with BCH, it can be done easily. I can do the followups in noise and here, and if i can borrow to a friend a good camera, i can even record all the process as a timelapse to share with you. Sounds good, right?
Let me know in the comments if you think this is a good idea, and if you have suggestions, feel free to ask them, i'll be more than happy to read all of your comments.
See you in the next article.
Fifth part of the project fueled by BCH: "A bedroom for my nephew".
This five days has been a full tour through all the things i've done in the project, this is the last one, and we will be up to date.
This couple of months has been fun, learning and applying all the things i've learned about construction, and this is my test, to prove myself and everyone that anyone can do this, if you take your time to learn, to practise and to apply it to real life, because, this will be helpful to someone, it may be for you, for your siblings or someone you love, you can change a life with stuff like this. In this case, this bedroom will change my nephew's life, because he will have his privacy, and that's very important in real life. All thanks to BCH.
Let's continue with the project!
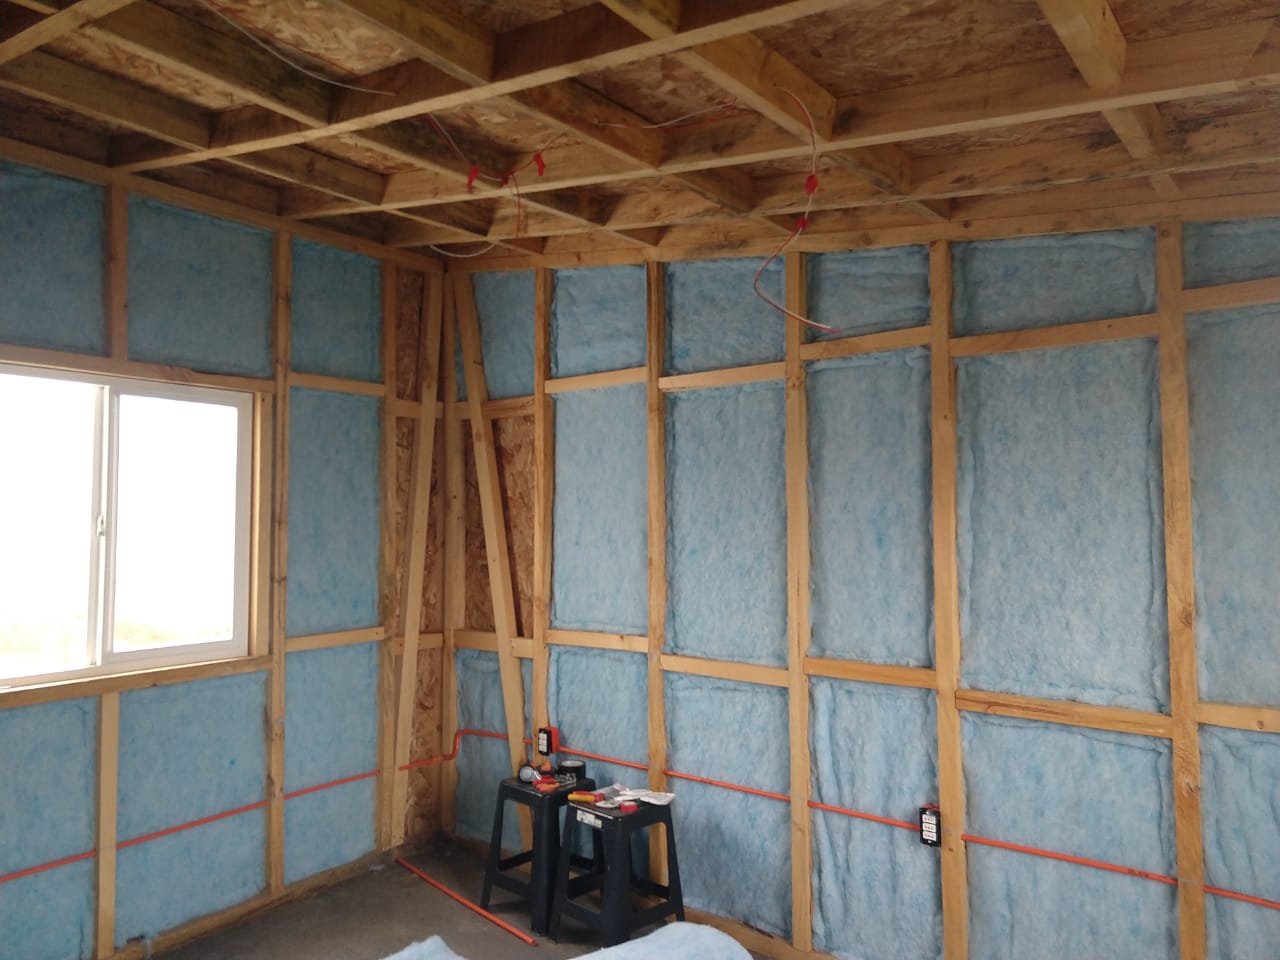
As we said in the last article, now it's time to apply the isolation inside the walls, this will be fun-ish.
To isolate inside the walls or/and the ceiling, you have a lot of options, been the cheapest one the polystyrene (not recommended), the middle range Isolating Polyester and the expensive one the glass wool. There's other options, but those are way too out of budget.
I will never recommend polystyrene panels, it was the greatest producer of house fires here in my country, it doesn't isolate heat so, don't fall to that, even if your budget is short. Spend wisely in this matter, because, as my dad always said "Choose to be cheap, and it will cost you in the future". You don't need to buy the most expensive, you can pick something in the middle. in my case i chose the Isolating Polyester, because it's similar to the glass wool, it's not as good as glass wool, but it will do the job, it helps isolating heat and sound, and it cost half of the glass wool, so if you want to get greedy, you can double isolate the whole room at the price of a single isolation with glass wool.
This is how it gets done:
You measure the width of each square of the walls, and with a cutter, you cut strips of isolating polyester, and you place them, making sure it fits very well, it must cover the whole square, then, you do the next one, and then, the next one, and so on.
This procedure will take some time, and it might get boring and repetitive, so i put music, and did fun things while i was doing it to make more bearable the process. You don't need to nail any of the isolating polyester squares, because it gets trapped by the wood pieces, so it won't move, even the ceiling ones.
This is the awesome part: You will inmediately notice that it's working, because while you are installing them, the "Echo" fades, to the point that the echo completely dissapears. Fun, huh?
**Inner isolation completed**.
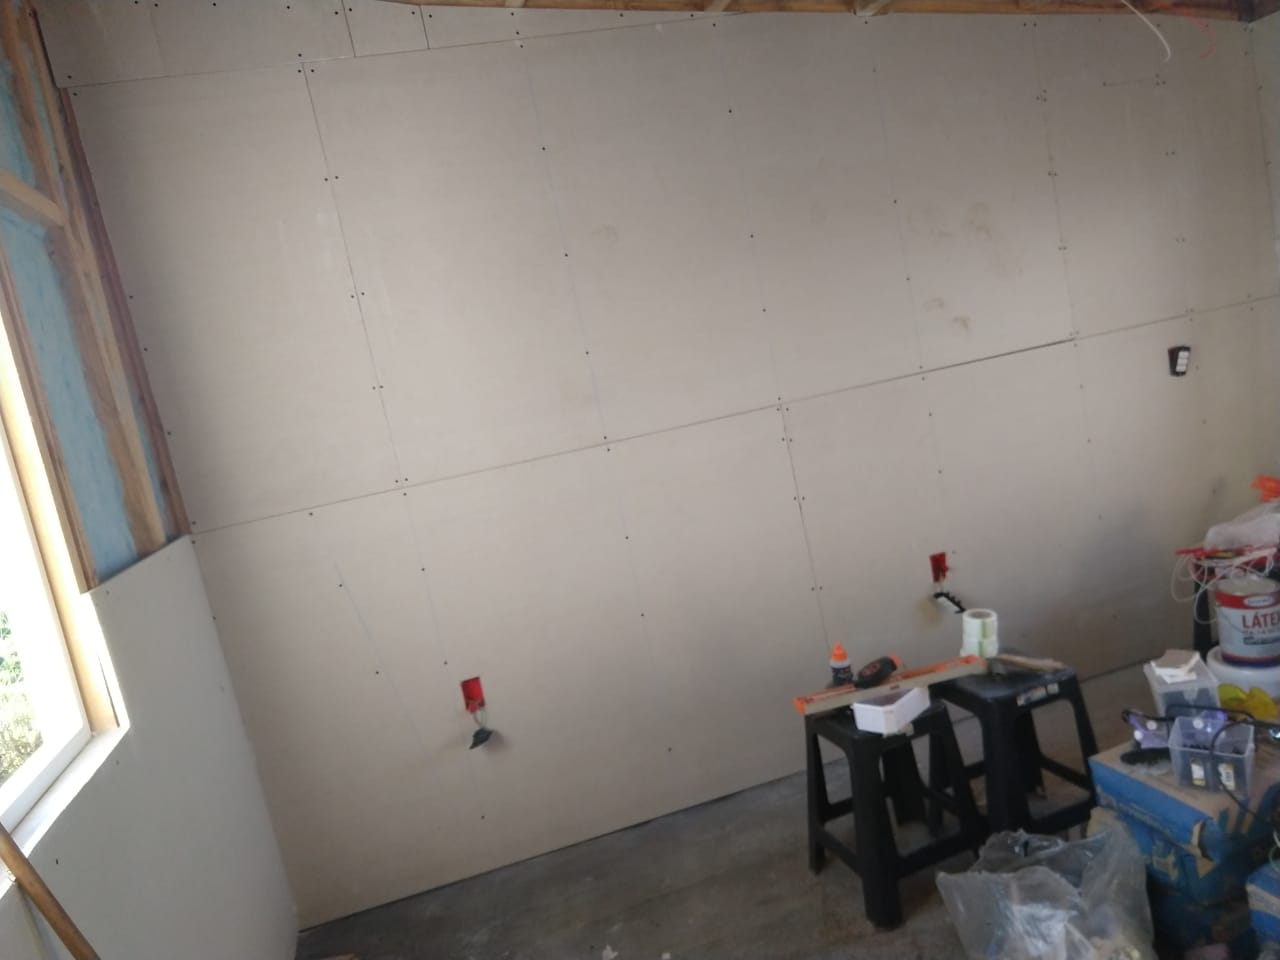
Now it's time to install the Drywall pannels. Yay!
At first, i was a bit concerned about how i was going to be able to install them alone, by myself, and prolix. It was days of trying to figure it out, until it finally hit me: "don't overthink and just do it!". So i didn't overthought it, and just did it.
The first plates were a nightmare to carry, until i figured out my confortable way to carry and place them without harming myself. So i started to do the following:
First you have to measure from half of one column to the next column between the measure of the drywall plate (it must be between 2.4 meters, no more), if a bit of drywall passes the last column, measure the distance, and you make the cut on the drywall using a cardboard cutter and a ruler (the cut must be even), and then, you must use a plaster scratcher, that helps the cut gets straight, and all the imperfections dissapears. Then, you place something under the drywall pannel so it don't touch the floor, and then you screw the panels to the columns and all the wood pieces inside the panel's area. Then, you repeat the process with all the pieces.
Now the big question: how do you cut a perfect square for the plug outlets and switches? Easy: Coordinates.
You only need to draw X to Y by measuring how long from the drywall and how high to the drywall the outlet is. For example:
long: 1,5 meters to 1,55 meters
High:0,5 meters to 0,53 meters
Those coordinates are the representation of a rectangle, and that's the place you have to cut using a plaster saw, And that's it.
**Walls installed...?** Not completely.
That we will see it on the next Article.
Did you enjoy this project series so far? I hope you do. This is the fifth part of it, and we are almost up to date. Tomorrow i will post the sixth part of it, and it will be the last part of the summary, after that, it will be in real time. And it gets even better, because now you are starting to see how will the inner part of the bedroom look, reflecting the raw product of the bedroom getting more beautiful, one step at a time.
*Disclamer: I need to say, i'm not a builder, i'm just learning how to do it on the go, and i'm doing it with all my love, because this bedroom is for my nephew, it will be my birthday present for him.*
*Most of the materials were purchased by the noise community by simply giving hearts to the followups.*
Thank you all for reading this article, so please, tell me what do you think. what are your thoughts about this? if you have any questions about the project, and all the steps and processes, please feel free to ask me, i'll be more than happy to answer any question from you.
And, if you want more of this kind of projects, i'm always willing to do more, always with the help of the BCH community.
And if you have any new ideas, please, let me know, let's do stuff with the power of BCH!
See you on the next article.
Part fourth of the project fueled by BCH: "A bedroom for my nephew".
Yesterday, in the last article, a problem was formulated, and it was "¿What if the rain hits the door and the water starts leaking from below there? " An it was interesting, because that problem appeared the day after i thought about it. It started raining, and not just a simple rain... it was a storm, full powered, so naturally, the problem appeared, water leaked through the door to inside the room. How do we fix this? Let's find out.
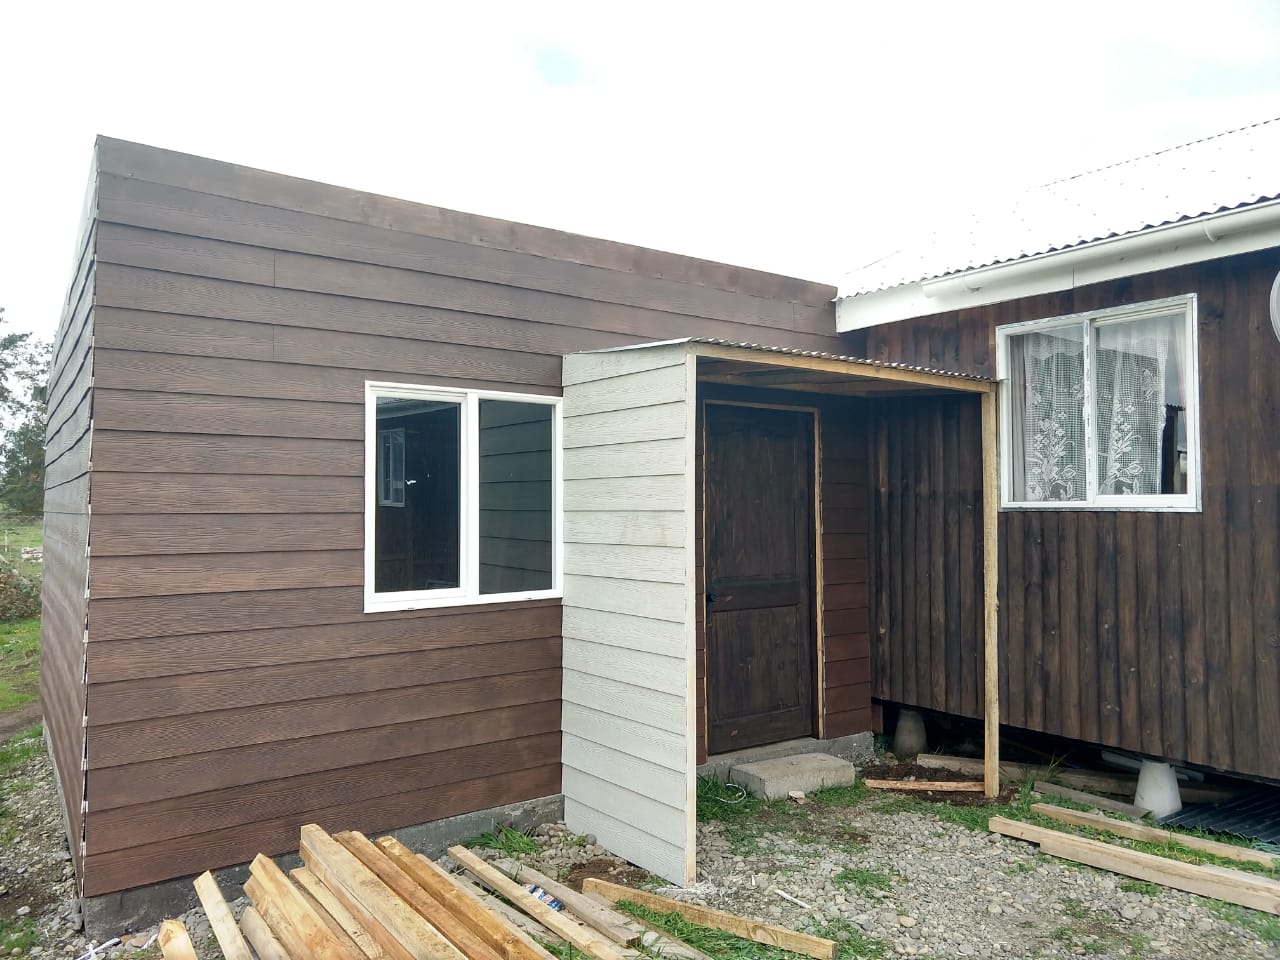
First, we need to take care of the rain's orientation. After i figured out which direction the rain mainly goes, i formulated a plan: First, i do a small porch at the entrance, with the wood pieces and the zinc plates i had that was a leftover from the main structure, that will help to prevent the raindrops falling directly to the entrance from the front. Then, i used the remaining siding i had to close the porch from the side, preventing the raindrops to fall directly from the sides.
I didn't create a big or visually attractive porch, because i don't have the materials to do that, i will do that later, when i do. When the rain goes away, i'm going to paint the porch. **Water leakings fixed**.
It's time for water protections.
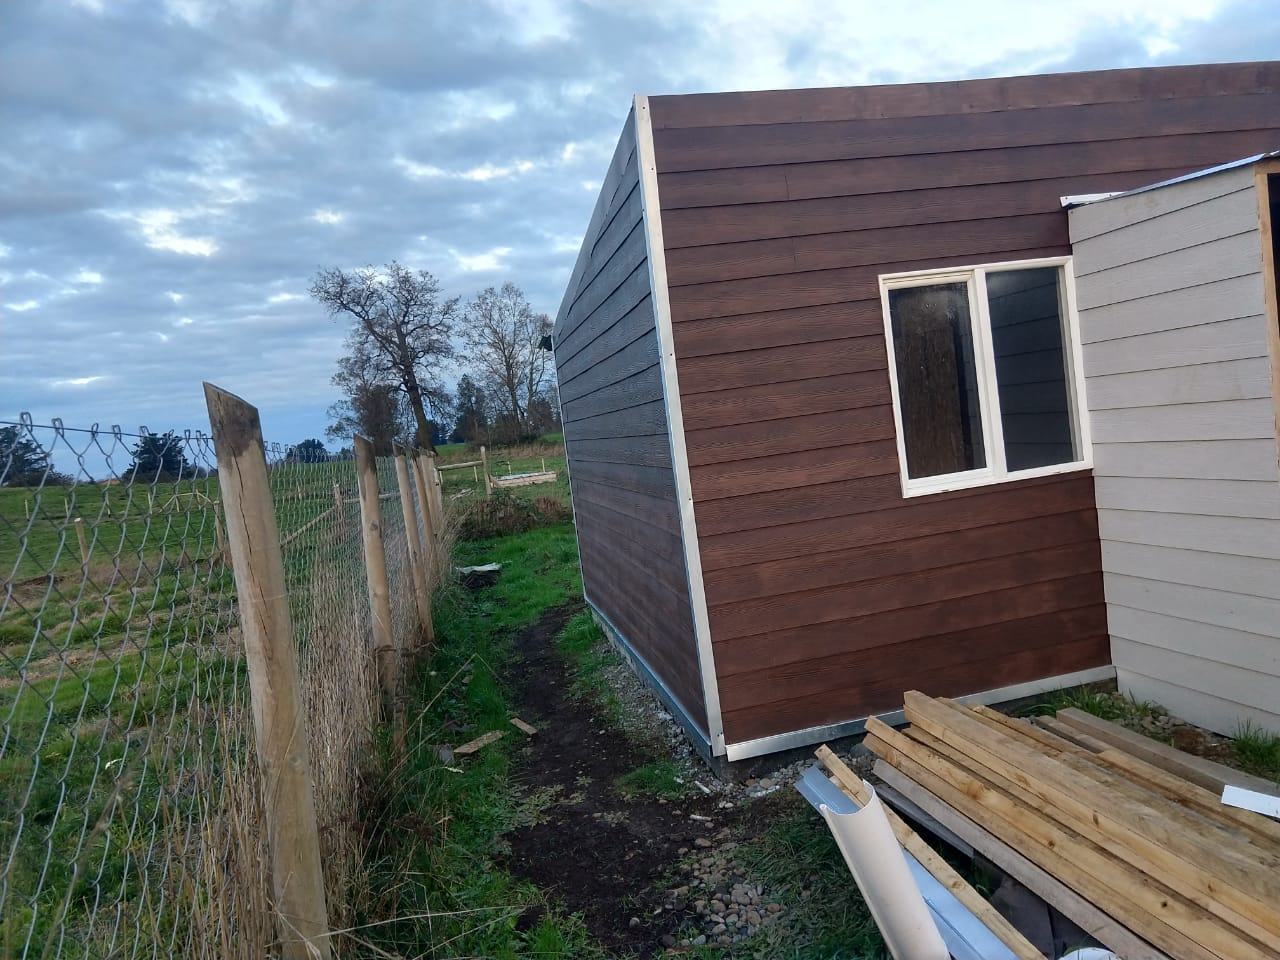
I placed two custom made "L" shaped profiles for the corners, and dropkillers on the bottom, for extra water protection. Both things makes the same function as a group: The profile prevents water leakings through the corners, and the dropkillers prevents water leakings from the joint between the concrete base and the siding, plus, both of them looks good without painting.
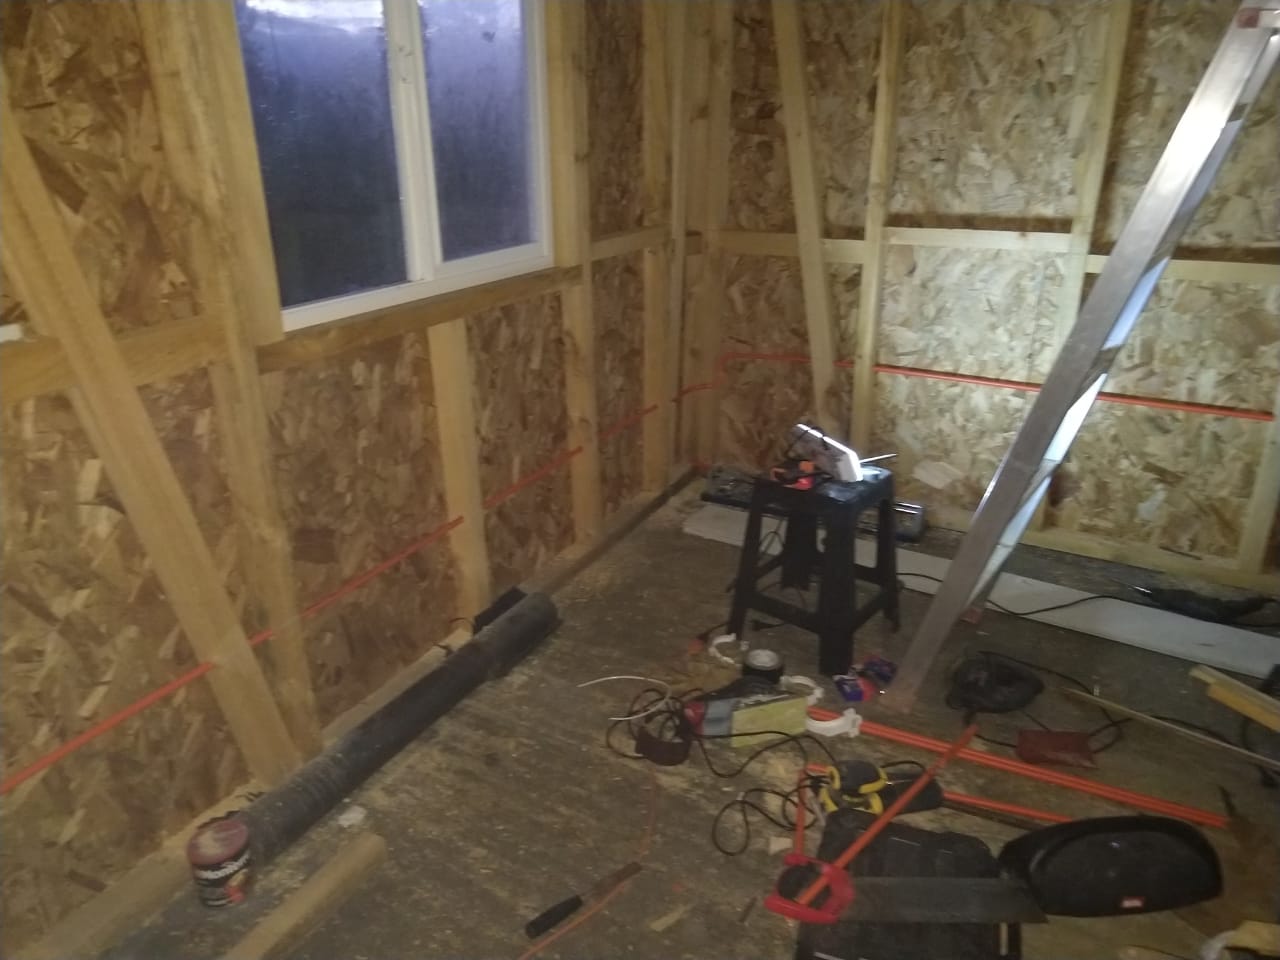
What to do on the outside from there? nothing really, it's time to work on the inside, the most delicate, but hardest part of the project. Why is it hard? Well, in this part, you can't make visible mistakes, because now everything you do, will be visible, so we need to do work in detail.
In this part, also, i got stucked, because i couldn't afford the entirely of materials i needed, i could only buy the electrical cables and the electric pipes, so i just did that while i gathered BCH through the community using noise.
Then, another thing happened: My mother lost her right arm movement, and started with pain, we get her to the hospital, and the problem was she broke her rotator cuff, causing her a lot of pain, and she needed an operation quick. So the project went to a halt for a couple of months, because the BCH i gathered, so as a loan i could get was set for the surgery, even a crowdfund i tried to do, without success, but finally, the surgery was a complete success, in case you wonder. My mum is now recovering, slowly but surely.
That moment was the most boring of the entire project, because as i was stucked in there, the electrical i did it really slow so i can have something to do daily, because it was that, or to lose my mind with all the problems i was having at that time, and i learned i'm stronger than that, because somehow, i did all the things i needed to do.
Well, for the electrical, there's two ways to go through it: Internal grid, or external grid. And those types of grid has its pros and cons.
The internal grid is visually great, because you only see the outlets (the switches and the plugs), the cons is that, it takes more time to install, and in case you need fixing something, it's harder, because it's all inside the walls.
The external grids are great for installing, it's quicker and easier to install and to fix, but it's visually ugly, it distorts the inside design of the project.
So i chose the Internal grid, for aestetic reasons, and i had a lot of time to burn, because i was stucked with the materials. **Electrical grid installed**.
After that, i was hopeless, because a couple of months passed, and i couldn't gather any BCH for it, because i used it all for my mum, and then, when sudendly, out of nowhere, my uncle came to the rescue, and he purchased all the drywall plates, the drywall screws and the isolating polyester i needed, and even better, the lockdown was over, so i could finally get back to my job, so i was able to purchase all the remaining materials i needed in that moment.
Now it's time to isolate the bedroom! Well, not really, that will happen on the next article.
Are you enjoying this project series so far? I hope you do. This is the fourth part of it, and we are close to be up to date. Tomorrow i will post the fift part of it, and it gets even better, because now you will see the inner part of the bedroom, reflecting the final product of the bedroom, one step at a time.
*Disclamer: I need to say, i'm not a builder, i'm just learning how to do it on the go, and i'm doing it with all my love, because this bedroom is for my nephew, it will be my birthday present for him.*
*Most of the materials were purchased by the noise community by simply giving hearts to the followups.*
Thank you all for reading this article, what do you think? Did you like the progress of the project? if you have any questions about this, please feel free to ask me, i'll be happy to answer any question from you guys.
And, if you like this kind of projects, i'm always willing to do more, always funded with BCH by the community.
See you on the next article.
Part three of the project fueled by BCH: "A bedroom for my nephew".
This is the third part of the project, and i thank you in advance for reading it, there's a lot of exciting things about this project, so, before i continue with the third part, let's summarize the order you must follow to create a room (and some tips i forgot to tell):
1. Create the concrete base.
In the first part, i forgot to mention that in order to create a nice concrete base, you need to frame it, in a way it can resist the weight of the concrete, because it's a lot, so what you must do to get it in line is to use stakes nailed to the ground and screwed to the frame, so the frame can have a nice resistance, and the secod thing i forgot to mention is this: never use only concrete mix for the concrete base, you must use steel mesh, and it must be placed inside all the framing. This will help in case of a seismic activity, the concrete base stays in one piece and it will not break/crack. And the last thing i forgot to mention is that you need to place the iron strips inside the framing, making sure it is in the place needed for the anchorage (normally in straigh lines near of the edges of the frame.
2. Align the anchorage with the base wood.
That is simple but tricky. You need to make holes to the wood, aligned with the iron strips so they all can fit and giving the lines of the room fixed. That helps to the structure be steady.
3. Lift the structure.
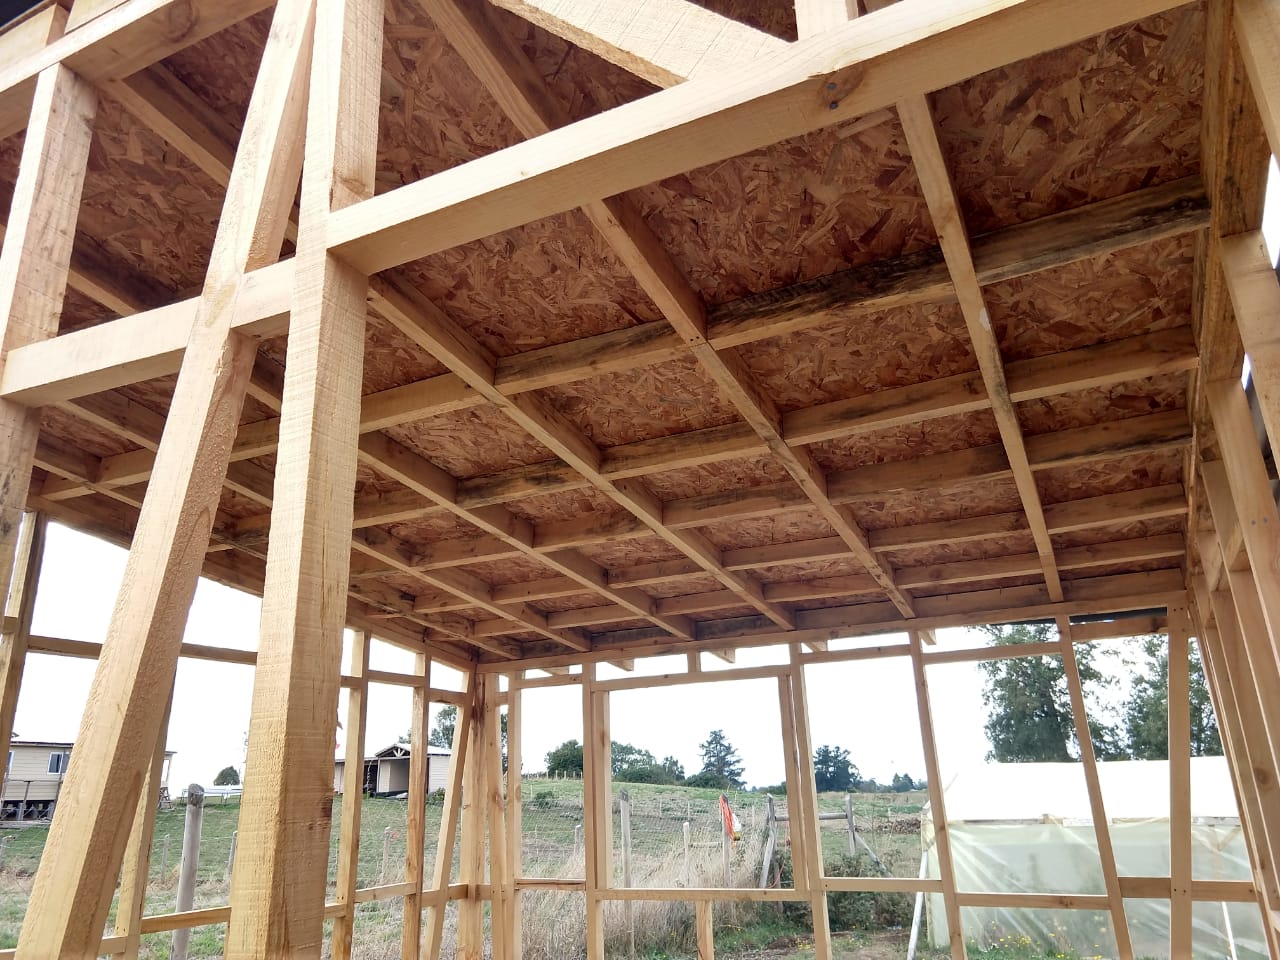
With stakes (flechas) screwed to the structure we keep the wall's skeleton leveled, and we can merge all the walls in a full structure, and making all as a one piece placing the wood pieces on the roof.
4. Install the rooftop.
This is the first thing you must have in order to be able to work with power tools during rainy seasons.
5. Install the OSB plates and the asphaltic paper.
I pretty much explained this in detail in the previous article.
And now it's time to the third part of this project, the part when you start to see the outside part as a bedroom.
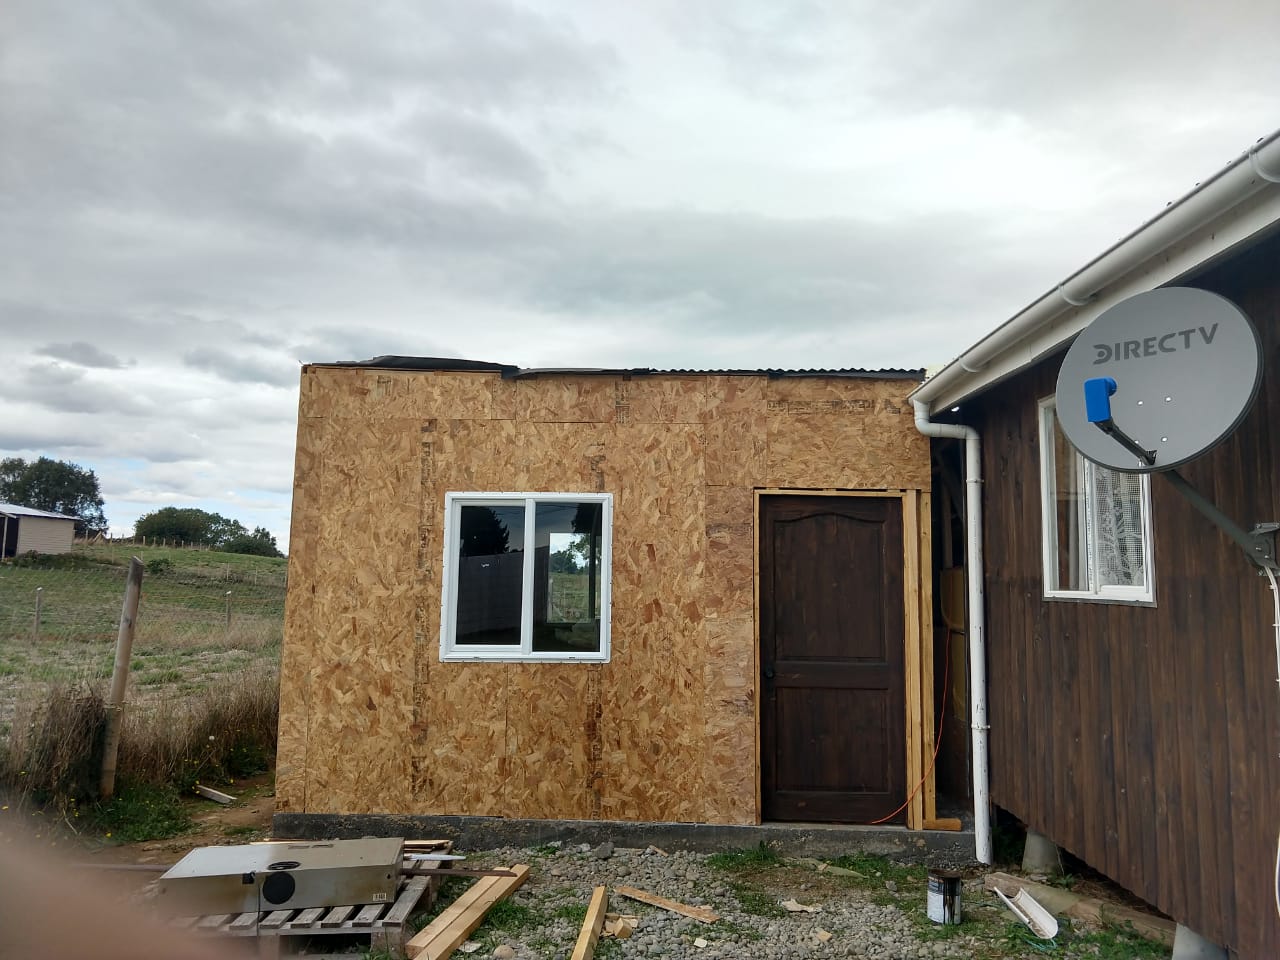
It's time to install the Siding, and the siding i chose for this project is Northway. Northway is a concrete fiber plate that installed gives you a look of scales. It's water resistant, and weather resistant, and it needs low to none maintenance, perfect for our weather.
This is one of the most repetitive parts of the entire process, because you have to place each one of the them one by one, from the bottom to the top, line by line, and one above the other. it has its technique.
In my case i prefer to do a straight line as far as it goes, then, i cut a northway with the measurement of the remaining part of the wall, and i place it with screws, completing the line (let's call it A), making sure it's leveled, and marking 2-2,5cm from the top of the northway (that mark is the limit of the next line).
That will be the guide for the rest, because the second line will be the opposite, starting from the short part placing a full northway as far as it go, and i cut a northway with the measurement of the remaining part of the wall, and i place it (let's call it B) and making a 2-2.5cm mark on the plate, then the process repeats, starting with A, then B, and so on until you get to the top of the structure.
The same goes to all the walls, making sure the lines of northway on the corners of the walls are the same, you don't want to have visible mixed lines on the corners, because that looks awful.
When you finish it, you can finally start the finishing touchs of the outer structural work, using plane zinc to merge the walls to the rooftop. Outer structural work finished. now it's time for the details.
there's a lot of things you can start with, i chose to start with the painting because of one reason, it was about to rain, and i need the siding fully protected.
So i started painting each and every one of the northway plates with water repelent paint (i wasn't picky about that, there's a lot of cheaper options for that, but it was on sale so i took it). I did two hands of painting, and that was more than enough. Now the siding can protect the inner structure without any problem.
But that raised another problem to be fixed: ¿What if the rain hits the door and the water starts leaking from below there? Well... That's a problem for the next article.
Are you enjoying this project so far? This is the third part of it, tomorrow i will post the fourth part of it, and it gets better and better, because it gets visually better in every article, reflecting the final product one step at a time.
*Disclamer: I need to say, i'm not a builder, i'm just learning how to do it on the go, and i'm doing it with all my love, because this bedroom is for my nephew, it will be my birthday present for him.*
*Most of the materials were purchased by the noise community by simply giving hearts to the followups.*
Thank you all for reading this article, and let me know what do you think about this. if you have any questions feel free to ask me, i'll be happy to answer any question from you guys.
And, if you like this kind of projects, i can do more, always funded with BCH by the community.
See you on the next article.
Part two of the project fueled by BCH: "A bedroom for my nephew".
As i promised, i will continue with the followup of the project "A bedroom for my nephew".
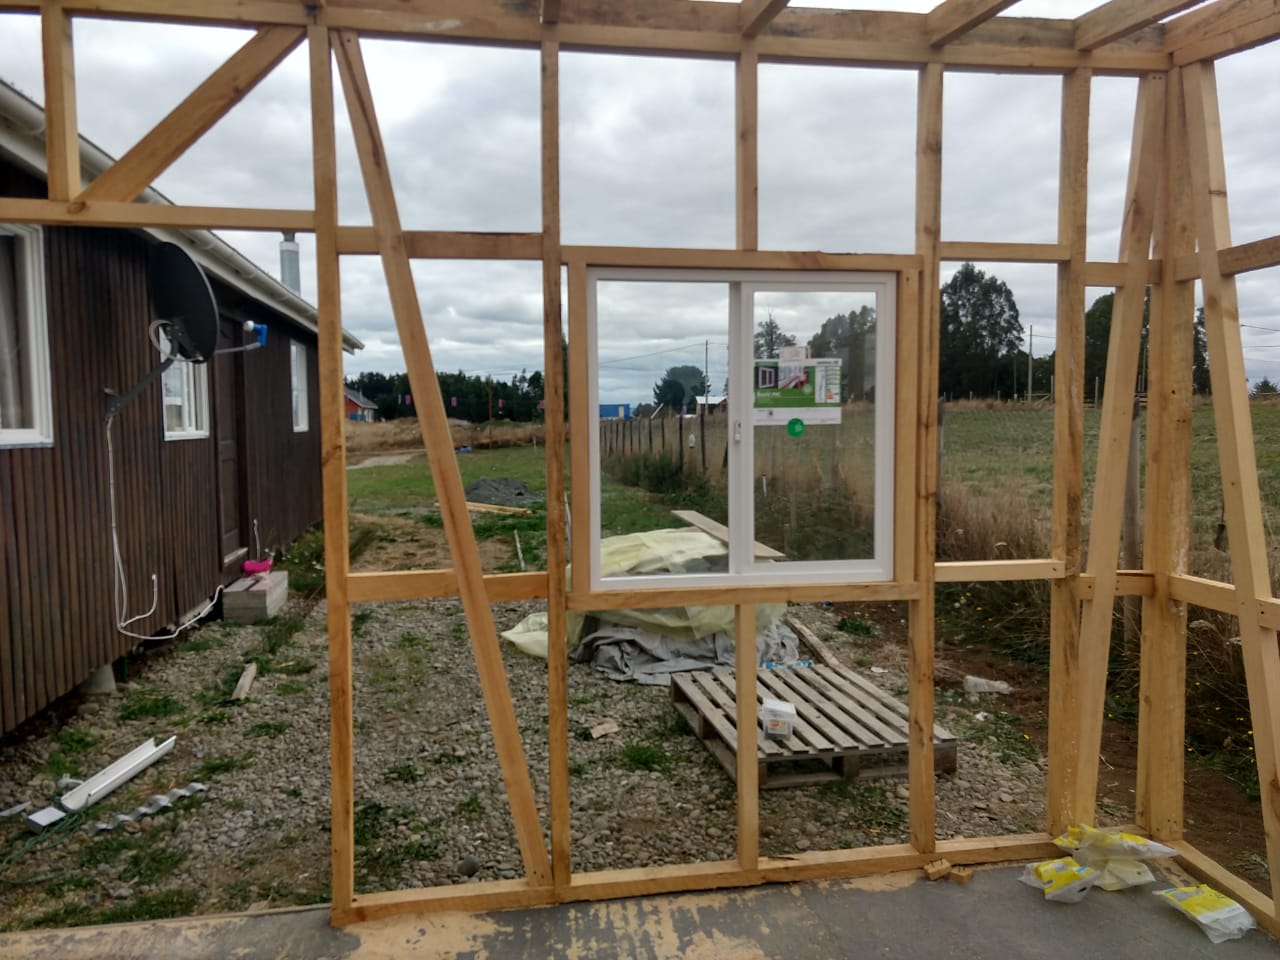
This part is when it gets visually faster, but more detailed, because to make the skeleton (partitioning) is one of the hardest parts of a building, and you can't make mistakes, because if you do, to correct it is a nightmare, starting with dissassembling, considering you are using 4", 5" and 6" nails, and if that is tough to nail, it's harder to remove them, specially because the wood pieces gets damaged, and that's not good at all.
Well, i got to the part i got it right, all leveled up and ready to go, even the frames for the windows, and i've tested it placing the windows through the frames and it fits perfectly.
Then it was time to go full on the rooftop. For the rooftop i've chosen ribbed zinc, because it helps to channelize the rain quickly right to the gutter. But before that, i need to protect the inside part of the room from leakings, and i've used two things for that purpose:
I've used OSB plates and asphalt paper.
*Asphalt paper is no longer recommended for isolation, but here, the recommented isolation materials for that purpose are way too expensive, and there's no fire hazzard here, so there's no problem using it, although i don't recommend it.*
So i've placed the osb plates first on the rooftop, using screws to get the fix stronger, you can use nails of 1.5", but it's better the screws because in case you make some mistakes, you can unscrew without damaging the plates. Then, i used the asphalt paper in double rows to maximize the isolation using a clasp. This is not needed, but i did it just in case.
This whole step took me a couple of days, it's complicated to work by myself, because i don't have anyone who can bring me the plates, so i had to take them one at a time, install them and then going to pick the next one.
The final step was to install the zinc, and that's the one who tells you that your are doing it right or wrong, because you have to assembly them one on top of the other, and if it's all correct, there will be no problem, and in this case it fitted perfectly, so we are doing fine in that step. Rooftop done? NOPE, we need to test it.
That test is simple: throw it lots of water, all over the roof, to see where the water goes, so we can see if goes forward with the inclination i gave it to the place where will be installed the gutter, and of course, to check if there's some leakings on the roof, i did it for a few minutes. No leakings, rooftop done.
Why is this important? simple, if there's a chance of raining, i won't stop, because now i have a roof for the power tools, 120 IQ move.
now it's time for the outside protection, and i used the same materials for it (OSB plates and Asphaltic paper). And this part is tricky.
To install the OSB plates, you need to do it in certain direction, that normally is displayed in the plate. My main focus is to place full plates on the framing, because it helps the windows gets sturdy, and don't break if something or someone hit the walls, or if there's an earthquake, all following my country's norms.
My country's norms says:
*You need to install the plates in a way that, if there's an earthquake, it can wave, instead of been sturdy, that way it prevents the walls fall down. So, in order to do that, you cannot place them in logical order, you need to scale them.*
Do you see that gap between the main house and the bedroom? well, that's an air gap, it helps trapping the sound between the walls, so that goes closed as well.
It is time to install the asphaltic paper on the walls.
This part was really hard for me, because in order to get it perfectly, you have to make the cuts with an assistant, of course it wasn't the case so i hade to place it as good as i could, row by row, side to side, starting from the bottom and finishing on top, and for even more bad luck, it was a windy day, so it was a very frustrating day, it took me two days to place it properly, it wasn't perfect, but it worked fine.
Asphaltic paper done.
It is time to place the Siding, but that, is a story for the next article.
Are you enjoying this project? This is the second part of it, tomorrow i will post the third part of it, it gets more exciting, because now we can actually see something like a room, right?
*I need to say, i'm not a builder, i'm just learning how to do it on the go, and i'm doing it with all my love, because this bedroom is for my nephew, it will be my birthday present for him.*
Thank you all for reading this article, and let me know what do you think about this.
If you like this project, i can do more ambitious projects, funded with BCH by the community.
See you on the next article.
Project fueled by BCH: "A bedroom for my nephew".
For some time ago, i did a lot of posts of followups of the project on my noise account (cesar.cantante), and i thought "why not merge them all in some articles?", so, in order to all of you get the context in this, i give you a summary of my project.
A couple of months ago, i was planning the project, but in that time, i couldn't afford it, because in that time i couldn't work because of the lockdowns, and the money i had i used it on more important things, like my mum's surgery and feeding my family. So i was thinking... Why not to do the project with BCH gathered by the community? If the community helps, i can pull this off. So i created that campaign in my noise account, first, i tried to do a crowdfund, but it didn't work, then, i used the likes of the noise platform, then, the project started.
*By the way, i need to address this: All the work in this it was by myself, i didn't get any help, excepting my brother that helped me for like an hour at the first day.*
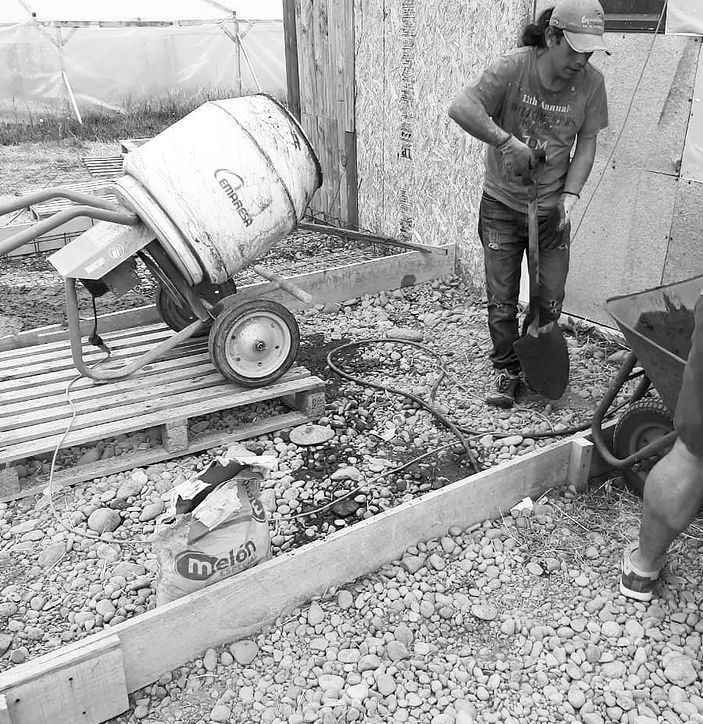
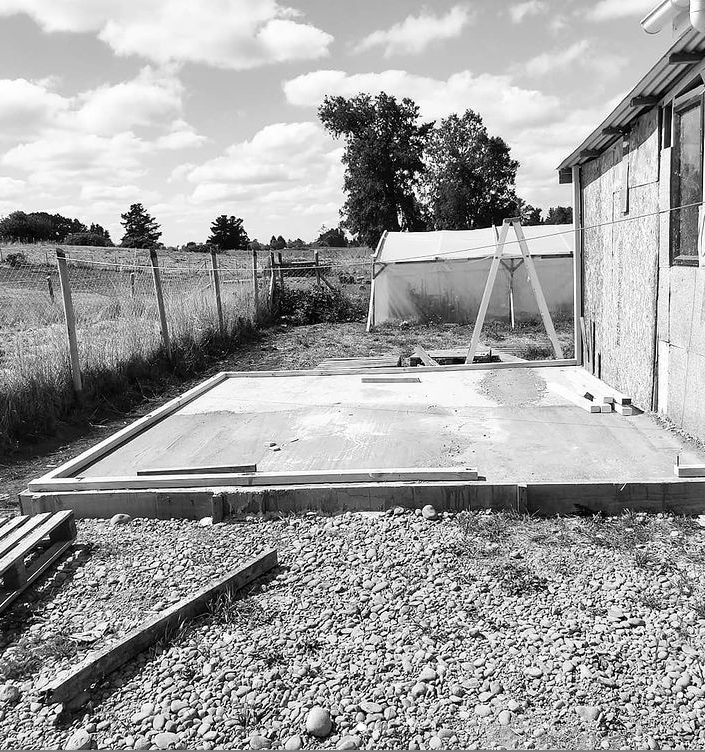
At first, i used the money i had left from noise and my own money and bought the materials i needed to do the concrete base of the room, and i did it in two days
Then, when it was done, I had to wait a few days for the concrete to settle and hardens before i can do anything, throwing water to it. Water is important for the concrete, it prevents crackings in the base.
Remember, Water makes the concrete stronger.
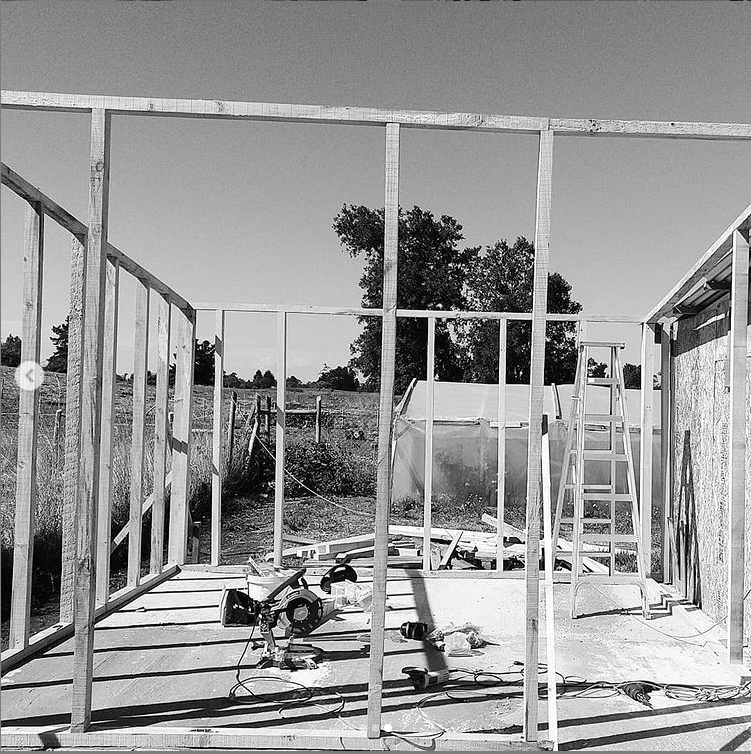
When i considered it was ready to go, i started to place the wood through the anchorage. Anchorage are the irons that you place when you place the concrete, that helps to keep the building from moving out from the floor, and i started to do all the skeleton of the room.
To keep the walls in place, because you need to keep it at proper level, you need to place "Flechas". Flechas are random pieces of wood that goes nailed to the ground and holds the structure in all the ways (left to right/front to back), keeping it straight. You can remove it when you have all the skelleton done.
It took me about a week to get this done, all because of the lockdowns, starting with hardware stores not opening and not doing delivery, all the costs of the materials went way too expensive (until this days), and all of that took me a lot of time.
There's a few things you might notice in this.
Did you notice there's some pieces of wood placed in diagonal?
Well, that is the anti seismic protocol required in my country, those 8 pieces of wood prevents the structure to fall. those are one of the most important part of the structure.
And the horizontal pieces of wood has two purposes:
*It keeps the Beams straight.
*It keeps the Beams sturdy.
After this was done, it started to go faster, the week later i did a lot of things, starting with the rooftop. but this will be in the second part of the project's article.
_________________________________________________
Did you like this project? i'm planning to give you all the project followups on the following days, at the current day, i'm about to finish the project, so i can everything in a couple of days. I need to say, i'm not a builder, i'm just learning how to do it, and i'm doing it with all my love, because this bedroom is for my nephew, it will be my birthday present for him.
Thank you all for reading this article, and let me know what do you think about this.
If you like this project, i can do more ambitious projects, funded with BCH by the community.
 @cesar.the.builder