As i promised, i will continue with the followup of the project "A bedroom for my nephew".
This part is when it gets visually faster, but more detailed, because to make the skeleton (partitioning) is one of the hardest parts of a building, and you can't make mistakes, because if you do, to correct it is a nightmare, starting with dissassembling, considering you are using 4", 5" and 6" nails, and if that is tough to nail, it's harder to remove them, specially because the wood pieces gets damaged, and that's not good at all.


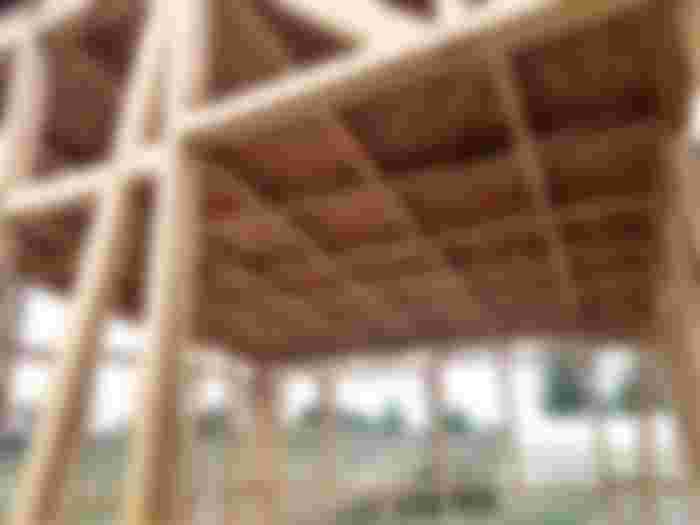
Well, i got to the part i got it right, all leveled up and ready to go, even the frames for the windows, and i've tested it placing the windows through the frames and it fits perfectly.
Then it was time to go full on the rooftop. For the rooftop i've chosen ribbed zinc, because it helps to channelize the rain quickly right to the gutter. But before that, i need to protect the inside part of the room from leakings, and i've used two things for that purpose:
I've used OSB plates and asphalt paper.
Asphalt paper is no longer recommended for isolation, but here, the recommented isolation materials for that purpose are way too expensive, and there's no fire hazzard here, so there's no problem using it, although i don't recommend it.

So i've placed the osb plates first on the rooftop, using screws to get the fix stronger, you can use nails of 1.5", but it's better the screws because in case you make some mistakes, you can unscrew without damaging the plates. Then, i used the asphalt paper in double rows to maximize the isolation using a clasp. This is not needed, but i did it just in case.
This whole step took me a couple of days, it's complicated to work by myself, because i don't have anyone who can bring me the plates, so i had to take them one at a time, install them and then going to pick the next one.
The final step was to install the zinc, and that's the one who tells you that your are doing it right or wrong, because you have to assembly them one on top of the other, and if it's all correct, there will be no problem, and in this case it fitted perfectly, so we are doing fine in that step. Rooftop done? NOPE, we need to test it.
That test is simple: throw it lots of water, all over the roof, to see where the water goes, so we can see if goes forward with the inclination i gave it to the place where will be installed the gutter, and of course, to check if there's some leakings on the roof, i did it for a few minutes. No leakings, rooftop done.
Why is this important? simple, if there's a chance of raining, i won't stop, because now i have a roof for the power tools, 120 IQ move.
now it's time for the outside protection, and i used the same materials for it (OSB plates and Asphaltic paper). And this part is tricky.


To install the OSB plates, you need to do it in certain direction, that normally is displayed in the plate. My main focus is to place full plates on the framing, because it helps the windows gets sturdy, and don't break if something or someone hit the walls, or if there's an earthquake, all following my country's norms.
My country's norms says:
You need to install the plates in a way that, if there's an earthquake, it can wave, instead of been sturdy, that way it prevents the walls fall down. So, in order to do that, you cannot place them in logical order, you need to scale them.
Do you see that gap between the main house and the bedroom? well, that's an air gap, it helps trapping the sound between the walls, so that goes closed as well.
It is time to install the asphaltic paper on the walls.
This part was really hard for me, because in order to get it perfectly, you have to make the cuts with an assistant, of course it wasn't the case so i hade to place it as good as i could, row by row, side to side, starting from the bottom and finishing on top, and for even more bad luck, it was a windy day, so it was a very frustrating day, it took me two days to place it properly, it wasn't perfect, but it worked fine.
Asphaltic paper done.
It is time to place the Siding, but that, is a story for the next article.
Are you enjoying this project? This is the second part of it, tomorrow i will post the third part of it, it gets more exciting, because now we can actually see something like a room, right?
I need to say, i'm not a builder, i'm just learning how to do it on the go, and i'm doing it with all my love, because this bedroom is for my nephew, it will be my birthday present for him.
Thank you all for reading this article, and let me know what do you think about this.
If you like this project, i can do more ambitious projects, funded with BCH by the community.
See you on the next article.
Very skillful or dear Cesar! You didn’t learn architecture, but you created something wonderful!