A simple but beautiful dress.
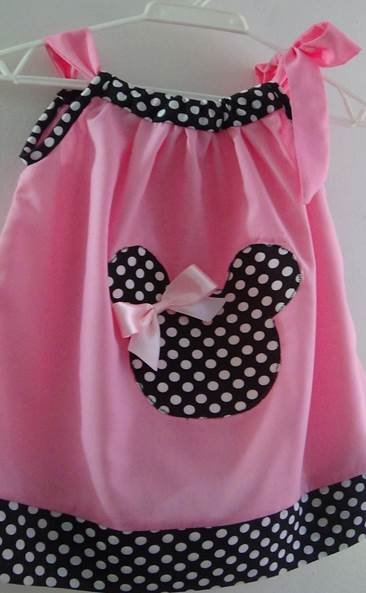
Greetings dear friends of Read.cash, especially to all those who love crafts and creativity. First of all I would like to apologize for my absence these days but I have been a bit busy with some house repairs. On the other hand I have received a lot of sewing work and that is something that makes me very happy because I like to make crafts and I also get some money to help with the expenses of the house.
Today I want to show you the design of a dress that the customers have liked a lot because it dresses the princesses of the house in a beautiful and simple way. According to some research I did I found that these "sheath type" dresses, come from the war times when mothers had nothing to put on their daughters, so they took the fabrics they found and with that they made dresses.

Anepdote: I remember that before reaching the perfection of this dress I practiced a lot, here I show you some dresses I made when I started. Thank God I was observing the details until I found the ideal pattern.

It is very simple to say that we are going to make a dress with a pillowcase, but in this case we are going to improve it and we are going to make it with the best fabrics and combinations that we can get in the market. Thank God we are in other times and we have a wide variety of stores where we can get the best to dress our girls, our princesses.
So not to take too long, we are going to start making the dress, I have also made a video that will support the descriptive photographs that you will find in this post.
The dress I want to show you is for a two year old girl. If you want to make it for a bigger girl, you can look up the size scale and according to the age, you add the size + the length of the skirt, that can give you an idea of how much you can cut.

🍓 Elaboration 🍓

Step #1.
The first thing we are going to do is cut two squares of pink poplin fabric 48 cm wide by 44 cm long.

Step # 2.
To cut the armhole we must join the two squares and then join the sides, secure with pins so that the fabric does not move, take a measurement of 3 x 9 as seen in the image and cut as follows.

Step #3
At the top of the dress we make a seam with needle and thread to pull the fabric and we have a measurement of 21 cm.

Step #4
Top of the dress:
We cut a rectangle of fabric to match measuring 21cm x 8cm.
Bottom:
Cut a rectangle of matching fabric measuring 48 cm x 14 cm. Both rectangles are ironed in half so that they measure 7 cm respectively, then we join them to the fabric.

Step number 5
When we have step number four done, we proceed to join the sides of the dress, joining the front and back, passing straight and zigzag stitches so that the fabric does not fray.

Step number 6
In this image I wanted to show a little bit of the process of how we make our own bias binding. In this case, cut it to a width of 4.5 cm.

Step #7
At the top, we join the rectangle facing only one side, on the right side of both fabrics. Both the front and the back. The bias binding is placed first on the back and then on the right side, making it as neat as possible. Fold the upper part where the ribbon is inserted and make a hidden seam or stitch.
The ribbon measures 1.50 cm and 8 cm wide, but you can modify it if you want it longer or wider.

Step number nine is optional, you can put the image you want, for this dress I was asked to be Minnie. I want to emphasize that you can sew with one stitch or with the smallest zigzag of the sewing machine.


Video tutorial to clarify some doubts.
As you can see it is very easy to make and depending on the drawing and the colors you want to place will be a beautiful dress. I hope you liked it and if you decide to put it into practice or have any questions I am at your service to clarify and help you in whatever you need.









I love creativity especially simple and uncomplicated one. This are indeed simple and beautiful kudos to the the creator