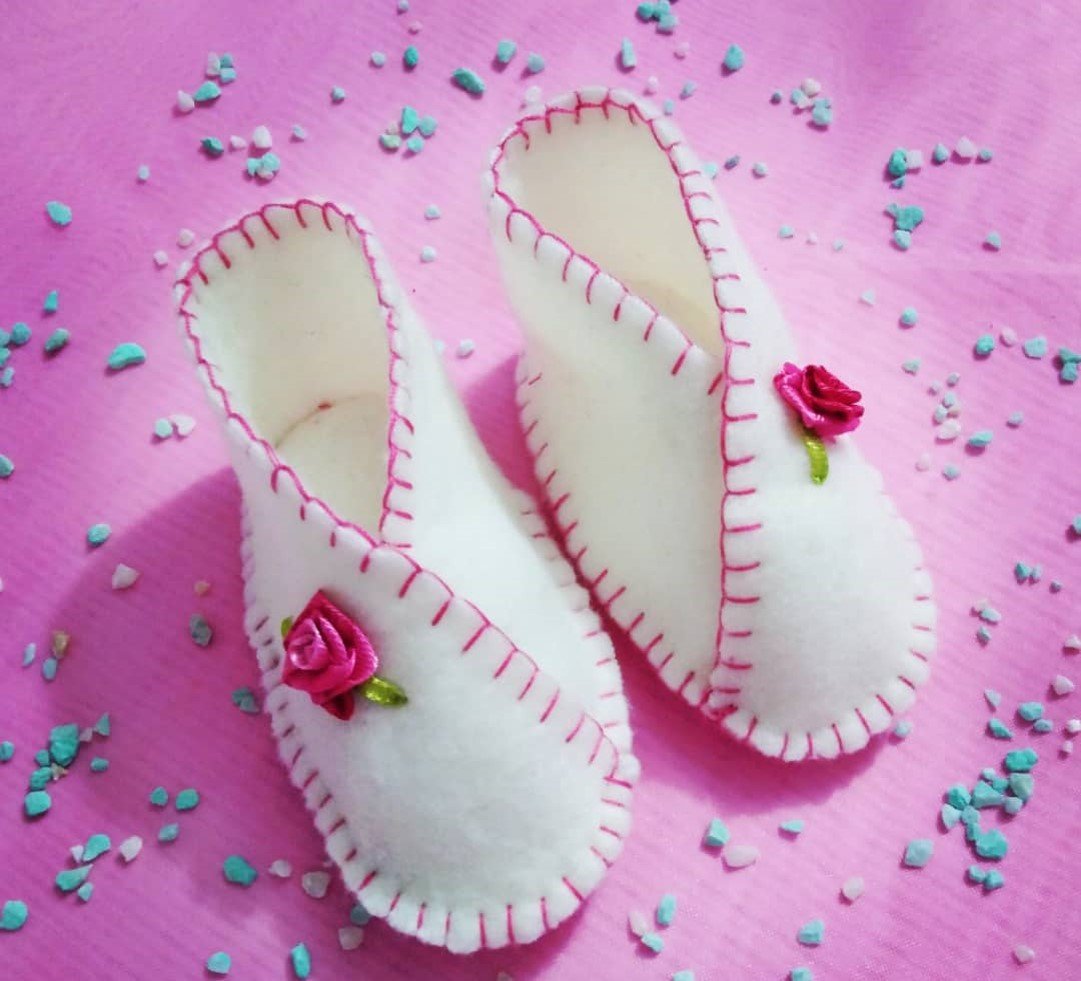
Slippers made with felt, beautiful, warm and economical to make.
A day without internet
Greetings my dear friends of read.cash, after a crazy Monday, no internet, no whatsapp, no light, I set myself the task of taking care of myself and not worrying. I will not deny that at first I was worried because I thought it was my equipment or my internet signal that was failing but luckily everything is better now and before these events we can only stay calm and wait.

Super easy to make shoes

When I see these shoes I don't know why I think of the shoes used in cowboy movies where the Apaches wore something similar to this model but in leather. It's all in my mind or maybe that's where they got this beautiful shoe pattern to design it for all the babies. Since I made these shoes I can't stop looking at them, they are so cute, I would like to make a lot of them and give them to all the children in the world.
It's a simple model, I won't deny it! But this shoe has nothing to envy to any shoe from the most expensive baby store in Caracas. They are very warm and this point is important, since we all know that babies suffer from cold at birth. They are also economical, no one can imagine that with just a piece of wool we can make something like this.
Now I want to tell you a short but practical step by step, anyway if you dare to do it you can look for more information on the internet, there you can find a lot of videos and other models that will surely help you. I think these tools were made to help us so don't shy away from using them to improve your ideas.

Step by step:

Step 1.
- To make these shoes we can use any kind of fabric, but it is better to use felt, sheepskin or any other wool that will give more shape to the shoe.
- We cut out the patterns according to the size you are needing, in this case they are for a baby from 3 to 6 months.

Step 2.
- We are going to make a scallop stitch on the straight part of the fabric or pattern, use a color of thread that stands out. (See it well in the image).
Step 3.
- We look for the middle of that long strip and we are arranging it from the back of the sole to the front, look closely at the picture, you will see that in the front one side crosses to the other side. Keep in mind that when you are going to make the other shoe you must do it the other way around.

- Fix it with pins or baste it to the sole with thread and needle, (bastear means to make long stitches, it is as if you were securing each piece with pins but with these stitches the work will be much better) when you are sure that it is well accommodated you begin to make the scalloped stitch all over the sole.

Step 4.
- Now we are finishing, as you can see there is nothing complicated so far. In this step I have marked with a red thread where I made the stitches to place a piece of elastic tape; this will make the shoe does not open so much on the baby's foot and thus prevent it from slipping off and getting lost.

Simple but beautiful decoration

The decoration is very important, I made these mini flowers with colored embroidery ribbon and the others I decorated with a ribbon; but you can use woven flowers, colored buttons or just leave it like that, it looks beautiful too. You can do the same process for a boy, just change the color of the fabric and that's it.
Well friends, it is a pleasure to be always with you showing you my projects, now comes the Halloween season and you don't know the amount of things I have in mind to do.
On the other hand I want to continue thanking my sponsors, with you the work is easier, God bless you.







I remember them out of my childhood. We made them at school. They look nice but wouldn't keep our feet warm.