Hello read.cash readers.
I am back with another DIY tutorial.
Christmas is just around the corner. Three more months and we will be celebrating Christmas Day. We all know that this is the most awaited time of the year, parties here and there, gift giving everywhere (though gift giving should not be limited to Christmas time alone).
This time, in the previous years, I would have slowly bought gifts for Christmas so that I won't have to join the Christmas rush. While others are still at the mall buying gifts, I am already packing my gifts.
But this year is different. The thought of going to the malls is quite scary because of the unseen enemy we all face, the covid19. So we go online. But buying online does not guarantee you of the quality of the items that are on sale. Yes, they do look attractive but some, in reality, when you receive them are really of poor quality.
So I thought of making my gifts this Christmas. It would be something personal and handmade with love. 😀 I am going to make a coin pouch with metal clasp.
But still I have to go online for some of the much needed materials. Once these raw materials arrived I started working on my Christmas gifts.
Below is the tutorial I made for the coin pouch. Please note that this tutorial is for those who already know the basics of crochet.
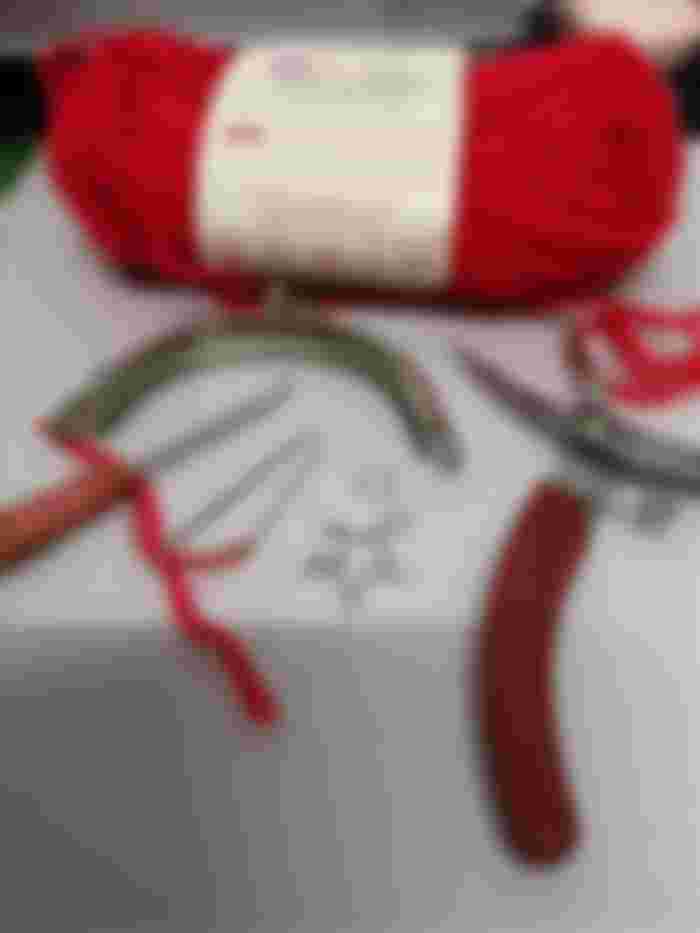
Here are the materials and tools that I used :
metal clasps (which I bought thru Shopee),
yarns (which I have plenty) - I used acrylic yarns
crochet hook
needles (for tying up loose ends and for sewing the crochet piece to the metal clasp)
some bling-bling (for design)
long nose tool (for attaching the bling-blings)

Directions :
Form a magic ring and make 6 single crochets. Close the ring and join with a slip stitch to the first single crochet.
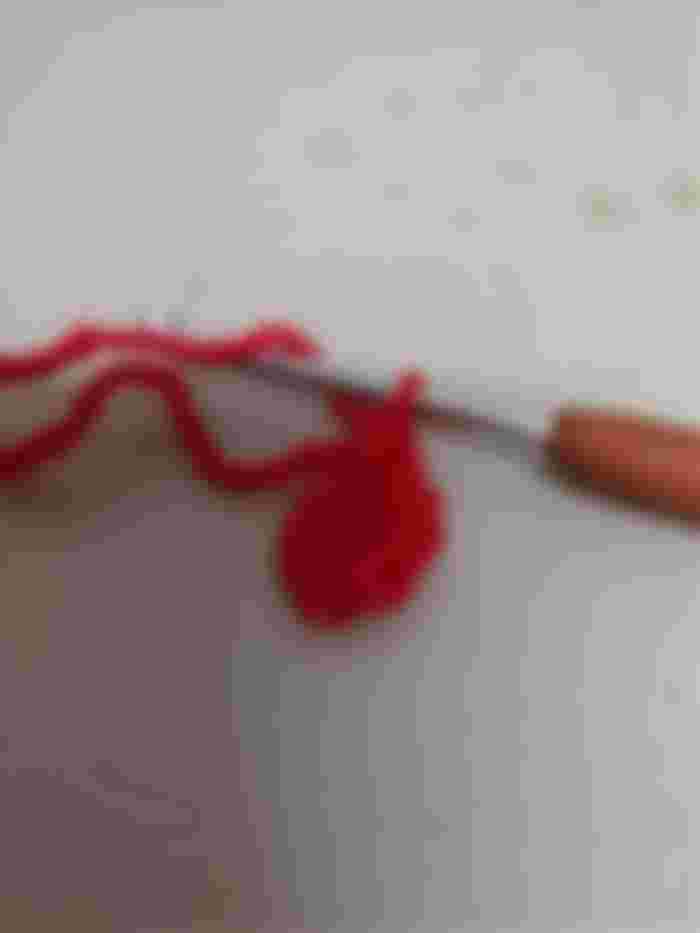

We make increases for round 2 - 6 and end up by joining with a slip stitch. Note that we start with a chain 1 in each of these round but this does not count as a stitch.
Rnd 2 - 2 single crochet in each stitch (you will have 12 single crochet in this round)
Rnd 3 - alternate 1 single crochet and 2 single crochet in each stitch (to make 18 single crochets)


Rnd 4 - alternate 1 single crochet in the next 2 stiches and 2 single crochet in the next stitch (to make 24 single crochets)
Rnd 5 - alternate 1 single crochet in the next 3 stiches and 2 single crochet in the next stitch (to make 30 single crochets)
Rnd 6 - alternate 1 single crochet in the next 4 stiches and 2 single crochet in the next stitch (to make 36 single crochets)
We will still increase in round 7 but we will no longer join the round with a slip stitch, instead we continue doing single crochets around.
Rnd 7 - alternate 1 single crochet in the next 5 stiches and 2 single crochet in the next stitch (to make 42 single crochets)


It is advisable to place a stitch marker in this round. This will guide you where you start and end the round. But first you have to fit the finished round to the metal clasp by opening the clasp and inserting the finished item. If your finished round does not fit the metal try to crochet another round (note : the fit varies based on the yarn used).
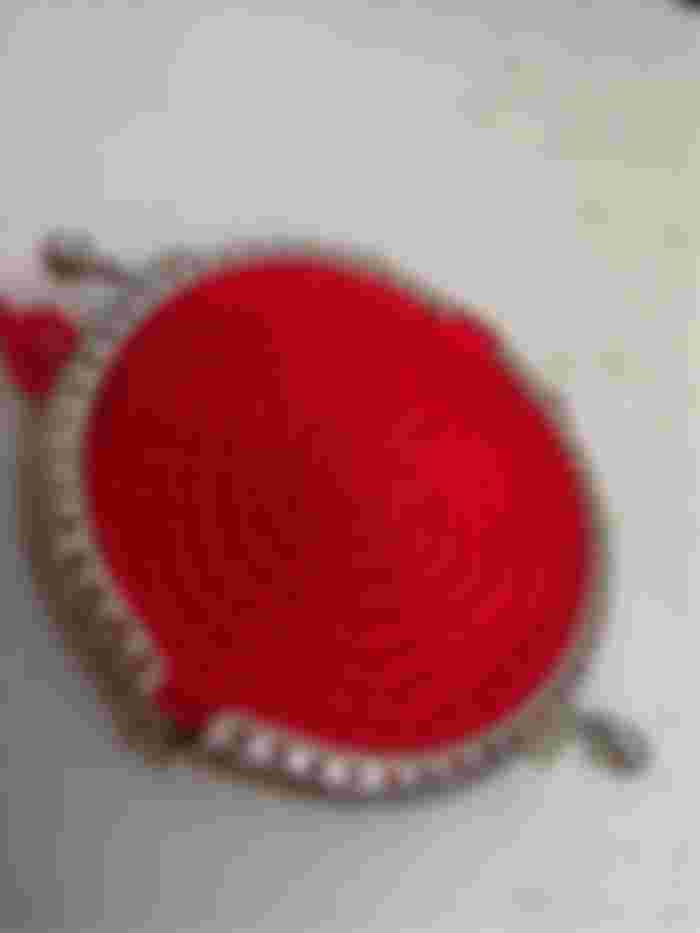

Once you are satisfied, continue with single crochet around until you reached round 20. This again will vary based on the yarn used. You might want to add more rounds.


For me, I fastened off at round 20 and then I hide the loose ends using the bigger needle.
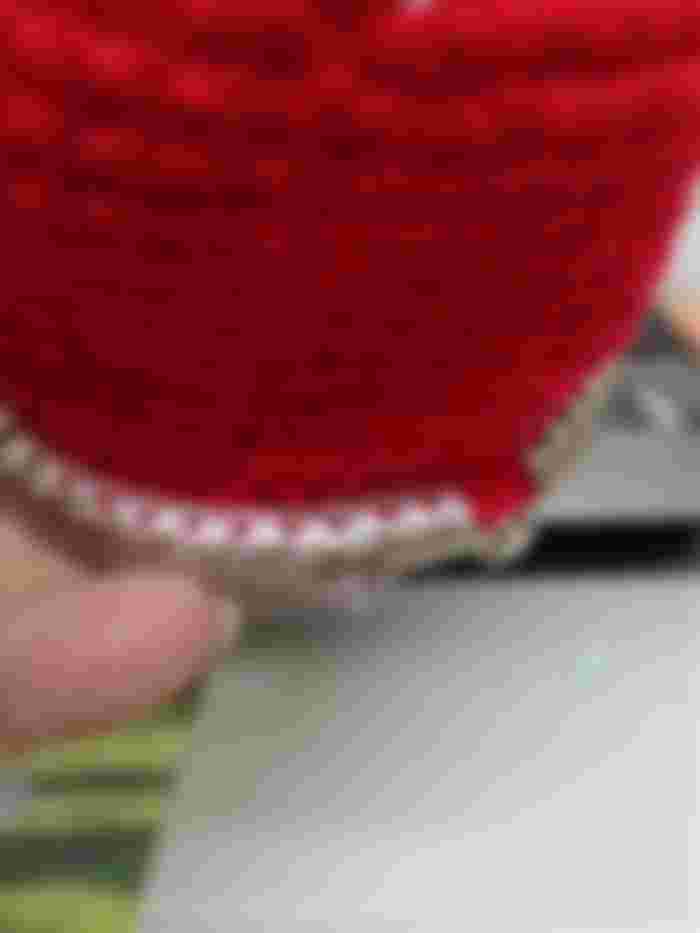
Then I attached the finished round to the metal clasp by just simply inserting the opening to the clasp.

And start sewing the edges. The outer portion of the clasp has holes wherein you can sew so that it will be securely attached to each other.

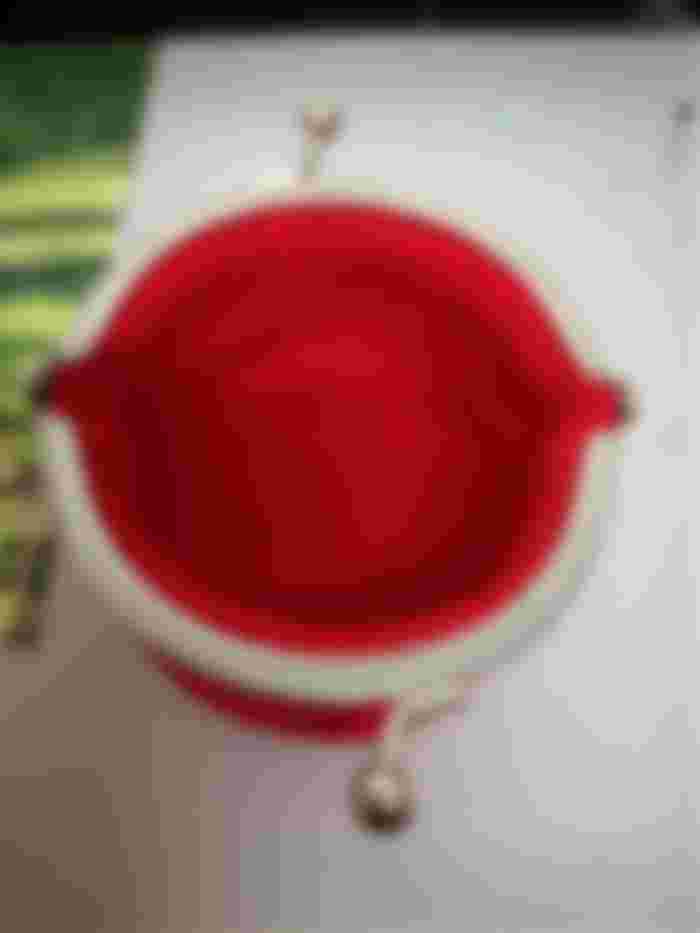
Then I am done.
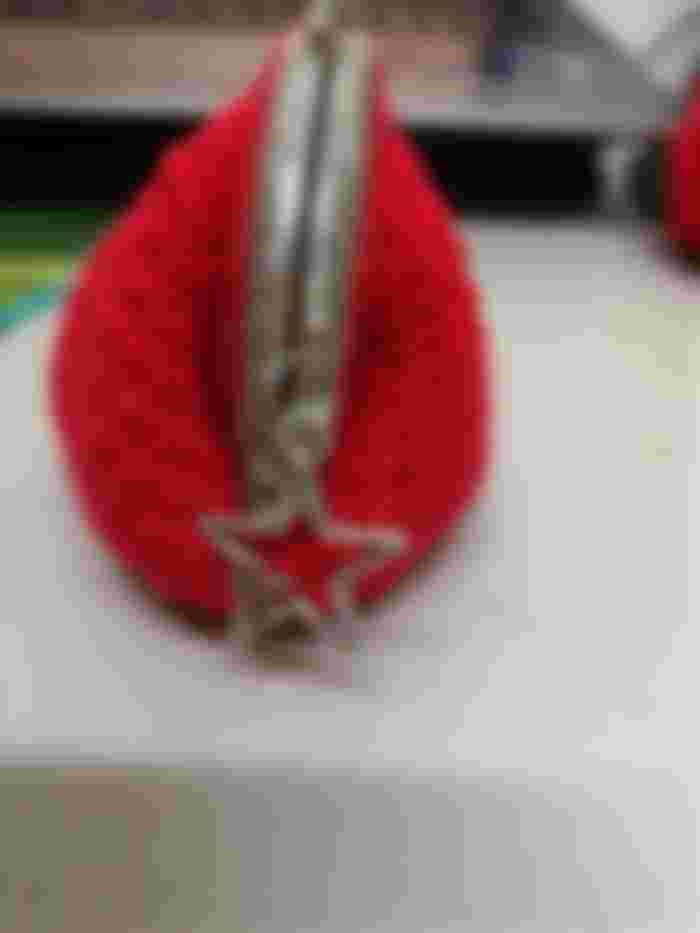

I attach the bling-bling and I now have one Christmas gift... and many more to go. 😍❤😍
Let's get crafting!
Thank you @TheRandomRewarder, glad to have met you. 😘