After watching a few videos on the internet about how to build a simple DC electric motor, I though that this is something I could also do with materials that (mostly) I already have available at home.
I have learnt two things:
The first one is that, yes, most of the materials are readily available at anyone’s home but not all.
The second one is that without clear instructions it may take quite a few try and errors to get it done right.


In this posts we are going to show you the steps we have taken not only to get the materials to build the motor but also clear instructions about how to make one.
Instructions and materials to build a simple DC motor at home
As one image is worth than a thousand words, we have filmed three videos that should walk you through the whole process of getting the materials, preparing them and building the simple DC motor.
Maybe, have a look to this video first and afterwards keep browsing through this post for additional details.
To build the motor you will need the following materials:
– A piece of cardboard (around 2000 x 700 mm)
– One cork
– One AAA battery
– One magnet
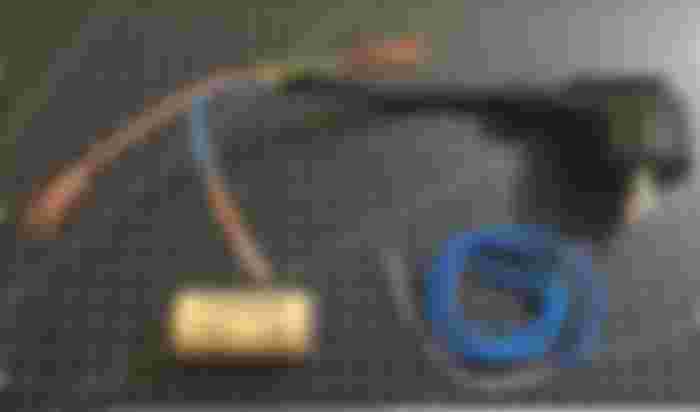
– Around 100 mm of copper wire from a standard cable.
– Around one meter of ENAMELED copper wire
– Glue
And the following tools:
– Pliers
– Cutter
– Scissors
– Your hands
Where from you can get a magnet to build a simple DC motor
Magnets are used quite widely and, also, are thrown to the bin without most of the people being aware of it.
I would say that most of the households have had some kind of musical toy thrown away to the bin during the last year. Or even some PC headset, or PC speaker, or some TV speakers,…
All those devices that emit any kind of music or sound most probably have magnets inside that can be extracted and used at home. To extract the magnets from toys it is a rather simple process but for the people who are not familiar with the process, we are showing how to do it on the video below.
Where from you can get enameled copper wire
Enameled copper wire it is not a material that can be recycled from old toys, an old printer or some damaged PC headset. The best place to get enameled copper wire is from motors so your best shot would be to find some old or damaged motor and extract the enameled copper wire.
Of course , most of the households will not have any old or damaged motor around. But, if you are working on a place that uses or builds machinery, or you know someone who works in such a place, maybe it is possible for you to put your hands on one or a few discarded motors.
In the video below we show the process of extracting enameled copper wire from a discarded motor. It is not that complicated to put such a motor apart an extract the enameled copper wire.
Still, it may not possible for you to put your hands on a discarded motor so another way to get some enameled copper wire could be to purchase some (a couple of meters) from a local provider or even buying in on line.
Other basic materials needed to build a simple DC motor
Probably enameled copper wire it is the material most challenging to procure. Other materials like standard copper wire, cork, cardboard or some paper clips are readily available at home.
The only material that may not be at everyone’s home it is the 1,5 mm copper wire rod. This kind of wire it is used for the houses electrical connections (at least in Europe). So there may be the chance to get some of this type of cable from any house undergoing renovation or new houses in construction from which the electricians may throw away some cable.
If you don’t have at home some of this 1,5 mm copper wire rod and you don’t know anyone working as an electrician, the easiest way to procure some is from a hardware shop.

Other materials like cardboard, cork or some standard copper wire from a cable can be easily found around most of the households.
How to CORRECTLY build the coil for a simple DC motor
Building a simple DC electric motor it is rather simple but there is one very important step that must be done right or otherwise you will finish with a construct that doesn’t work and you will not know why.
Once you have made the coil, as shown on the video, you must remove the enamel from ONLY the top half of each end of the wires
On the image below, the copper wire it is colored in dark orange and the enamel it is colored in light orange. As depicted, we have marked the area from where the enamel has to be removed ( ‘ Remove the enamel’) and as you can see we have to remove it from ONLY THE TOP HALF of each end.


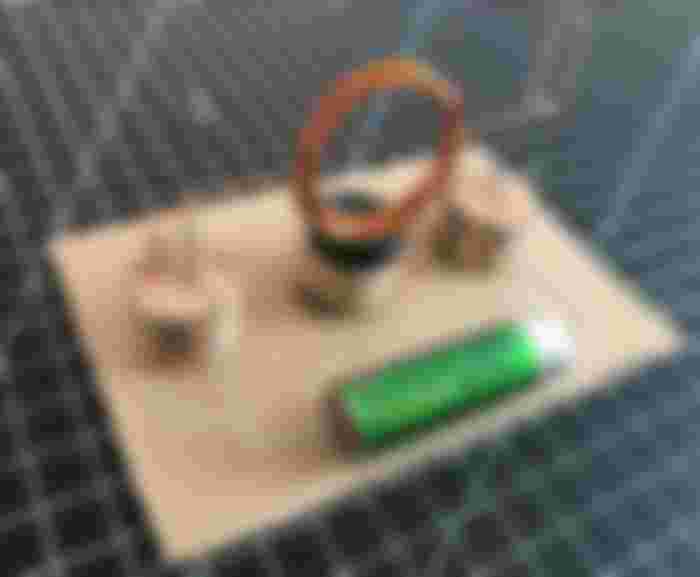
We have build the whole circuit over a 2000 mm by 700 mm piece of cardboard from a show box.
We recommend that before start gluing the parts to the cardboard or even cutting the slot for the battery, that you mark all the locations first. Than will avoid you wrong guesses and mistakes.
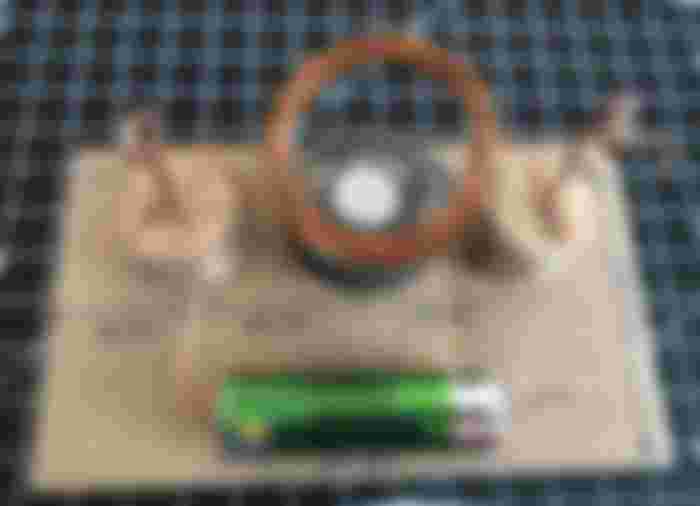

One more detail, we have made several coils of ten turns each and it has always worked well for us.
Also, the coil has to be relatively close to the magnet. We leave around 5 mm between the coil and the magnet.
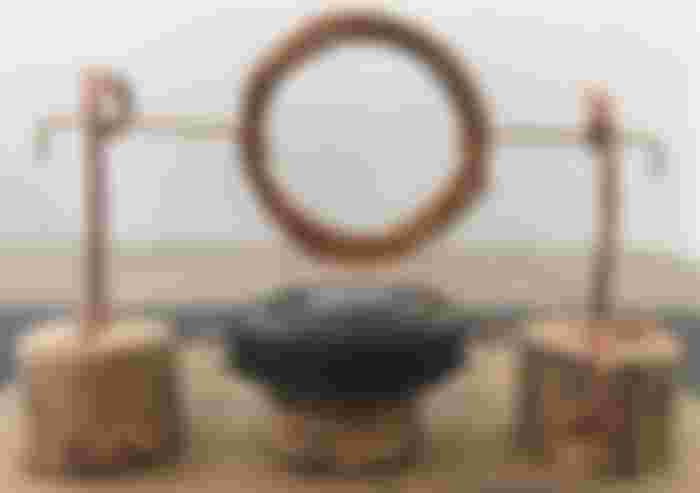

Finally, note that if the coil is not well leveled or imbalanced, at it starts spinning the whole coil will start moving towards one side. This may cause for the coil to collide against one of the side poles and stop spinning.
The science behind a simple DC motor
You have just built an electric circuit that takes the electrons from the negative side of the battery to the coil.
Those electrons pass through the coil, creating an electromagnetic field in the process, and return to the positive side of the battery.
The process keeps repeating and the electromagnetic field created by the electrons while passing through the coil interacts with the magnet and creates the spin.


While we have a closed circuit and the electrons are flowing through the coil, the coil and the magnet repeal each other. This is, the coil tries to move away from the magnet and starts rotating.
But, as the coil start rotating, because we have only removed the enamel from half of the wire, the circuit opens because the enamel doesn’t conduct current and the electrons do not flow anymore through the coil. And, because there is not electromagnetic force and the coil is not repealed by the magnet anymore, it moves back again to a rest position.
And the process repeats itself again and again creating a constant coil rotation, until the battery runs out of power.
If you would like to have some more detailed information, have a look to this DC motor explanation at Wikipedia. Or, also, to this electromagnetic coil explanation also at Wikipedia.
Build a simple DC motor with paper clips
It is possible to build a simple DC motor by using just some paper clips because the clips can also conduct the current from the battery to the coil.
Paper clips are made of galvanized steel wire and they also conduct current, even though not as well as copper. For more information about conductivity, have a look to this page. Copper’s conductivity is much higher than the conductivity of the stainless steel. Still, the stainless steel conductivity it is enough to conduct the electrons from the battery to the coil.
Just be aware that this design it is very unstable and it will need quite a few tweaks to get it to work. This is because the clips will move, or the battery clips will not make good contact with the clips that hold the coil, or the coil clips will turn and block the coil from turning,…
I do not recommend to use paper clips for your first simple motor construction, unless you have not any way to get some copper wire.

Troubleshooting a simple DC motor
Building a simple DC motor it is quite a straightforward process but when building one for the first time you may make some mistakes. It took me a couple of attempts to successfully build one.
The first time I made one, I didn’t have the correct instructions and I removed the enamel from all around the wire (Remember, you just need to remove the enamel from the top half). Because of this, the close circuit open circuit interaction needed to create the spin was not present and the coil didn’t spin.
Of course, if at any point there is not a good connection and the electrons do not flow from the battery to the coil or from the coil to the battery, the coil will not spin. I found this lack of good connections to be a recurrent problem to the simple motor I built using paper clips.
The easiest way to troubleshoot most of the problems is to use a multimeter.
On the left picture below it can be appreciated how I measure the DV voltage at the rods that hold the coil. This way I can be sure that there is good connection all the way from the battery to the coil and the electrons are flowing from the negative to the positive side of the battery.
Also, on the right picture below it can be appreciated how I measure continuity between the both extremes of the copper wire I have used to build the coil. If you have removed the enamel from the TOP HALF of the wire, there should not be a problem whatsoever but this is a test that can be used to discard that there are any coil related problems.


________________________________________________
We hope you found this article interesting. For more information, visit https://effiworkx.com/blog/how-to-build-a-simple-electric-motor-at-home/