A walk in the dark side of crypto
Yesterday someone mentioned in Noise the Ranches in BenSwap, saying that he'd made good profit there. I saw the release some time back but didn't pay much attention.
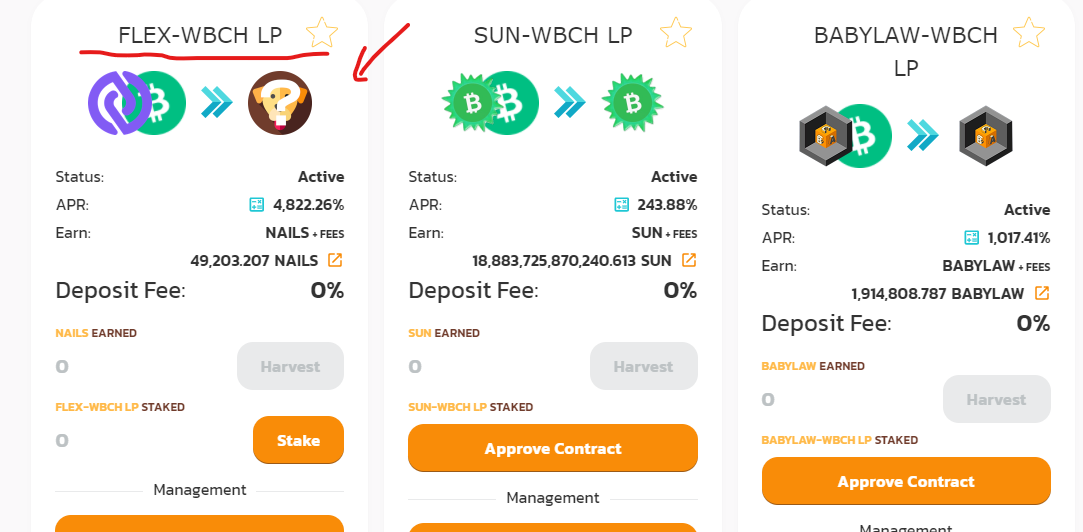
So I went to look and found some very juicy pairs. Curious as most, one called my eye. It was a token called Nails. Never heard of it. There was a ranch of FLEX-BCH giving 4K APR in Nails. FLEX is a good coin, so I thought it was safe enough.
I created my LP token, staked it, and today I had already $ 1.5 in Nails. Like in the disclaimer it says the creator of the ranch can pull it at any time (or that's what I understood, could be wrong), I took the pair out.
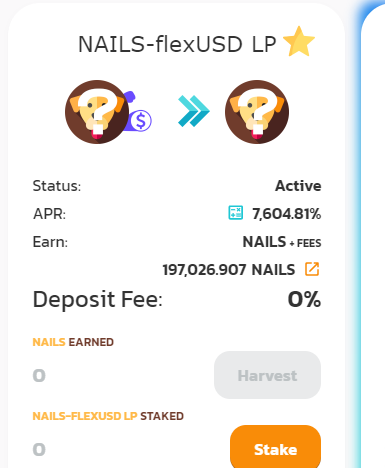
Now, I realized that I couldn't swap it. It was only 1.5 bucks, so I said, ok, lets take the risk and stake a pair with flexUSD, let it run. And I did it.
But... I didn't like it. I'm not a gambler. So I decided to find out more about this project.
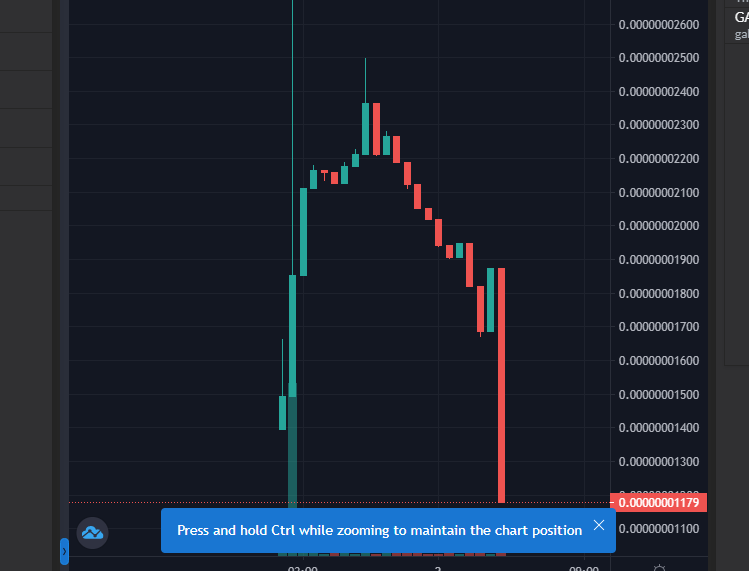
Found a Telegram group, Twitter and website for a coin with the same name but working on Pancake Swap. Website down, and both Ts showing latest activity on July 2021. In one of the posts it provided a link to poopcoin. I followed and what that curve told me was the story of a rugpull:
https://poocoin.app/tokens/0xed6e69203af0ebfe4205991f2b3f6dbf6b85205d
Ookey... lets get out of there, I said... (good luck with that)
Unstaked my pair but there was no way to open the LP token.
I went to the SmartBCH telegram group, but... didn't want to bug people before working it. So I searched for the BenSwap telegram page instead.
On top there was something called BenSwap support. It was weird that there was almost no people, but well... (took notice though)
I started asking my question of how the "clouds" do I open the LP token and the guy tells me to talk privately. I go and he sends me to a website with dozens of links none of which said open LP tokens. So I asked which link it was, he signals one that didn't seem related.
But, hey, this is what school indoctrinates us, right? to follow directions?
I didn't like it but I clicked anyway. I found a page that asked me to provide my Metamask seed phrase.
That's a no-no for me. I don't give my seed phrase to anyone under no circumstances. PERIOD.
So I came back to the group and told them... "hey, **this thing is asking for my seed phrase.** The guy that took me into private sent me there. There is something wrong here."
Two other guys appeared, yes, he is an admin, he knows what he is talking about it. Another one said: "that solved the problem for me".
(What? Are you going salesman with me? Social proof? Really?)
I said, thanks but no thanks.
So I did go to bug the guys in the SmartBCH telegram group and they told me two things: that there were a scammer group impersonating BenSwap and they gave me the real link to their group.
In the real group there was a lot more history, and a bot, and they didn't answer my question. (A couple of hours later after writing this and now checking, some people answered but still no solution.)
I have a useless LP token with three bucks in my wallet, but other than that I dodged the bullet. Now I worry if I downloaded something when clicking on that link. My computer is fairly protected, but you never know.
Note to me and all who feel represented by this (true) tale:
*Careful kids when you decide to walk on the fringes looking for shiny objects. There could be great profit, but it's also close to the dark side of crypto.*
Thanks for reading.
Imgs: screen captures. Lead image and the last one are made in Canva.
Proyectos de NFTs en SmartBCH
Salvo Space, del que hablé bastante, el otro gran marketplace es **Oasis.cash** . https://oasis.cash/
En Oasis solo se venden NFTs de proyectos que acordaron con anterioridad estar ahí. En general son grupos de NFTs únicos, pero con variantes. Esas variantes les dan diferentes niveles de rareza y la rareza aumenta el valor.
(( Para programadores: creo que el modelo base es este: **cryptozombies.io** )) https://cryptozombies.io/
Estos NFTs tienen un lanzamiento inicial con un precio de base y cualquiera puede ir, poner la billetera y hacer "minting". La suerte va a determinar qué rareza de NFT pega. Se usa Metamask y se paga en BCH del lado de SmartBCH.
Ahora, estos NFTs si bien tienen mayor o menor valor por elementos estéticos y por la rareza, lo que da el principal valor es el plan del proyecto. Es decir, casi todos estos NFT pertenecen a proyectos que además tienen moneda propia, y usan los NFTs (o van a usarlos en el futuro) para hacer staking u otras operaciones de DeFi.
En este momento hay varios proyectos y más siguen apareciendo todos los días.
Tengo que reconocer que no entré en este asunto desde el principio, y no tengo muchos NFTs. Así que comparto lo que entiendo que es información limitada.
Es MUY importante que antes de comprar un NFT en Oasis, miremos con mucho cuidado el proyecto para ver si el precio es razonable. En lo que sigue agrego alogunos proyectos y lo que sé de ellos (no es exhaustivo).
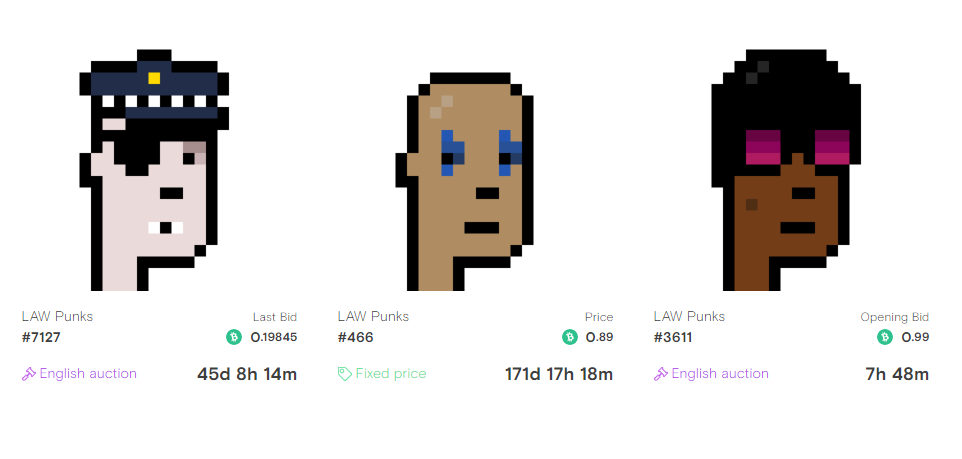
Law Punks
Es el proyecto más complejo y el que creo que marca la tendencia. El sitio es BlockNG: **blockng.money/?r=elearah#** (link de afiliado) https://blockng.money/?r=elearah#/
Tiene varias monedas, y un sistema de DeFi. Los NFTs sirven para hacer staking y se pueden "empeñar" para sacar moneda prestada que después hay que devolver antes de que se venza el tiempo.
Una cosa que noté en Oasis es punks pálidos. Vi en un video que si se pasa el tiempo de devolver el préstamo, el NFT se cambia por un NFT igual pero fantasma sin valor de staking. Cuidado con los NFTs pálidos en Oasis, que vi varios.
No tengo ningún punk. Si estoy usando su sistema de DeFi.
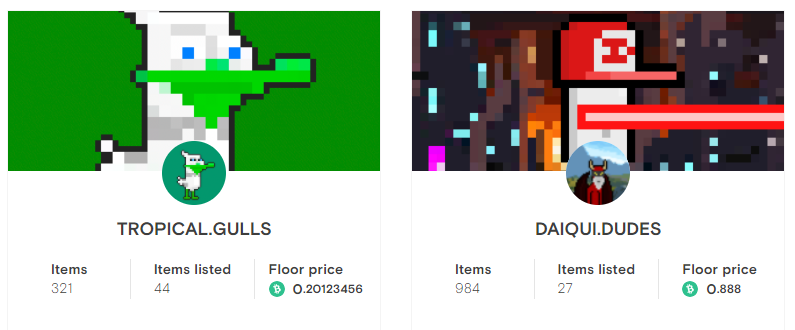
Tropical FInance NFTs
Tienen 3 colecciones diferentes:
--Tropical Gules
--Daiqui Dudes
--Tropical Monster
En general los reparten entre personas que tengan Daiquiri en cantidad y por ayuda con promociones. Después esas personas los ponen a la venta. Aparentemente van a agregar staking o algo qué hacer con ellos en el futuro.
Para estar al tanto de lo que pasa con el proyecto, como con todos los demás, hay que ir al grupo de telegram.
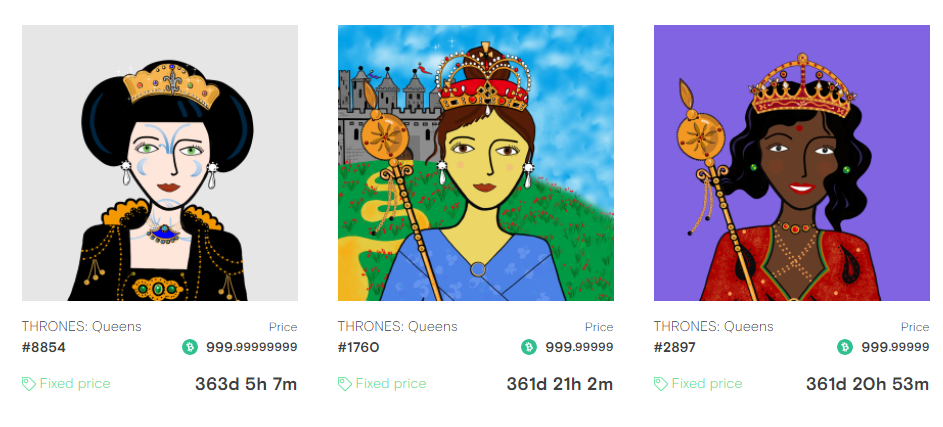
Thrones: Queens
Este proyecto es un poco diferente porque no es pixel art. Son muy bonitos para el estilo y las limitaciones del sistema.
Algo interesante sobre estos NFTs es que van a lanzar los Reyes, y después se va a poder hacer minting de las princesas y principes a partir de las parejas.
De nuevo, no tengo NFTs de este proyecto. Hubo retrasos y para cuando me quise dar cuenta estaba agotado.
NFTs que sí tengo
Tengo un par de NFTs de los proyectos siguientes:
Cattos
Reapers
FatCats
WenLambo legendary collection
Por qué? Principalmente porque pude hacer minting, es decir, tomarlos al precio base.
Los recomiendo? No sé. Todavía no me dieron ningún dividendo.
Por ahora son apuestas que pueden salir bien o mal. De estos proyectos FatCats y WenLambo es posible que todavía tengan unidades para hacer minting.
Te gustan los NFTs? Inviertes? Cuál es tu experiencia con ellos?
Muchas Gracias @Loucy por ser mi esponsor. Muy agradecida. :)
Thanks @Jehoshaphat for the sponsorship. I just saw it. Sorry, learning my way in the comments.
I highly appreciate it. :)
Publishing my first NFT in Space
Yesterday I found out the new NFT marketplace called Space and I jumped right in. You can read the first part of my adventure here. https://read.cash/@Elearah/minting-my-first-nft-in-space-03a56dd9
By the end of the day and after talking with the team in their telegram group I knew a couple of things more.
When we mint an NFT, it goes right into the IPFS and a contract is created for it with the full info of the ledger. Meaning, it's in the system. I saw the IPFS address as result of my minting, but couldn't do much with it as I couldn't see my image. Later on the developer told me it was encrypted, ok, now those weird symbols made sense, sort of.
My Metamask is a browser version and I can't see NFTs, also I had no idea how to find the contract, so I asked. Again the guys told me and with that contract I tried to see my NFT in OASIS, that didn't go too well either. It picked it up but they expected different parameters, so I couldn't see it. And today it was deleted from my NFTs list, what makes sense as Oasis works with approved projects only. I was not trying to sell my NFT, just see it.
So, fast forward today, my NFT was approved and I could see it in Space. I could also put it for sale. I looked around the NFTs they already had and they ranged between 1000 Space to 3000 Space. So to be able to buy an NFT there, we need to get the token first. Of course this lead me into a tangent to know more about the token.
The token
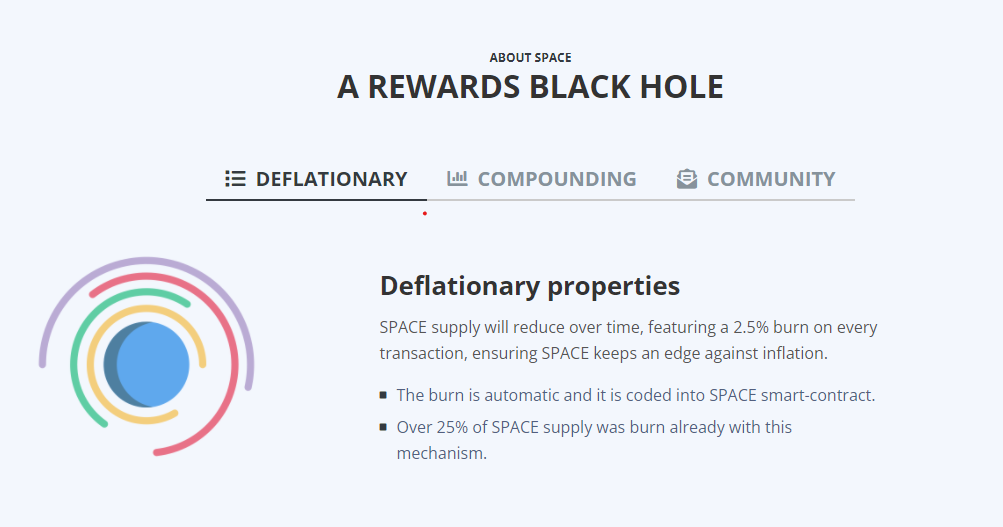
SPACE is the token used to trade in the marketplace. It's a deflationary token.
The marketplace works both in BSC and sBCH so you are going to find mixed up info. It's still in alpha so much of what is today, might change tomorrow as the ideas and methods settle in terms of esthetics.
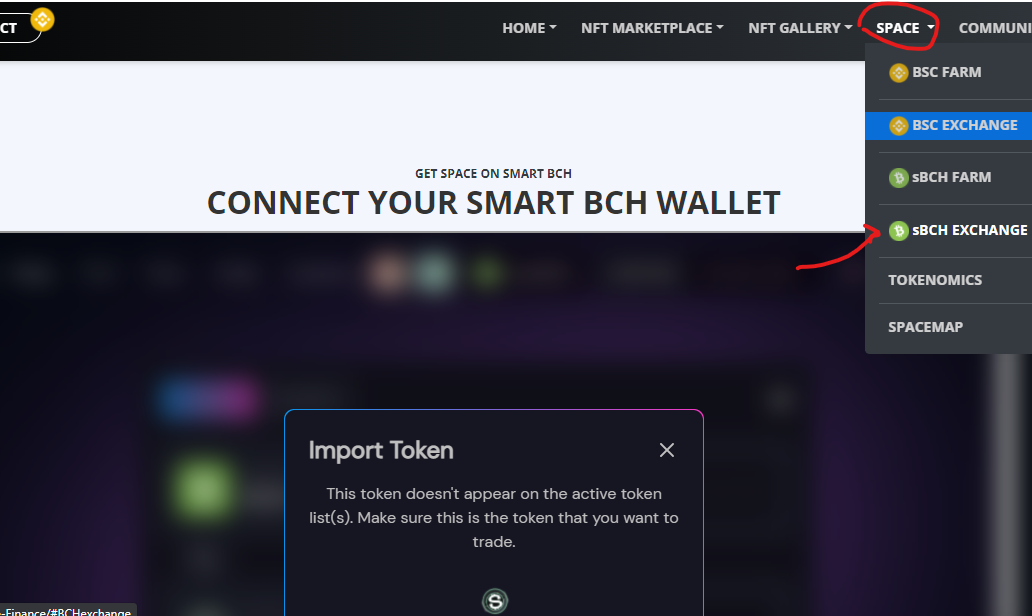
To get Space, there is a liquidity pool in MistSwap. It's most efficient to go through the site to add the token.
It opens MistSwap in a frame. Of course, I wouldn't spend too much from a frame. The developer told me (again in Telegram) that SPACE smart contract automatically takes 4.5% with every transaction, for reflection and burn, so to make it work it needs 5% slippage. I bought 250 Space to test and arrived 238.
They also added some kind of staking and farming system, maybe for now or for the future. Here is the link: https://timefoundation.net/Space-Finance/Farm/BCH/
The Marketplace
Putting the NFT for sale was very simple, just setup the price and pretty much it.
I'm very thankful the team actually put the NFT as featured.
https://timefoundation.net/Space-Finance/Market/BCH/
So all in all, this is a very promising project. Still has some way to go, but it's functional. You can test it by bidding on my NFT. :D
Minting my first NFT in Space
When #Oasis (https://oasis.cash/) came to be I was very happy because NFTs are such an important part of crypto and their role is only going to be more relevant as time goes by. They are doing an amazing job launching projects and making them thrive. I lurk around quite a bit, and always pay attention to new launches.
But there was something missing. The possibility to give people like me, who likes art, to mint our ramblings and show them to the world.
I have one collection of coloring pages in WAX, and I wanted to put my digital art here. And today I had my chance.
I read in #Noise (https://noise.cash/post/gkq5x5msjk54) that a new NFT marketplace was in alpha, and that you could mint your own NFTs.
So I looked around the place and checked them out in Twitter.
What I found out
Here is the place:
https://timefoundation.net/Space-Finance/Market/BCH/
They are a group called Space Finance, releasing in SmartBCH and BSC. They have their own token with liquidity in #MistSwap, but that part is still not working for me. The DEX does not recognize the token (see Part 2 Here for the resolution). https://read.cash/@Elearah/publishing-my-first-nft-in-space-07b70e76
They have already a collection about space which is beautiful. I think they go more for the artsy type than the pixelart style with variants we have seen so far, with the exception of Queens, and maybe Pandas in the close future.
The team prefer to stay hidden, which is a possible red flag, but it's quite normal in the space.
They started this project almost a year ago, possibly in BSC, and I think they are landing now on SmartBCH.
Minting
So I decided to give it a try and mint my first NFT in the #SmartBCH side of the site.
#BCH has become such an important part of my life this past year that this is the space where I want my ramblings to be.
Ok, the tech part.
Pretty straightforward. Just fill in a form with the name, description, author, upload the image (1-1 aspect ratio, png, jpg or gif) and that's pretty much it. You connect the wallet and pay.
It does go to review and it's not released right away. I don't think it's in the blockchain yet.
The cost at this time is 0.001 plus network costs.
After you fill in the form, you see this message:
Conclusion
I'm very happy with the marketplace, and can't wait for this to grow and flourish. I've seen some amazing drawings in #Noise, lots of talented people can find a home and it's a great opportunity for investors to grab original art.
This is the soon to be NFT. It's digital manipulation and painting over base photos.
If this piece goes through, I will only put ONE copy for sale (and only in this network). That's it.
Second part of my adventure here: https://read.cash/@Elearah/publishing-my-first-nft-in-space-07b70e76
Paso a paso. Cómo subir BCH a Smart BCH
Hay mucho para hablar sobre SmartBCH y por qué puede ser una buena idea pegar el salto. Pero en este caso quiero centrarme en el cómo. La idea del paso a paso es proveer documentación que queda como referencia para usar y mostrar a otros que quieran operar con BCH.
Este procedimiento tiene un punto de origen, un punto de destino, y un medio para pasar de un lado a otro. Las herramientas que voy a introducir no son las únicas que existen. Considero en este momento que son las más simples y eficientes para hacer el trabajo.
**Origen: Una billetera con BCH**
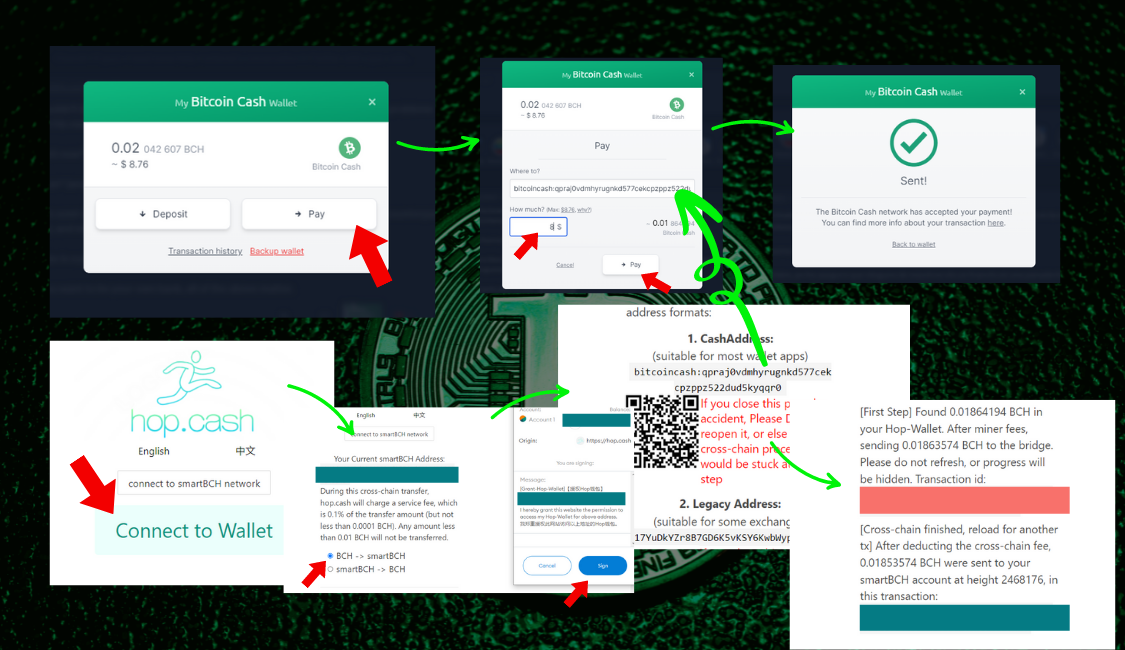
Voy a mostrar el procedimiento desde la billetera de Noise.cash, pero sirve también para Read o cualquier billetera con un valor de BCH acumulado de más de 0.01 BCH. Por favor notar que dije "más". El procedimiento que vamos a emplear requiere mover como mínimo 0.01 y tiene que quedar un poco en la billetera para pagar la transacción. Como regla general, dejo los decimales. Usualmente, es más de lo necesario. https://noise.cash/
**Destino: Metamask.**
Metamask es una billetera para navegador, y también hay una aplicación para celular. Se la puede encontrar acá: **metamask.io/download** https://metamask.io/download
Es una billetera que trabaja por default con Ethereum, pero se le pueden agregar otras redes. En particular vamos a agregar SmartBCH. De nuevo, hay otras opciones como la billetera de Brave, pero Metamask es la más usada.
**Medio de salto:** ****hop.cash**** https://hop.cash/
Hop provee un puente que toma el BCH en una billetera dedicada transitoria e introduce el equivalente (después de cobrar el servicio) en la red de SmartBCH en Metamask.
Cómo agregar SmartBCH a Metamask?
Este es el paso a paso en navegador.
1) En Metamask clickear en **Ethereum**.
2) Se va a abrir una lista con las redes instaladas. Clickear en **Add Network** (agregar red). Se abre una página en el navegador con un formulario.
3) Ir a la comunidad de Smart BCH en telegram: **t.me/smartbch_community** Escribir: /rpc https://t.me/smartbch_community
El bot entrega la información de SmartBCH más eficiente.
En el momento de escribir esto es:
Network name: Smart Bitcoin Cash
New RPC URL: **smartbch.fountainhead.cash/mainnet** https://smartbch.fountainhead.cash/mainnet
Chain ID: 10000
Currency Symbol : BCH
Block Explorer URL : **www.smartscan.cash** https://www.smartscan.cash/
4) Llenar el formulario con esta información. Salvar. Donde decía Ethereum ahora tiene que decir Smart Bitcoin Cash. Si no lo dice, ir a la pantalla con la lista de redes y elegirla.
Como mover moneda de BCH a SmartBCH
Vamos a necesitar: Metamask en SmartBCH y dos ventanas abiertas a la vez.
1) En una ventana, ir a la billetera de Noise, o la billetera que contiene el BCH a mover. Recuerden que la cantidad mínima a mover es 0.01 BCH (hace falta 0.1 BCH para volver, así que cuidado con subir moneda si la van a necesitar pronto y no tienen lo suficiente para volver).
Apretar "Pay" (pagar).
Va a ir a un formulario donde hay que poner:
la cantidad a mover en dólares (a la derecha se ve la cantidad en BCH, así que se puede ver o ajustar las cantidades)
la billetera de destino
el botón para pagar. Por ahora solo podemos ajustar las cantidades.
2) En la segunda ventana ir a **hop.cash** https://hop.cash/
Apretar **Connect to Wallet**. Identifica el monedero y pide elegir si vamos a subir moneda o bajarla. Una vez que elegimos, se va a abrir Metamask pidiendo confirmación. Aprobar el contrato.
Cuando esto pasa, aparece la dirección en diferentes formatos: en la forma moderna que empieza con "bitcoincash:...", el código QR, o la forma antigua que es todavía usada por algunas plataformas centralizadas. En este caso utilicé la manera moderna porque estoy moviendo BCH desde Noise. Ajustar, según el origen que corresponda.
Copiar el código. No cerrar esta ventana!
3) Volver a la solapa de la billetera de Noise y pegar ahí la dirección de destino. Revisar y enviar, apretando Pay.
4) Volver a la ventana de hop. Cuando detecta que hay suficiente moneda en la billetera de destino, empieza el proceso de conexión. Se ve un mensaje rojo cuando empieza y otro azul cuando termina. El procedimiento usualmente dura un par de minutos. Cuando aparece el mensaje en azul, la moneda debería estar en la billetera.
Esto es todo. Comentarios, correcciones, preguntas... todo es bienvenido.
Imgs: Hechas en Canva. Se pueden reproducir con atribución y link activo a este artículo.

What in the World is happening?
I wonder it every day and I think that, if you clicked on the title, possibly too.
I believe we all have a piece of the puzzle and maybe putting it together we can arrive at some actionable conclusion. So here I go. I invite you to later on add your own vision so we can grow together.
Ten years ago I heard for the first time of global warming, and I believed it. Quickly downed on me that the temperatures would be like the ones on the Pleistocene and there were no humans there. All this considering that the geological official story is right, what I believed at the time and have serious doubts now.
I decided to check the information. First thing I did was to see the temperature records, they were very poor. We only have records from the late eighteen hundreds and really only started measuring all over the globe in the 70s or so. You can't really make any prediction about geological events with that data.
So I went looking for other events that talked about temperatures. For example there were records of having grapes in the UK in the Middle Ages, that meant the temperature was higher than now.
To make the story short, I came to the shocking conclusion that we were going to a glaciation, not a warming period. Of course in geological years 100 years is nothing, so the colder days maybe would skip ahead a couple of generations.
Now if my conclusion was right, we had some tough times ahead as the colder periods imply famine and mass extinction. But I was hopeful because we do have the technology to cultivate indoors. I thought that if we worked together we could pull it off.
Imagine my surprise when I saw that people who lived in the best areas for the coming future (Africa, Central America, Middle East) were being decimated or forced to emigrate.
As time went by I saw the narrative getting louder, and the temperatures getting colder. The cherry of the cake was tiding the fake global warming with the very much needed CO2 and propose as solution the tax to breathe...
Because of all this madness I was not so surprised when I saw the covid fiasco started to unfold. It was not the first time the WHO tried to impose this medical martial law globally. Again, at the beginning I believed covid was real enough, but soon I realized that even when the virus can be real, it's the least of our concerns. Really.
Because, you see. Covid is another of the viral infections of the winter generally called flue. There are many efficient preventing measures (like high level vit D) and also treatments. What is different is the assumption that it is different, the test and the scare, which leads to protocols that do more harm than good and almost seem designed to kill people instead of saving them.
Do people die from the flue? Sadly yes, many every year.
Have you considered putting your life on hold and give up your core rights and sovereignty as human being for a flue? If you are here, I will assume not (of course I could be wrong).
So now is when covid ties up with the glaciation situation. I found out last year that we entered the solar minimum in 2020, meaning, we are entering the cooling period of the glaciation. Covid was announced to the world more or less at the same time we entered the slide.
So I wondered, now what? And this year I had my answer when the compilations with athletes falling dead started to multiply.
If you considered yourself god (with a small g) and wanted to make sure there would be enough for you and your own in the planet, wouldn't you find even humane a fast heart attack instead of the degradation of famine and cold?
Well, in a nutshell this is what I think the experimental treatment is trying to accomplish among other things.
Do you think it's humane? I think not. Nobody has the right to decide for others like this. And I firmly believe we have the technology to make it through altogether. This ties with my series about permaculture. Yes, that's the technology and this is why I also talked about planting the cities with fruit trees. I will finish that series soon.
I don't claim any of this is true. it's the best model I came up with considering the information I have and the way my brain is wired.
ref: the grand solar minimum paper https://www.tandfonline.com/doi/full/10.1080/23328940.2020.1796243

BCH es la solución para los países emergentes
Los países emergentes, con honrosas excepciones, se caracterizan por tener gobiernos ineficientes que gastan más de lo que recaudan.
Porque son ineficientes, resuelven su problema de liquidez aumentando impuestos en vez de controlar el gasto público, lo que lleva a un nuevo impuesto no blanqueado llamado inflación.
Por esta razón, los ciudadanos escapan de la moneda y se refugian en cualquier cosa que vaya a conservar el valor en el tiempo. Empezando por comida, alhajas de oro y plata, y en casos de muy alta inflación bienes muebles como automóviles, cuya devaluación es menor a la inflación.
BCH es la solución para varios de los mayores problemas de los países emergentes:
escapar al yugo del gobierno
conservar el valor del ahorro
hacer transacciones con valores predecibles
¿Por qué BCH provee todas estas soluciones?
Escapar al yugo del gobierno -- Monederos
BCH es una moneda virtual que puede almacenarse en monederos propios, sin bancos y sin proveer información. Se puede pagar entre monederos. El gobierno no tiene injerencia salvo la que uno mismo comparta.
Obviamente, esto puede traer problemas con el fisco, ya que los gobiernos tienen el monopolio de la violencia y pueden ser opresivos. No estoy proponiendo actividades ilegales. Simplemente, uno decide cuándo y qué comparte.
Una salvedad sobre esto: BCH es transparente, todas las actividades de una cuenta son visibles. Hay soluciones para que las transacciones no sean tan visibles. Más sobre esto en otro momento. Los monederos proveen una solución eficiente para los que eligieron no vacunarse. En estos días de pasaportes Nazitarios, hay personas que no pueden siquiera ir a retirar sus fondos del banco. Manejarse directamente con crypto es una solución que elimina los intermediarios.
Conservar el valor del ahorro
Si se miran las curvas de valuación de BCH se ve que aunque es volátil, la línea de base siempre aumenta.
¿Por qué? Porque es una moneda deflacionaria como el Bitcoin (tiene una cantidad máxima a ser minada y cada vez va a ser más difícil llegar a ella) así que su valor va a tender a aumentar.
¿Es segura? Bastante más segura que invertir en acciones y fondos de inversión.
¿Sirve como ahorro a corto plazo? Yo diría, y puedo estar equivocada, que no es la mejor idea porque es una moneda volátil. Pero... hay soluciones para esto en SmartBCH.
En este momento BCH está a muy bajo precio. Es un momento ideal para entrar en su ecosistema. Si uno compra en un pico podría perder 50% de los ahorros en un par de días. Es decir, no es la panacea.
Necesitamos entender bien con lo que tratamos y tomar decisiones informadas. SmartBCH es una capa creada encima de BCH que le provee contratos inteligentes. En esta capa hay otras posibilidades de inversión, algunas bastante seguras, como la pileta de flexUSD en Tropical FInance.
Hacer transacciones con valores predecibles
Ya nombré varias veces flexUSD que es la moneda "estable" del sistema (con comillas, pero por ahora sigamos). Si tenemos Metamask en el celular y hacemos operaciones en flexUSD, es como pagar en dólares. Funciona enviando de monedero a monedero pasteando la dirección o por código QR. Hasta aquí la introducción al tema.
Gracias por leer. Los invito a agregar, preguntar... lo que tengan ganas.

Getting some JOY in Joystick.club
EDIT: from Jan 1rst 2022 the rewards halved to 12.5 JOY. So the balance investment/reward is changed. I will leave the post as was initially written. Just take this change into consideration. My son decided to play just casually under these new numbers. Still fun games.
I was looking around the farms and saw, again, the one with JOY-BCH in Ben, Mist Muesli and Tango. Pretty impressive to have farms in 4 of the 6 DEXes.
I had payed a visit to the site before smart.joystick.club but my brain-hand coordination is not that great, so I'd never tried it. https://smart.joystick.club
Now this time, I gathered some help. My son was kind and humored me, giving it a try. He played Smart Blaster in my computer and got 17 JOY, when the max per game is 25. Pretty impressive for a first time. You pay 25 cents in BCH to enter, which is more or less 6 JOY.
So we setup his computer. Yes, it meant installing Metamask, adding the Smart BCH network, and sending some coin his way.
He played one time and got perfect score. The 25 JOY entered his wallet pretty fast.
He played a second time. more or less same level. There was a message saying the reward was in its way, but nothing.
Ok, lets way. We said.
But, just in case I jumped into the telegram group. There was a lot of activity and some contest. People were happy. It's a great community.
I asked about the reward. They told me they had a rather loooong queue, and they were working both in processing it and solving it.
Next day my son decided to play again even when nothing had arrived. Again silence. I went again to the telegram group and this time the developer answered. Very nice guy. He took the time to answer in detail and even gave me 10K PTS tokens. I wasn't expecting any of that, so it's highly appreciated. I imagine myself in his situation, having to fix the script because it was not managing the volume right, and people nagging: "hey, where are my tokens!" Yes... chapeau. I would have probably been a lot less nice.
Day 3. We still waited.
Day 4: Today 20 tokens arrived. I don't know if this is for the 4 games or just one.
But... today he decided to play again and earned 41 more tokens.
The final numbers in BCH are around 0.015 BCH so far, starting with 0.01 BCH. Not bad for a play to earn game in beta.
I asked my son to write down his impressions, and he even recorded a game. I will be adding that in a different post. Otherwise it will be too long.
Rounding up
After going through the procedure and seeing my son play, I think joystick is a really fun way to engage people from outside the space. Once the person setup Metamask, and has some coin in, going to the DEXes to change it, find the farms, etc, is only natural.
Yes, it's in beta. Yes, there are some problems. But the developers respond and the community is great.
Also, these are real games based on classics. Can't beat that.
They have plans setup to encourage people into keeping their tokens. There will possibly be NFTs down the line, which is great because, otherwise, I don't see why people won't just go ahead and change the tokens right away.
Also the number of JOY per game will go down in time. This is a good moment to jump in.
Designing an edible garden part 8: Small animals in Zone 2
In the article about zones, I mentioned that Zone 2 contains the elements we need to visit at least once a day but we don't necessarily want in front of us all the time. https://read.cash/@Elearah/designing-an-edible-garden-part-3-zones-44df495c
In practical terms, Zone 2 is a lot about small animals that are not pets. Are animals absolutely necessary in the design of an edible garden? It will depend on the size. In the medium size plot we explored, they likely are.
Why? They are essentially amazingly efficient compactors of calories and nutrients. I'm not even talking about killing and processing them, which could be a part. I'm talking about natural side products and how we help each other: they have their needs meet, help keep our garden clean, and provide us with very concentrated forms of food or fertility.
In particular I'm going to talk about three types of animals: worms (red wigglers), birds (chickens, quails and ducks) and rabbits.
Rabbits
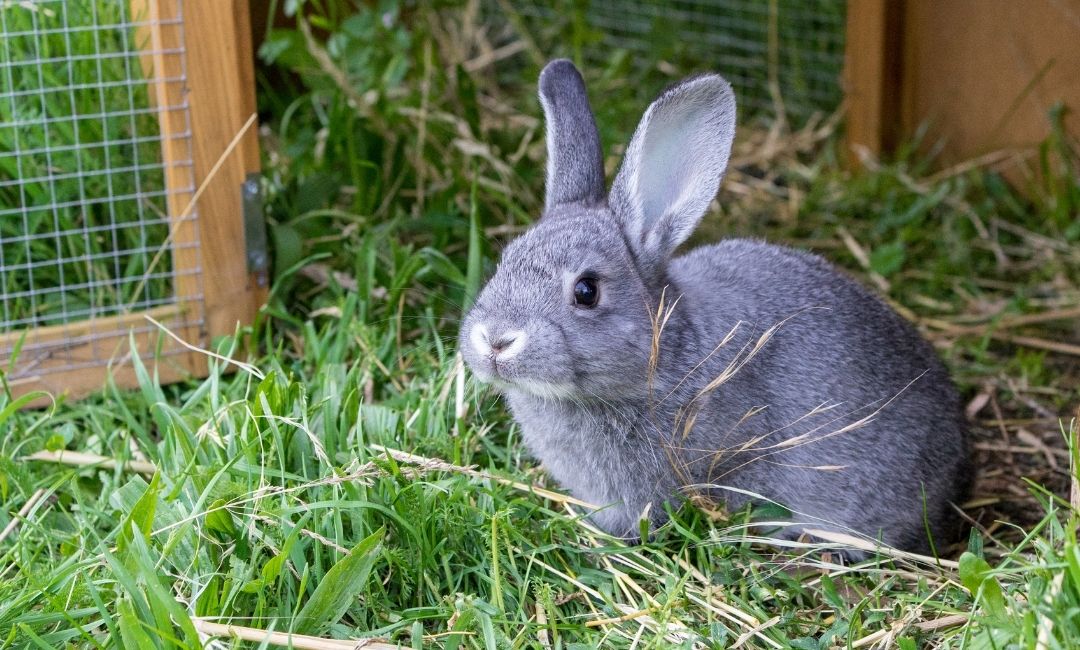
Rabbits are amazing animals. They process huge amounts of edible greens and give as result small pellets that can go right into the worm bin.
I've had three rabbits that were half pets. Two were rescued from processing in a farming school, and the third one was a tiny Holland lop we got thinking on breeding. Another option I looked into but never acted on are angora rabbits. These are bred for the hair.
Rabbits can be kept in cages but they need space to move, so think on giving them space to run. If you feed them your edible weeds and garden clips--which are all over the place in edible gardens, they almost don't need extra food and they drink a lot less water. In fact my rabbits didn't drink water at all, which every single breeder I talked to said it was impossible.
I never had more than one rabbit at a time, but if you plan to let them have babies, then you need a more complex setup, like different cages for female and males, and also separate spaces for the moms with their babies.
About the cleaning, here comes one of the favorite strategies of permaculture: compiling function. Put worm bins right under the cages and you solve two problems at a time. You dispose of the rabbit droppings and feed the worms.
Can you let your rabbits free range? Not such a good idea. But you can have then reasonably free with a dog harness and a long leash if you are around or if you have a trained shepherd dog with them. You can also let them free in a controlled environment. But letting them completely on their own not only will be the end of your garden, they will likely be hunt down and killed by predators.
If you have enough space, you could also use rabbit tractors, which are mobile cages that you put in different sections of your garden for the rabbits to eat and fertilize. Make sure they still have their needs met, like shadow and a protected place to sleep.
Rabbits are very sensitive to the sun and the heat. Please keep it in mind.
Red wigglers
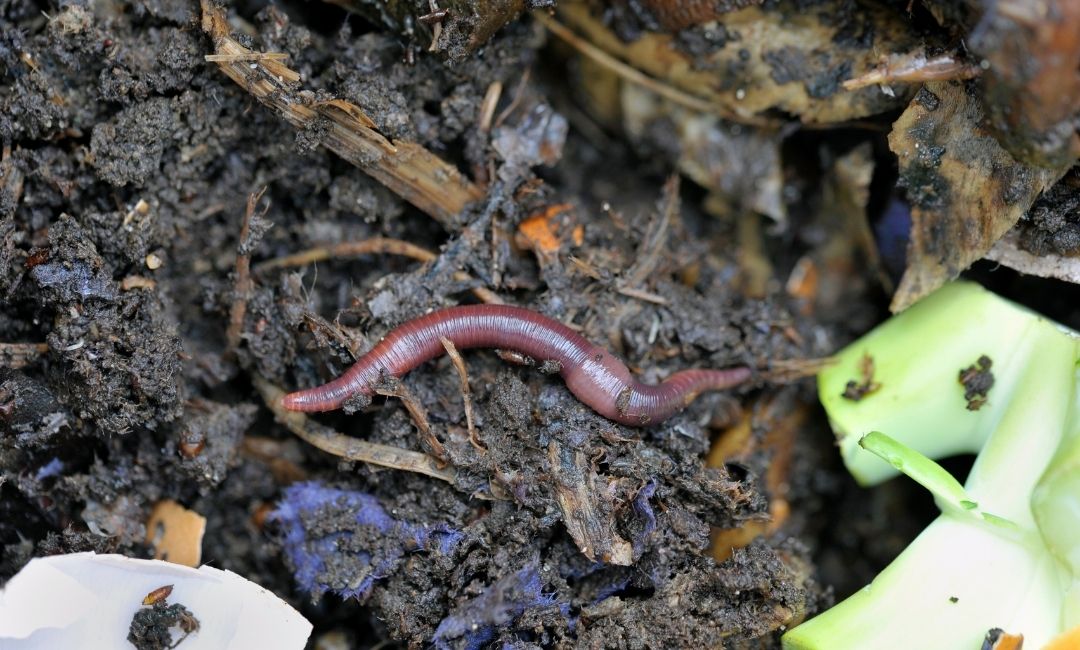
As I already mentioned in Designing an edible garden part 6: Composting, red wigglers are specific worms that will process big amounts of compost. These worms eat bacteria, and they break apart matter in the process of searching for food, which helps more bacteria colonize easier as there is more exposed surface. https://read.cash/@Elearah/designing-an-edible-garden-part-6-composting-9f2f0c45
So red wigglers are perfect to go under rabbit cages, as rabbit manure is among what red wiggler can process and be happy. The left over food from the rabbits is also good compostable material.
We just need to make sure the humidity is right, and the worms are covered.
To aid reproduction, it's a good idea to add to the bin eggshells processed with water about once a week. They need the calcium. And it will render a high quality compost later on.
To collect the composted soil we add new food on top and collect from the bottom (they stay on the top 20 cm or so), or we use different sections if the bins are bigger. The worms will migrate to where the food is and we can collect the old fully processed part.
Birds
When we think on birds for an edible garden, we more or less automatically think on chickens. But it's not always the best option. Chickens will be the best option for most climates with average humidity if we have enough space for them.
**Quails**
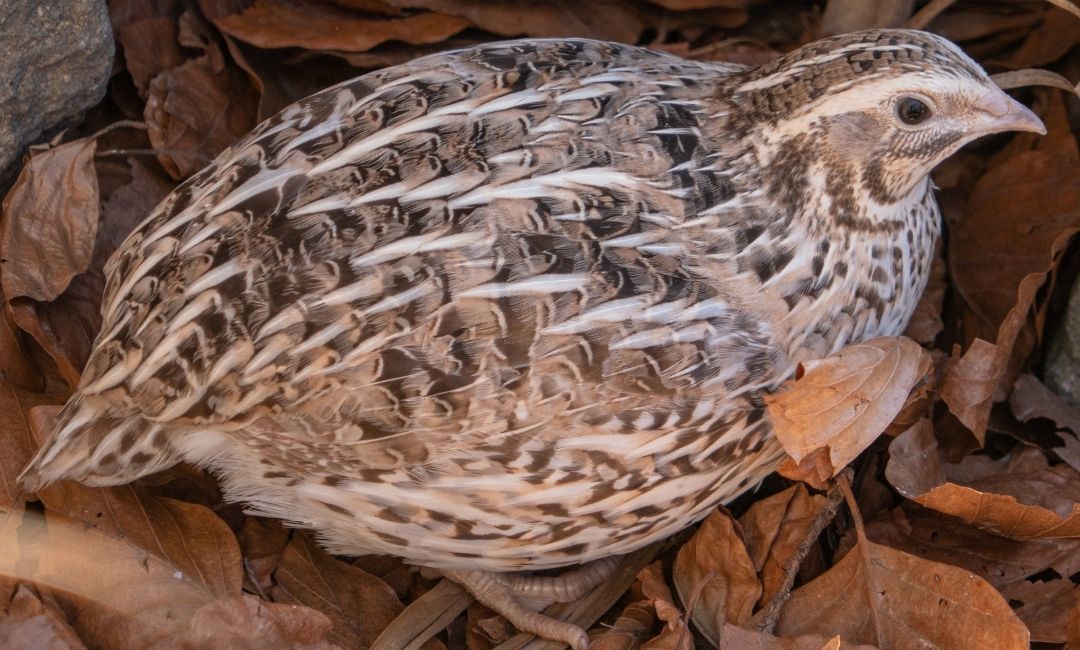
If we have a small plot, quails will be the best option. They can be raised in very small spaces (I'm not saying it's ideal, but it can be done), they put eggs all year around and the eggs are highly nutritious which compensate the size.
Quails are also fairly easy to kill if someone chooses to go that route, and they reproduce very fast. Eggs hatch in about 18 days and they are mature in more or less 6 weeks.
They lay eggs all over the place and don't need special boxes for brooding.
How to keep it clean? if the cages are over boxes with hay, and the bars of the bottom are wide enough, the hay will contain their droppings and eggs and we can collect the eggs right from there. Some people don't use bars at the bottom, but drawers to be able to take the eggs.
As it happens with chickens composting of their droppings will take between six months and a year. We should add carbon in the form of hay, or sawdust quite regularly and move things out from time to time, or we can have an opening at the bottom to collect the composted soil.
Here is a detailed document about how to keep quails. https://www.dpi.nsw.gov.au/__data/assets/pdf_file/0005/145346/Raising-Japanese-quail.pdf
**Ducks**
If we live in a very humid climate, with plenty of water around, or if we have one or several ponds, ducks are a very good option.
Now, their droppings are sticky and will create ponds on their own. Keep that in mind too.
Ducks will fertilize the water and keep mosquito larvae in check. Like chickens they are omnivores and will eat whatever they can swallow. (If you ever see a giant duck or chicken, start running.) In some places they use ducks to keep rice fields clean from insects.
They lay eggs in different places, so finding them is like a treasure hunt.
**Chickens**
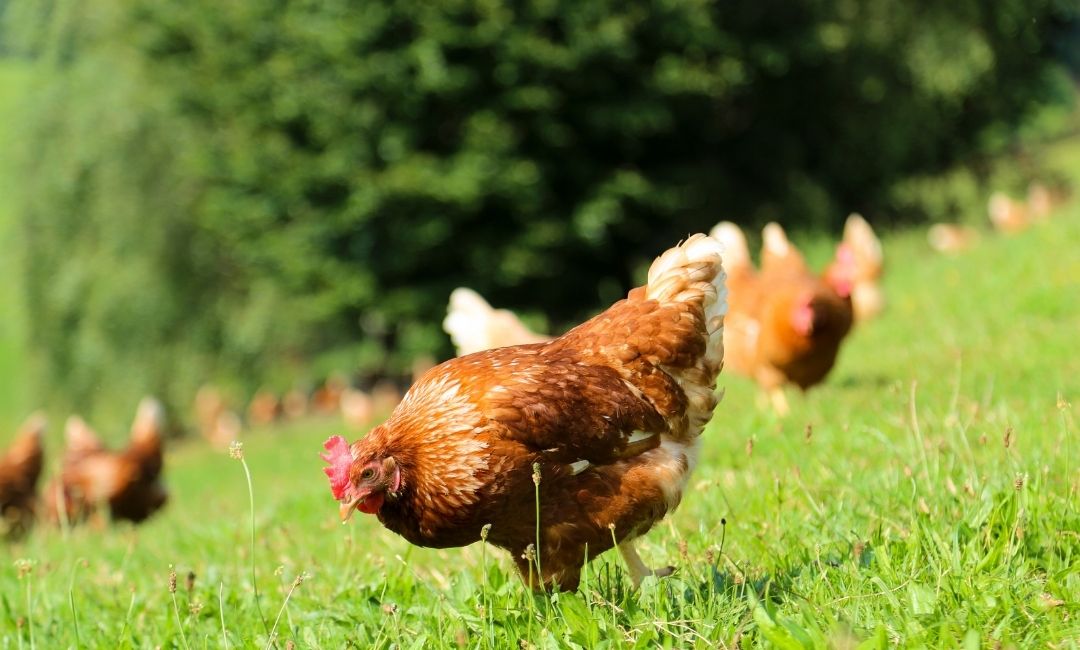
Chickens are the best known of the bird species we keep for eggs. They have evolved from their forest ancestors and today we have with them a mutualistic relationship. They need a protected place to be at night as they almost have no night vision. We provide for their needs and they share their eggs (well, not exactly willingly share, but you get the picture). This is possible because hens lay eggs whether or not there are roosters around, and they do it in special places, which we can provide and take advantage of.
They need water to drink, but they bathe in dust, not in water. Humid places are not good for their health.
As I mentioned before they are omnivores, and we can supplement their diet with red wigglers from the worm bin if they decided to stay when we take the composted soil out. Some people place the completely processed composted soil on a hard surface and give the chickens access to it before bugging it or using it for new planters. They will clean up everything, including insects and their eggs, some fungi and its mycelium.
They can free range and will learn to go to their coop at night, or we can have chicken tractors for specific areas. Left alone they might eat something we don't want. Keep it in mind: what you like the most, they will too.
Some people use this destructive ability of chickens to clean up plots from one season to the next. They will not only eat all the left over greens and veggies, they will also take care of the insects, leaving a clean slate for planting.
About the coop, as with quails deep mulch is the easiest way to go. Otherwise, it will take time and effort to clean up. Adding carbon on top of the nitrogen of the chicken droppings is the best way to sequester the nitrogen and keep it away from the air.
Here is one example:
https://www.youtube.com/watch?v=z_u78eXEJjA
Final thoughts
Animals are a very useful addition to our edible gardens. They are also a great responsibility. Once we add animals we can forget about traveling and vacations, unless we find a suitable replacement to take care of them while we are not around.
The systems I introduced include modifications to make maintenance easier. It's still a daily long term commitment.
Thanks for reading.
All comments are more than welcome.
Designing an edible garden part 7: Borders and shapes in Zone 1
Life has in incessant compulsive need to expand. The plants in our gardens grow as much as they can and yet some. They expand towards the empty spaces, they grow toward the sun, trying to cover as much ground as possible.
And when plants grow and develop, the center, the space that goes into shadows, doesn't have any green left. These spaces become dead spaces in practical terms. And, specially if we have a small garden, we don't want that.
So when we design the garden, once we have our water flow in place, and the soil ready, and the compost places in place, at this stage, we design our borders.
The borders of our different spaces will give the frame for the plants to develop and to find the limit that we setup.
Usually these borders will also give us the space to move inside the garden. They will be our paths, the water streams, the bridges. These will be the places we are the most, so we can make them as simple or as intricate as we choose. We could setup spaces for tables or benches, we can make roads or brick/mulch/gravel paths.
In this article we will center on Zone 1: our kitchen garden.
In zone 1 we want to setup the planters in a way of being able to reach the center from the border. There are different shapes for them that we can choose that will allow for more or less diversity in terms of water/nutrients/sun needs.
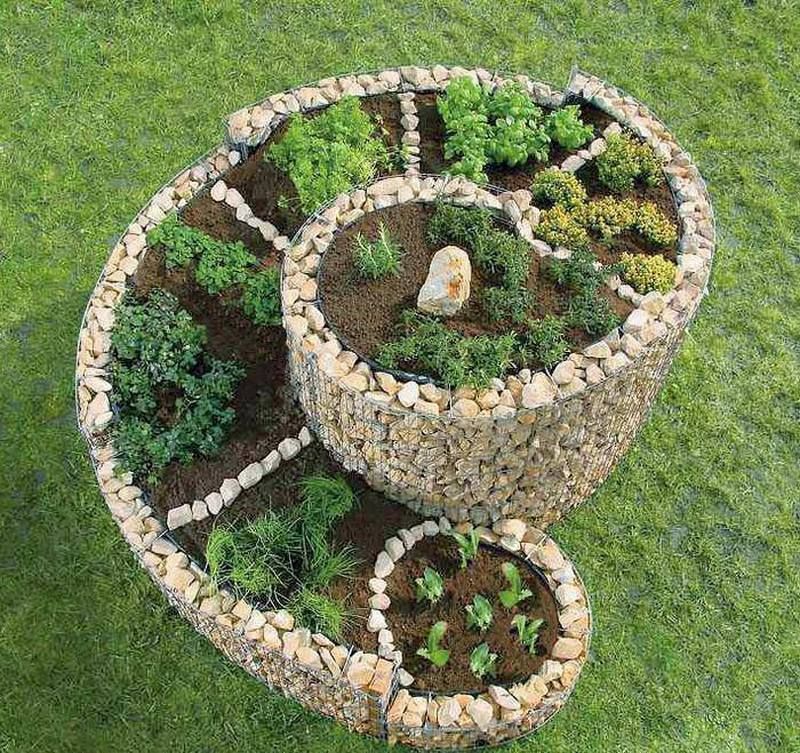
Spiral garden
For herbs and everyday salad plants, there are some innovative practices that make harvesting and working in the garden more rewarding. Examples of them are the spiral and keyhole gardens.
The image is of a spiral garden. Plants that need more water like lettuce go on the lower sections and herbs that need less water like rosemary go on the upper part of the spiral. All sections have their share of sun.
There are many variants of this system. Some put a worm-compost system right in the middle so fertility is diffused on an ongoing bases and the soil is naturally moist. If we irrigate, usually the top is the only place where we need to add water.
Keyhole garden
The keyhole system opens up a path and a circle in the middle so we gain easy access to all parts of the planter. Some also add a compost system in the middle instead of a hole (in this case some call it an African keyhole bed). The next image is a keyhole garden at St Ann's Community Orchard, Nottingham.
U-shaped garden
Another option is the U-shaped garden as an example for a bed that can hold deeper root plants like tomatoes, like they show in the following video--part of a three parts series:
https://www.youtube.com/watch?v=sy6PGJmPc5Q
Barrel planter
For small spaces, an interesting option is barrel planting. It's a good system for potatoes, strawberries, onions and garlic, or combinations of them. The main characteristic of barrel planting is the holes on the sides that allows for more plants to be added on the barrel walls.
Self watering systems
Because water is such an important resource, I want to end this article with an introduction to self watering systems. They work very well for dry climate as water is on the bottom and away from evaporation surfaces. Of course they work well in all climates,but it's in dry climates where they become an invaluable resource.
The self watering system includes a place to hold water, and some kind of wick to moist the soil as needed.
From this same concept there are many options. The first one I came across was the kiddie's pool system which morphed into the grow bags system later on. I use self watering for the first stages of my plants always. I don't plant seeds or start cuttings without self watering of some sort (usually the not so fancy system of the cut soda bottle).
The following is a video comparing options. It's broad enough to give you an idea. I don't completely agree with some of the practices (buying potting soil and covering with plastic for example), but it's a really good way to see what's out there and the results they got.
https://www.youtube.com/watch?v=EklgdNg6WDU
As you can see, there are many different forms to create a garden in Zone 1 besides the traditional rows, which have a better management of borders and space. Main things to consider are practicality, the requirements of the plants we want to use and the limitations of the space and water.
Raised beds are a good option for zone 1. They do require sometimes more water than ground level, but it's not a problem as could be in other zones if we have a roofed place nearby as we can and should collect water and setup an irrigation system. If we use the hugelkultur trick of adding wood inside the planters, we have better water retention, and if we add small or not so small worm-bin systems, we have additional ongoing fertility.
Thanks for reading.
All comments are more than welcome.
**Images:**
Cover image: https://ar.pinterest.com/pin/534661787006216026/
Image 1: Stock photo, Canva.
Image 2: Wikipedia commons photo. Photograph by Clem Rutter, Rochester, Kent. (www.clemrutter.net). - https://en.wikipedia.org/wiki/Keyhole_garden#/media/File:St_Ann's_Community_Orchard_African_keyhole_bed_1304.JPG https://commons.wikimedia.org/wiki/User:ClemRutter http://www.clemrutter.net/
Image 3: Video
https://www.youtube.com/watch?v=RXK8Hvu53Yw
Designing an edible garden part 6: Composting
As I mentioned in the article about zoning, each edible garden needs a composting area. Composting brings back the fertility to the soil. It feeds the microbiology in a permanent cycle that will sustain a growing spiral of fertility and production. https://read.cash/@Elearah/designing-an-edible-garden-part-3-zones-44df495c
Anyone who's got some seeds or brought a new plant to the house knows that feeling of: now what? Having nice black and alive compost soil is always the answer. And if you read the article about preparing the beds, you also know that compost is in the heart of the bed preparation. https://read.cash/@Elearah/designing-an-edible-garden-part-5-preparing-the-beds-ed96c168
I know... composting is not a sexy thing. The decomposing side of the cycle of life isn't something many of us want to deal with. But it's an important part of the cycle. And it has to be addressed.
Middle size plot
Going back to the middle size plot, in the zoning article I mentioned the need to have at least two composting areas, one with the worm bin and one for garden clips. Of course this is highly dynamic. *The bottom line is: we need to make sure that no fertility leaves the property.*
Do we need dedicated areas for composting? Well, we could go without. For example if we blend the kitchen veggie scraps (more about this later) and/or shred the garden clippings with a chipper, we could just add the material directly to the corners of the beds, or the roots of the trees.
Or if we plan with time, we can create a bed or hugelkultur during a whole year simply adding material to a dedicated area for six months and waiting additional six months for it to compost enough to hold plants safely. This is related with crop rotation practices. We will talk about this some other time.
**Worm bin**
Californian red wigglers are the best worms to process kitchen waste and rabbit manure. If we choose to have a worm bin, these are recommended. They move in a circular way on the top 20 cm of the compost pile and have specific requirements of humidity (around 75%). They also don't do well in the cold and don't do well with mold.
If you check out the web you are going to find very different and interesting worm bin ideas, from old fridges, to cement and wood constructions, to plastic or Styrofoam boxes. And there are commercial options as well. They all have elements in common: they have an opening on the top for air and to feed the worms, and a hole on the base to release worm leachate. This substance is a high concentrate of nutrients that can be diluted in water to make worm tea.
There are some people who have them right on the ground. It's not too common. Being highly superficial, they can be easy prey for birds.
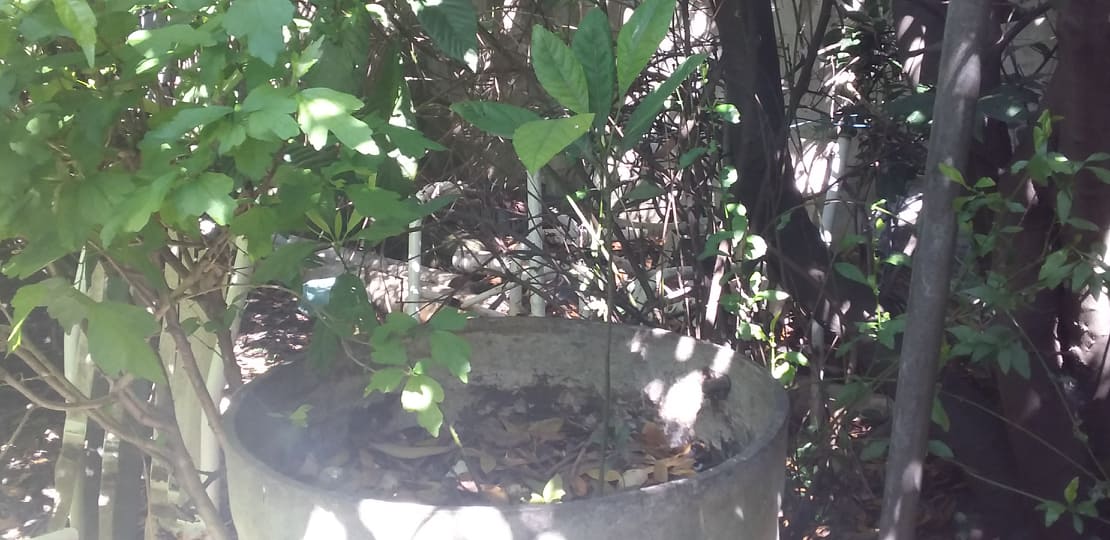
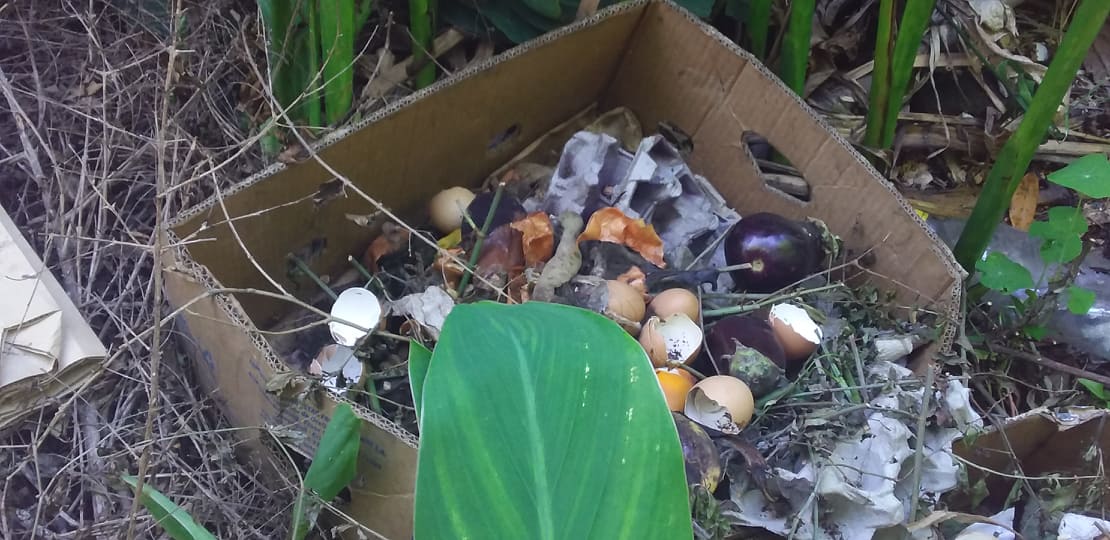
I have at this time my kitchen compost on the ground, but the worms on that bed are not red wigglers, they are the brownish ones naturally occurring in my area and do the work just fine. My first compost bin was an old cement water tank, it's long been completely composted and has two avocado trees growing in it.
If you go the worm bin route, check the requirements for the worms. They will process fruits and veggies, rabbit and cow manure; do not put anything animal or with oil there. Also avoid fruits that are usually decomposed first by fungi because they are highly antibiotic, like oranges and lemons. Worms feed from the bacteria on the plant material, and they break it in the process, so more bacteria can colonize faster.
**Yard clippings compost**
Following the concept of no fertility leaving the property, we need to find an efficient way to compost the yard clippings. The best way is using a chipper, but it's not a must have. Any plant material will be composted, it's just a matter of time. The smaller we cut it the faster it will compost and the faster we can use it.
I have an area per bed for the clippings of that bed. And a bigger area on the back of the house for seasonal cleaning.
Usually the yard compost is not a worm compost, but mostly a bacterial/fungus compost. If you look around you will find recommendations on the proper proportions of nitrogen and carbon for the piles, the sizes and all sorts of things. I think it's a great technology if you want for example to use your compost pile to heat a place (yes, it can become hot). I have no personal experience with this. I've never moved a pile. Just wait it out.
**Other waste composting?**
Yes, dog and cat poo can be composted--human too. It's a bit more complicated because of the risk of transmitting pathogens. I have no personal experience with this. What I understand of the subject is that it's best to be composted under the ground level and the result only be used for the roots of trees.
How about other food waste? The spaghettis with tomato sauce that ended up being more than the family ate? That chicken that has been a week in the fridge and doesn't smell that good? Yes all that could be composted inside the yard pile if you cover it. Now... it might attract rodents and flies. Be warned.
Cardboard and pizza boxes? Yes, those can go in the compost pile too. I do it all the time. Pizza boxes actually do well in worm bins if they are broken into small pieces and wet.
There is a method called bokashi which inoculates the compost with a particular ferment and apparently can compost all table scraps in small spaces in an efficient way. I've never used it.
Composting in apartments - bio-enzymes
Any place with a sunny window can grow plants. And if we grow plants, we need to find the way to keep the fertility growing. Now, composting in small crowded places, like apartments is certainly a challenge. Some people do have worm bins and it's a very good option.
I'm going to propose a different method altogether for this. This method is only good for raw fruits and vegetables. All the other kitchen waste will not work here.
What we are going to do is a typical vinegar fermentation. The idea is to put the fruits and veggies cut small or blended, in a bin with water and sugar. Now, we need to inoculate this properly and for that we use organic unrefined sugar. This will give both the right ferment and food. That's our seed. From there we can add refined sugar if it's more affordable. Another option for this is to use molasses and bread yeast, or any combination of them. In both systems the idea is the same: we need an inoculant and food for it. If we don't inoculate, and because it's going to be an anaerobic fermentation, we can end up with very unpleasant smells.
We can do this in milk jugs, water bottles or whatever than can hold water. The more we cook, the bigger the recipient, or the more of them will be needed. I personally use this method with orange and lemon peels in 10 liter water bottles. The result is an aromatic vinegar that works great for cleaning floors. You can find this around under the fancy name of bio-enzymes.
Being a fermentation process there will be gas release, so if you use lidded bottles, you will need to burp them daily or they might explode. A simpler option is to leave the lid lose. In this case make sure to leave it in a place nobody will tip it over.
The fruits and vegetables simply dissolve in the water in time leaving a slur. This vinegar can be dilutes one in 10 parts of water and used as organic liquid fertilizer.
This is just an overview on composting, and only scratches the surface of recycling. There are many other options to use waste in productive ways, some of them with stacked function. For example what I mentioned about using the compost pile to heat up something, like the wall of a chicken coup in winter.
Composting is a natural process that happens on its own. We can speed it up or learn how to work with it for our purposes. I believe it's important not to get caught in the details and keep the big picture in mind to avoid paralysis by analysis.
Thanks for reading. :)
All comments are more than welcome.
Imgs: Compost in my garden.
Designing an edible garden part 5: Preparing the beds
Besides the sun, the plants in our garden need water, air and nutrients. Some are adapted to extreme conditions but for simplicity we will assume they will take the last three from the roots.
As I mentioned before, plants don't have intestines so they create mutualistic and symbiotic relationships with the microorganisms around the root system. This peculiarity makes it of vital importance to have a soil that is alive. Now, not all microorganisms are made equal. Some will develop parasitical relationships or will produce toxic byproducts. Usually, oxygen loving microorganisms are our friends and those who don't need/like oxygen are not the best company.
What do the microorganisms need?
They need:
Food: organic material to decompose.
Water: enough, not too much or the environment becomes anaerobic.
Air: worms usually take care of this.
To be protected from the sun: the sun kills them at contact.
Usually, we don't need to do all the work. Nature has it figured it out. We just need to help as much as we can and specially do not do silly things like turn the soil or strip it naked (with exceptions, and covering it as fast as possible).
When microorganisms work they will degrade the organic material and their byproducts will contain minerals, vitamins and other substances soluble in water that the plant can take in right away. Some will be adapted to work right on the root system, some will be around going about their business. Usually plants release substances to the ground that will help their "team" to have a comparative advantage over the others. They also pass information. For example, trees make networks with the help of fungus, in such a way that some forests have more connections than the human brain, and essentially can act as a whole organism.
Preparing the planting beds
If you start with a **good enough soil**, to have health happy plants in our different spaces we need to cover the planting space with at least 5 cm of compost and 5 cm of dry leaves or straw. It's important that they are layered and not mixed. We are going to do this every year (keep piling up on top).
This is the most straight forward method. For anyone who actually gets to do it and depending on the size of the plot, it's also not so easy to accomplish.
Some people just add straw once the system is established (lots of it, if you follow Ruth Stout advice), and others use chipped full trees (this is the Back to Eden method) https://www.youtube.com/watch?v=GNU8IJzRHZk https://www.youtube.com/watch?v=gWkgU9mORt8
If you start with **compacted soil**, you will need to break it deep with a pitchfork to create spaces for air pockets, before adding the compost and straw (or dry leaves, or...).
if you start with **sandy soil**, you will need a lot more organic material. Think hugelkultur or lasagna gardening (more about this later).
As I mentioned in another article, a **hugelkultur** starts with wood, and covers it with dirt, compost and straw. If you have wood laying around, a hugelkultur cold be a good option, because it gives fertility for several years.
In any case, if you can afford to wait, you could simply cover the spot with organic matter and forget about it until the next season.
As you see there are different methods, and I didn't even mention my favorite one: lasagna gardening. Yet they all go after the same goal. Let's create an environment where there is soil already ready for the plants to feed, enough microorganisms to help out and food/shelter so they keep reproducing. covering the soil also provides an environment that retains water without getting soaky and gets rid or at least diminishes the competition to our plants.
With any of these systems we are going to prepare our seedlings in a different area and introduce the plants when they are already of at least 15 cm in size. We are going to open up the cover and plant on the compost, then close the cover around, and water to settle.
How I do it
I don't claim to have the best method around, but this is what I do and it works for me. I use an adaptation of the lasagna method.
Here is the situation, when I started my beds I had very healthy and tight grass and weeds. So I chose a method that would allow me to cover it up.
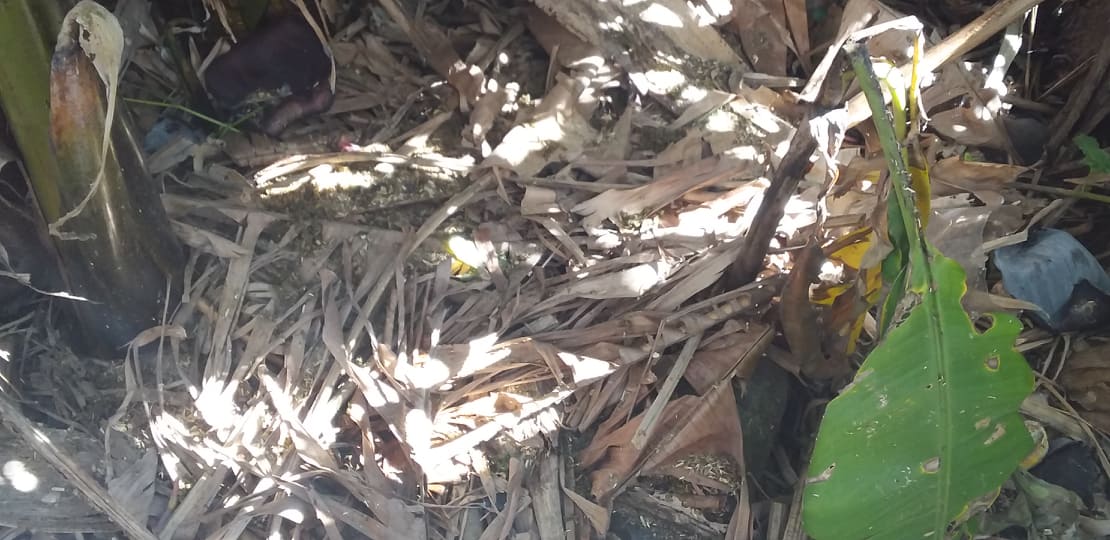
The lasagna method starts with paper or cardboard. These have to have no color and preferable not glue either. Instead of this I start with banana trunks cut open and separated in their folds. As I said here, banana trees are the cornerstone of my garden for different reasons. This one one of them. The idea is to make it very hard to the initial plants to keep thriving. https://noise.cash/post/05m889vfmg6x
The second layer is unfinished compost, this includes rabbit manure, kitchen scraps, wood and tweaks, the compost that is only half way done, etc. This is food for the next generations of microbes and a good source of nitrogen for our plants.
Third layer is good soil/compost. This is the soil where we are going to plant. It has to have enough water soluble nutrients ready and the microbiology.
Finally, the cover. Again I use my banana trees, this time the dry leaves cut in little pieces. In places where I want it to look fancy, I use red woodchips that are beautiful, a bit expensive too. This provides cover to the soil, it makes it difficult for plants we don't want to establish, and in time it's a source of carbon, with is vital for our plants.
The cherry of the cake in my case could be considered controversial. (Have you seen those stunts where they say: kids, don't do this at home? You've been warned.) I use Himalayan salt to make sure the whole range of micronutrients is in my soil. How much? Just a tiny pinch in places away from where my roots will be. With this, a bit takes us a long way and if we use too much we can mess up big time. When I have access to ocean water I definitely prefer it over the other one. I use the pink salt because I don't completely trust that sea salt is really sea salt, and have no access to the ocean in my location.
Thanks for reading.
All comments are more than welcome. :)
Images: stock photos from Canva.
Designing an edible garden part 4: mapping the soil
Sometimes when zoning a garden we have different candidate placements for the same function. Even if we don't, before we start digging it's a good idea to see what nature is telling us. https://read.cash/@Elearah/designing-an-edible-garden-part-3-zones-3dd37a2b
How are we going to read the area? Looking at the plants that are already there.
In part 1, I mentioned this already, in the last section: What's already in it. But at this stage of the design it's time to give a deeper look at it. https://read.cash/@Elearah/designing-an-edible-garden-what-to-do-first-199d6503
The different species that appear will provide us information about the quality of the soil, it's consistency and it's pH. And this information will help us choose and amend the different sections for better yield and long term success.
Compacted soils
If the soil is compacted, you are going to see taproot species, like dandelion or chicory. This is how nature opens it up. Compacted soils will make plants work extra hard to develop the root system and this can hinder the development of some plants like tomatoes.
What to put in compacted soils? Taproot plants, like carrots or turnip. Now... don't expect nice looking roots if you do, they are going to look very funny, but be edible anyway. And they will help loosen the soil and open the door to plant other things in the future.
Compacted soils are usually the result of leaving dirt exposed, so it might need to be seeded with microorganisms using compost black soil and cover.
Clay soils
Clay soils have poor drainage, and have a tendency to be saturated if it rains and caked if it's dry. They can look compacted, but they also look more brown than grey. On the bright side, they are likely to be high in nutrients.
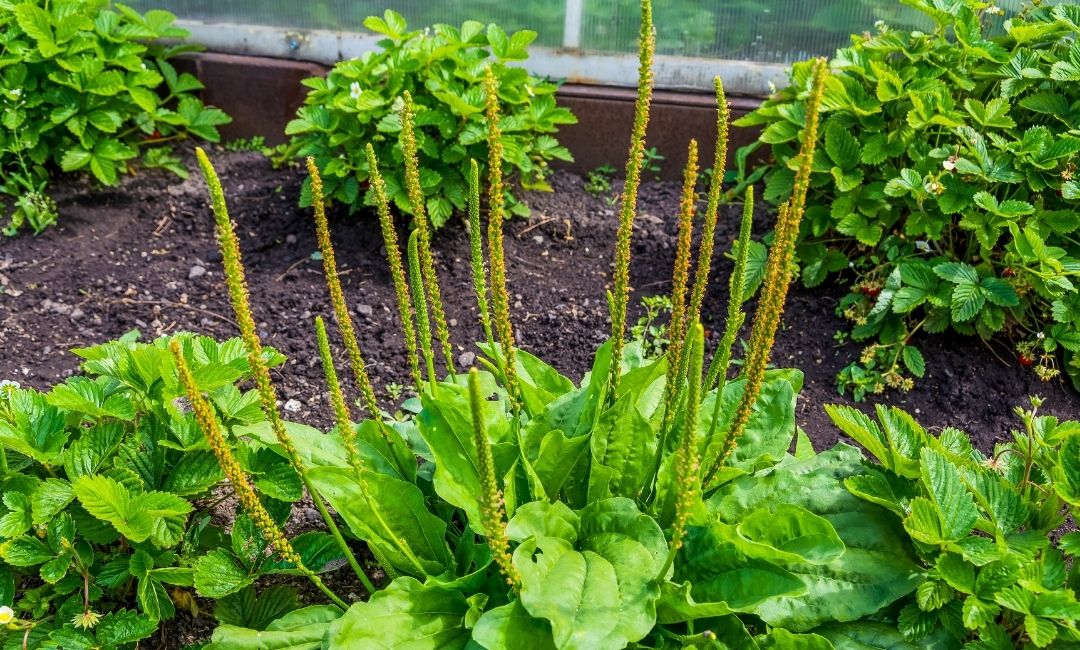
If you see plantain or nettle, you might have clay soil.
What to do with clay soils? That's a good place for raised beds or hugelkulturs. This way instead of having rotten roots, we have self watering beds.
Another good thing to do in an area with clay soil is a water reservoir.
Sandy soils
Sandy soils have poor water retention, and oftentimes are also poor in nutrients. Not a nice combo.
If you have a sandy soil you are going to see draught resistant plants. Yarrow and sorrel for example can appear in these conditions.
If you like cactuses or succulents, this is your spot (amending the nutrients if needed). Especially if it's shady. These plants are not only beautiful, some are edible or have edible fruit, they are easy to propagate and they are in high demand. So it is a good way to transform a problem in a solution and have, maybe, an additional source of income.
The idea that in each problem lies the seed for a solution is in the core of permaculture.
PH and soils
Good soil is pH neutral. Some plants can grow in off balanced soils, but ideally we strive for a pH of 7. The solution for both low or high pH is the same: compost and cover. The soil tends to balance itself when it's alive.
For example, if you have a compacted soil, chances are it will be also off balance pH-wise. So if you see dandelion, you can strongly guesstimate it will be acidic (low pH) and if you see chicory it will likely have high pH (alkaline).
There are pH test stripes to have a better look. And also other tests like adding vinegar to one sample dissolved in water and sodium bicarbonate (or baking soda) to another. If the one with vinegar sizzles, it's an alkaline soil, of the one with bicarbonate sizzles it's acidic. Essentially we are making Redox reactions (have you ever mixed sodium bicarbonate with lemon? same idea).
Nutrients and soils
Rich soils can be seen right away, black dirt, tight vibrant green cover. This means that the nutrients are there and the "gut flora" to digest it too. Plants need three major nutrients: Nitrogen, Phosphorous and Potassium (the famous NPK) and a myriad of micronutrients. Plants also need and create symbiosis relationships with a wide variety of micro-organisms that predigest the material in the soil for them.
If you see chickweed for example, it's a sign of rich high in nitrogen soils.
To fix nitrogen in the soil nature uses, and we can use too, legumes. Legumes promote the development of rhizobacteria, which are the nitrogen fixers of the system. So if you see clover the soil is being repaired and ready to plant.
Clover and other plants of the family are great for paths, or to seed in times we let land rest. legumes are an important part of seasonal planting and rotation. We will get there some other time.
Conclusion
So, when you are going to choose what to put specifically in each spot in your different zones, give a hard look at the plants that are already there, try to identify them and see what information about the soil and conditions are giving you.
If you made changes in the water flow, the information you have now will change as the system has an optimized access to water, but still this is really important information.
Also remember that many "weeds" are actually edible and make great crops. They are high in nutrients, resilient and self seeded. Seriously, what else can we ask for?
Thanks for reading.
All comments are more than welcome. :)
**References:**
https://www.almanac.com/weeds-indicator-plants
https://www.growveg.com.au/guides/what-your-weeds-are-trying-to-tell-you/
**Images:** Stock photos from Canva.
Designing an edible garden part 3: zones
So, now that we have the main topology of our plot in paper, and we added the water flow, we can think on what to put where to serve our needs. We are ready to introduce the human element. https://read.cash/@Elearah/designing-an-edible-garden-what-to-do-first-199d6503 https://read.cash/@Elearah/designing-an-edible-garden-part-2-guiding-the-water-b02ea718
This in permaculture is called zones.
Here is the idea behind it: we are going to organize our garden in terms of the time we need to spend on it, and specially how often we need to go there. Parts of the garden that need more tending are going to be closer/more accessible, and those parts that don't need tending will be the furthest.
Middle size plot
So lets go back to this concept of a middle size plot we talked about previously. If we look at the page with the design, we still need to establish accessibility of the different areas.
**Zone 0**
Zone 0 (zero) is the home place in the plot. If there is a house, that is Z0. If there is no constructions yet, it's the place where we plan to put it, or the parking space.
**Zone 1**
Our kitchen garden will be Zone 1, that is where we go every day to collect veggies and herbs for cooking.
**Zone 2**
Zone 2 is about places that we need to tend every day but we don't want necessarily to see from our kitchen window. Elements in Z2 can be a greenhouse, a worm bin, a chicken coop, rabbits or any small animal that need regular tending.
Now these have their own particular needs for growing healthy and happy, so we need to find places in our plot that are close enough and have the proper conditions of water, soil, wind protection and light. We need to make sure they are close enough (preferable at a walking distance) and have an easy path joining them with Z0.
**Zone 3**
Zone 3 is where our food forest is located. A food forest is similar to an orchard, but it maximizes the space for growing food using the five levels of the forest: ground cover, bushes, small trees, big trees and vines. Ideally Zone 3 doesn't require much work after established, and for the most part we go there to harvest. It requires seasonal work to control and amend.
In Zone 3 we will also have a composting area (a general one, not specifically a worm bin), and maybe a shed for tools and storing wood. If we have chickens we could do a mixed system having them free range in some areas, so the chicken coup could be located in the transition between Z2 and Z3.
**Zone 4**
Zone 1-3 are in general for personal use. In Zone 4, we have pastures for bigger animals or it can also be a cash crop area. We can also have a semi managed forest for lumber, wildlife and for harvesting wild mushrooms.
**Zone 5**
Zone 5 is an untouched area that will be the reservoir of healthy undisturbed soil ecology that we can harvest for our compost piles. It's also the place where we learn about the way nature resolves situations and issues in our area. It's a powerful school.
We need easy access to all the spaces, and in some cases we will need roads and bridges. make sure all that is in the design. It will save a lot of pain down the road.
Small plots
If are in an urban area and have a house with a garden, we still can zone it. Everything that we will need daily has to be the close to the kitchen door and the trees forming our fruit forest will be further to the back or the sides of the property. We could leave an area for the birds so they don't attack our fruits and veggies.
Zone 5 will possibly be outside the property.
Son now that we understand our zones, we can go back to our drawing and select what area will be what. We need to make sure each area will have all their needs met. It's an interesting puzzle and very rewarding when we manage to put the pieces together.
Now we are ready to start selecting the species for our plot, and get the hands dirty.
Above all... remember this is a cocreation process where we learn on the go. We do all this to reduce mistakes, but mistakes are unavoidable, so don't let doubt stop you at this point.
Happy gardening!
Thanks for reading.
All comments are highly appreciated.
Images: stock photos from Canva.
Designing an edible garden part 2: Guiding the water
Once we look at the plot and have a fair drawing of the topography, the light, wind and how the water runs, we get to the second stage. https://read.cash/@Elearah/designing-an-edible-garden-what-to-do-first-d15611ce
In this second stage we will choose how to modify the topography so *water moves slowly and get to the places we want*. Designing the water flow can be very simple or very complex depending on the size of the garden, the initial material, our imagination and the budget.
(Don't run to dig trenches after reading this, we still have more designing to do before touching the land.)
Middle size plots
Lets suppose we have a plot off the grid with no rivers or streams crossing them, and only rain water to serve our purposes.
In this case we will have to create the whole irrigation system for the plot. To do it we go to the drawing of the topology and locate the higher point. Exactly on that point we will create our artificial lake.
Ok... here is where I said it can be as complex as we can afford. The lake can be a real lake, a big construction or it can be just a small hole made with a kid's shovel. From that top point we will create a swell that will meander along our land en-contour--that is perpendicular to the slope of the ground. If you are not familiar with the idea, think on on someone skiing, if they go in a straight line they go dazzling fast and if they go in zigzag they go slowly. We want that effect, to slow down the water as much as possible so it has time to sink in the ground before leaving the property. The best proposed system I've seen so far is to do it en-contour.
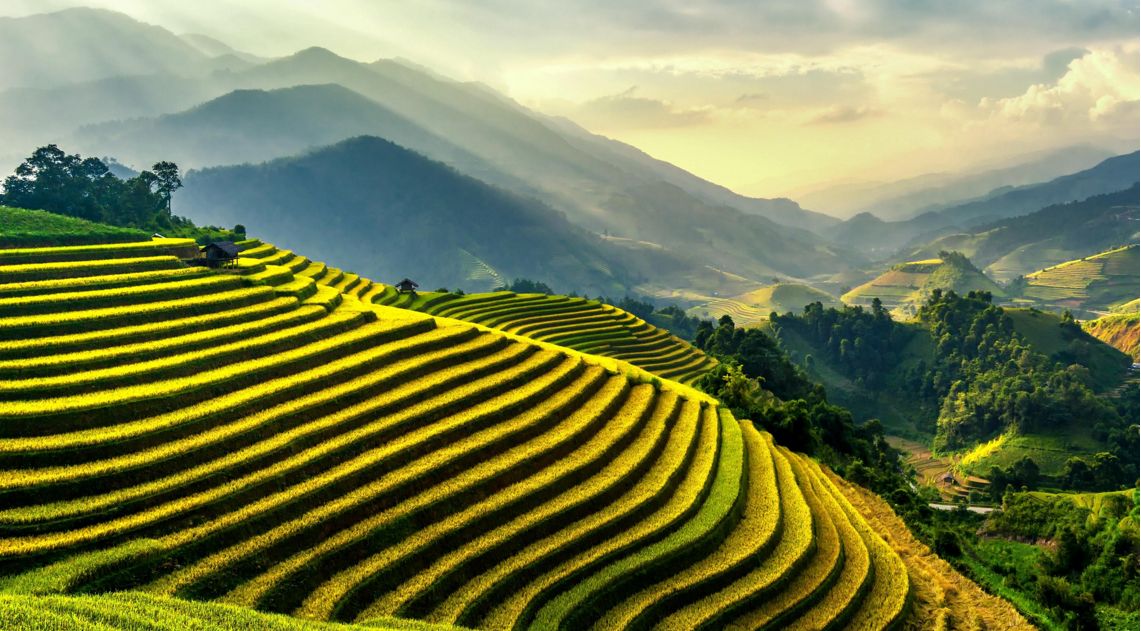
This is an adaptation of an old technology. I'm sure you have seen at least photos of terrace farming.
Two things to consider here: you can do swells by digging or adding material. Both options have the same effect.
The other important element is how to connect the different trenches. Ideally we want one to fill up before the water goes to the next one, so we have to open connections between one and the other in such a way that a whole swell fills in before letting the water move on. The most efficient way I've seen so far is at the extremes in zigzag and at a higher level from the depth of the trench.
If the land is big or it has many "hills", we can make more of these artificial lakes in key places.
At the bottom of the property we will collect all the water that arrives there in a circumvent sink, before letting the excess water leave.
This system has three key elements: it has a reservoir of water at the top, it has a reservoir of water at the bottom, it forces water to move slowly and get absorbed by the ground as much as possible before leaving the property.
Some people add to this pumps that will take water from the bottom reservoir to the top one in times of draught.
Small urban gardens
If we have a small urban garden we can think at first sight that this will not work. Actually it does. We can still make swells to collect water, we can have one or more ponds as part of the design and we can and should force the water to move slow to avoid erosion and keep as much if this vital element as possible.
Another important thing to do in an urban setting is to collect roof water. Whether there is municipal water or not around, rain water is always the best option for our garden.
What to do once we have our swells?
Now, if you read my article Black gold is not oil, it's soil, and maybe if you didn't, you might be seeing a contradiction here. I said that the soil had to be covered to protect it's living force, and now I'm proposing to just cut through and make a mess of things. https://read.cash/@Elearah/black-gold-is-not-oil-its-soil-dc606aeb
True. There are many ways to do what I said and still protect the soil. One is to cover it immediately with organic matter-- straw for example or garden clippings. The second is to seed it with fast growing easy to remove plants--clover comes to mind but each area will have it's best combination. The last option I'm going to propose here is to make the swells not by digging but by going high around it. An example of this would be to use hugelkulturs.
Hugelkulturs are planting structures based on wood and organic material covered in soil and the soil covered by straw. These structures have amazing water retention abilities and release nutrients at different speed, not needing amendments for long periods of time, in some cases up to ten years.
Now. We are still not ready to start digging. First we need to separate the plot in zones. That will come next.
Thanks for reading.
All comments are highly appreciated.
Images:
Img 1: Photo by **thanhhoa tran** from **Pexels** https://www.pexels.com/@thanhhoa-tran-640546?utm_content=attributionCopyText&utm_medium=referral&utm_source=pexels https://www.pexels.com/photo/rice-terraces-1462892/?utm_content=attributionCopyText&utm_medium=referral&utm_source=pexels
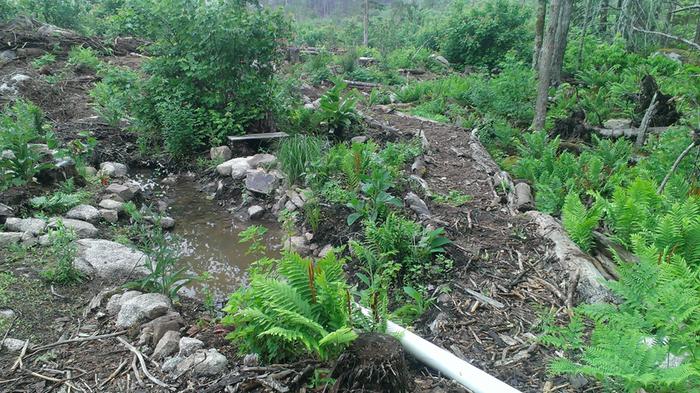
Img 2 and cover photo: taken from the Pearmies forum. This thread: https://permies.com/t/43055/good-pictures-hugelkultur-beds-article
Black gold is not oil, it's soil
The present agro-industry practices have to go. Every time I see a row of lanky plants on naked soil, I just can't believe it. It's wrong in so many levels that it's hard to think how such idea could've even been conceived.
Civilization (which means these practices *sigh*) is said to have started in Mesopotamia, which was located by the Euphrates river about six thousand years ago. It was supposed to be a wonderful place, the land of milk and honey. Where is it now? Oh yes, Irak, a desert.
How could it happen? If you read my previous article: "Designing an edible garden, what to do first" (and possibly if you didn't) you might have a fair idea of what happened: erosion. https://read.cash/@Elearah/designing-an-edible-garden-what-to-do-first-199d6503
Top soil is the most valuable thing in the world for us because it supports life as we know it. But not all top soil is made equal. The soil needs to be *alive* to support life.
How do we know if it's alive? Simple. It's black. Black soil is spongy. It holds the right mixture of water and air, and it's full of microbial life.
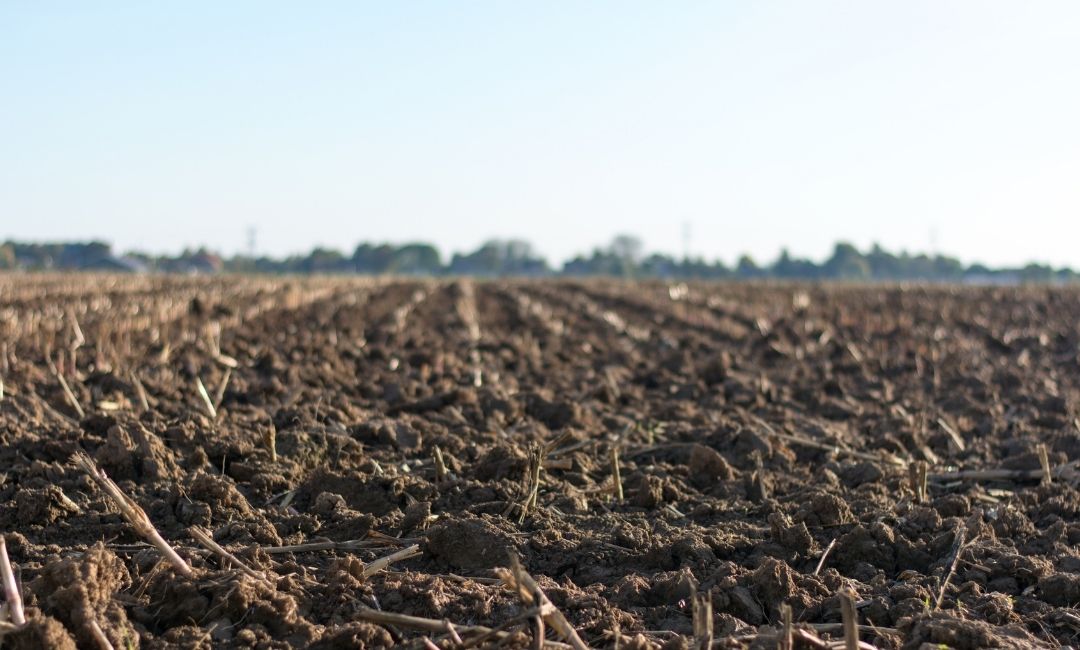
What happens when we take out the vegetation cover of the soil? The sun kills the microbial life (the soil becomes grey, hard and brittle), water and wind moves the exposed dirt away. *Uncovering the soil, turns gold into dust*.
The role of microbes in the soil
Realizing why the microbes were important was another *duh* moment for me, transformed into *aha* as the complete scope of the information sank in.
Here it goes: Plants don't have stomach, nor intestines.
There I said it. Stated the obvious. Now what does it mean?
it means that the roots will only be able to take in nutrients dissolved in water and of the size of the absorbent hairs of the root system. And what takes care of extracting the nutrients from decaying life and making them available? Microbes. So they play the part of the gut flora.
This is why the salts used in agro-industry are water soluble. So the roots can take them in directly, without the need of bacterial help--which by the moment this is required has been for the most part decimated.
Now, plants are fairly self-sufficient beings. They only need around fifteen nutrients to make things happen. We, on the other hand, need a lot more nutrients between minerals and vitamins (around 90 give or take). These are essential for the proper function of the body and we do not produce them. So, when the plant is in a great soil with a rich biology, the soil will have available the minerals that the plant needs and the ones that we need. When available, plants take in additional nutrients (different plants have different preferences) and they go right to us when we eat them. You probably saw charts about what plant carries what mineral, etc. Well, that's not necessarily true. Spinach can have a natural ability to carry iron, for example, but if it's not in the soil, guess what? it will not be there.
I realized when I learned this that agro-industry was essentially a scam. Because plants treated with artificial amendments (with exceptions) will not contain the nutrients that the plant is able to carry and pass to us, so it's fake food devoid of the nutritional density we really buy it for. *It's the equivalent of buying a gold ring that it's gold on the outside and lead in the core.*
Wrapping up
To have a healthy beautiful garden, we need to dedicate thought, time and space to grow a healthy soil. A healthy soil will give a plentiful bounty of beautiful plants that need little tending and pass that health to us.
Thanks for reading. :)
All comments are more than welcome.
Imgs: stock photo from Canva.
Designing an edible garden, what to do first
Before cleaning the plot, before getting a single plant, we need to have a long hard look at the place where we plan to put the garden. It can be big or small, it can have constructions around or be completely on its own, it can have plenty of life already or be a deserted area.
What are the first things we need to look at and pay attention if we want a garden that can live on its own and require little maintenance once established?
Are you ready?
(It's going to feel more like a duh moment than an aha moment... but bear with me) We need to pay attention to:
The land, the sun, the water, the wind and what's already in it.
Sounds obvious, right? But what does it mean in practical terms?
The land
Here's the drill... water travels and when it does, if the soil is not kept tight by life (and sometimes even if it is) it will be carried away. We don't want that. The top soil is the gold of our land, we want to keep it and we want it to grow as much as possible. We can never have too much good black fully alive top soil.
So the first thing we need to watch carefully is the topology of the plot. The topology is the ups and downs, the bumps and valleys. This happens in all land, no matter how small or big, there is always an inclination and water will move from some part to another. Otherwise, we don't have land, we have a lake.
So we take paper and pen (or color pencils) to draw our plot and the topology. We will later on have to come back to this several times. If the plot is big we might need special equipment or to hire someone. if the plot is small we can more or less eyeball it and wait for rain to see how water behaves, where it goes and how it does it.
The sun
We need to know, at least where the sun is coming from and where goes in the sunset. From this we will also need the extremes in the summer and winter solstices. The sun's trajectory will move between those points along the year. The solstice angles will be more or less important depending on how we are going to design the garden and if we are going to do seasonal planting or not.
If you want to keep it simple, just get the general direction of East and West to know how he sun will move along the day.
Why is this important? Imagine that you want fruit trees and you also want some flowers and tomato plants. Well, tomatoes need full sun for most varieties and the sun of the morning is always better. So if you put your trees on the east, you will cover the sun of the morning and waste all that precious energy.
If you already have landmarks, meaning buildings or trees you will not remove. Take your plot of the land and add the info about what patches have light in what timeframes.
The water
I already talked partly about water in the section about the land. Now we need to do two things: one is wait until it rains and really have a look at the streams that form, how the water runs, how fast or slow it moves.
Look for signs of erosion and figure out what is going on.
I can't stress it enough: we cannot lose top soil. Period.
The second element about water we need to look into is accessibility to it as a resource. We need to find out when and how it rains in the area, and any information about other sources of water (wells, rivers, roofs, etc.).
The wind
Wind can be a source of erosion. We cannot lose top soil and young plants are easily uprooted. So we need to gather information about the winds. Are they soft or strong? Are there regular or seasonal preferred directions?
If we are in an area with strong winds we will have to introduce fences in the design to protect our plants. The fences can be living fences. I'm not talking about building walls here, even when it could be a valid choice in some cases.
What's already in it
Nature's very wise and she knows how to move things around to enter the growing spiral of complexity.
So looking at the different species that are already colonizing the plot we will get information about many things, like the health of the soil, where water moves, if there is erosion going on, if there is water under the ground. Some of this information will be redundant with what we find out from the study of the other sections. Some will be new.
Learning to stop and watch is an important skill. There is plenty of information that will help us take decisions about how to use the plot both for our and Nature's benefit.
Thanks for reading. :)
All comments are more than welcome.
Images: stock photos from Canva.
The Second Energy Revolution, can we make it happen?
In 2010 I was very interested in the concept of empathy, and read the book "The empathic civilization" by Jeremy Rifkin. It wasn't what I expected. This was the first time I encountered the idea of global warming--now called climate change.
I bought the idea, hook and sinker, and did what I always do in cases like this, search for data to corroborate it. What I found was shocking to say the least. If what I found out is right, we were not going towards global warming but we were late for the next glaciation according to the geological data. And the climate evolution of the planet was tied up to the sun's activity, not our tempering on the surface.
Now, if we were going to higher temperatures, we could be in bad shape, but high temperatures and high CO2 means lots and lots of food around. On the other hand, a glaciation means that the whole most populated and rich part of the globe would have to relocate to the tropics or perish. I'm not sure if and when something like this can happen, but it gave me the hint that like it happens with the financial system, things are fishy to say the least.
In all these years I've seen in dismay how the whole climate change agenda was pushed and it always had the same angle: asymmetric restriction. But nothing to really solve the problem as a collective if it were true--I mean, first thing you have to do if you are worried about climate change is to stop using private jets, don't you think?
Now lets talk about the First Energy Revolution. When was that? it was called the Industrial Revolution. But industry was a side effect. The core was energy. Energy is in the heart of every movement, and it's in the core of every transformation that we make around us to serve our needs.
Crypto is distributed systems of currency, and currency is a means to make things happen, so we can equate it with a form of energy. Now, under the restriction threats of the climate change agenda, we might need to take it a step forward and make the whole energetic grid distributed. And like with crypto it has to be a bottom up effort because those who control energy are not going to give it up on their own.
I don't know if climate change is real or not, I don't know if we are heading to the Tertiary and play with dynos in the back yard or to a glaciation. What I do know is that access to energy is the big equalizer.
Every time we open a faucet we could be generating electricity, every time there is some wind, every time we start the stove, not to mention the roofs and the sun. And this is with technology that it's well known at this time. I'm not going woohoo on free energy or anything like it.
In crypto we need electricity to function. Finding distributed sourcing of electricity seems to be a logical next step. Distributed energy is the Second Energy Revolution.
As the book says, we need to think global and act locally. Share experiences and support those people doing the hard work. For example there are great efforts into solid state batteries, non traditional generators, printable batteries, and the list goes on. Yes, some of the people doing this can be called crazy, but if there is a grain of truth it's worth looking into it.
Thanks for reading. :)
All comments are more than welcome.
Images: stock photos from Canva.
Zero KM food, what is it and why it's important
Many high end restaurants have their own local organic gardens nowadays and many top athletes follow a seasonal diet. Why is that?
Well, for many reasons. Some obvious some not so much.
With the improvements in transportation and global integration we are used, and take for granted, to be eating bananas from Ecuador, Swiss chocolate and jam from Spain in the same meal. To eat tomatoes in winter and cabbage in summer. And the list goes on, but hopefully you get the picture.
With exceptions, we don't even know what is grown where and when anymore.
Don't get me wrong. I'm not complaining. Having access to the whole world is a great achievement. But it is also a problem if we want to do it all the time. It's a bigger problem if we are "forced" to do it all the time. It's a problem both for the environment and for our bodies.
Food is information. Plants produce phytochemicals to take care of business where they are and because they can't move they are darn good at it. If we eat a plant that is grown in the same location we are at, their reaction to the environment protects us too. It is important though that the plant is not tinkered with added chemicals because they also create a reaction that will be passed to us.
So this in a nutshell the secret about eating local and in season: the local plants develop what they need to face the environment and they pass that to us.
If, on the other hand, we eat food from all over the place, we create confusion in the body and confusion derives in des-ease. Of course this doesn't mean we can't have that chocolate or the jam or the banana, it just means that they should be the exception, not the rule if we want a healthy life.
Zero Km food is taking local to the extreme. It's a system where most of the food should be produced within one kilometer around. It is a bit extreme and I'm not sure how possible it is for most of us, but it's certainly an interesting concept and one we should strive for if we want to design a world where we and the environment see eye to eye.
It's the most efficient solution for the environment. Think on the transportation, plastic, space for storage, refrigeration and chemical products due to the artificial environments of monoculture crops... all that solved at the same time. Think on the necessary rate of construction vs non construction spaces it requires. Think on how beautiful it could be to walk around.
This ties with the idea of edible landscaping in public places from my previous post and of course with permaculture. https://read.cash/@Elearah/edible-landscaping-can-we-recreate-eden-964faa6b https://read.cash/@Elearah/whats-permaculture-and-why-its-a-good-idea-e1982a1b
In a nutshell, zero km food cares for the environment, cares for people and fair share enters in the design per se. I firmly believe that having local food available is essentially both a human and nature rights.
Thanks for reading.
Al comments are more than welcome.
Imgs: stock photos from Canva.


Edible landscaping, can we recreate Eden?
I live in a relatively small city with plenty of trees on the sidewalks. They all have something in common: they are for the most part not fruit trees. I lived in other places too. And noticed the same thing. Most of the common places have "ornamental" plants, meaning chosen for looks and not to be useful.
And don't get me even started on the yards and lawns. Is is there anything more useless than grass? (we are not cows, you know?)
If we are going to start thinking how we can improve our relationship with the planet and our own health, that's a great place to start. Making our surrounding into food production areas so we don't need to keep taking space from nature to feed ourselves. I'm not talking about rows of mud. Edible landscaping can be very beautiful.
I know, I know... too much people to feed? Not enough space? I never said it was all contained, though maybe it could. But it's a start. Trees are pretty awesome, you have those bearing fruit, yes, but also for oil production, and for beans, to make baskets... (not to mention that they are temperature equalizers) can you imagine how much we could develop local industries if we had all sidewalks, parks, roads and train rails with edible/useful plants around?
Can you imagine how we could increase the general health if we had nature's first-aid kit right at our fingertips?
The main question is: why not? Why don't we do it? Why haven't we done it?
The answers I have received for these questions are:
1) it would attract wildlife.
2) it will hurt business.
You know what? If we consider there are people hungry in the world, and even more people eating junk with reduced access to healthy food, these are not strong enough reasons in my book.
Can we put priorities in the right place?
I think it's all it takes.
Thanks for reading. All comments are more than welcome. :)
Image: Photo by **Maria Orlova** from **Pexels** https://www.pexels.com/@orlovamaria?utm_content=attributionCopyText&utm_medium=referral&utm_source=pexels https://www.pexels.com/photo/lush-green-trees-near-wall-4946845/?utm_content=attributionCopyText&utm_medium=referral&utm_source=pexels
What's permaculture and why it's a good idea
There is plenty of talk about the environment and how we are not doing things the right way. The solutions though, don't seem conducive to a happy or even efficient way out of the mess.
For the most part the main proposals reduce to restriction in different ways. In consumption via taxation, or CO2 points in the use of credit (Mastercard is testing this). In travel, whether it is with protected areas or green passports. And the list goes on. They all have the same theme though: lets impose coercive rules and regulations that limit expansion, while keeping the destructive behaviors untouched. The natural tendency of every living being is to expand. Putting a cork to the situation will only make it explode.
On the other hand, it's clear that expansion unchecked is invasive, and Nature has embedded a system of checks and balances that always resolve the problem (often tragically for the offender).
So to self-impose restrictions before falling off the cliff seems reasonable enough. But doing so without changing invasive behaviors by others more effective is the reasoning of a very limited mind. If we think further, it becomes clear that said behavior is counterproductive.
Fortunately for us there is a way to solve the core problem and avoid tragedy.
The keyword is cooperation.
Cooperation is in the heart of permaculture. Cooperation with the environment, but also with other people and the community.
The 3 core principles of permaculture are: Earth care, People care, and Fair share.
The word Permaculture was coined by Bill Mollison and means Permanent Agriculture.
Permanent agriculture seeks to develop systems that allow for long term (ideally unlimited) inhabitance of a place.
For fifty years, starting from the basic ideas of cooperation and observation, he first and the people he trained later on developed systems that would allow humanity to move towards the next level in evolution: from children who expect others to solve their mess to adults who nurture themselves and the environment.
This is in the core of the conversation about freedom, in which crypto has an important role. Children need supervision because they are not able to take responsibility of themselves. Adults can exercise freedom because they have developed responsibility--please note that is is not necessarily attached to age.
Is permaculture the answer? I think it's a possible answer. One that is good enough so solve our present situation and it's way way better to what governments have proposed so far.
Thanks for reading.
All ideas and comments are highly appreciated.
Img: I made it in Canva.
 @Elearah