 @EatingTasty
Oops, on the Mount.... https://youtu.be/PcaCISyT-X0 **BURN IN HELL, YOU RUSSIANS!**
Joined 5 September 2022 · 35 posts
EatingTasty
120 KT
0 KT · $4.62 received · 0 KT · $6.11 given
@EatingTasty
Oops, on the Mount.... https://youtu.be/PcaCISyT-X0 **BURN IN HELL, YOU RUSSIANS!**
@EatingTasty
Iran, Belarus, Russia - who will be overthrown first? Ukraine is lucky with dirs (sarcasm). Today one (Putin), who has been in power for 22 years, openly hates Ukraine and is doing everything to to destroy it. The second one (Lukashenko) is the self-proclaimed president of Belarus, - he hates Ukraine diretly and helps in every way to destroy it. The third dictatorial regime that seized power in Iran just before The third dictatorial regime, which took the power in Iran a little bit earlier than two previous "mothballed" grandfathers: it doesn't care what is going on in Ukraine, it just lends weapons and willingly helps the first two dictators to destroy Ukrainians, without any emotions. Only business, and business on the blood of Ukrainians. Let's "open the curtain" a little bit and Let's see which people will be the first to overthrow their dictatorial power, like the Ukrainians did Ukrainians with Yanukovych😉 Belarusians? Russians? Or the Iranians? Belarus. In the first presidential elections in 1994, Belarusians gave 80% of the vote to Alexander Lukashenko, director of the Gorodets state farm. Gorodets sovkhoz director Alexander Lukashenko. In the hope that a strong, knowledgeable leader could develop and strengthen the country. And in the 2020 elections. they drew the same 80%. Only this time instead of hoping for of a better future the Belarusians got riot police batons, tear gas tear gas, stun grenades, and mass detentions! The scenario received a slightly The scenario developed a little differently: the slide towards dictatorship was slow and gradually. В In 1995, Lukashenko initiated the first referendum, which, among other things. the question of changing state symbols and granting Russian as the state language. In '96, Lukashenko demanded a referendum to to further consolidate his power, which almost cost him his impeachment. But Moscow "bailed him out." When Chernomyrdin came to negotiate. Chernomyrdin was able to wrap the opposition around his finger. A referendum was held and, based on its results, the report of the presidential term was restarted and also increased by two years. The powers of the president were significantly (That's probably why all dictators so much love to hold referendums). Opposition leaders tried to... to protest, but the public's silence and its and its belief in the need for a firm hand, laid the foundation for a dictatorship. There were rallies of course, but it was spring and it seemed that planting potatoes was more important. Who knew that in a few in a dozen years they would be "planting" the Belarusians themselves much more often. The epiphany came in 2020. mood among the people began to gain strength and it was no longer possible It had already been impossible to win the elections fairly. The government did not "reinvent the wheel: First, they eliminated candidates who posed a threat to the regime. Tikhonovsky and Babarik were arrested from Tsepkalo had his signatures rejected, and Svetlana Tikhanovskaya was only admitted because chauvinist Lukashenko frankly did not believe a woman would not be able to take his place. We will not know the real results of the election of August 9 We will never know the real results of the August 9 elections. The ballots have been destroyed and large-scale The ballots were destroyed and the large-scale falsifications began at the level of at the level of district commissions. Lukashenko, who is now more and more often is more and more often called not his father, but a cockroach. On August 9 . August 9, as on other election days. the Internet was lying in the country, people went to the the center of their cities and the security forces responded immediately-more than 3,000 people across throughout Belarus, of which 2,000 in Minsk 2,000 of them were detained by the police. In the evening of 9 and on the night of August 9 and 10, Russia reached out to the potato dictator... to the potato dictator was extended by Russia - 1.5 billion... of Kremlin dollars for which chick-chick bought some more loyalty and promises of military aid has done its job. Protesters who disagreed or or sympathizers were beaten, imprisoned and forced forced to leave Belarus. The dictator won. The Belarusian people surrendered. They accepted The Belarusian people surrendered. They accepted the unelected president and kept silent. The siloviki suppressed their own people. Because they needed money. And what did the country get the country got in return from a dictator who's been who has ruled for 28 years? Lukashenko took Belarus virtually without debts. And at the time of his election in 20, the total debt of Belarus at the time of his election in the twentieth century, the total debt of Belarus was close to $45 billion. Batka is not discouraged, the Kremlin is feeding him. That's why the airfields airfields to the planes that are bombing Ukraine, Russian missile forces stationed there, that are shelling Ukraine, masses of damaged equipment is being repaired, the strategic Belarusian stockpile of weapons and ammunition. And the moment is not far off the moment when the mustachioed dictator will be billed the bill and take Belarus! For his debts! Alas fellow Belarusians, Revolutions of unfulfilled hopes always end in the triumph of the bastards. Iran. Iran didn't start helping Putin right away... it it waited for Putin to come to bow and they bent the Kremlin dwarf the Kremlin dwarf. Some Lavrov was asked to come to Tehran, they asked none of Lavrov, but Putin exclusively: they said he would come himself then maybe we will help. But things with the dwarf were so bad that he humbly biting his lip, he came anyway. Iran helped. Most likely because the big money was offered. After all 40 years under sanctions, every penny counts. counts. And also because they wanted to hurt the U.S.. In this, Ali Khamenei and Putin were the same on all points. So why Iranian authorities hate the West so much? Because Because Iran's previous government, which was overthrown in 1979 was directed at the West! Oriented In the 1960s and 1970s, Iran in the Western world was considered one of the most progressive!!! Of the secular in the Muslim world, the state was the most important foreign policy ally of the United States and Israel. Oil and gas are both a blessing for the countries possessing these resources and curse at the same time. Shah Pehlovi saw Iran's future in close cooperation with the West. Thanks to him, investors from the United States, Britain and Israel came to Iran. United States, Britain and Israel. He believed that Iran would become the fifth industrial power of the world. The economy was booming. The country was rapidly ...and the rights of women... of women. The way of life was changing. Many it frightened them, but the Shah was told what what he wanted to hear. Doesn't that sound like a familiar story? In 30 years in power, Muhammad Ali had lost his connection to reality. An entourage of of traitors and sycophants has greatly distorted what what was going on in Iranian society. Against the backdrop of the words of Ruhollah Musavi Khomeini who criticized the Shah and was forced to live for 14 for 14 years in exile, were a call to fight for their alleged values for their "Russian" or rather the Iranian world. The regime of Shah Pahlavi fell in February 1979 under the guise of escaping slavery. Ruhollah Khomeini returns from Paris to Tehran-- the revolution had won, but the hopes of the protesters for liberal development were quickly dashed. Musavi Khomeini managed to to seize the levers of power faster than the revolutionaries. They came to their senses and didn't even before they knew it, the country was under the country was under the yoke of dictatorship. In no time at all, his supporters organized the same notorious referendum in which an overwhelming overwhelmingly supported the Theologian's plan. The authorities closed in on the post of supreme leader in this chair, Ruhollah Khomeini sat in that chair until his death. В 1989 he was replaced by Ali Khamenei Ali Khamenei succeeded him in 1989, and he has been ruling the country ever since. to this day. Referenda, all power in one hand. We've seen this somewhere before, haven't we? There was a referendum. The Shah's special forces were quickly replaced by Iranian Hezbollah, the new regime changed the woman back into the chedra brought back polygamy, introduced separate and religious education. The order and the appearance of Iranians is monitored by the police. morals Islam is also about politics. So no matter what they say, no matter what politicians do is about Islam. Maksame, 22, was not apprehended by the vice police on September 13, 22 in Tehran for not wearing the hijab and died three days later, she passed away. And it was this death that triggered the start of the mass protests in Iran. A country that's been ruled by dictators ruled for so many years by dictators who, like Russia. like Russia, has been under sanctions - the common people have awakened!!! Today, rallies are taking place in about 100 cities in Iran. At first the protesters demanded an investigation and to punish those responsible for Amini's death. But now the slogans have turned into completely political. The protesters, for their part. for their part, reject not only the version of the events put forward by the authorities, but also the entire Iranian system of government. As in all countries with a dictator in power. a dictator, the first thing the Iranian authorities did was to crack down hard on the protests. the protests, calling them initiated. Chaos and terror in Iran well that coincided with Russia. In Russia it's all Biden's fault. Recently and for the first time from the Islamic Revolution. 1979 protests are supported state parties and some supporters of religious ideology. The protests have been accompanied by strikes at universities and there are increasing calls for... for regime change! The protests are becoming unmanageable and unlike unlike the Russians in Iran, they don't run away! Crowds from a single policeman, but bravely rebel against the armed forces reaction. Despite the brutal repression Iranians have once again come out to these government protests. Judging by the Videos posted on social media, the rallies took place in the universities of Tehran Isfahan and Hermanshak. The fierce fighting that broke out almost all over Iran are very reminiscent of Kiev! When beaten up by the security forces brought to the streets millions of Ukrainians and we all remember how disgracefully ended up having to flee. Yanukovich (former president of Ukraine who fled to Russia). Fleeing, of course, to Russia, a country that has become the epicenter of the world's dictatorship and which is always ready to offer a helping hand to criminals!!!! After all the people here are too petty and there's nothing depends on them. So we shouldn't be surprised if Pretty soon Chemenei will soon end up somewhere near Rostov on the Don. That is exactly how they plan to carry out their plans. 😞Dictatorial regimes today are united Against Ukraine. The dictators of Russia, Belarus, Iran are in are somewhat similar. But they are fundamentally different in one thing: the ordinary Belarusians- have been defeated defeated in their attempt to overthrow the dictator. Ordinary Russians accepted their own inferiority and gave their homeland to Putin. Iranians are struggling!!!! And the resistance is only is growing! And one would like to believe that this people will be able to stand up and show the world that a dictatorship can be broken! After all, so already happened in Ukraine! Glory to Ukraine! 🇺🇦
@EatingTasty
Iranian drones are used in Ukraine and that they are preparing sanctions United States in UN said that they are sure that Iranian drones are used in Ukraine and that they are preparing sanctions. The United States said at a meeting of the UN Security Council that it has no doubts about the origin of kamikaze drones, which Russia has been using massively against Ukraine lately, and it is preparing sanctions against Iran. The State Department: The issue of Iranian drones in Ukraine was raised together by the United States, Britain and France: "We expressed deep concern about Russia's acquisition of these drones from Iran, contrary to UN Security Council Resolution 2231. The U.S. began warning back in July about Iran's plans to provide UAVs to Russia for use in its barbaric war against Ukraine, and we now have ample evidence that these drones are hitting Ukrainian civilians and infrastructure. While Iran continues to lie and deny providing Russia with weapons for use in Ukraine, we will work with allies and partners to prevent Russia from transferring dangerous weapons. We will not hesitate to use sanctions and other appropriate tools against anyone involved in this process." The State Department adds that Washington will continue to provide Ukraine with extensive military assistance, including air defense assets, so that it can defend itself against this new threat. As you know, the Russian Federation has recently been massively using kamikaze drones for strikes against Ukraine, which experts identify as Iran's Shahed-136, while Russian forces use them as Geranium. Tehran has repeatedly denied handing over the drones to Russia. The White House considers Iran's denials untrue. Ukraine says that Iran's provision of weapons to Russia for a full-scale war makes it an accomplice to aggression and war crimes on the territory of Ukraine, Dmitry Kuleba calls to break diplomatic relations with Tehran. He also said that Ukraine is ready to hand over a "bag of evidence" to EU countries that doubt Russia's use of Iranian drones.
@EatingTasty
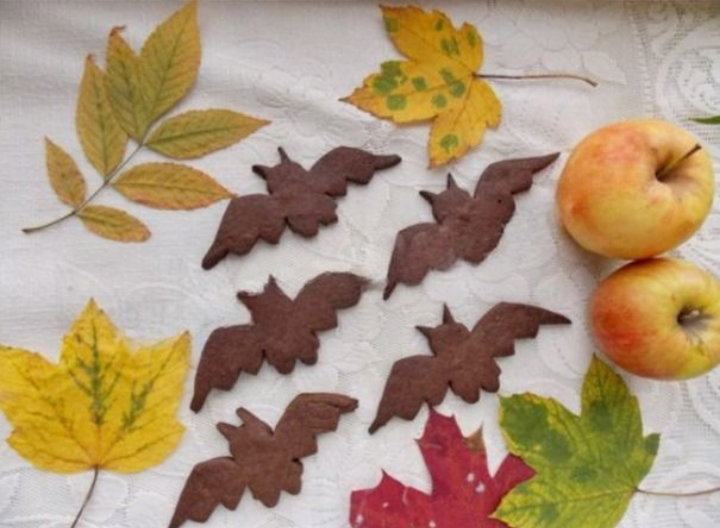
Halloween Cupcakes Bats Good afternoon friends! Let's bake some original shortbread cookies for Halloween! Fun, right? I assure you that there will be plenty of people hunting for such a treat! Very cute cream cupcakes with bats perched on them are a great idea for Halloween baking! The kids love the bat cupcakes, and they love not only treating themselves to such original sweets, but also making them! Making scary cute cupcakes is fun and absolutely not difficult. You need to bake any cupcakes for the base, sand cookies in the form of bats - such we did with you last year - and make a protein cream.🦇 It's about the same way you and I made spider cupcakes. It's a little easier, since the spiders are made with round cookies, and you'll need a mold for the bats. You can make it out of tin or print it out on a 3D printer. Recipe for simple cupcakes from what's in the fridge: Cupcake Dough Recipe. I recommend adding cocoa to make the muffins chocolatey! Although you could also bake pumpkin muffins, they would be very much in theme. The combination of pumpkin and chocolate, orange and black, is the most Halloweeny thing ever! Bats Cookie Recipe. However, you may as well put black cats on your cupcakes! And finally, protein cream. **Ingredients:** cupcakes; Bat-shaped cookies; Protein cream; *How to Make Halloween Cupcakes:* So, we've baked the cupcakes and cookies, cooled them, and made the cream. Here comes the fun part! We decorate the cupcakes with a puffy "hat" of cream, in which we put the bat. You can use the same cream to draw its eyes and a cute fangy smile. Or no less cute nose. You can make a whole flock of bats! The only thing left is to decorate the kitchen with pumpkins and make tea - and you can scare... That is, you can scare the housemates and guests! This is a delicious and beautiful treat that not only children will love, but adults as well. I made them for the Halloween holiday. Baking is homemade magic:) A house that smells like pies is cozy, warm, and welcoming. Let's cook with love and treat our loved ones! 19.10.2022 I thank God for his help in writing this article, and you, dear readers, praise him if your reading has been helpful to you. I want to know your opinion. If you are interested in my content,then I invite you to read my other articles: https://read.cash/@EatingTasty/how-to-make-lace-pancakes-d5834022 *Good luck to you readers* read.cash @EatingTasty
 @EatingTasty
Pros and cons of making money with cryptocurrency In today's environment, digital currency is becoming more and more popular not only as an investment, but also as another opportunity to earn money. However, not everyone is aware of the pros and cons of the cryptocurrency trading process itself. Below are most of the facts that every trader should know. ***Advantages.*** These include: ●Access to screenings. Any trader with sufficient theoretical knowledge is fully capable of creating his own coin. Of course, no one promises to find investors quickly. A special approach is needed to make it work. ●There is no inflation. Countless coins can be issued. And you don't have to worry about devaluation. After all, the exchange rate changes according to rules different from those of the state economy. ●Storage of personal data. You don't have to send personal information to anyone to make transactions. The storage of digital currencies and the creation of wallets is also anonymous. ● Amount of monetary transactions. No quantity control, so even large amounts can be transferred in one go. ● Level of security. Digital currency is more secure than fiat currency. If you configure your own wallet properly, it will not be easy to hack, and your cryptocurrency proceeds will be safe. You can even get help from an experienced trader you trust. ●These are the main advantages of working with digital currency. They don't just apply to certain coins, but to cryptocurrencies in general. ***Consensus*** These include: ■ No possibility of recovering lost assets. If funds are accidentally transferred to the wrong account, there is no way to recover them. If funds are lost or misplaced, the account can be returned to the sender at his expense. ■Lack of control by banking institutions. In other words, control over the funds is completely in the hands of the account holder. The only security is the digital encryption of the e-wallet. ■Complete lack of legal control. Most modern services do not accept cryptocurrencies as a full-fledged means of payment. This is due to the fact that it is not controlled by law. Therefore, the coins are still not used in the daily economy. ■ Risk of losing funds. Since cryptocurrencies are usually stored in a wallet or in an account on an exchange, there is always a risk of hacking and losing login information. Especially the password. In most cases, the trader will not be able to recover his coins. ■Frequent exchange rate changes. Traders' news feeds regularly contain news about exchange rate changes for some cryptocurrencies. The main disadvantage is that the drop can range from a few cents to thousands. Premature transactions therefore guarantee the loss of funds. ■Although these are mainly disadvantages, some traders see them as a positive. For example, the lack of control makes cryptocurrency transactions unlimited. To avoid other disadvantages, be careful when using cryptocurrencies and secure login credentials. ***Conclusions*** Regardless of which money-making option you choose, it is important to remember that the choice is up to the trader. Do not rely on the advice of others, but on your own needs, skills and impressions to choose one way or another. Each is useful in its own way. However, the risks should not be forgotten. Image
 @EatingTasty
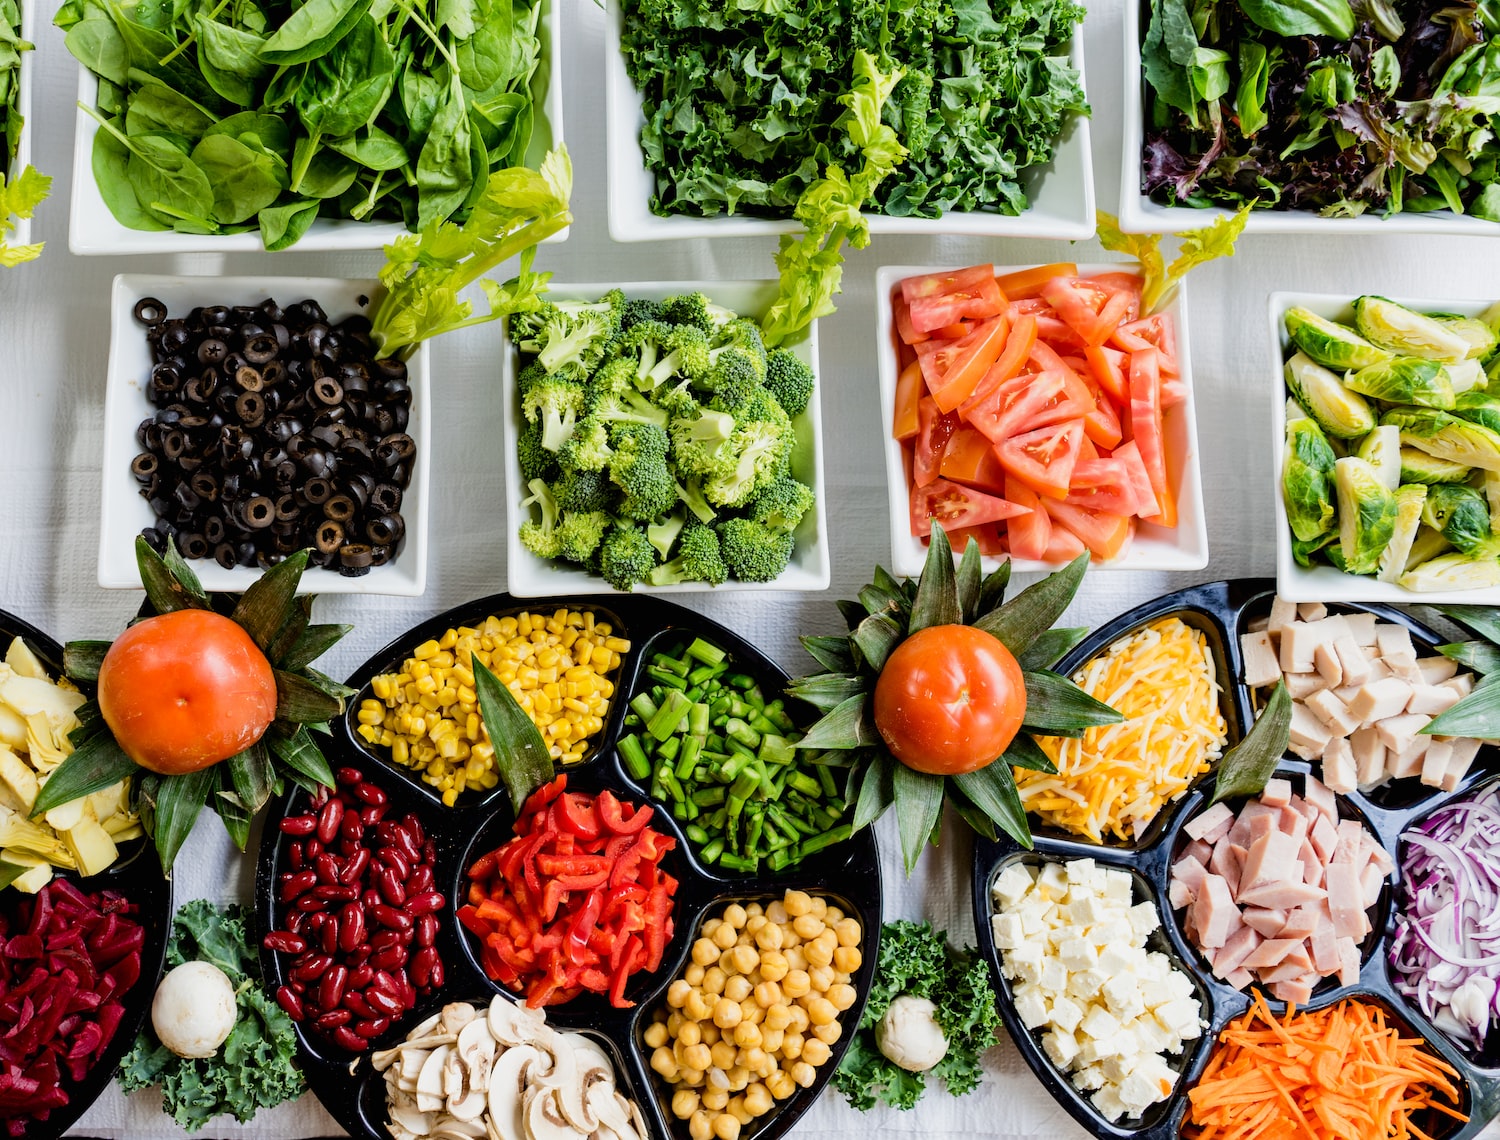
How to eat well on a budget When times are tough, nutrition is often not a priority. A balanced diet is a privilege for a peaceful life if you have the energy, time and money to cook and buy good food. What if those resources aren't available? What is a balanced diet? **Balanced diet** Includes essential nutrients (protein, fat, carbohydrates, fibre) and complementary nutrients (vitamins and minerals). You can use the rule of thumb to easily navigate the nutrients. It is a representation of an ideal meal where 0.5 is vegetables, 0.25 is side dishes, 0.25 is meat, fish, poultry. I'm not a particular fan of hard to find superfoods, I believe you can and should learn a decent diet from what is available in a store near your home. I think coconut sugar is optional, but it would be good to expand your food basket in general. We don't realize that we tend to follow the same route to the grocery store and buy the same items. I suggest you look around: what else can you add? When it comes to fruit, don't just choose bananas and apples, but seasonal fruit as well. It's healthy and more economical. When it comes to vegetables, it's not just tomatoes and cucumbers. White cabbage, red cabbage, cauliflower, broccoli, beetroot, corn, peas. The more foods you eat, the more nutrients you get into your body. Be healthy and eat right. What to do in such cases?
 @EatingTasty
One day - four holidays. Today, Friday, **October 14**, **Ukrainians are celebrating an important holiday**: the Day of Defenders and Defenders of Ukraine. In light of the full-scale bloody war unleashed by the Russian Federation, it has taken on a special meaning, as it is Ukrainian soldiers who are now defending the future of our country. For Ukrainians, October 14 has many meanings. On this date there are four holidays. Aside from the Day of defenders of Ukraine, there is also a religious holiday - the Intercession of the Holy Virgin Mary, the anniversary of the Ukrainian insurgent army (UPA) and the Day of the Ukrainian Cossacks. Cossacks played an important role in the development of the Ukrainian statehood and national idea in the society. The Cossacks appeared in the Ukrainian lands in the XV century and played an important role in the Eastern European history. And in the XVI century there was founded Zaporizhian Sich as a prototype of statehood. In the 20th century, the traditions of the fight for Ukrainian independence were inherited by the warriors of the Ukrainian Insurgent Army. This year will be the 80th anniversary of the UPA. The Day of defenders and defenders of Ukraine correlates with this commemorative date, because now our state is again defending its independence, its right to freedom and identity. Thus the very fact that these three holidays fall on the same day is already symbolic. Today, when Ukraine is defending its independence in a full-scale war with the Russian Federation, the two anniversaries are closely intertwined. We want to show the inheritance of the struggle for statehood and military traditions, as well as the connection of generations that have embodied and embody this struggle. How the Day of Defenders and defenders of Ukraine appeared The Day of Defenders and Defenders of Ukraine actually replaced the Soviet February 23 (the so-called Day of Defender of the Fatherland). Russia's invasion of Ukraine's sovereign territory in 2014, the criminal annexation of Crimea and the beginning of the war in Donbass changed military traditions. The celebration of February 23 has faded into oblivion. A presidential decree in 2014 established a new state holiday - Defender of Ukraine Day. The date of its celebration - October 14 - was not chosen by chance, because on this day the Intercession of the Blessed Virgin Mary and the Day of the Cossacks are celebrated. The holiday was established to honour the courage and heroism of defenders of independence and territorial integrity of Ukraine, military traditions and victories of the Ukrainian people, to promote further strengthening of patriotic spirit in the society. Although **October 14** is a public holiday, this year it will not be a day off because of martial law. And after the full-scale invasion of the Russian invaders on February 24, 2022, without exaggeration, the entire nation rose to defend Ukraine - some at the front and some on the home front. Ukrainians now confront the aggressor on different fronts, each of which is important, because without that unity the defense would not be so successful. That is why the Day of defenders and defenders of Ukraine has acquired a new meaning in modern conditions. **Photo: Ministry of Defense Press Service** ***We admire your courage. We are convinced that thanks to heroes like you, we will definitely achieve victory. Happy Defenders and Defenders of Ukraine Day! Glory to Ukraine! 🇺🇦***

 @EatingTasty
The End of the Mountain Today I want to tell a story from my childhood. I will tell it again, and in new words. There are some things that cannot be copied, only told anew. Really, I'm a worse storyteller. Have you noticed how much, for example, the words "this" have become in my posts? Or "here." Sure, I can see that. But I don't see the point in doing anything about it. Still. If it's true that one sees some important events of one's life in the last seconds, I think the ouch to the end of the mountain should definitely show up there. In it is everything. The beginning, infinity, and its end. When I was about eight years old, I first discovered travel. That is, travel began earlier, but in my imagination. I told about it too: even earlier, when I was five, I invented my first big game where in the corners of the yard my friend Sashka and I would find some iron pieces, crocks, glass, stones - and we made up stories about them, as if they were foreign goods and jewels, and we brought them from faraway lands and now we boast of our loot, put them into our chests, sell them to each other... About each of these jewels composed its own story, so that the value of the find depended not only on its attraction in itself, but on how you knew how to talk about this thing. Well, there were other games-travels, too, of course. But one day Sashka and I went looking for the End of the Mountain. At the time, I was spending a lot of time at my grandparents' house. And there was the Mountain looming over our village. It was visible from everywhere. Its beginning was about six hundred meters from my house, but to get to the foot of the mountain, you had to walk through the "meadows" - as we called the flooded meadows with hayfields, overgrown here and there with willows, willows, blackthorns, guavas, pear trees and all kinds of other vegetation. I well remember this sultry grass jungle, a significant part of my childhood passed in the hayfields, this special world of grasses, hot sun, the smell of meadows with a distinct swampy scent, the sound of countless gnats and mosquitoes, all kinds of jumping, crawling, flying little things... This was the country that had to be crossed to get to the mountain. At the very beginning of the mountain the thickets got thicker, in some places absolutely impassable, especially where sedge and rushes were closed by the wall... Until I was about eight years old, I had never gone further than a couple of hundred meters from the house. The street was interesting as it was. If I tried to list all the games we played on it... And the Mountain... It became available to me, probably, with the beginning of school life. We were taken on a hike (well, such, very small, to the abandoned gardens at the edge of the village), I met a boy from an infinitely different world, almost three kilometers from my home, and visited him several times. And of course, sooner or later I had to go on the road, to discover the Mountain Not alone. With my roommate friend Sashka. I don't remember now whether we decided at that time to go straight to the Edge of the Mountain or just went there to play and explore. It was a magical world. From the top you could see the whole village and far away. There were also sand pits with white, yellow, red, orange sand, so soft that we wanted to dive into it like into hot water. We also once found something like a small dump, and in it we found an old book called "Arithmetic" - absolutely magical, big format, with beautiful pictures. From maybe the '40s or '50s... How I would love to hold that book in my hands again! But I have no idea what we did with it back then. On the Mountain, we often came across various bones and skulls. By the way, I forgot to tell you, there was a tank in the jungle at the foot of the mountain, as my friends assured me, somewhere hiding a tank left over from the war. I even came across this "tank" once, though it wasn't really a tank, but something incomprehensible, iron, with a hatch at the top. Unless I was dreaming, of course, it could have been some kind of large cast-iron wall of an oven, something like the ones that used to be in the stoke room (boiler room) of the House of Culture; however, I hardly remember what I saw, and whether I saw it at all, and what kind of an oven the stoke room was, I don't remember, and how such a thing could ever get into the bogs and swamps under the Mountain, and how it then disappeared from there, so I'm more likely to have dreamt about it. ...Anyway, what happened was that my friend and I went to the top of the Mountain on a bright, sultry, endless summer day, and somehow it just so happened that we decided to go to the other side of it. The edge of the Mountain had to have an end. Everything has an end, we knew that. Even a mountain like ours. So we walked up the mountain, under an endless sky, on and on. We came out on the road, and we walked and walked... The village disappeared, steppes and fields and the road were ahead. The mountain became a plain. And one day we met a man. I vaguely remember that it could have been a man on a roller, well, what is it called, I don't know, a roller, which is a paver... It was around that time that they were actively paving asphalt roads around our village. We asked him if it was far to the Edge of the Mountain. ...I wonder what the man thought then, seeing two small friends in the middle of the road with this question... And his answer was something along the lines of, no, the Mountain's Edge is very, very far away. I don't remember if he gave a specific figure. But we realized that we weren't going to make it to the edge of the mountain. That's how we discovered then that the mountain could be almost endless. I think that in some special way changed the picture of my world altogether. A little bit later, just a couple of years later, I was playing a lot with other spaces, where you cross, say, a small moat and find yourself in a completely different place, a completely different place from where you would have been if you'd gone around that moat. Well, you know, the world is very different, depending on whether you're going directly to the goal or bypassing it. And the mountain is really a plain, and you've been living at the bottom of a huge gully, thinking the whole world is sea level below. ...Then there was the way back. I wouldn't say that we felt like losers. What had changed, I repeat, was the world. Well, and so had we, of course. It was a bright, bright summer. The heat breathed over us. The sky. We walked and walked, and what I remember for sure is that we were dying of thirst, but it was also a game, because it was terribly wonderful to walk, dreaming about how we would finally reach the water pump, beautiful, delicious, cold, fresh water, and we would drink, drink, drink... In the meantime, we told each other how much money we were willing to pay for a mug of the most wonderful water in the world. And at the end of the road, we reached the water column and drank the water. It was Summer. There was a Road, an endless road that we walked and walked and walked... It was as if it penetrated my blood, that road under the sky of Summer, the road that was with me always, all this eternity. Respect, love, cherish your friends!!!! And then any "mountain" in your life will seem like just a small hill that together with your friends you can easily overcome. 🤝
@EatingTasty
The difference between a token and a coin in simple words Not only newcomers but also more experienced cryptans very often use the terms "coin" and "token" interchangeably - however, there is an obvious difference between the two. A coin is a digital asset (currency) that operates on its own blockchain. Coins can operate completely independently of other financial systems or platforms. Examples of coins: Bitcoin, Ethereum, Litecoin, Cardano, BIP (Minter), Toncoin, Dogecoin. A token is a virtual digital asset that is based on an existing blockchain platform. A token can be compared to a gift certificate: if you get a $500 certificate for a purchase at Apple stores, you cannot buy goods at Samsung stores, much less go to a construction store and buy a screwdriver with this money. There are of course exceptions in the form of partner companies, but it's similar to bridges between blockchains in the crypto industry. Some of the most popular tokens include: USDT, USDC, Shiba, UNI, ApeCoin (APE), Axie Infinity (AXS). Many people will probably ask: Which is better, a token or a coin? "Better" is not the right term at all. Some projects do not need to bother, spend a lot of time and money to create their own blockchain, and can use a ready-made platform (Ethereum, BSC, Minter) and create a token without too much effort, and on some blockchains it can be done literally in a few clicks. Other projects, for more complex tasks, need their own financial system, i.e. blockchain. For example, BNB, the native digital currency of the Binance exchange, functioned for a long time on the Ethereum network as an ERC-20 format token. But after a few years, the management of the exchange decided to expand their business, for which they needed their own blockchain. Now BNB is a native network coin, not a token. Of course, there are also Wrapped variants (wrapped BNB in other networks), but that is another story. Photo taken from pinterest.com I thank God for his help in writing this article, and you, dear readers, praise him if your reading has been helpful to you. I want to know your opinion. If you are interested in my content,then I invite you to read my other articles: https://read.cash/@EatingTasty/how-to-make-lace-pancakes-d5834022 *Good luck to you readers* read.cash @EatingTasty 08.10.2022
 @EatingTasty
How to apologize properly so you don't mess it up even more Some people can't even say a simple "I'm sorry", while others say that instead of apologizing, they make things worse. I would rather not say anything. If the person you want to apologize to is dear to your heart, you should apologize properly. It doesn't take much effort. All you have to do is..: - An open admission of wrongdoing. This is understandably embarrassing, difficult and uncomfortable. But admitting guilt and sincere repentance is half the battle. To be honest, many people are simply repelled by the admission of guilt. This technique works well with anyone, whether it's a boss, a stranger, or a loved one. - Take responsibility. In some cases, this needs to be done even if the guilt itself is not present. This is especially true in relationships between lovers. Very useful for maintaining the relationship - Don't just talk about yourself and your feelings. If anyone is really hurt, it is the one who is hurt. You need to talk about their feelings and concerns. You can praise yourself, - Don't turn everything to your advantage. Sometimes this leads to the offended person themselves starting to apologize to the offender. But if he apologizes the moment he does, the next moment he is overcome with anger and even more resentment because he doesn't understand how this happened. If your relationship with the person is important, you cannot do this, don't run away from problems and don't expect things to work themselves out. It may, but there is no telling who will benefit. And running away doesn't last forever. Sooner or later you will have to account for your words and actions. This is a case where it's best to do it early. - Don't cover up conflicts with gifts. Those who have been hurt may think they have been redeemed. And after being compensated, the perpetrator may not be fully aware of their guilt. It is best to associate gifts with good events - Don't try to look for positives where there are none. Yes, it's great to see the positive side of things, but no one has ever been able to read another person's mind and understand the power of their experience. And in some cases, this behavior is not appropriate at all, - Stop blackmailing and setting conditions. All those "what ifs" are humiliating, not excuses. This is not an opportunity. Setting conditions and demanding something in return is not. Not apologizing is one thing. But if forgiveness is important, it's better to bow your head and apologize. Even if it's not sincere. Make it difficult. But sometimes a simple "sorry" can change the world. Foto: pixels.com I thank God for his help in writing this article, and you, dear readers, praise him if your reading has been helpful to you. I want to know your opinion. If you are interested in my content,then I invite you to read my other articles: https://read.cash/@EatingTasty/how-to-make-lace-pancakes-d5834022 *Good luck to you readers* read.cash @EatingTasty 05.10.2022

 @EatingTasty
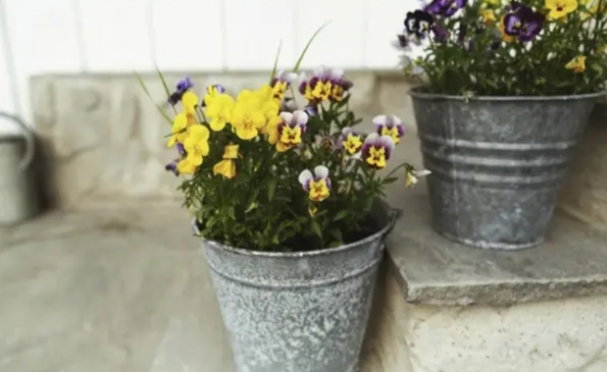
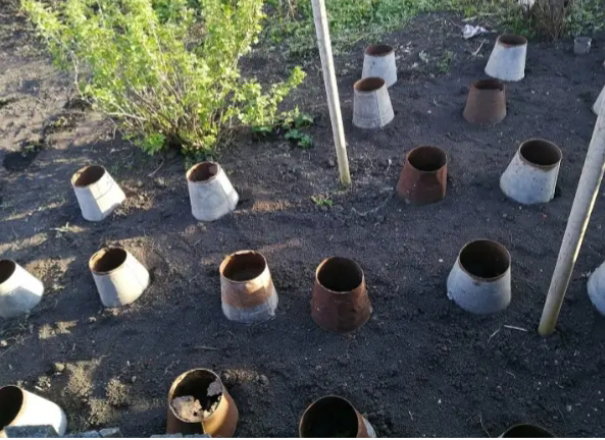
What to do with leaky buckets Buckets that are leaking very often go straight to the trash, because they can no longer perform their function. However, even such an object can be given a second life in the garden. The bucket will be useful not only in the flowerbeds, but also in the beds. Making a pot. ***From a leaky bucket*** make excellent cachepots or pots for flowers. For this purpose, it is best to take products made of metal. With buckets clean off rust and dirt, if you want to paint, so that the new pot more successfully fit into the interior of the garden. Before planting the plants to make sure that the container has enough drainage holes, and if they are not enough - make more. In such containers will feel great annual crops, which will find a place or on the stairs, or next to the entrance to the house, or on the fence. The main thing is not to forget to timely water and fertilize crops. Pots from buckets: ***To protect seedlings.*** Return frosts in the spring period are not uncommon, which means that seedlings planted in a permanent place will need protection. An old bucket will do an excellent job with this mission. We cut out the bottom of the product and everything is ready. The buckets are placed over the seedlings and are pinned, so that a strong wind will not drop the shelter. On top of the bucket put pieces of glass, for better protection of plants. As soon as the frost is over, the buckets are removed. By the way, if such a container is attached to the bottom of the wire, the bucket can be used throughout the season, for example, for cleaning weeds, harvesting *Hose holder* Garden hoses do not handle storage in a coiled form well. Because of kinks and kinks, the product deteriorates and can no longer perform its function. Hole the bucket on the wall or in another chosen place, then wrap the hose around the bucket. In this form, the hose will be easy to remove and unwind. And the inside of the bucket can be used as storage for nozzles or other small garden tools. How to use for vegetable crops Old buckets are not only suitable for growing flowers, but also vegetable crops. Tomatoes will grow beautifully in the bucket. With regular watering and feeding tomatoes give a great harvest. Everyone knows the ability of horseradish to sprout and spread throughout the garden plot. A bucket buried in the ground without a bottom will perfectly contain this crop while not preventing the plant from doing well. ***Making a feeder for poultry.*** If there are poultry in the farmyard, it is easy to make a feed container for the feathered birds out of a bucket. In this case, plastic products are best. At the bottom of the bucket, several holes are cut at the same distance. The container is placed in a flat container with sides. This can be a tray, a basin or something else. The bucket is filled with loose feed and closed tightly with a lid. As the birds eat, food will flow to them. Storage for miscellaneous little things. Buckets can be used to store a variety of items. The product is hung by the handle or attached to the wall. Can serve as a bucket and a stand for umbrellas. Will find him a place in the back or garage for storing various parts, tools or garden tools. Hole buckets can serve for a long time, and therefore do not rashly get rid of them. Photo: https://read.cash/@Belozoriana/what-to-do-with-leaky-buckets-00e55248#photo `tytmaster.ru vosadu-li-vogorode.ru`
 @EatingTasty
Pandora's Box is open! Many have heard the phrase "to open Pandora's Box" - to do an act that will lead to irreparable consequences. But few are aware of its origin. The legend itself: "Pandora was the first woman on earth. Ancient Greek mythology says that she was a woman created by the gods. Treacherous Zeus gave Pandora a magnificent box as a wedding gift, in which were collected all human sins, evils, diseases and vices. And of course she opened it... Out of it came ghostly creatures: sickness, poverty, sadness, despair, death, and all the evils of the world.😥 Pandora slammed the lid shut, but it was too late. Scary ghosts scattered across the world, all but one thing that lay at the very bottom - Hope. Hence the expression, "Hope dies last". But then Epimetheus, Pandora's husband, suddenly heard another thin, barely audible voice coming from the box. Pandora, regretting her action, begged her husband not to give in to pity and leave the box closed. To which Epimetheus said that she had caused many woes to people, if another one was added, it would be no worse. He opened the box, from which the timid Hope flew out. She touched them - and the pain went away.🕊 Then hope flew down to earth to help people who had fallen prey to the evil vices and diseases that still plague mankind." As it happens, hope always comes after trouble and makes people believe in the best. Even today, in Ukraine's darkest times, hope comes to those who are suffering. But Pandora's Box is open not only in Ukraine! Uncle Vova opened Pandora's Box in Russia! First of all, it should be noted that those cadet boys who swore so heartfelt and devoutly in loyalty to Uncle Vova, have long since reached conscription age. It is unlikely that they are now singing - "Uncle Vova, we are with you". Many are already lying in Ukrainian soil. And many, instead of the "last battle" to which Putin called them, have chosen to flee to Georgia, Kazakhstan, and even, God forbid, to wild Mongolia. Russia has never known such a mass exodus from moralization in its centuries-long history. Who can count now how many men of conscription age have left Russia and how many of them will return to their homeland? And this at a time of catastrophic population decline in a far from overpopulated country. But this is not the final assault that Putin will bestow on Russia at the "curtain" of his reign. By attempting to annex Ukrainian territories through "referendums," Putin is opening a "Pandora's Box" that could become a tool for Russia's own disintegration. After all, there is a separatist movement after defeat in this war. The regions, which are already honestly held as part of Russia, may have a reasonable question - "Why, was it possible?" How happy China will be to take advantage of this Russian method. Why wouldn't it instigate similar referendums in the Siberian and Far Eastern regions? If Russia uses nuclear weapons on Ukraine, everyone will use them on Russia, including biological and chemical weapons. Israel will use them on Iran, Iran on Israel. North Korea will hit South Korea and Japan. The U.S. and China, I don't know who. Pakistan and India at each other. All in all, Putin has decided to light not only the whole of Russia on fire before he dies, but the whole planet. In revenge for his obstruction. And he crossed everyone - China, the West, the rulers of the world, the oligarchs, the chemists, all the peoples of the world. Cooler even than Yanukovich. The whole planet wants to kill Putin as quickly as possible, time is short - a few weeks to put out the fire. "We'll blow up the world fire on the mountain of all the bourgeois." So Putin is a suicide bomber, his days are numbered. His death **benefits everyone!!!**👌 *Yes! Ukraine is fighting for its territorial integrity. And it is supported and assisted by almost the entire civilized West.* And who will support Russia if it itself is the initiator of such methods of tearing away other people's territories? 3.10.2022

 @EatingTasty
How to make yeast at home I welcome those who continue to read my articles. Some of them are crazy, I don't deny that, but some of them are good. It might be useful to someone. I decided to come back to help others who are interested in cooking and all that comes with it. I am happy to have you, dear readers, on this platform and thank you for continuing to visit :) As a result of the war that Russia started against Ukraine, many people in Ukrainian cities are having problems making a living. In our city, for example, in the first days it was very difficult to buy bread and yeast for baking at home was almost impossible to find. That is why I prepared an article on how and what you can use to make yeast at home. The problem is that, in addition to healthy microorganisms, a whole "zoo" of different bacteria, including harmful ones, can live in food. Potatoes, for example, grow in the ground and it is unlikely that you can peel them well enough to safely make potato yeast, the recipe for which is available on the Internet. If you even see bubbles, that's not the fermentation you need. Yeast releases carbon dioxide and harmful bacteria release butanol, methane, etc. At best you just spoil the food and the bread doesn't rise, and at worst you can get poisoned. But you can try to make homemade yeast without special microbiological knowledge or equipment: there are several safe options. Yeast from fermented milk products https://read.cash/@Belo/how-to-make-yeast-at-home-4be5de63#yeast-from-fermented-milk-products Take kefir or yogurt and keep it warm for 12-18 hours. A thermos or yogurt bucket is useful, or just a glass container that you can cover and hide a little. In the heat, the lactic acid bacteria are activated and start producing carbon dioxide. When bubbles appear, you can add the product to the dough as a starter. Leave some of it and add warm milk or kefir so that you have a new starter after a while. Yeast bread https://read.cash/@Belo/how-to-make-yeast-at-home-4be5de63#yeast-bread One of the easiest ways is to cover a few slices of bread with hot water (36 degrees) and leave them warm. This creates a sourdough that can be used for baking. Yeast obtained from grapes or raisins. Pour 100-200 g of grape skins or sultanas into a wide-mouthed (round) kettle and pour hot water over them until the grapes float. Cover with four layers of cheesecloth and leave in a warm place for 3-4 days. When it starts to ferment, separate the yeast from the whole mass and use it to bake bread.Yeast from natural juice https://read.cash/@Belo/how-to-make-yeast-at-home-4be5de63#yeast-from-natural-juice The juice should be natural, not store-bought. Not just any juice, but grape or apple juice. Orange juice, carrot juice, pumpkin juice and tomato juice are not suitable. Add a little sugar to a jar of juice, place it in a warm place and put a rubber glove on the neck: when fermentation begins, the glove will swell. It is easy to check by smell if the gases come from the same bacteria. If the smell is pleasant - yeast or apple - all is well. If it is pungent and unpleasant, it is better to empty the experiment and try again. Take some yeast for the dough and keep the rest in the fridge without covering it well or boiling: yeast needs oxygen to ferment. Hop yeast https://read.cash/@Belo/how-to-make-yeast-at-home-4be5de63#hop-yeast Rinse a cup of dried hop cones thoroughly, add to 2 cups of hot water and simmer for 4 hours. Then strain, add 2 tablespoonfuls of sugar and half a cup of flour to the steamed milk-steamed pasta temperature, stir until it becomes a thick sour cream, roll up and put in a warm place overnight. Dear friends and all the readers of read.cash, I would like to thank you from the bottom of my heart for all you have done for me, for your reliability, kindness and cordiality. Thank you for always being there for me! Thank you for your support!
@EatingTasty
Not just ketchup When you have a jar of homemade tomato paste in your pantry, it opens up a channel of possibilities. Many of the sauces on store shelves that we love so much are made with tomato paste. If you already have such a preparation, why not go further and make your own cold and hot sauces by adding spices and seasonings to the tomato paste. How to make homemade sauces based on tomato paste. The first thing many people will think of is ketchup. We are used to the fact that ketchup can only be a ready-made sauce, and few people know that it is easy to make it yourself, in your kitchen, if you have ready-made tomato paste. The myth that ketchup is harmful, dispels itself: you put into it only what will not hurt and like you and your children to taste. No chemicals, but natural and healthy products! In order that it did not differ in consistency from ready-made, turned out perfectly smooth, silky, as a store, you should additionally beat the tomato paste with an immersion blender until absolute homogenization. ***Per 200 g of cooked tomato paste:*** 100 ml boiled water 1-2 tsp. salt 2-3 tsp. sugar 1 tbsp. apple or grape vinegar This is the basis of a classic ketchup. But all these ingredients can be adjusted based on your own taste. And also add garlic, fresh or dried herbs, hot red pepper and freshly ground black pepper, mustard, bay leaf, cinnamon. After adding the spices, the ketchup should be heated until the first signs of boiling. ***Sauce for kebab on the basis of tomato paste*** What a kebab without sauce! Dipping a hot, smoky-smelling piece of any meat, chicken or fish into a spicy tomato sauce is an indispensable ritual. You can make the sauce specifically with fresh tomatoes, or you can make it with homemade tomato paste. It is enough to add hot red pepper, cilantro, onions, garlic, if desired, a little vinegar and a pinch of sugar. Dilute a little with boiling water, if necessary. For this sauce, first sauté the onions in vegetable oil, then add the tomato paste, 50 ml of water, a mixture of dried Italian herbs - for character - salt, sugar to taste. For 6 tbsp of paste, 1 small onion, 1 tbsp of herbs, 1 tbsp of vegetable oil, salt to taste and a pinch of sugar for balance is enough. Cook this sauce over medium heat for 5 to 6 minutes. ***Sauce -Sauce with homemade tomato paste*** This simple sauce, which was used to pour over cutlets in the Soviet catering industry, is surprisingly liked by children who fortunately don't know what canteens are. Well-balanced in flavor, making any dish more appetizing, it may well be offered to children. Gravy based on homemade tomato paste with cutlets is very liked by children. To make the sauce you need: 1 small onion 50 grams of tomato paste 25 grams of wheat flour 50 gr of butter or vegetable oil 1 bay leaf 1 cup hot water salt, black pepper to taste 1 pinch of sugar Heat oil in a frying pan, add chopped onions. Saute onions until transparent and lightly browned. Onions don't need to fry very much. Add flour, stir it and fry all together until golden brown. Then add the tomato paste, stir it and cook for 2-3 minutes. As soon as the sauce thickens, add water, stirring intensively with a whisk. By the way: instead of water you can use chicken, beef or vegetable broth. Bring it to a boil, turn down the heat, salt and pepper it, add sugar and bay leaf. Adjust to your taste. Cook for 4 minutes. In gravy if desired, you can add spices. You can use it immediately as a sauce for meat and fish cutlets. Or you can make it twice as much and stew the cutlets in it after frying - 15-20 minutes. In general, sauces based on tomato paste for cooking hot dishes is a separate big topic. Any sauce is a matter of taste and a chance for culinary experimentation. Many cooks rightly believe that a sauce can fix any dish or give it a different character. We agree with them. Start with tomato paste, add cumin, cinnamon, coriander, curry, and grated fresh ginger, and you will immediately get a taste of Indian cuisine. Or finely chopped basil and marjoram leaves, a mix of dried Mediterranean herbs - now chicken steaks have an Italian accent. If you want it spicier, like in Mexico, feel free to add more hot chili peppers and some lime zest. This would be delicious with beef steaks! I thank God for his help in writing this article, and you, dear readers, praise him if your reading has been helpful to you. I want to know your opinion. If you are interested in my content,then I invite you to read my other articles: https://read.cash/@EatingTasty/how-to-make-lace-pancakes-d5834022 *Good luck to you readers* read.cash @EatingTasty 01.10.2022 Photo taken from pixabay.com
 @EatingTasty
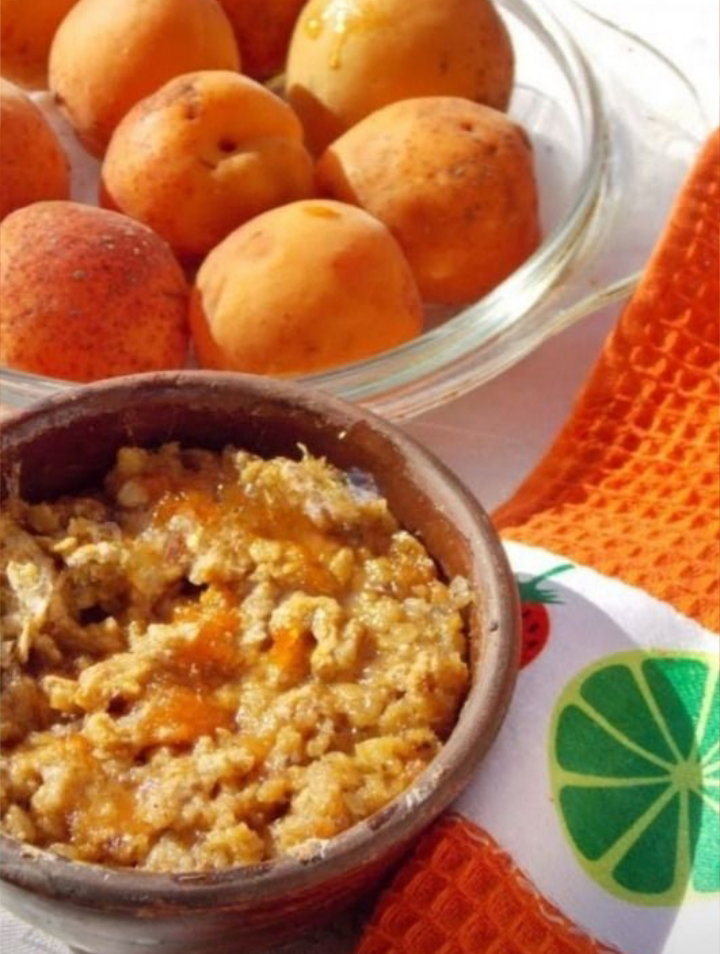
Crumble with apricots or what a nursing mother needs I ate a portion of dessert - and it feels like I ate a hearty breakfast of porridge with berries and fruit! Is it really possible? It is if you try a wonderful English dessert called Kramble! It is truly a godsend for everyone! Both for those who are on diets and want a sweet tooth, and for a nursing mother when you want buns or cake - I remember how it was when I was gnawing on cookies and crackers! That's when I would learn about such a thing as kramble - it tastes almost like fruitcake, and the composition is the healthiest. And kids will gladly eat cereal without even suspecting that this tasty "pie" includes oatmeal ... and even if they guess, they'll eat it anyway, because it's delicious! What kind of dish is this? Crumble means "crumble" in English, that's why the dessert is called that - a layer of berries and fruit is layered with crumbs of flakes, nuts, and seeds. The result is a juicy, tender filling on the bottom and an almost sandy layer with a crunchy crust on top, soaked in the juice from the fruit, which boils underneath while baking. A very delicate and satisfying flavor! And that flavor can be varied endlessly! I vividly remember wanting something yummy for tea when I was nursing my babies with milk! And the only tasty thing I could get was cookies:) Dear reader-moms, a familiar situation, right? After all, candy - a source of good mood, and when a mother has a good mood, then the baby is happy and glad! I have in store diet recipes for delicious desserts for nursing moms: delicate puddings, sweet croutons and simple cookies. Light cakes and cottage cheese dishes, baked fruit. What can a mother eat while breastfeeding? There is no specific answer to this question, there are many answers, and they will be different for each breastfeeding mom, their own. Please note that every body is different, and if someone can, for example, eggs or raisins while breastfeeding, then the other these products are not suitable. So help yourself to the deliciousness of my recipes, but first adjust them according to the peculiarities of your menu. The first crumble I made was apricot. Orange, velvety, juicy fruit, sweet with a slight sourness, harmoniously combined with oatmeal and flour, nuts and sunny apricot confit! But instead of apricots you may take berries, for example - strawberries, raspberries, cherries; or plums, or mix of all at once; add cereal of 3 or 7 grains; whole wheat flour, buckwheat or wheat flour; butter or vegetable oil - sunflower or olive (but without smell); use cherry, apple confit instead of apricot confit... By the way, the most popular kramble is just apple kramble, and you and I are going to try it too. I think you've grasped the general principle of making krambles! You can bake this healthy dessert both in portion molds, glass or ceramic, and in a whole larger form. To eat, spoon it right out of the mold when it's almost cold (and since fruit takes a long time to cool, taste it carefully!). ***For 2 large servings:*** Fresh or canned apricots - 8 pieces; Flour - 60 g; Oatmeal - 2 tablespoons; Cracked nuts - 2 tablespoons; Apricot confit - 2 tablespoons; Vegetable oil - 1 tablespoon; Apricot syrup (or jam, diluted with water) - 2 tablespoons. ***How to prepare:*** The recipe is very simple: mix cereal, flour and nuts, add confit and butter, mix with a spoon and then grind with hands into crumbs. Put apricots into greased moulds and top with crumbs, tamping them down. Pour the syrup and slightly loosen the surface of the crumble with a fork. Bake at 180C for 15-20 minutes. The apricots underneath will let the juices flow and begin to simmer, soaking in the juice of the crumble; and the top will acquire an enticing ruddy crust! Time to take the dessert out. Let's cool it down and treat ourselves! I couldn't help myself and tried apricot kramble while it was still warm; I even ate a whole bucket of it quietly:) Try it yourself! *Bon appetit and be healthy for you and your kids! :)* I thank God for his help in writing this article, and you, dear readers, praise him if your reading has been helpful to you. I want to know your opinion. If you are interested in my content,then I invite you to read my other articles: https://read.cash/@EatingTasty/how-to-make-lace-pancakes-d5834022 *Good luck to you readers* read.cash `@EatingTasty` 30.09.2022 https://read.cash/@EatingTasty/unsolicited-advice-4594f917#bad-link
 @EatingTasty
Lazy curd dumplings. Great breakfast! Simple, quick, delicious, and good for kids! The classic recipe takes only twenty minutes to make cottage cheese dumplings, which is why they are called lazy dumplings. Tender, sweet, they are so much liked by children! In addition, the dumplings are also useful, because they have so much cottage cheese, useful for children!!! **Ingredients:** Cheese - 200 gr. Eggs - 1 pc. Sugar-2 table spoon. Salt- 0.25 gr. Flour-3 tablespoons. **CREATION** Cooking time: 20 min How to make the classic Lazy Dumplings with Cheese Cheese? Prepare the products. Cottage cheese is suitable for any fat content, but the most delicious dumplings will turn out of fat, country cottage cheese. The amount of flour is approximate, may go both more and less, it depends on the moisture content of cottage cheese. We prepare the dough for the dumplings that will not boil when boiled. Take a bowl, put the cottage cheese in it. Rub it through a sieve is not necessary, even if it is gritty. After all, it's lazy dumplings. Everything is done quickly and easily. Break the egg into the cottage cheese, add salt and sugar. Mix the cottage cheese and egg until smooth. Start adding flour a spoonful at a time, mixing after each batch. The dough should eventually become thick and come together in the center of the bowl. But do not overdo it, do not make it too steep - the dumplings will turn out floury, not cottage cheese. I had cottage cheese with 5% fat content and it took exactly three full and spoonfuls of flour. If your cottage cheese is very wet, put more. Sprinkle flour on a table or work surface. Take a small portion of the dough. Dip it in flour and roll it into the shape of a long sausage 2-3 cm wide. Cut the sausage into strips about 1 cm wide. I always cut it a little askew to make rhombuses. This is how my mom used to do it, and she got it from kindergarten. Transfer the finished batch of dumplings to a board sprinkled with flour. Make the rest of the dumplings from all the dough in the same way. Boil water in a small saucepan or saucepan, salt it. Throw in water a portion of dumplings. Do not throw them all at once - they will be crowded to boil and they will stick together. Stir, so that the dumplings do not stick to the bottom. Cook the dumplings for a minute after they have floated. Do not boil them any longer, they can fall apart. Use a slotted skimmer to remove the dumplings to a plate. Immediately throw in the next batch and cook it in the same way. Serve the dumplings hot, with butter or sour cream. They are very slightly sweet, you can serve them with condensed milk or jam. I like to sprinkle sugar on top of dumplings. Without false modesty, I will say that I know how to make lazy dumplings. I make them for a long time and all the time. With experience came how much flour to put, so they do not fall apart and do not become stiff. I'm sure you can do it too!
 @EatingTasty
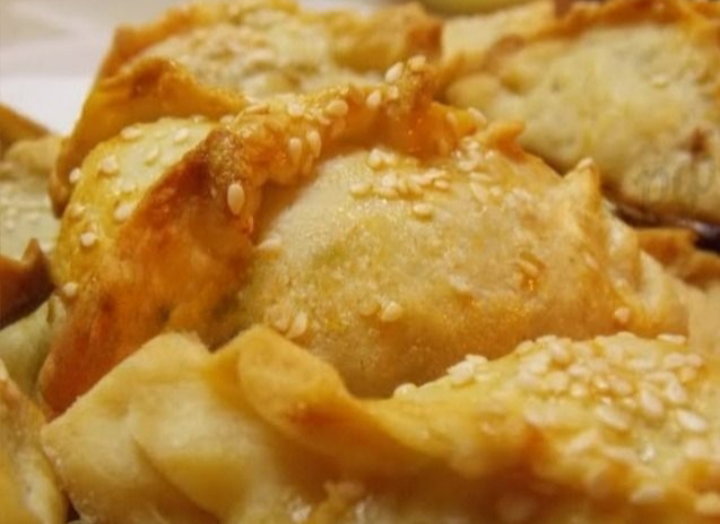
Recipe for homemade samsa puff pastry with meat. And let's have an Oriental Bakery Week! We've got the right recipes for it: homemade samosas, chebureks, which I'll be offering next, and khachapuri with cheese! Samsa made of homemade puff pastry is something new. We used to take the easy way: puff pastry means to buy ready-made in a store and not to suffer :-) But these days I'll experiment in the kitchen with this recipe. Samsa is such triangular pies, usually with meat, delicious, hearty and very cute! I've been meaning to make samsa for a long time, I had a recipe in my notebook, written in Crimea, waiting for its time - it finally came! Rest assured, Crimean puff Samsa with meat is authentic, that is correct. There are many recipes for samsa made of puff pastry, but this recipe will tell you how to make homemade dough for samsa, just as I did in the Crimea, and it is much better than the store-bought, as well as all homemade. When we were traveling by car in the Crimea, closer to the peninsula on the highway began to come across more and more stalls with the intriguing title: "Tandyr Samsa." This incomprehensible phrase every time plunged us into a fit of unbridled joy. Later we learned that tandyr - an oven of unusual design, which baked tandyr flatbread, samsa and other Crimean pastries, - are filled with respect for tandyr and stopped snorting like first graders, seeing the familiar inscriptions. Here is the recipe of samsa, which Crimeans told me, and they are experts in making samsa, baklava, and other oriental delicacies! Homemade samsa is a great option of unsweetened baked goods. I think we should pay more attention to salty baked goods, there is so much room for invention! In the meantime, let's bake samosa. **Ingredients:** ***Puff pastry for samosa:*** Puff pastry for samosa: 2 cups flour; 1 cup water; pinch of salt; Half a packet (100-120g) of butter. Meat filling for samsa: 300-400g beef; 1-2 large onions; bunch of greens (parsley); salt, water. *****Puff pastry for samsa recipe:***** Imagine, for samsa we need to knead... our familiar custard dough for dumplings and dumplings! Yes, yes, that's right, specially treated, it turns into homemade puff pastry! And by processing it means glazing with butter. Let me tell you more about it. So, we pour boiling water in a thin stream into salted flour and knead elastic dough, not sticky to hands. Melt the butter; you can do it in a microwave oven on low power, or on a stove over a low flame. Sprinkle the table with flour, roll out the dough thinly with a rolling pin, so that it almost glows, and smear it with melted butter using a silicone brush (a feather). But not too generous layer - if you overdo it, when you work with the dough it flows out onto the table, then gaily splashes far away! Once the cake is greased, fold it in half, roll it a little with a rolling pin and grease again with melted butter. And so on five times: fold, grease, roll, fold again. We greased and rolled out a little at a time - the oil was stubbornly coming out of everywhere. We'll have to practice some more. We get such an "envelope" of dough, a small rectangle, folded 4-5 times - we put it in the fridge for 1-1.5 hours. Then the puff pastry will be more puffy (and the butter will be tamed, finally!). While the dough is in the fridge, you can make the filling for the samsa. mince the meat, or mince it twice. Finely chop the onions, salt them and press them in your hands a little, like you usually do with cabbage for salads, to make them flow. Keep the greens in water for about **5 minutes**, then rinse them under the faucet, dry on a towel and shred. Combine all the products, salt and pepper and add a little water to make the stuffing juicy. Initially, I was told to take ¼ cup water for 1 kg of meat, but I got almost half a cup for **0.5** kg. Watch the consistency: the stuffing should not be dry, juicy, but not so much that it "runs away". *****How to make samosa:***** Here we have ready dough and stuffing, you can proceed to making samsa. After taking the dough out of the fridge, we roll it out again on a table sprinkled with flour into a crust a couple of millimeters thick, and once again we brush it with melted butter. But now we do not fold, but roll it. There is a fast variant, simpler, for those who want to make samosas in a hurry: without folding and cooling repeatedly. We just roll out five pancakes with melted butter, grease them, stack them, roll them, grease them and make a roll. Cut this roll into **2-2.5** cm wide slices. Each piece is flattened - note, put the cut not upwards, but on the edge - otherwise you get a continuous "tracery"! - and roll out into a circle. The thickness is up to 0.5 cm, don't make it too thin. I roll it thin, so my friends told me that my samosa should be eaten with bread: such a thin layer of dough turned out. In the middle of the circles, we generously put the filling. And then connect the edges of the circles so that you get a triangular-shaped pie. And artistically (and firmly!) pinched, like dumplings - for beauty and security. Place samosa on a baking sheet greased with vegetable oil or covered with pastry parchment. Grease with whipped egg yolk and sprinkle with sesame seeds. Place in oven heated to **200-200°С,** then lower it to 180-200С, and bake for about **35 minutes,** until the filling is well-cooked and the samosa browns. Warm puffed samosa with meat is very tasty and hearty! Eat one such pie, and you're full. And the next day, homemade samosa can be reheated, and it will be delicious as fresh. *****I have a little addition to this recip********e***: instead of sesame seeds, sprinkle it with zira, and then you get the flavor of the real Crimean samsa. I still add it a little in the stuffing, which should not be minced, and cut into small pieces. **I hope that everything will be fine with this recipe.**
 @EatingTasty
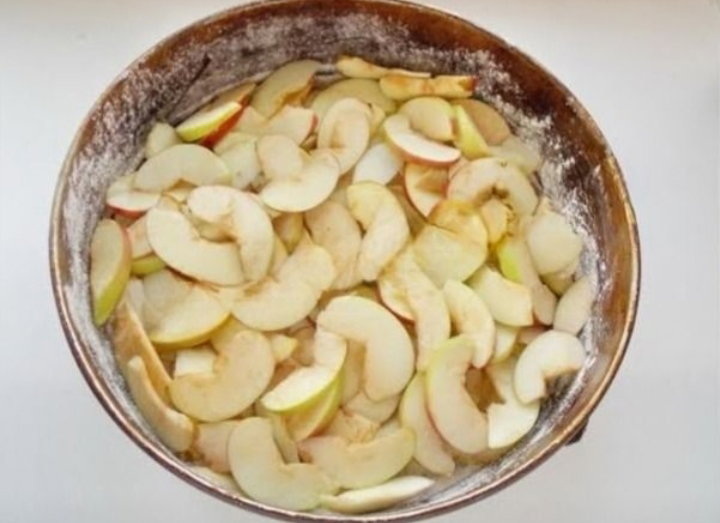
How to Make Buckwheat Flour Charlotte. I used to think that baked pies were made only with the most familiar flour, wheat! And it turns out!!! You can come up with so many quiches with unusual flours! I was inspired to make this discovery by a recipe for oatmeal quiche. If you can do the familiar apple biscuit recipe with oat flour, then you can do it with other kinds, too? Buckwheat flour, for example - buckwheat pancakes with it are very interesting and delicious! It's decided - we're baking buckwheat biscuits! I loved the result: a fluffy, beautiful biscuit, with a dark golden, buckwheat honey-colored crust; with pretty light brown flecks; with a subtle buckwheat flavor and a crispy crust! This gorgeous crust, as thin and crispy as meringue or as the first ice is a distinctive feature of biscuits with the addition of unusual flours. The oatmeal had one, and the buckwheat flour shuffle came out with a deliciously tender crust, too. Also, buckwheat casserole is especially crumbly and crumbly because buckwheat flour has no gluten in it. If you bake 100% buckwheat, the dough just won't "hold together" Therefore, buckwheat baked goods add wheat flour in the ratio of 1:1 Ingredients: **Per 23 cm. mold:** 5-7 juicy (not loose) apples; 3 fairly large eggs; An incomplete cup of sugar (about 170-180g); Half a cup of wheat flour; Half cup of buckwheat flour (about 70-75g of each type); One teaspoon of baking powder; A piece of butter to grease the mold. How to bake: First, prepare the mold. Suitable as a slotted, as well as solid. At the bottom we will cover the parchment, so that the pie was easier to get out. Grease the walls and bottom of the form with oil and carefully flour a thin layer. Now prepare the apples: rinse, cut into quarters, peel the core and cut into thin slices. Spread the apple slices evenly over the bottom of the mold. Finally, let's prepare the dough - I always start with the dough when everything else is ready, because the dough for the quiche is very fluffy, and you have to bake it as soon as it is ready, so it does not have time to settle. To the eggs (yolks and whites) poured sugar and beat with a mixer, starting at low speed and gradually increasing - until the mass increases, becomes fluffy, light and thickens so that the mixer whiskers will leave not immediately melting traces. Carefully pour two kinds of flour with baking powder into the whipped mass and mix from bottom to top, in a circle, until all the flour is incorporated. Pour the buckwheat biscuit batter over the apples, helping it to spread evenly with a spoon. Put into the oven heated to 200C and bake for about 20 minutes, then look carefully: is it ruddy? Try the middle: is it dry? If not yet, and the top is already very "tanned," slightly reduce the temperature to 180C. You can put a ladle of water at the bottom of the oven, so that the bottom of the charlotte does not stick - but do all maneuvers carefully, from too sharp changes "hot-cold" biscuit can sag. The charlotte is ready when the wooden stick remains dry. Open the oven door, let the pie stand like that for 5 minutes, then you can take it out, open the form and transfer it to a dish. If desired, you can sprinkle the buckwheat charlotte with powdered sugar. Charlotte is an incredibly popular dessert that was invented in England. Hence the name after the English name Charlotte. However, it caught on and became popular in our regions, where we've come up with a special recipe for it. In our classic sense, Charlotte is a sponge cake, which is made with sour apples. It is quite a caloric, very sweet dessert. It is the kind of dish that is absolutely impossible for those who are watching their diet. But that is not true. You and I can make a dish that's practically a proper diet: the wheat flour shmalottka. Of course, you still need to use a lot of sugar to make a proper biscuit dough. Without sugar, it won't rise and you won't get that fluffy protein mass. However, you can still use sweeteners such as stevia or fructose. Buckwheat flour charlotte is almost identical in flavor to classic charlotte, the only difference is the darker color of the dough. Another undoubted advantage of such flour is that it can easily be made at home. And for this you need only one ingredient! You just need to grind a few cups of buckwheat in a grinder and you will get ready a healthy flour, which you can use for many other recipes. This recipe is extremely easy to follow and any hostess can handle it, you'll want to make this pie over and over again! ***I loved it as it is!*** 26.09.2022
 @EatingTasty
Delicious homemade egg noodles How often do you buy pasta? Our family is very fond of pasta, especially the children. But much tastier than store-bought noodles and vermicelli, we get homemade noodles on eggs: yellow, like the sun; nourishing, tender, they just melt in your mouth! And what a delicious chicken soup with homemade egg noodles turns out - delicious! If you boil it in a rich, golden broth, put circles of orange carrots and a sprinkle of bright, fresh parsley... You can't take children away from such a first course! And adults, too, by the way. They will eat it for breakfast and lunch and ask for more. I'm going to tell you how to make noodles on eggs at home, without any cunning devices like a noodle cutter! ***Very easy***: a minimum of ingredients, a rolling pin and a knife - that's all we need to make it. From 100 grams of flour you get a decent portion - enough for two soups in a three-liter pot. The first batch of noodles can be cooked immediately, and the second - to dry and perfectly stored for several days. `Ingredients:` For every 100 grams of flour - 1 chicken egg; ½ teaspoon vegetable oil; ¼ teaspoon salt. If you take eggs from a homemade chicken, with a bright, orange yolk, then the noodles will be cheerful as a dandelion! You don't need a small egg - otherwise the wet ingredients may not be enough, and you'll have to add more butter to the flour; - but not less than a medium, closer to a large one. Chicken for noodle soup is also better to take a homemade chicken, not a broiler - first, healthier, especially for children; and secondly, much tastier. Let the home-cooked chicken boiled oooh very long, compared to the purchase - but the broth is excellent. Try it for a comparison. But, of course, it's better to buy poultry from trusted vendors. Or in the store from the poultry farm, there are soup chickens, that's what suits us. They look wiry and slender, compared to fat broilers, but if you cook for two hours, you get soft meat and tasty broth. Now let's make some noodles! Recipe for making homemade noodles: Sift the flour in a heap on the table. You can cover its surface with a sheet of pastry parchment, so you don't have to wash it later:) Or prepare the dough in a large bowl. Lightly salt the flour. On top of the slide make a depression and beat an egg there. Of course, first carefully washed the shell. Mixing with a spoon, continue to knead the dough with your hands, and so it does not stick to them, grease a little vegetable oil. Knead the dough for noodles, you need quite a long time: five minutes, or better all 10: with prolonged kneading in the dough gluten is formed, so it becomes possible to roll it thinly, without tearing. The dough is not homogeneous, you need to knead some more: And, since the dough comes out quite steep, kneading it is a wonderful workout for the hands! A dozen push-ups and a dozen pull-ups will definitely do the trick! It takes some effort to knead the noodle dough properly, but it's a lot of fun:) At first it will be heterogeneous and unyielding, but then you'll notice that the dough becomes elastic and smooth. Aha, so it's ready! Now let's wrap it in a food bag or cling film and put it into a warm place to "rest" for 15-20 minutes. And now it is already homogeneous, well kneaded: After the time has passed, we proceed to roll out the dough - another exercise for hand strength! Steep egg dough will tend to shrink as you roll it out, like rubber dough. But do not worry - the noodles will not be so! On the contrary, if you try to roll them thin, so that they see through the pattern on the table, then the noodles will be tender and very tasty! If the dough sticks a little, you can lightly dust the table with flour. But not too much, so that the dough, absorbing the flour, does not become even steeper:) Rolling out a thin, shiny layer, leave the dough for about ten minutes to dry out. This is not dumplings, which, just rolled out, must be urgently molded until it dried up and stick! Noodles, on the contrary, it is easier to make from dried dough, then it does not stick. Well, now let's move on to the most exciting part! You can call children to help. We roll up the dough, not too tightly. And we cut it into 3-4 mm wide rings. And then we take each spiral roll and shake it over the table to make it unfold! Doesn't want to unfold? We gently help it with our hands, gently, so that the delicate long noodles don't tear. We get long strips of dough - here are ready homemade noodles! Loosely scatter the strips of dough on the table or on a large board, so that they do not stick together. Now you can air dry them well - or add them to the soup. And how to make chicken noodle soup, I'm about to share with you, too. So, the first thing is to prepare and cook the chicken. We immerse it in cold water; when it boils, we wait a minute and drain the first water. Pour the new, boil until the meat is soft (try with the tip of a knife). While the chicken is boiling, you can peel three potatoes (although noodles can be cooked without potatoes), one medium carrot, a small onion. Let the greens in advance in cold water, let the soil soak from the sprigs. We add diced potatoes, sliced carrots, finely chopped onions to the pot (and you can put and cook a whole onion for flavor, if your family does not like it when you get bits of onion in the soup) - and cook further, about 10 minutes, until the vegetables begin to become soft. Now you can salt the soup (for 3 liters - not full tablespoon of salt, or to taste), and pour into the boiling broth noodles. Immediately stir it, so that it does not stick together into a galushka. Also put in the soup 1-2 bay leaves and chopped fresh parsley greens - the aroma and taste will be delightful! After adding the noodles and greens, the soup should cook just a couple of minutes. Boil for 2-3 minutes, and it's ready: tender homemade noodles cook very quickly. ***We pour hot soup with chicken noodles in plates and invite the family to the table!*** If you are interested in my content, you can also read my previous articles: https://read.cash/@EatingTasty/floki-inu-dogecoin-and-shiba-inu-will-have-to-move-this-coin-915d93b0 https://read.cash/@EatingTasty/unsolicited-advice-87587d12

 @EatingTasty
Floki Inu, Dogecoin and Shiba Inu will have to move - this coin DOGE, SHIB and Floki have surprisingly been the best performers during the last market cycle and have not fallen as many expected in a bear market. Now investors are looking for the next meme project that can explode and deliver 8,000% returns. Could Tamadoge replace FLOKI? FLOKI's notoriety has grown largely because it was created as a joke after Ilon Musk's tweet. In the last cycle, that was enough to make token prices skyrocket accordingly. Tamadoge also has the potential to ride this wave in the next bull market, as it not only has the aesthetics of the popular Doge meme, but is about to create its own Metaverse project with `NFT` and more. TAMA has a lot more utility. Unlike FLOKI and SHIB, the vast majority of whose value is only due to the name and the meme, the Tamadoge team is focused on innovating games where you can make money from cryptocurrency. TAMA will operate not only as a meme token, but also as a Tamaverse game, which is a specially designed meta universe designed for the gaming community. The Tamadoge store will be the main economic playground in the Tamadoge world - it will be extremely useful for the circular economy of the ecosystem, as 5% of all revenue generated by the store will be used to redeem and burn TAMA. The Tamadoge presale is nearing completion The Tamadoge presale has been extremely successful and so far has raised nearly $17 million. The total amount raised will be $19 million. This means that there is very little time left for interested investors to buy Tamadoge at presale prices. Once the TAMA presale is complete, the token will begin to be listed on exchanges. The first exchange to list Tamadoge will be Uniswap, but placement on the centralized cryptocurrency exchange LBANK has already been confirmed. Tamadoge will continue to gain momentum and more and more people will learn about the project. Those who want to take part in Tamadoge might want to consider taking part before the price rises at listing to be eligible to win $100,000 at TAMA. If the team can maintain the same high degree of consistency over the coming months, the price will skyrocket Tamadoge (TAMA) - New Promising Cryptocurrency Beta Sale Ends in September 2022 - tamadoge.io Deflation, Low Supply - 2 Billion Move to Earn, Metaverse integration in Roadmap NFT with Pets - High Potential for Market Demand -Play to Earn - Get Reward Tokens!

 @EatingTasty
Unsolicited advice This article seems very important to me. In any case, I missed something like this in my time, and if I could find something similar, it was very supportive. And so. My baby boy was born, then, as all babies should, lost weight in the normal range. My colostrum came during pregnancy, milk - a couple of days after delivery. Everything like clockwork. But the baby was gaining weight slowly, or maybe, as I now analyze, slowly by the standards of the maternity hospital. I won't go into details, it's not that important. The point is that we were given formula feeding. After reading the writings of breastfeeding adepts, I started fighting desperately to keep breastfeeding and move away from formula. The books I read (plus outside advice) all said that formula was "evil" and I had to do everything I could to keep breastfeeding. I, in my usual way, fell for it. Then the struggle began. I did the best I could. I tried all the folk tips, from tea with milk to tie my chest with a warm scarf. It didn't help. Later I found a breastfeeding counsellor. I was corrected the attachment, I was told to squeeze as much time and effort as possible, to put the baby to the breast as often as possible (he was on my breast all the time, we are talking about the first month). I was like a madwoman getting up every two hours at night, counting the minutes during the day, constantly pumping the milk (it was almost not pumped) and so on. There was a little more milk but the weight gain was just as bad. I went to a second counsellor. There were tips like skin to skin contact, wearing a sling and, dammit, lactation too. Didn't help much either. The weight gain was a little better, but as I understand it, at the expense of supplementation with formula. It's worth noting that I was under tremendous stress, along with the fight for breastfeeding was also lack of sleep, almost complete. To say I was tired is nothing to say!!!! I was dreaming of switching to formula completely. I didn't care about the GF adepts and the best decision at the time was to call my doctor. She reassured me , we came to the conclusion that there was nothing wrong with formula and I was ready to switch completely. Oh yes, everyone, including doctors, were telling me that I wouldn't stay on formula for long, that there would be constipation and lots of problems. I never fully switched to formula. It all sorted itself out after talking to a mammologist. I just took it easy, that's all. There was a lot more milk, but not enough to fully feed the baby, so I finished feeding him. After I calmed down, the baby slept perfectly. The family was at peace. As of this writing, my son is five years old. Until then, the first year of his life, we were on mixed, introducing complementary foods. Not once he was not constipated and no problems with food in general. Moreover, what they described to me as disadvantages, for me is a plus. For instance, I cannot always give him formula at night, because he gets full from the breast. I can leave him with my grandmother or husband, because he is used to the formula, and there is no problem with increasing its quantity. And so on. Everyone chooses for himself and the baby. One thing I will say here is that the most important thing is calmness. Nothing makes breastfeeding work like a calm mum. 🤗 Friends, I'm writing this to underline that it's all about individuality! We are all different though we are all the same. What works for one, does not necessarily work for the other. Some people find artificial feeding suitable, while I prefer mixed feeding. The most important thing is that the baby and the mother feel comfortable. I would also like to add to this article that when I had a baby all my relatives and people who cared about me believed (and many still do) that I would not survive without their advice😬 They were given on any occasion and not on demand, but out of the goodness of their hearts. The past in the Soviet Union was a strange time. It was ridiculous, even my friend, so to speak, advised me to breastfeed as long as possible! In my own stupidity and inexperience, I listened to this advice for the first month. I listened and did not understand why I can't do it, I am not happy, I am just tired like an animal. I was suffering for a month, and then one day my friend wrote to me to say how I was doing. I told her about my plight and she opened my eyes in response. She told me how with her first child, too, all tried to "help" and then like a copy of my story! And that got me thinking. I decided to act on the situation and my heart's desire. At first we had a little problem with weight gain and, consequently, with the GF (breastfeeding). Then, as the chain, and then attracted and problems with sleep. And I was told to drink tea with milk, and drink special formula, and constantly squeeze. When I began to have problems with sleep, I was told to do different rituals, like washing with holy water and so on. But when I decided to do as I saw fit!!!! everything changed. I have been watching my baby, reading experts who I consider to be authorities for myself (these are several blogs-pediatrician, osteopathic massage therapist,). I only listen to their recommendations through my own filtering. Suddenly, things started working out for me. Sleep got better, feeding lined up comfortably, weight started to be gained according to norms. And guess what!!! They started telling me that I was just lucky to have such a calm baby. When I told them it was my credit and that my baby was ordinary, albeit my most favourite, the heavy artillery and bullying 😂 came into play. Here are my in-laws top three scares: The colic will start, then we'll see. It didn't. Did tummy massages, put her over the sink, monitored her nutrition. Soon we'll have sleepless nights and whistles. With a well-regulated routine or, at an earlier age, monitoring of sleep rhythms, they almost never start. The exceptions are sleep regression, learning new skills, illness and the like. That is, when all is well with the baby, he actually sleeps through the night. But his teeth will come out...(substitute any frightening phrase). We haven't had any yet. Can't say anything. Yes, I have faced problems sometimes, yes, it may be difficult for me when the teeth come out. But I don't want to insist in advance on some kind of thrashing. I want to deal with problems as they come. With love for my son. All problems are temporary. Even if it seems like there's no strength, they just appear out of nowhere, like in childbirth. Everything passes. And most problems are solved and you just wait them out, as it turned out, no need)) I spent sleepless nights watching smart TV shows and was enriched with knowledge. The point is that you can find something good in any situation)))) I want to somehow reassure those who are in a panic looking for solutions to the problems of sleeping a child or those who are just tired. Or the one who thinks she's a terrible mum and can't cope. Everything is solvable!!! And what can't be solved passes with time. You can find something positive in everything. ***Harmony to all!*** ***Photo:******pixels.com.*** I thank God for his help in writing this article, and you, dear readers, praise him if your reading has been helpful to you. I want to know your opinion. If you are interested in my content,then I invite you to read my other articles: https://read.cash/@EatingTasty/how-to-make-lace-pancakes-d5834022 *Good luck to you readers* read.cash @EatingTasty 22.09.2022

 @EatingTasty
How to make lace pancakes I promised to post a recipe for lace pancakes tomorrow, but I couldn't resist!!!! These are awesome! Make these for sure! Baking lace pancakes is not hard at all, and as it turns out, very easy and fun! I want to share with you a recipe for delicious Pancakes in a hole, as I call them) Pancakes in this recipe are good with all fillings, both sweet and savory. It's also delicious to eat just with sour cream or honey. The pancakes themselves are fluffy, that is, not too thin!) I would be glad if you like my pancake recipe. I've tried this recipe a few times, every year for Shrove Tuesday, but now finally I've found the perfect batter for lace pancakes - moderately fluid, moderately thick, just the right consistency, no sticking, easy to remove, in general, beautiful! Of course, you have to practice a lot to get such beautiful patterns. But in general, if you do not set a goal to create a masterpiece for the exhibition, drawing patterns with dough is a fascinating activity!!! Hearts, sunflowers, lace! And children are so excited! I drew them a cat, and cars, and stars! And my dad made a pancake in the shape of an anchor, since he builds models of ships. Now I decided to try the lattice pancakes, which I saw in the beautiful pictures. And it worked! **Ingredients:** 1 cup milk (200ml); 2 eggs; 1 tablespoon sugar; A pinch of salt; 60 grams of flour; 2 tablespoons of sunflower oil. How to make patterned pancakes: In warm milk add eggs, sugar and salt, beat with a mixer. Sift flour through a colander. Whisk again, so that there are no lumps. This is a very important point, since even the smallest lump will get stuck in the hole through which the dough is poured. Add vegetable oil to the dough and mix. The dough is ready! I used to pour the dough simply with a spoon, but this time I tried a more convenient way, thanks to the author of the recipe! We take a half-liter plastic bottle, in the lid of the bottle we make a hole 2-3 mm in diameter with the tip of an awl, not too big, so that the dough flows in a thin stream - then the patterns will be more elegant. Pour the dough into a bottle through a funnel, screw the lid on. Well heat a clean dry frying pan and, for the first time, grease it with a thin layer of vegetable oil or lard. Next time you don't need to grease. Now let's draw! Think of your own patterns, but note: first, you need to draw quickly, so that the pancake baked evenly, and secondly, the lines should be moderately thin, so that when you turn the pancake is not torn. 15-20 seconds, and it's time to flip! Do it very carefully, picking up the pancake with a thin wide spatula, you can also help with your hand. The same on the second side, and the lace pancake is ready! They bake instantly, which is another advantage of this recipe. And how delicate they are, both in appearance and in taste! Imagine, create, make yourself and your family happy! Of course, every housewife has her own recipe for pancakes, familiar and favorite. In the process of baking thin, delicate pancakes, you just need, as they say, to get used to it and everything will turn out with your eyes closed. If you want something unusual, *learn how to make openwork pancakes. An ordinary recipe with unusual results, because each prepared pancake is like a real work of art!*
@EatingTasty
Delicious apple pie: a simple recipe Yay!!! I finally came across a recipe for apple pie that is, well, very similar to the one I've been looking for for years :) Wonderful recipe, looked at it for a long time and finally tried it out. You should try it too. It's such a lush and delicious apple pie and such an easy recipe, I'm in a hurry to share it with you! I tried making it yesterday. Actually, I thought it would turn out, but not quite the way it should, because I thought it was a lot of apples and not as much dough. But, it turned out great) The dough "soaked" all the "gaps". It was yummy and I wanted it so bad!) And I couldn't resist, I baked this wonderful apple pie! It was delicious! It went viral in a jiffy! My daughter couldn't wait till it was cool!))), And when she was finishing the third piece, she started to ask for more, I had to put the rest of the pie in the fridge)))) And today we had tea with it, so I thought it was even tastier cold! Every year one of my mom's co-workers treated colleagues to it for their birthday, but no one told me how he baked it. And the pie was delicious - a layer of fluffy dough, a delicate apple layer in the middle, and an amazing shiny, brown crust on top, thin and soft! The mystery recipe has been bugging me for a long time. I've baked all sorts of apple baked goods: yeast, charlotte, and manniki, but the pie from my childhood remained elusive. It wasn't biscuit or yeast, but what was it? And now a recipe has been found that looks and tastes very much like that particular pie! `Ingredients:` -6-8 large apples, the more, the appleier the pie! It's best to take hard, sour apples; -Lemon juice - 2 tablespoons; 225g butter; -280 g sugar (1 cup and a little more than 1/3 cup); -4 large eggs (because if you take small eggs from young hens, the dough will be too thick. Although you can take them 6 pieces:) -Wheat flour - according to the recipe 350 g, that is 2 and 2/3 cups. But, in my opinion, this is a lot - the dough is not poured into the form, but out. Next time I would take a little less, for example, 2 ¼ - 2 ½ cups of flour. -Baking powder - 2 teaspoons; -Cinnamon - 1 teaspoon; -If desired, a bag of vanilla sugar. ***How to bake a delicious apple pie:*** First, let's prepare the apples: wash them, cut them into quarters, peel from the cores and cut into thin slices. And to prevent oxidation, sprinkle them with lemon juice. The cake looks like a biscuit and a muffin at the same time: very puffy, but denser than a biscuit. You might even think that it is a yeast dough, although there is no yeast. Beat softened butter with a mixer with sugar until fluffy (1 minute on low speed). Better yet, use powdered sugar instead of sugar, then the dough will be even more tender. Add the eggs to the beaten butter one by one, beating each time until homogeneous. Sift flour with baking powder into the dough, not all at once, but in 3-4 steps, and mix each time. Look at the consistency of the dough: it should not be too steep, but also not too liquid, thicker than pancakes. For baking the cake is suitable round or rectangular form. I have a round one with a diameter of 25 cm, but the layer of dough in it turned out high, so the cake baked for a long time, more than an hour. So I advise you to take a roomier form, in the original - 20x27 cm. We line the form with oiled parchment and grease the rims with vegetable oil. Spread half of the dough out on the bottom of the mold. Spread apples evenly on the dough and brush with cinnamon. Spread the rest of the dough on the apples and smooth with a spoon. Place apple pie in the oven and bake at 180-200C until a wooden stick is dry, how long depends on your shape and oven. About 50-60. And to make the crust on the pie even more ruddy, shortly before it is ready, brush its surface with whipped egg yolk. Let the pie cool a bit in the form, then carefully take it out and put it on a dish. *Puffy cake in the cut!* **I think next time we should take a smaller mold, and put more apples. Then it will look even more like that delicious apple pie!**
@EatingTasty
Canadian pancakes - pancakes with maple syrup These Canadian pancakes, let me tell you, are something extraordinary! So tender, soft, warm, and delicious, and if you sprinkle them with maple syrup, as in the authentic recipe, you'll love them! The recipe is easy and quick: just half an hour - and you have a wonderful breakfast for the family! Also great is that the pancakes are absolutely non-fat: unlike, for example, our pancakes, pancakes are baked in a dry pan. And they do not stick! They come right off. I baked them in a ceramic pancake pan, and I think I can do it in a cast-iron or non-stick quality pan, too. By the way, that's why Canadian pancakes are called pan-cakes: "pan" means pan in English and "cake" means muffin. I've had a bottle of maple syrup in the fridge for a long time now: my mom gave it to me as a New Year's gift, knowing that I was into interesting recipes. But I was not familiar with maple syrup. I went around the bush, wondering what I could do with it. I have found out that the syrup is used to flavor biscuits, sprinkle on muffins and pancakes, and as an additive to an exquisite marinade for main courses and salads. But it didn't get any further than theory until Saturday when I discovered a recipe for maple syrup pancakes! Very interesting! As I researched further, I found out that there are many recipes, and they are different. There are yeast ones, sour cream ones, and chocolate ones. But I was looking for the easiest recipe for delicious, fluffy pancakes, no yeast, and easy to repeat. And I found it! The dough here is similar to a biscuit dough, only a little less thick. The pancakes are shaped perfectly, turning out round without any tools like a molding ring. I recommend you try it too! Warm, sweet and fluffy pancakes are a great way to start the day off. Serve them with a cup of morning tea or coffee - and the good mood will rejoice all day long! Ingredients: For 12 pieces: 2 large or 3 small eggs; 2 tablespoons sugar; A pinch of salt; A pinch of vanilla; 200 ml (1 cup) milk; 130 g (1 cup 200 ml) flour; 2 teaspoons (10 g) of baking powder; 2 tablespoons vegetable oil; Maple syrup to taste. Instead of refined sunflower oil, you can take melted butter. And in addition to maple syrup, pour honey, jam, sour cream or rosehip syrup over the pancakes! How to bake: Carefully, so that the yolk does not get into the whites (this is a prerequisite for a lush white foam), we separate the yolks from the whites and put in different dishes. Add sugar to the whites and salt to the yolks. Beat the yolks with a mixer for a minute until lightly fluffy and pour in the milk. After stirring with a spoon, sift the flour mixed with baking powder and vanilla into the whisked yolks and milk. Stir again with a spoon, and then lightly beat with a mixer so that lumps disappear. Now wash and dry the whisk thoroughly. Whip the whites with the sugar until a thick white puffy foam, on which the marks from the mixer hold. At first turn on low speed, gradually changing to a faster and faster mode. All in all, whip for 4-5 minutes. Time to put a frying pan on the fire, let it heat up well! Carefully, in 2-3 steps, pour whipped whites into the batter - in a circle, in a watery direction, just like for a biscuit. Then we pour 2 spoonfuls of butter into the dough and mix again - gently to maintain its puffiness. This is the consistency of the dough. Like a biscuit, only less thick. It pours off the spoon, leaving melted traces. And then we start baking, so the fluffy dough doesn't settle. We take a portion of the batter - a little less than a scoop - and carefully pour it down the center of the hot pan, trying to make a round pancake. We got it! It holds its shape nicely. Bake it until there are bubbles like these and they start to burst, which means it's time to flip. On medium heat on one side the pancake bakes for less than a minute, about 45-50 seconds, and when the pan is well heated even less. And on the second side even less, about 15 seconds. Gently lift with a spatula and flip to the other side. I had only the first pancake stuck a little - and that's because the pan is not heated up enough, and I was in a hurry to flip - as soon as there were "bubbles", and you have to, when they are already bursting. Then it was off! The pancakes are stacked on a dish, it is better not on top of each other at first, but side by side - when hot, they are very tender. And when you bake them all, you can serve them like in Canadian cafes: stack the pancakes. ...and pour a spoonful or two of luscious, sweet syrup on top! The classic serving is 3 pieces. *Treat your family to pancakes with maple syrup! The pancakes soak in it and become amazingly juicy and delicious!*
 @EatingTasty
Dried meat at home and a quick steaming. One of my acquaintances wrote me a letter. With words of encouragement and well recipes. A huge thank you for both. It is very important when people write, support and share advice in this difficult and anxious time. It immediately becomes warmer and gives me strength. In turn, I am sharing with you. Although this is not a bake, but maybe someone will find the recipes useful. The first is a quick and economical pastry for dough, and the second is a jerky. Here's what she wrote: *"Hello. We are all with Ukraine and its people. In Finland, in addition to the protests, volunteers, ordinary citizens also help refugees and send food and clothes to Ukraine.* *Our family, having lived through the war themselves, having been granted asylum, knows what it is like. A friend, Ukrainian by nationality, collects things, transfers in social services. We are all with you, family!"* **A quick marshmallow for dough** A quick marshmallow for dough. I tried this recipe out myself, maybe people will find it helpful. The dough dough is a whipped dough. The point is that you only take 2 grams of dry yeast per glass of liquid. Raw yeast can also be reduced by a factor of three. Yeast, dissolve sugar in warm water and beat with a mixer on the second speed. Let stand for 30 minutes and you can start the dough. The dough rises just incredibly fast. I think that in case there is no electricity, you can whip with a whisk, though it takes longer. Jerky (dried ribs) We make dried meat that can be stored for months without a refrigerator. And there is no need, and still everyone has ropes hanging in their kitchens. In the villages in the Caucasus they make dried sausage, which also kept without refrigeration for months. The only thing is that you need a lot of salt in the beginning and some when soaking the meat. Sausage is still more difficult to make. Meat dries out in the conditions of a normal home, the main thing is to be fly-free. We cut it into strips, but mostly we dry the ribs. In a pot pour rock salt, lay a layer of meat, salt again and so several layers. Put in a cold place under a crutch. After two days, turn it over. Leave it for another 24 hours. Put no seasoning. Then take it out of the brine, blot with paper towels or a clean rag. In a usual apartment, we stretch a rope, at a distance of 15 centimeters, fix a wire about 20 centimeters long. We make a puncture in the piece and put it on the wire. And we hook it to the rope. On one wire enters two pieces. And it hangs for five days. You have to watch it. It should become like a knuckle. Then we put it in a cloth bag or in a paper bag, hang it somewhere in the kitchen or pantry and cook it as needed. The smell of corned beef will be there the first 24 hours it's drying. But that's okay. Before cooking, you have to throw it in cold water and add salt. The salt will draw the salt out of the meat. Some people, after soaking it, heat it to a boil and then drain the water. Then it won't be salted at all. They say that during the war it was a great saving, because in the heat these knucklebones did not do anything.
 @EatingTasty
Ceramic-coated pancake pan: my review:) Do you think a ceramic-coated pancake pan is a good idea? Actually, pancakes are supposed to be baked in a separate pan. But still, I always thought it was a cop-out so we'd buy more utensils (like a special ice cream scoop!) and could get by with one frying pan for everything, which I've done quite successfully. Pancakes and pancakes, omelets and borscht toppings, gravy and even round cakes and muffins all cooked perfectly in my good old cast iron skillet. But now my mom gave me a special pancake pan. The frying pan with a white ceramic coating looks very unusual: flat, like a pancake, which should be baked on it:) The sides are so low that they are barely noticeable. You can't make gravy in such a shallow pan. But pancakes, pancakes, burgers, and cheesecakes are fine! Since they gave it to me, I have to try this wonder of culinary thought in action. I was just about to make a zucchini pancake cake, and you know how capricious zucchini products are. Zucchini pancakes are so tender that it's a story to flip them, let alone pancakes, which are seven times bigger in area. So, the zucchini pancakes came right off this pan. Only a couple tried to stick to the gorgeous white coating - then I started oiling the pan a little before each pancake, and the rest of the pancakes came off easily. Encouraged by my good fortune, the next time I baked regular pancakes with milk in the new pan. What I really liked was that the pancakes on it turned out huge, noticeably larger in diameter than usual. By the way, my mother praises this feature of the skillet: the large area accommodates many cutlets or pancakes, and the cooking goes faster. I haven't tried the cutlets yet, but I like frying the cheesecakes in my usual frying pan better, for they require more oil. For pancakes, on the other hand, it's perfect. I only had to grease the pancakes with oil before the first one, and they came off easily even without oil - just a song, that's all. So, the conclusion is that if you like to make pancakes and fritters, then the pancake pan with ceramic coating will make you happy and useful. You can bake different kinds of pancakes on it, and (if you prepare the batter correctly) even the first one will not be a failure. Thin openwork pancakes with holes and lace, yeast and milk, even the capricious, tender kefir and zucchini pancakes will "make friends" with you. And of course, you can learn how to fry meatballs, chops, steaks, and the like in a frying pan, the oil consumption will be much less. Two or three times less. ***The main thing is:*** Before the first use, wash the pan with warm water and detergent with a soft cloth; Before laying out the first batch of pancakes or pouring a pancake, grease with vegetable oil - exactly grease, not pour, it is enough. To flip and remove, do not use a fork or metal spatula - the ceramic coating will be scratched. You can use a silicone spatula, a plastic spatula, or a wooden spatula. And the silicone one is convenient for small things like pancakes and cutlets, because it's small and flexible. But wide pancakes are better turned with a stiff, wide spatula made of wood or plastic. Also, to wash a frying pan after use, don't scrub it with a metal sponge! Gently scrub it with a soft sponge and some fairey, wipe it down with a kitchen towel, and let it rest for a while until the next pancake!
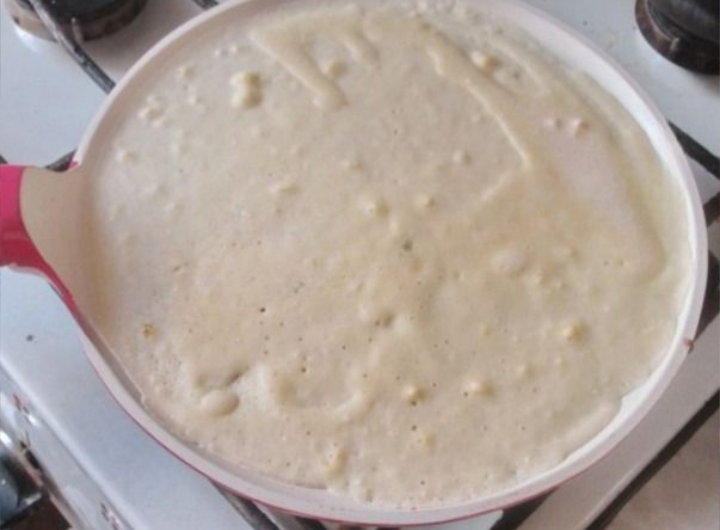 @EatingTasty
Palyanichki: buns with cheese Palyanitsya is Ukrainian bread. And a bakery near my work sells very tasty "Palyanichky" buns, which are round flatbreads with cheese. Thin dough base, juicy filling and ruddy edges... Delicious! So I decided to experiment and bake these scones at home. It worked the first time. Very similar, fragrant, delicious scones with raw filling. Speaking of filling. If you just sprinkle grated cheese, it dries out and that's it. As I was eating the bun, I wondered why the filling was so juicy. And then it hit me: you need to take not hard cheese, which is yellow, but white, soft - for example, mozzarella. Or adygeyan. And brynza will do. And for more juiciness add an egg to the stuffing. Sprinkle with hard cheese when the buns are almost ready. Then it has time to melt, but does not have time to dry out. And I decided to take the dough from a pizza recipe - there is just a very similar thin yeast base. The plan worked perfectly - I recommend the homemade cheese rolls! And for a cup of coffee for breakfast, and a bowl of soup for lunch, and instead of bread for dinner, and to take with you - to work, to school, on the road and in the countryside... Just what you need! ***Ingredients:*** For 12 pieces. Dough: 25 g fresh yeast. 3 teaspoons sugar 230 ml of warm water 0.5 teaspoon salt 3 to 4 cups of flour 3 tablespoons vegetable oil Filling 200 g of mozzarella (or bryndza) 100 g of hard cheese (Dutch) 2 eggs ***How to bake:*** Crumble yeast into a bowl, rub with sugar and pour in warm water. After stirring, sift in half of the flour. Stir once more and leave in a warm place for 15 minutes. The dough will rise and begin to ferment. Add the rest of the flour in portions, along with it - salt, and in the end - vegetable oil, olive or sunflower oil. Knead the dough well - for at least five minutes, to make it smooth, then it will rise well. Put it in a bowl sprinkled with flour, cover with a towel and put it in the heat for an hour. Knead the dough once it has risen and divide it. Roll into balls and each one is 5-7 mm thick. Put on a baking tray lined with oiled parchment, let rise for 10 minutes. Meanwhile, preheat oven to 200 C and prepare stuffing. For the filling grate the mozzarella on a coarse grater and mix with the eggs. Leave some of the yolk to grease the buns. Put a couple of spoonfuls of filling in the middle of the buns. Bake for about 15 minutes until the dough is cooked through. Then we take out the tray, grease the edges of buns with egg yolk and a little water or milk, and on top we sprinkle the buns with grated cheese. And we send it to the oven for another 5-7 minutes, until the cheese melts and browns. In an electric oven everything bakes about one and a half times faster than in a gas one, take it into account:) Cover the finished flatbreads with a towel, then they will stay soft. Let them cool down to a nice warm condition - and you can try them! Just do not drink cold, it's better to make hot tea. Buns with cheese from yeast dough can be made at home, without much effort. Bakes according to this recipe always turn out puffy and fragrant. Such cheese buns can be served with tea, smeared with butter, or replace the bread with them. Our daughter loves them very much, pulling them endlessly. And first of all she chooses those buns where the cheese is baked at the bottom, forming, "cheese wings". Wonderful yeast buns with cheese: fragrant, airy and very, very tasty. I bake such unsweetened buns instead of bread, they are convenient to take with you to work, to school or on the road. The recipe is not complicated at all, you can bake these buns very quickly and easily at home.
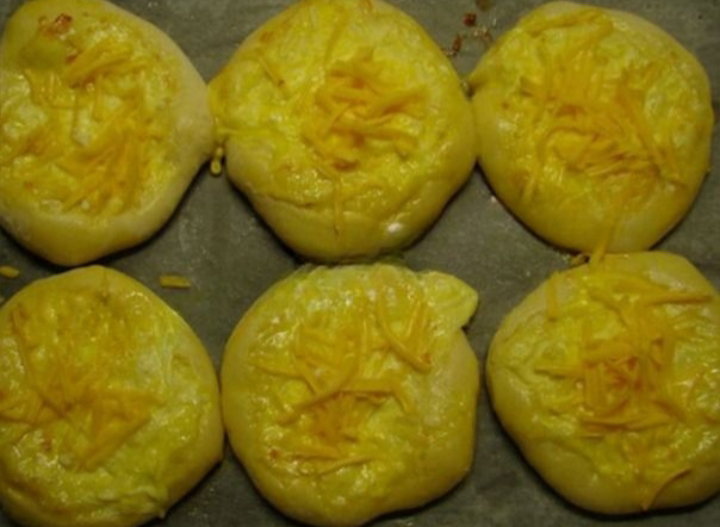 @EatingTasty
Eggplant appetizers: recipe Melidzanosalata Now is the time to cook eggplant. And on an industrial scale. Right now they are at the most interesting price. Another couple of months, and it will be a pain to buy. So seize the moment, if you haven't had time yet. By the way, in none of the recipes I salt eggplants to get rid of bitterness - modern varieties of eggplant are not bitter. The only reason eggplants need to be salted before cooking is so that they absorb less fat later in frying. Since you're so good with eggplant appetizers, I'm sharing the recipe for another one. Melidzanosalata 🍆 is a Greek appetizer-dip based on baked eggplant. And classically, they are baked over an open fire - so that the skin is partially charred. Some enthusiasts roast the eggplants over a gas burner and then finish baking them in the oven. I've simplified the recipe for those who don't have a grill or gas stove and suggest baking the eggplants simply in the oven on high heat. Additional garnish components - olives, cheese, herbs and more - are up to your choice and taste. You can add everything at once, choose one thing or limit yourself to adding only flavorful olive oil. Either way, it will be delicious. Oh, and don't forget the delicious bread to go with it all. ***Base:*** eggplant medium 3 pcs. Garlic 3 cloves; red onion small 1 pc; a small bunch of parsley 20 grams; lemon small 1/2 pc; olive oil 60 ml; salt and pepper to taste. Optional feta, olives, walnuts, olive oil, parsley. ***Recipe:*** prick the eggplants with a fork in several places and put them on a baking tray. If you are making melidzanosalata with roasting eggplants, scorch them over a gas burner and put them on the tray afterwards. Place in a preheated oven to 220 degrees and bake until soft, about 30 minutes. If your oven has convection - great, turn it on. Take baked eggplants out of the oven and cover with foil. Let stand for 10-15 minutes so the skin comes off easier. Remove the skin, put the eggplants in a bowl and cool completely. Knead the eggplants with a fork. If you want a more uniform texture, beat the mass with a blender - partially or completely. Add chopped onion, garlic, parsley, season with salt and ground black pepper, drizzle with olive oil and 2 tablespoons of lemon juice. If you like lemon flavoring in your appetizers, add some finely grated zest as well. Stir, cover with clingfilm, and place in the refrigerator for an hour to allow the ingredients to exchange flavors. Serve with the toppings of your choice - feta, olives, walnuts, extra olive oil or herbs.
@EatingTasty
Implementing BCH and How to Make Money! Bch is a computer file stored in a digital wallet. You can send Bch to someone with your digital wallet, and they can send bitcoin cache to you. Bch is not a physical asset, so ignore the images displayed on websites. You can also buy bch and store it until the price goes up. All transactions are verified by network nodes and recorded on the blockchain. If this interests you, there is no need to wait any longer. This article provides you with all the basic information you need on bch cryptocurrency and others too. So if now you are ready to learn how to make money with Bch then you should read this. Here are the most effective ways to earn bitcoin cache: Mining You can make a lot of money by solving cryptographic problems and adding blocks to the bitcoin blockchain. **It includes 2 types of mining.** **Professional mining.** This type of mining is done individually. Bch as well as BTC is considered to be one of the hardest cryptocurrency mining. Because it is the subject of massive successes. The demand for bitcoin cache is higher than its supply, so you may have to try to get big profits after determining the cost of maintenance. **Cloud mining equipment.** Cloud mining equipment is a popular choice of many because it doesn't require regular payments and an increase in your electric bill. It only requires you to pay a one-time contract fee. Other than that, you don't have to purchase any software or hardware. As a result, it has become a great alternative for personal mining, where you keep making profits. **Note:** Before you invest in a cloud company, you should always make sure that the company has credibility! **Buy bitcoins and hold them** People think of it as simple formulas because it is an easy way to make money. The long term investor usually takes this approach because it is a safe way to make money. You can buy BCH and wait for prices to rise and then sell it and earn income. The reason this approach is effective is that its not like a short-term investment, you may have to hold it for a long time because it is not one of those exorbitant expectations. However, you need to know the right time to buy. Accept payment in bitcoins The site should state that you accept BCH. Nowadays, many companies have started using BCH to pay for their goods and services. If other companies are doing it too, why don't you? Accepting bitcoin as payment is an easy thing to do! For example, with a physical business, you can start buying BCH just by putting a small sign in your showroom or store. If you are an online business, you can use a payment service or put a banner on your website about accepting bitcoin caches. Earn bitcoins by being an affiliate You can make a lot of money with Bch and promote it on social networks. You can be an affiliate of a BCH company of some other cryptocurrency holding company, promote your products and services, increase the number of visitors, get a commission on each sale. The amount of commissions depends entirely on increasing your customer base and their sales. You can use subscribers in social networks to influence and notify customers about the purchase of a given product or service. Bitcoin credit. The best part of BCH is that you don't need any authority to check it, so you can process transactions without interruption. Individual BCH for other people is a great way to make money. There are many sites that can assist you in getting credit services. It is very important to choose a reliable credit source because otherwise you can lose all your bitcoins. All reliable credit platforms offer an interest rate of about 10 percent, maybe less. Microloans While it's not impossible that earning money from microloans will make you rich, it's a good way to earn some extra money to cover everyday expenses and needs. Plus, if you work for legitimate PTC websites that pay you in cryptocurrency such as BCH, you could potentially earn even more. For example: CoinPayU; adBCH; RUCAPTCHA Even though the pay on these sites isn't very big, it's still one of the fastest ways to make a quick buck. Some sites pay for completing your bitcoin cache tasks. Trading Many people make good money trading BCH. Many successful traders follow trading charts, study the trading market, and consider internal factors before making trades. These traders also consider risk. When they decide it's time, they close the position for a profit. The Bitcoin Cash Society says that the main purpose of BCH is to be used as money. This allows the cryptocurrency to send and receive funds quickly to any BCH wallet owner, whether an individual or an entity. With fast transactions and low fees for everyday use, BCH outperforms bitcoin, especially for small payments.
@EatingTasty
What to bake with old sour cream Do you ever find yourself with a sour cream packet in the fridge? Or even not started, but bought on a special offer, when they make a discount on dairy products in the supermarket on the eve of the expiration date? And then you look at the package, and it says that the sour cream is valid until yesterday:) And what to do with the old sour cream? It's a pity to throw it away, but it's scary to eat it! Well, not terrible, but somehow you do not want to add old sour cream to borscht or pour it over cottage cheese. Old sour cream is really not good for eating without cooking, but it's just right for pastry! Now I will tell you what you can make from old sour cream - so that the product will be saved, you will be satisfied, and your family will be surprised and delighted with a delicious dish! So, I offer you 5 recipes: what to bake from old sour cream. ***Attention!*** Sour cream is not the same as sour cream. There is just old sour cream - the one that has spent a few days in the refrigerator, but quite normal in taste and color.... That is, the smell. And then there is spoiled sour cream, which is no longer suitable for baking. It can be recognized by an unpleasant smell. Now, don't cook anything from such sour cream! It is better to throw away one spoiled product, than to spend a few more trying to cook something. It's like with sour milk: if it's just gone sour, you can bake pancakes and pancakes, but if it's rancid, feel free to pour it out. For sour cream, and pies in which sour cream is used for filling, use fresh sour cream. Quick recipes-such as waffles on sour cream or shortbread cookies-are best made with fresh sour cream, as they are minimally heat-treated. Simply put, they bake very quickly: only 5 to 15 minutes. But pies and muffins, which take 30 minutes to bake, are fine.Baking with old sour cream. Sour cream cupcake The easiest but very tasty sour cream muffin with reduced butter. especially delicious if baked with spelt flour. But you can also use wheat flour. you can add pieces of chocolate, different berries, nuts, poppy seeds to the dough. Whisk 3 eggs with 150g of sugar. Add 1 cup (200 ml) of sour cream, stir to combine. Add 70 g of melted butter, stir again. Sift 1.5 cups of flour (200 g), mixed with 1 teaspoon of baking powder and 1/4 teaspoon of baking soda, add 1/4 teaspoon of salt, and knead the dough. Pour the berries (do not defrost the frozen ones, wash and dry the fresh ones) and chocolate, mix it up, pour it into the baking dish lined with parchment and greased with a thin layer of vegetable oil. Bake at 180C for about half an hour, until a skewer is dry. Finished cupcake cool slightly, pour chocolate glaze and sprinkle with nuts. Sour cream muffin A variation on the muffin theme. This cake is especially delicious if you put a generous amount of dried fruit and nuts in it. Beat 3 small eggs lightly with 1 cup of sugar, add 1 cup of sour cream, beat, sift 1-1.5 cups of flour with 1 teaspoon of baking powder or 0.5 teaspoon of baking soda, stir. The amount of flour may vary. Be guided by the density of the dough: it should be thicker than for pancakes. Pour in pieces of apricots, prunes, raisins or dried cranberries, chopped nuts. After mixing, lay the batter in a form greased with butter and sprinkled with semolina. I recommend using a form with a hole, in it the pie will bake faster. Or not very high round or square. Bake the cream cake at 180C for 50 minutes, checking it with a wooden spoon. Mannik with sour cream and berries One of the most delicious and crumbly pies is a mannik! Manniks are usually baked with kefir, but you can also bake them with sour cream and rye. Try a delicious mannik on sour cream with raspberries, you can also add other berries: strawberries, cherries, blueberries, currants; pieces of fruit: apricots, apples, pears. Stir 30g of softened butter with a spoon and 90g of sugar (a little less than half a cup). Add 2 egg yolks and knead again. Add 250 ml of sour cream and mix well. In a separate bowl mix 250g semolina with 1.5 teaspoons of baking powder and 1/4 teaspoon of baking soda. Combine the dry mixture with the liquid mixture, stir and leave for 10 minutes. Beat whites with 1/4 teaspoon salt for 2-3 minutes at medium speed with a mixer, until thick white foam. In 2 to 3 strokes, incorporate the whipped whites into the batter. Layers of dough, sprinkling with berries, in a greased paper form. 3-4 times repeat the dough-berries, berries need 150 g. The first and the top layers are dough. Bake at 180 degrees Celsius for 45 minutes to 1 hour, depending on the size of the mold and the height of the pie. When the top becomes ruddy and the skewer will come out of the dough dry - the mannik is ready. Pear pie with sour cream Beat 3 eggs with 180 g of sugar for half a minute on low speed. Add 120 ml of sour cream and beat a little more. Sift 160 g of flour mixed with 1.5 teaspoons of baking powder and a pinch of vanilla, add 1/4 teaspoon of salt, mix. Pour 50 ml of refined sunflower oil and stir again. Pour the batter into the mold, fan thin slices of pears on top. Bake at 180C for 45-55 minutes. Poppy seed cake without butter. What I like about this pie is that it has absolutely no butter. It does have sour cream, though:) Beat 2 large eggs with 150g of sugar for 4-5 minutes, starting with the minimum speed of the mixer and increasing to the maximum. Add 200 ml of sour cream and beat on low speed for 10 seconds. Add 100 g dry poppy seeds and 100 g chopped nuts. Stir in one direction in a circle. Sift 1 cup of flour (130 G, it is a 200 ml glass) with 1.5 teaspoons of baking powder and a pinch of baking soda, salt (1/4 tsp.), stir, and pour into a baking dish lined with oiled parchment. Bake at 180 C for 30-40 minutes, until skewers are dry. Choose what to bake with the old sour cream - and the food is saved, and there is a delicious pastry for tea!
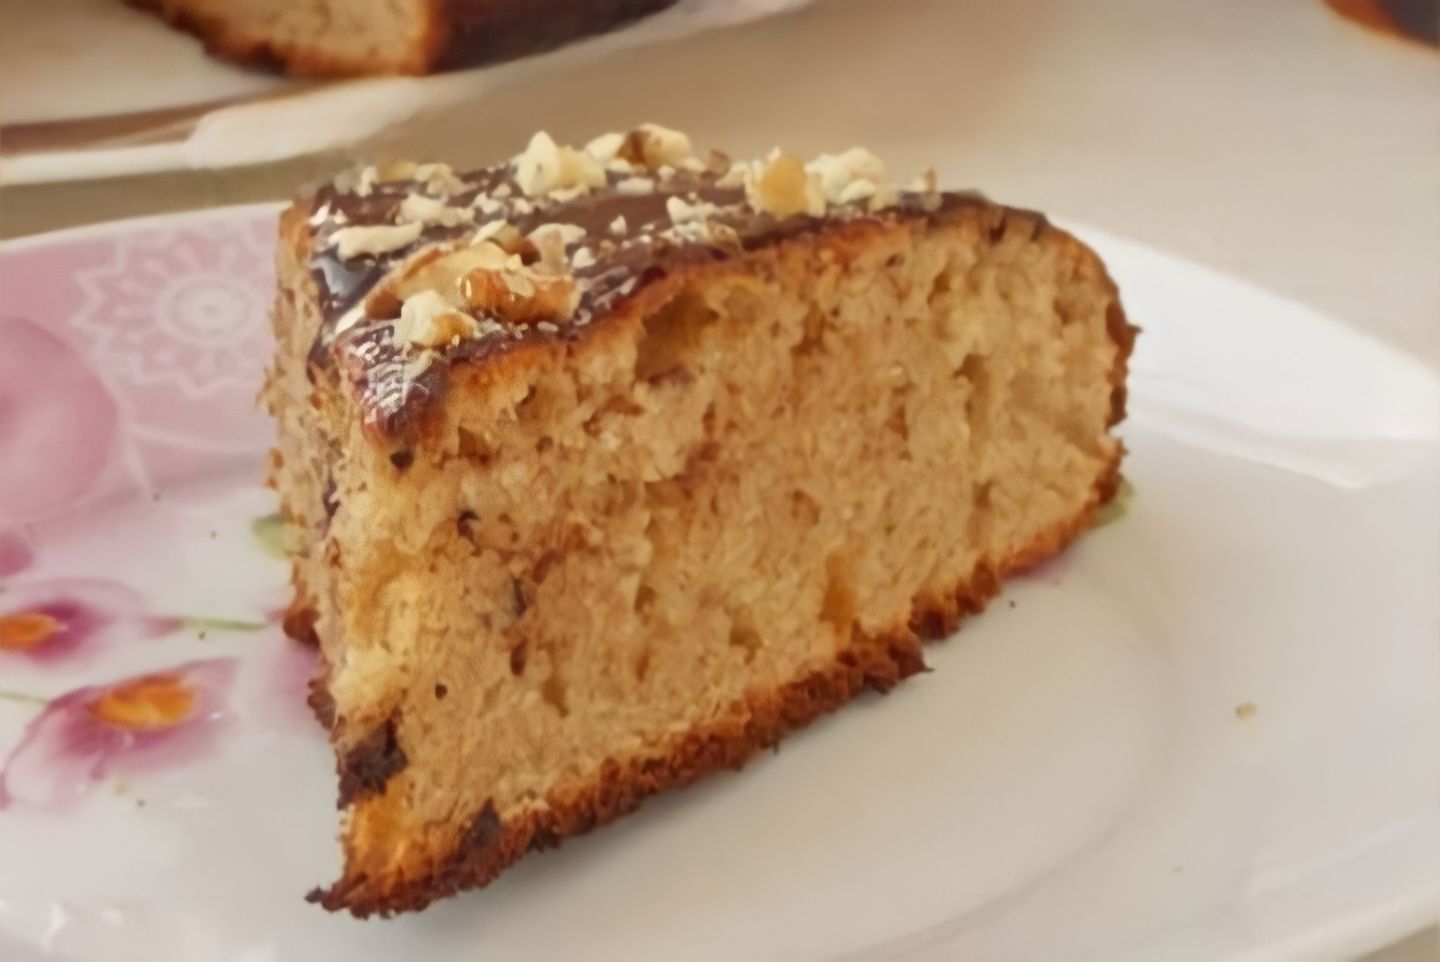
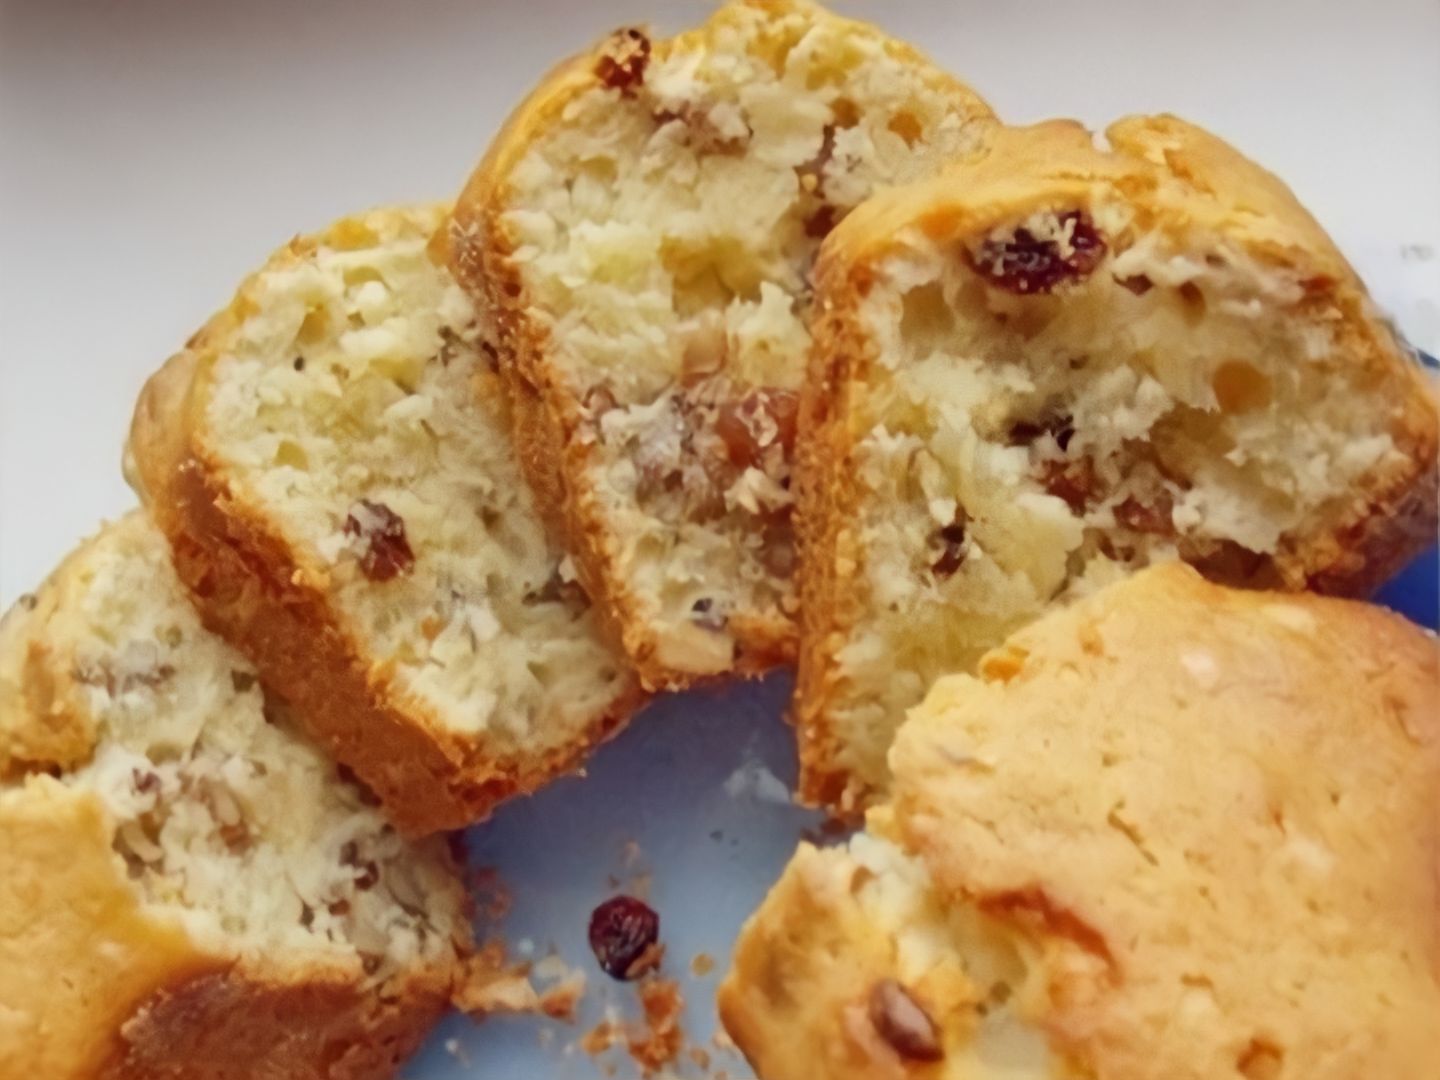
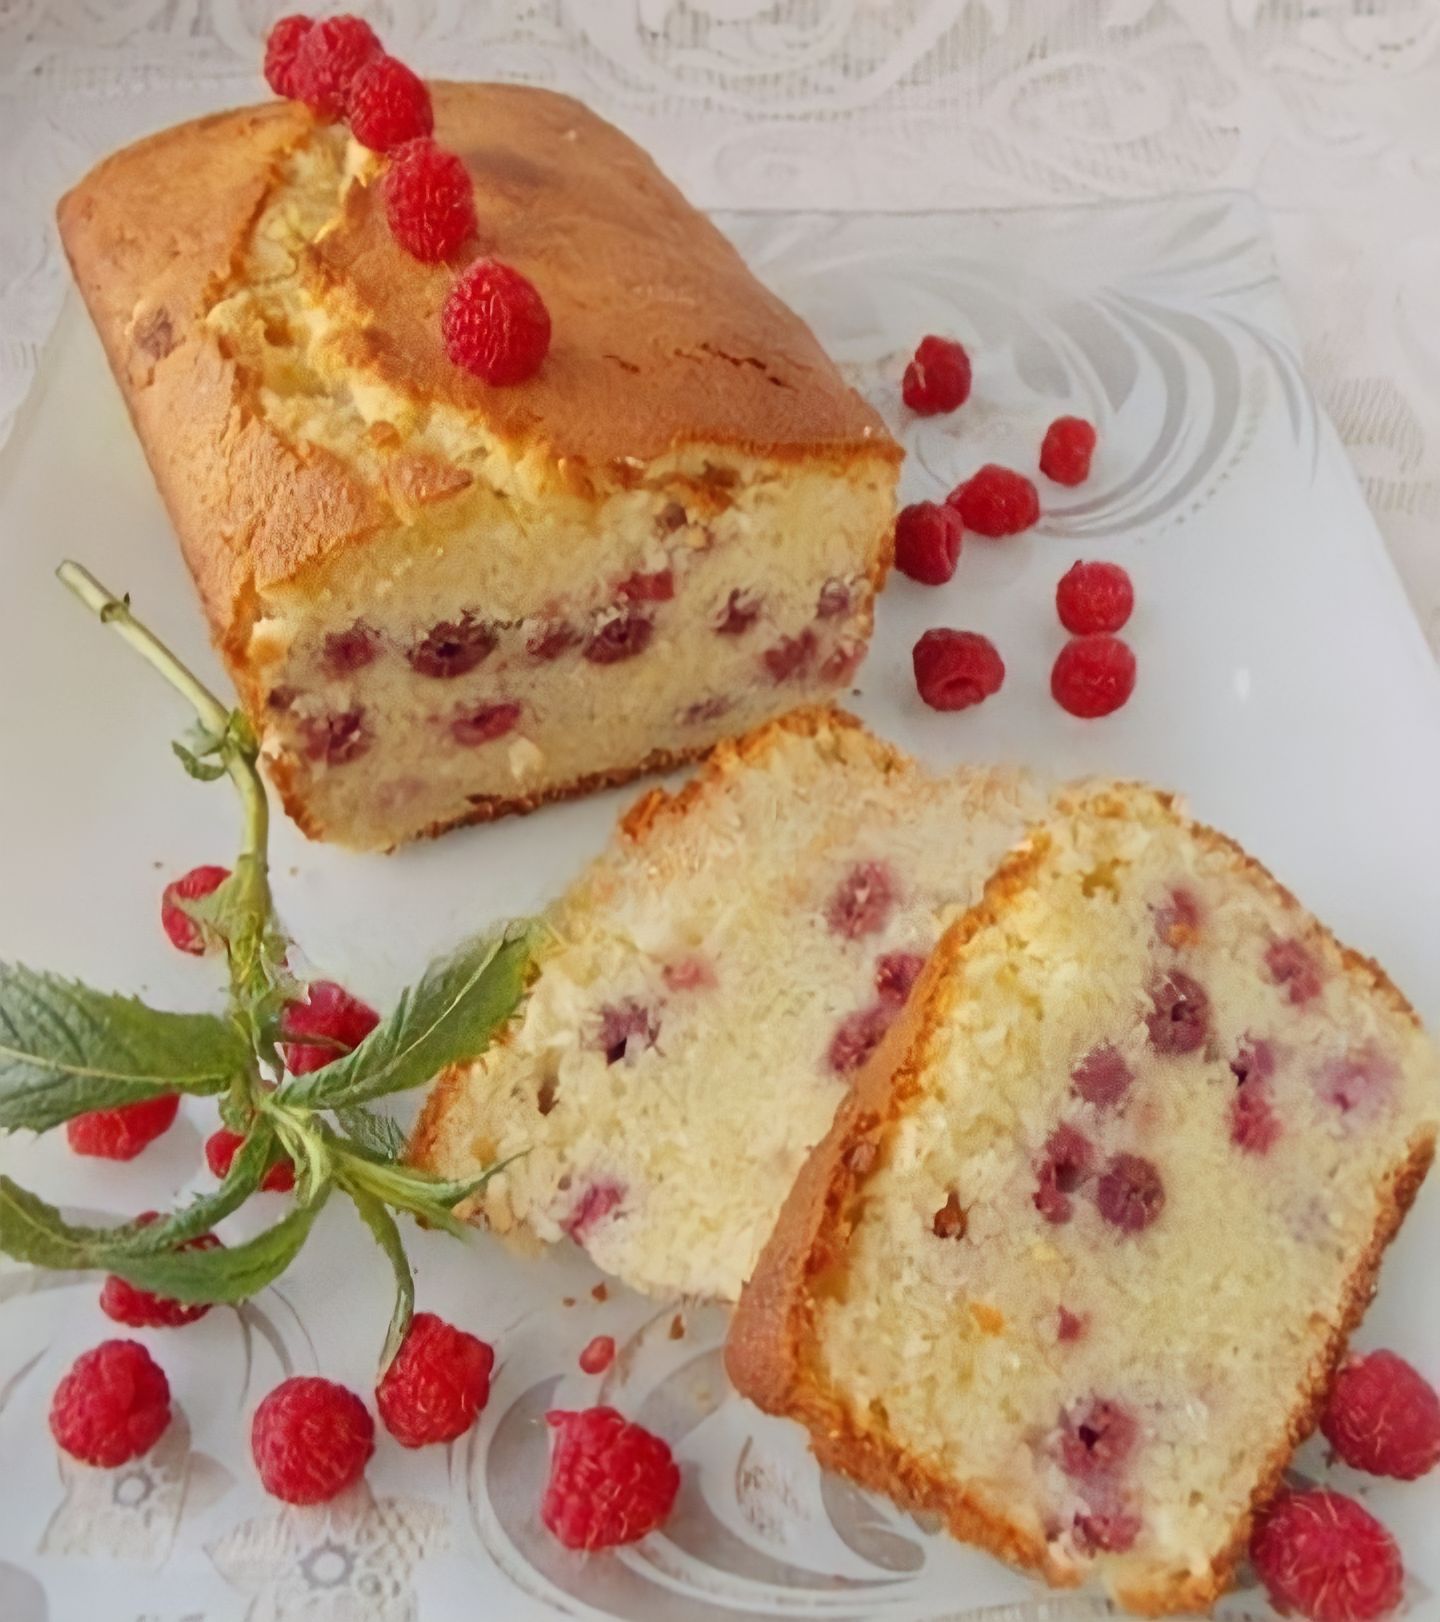
+2 more