Creating an Loot Royale NFT Collection DApp
Introduction
In this series of blogs, I am going to show how to create an on chain and off chain NFT collection smart contract and create a DApp to mint NFTs.
I am also going to show how to create your own DApp which I designed for fun last year and also to learn about NFTs and DApps.
Idea
The idea to create an NFT DApp is inspired from the loot project but I also want to add my own flavors of creativity to it and understand the working of smart contracts in the process.
Learning
Before this , I tried out different things like building my own token on Ethereum test network back in July, 2021 when I am new to cryptocurrency space and understanding little things like how merkle tree is used. https://www.thecryptoinsight.com/2021/07/how-to-create-your-own-cryptocurrency-on-ethereum.html https://www.pranaybathini.com/2021/05/merkle-tree.html
It is this time when I learned about remix IDE, MetaMask wallet, different test networks of Ethereum blockchain, deploying smart contracts through remix IDE. I also learned little things like we can deploy the same contract which deployed on Ethereum blockchain on other blockchains like Binance Smart Chain. https://remix.ethereum.org/ https://www.thecryptoinsight.com/2021/07/how-to-create-your-own-cryptocurrency-on-binance-smart-chain.html
I have decided what to build but don’t know how. I began exploring some resources with little knowledge and found this solidity tutorial from a reddit post. https://cryptomarketpool.com/getting-started-with-solidity/
I have gone through the solidity basics to understand code from verified smart contracts and to develop new ones.
Smart Contract Development
After getting a bit of knowledge on solidity, I began exploring the smart contract of loot project. It didn’t make much sense but after spending some time with it, I understood the working.
I know ERC-721 standard is used to build NFTs and ERC-20 standard to build our own token on Ethereum block chain but don’t know what functions exactly we need to define in those standards.
I referred openzeppelin docs to understand more about the functions in the ERC-721. So, without any further journey lessons, I will jump into smart contract development. https://openzeppelin.com/
To develop our own NFT smart contract, we require
**Ownable** **Smart contract** https://docs.openzeppelin.com/contracts/2.x/api/ownership#Ownable
It is used to manage the ownership of the contract. By default, the owner of a smart contract is the address from which it is deployed.
It has functions that lets transfer ownership of the contract to other address using transferOwnership(newOwner) method. https://docs.openzeppelin.com/contracts/2.x/api/ownership#Ownable-transferOwnership-address-
It lets you renounce your ownership of the contract with renounceOwnership() https://docs.openzeppelin.com/contracts/2.x/api/ownership#Ownable-renounceOwnership--
It provides onlyOwner() modifier to let some functions get executed by only owner like starting the sale, pausing the contract, Give away NFTs from the contract. https://docs.openzeppelin.com/contracts/2.x/api/ownership#Ownable-onlyOwner--
**Enumerable721** **Smart contract** https://docs.openzeppelin.com/contracts/4.x/api/token/erc721#ERC721Enumerable
It extends ERC721 standards, so we don’t need our contract to extend ERC721 contract explicitly. https://docs.openzeppelin.com/contracts/2.x/api/token/erc721
This provides enumerability of all the token ids in the contract as well as all token ids owned by each account.
See the functions provided by it the he documentation. https://docs.openzeppelin.com/contracts/4.x/api/token/erc721#ERC721Enumerable
**ReentrancyGuard** **Smart Contract** https://docs.openzeppelin.com/contracts/4.x/api/security#ReentrancyGuard
This module that helps prevent reentrant calls to a function meaning it makes `[nonReentrant](<https://docs.openzeppelin.com/contracts/4.x/api/security#ReentrancyGuard-nonReentrant-->)`modifier available, which can be applied to functions to make sure there are no nested (reentrant) calls to them.
Functions marked as `nonReentrant` may not call one another.
**Pausable** **Smart Contract** https://docs.openzeppelin.com/contracts/4.x/api/security#Pausable
It is also advisable to extend this one which allows child contracts to implement an emergency stop mechanism that can be triggered by an authorized account.
This used through inheritance and makes modifiers `whenNotPaused` and `whenPaused` available which can be applied to the functions of your contract.
We can make our main smart contract extend these smart contracts directly by importing these in our code.
The code is found here for Loot Royale Onchain NFT Smart Contract — Loot Royale On chain NFT Collection Smart contract code. Please open this in new tab to follow along. https://gist.github.com/pranaybathini/52f4ff2da4c3518855264febe7d95739
Let us discuss about the functions inside the main smart contract — **BattleRoyale.sol**
Three functions are important.
Function to let the users mint NFT Tokens by paying required amount of price for the NFTs they are minting.
Function to get the token URI of the NFT. This takes in token Id and gives a JSON with the NFT. Here in our case, it is an SVG image generated from the code — On Chain. No external calls required.
Function to get the amount from the contract address to your own address or any address you want to withdraw. I wrote the function to withdraw to owner address of the smart contract.
NFT Design for on chain smart contract
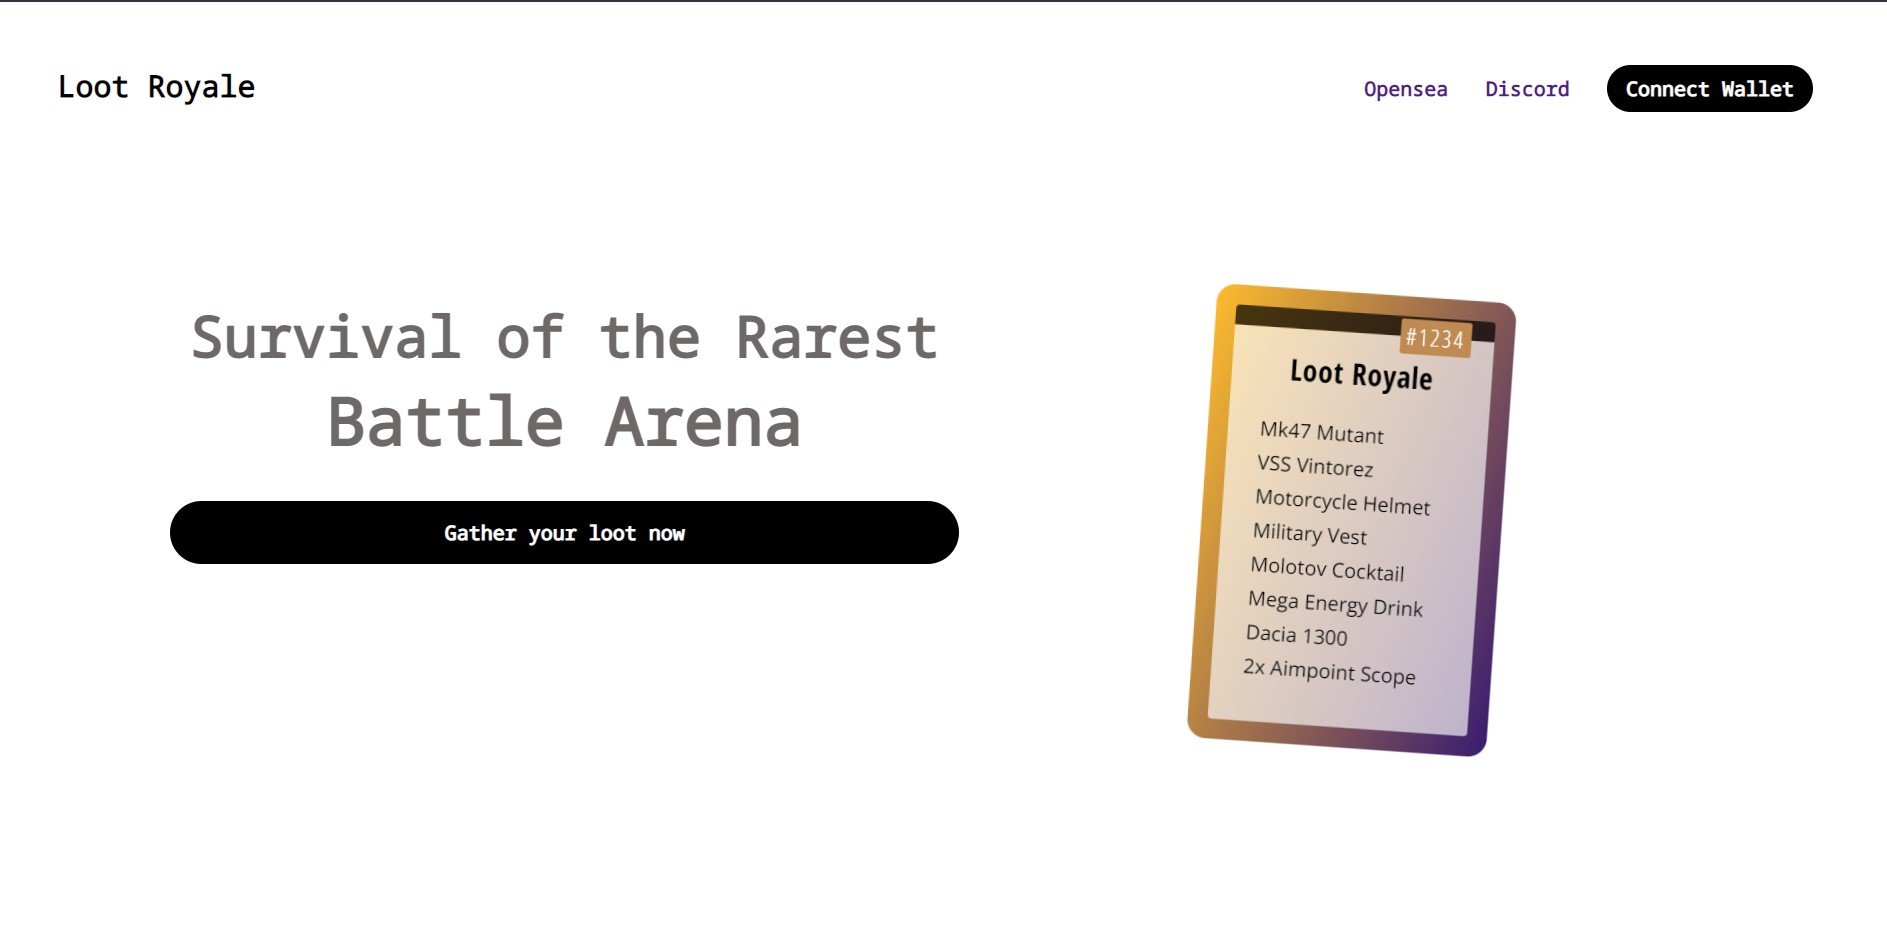
Here is one of my NFTs look like.
A simple HTML CSS Design inside svg tag with curved border and it also displays the token ID at the top. It took some time for me to realize that we can include html CSS inside svg tag. Initially, I took the HTML CSS code and used this site to convert to SVG but the output svg size is very heavy. https://www.hiqpdf.com/demo/ConvertHtmlToSvg.aspx
Another problem I faced while storing this data for design was that the max size of a smart contract cannot be more than **24576** bytes. So, I moved the code to another smart contract then to library, just so to reuse it in another contract. This is just one line but took some time since I tried optimizing it first before realizing I can do move this to another contract. Learning++.
Here is the link to SVG Code for the above NFT. https://gist.github.com/pranaybathini/d3875355c93e726899c5104cb388cb66?short_path=a38f07c
Also, you can see my data in the code which is different from loot project. You should have guessed it by now where did I get my data from. Now lets see what are on chain vs off chain NFTs.
On chain vs Off chain NFTs
The difference between on chain and off chain NFTs as the name suggest we will be storing all the data related to NFTs on the blockchain itself for on chain NFTs.
In case of off chain, I need to provide some external URLs like https://somedomain.com , ipfs://sha256hash/1.png. https://somedomain.com/ http://somedomain.com/
In both cases, I need to return the JSON output file following NFT metadata standard. https://docs.metaplex.com/token-metadata/Versions/v1.0.0/nft-standard
A sample IPFS image URL looks like this — ipfs://QmV3yGkzx2Uw3NHPZV9SAMLA58j7LvCFLFYtyfCMBAvstF/2.jpg
You can open this in brave browser directly — a pin I have drawn on art flow mobile app long time back.
If we were to create off chain NFTs, how would the code look like?
Refer this github gist link for offchain smart contract. https://gist.github.com/pranaybathini/dbb8c34dfbed1720f33960669342148b
I will set the IPFS or HTTPS BASE URI in the contract when the sale starts or now a days, the developers are revealing the NFTs after all NFTs are minted.
It is simple to write a function to set URI variable and call it once all NFTs are minted.
There are two variables
Base URI — actual URI for NFTs
Blind URI — Till we reveal the NFTs, this image or video will be same for all the minted NFTs.
The URI we should set will be like ipfs://QmV3yGkzx2Uw3NHPZV9SAMLA58j7LvCFLFYtyfCMBAvstF/
When we query, our token Id gets appended to it and Open Sea or any other market place can find and display it.
Starting steps are to set the contract active, then set the blind URI. Once all NFTs are minted, you can reveal the NFTs minted.
The tokenURI method output will look like
{
"image": "ipfs://QmV3yGkzx2Uw3NHPZV9SAMLA58j7LvCFLFYtyfCMBAvstF/1.png",
"name": "Loot Royale 1",
"description" : "Some description"
}
Compiling and Deploying to blockchain
Now we have our contracts, how do we deploy them to the blockchain network. Many blockchains forked Ethereum with added changes to bring DApp development features. You can deploy to any network that supports solidity.
Let us deploy this on chain NFT smart contract to Ethereum’s Ropsten test network. But before that, we need
Remix IDE — You can use it online. Simply click https://remix.ethereum.org/. In case you want to run it offline, you can refer this blog on how to download it on docker and run it. https://www.thecryptoinsight.com/2021/07/how-to-create-your-own-cryptocurrency-on-ethereum.html
Metamask wallet — If you don’t have metamask wallet, follow this blog to install metamask wallet in the browser of your choice. If you are using brave, it is inbuilt within the browser. You can access it from settings. https://www.thecryptoinsight.com/2021/06/how-to-create-an-ethereum-wallet-using-metamask.html
Get some Ropsten testnet ether/ Rinkeby testnet ether/ Polygon testnet Matic to deploy the contract on the ropsten network. Change the network to ropsten on metamask.
https://faucet.ropsten.be/ — Ropsten Testnet Faucet
https://faucet.polygon.technology/ — Polygon testnet faucet
If you deploy on Rinkeby testnet or polygon testnet you will be able to see your NFTs on opensea testnetwork. Next steps are same for all the networks.
**Next steps**
Copy the contract to your remix IDE. It should look like below.
Remix IDE
You can select the compiler version to any version above 8.0 But remember this version which you used to compile. This is needed while verifying contract on the block explorer.
In case you don’t know what is a block explorer, refer this blog to understand in detail. https://www.thecryptoinsight.com/2021/08/block-explorers-how-to-use-a-block-explorer.html
Go to compiler tab and click on compile. You should see a green tick mark like below.
Go to deploy tab. You should select the contract as BattleRoyale.sol
By Default, the environment will be Javascript VM. All the transactions will be executed in a sandbox blockchain in the browser. This means nothing will be persisted when you reload the page. The Javascript VM is its own blockchain and on each reload it will start a new blockchain, the old one will not be saved.
You need to select Injected Web3 as environment, which will allow us to inject metamask and deploy to the network selected on metamask. You should be able to see the your metamask account and balance in the accounts section.
When you click on deploy, you will be prompted twice. First the CardDesign Library is deployed and then our smart contract.
You will receive two metamask notifications once the contracts deployed. Click on them, you will be redirected to Ropsten block explorer. You can also view the transactions from activity tab in metamask.
Congrats, now the On chain NFT smart contract — loot royale has been deployed.
But how do we interact with it. I will explain in detail on how to interact it from our custom react frontend later. Let’s see how to interact with the contract from the block explorer.
FYI, block explorer is also a DApp.
Verifying the contract on blockchain Explorer
Now, let us verify the contract on the block chain explorer and interact with it from the explorer itself.
Open contract addresses of Card Design Library in one tab (We require this address), Open the contract address of the Loot Royale contract in another tab like below.
Click on verify and Publish and fill the details as below. I used 8.7 as compiler version while deploying from remix, so I am using the same here. Click on continue.
Copy the code from remix IDE and paste in the code part. Remove the string from constructor part like below.
Enter the library address as below and verify you are not a robot and click on Verify and publish.
Now, our contract is verified. It looks like below image. You should see the functions to read and write to blockchain.
Navigate to write contract section and click on connect
to web3, you will be prompted to connect to a provider like below.
Click on Metamask, it will prompt to connect. Click on connect to web3 again and you should be able to connect explorer with Metamask like below.
Now click on mintSingle function, it will an NFT. Enter 0.01 as NFT Price like below.
Congratulations. You have successfully minted an NFT. Now, lets view the token URI.
You can go to testnets.opensea.io, connect your wallet and you should be able to see your Loot Royale NFTs. https://testnets.opensea.io/
Loot Royale NFTs on Open sea Testnet
In the next blog, I will show how to design the frontend for lootroyale.xyz to mint the loot royale NFTs since this blog has become lengthy already. https://lootroyale.xyz/
Any feedback is appreciated. In case of any doubts or issues or any new ideas, DM me on twitter — @pranay_bathini. Let us learn together. https://twitter.com/pranay_bathini
Thanks for reading!!
Note:
This is a repost from my medium blog : https://pranaybathini.medium.com/creating-an-loot-royale-nft-collection-dapp-e9b5e43452c6
More tech content follow my tech blog and crypto blog. http://pranaybathini.com/ https://www.thecryptoinsight.com/
Understanding creation of seed phrase, private key and public key in blockchain crypto wallets
It is only repetitive to say how important it is to understand the seed phrase also called as recovery phrase or secret recovery phrase or back up phrase , private key and public key.
Whenever you create a crypto wallet, you might have warned to keep the secret phrase and private key safe and never share with anyone. In this blog post, I would like to explain about the three terms and the journey of seed phrase to your wallet address in most clear way possible.
Seed Phrase
Blockchain wallets have a **master key** made up of unique 12 word phrase generated when you create a wallet on blockchain. You would be given a unique 12 word secret phrase when you create your metamask wallet or bitcoin wallet or any wallet which is managed by you.
You only protect your secret phrase, your funds are stored on the blockchain. If you lose your secret phrase, your funds are lost too.
It is always advisable to store your secret phrase safely - write in diary, engrave on steel plates, write in cryptic form which only you can understand are some options to keep secret phrase. Never share your secret phrase with one. Sharing your secret phrase is like handing over keys to your house.
**Example seed phrase - 12 words**
zero small sunny grape dose weasel image bind crack soap thunder theme
Private key
If we apply the house analogy here, a private key is the key to your locker room in your house. Suppose you have multiple locker rooms in your house, your seed phrase is the master key which could open all your locker rooms and private key is the key which could open a specific locker room.
We derive private key from our seed phrase. They are infinite number of private keys that could be derived from the seed phrase.
Private keys are used for authentication and encryption. We sign all our transactions with our private keys.
Public Key
Again if we refer to our house analogy, a public key for the public identification of your locker room in your house. It is to receive digital assets. All your assets are stored on the blockchain. But only the people with the private key could access the assets stored on the blockchain.
Again, you public wallet address is derived from your public key which in turn derived from private key.
How can blockchain verify that the transactions are signed with your private key only?
When we do any transaction, we sign the transaction with our private key which would generate a signature. When it goes to blockchain, the blockchain has a crypto-algorithm which can take this signature and deduce your public address from it and it compares to the public address the transaction is originating from and if both match, then the transaction will be allowed to execute.
This confirms the of the assets.
We can create the public key from the private key but not vice versa which is private key from public key. This is what makes crypto.
Creation of Seed Phrase
Secret phrases are defined by the BIP-39 specification. This is also called Brain wallet which is a means of deriving the secret key alone from the seed phrase. https://github.com/bitcoin/bips/blob/master/bip-0039.mediawiki
To create a 12 word seed phrase, we will need 128 bit entropy which is random 0's and 1's. We then apply SHA-256 algorithm and then take entropy/32 which is 128/32 = 4 bits from the SHA generated and add it to the entropy. Now we will get 132 bits and we will divide it into 11 bit groups like below and convert them to decimals like below.
11111011000 10101111111 00000111100 10001000001 10111011010
2008 1407 60 1089 1498
00011000101 00000001111 01001010111 11101011100 00111111110
197 15 599 1884 510
10000111111 10111100100
1087 1508
BIP-39 specification will contain many word lists and each list contain 2048 words(0-2047). We will refer a random list and reach upon the 12 word phrase like below.
pond mass tray vicious digital when pool panda renew mansion sunset depart
Seed Phrase to Private key
There is no randomness will be used to generate private keys from seed phrase as we need it to be deterministic. Regardless of how many times we apply the cryptography algorithm to seed phrase, same private keys need to be generated.
**Steps**
A seed is generated from seed phrase by using a key derivation function called PBKDF2 Function which is also known as **Password-Based Key Derivation Function 1** and **2.** It gives a 512 bit long seed like below https://en.wikipedia.org/wiki/PBKDF2
d1f8cfb79acea59c03deb87b1ef1ef88f94974b7fe82ad7cb58f75a155ca5
457b3b482f9bf286099bb0dbdd4ce12d811aab3f8520c0b5279e9a1647edf2cdc0d
This seed is used again and passed to PBKDF2 function to generate a 512-bit long key. From this key, we can derive many different child keys. This 512 bit key is called master key.
The first 256 bits are used as child keys and last 256 bits used as chain code to make the child keys not to introduce entropy and both of these are used to create an extended private keys. The generation process of child keys are not explained as it requires very higher level mathematics.
We generate the public keys from these private keys using elliptic curve cryptography algorithm known Elliptic Curve Digital Signature Algorithm (ECDSA)
In case of bitcoin, publicKey = privateKey * G where G is a constant on elliptic curve is used. Bitcoin uses secp256k1’s elliptic curve.
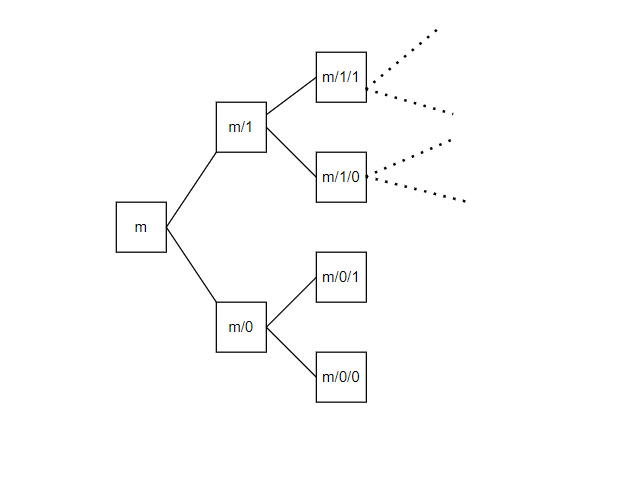
We can generate as many private keys. We need to pass index every time. Our primary wallet is at index 0.
Private Key to Public Key
We generate the public keys from these private keys using elliptic curve cryptography algorithm known Elliptic Curve Digital Signature Algorithm (ECDSA). Ethereum uses secp256k1 to generate public keys where public keys are a point on Elliptic curve. http://www.secg.org/sec2-v2.pdf?ref=hackernoon.com
Public Key to Public Wallet address
In Ethereum, we apply keccak-256 hash function over public key and we will take last 20 bytes and append 0x to it.
Example
0xd8E5A11616c45A0E9c76Ef42b0e3ef85B6c12981
BIP39 Mnemonic Code
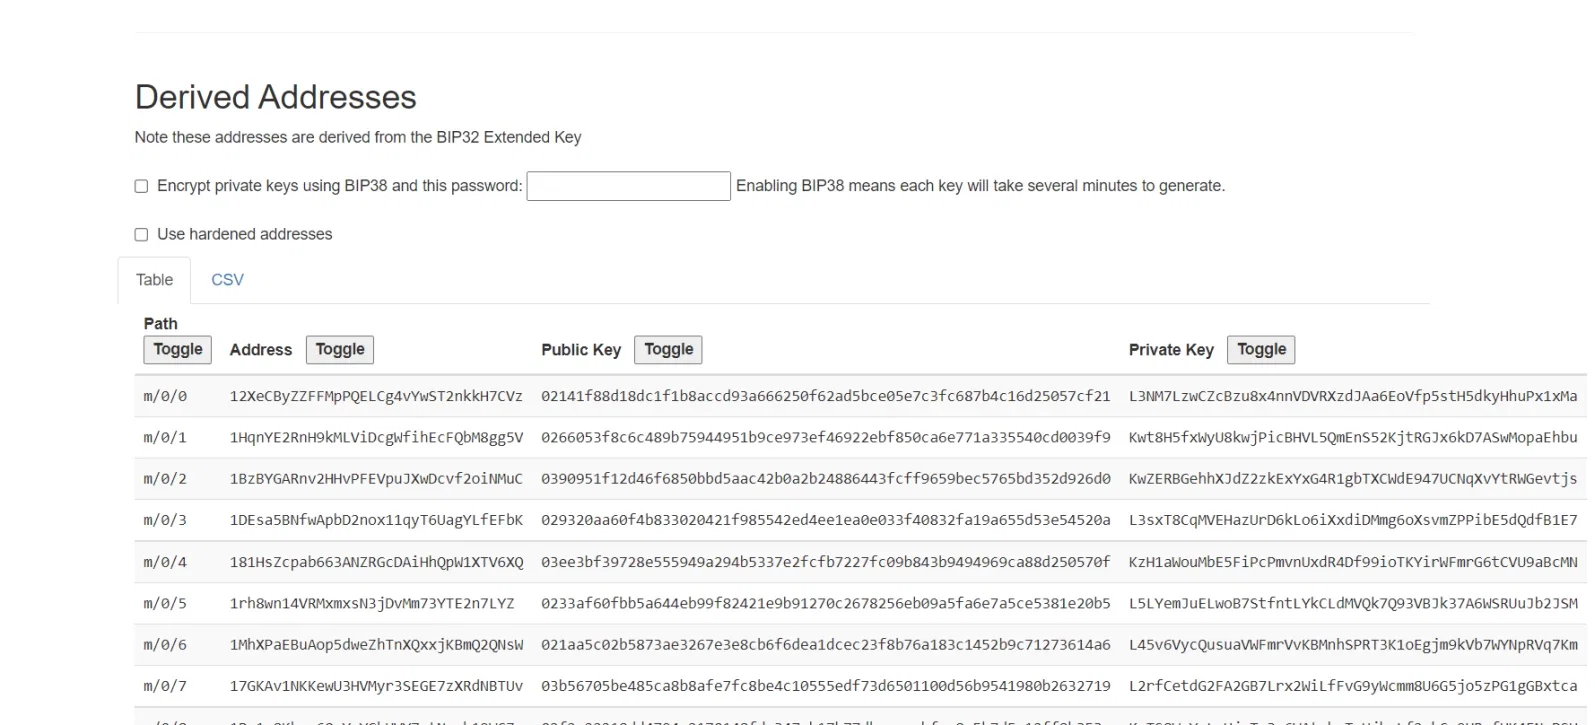
This last part is a bonus. This will be helpful in recovering your private keys to the accounts you lost but you remember the seed phrase.
Visit mnemonic code converter, paste your seed phrase in the site and select the appropriate coin. For safety, load the site and use it in offline mode, it will function. It will generate all the possible public and private keys like below. https://iancoleman.io/bip39/
More tech content follow my web2 blog and crypto blog. http://pranaybathini.com/ https://www.thecryptoinsight.com/
Thanks for reading.
Metamask Security tips to keep your crypto safe
Very recently, I came across a false blog post on a popular forum with a catchy title to disconnect metamask wallet from all Dapps (Decentralized applications which includes DeFi short form for Decentralized Finance) over an invalid remark that it leads to phishing without providing any proper evidence and no any other occurrences leading people to FUD.
FUD
**Fear -** Fear of losing all money, privacy and fear of using metamask or any wallets.
**Uncertainity -** Uncertainity to use metamask or not. To that matter to invest in crypto or not.
**Doubt -** Doubt of losing money, their privacy and their data.
Summary of False blog post
The article claims everytime we visit a Dapp like Uniswap, we give the website access to view your cryptocurrency, not to move it or control it, but to view it. After browsing for a while, the author claims metamask itself will connect to sites you never heard of before and asks the audience to disconnect from connected websites section in metamask to maintain privacy. Further he says **if you give them access, they can't move the crypto, but they can see it. And if they can see your crypto and they see your target, then they will go after you with a phishing scam, which is the worst thing that could happen when it comes to a MetaMask wallet. You can lose all of your crypto. And if you want to learn how to protect yourself from a MetaMask phishing scam, go ahead and read my previous article.**
If this is true, I would have appreciated the author's concern towards people privacy and their crypto safety but this post is a copy from an youtube video which also did not explain the reasons.
My questions on missing details and explanation
**Site automatic connection to metamask -** A site cannot automatically gets connected with metamask wallet. This is not possible as by default privacy mode is enabled. To explain a bit further on connection to metmask, there are two states to metamask wallet. https://medium.com/metamask/privacy-mode-is-now-enabled-by-default-1c1c957f4d57
**Locked State** - Where you wallet is protected by password which you set at the time of creation as a cautionary measure. In this state, you want to connect your wallet to a Dapp, the metamask will prompt for the password. Then it will initiate a transaction for connection for which you need to provide permission by clicking on accept in the pop window displayed. The password protection will last a browser session. There is simply no one can crack it if you have set a Strong password even with a super computer.
**Unlocked State** - Let us assume, you want to interact with a Dapp such as pancakeswap.finance, you unlock your metamask with the password you set. Now, again there are two possibilities https://pancakeswap.finance/
You explicitly needs to click on connect button to connect to the Dapp which will open a pop up window to click on connect.
The app will prompt you automactically to connect to the Dapp by opening the notification window. You need to be careful of such Dapps.
In Both cases, metamask will warn you before connecting to connect only trusted websites. After connection, the website can see the wallet address(20 bytes from public key) and wallet balance.
As a caution, I always recommend on checking what sites your are connecting to and read their privacy policy. Are the Dapps you are connecting too are secure and trusted? Verify the lock symbol on the address bar. The website can view your address and balances only as long as your connected.
**Concern on sites can view your crypto balance -** Everyone on the internet can view your crypto balance. The crypto balance is stored on the blockchain and there are block explorers like etherscan and bscscan which lets anyone on the internet to view the cryptobalance with the help of wallet address which is a 20 byte hexadecimal gibberish. There is no security concern attached here.
Even people can view, they cannot do anything as you hold the private key which you should not tell your private anyone.
All transactions are signed with your private key. As long as your private key is safe, there is no issue.
Remember, **not your keys, not your crypto.**
**Possible Phishing attack and privacy compromise-** Phishing is a type of social engineering where an attacker sends a fraudulent message designed to trick a human victim into revealing sensitive information to the attacker or to deploy malicious software on the victim's infrastructure like ransomware. A possible phishing and privacy concern is mentioned in this article if we give access to Dapps which is the whole concern of this article. How this is even possible? The author did not explain how the hackers can get your data when all they can see is a crypto address which is a 20 byte hexadecimal gibberish. We can see a lot of accounts which millions of dollars worth crypto yet we cannot trace them back to their real world identity.
There is simply no way even if the Dapps can see the wallet address and balance, there is no compromise in privacy as they cannot trace you back to real world identity. As a security caution, do not share your wallet address which leads to your identity on the internet.
We cannot trace a person based on his crypto wallet address and crypto balance to real world identity but vice versa is possible. Beware of visiting fraudulent sites full of malicious ads. Do not respond to spam and phishing emails which pretends to be customer care / high profile traders. Do not click on the links sent to your mobile inbox without verifying.
The phishing attack is possible when the hacker knows your physical world identity such as email, mobile number, social media handles etc. He can then can trick you to reveal your secret passphrase(your private keys) and then can steal your funds but if the hacker knows your crypto address but not your physical identity, there is nothing he can do.
The other possibility is when you visit any malicious site, the hacker can show a pop-up which resembles the metamask and tricks you into initiating the transaction which could be easily prevented if you pay attention everytime and using ad-blockers like ublock origin filters a lot of spam content, prevents malicious scripts from loading.
Browsers such as Brave has inbuilt ad-blockers which would be block malicious and intruding ads. Always **double check the domain name**(if blockchain.com is real, it's phishing site will be like blockchein.com) of the Dapp, website and ensure it is not some fake version of the popular website. Same goes for mobile apps, browser extensions as well. In browser, always keep you location, camera, notifications, pop-ups to blocked.
Use privacy friendly search engines like duck-duck-go, https://search.brave.com/ which blocks trackers by default. https://duckduckgo.com/
So, in conclusion even if you leave the metamask connected websites, nothing will happen. Only when you open the site in connected sites, the metamask will try to connect. And also, everytime, to perform any action, you need to provide consent. As a request, please don't encourage false and low value content which plays with people's emotions.
Follow the measures and have a safe crypto journey.
Thanks for reading.
Connect Polygon(MATIC) to Metamask
Polygon is a protocol and a framework for building and connecting Ethereum-compatible blockchain networks. It provides scalable solutions on top of Ethereum multiple side chains ecosystem. It is also known as layer 2 scaling solution as it provides scalability on the top of ethereum blockchain.
Polygon solves pain points associated with Blockchains, like high gas fees and slow speeds, without sacrificing on security.
Ethereum blockchain has its own share of problems for Decentralized application developments(Dapps) such as
Poor UX
Low Throughput
No sovereignty (shared throughput/clogging risk, tech stack not customizable, governance dependence)
These problems introduces challenges and there is no framework to address these. So polygon was created as a protocol and a framework for building and connecting Ethereum-compatible blockchain networks.
MATIC is the native currency of the polygon ecosystem with ATH value of $2.62 dollars and market cap of $6 billion. More about the token performance is found here on coinmarketcap. https://coinmarketcap.com/currencies/polygon/
Polygon Features
Scalability
Ethereum compatability
User Experience
Developer Experience
Modularity
Security
In this blog, let's learn how to configure polygon on metamask.
Before proceeding further, We need to create a metamask wallet. If you do not have one, create it by following this blog. https://www.thecryptoinsight.com/how-to-create-an-ethereum-wallet-using-metamask
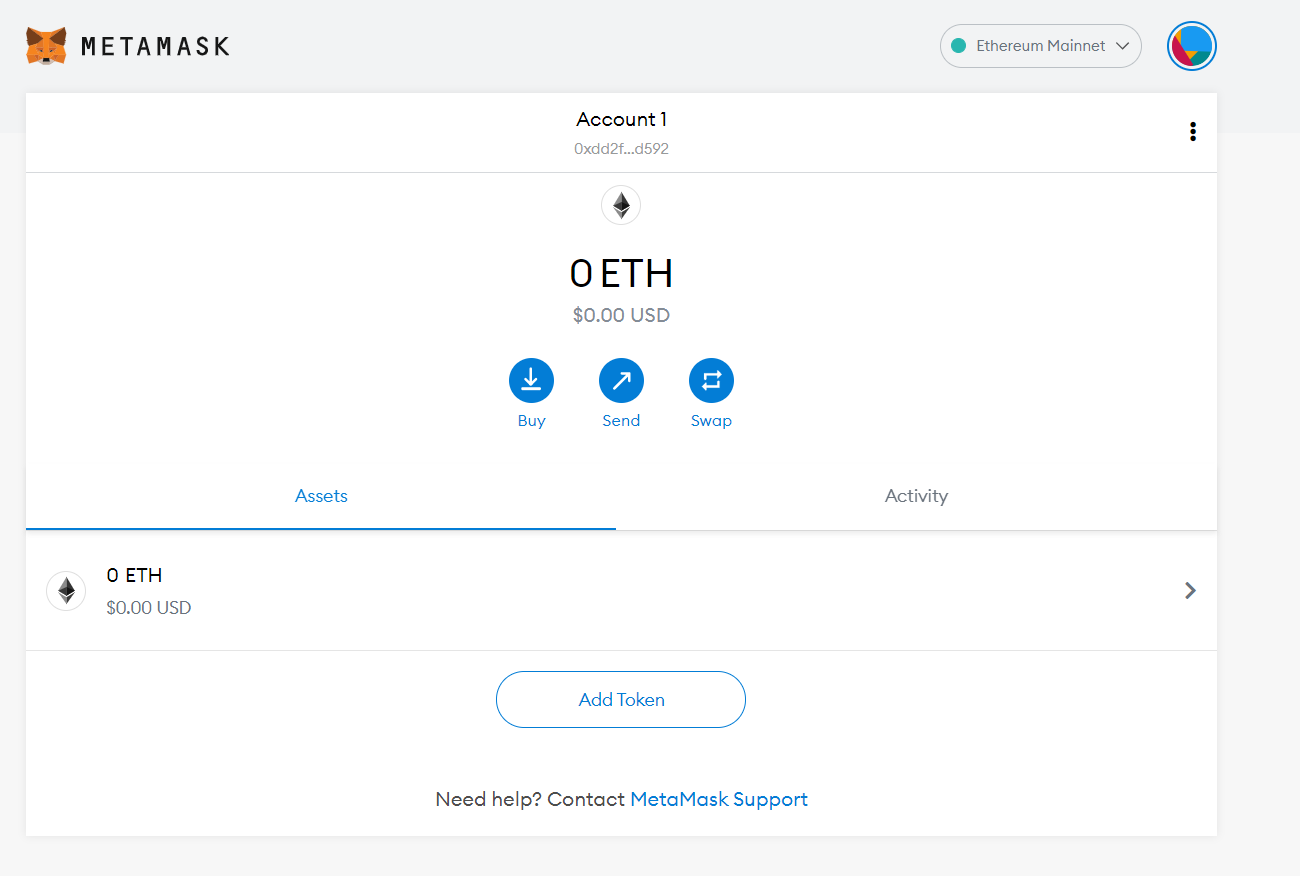
After you created, the wallet will look like below.
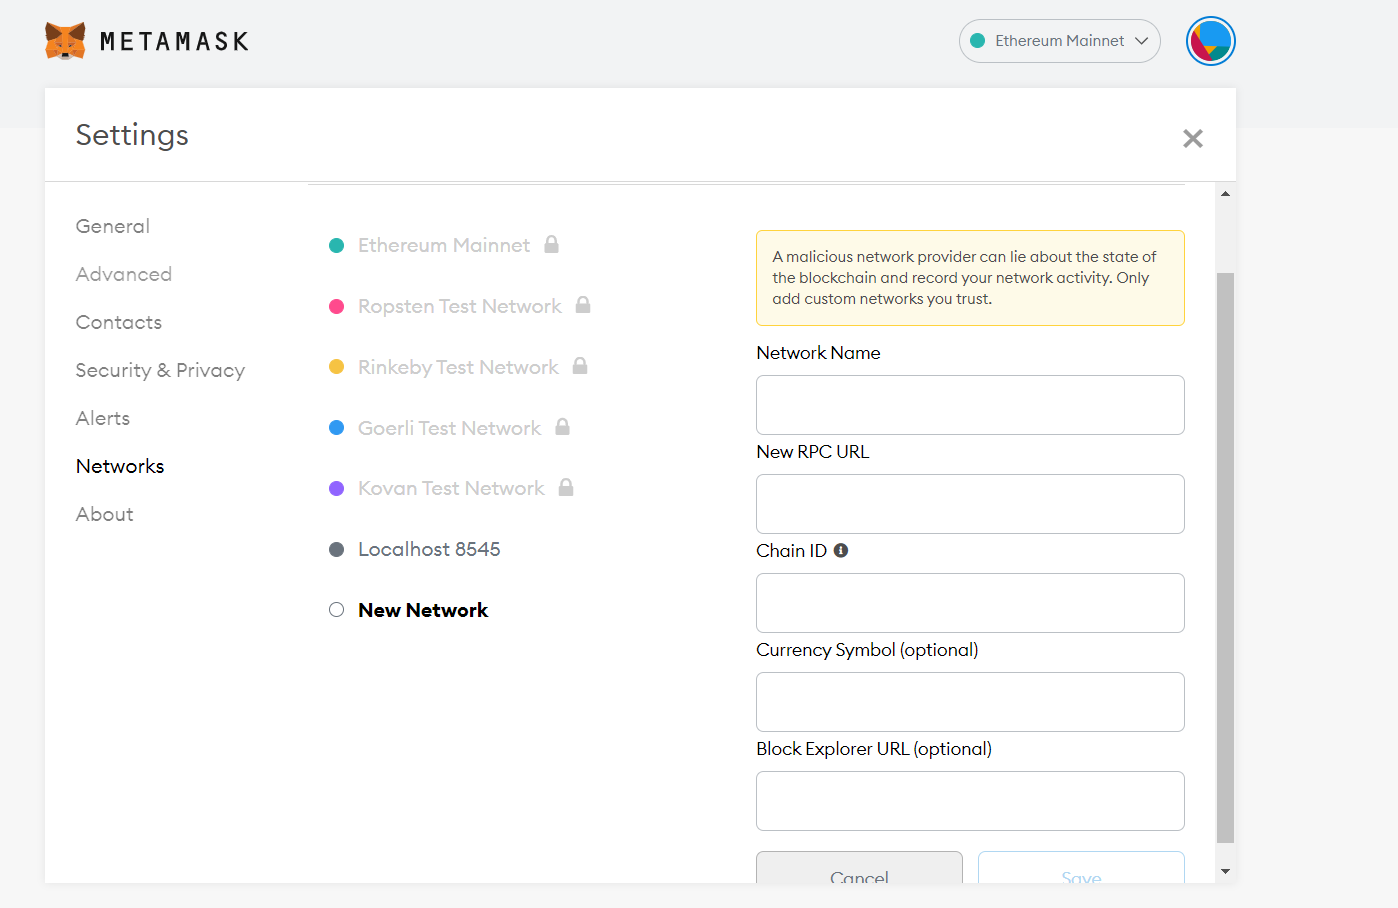
Click on the Ethereum mainnet at the top right corner and expand it. At the bottom, click on Custom RPC. Now you should see a screen just like below one.
Now, enter the below details for mainnet and Hit Save.
Polygon mainnet Settings
**Network Name**: Polygon Mainnet
**New RPC URL**: https://rpc-mainnet.maticvigil.com/
**Chain ID**: 137
**Symbol**: MATIC
**Block Explorer URL**: https://polygonscan.com/
Polygon Testnet Settings
**Network Name**: Polygon Mumbai
**New RPC URL**: https://rpc-mumbai.maticvigil.com/
**Chain ID**: 80001
**Symbol**: MATIC
**Block Explorer URL**: https://mumbai.polygonscan.com/
You can transfer BEP-20 MATIC to polygon network using binance. Otherwise, ERC-20 tokens will be transferred on Ethereum mainnet and BEP-20 tokens transferred on Binance smart chain.
More resources
Matic Faucet for testnet - https://faucet.matic.network/
Polygon papers - https://polygon.technology/papers/
Polygon docs - https://docs.matic.network/
Polygon Dapps
https://app.easyfi.network/
https://polymarket.com/
Resources
**https://polygon.technology/**
https://docs.matic.network/
https://coinmarketcap.com/currencies/polygon/
A lesson from the past
Everyone starts there journey to find the self, to find who you are at sometime and in the process one will travel to different countries, different cities and try different things.
I happened to take one such life changing journey for the fact is that I don't want to identify myself based on what I do but what I enjoy. We all have only one life with the possibilities to try different things reducing with age. I happened to learn very valuable lessons to enjoy the life in this journey.
I such lesson I learned is to enjoy the mornings - to start everything afresh every morning while travelling through the northern parts of India.
I jotted down couple of lines from what I am observed while travelling in a local bus. I observed,
*Blue clouds, white fog*
*cold weather, invisible roads*
*Faraway hills in my sight*
*Seems like an art drawn in black*
*As l breathe the fresh air*
*The mighty sun out of clouds*
*With the warm rays*
*Wished me a very good morning*
I read these lines every morning. I feel the experience I felt at that time. I remind myself how beautiful this life is and a fresh start of the day is all we need to enjoy it to full extent.
Thanks for reading.