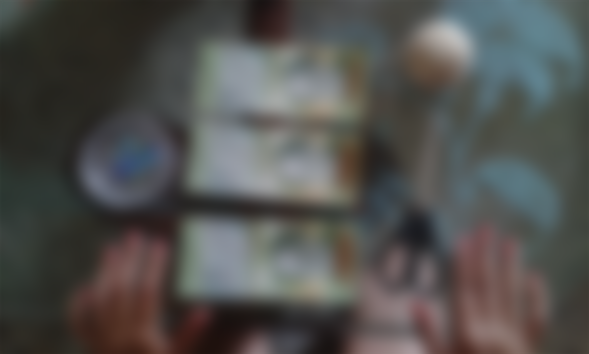

Some time ago I kept bills thinking about future expenses, however, my country's inflation goes like champagne. It goes up and up! these were left as unusable material, not so much! Many creative people made things like banknotes, confetti, recreations of very famous people on the banknotes and finally, origami with the banknotes.
Together with my grandmother, we search YouTube for different tutorials on how to make origami in banknotes; It is a bit tedious depending on the figure, since, the paper or the material is so small that it is difficult to fold it in some occasions I only knew two figures! Hahaha! the famous fan we made since childhood and a t-shirt.
My grandmother had very high expectations to be a simple origami rookie. I wanted to make a dragon! No more no less! I stopped and said, Gradually, Grandma, let's make butterflies! We made two butterflies later, we made two flowers.
We thought it would be good content for read.cash! my grandmother Flor, is my muse, is my right hand, whenever I need ideas and photos She is there! It is not the best taking photos but it fills me with much joy, having her by my side filling me with many positive vibes.
Below I will give you a mini tutorial how to make origami with tickets. Worth the redundancy! I have repeated the same thing 20 times, but aha, you understand me!
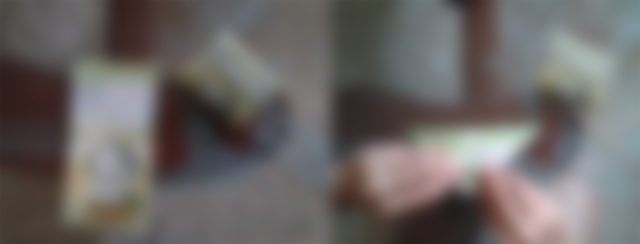
Step 1- Fold the zig zag bill so that it looks like a fan with very small folds.


Step 2- Take another ticket to create the upper wings of the butterfly, fold in half creating two triangles in each corner.

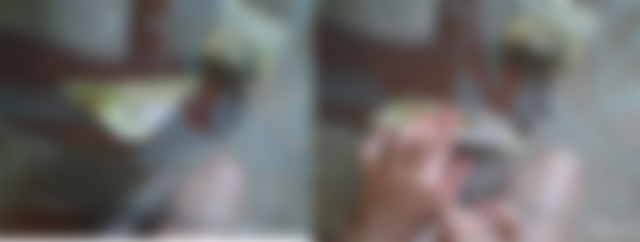
Step 3-Tilt the two corners of the triangles that are connected by creating a tab, the bottom of the bill, so we will create a kind of little boat.


Step 4- Do you remember the tab that linked both triangles? Well, now fold half that zig zag tab for the upper wing folds!

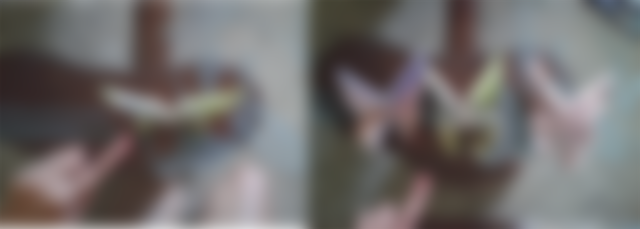
Step 5- Cut wick, cloth, nylon thread Whatever you have and want that simple! hold both bills, and in the middle, make a knot, you can leave a little thread, to assimilate that they are the antennae of the butterfly.


Step 6-Move the folds and Ready, you have butterflies! TARAN!

I decided to divide the tutorial of the butterfly and the origami flower in two, so that it doesn't bore you and the post is not so long. I hope you liked it, practice it and give it as a gift, it is also perfect to start a craft activity with your: family, your girlfriend or boyfriend, friends, the dog, the cat, the neighbor, believe beautiful things see you in another post ...
Last but not least, all the photos were taken by my grandmother on her Samsung mini S3 cell phone
This is cool and terrible at the same time! Nicely done!