I did the rear brakes


My son gets to do the front ones next weekend.
Here you see the old brake pads, and the new. So let's take a look at how the brakes work and all the steps necessary to change the pads.
The calipers slide on Centering Pins. When the brakes are applied, the piston pushing on one side, causing the entire assembly to center itself around the spinning brake rotor (the disk).
When I had my shop, I had the ability to resurface the brake rotors and rebuild the hydraulic parts if needed. This bike only has 4,000 kilometers on it, so I know we can simply change the pads and get back on the road.


Brakes are very similar on all brands. This post should help you figure out your set pretty easily.

First we are going to remove the Brake Assembly Mounting Bolts which will allow us to remove the Caliper Assembly. We loosen the bolts first and then place a flat head screwdriver between the rotor and the brake pad - then Twist gently to retract the hydraulic piston. You will see fluid returning to the master cylinder if yours are translucent like mine.


It is not necessary to open your the reservoir during the process. Just know that it is happening. Keep changing the position of your screwdriver to open the gap between the caliper piston and the brake rotor. I usually fully retract the piston at this point to make room for the new brake pads. If your pads are completely worn out they piston could pop out if you disassemble the brakes without pushing it back in.
Also, never pull the brake lever with the caliper removed. One pull and the piston will pop out, and you will need to call someone who knows hydraulic systems. What I am showing you today is a fifteen minute job.


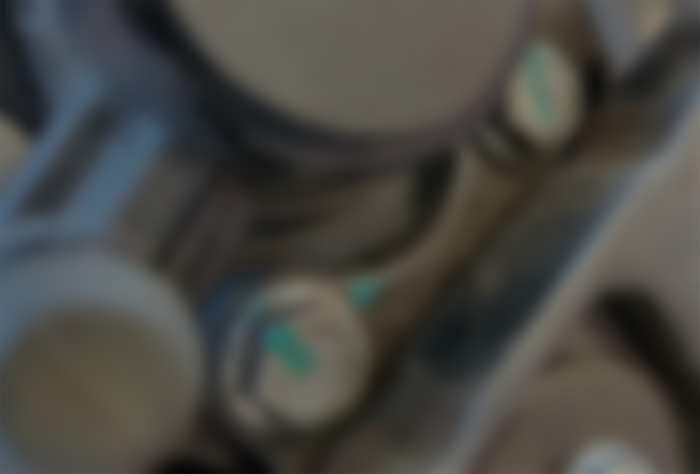
After pushing back the piston, you can slide the caliper side-to-side which checks to see if it is free floating on the Caliper Centering Pins (there are two). If it free floats, we can assume that there is sufficient grease inside the Grease Boots. If it does not free float back and forth, then you will need to disassemble the assembly and get any corrosion off of the pins and fill the boots with grease.
If I am not sure, bit it free floats, I will fill a hypodermic syringe with grease and inject it into the grease boots. Then work the caliper back and forth.
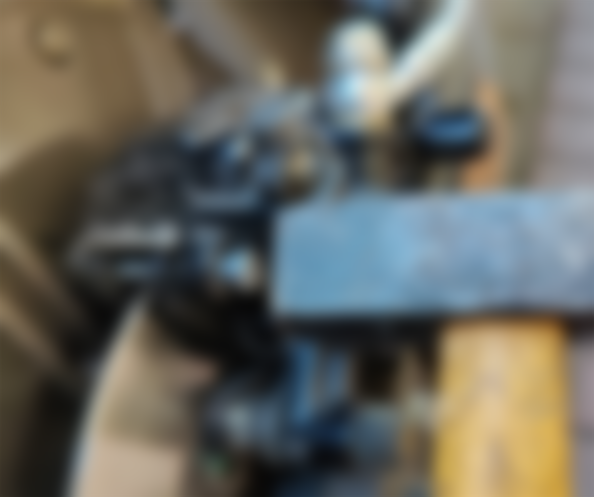
Now we remove the Brake Assembly Mounting Bolts and we can lift up the whole assembly - caliper, pads, everything. Nothing will fall out because we have not removed the Retaining pins for the brake pads.


At the thin end (left) of each pin, there is a cotter pin that keeps the retaining pin from falling out. Remove the cotter pin by uncurling the bent ends enough to slide it through the hole (save these). Then slide each pin out of the caliper. If you break the cotter pins, you will need to take them to a hardware store or parts store and get new ones. It is likely that they will break if the brakes have been done several times in the past. This is the first brake job on mine so I was able to save them.
The brake pads will fall - I like to take them out when free and examine if there is a difference between the inner and outer pad. If so, you need to note which kind is on which side. In my case there is no difference.


You can see in these photos that the centering pins, along with the boots that cover them, are in different positions. I am noting that here because it may not have been clear in the above photo.
Reassembly Time
We will reverse the process next. Install new brake pads with the friction material facing toward where the rotor will be. You will need to push upward, against the thin piece of metal shown, until the retaining pin lines up with the ear of the brake pad. You can Lubricate each of the retaining pins (lightly) to prevent rust if you want but in normal operation, the pins do not slide back and forth except when changing the brakes. Be careful, we do not want any oil or grease to get on the friction material!


You can start one of the Brake Assembly Bolts to keep things from flopping around, but I do not tighten everything until I have the brake pads secured in the caliper assembly. I sometimes get the brake pads secured in their spot before putting the caliper assembly in place. Other times, I need the assembly to be in place (as shown in the photo) in order to put pressure on the bottom of the pads to compress the clip at the top. Just pry upward on the bottom of the brake pad until the retaining pins line up and slide into place.

They don't always go in by pushing with your thumb, especially when heading toward lining up the second brake pad ear. You can use a small hammer to tap them into place. This never requires hard hammering!
When both pins are in place and the cotter pins are secured (the ends bent over), then you can tighten the Brake Assembly Mounting Bolts. Make sure that everything you took apart is all back together. Then recheck that the first bolts you took out are in and tight.

Lastly, you need to pump the brakes until the piston comes out far enough for the brake pads to actually squeeze the brake rotor. Now it is time to test drive the vehicle, make sure the brakes work, and heat up the brakes at least one time. It will take a day to "seat" the brake pads, and they will work better after a few days as compared to the first test drive.
That is the end of the post. Yes, I did the job in fifteen minutes which included going back in the house for other tools I needed. If you do not do a lot of brakes, it may take you longer. Take your time and make sure they are safe for another x-thousands of miles and on into the future.


Very useful article, bro, after I read the process of installing brake linings and caliper working systems, now I know and can install them myself. I used to replace the brake hose, because I didn't know how the system worked, so the brakes I installed failed or didn't work.