
Wix is one of the most popular website builders out there. It is suitable for the development of projects of varying complexity, from one-page pages to online stores. One of its main features is ample opportunities for changing the appearance of the site.
Building a Wix website WIX WEBSITE from scratch is easy. Difficulties can arise at the stage of its configuration - first of all, this is due to the abundance of customization tools and various applications.
The Wix Builder offers a variety of ways to create a website, including using an artificial intelligence system. But the user always has the opportunity to make changes manually using the powerful customization tools available in the visual editor.
All types of sites on Wix are created the same way. Differences appear during the setup phase because, for example, a blog and an online store perform different tasks and require different functionality. But there are a lot of common points, so we have prepared an instruction for novice webmasters.
Website creation
Signing up for Wix takes a few minutes. You can use email or Facebook and Google accounts to create an account. It is enough to come up with a password for your account and confirm the registration using the link that will come in an email from Wix.
After authorization, click "Create Site". A window will appear with the choice of the type of project. The content of the template directory depends on which item you check. Therefore, if you are doing an online store, then click on the item of the same name.
The next window is to select a method for creating a site. There are two approaches:
Wix ADI technology - artificial intelligence asks several clarifying questions and, based on the information provided, forms the site interface.
Manual website creation: choosing a template and bringing it to mind in a visual editor.


The use of the first approach does not exclude the second method. After working with Wix ADI, you will still be taken to the visual editor, where you can customize the appearance of the site. So let's see what capabilities the constructor's artificial intelligence has.
Here is a list of questions (you can skip them):
Field of activity - for example, an online store of household appliances.
What functions are needed: chat, blog, video, Instagram feed, events, online recording, etc. You need to highlight the appropriate widgets.
Business or website name - For example, Best Home Appliances.
Links to the old site or company page in Google Places for importing texts and photos (if any).
Information about the site: logo, administrator's email, address, phone number, social media accounts.
The type of template you like.
Homepage design that you like.
After choosing the Wix options, ADI will independently collect the blocks you have marked, apply the template type and homepage design to them, and populate the contact list. The result of the wizard will open in the visual editor.
Functionality and design customization
Whichever way you create the site, in the visual editor, in any case, there will be a template with demo content. All the elements that you see on the screen can be changed, moved or deleted. When you hover over a block, tools appear to control it. If it is a text element, then you can rewrite it here, change the font, style, letter size, formatting, color, and other parameters. Large blocks have more customization options - for example, you can choose how the content is displayed or add animation.
Content publishing
Wix offers an interesting approach to managing site content. If you are making a portfolio, business card, or landing page, then, most likely, manual editing of text blocks right in the site interface will be enough for you. You can add text and format it - standard options for working with fonts and colors are available in the pop-up window.
If you are making a blog, then the content management tools are moved to the widget of the same name, available in the toolbar of the visual editor. It has everything you need to conveniently work with publications:
A simple text editor with the ability to insert photos, videos, galleries, and HTML code.
Post settings: publication date, author, announcement fragment, post cover.
Adding categories for sorting posts.
Separate SEO settings for each post: unique address, the name for search engines, description for a snippet.
Search engine optimization
In order for a site to appear in search engine results, it must be optimized. The Wix SEO Master is responsible for this in the constructor.
Expand the Settings menu.
Click on "Search Engine Optimization".
Enter the name of your site or business.
Add the physical location of the office, if available.
Add key phrases that describe the business. For example, an online store, home appliances, etc.

After processing the information received, Wix website designer create a customized SEO guide. It consists of a large number of points, which will take a significant amount of time to complete. But the main thing is that you will go through all the main stages of optimization, after which your site will be displayed correctly in the search results. This means that users who make relevant queries will see it.
Domain connection
By default, the site is assigned a third-level domain, which contains the Wix builder. To connect a second-level domain, you need to upgrade to a premium plan. There are two lines of tariffs - for websites and e-commerce. The cost of service packages for websites is from 160 to 750 rubles per month. To operate an online store, you need e-commerce tariffs, they cost from 600 to 1400 rubles.


The difference in pricing of premium packages is due to the functionality they provide, such as bandwidth, disk space, disabling ads for the builder. Connect a domain after paying for any tariff plan. In all service packages, except for "Connect a domain", when paying for a year, you get a domain as a gift.
Checking before publishing
The most difficult thing when creating your first website is not to forget anything. To exclude the publication of an unfinished project, Wix places checklists in the control panel for setting up, maintaining, and developing a business. The list of items depends on what type of site you are creating. For example, for an online store, Wix offers to fulfill the following mandatory points:
Add products.
Specify delivery regions.
Set up payment methods.
Adjust SEO parameters.
Publish site.
Connect domain.


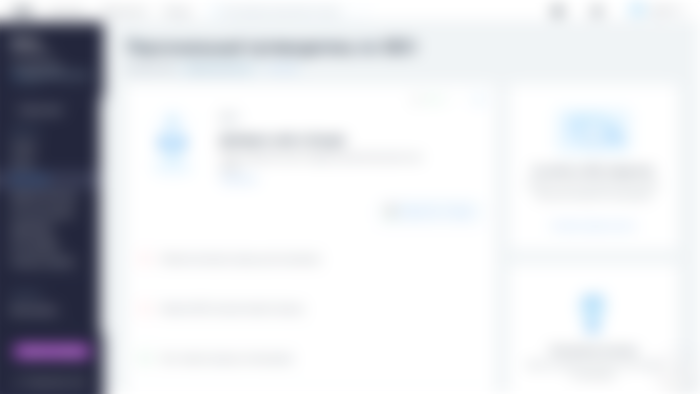
The good thing about checklists is that when you select each item, a link to the constructor section appears, which allows you to customize the specified functionality. For example, if you forgot to set up SEO, then select this recommendation and click "Get Started" - this will open the Wix SEO section.
conclusions
Wix offers one of the simplest algorithms for creating your first website. A lot of actions on it are automated. Wix ADI creates an interface based on the information provided by users, in the editor of the mobile version, you can click on one button to optimize the content for small screens, and a convenient checklist will help you make sure that the site is ready for publication.
Despite the automation of the processes, the user has all the possibilities for manual customization of the template. After the work of the same Wix ADI or automatic optimization of the interface for the screens of mobile devices, editing tools remain available. This makes Wix flexible in terms of how you create and customize your site. You can get started on this platform with minimal knowledge of how the web works. The constructor will help you implement the basic requirements so that search engines index pages correctly. As you work on a project, you will discover new Wix features, apply them, and make your site better.