HODL - smart contract plugin for Electron Cash to timelock BCH
Did you ever regret acting under FUD or FOMO influence?
Did you make big financial mistakes because of that?
Do you want to protect yourself from such compulsory actions?
Then you'll certainly want to use the HODL plugin for Electron Cash. With it you can lock your funds in a smart contract utilizing CLTV opcode, rendering them unspendable until a certain date or blockchain height.
I invite the community to test the plugin and experienced developers to audit it for security and other potential issues.
HODL Contract
HODL contract is a simple upgrade over the most common "pay to public key hash" (P2PKH) address type. It utilizes in addition the OP_CHECKLOCKTIMEVERIFY opcode to check against the current blockchain height or current date before locking the funds to the redeemer's public key hash. The target locktime is provided to the contract upon its construction as an argument.
scriptSig: <sig> <pubkey>
scriptPubkey: <locktime> OP_CHECKLOCKTIMEVERIFY OP_DROP OP_DUP OP_HASH160 <pubkeyhash> OP_EQUALVERIFY OP_CHECKSIG
Transaction fees are very low and target 1sat/byte. However, the total fee depends upon the number of inputs, as usual.
Remarks
0. The plugin is quite young, so be careful and try to lock small BCH amounts first.
1. The plugin is designed only for the standard HD wallets (multiaddress). Watch-only, Multisig wallets or wallets with imported private keys are not supported.
2. If you lock the funds until certain date, allow for extra time (up to 70 minutes) after the contract maturation. This is due to the median time-past for the lock-time calculations (BIP-113).
3. HODL contract can safely lock values greater than 21 BCH.
How to install and use the plugin
First, download the **hodl.v1.0.0.zip** file from github repository releases and verify the checksum to be `eaafab422c8cae0fe5786711e44f9ee867b9b86d5f8e855248176cfe8a617cc7`. https://github.com/mainnet-pat/hodl_ec_plugin/releases
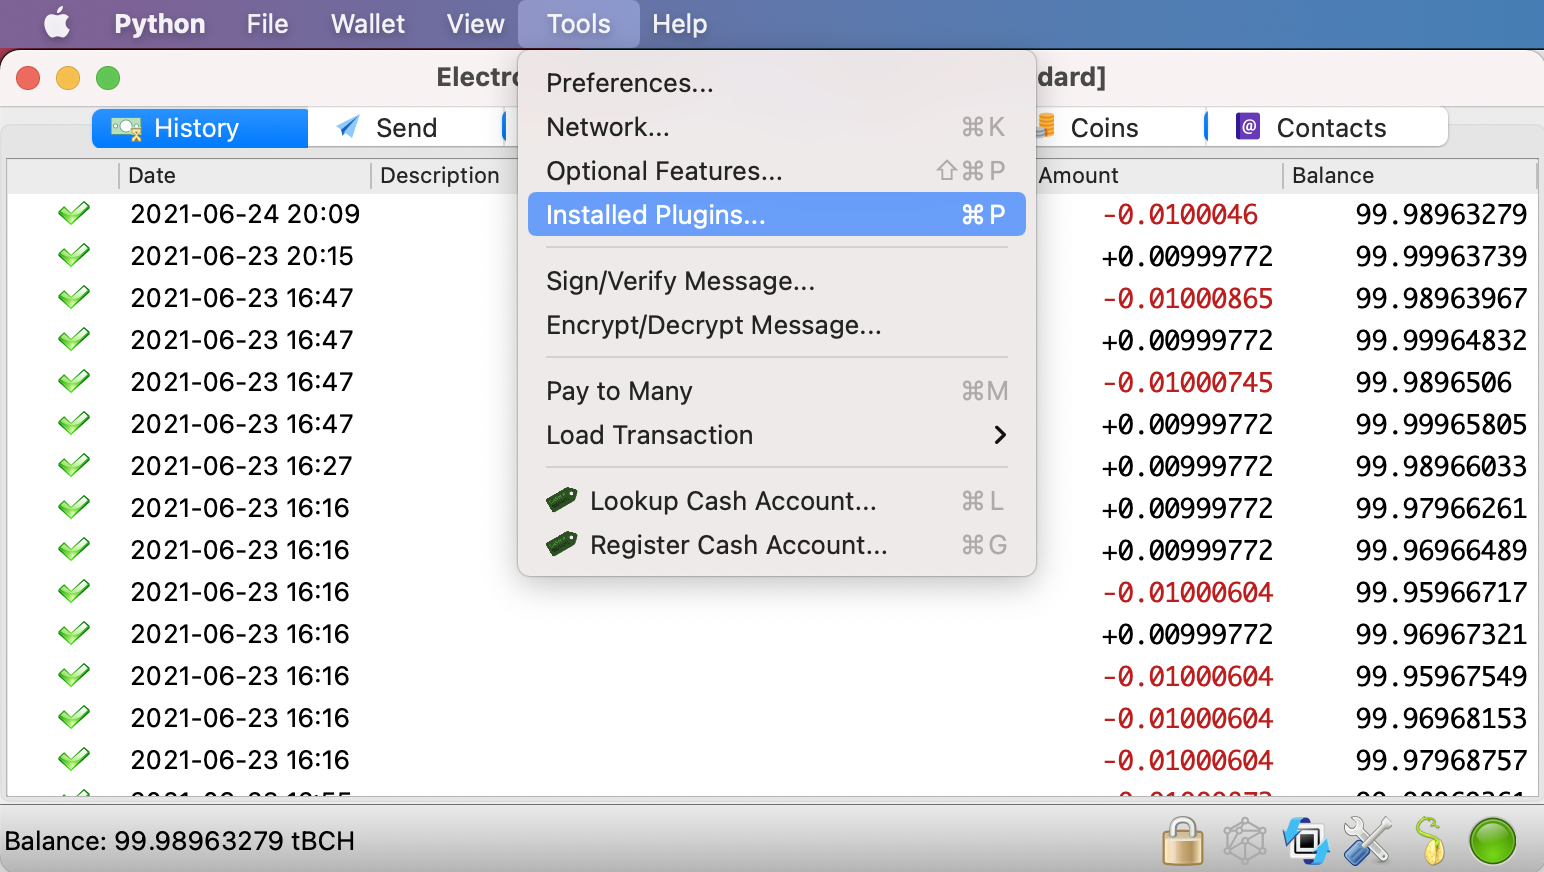
Then go to your Electron Cash and install the plugin: in the menu click "Tools" > "Installed Plugins..."
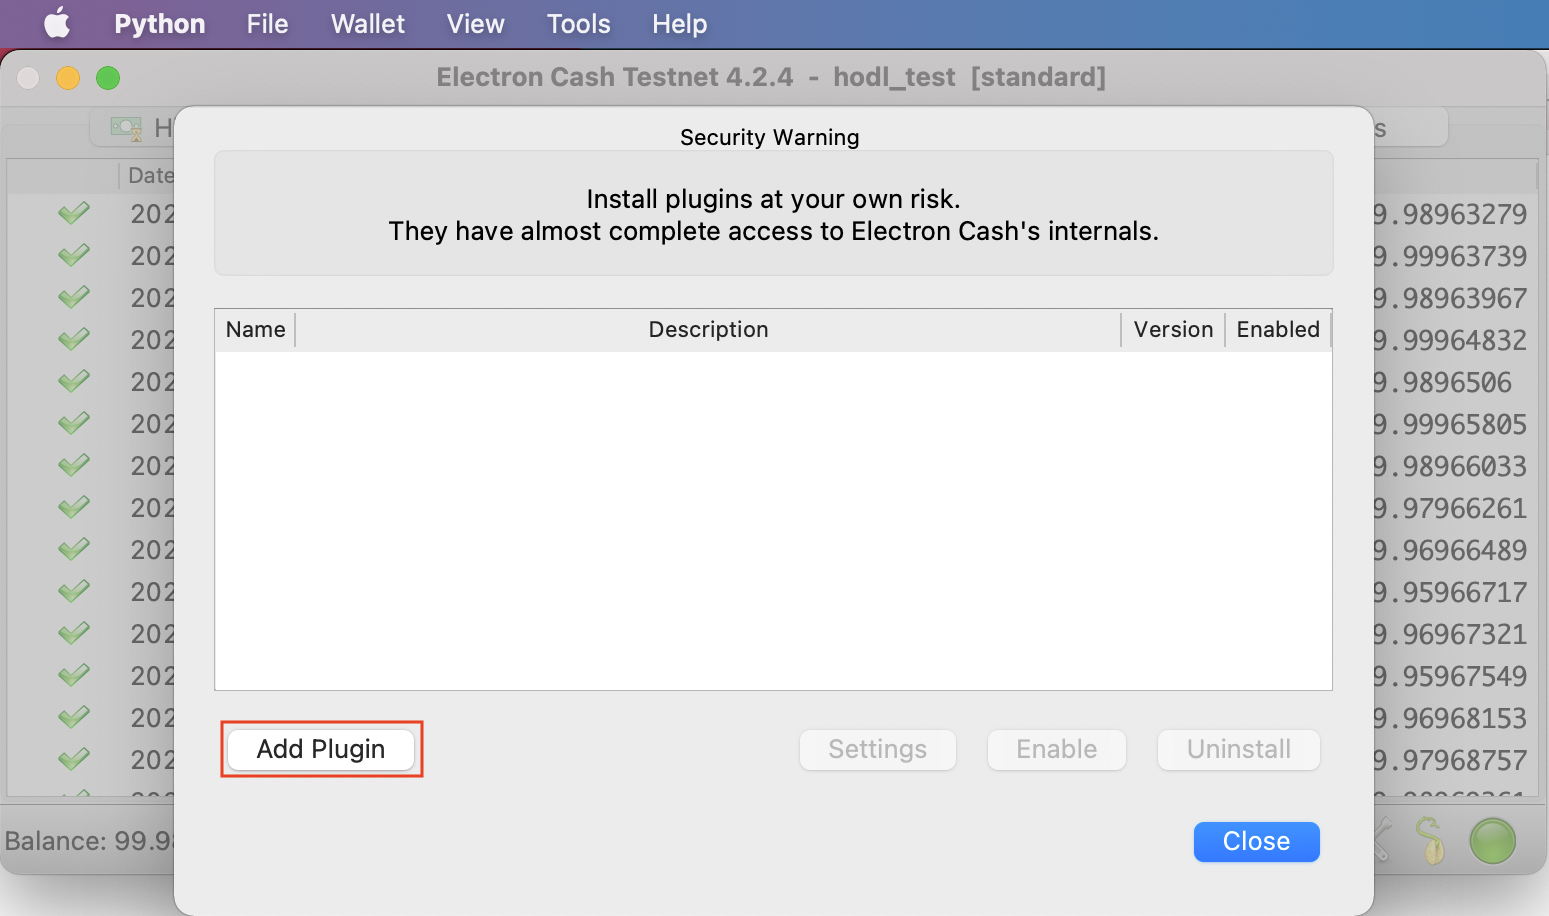
In the presented window select "Add Plugin". Select the dowloaded archive and confirm.
Next, review the plugin info and verify the checksum. Carefully read the **Risks and Dangers** section. You'd have to check the boxes before completing the installation.
After installation, a new "HODL" tab will appear. It will list all smart contracts with CLTV locked funds created earlier.
Click **Create new HODL contract**, choose the amount of BCH you want to lock until either certain blockchain height or certain calendar date and confirm.
After that the list of contracts will update and your new contract will be displayed there along with the information about its locked value and expected maturation.
When contract is matured, it is unlocked for spending. Simply click **Spend contract** button and confirm the prompt.
Attributions
This work is based on the codebase of an excellent Mecenas Electron Cash plugin by @Licho.
The diamond logo is taken from https://icons8.comhttps://github.com/KarolTrzeszczkowski/Mecenas-recurring-payment-EC-plugin.git
waifu.camp flipstarter
Hi there, pat from mainnet.cash team here.
I've been working on adding the SLP and NFT support to mainnet.cash project the last couple of months. While developing it I grew passionate about tokens in general and non-fungible collectibles in particular, thanks to amazing Waifu faucet and its community. So I have set up a website to try out the recent developments - the Waifu Camp. https://mainnet.cashhttp://waifufaucet.com/https://t.me/waifuresearchhttps://waifu.camp/
Waifu?
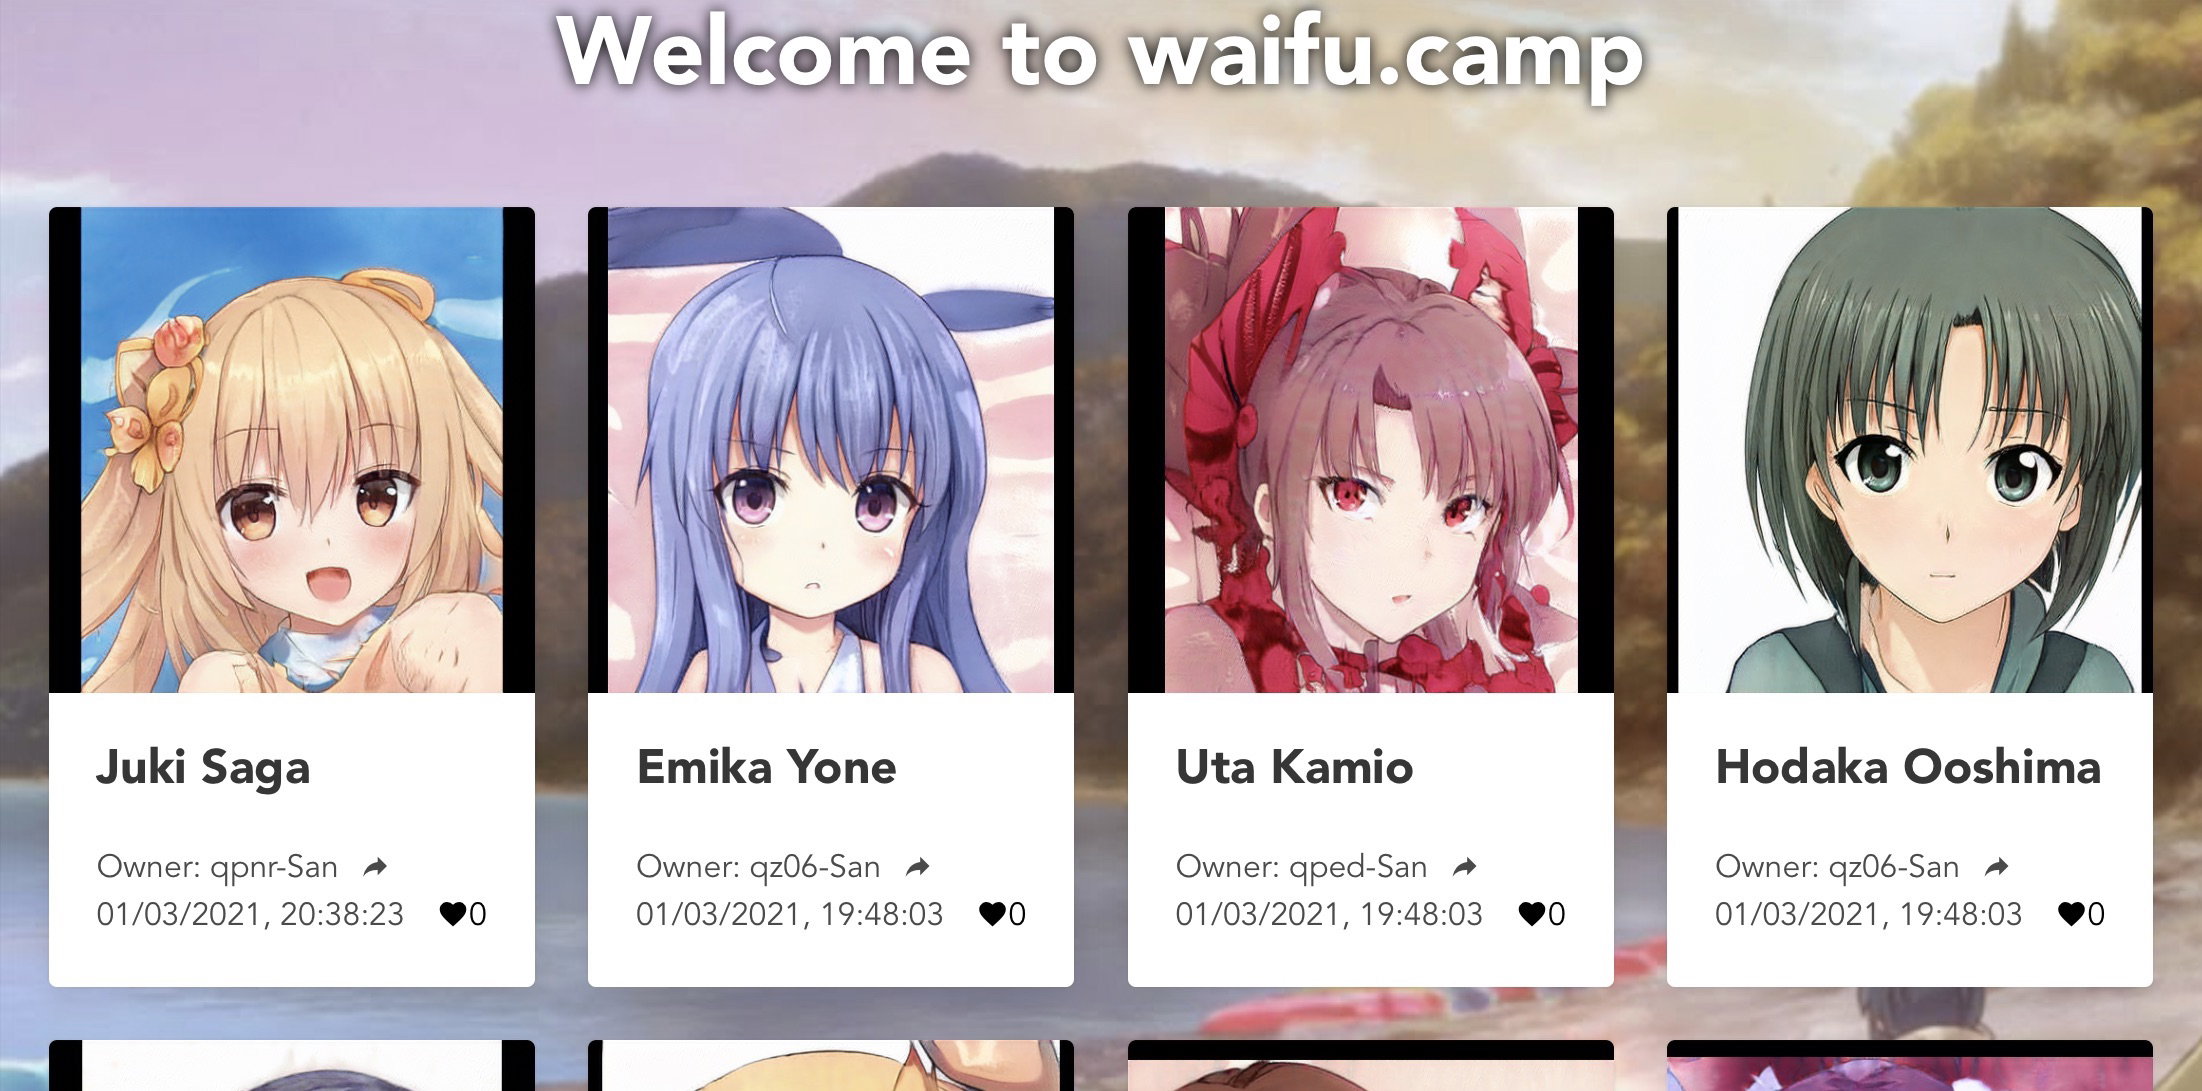
So what are Waifus? These are NFT tokens which depict a fictional character, one-of-a-kind, generated by artificial intelligence. They have profile photos, names, character traits and a loving owner - you!
Waifu Camp
Waifu Camp is your safe haven from the daily hassle. You come to your cozy camp full of lovely waifus to appreciate your collection. As if you'd be sitting besides one of them, your best waifu, at a campfire sharing quality time while the world revolves around you.
On the technical side it is an NFT token indexer and browser which allows one to view their own or someone else's collection, browse the most recent or most popular waifus and more. If you'd visit the Waifu Camp, you will see that a lot has been done already, but to finish this up I look for community support.
I plan to add: https://waifu.camp/
Fast dedicated SLPDB instance to index the tokens
User sign up and wallets
On-chain voting and BCH staking for top waifus
Memo protocol integration for discussions
Cashaccount integration for user names
Possibly a marketplace
Your suggested features!
Value for the community
The NFTs are booming right now on the Ethereum chain with unprecedented auctions worth tens of millions USD. On the other side of the spectrum are cheaper NFTs which can not be moved as easily on Ethereum due to very high network fees. This is where BCH can truly shine! And now is the moment to build the infrastructure and tools to enable the NFT business ideas to be implemented easily. This is why I am willing to generalize and opensource the project, provide help and info support for the developers willing to build on top of it.
https://twitter.com/KimDotcom/status/1366346581570555905
If you like the idea, consider supporting the project's flipstarter.
Also join the discussion on Telegram
https://flipstarter.waifu.camphttps://t.me/waifu_camp
mainnet.cash - using REST server
Hey, everyone!
In our tutorial series we have created an in-browser Bitcoin Cash wallet and added the support for SLP tokens to it. This wallet is based on the mainnet.cash javascript library. It provides many useful functions to interact with the wallet and BCH network. The issue is - it works only in javascript environments like browsers or node.js. But what to do if you are proficient in some other programming language like python or C++? The answer is - use the mainnet.cash REST server which abstracts all the details away, while keeping your application slim. https://read.cash/@pat/mainnetcash-getting-started-a75b2fc6https://read.cash/@pat/mainnetcash-slp-wallet-4bc39068
We at mainnet.cash host our REST server at https://rest-unstable.mainnet.cash. We use it for testing purposes and further development of the library. Also it hosts our API reference listing all supported methods, which you can try out immediately. This API supports the OpenAPI specification, meaning that you can get a client library in a big variety of programming languages and technologies (see). We will be using this server in our tutorial, but if you are going to run an application on the BCH main network you are strongly **(!)** advised to run your own instance. It is simple. https://rest-unstable.mainnet.cash/api-docs/https://github.com/OpenAPITools/openapi-generator#overviewhttps://github.com/mainnet-cash/mainnet-js/blob/master/generated/serve/docker/README.md
So let’s try to rewrite our wallet and make it not to use the `mainnet-js` javascript library, but rather to move the weight lifting to a REST web server. For this we remove the the mainnet-js and import the `axios` library for simpler HTTP requests:
<script src="https://cdn.jsdelivr.net/npm/axios/dist/axios.min.js"></script>
Then in the `run()` function let’s configure axios to point to our web server by default:
axios.defaults.baseURL = "https://rest-unstable.mainnet.cash/";
When working with REST server we use `named` wallets for persistence reasons. For testing we will be always creating a random one:
const randomName = Math.random().toString(36).substring(6);
Now we can create the wallet on the server.
let wallet = (await axios.post("wallet/create", {
type: "wif",
network: "testnet",
name: randomName
})).data;
Note how we are sending the POST request to an endpoint (`wallet/create`) and supplying the method parameters as a JSON object enclosed into curly braces `{}`.
We stop the program execution and `await` for the result and get the `data` from the response.
The returned `wallet` object contains many bits of useful information. From the data we are most interested in the `walletId`. It is composed of a prefix and the private key encoded with the Wallet Import Format (WIF). Let’s construct the `walletId` object which we will be using often:
const walletId = { walletId: "wif:testnet:" + wallet.wif };
Getting balance then becomes:
const balance = (await axios.post("wallet/balance", walletId)).data;
The objects returned are the same as in the javascript library so we do not need to change the rendering code at all. Neat!
Getting the deposit address and deposit QR code turns into:
const addr = (await axios.post("wallet/deposit_address", walletId)).data.cashaddr;
const qr = (await axios.post("wallet/deposit_qr", walletId)).data;
Balance watching is a bit different, since we can not receive the server response immediately for these kind of events. We use the websockets for this purpose:
const balanceSocket = new WebSocket("wss://rest-unstable.mainnet.cash/wallet");
balanceSocket.onopen = (event) => {
const request = {method: "watchBalance", data: {cashaddr: addr}};
balanceSocket.send(JSON.stringify(request));
};
balanceSocket.onmessage = (event) => {
const balance = JSON.parse(event.data);
// UI rendering
};
It is a bit verbose compared to javascript callback but does the same thing.
Note, how you form the request object with the method name and the data it will receive, then you send this object in the JSON encoded string form.
To get the testnet BCH we use the `faucet` endpoint. Exceptionally we do not need to supply the `walletId` parameter here. Our faucet grants the testnet BCH for free for everyone, but rate limits apply. https://rest-unstable.mainnet.cash/faucet.html
document.querySelector('#getSats').addEventListener("click", async () => {
await axios.post("faucet/get_testnet_bch", { cashaddr: addr });
});
Sending the funds is uncomplicated and we substitute the sending functions with:
await axios.post("wallet/send", {walletId: walletId.walletId, to: [{cashaddr: addr, value: 1000, unit: "sat"}]});
and
await axios.post("wallet/send_max", {walletId: walletId.walletId, cashaddr: addr});
Pretty simple!
Very similar to BCH we use `wallet/slp` endpoints for the SLP but supply the `tokenId` everywhere and use the `slpaddr` parameter instead of `cashaddr`. The rendering code is remaining the same.
const slpBalance = (await axios.post("wallet/slp/balance", walletId)).data;
const slpAddr = (await axios.post("wallet/slp/deposit_address", walletId)).data.slpaddr;
const slpQr = (await axios.post("wallet/slp/deposit_qr", walletId)).data;
Waiting for the SLP balance is again based on websockets and is similar to the BCH:
const slpBalanceSocket = new WebSocket("wss://rest-unstable.mainnet.cash/wallet");
slpBalanceSocket.onopen = (event) => {
const request = {method: "slpWatchBalance", data: {slpaddr: slpAddr, tokenId: tokenId}};
slpBalanceSocket.send(JSON.stringify(request));
};
slpBalanceSocket.onmessage = (event) => {
const slpBalance = JSON.parse(event.data);
// UI rendering
};
Getting the testnet SLP is done through our `faucet` endpoint again:
await axios.post("faucet/get_testnet_slp", {slpaddr: slpAddr, tokenId: tokenId});
Finally sending some tokens and all tokens of a certain `tokenId` kind is done with:
await axios.post("wallet/slp/send", {walletId: walletId.walletId, to: [{slpaddr: addr, value: 1, tokenId: tokenId}]});
await axios.post("wallet/slp/send_max", {walletId: walletId.walletId, slpaddr: addr, tokenId: tokenId});
So we do not actually see any UI difference, but as you could have guessed our webpage now consumes less RAM (1.2 MB REST vs 9.8 MB JS) according to Chrome memory profiler.
This concludes the article and our short tutorial series. Next time I am going to explain in details how to bootstrap your own REST server. What other topics do you want to learn about? Maybe how to create your own tokens, minting and burning them or maybe how to monitor transactions and blocks? Tell me in the comments! Be sure to check out our **web site** and **library documentation**. You can ask any questions in our **telegram group**. The source code of this tutorial is available on **github**. https://mainnet.cashhttps://mainnet.cash/tutorial/https://github.com/mainnet-cash/mainnet-tutorial/blob/master/4.tutorial.rest.bch.html
Cheers,
pat for mainnet.cash team.
mainnet.cash - SLP wallet
Hey guys, in the previous article we have created our own in-browser bitcoin cash wallet using the mainnet.cash library. Today we will add the Simple Ledger Protocol (SLP) support to it. https://read.cash/@pat/mainnetcash-getting-started-a75b2fc6
SLP tokens in BCH are similar to ERC-20 tokens in Ethereum. These can be treated as valuable bits of information - very similar to Bitcoin Cash itself - floating on top of the blockchain, forming its second layer. If you are interested in what the SLP tokens are and how exactly do they work, consider visiting the https://simpleledger.cash and http://slp.dev.
So let's start programming right away and duplicae the UI we have created for BCH and rename the HTML element ids and titles to have `slp` in their names, so we have no ambiguity. The result is this snippet, placed right after the BCH wallet's closing `div`:
<div style="margin: 30px; flex: 50%;">
<h1>Simple ledger tokens</h1>
<div>Wallet balance: <span id="slpBalance"></span></div>
<div>Wallet balance USD: <span id="slpBalanceUSD"></span></div>
<div>Deposit address: <span id="slpDepositAddr"></span></div>
<div>Deposit QR: <img id="slpDepositQr"/></div>
<div>
<button type="button" id="getSlp">Get testnet slp tokens</button>
</div>
<div>
Send to slp address
<input id="slpSendAddr"></input>
<input type="button" id="slpSend" value="Send SLP"></input>
<input type="button" id="slpSendMax" value="Send All SLP Tokens"></input>
</div>
</div>
Now let's render the missing information in our SLP wallet by calling its SLP functions.
For this we need to declare the `tokenId` of the token we will be working with.
const tokenId = "132731d90ac4c88a79d55eae2ad92709b415de886329e958cf35fdd81ba34c15";
`tokenId` is a 64 character long string. In fact it is a transaction hash in which the token first *appeared* on the blockchain. The `tokenId = "1327..."` you see here is the `tokenId` of our `Mainnet coin` which we created for testing purposes beforehand. Working with SLP tokens requires precise knowledge of the token id. Knowing the token name `Mainnet coin` or its ticker `MNC` is not enough, since anyone can create a token with the same name and ticker and fool us about its identity.
Now let’s duplicate the code in the `run()` function and start adapting it. First let's get the token balance of our wallet and update the UI:
const slpBalance = await wallet.slp.getBalance(tokenId);
document.querySelector('#slpBalance').innerText = `${slpBalance.value} ${slpBalance.ticker}`;
document.querySelector('#slpBalanceUSD').innerText = `???`;
This code looks familiar, doesn’t it? We access all the functions of an SLP wallet with a `wallet.slp` accessor. We have designed both wallet interfaces to be as close as it can get. Most notable difference is that you have to supply the `tokenId` everywhere in the function calls. Note, that we do not know the USD-MNC conversion rate, hence the `???` USD value.
Watching the balance is similar to the BCH code:
wallet.slp.watchBalance((slpBalance) => {
document.querySelector('#slpBalance').innerText = `${slpBalance.value} ${slpBalance.ticker}`;
document.querySelector('#slpBalanceUSD').innerText = `???`;
}, tokenId);
Let's now get the deposit address and deposit QR Code in the SLP format with the `slptest:` prefix (`simpleledger:` on the main network):
const slpAddr = await wallet.slp.getDepositAddress();
document.querySelector('#slpDepositAddr').innerText = slpAddr;
const slpQr = await wallet.slp.getDepositQr();
document.querySelector('#slpDepositQr').src = slpQr.src;
This is how the UI of our SLP wallet looks like now. Very similar to that of the BCH wallet.
Now lets animate the last three buttons remaining: "Get testnet slp tokens", "Send SLP" and "Send All SLP Tokens".
Getting the testnet `Mainnet coin` tokens from the faucet is very similar to BCH:
document.querySelector('#getSlp').addEventListener("click", async () => {
await wallet.getTestnetSlp(tokenId);
});
Sending the tokens requires the knowledge of an SLP address of your counterparty and the `tokenId` which you want to send.
// send some
document.querySelector('#slpSend').addEventListener("click", async () => {
const addr = document.querySelector('#slpSendAddr').value;
await wallet.slp.send([{slpaddr: addr, value: 1, tokenId: tokenId}]);
alert('Sent 1 slp to ' + addr);
});
// send all
document.querySelector('#slpSendMax').addEventListener("click", async () => {
const addr = document.querySelector('#slpSendAddr').value;
await wallet.slp.sendMax(addr);
alert('Sent all slp funds to ' + addr);
});
*Important notice:* getting the tokens from the faucet does not cost you anything. But the tokens will turn to be a dead weight if you don't have any spare BCH in your wallet. This marginal amount of BCH is required to pay the miners to move your tokens: compare to the Ethereum gas. So before trying to move the tokens, ensure you have claimed some BCH into your wallet too!
Our resulting UI will look like this after claiming from both faucets and moving the tokens:
Note that our BCH balance is down by about 1000 sats. This is about ~4x larger than your usual transaction fee. Reason for that lays in fact that SLP transactions require a special non-monetary output which contains the information about the token movements. But don't be worried about all these complex matters - mainnet.cash library takes care of building these outputs and ensuring that your tokens will not get burned.
This concludes our second tutorial article. Next time we will port our wallets to use the mainnet.cash REST server which will do the weightlifting for us, making our web page leaner. Be sure to check out our **web site** and **library documentation**. You can ask any questions in our **telegram group**. The source code of this tutorial is available on github. https://mainnet.cashhttps://mainnet.cash/tutorial/https://github.com/mainnet-cash/mainnet-tutorial/blob/master/3.tutorial.slp.html
Cheers,
pat for mainnet.cash team.
mainnet.cash - Getting started
mainnet.cash is a library which allows you to interact with the BitcoinCash network. It aims to simplify the BCH development substantially, allowing new business ideas to be implemented swiftly. Our core features are available in the browser or in the node.js environment. Our REST server allows for an easy integration with other programming languages. https://mainnet.cash
We’ve implemented the most convenient functionality of a crypto wallet like working with network transactions, sending and receiving funds. However, you can treat mainnet.cash as an “umbrella” library which aims to support the most popular and emerging BCH technologies. Among these are: SLP tokens, HD and multi-signature wallets, encrypted messaging, smart contracts in bitcoin script and cashscript, decentralized exchanges, anyhedge and much more!
So let’s get started using mainnet.cash with Javascript and build a simple wallet application, shall we?
For this clone the following repository **https://github.com/mainnet-cash/mainnet-tutorial.git** and open the 1.tutorial.html file.
Or simply paste this text in a new file with `.html` extension:
<html>
<head>
<meta charset="utf-8">
<script src="https://rest-unstable.mainnet.cash/scripts/mainnet.js"></script>
</head>
<body>
</body>
<script>
async function run() {
}
run();
</script>
</html>
This is a basic html page with mainnet.cash library imported.
Now lets add the UI elements to the webpage and paste the following text inside the `<body>` tag:
<div style="display: flex; flex-direction: row;">
<div style="margin: 30px; flex: 50%;">
<h1>Bitcoin cash</h1>
<div>Wallet balance: <span id="balance"></span></div>
<div>Wallet balance USD: <span id="balanceUSD"></span></div>
<div>Deposit address: <span id="depositAddr"></span></div>
<div>Deposit QR: <img id="depositQr"/></div>
<div>
<input type="button" id="getSats" value="Get testnet satoshi"></input>
</div>
<div>
Send to address
<input id="sendAddr"></input>
<input type="button" id="send" value="Send"></input>
<input type="button" id="sendMax" value="Send All Funds"></input>
</div>
</div>
</div>
This markup will render the basic UI elements of the wallet: balance, balance in USD, deposit address, deposit address QR code, some buttons for getting the testnet satoshi and sending them around.
Let's animate our webpage and make our wallet functional.
First things first - we should create the wallet object.
const wallet = await TestNetWallet.newRandom();
The `wallet` variable will now provide the wallet functionality on the test network, where BCH is worthless.
Now we can access the full functionality of the mainnet.cash library. Let's get the wallet balance in satoshi and USD and update the webpage UI.
const balance = await wallet.getBalance();
document.querySelector('#balance').innerText = `${balance.sat} testnet satoshi`;
document.querySelector('#balanceUSD').innerText = `$${balance.usd}`;
Easy, isn't it? We hide the complexity of interacting with the network, counting the unspent transaction outputs (UTXO), calculating the fee amount and converting the sats to USD from you. We want to enable you to concentrate on the business-logic.
To watch for balance updates we set up a callback:
wallet.watchBalance((balance) => {
document.querySelector('#balance').innerText = `${balance.sat} testnet satoshi`;
document.querySelector('#balanceUSD').innerText = `$${balance.usd}`;
});
The code within curly brackets is identical to one shown above. It will be evaluated each time our wallet receives or sends funds.
Now let's get our wallet's deposit address and QR code image containing it and update the UI:
const addr = await wallet.getDepositAddress();
document.querySelector('#depositAddr').innerText = addr;
const qr = await wallet.getDepositQr();
document.querySelector('#depositQr').src = qr.src;
mainnet.cash hosts a testnet faucet which will refill our wallet's address up to 10000 satoshi.
document.querySelector('#getSats').addEventListener("click", async () => {
await wallet.getTestnetSatoshis();
});
Let's claim them by clicking on the `Get testnet satoshi` button.
Pay attention to the wallet's real-time balance update.
Now we have 10000 satoshi which should worth $0.05 USD on the BCH main network.
Lastly let's program the `Send` and `Send All Funds` buttons:
document.querySelector('#send').addEventListener("click", async () => {
const addr = document.querySelector('#sendAddr').value;
await wallet.send([{cashaddr: addr, value: 1000, unit: "sat"}]);
alert('Sent 1000 sats to ' + addr);
});
document.querySelector('#sendMax').addEventListener("click", async () => {
const addr = document.querySelector('#sendAddr').value;
await wallet.sendMax(addr);
alert('Sent all funds to ' + addr);
});
Try sending the funds to yourself, or open a new browser window and send them to another random wallet.
This concludes the first chapter in our tutorial series. Next time we will add the SLP token support to our wallet. Be sure to check out our web site and library documentation. You can ask any questions in our telegram group we have created recently. https://mainnet.cashhttps://mainnet.cash/tutorial/
Cheers,
pat for mainnet.cash team.
 @pat
@pat