How to weld properly and correctly for beginners
Welding is one of the metal joining techniques by melting some of the parent metal and filler metal with or without pressure and with or without adding metal and producing a continuous connection. Welding with the method known today, became known at the beginning of the 20th century. As a heat source used fire from the combustion of acetylene gas which became known as carbide welding. At that time, electric welding had been developed, but it was still rare.
Based on the definition of DIN (Deutch Industrie Normen) welding is a metallurgical bond at the guide metal joint which is carried out in a melted or liquid state. From this definition, it can be further elaborated that welding is a local connection of several metal rods using heat energy. At this time, 40 types of welding have been used, including welding which is carried out by pressing two joined metals so that these two metals can be glued together.
Welding is one of the metal joining techniques by melting some of the filler metal with or without pressure and with or without additional metal which produces a continuous connection. The scope of use of welding techniques in construction is very wide, including shipping, bridges, steel frames, pressure vessels, pipe pipes, pipelines and so on.
Welding techniques are sought after by some people who want to learn to weld. We can get these techniques in vocational or technical schools. However, for ordinary people who want to open a welding workshop business, for example, they tend to not have time to study formally. Therefore, we will provide some welding tips that we hope can help us all in learning how to Weld Correctly.
How to Weld the Good and Correct
The equipment needed in the welding process includes:
1. Main Equipment
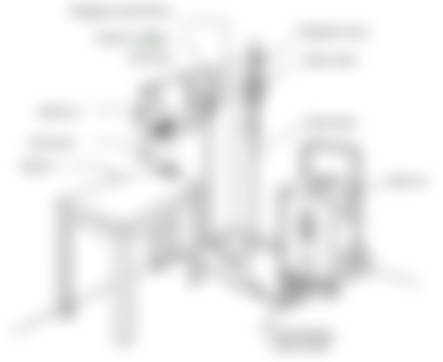

Source image
- Welding machine
– Electric Current: AC/DC
– Electrode Holder / electrode pliers / electrode clamp
– Welding cable (electrode cable / mass cable / power cable)
2. Work Safety Equipment


Source image
– Welding mask, to protect eyes from welding rays
– Welding mask / suction blower, to protect the nose and breathing due to fire smoke
– Apron / chest protector, to protect the body from sparks
– Weldin gloves
3. Auxiliary Equipment


Source image
- Smel
– Steel brush
– Keraki Hammer
– Welding table
- Grinding machine
The following is the correct welding procedure:
1. Clean the material to be welded. Use a hammer to descale the surface of the area to be welded. Use a steel brush for maximum results.
2. Place the material to be welded in the space provided. Be it using a workbench or just laying it on the floor. Adjust the density between the two materials. Use clamps if needed.
3. Place the welding machine mass on one part of the material to be welded. Insert the electrode on the electrode clamping panel on the welding machine. Install the slope of the electrode according to the position of the material. Usually there is a special place for the electrode slope on the electrode clamping pliers. Be it 90 degree, 30 or 40 degree perpendicular.
4. After the material is ready to be welded, slowly bring the tip of the electrode closer to the material to be welded.
5. The distance between the tip of the electrode and the material to be welded greatly affects the quality of the welding. If the distance is too far, there will be sparks like rain of fire spots. The welding process will not be perfect. If the distance is too close, the fire will not burn properly. And there is not enough distance for the melting electrode. A good distance is one-eighth of the thickness of the electrode.
6. By using a protective mask or welding goggles, you can pay attention to the part of the electrode that has melted which unites the two materials being welded. Slowly move the electrode along the welded area.
7. Good results during the welding process can be seen when the welded surface is shaped like a tight and regular wave that completely covers the welded part.
8. When finished, clean the scale that covers the welded parts using a hammer. Check again if there are parts that are not perfect. If it's not perfect, repeat the parts that haven't been put together well. In some cases, the welded material must be grinded again if the welding is not perfect. But if it's not too fatal, we just need to weld the parts that haven't been welded perfectly.
Things to consider when welding:
.Welding wire must match its designation with the metal to be welded. For beginners, you should learn to weld materials from ordinary iron (eg concrete iron, angle iron, plate iron, etc.).
.The material to be welded should be placed horizontally because it will be easier than upright or above (overhead).
.It is easier to use a DC welding machine than an AC. Because the fire that arises in the DC current is small and does not splash excessively. Also most welding wires require DC current rather than AC.
.To learn to use a wire with a small cross section, for example 2.6 mm or if it can be marketed use a wire of 1.5 mm (but usually expensive
.As a beginner, learn with medium thickness materials ( 2 ~ 6 mm), welding thin materials (< 1 mm) requires special skills and tricks.
.The material to be welded must be sealed, if possible, must be pressed/pressed, so that only thin welding is sufficient and does not patch. If the material is thick enough, for a neat weld it is necessary to make cuts / holes along the length to be welded with a grinder.
.Setting the amount of current is very necessary. A small current causes the welding wire to not turn on, the weld is not cooked/strong and uneven. The current that is too large causes the material to be welded to burst, the weld becomes rough and when it is cold it shrivels up due to the temperature being too high. As ancar2 for 1 mm of welding wire required current of 30 ~ 40 Ampere.
.Direction of welding: After the welding wire is lit, the welding wire should be pulled away from the material by about 2~3mm. Too close will result in undercooked welds and the wire will easily stick to the material so that the fire will die. Too far results in rough and uneven welds. Welding wire forms an angle of 45 ~ 60 degrees to the material. The welding flame must be sprayed/sprayed on the weld that has just occurred (as we wrote, initially from the left and then moving to the right or if you are left-handed you can go the other way). Wire speed, depending on the results of the weld. If the materials are already fused, you must immediately move the welding point. Too fast will result in uneven welding, too slow will cause the material to break / perforate.
.If you need to stop while welding, before starting again you must clean the scale on the weld by tapping with a hammer. If this is not done then the next weld will stick to the crust so that its strength is reduced.
.It is best to avoid sudden cooling after welding (watering) because some materials will crack.
If we weld slowly and carefully, the welding results will be good. But if we weld in a fast way, in a hurry, the results will not work well, because in the welding technique we need caution, accuracy, and tenacity so that the work and welding can be done properly.
That's it buddy, for the discussion this time about How to Weld Good and Correct For Beginners, Hopefully it will be useful for you. Thank you