 @Read.Cash
How to implement CashID ("Login with Badger Wallet") on your site What is a "CashID"? CashID is basically "Login with Bitcoin Cash" button. Here is the specification, created by JonathanSilverblood. This article will mostly concentrate on how to implement it. https://gitlab.com/cashid/protocol-specification https://read.cash/@JonathanSilverblood Overview The only client that we know of that implements CashID is Badger Wallet, so we will implement the CashID using that particular wallet. We also only implement the "authentication" part of the spec. https://badger.bitcoin.com/
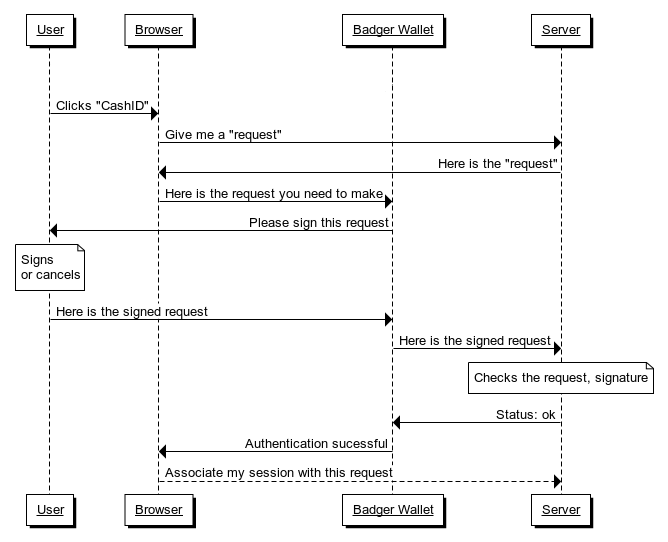
Step-by-step User clicks "CashID"
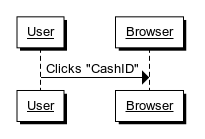
User clicks "CashID" or "Login with CashID". At this moment you need to check a few things: 1) Is Badger wallet installed? 2) Is it unlocked? JavaScript in the browser: if (typeof web4bch === 'undefined' || typeof web4bch.bch === 'undefined') { alert('Please install Badger wallet first'); window.open('https://badger.bitcoin.com/', '_blank') return; } if (typeof web4bch.bch.defaultAccount === 'undefined') { alert('Please unlock your Badger wallet'); return; } Of course, all JS here is just an example - change it to your own will. `web4bch` is the variable that is injected by Badger wallet to your code if it is installed. `web4bch.bch.defaultAccount` is the current account that user have selected in Badger Wallet. If all of this goes well - we need to ask our server to generate us a "request" to sign. Ask the server for a request
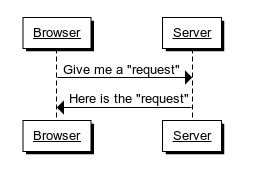
**What is a "request"?** It's a string that looks like this: cashid:yourserver.com/path?x=NIymFmzrktywUGWhcAvGGYyk2BRr2Pob This is the request for default action (i.e. `login`). The important parts here are: `yourserver.com/path` - it's a path that Badger wallet will call using the `https` scheme, like this: POST https://yourserver.com/path `?x=NIymFmzrktywUGWhcAvGGYyk2BRr2Pob`is the part with the nonce, where `NIymFmzrktywUGWhcAvGGYyk2BRr2Pob` is the "nonce". A "**nonce**" is a random string that is hard to guess. From the spec: https://gitlab.com/cashid/protocol-specification#nonce The **Nonce** parameter acts as a replay-protection mechanism, by making each request challenge and response unique. Each **Nonce** can only be used a single time during its lifespan and should expire if left unused for a significant amount of time. The service provider should not process requests that it has not issued nonces for, except for **User actions** that have a valid and recent **Timestamp** according to ISO-8601 as their nonce value. https://en.wikipedia.org/wiki/ISO_8601 What are we protecting here from? If someone intercepts your request - they will be able to replay it and authenticate as you. That's why it's important that: Your server issues the nonce and the request, not the client (i.e. do not generate nonce in Javascript in the browser) The server must remember the requests it gave out (until their expiration) The server must expire all requests if they are not used When server gets the request with the request back - it must check that it has issued this nonce, it hasn't expired and it hasn't been used yet Keep the nonce reasonably long, but not too short. The attacker shouldn't be able to guess the nonce. **Note about** `session_id`: if you have some identifier of the session that you want to send to the server - you can use this request type (`a=login`): cashid:yourserver.com/path?a=login&d=123-123&x=NIymFmzrktywUGWhcAvGGYyk2BRr2Pob where `d` parameter would contain anything that you need to identify session on the server. (Badger Wallet won't send your cookies along to your server) The request has a lot more parameters that we'll show in a bit. JavaScript in browser: const r = await axios.get('https://yourserver.com/cashid/new_request'); const request = r.data.request; (`axios`is the library to make http request from Javascript, you can also use `fetch`) This is the code assuming that if you call `https://yourserver.com/cashid/request`, you'll get something like this in return: {"request": "cashid:yourserver.com/path?x=NIymFmzrktywUGWhcAvGGYyk2BRr2Pob"} This is the part that you need to implement on your server. Ask the Badger Wallet to sign the request
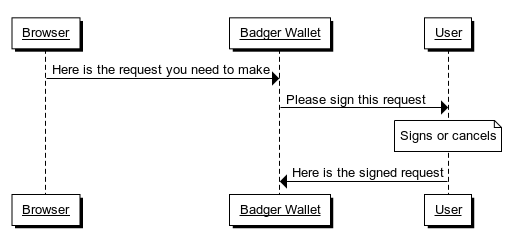
Assuming you have the `request` variable in JavaScript, now you can make a call to Badger to sign it: web4bch.bch.sign( web4bch.bch.defaultAccount, request, async (err) => { if (err) { alert(`Error: ${err}`); return } // TODO: Success } ); If the request is well-formed, the user will see something like this:
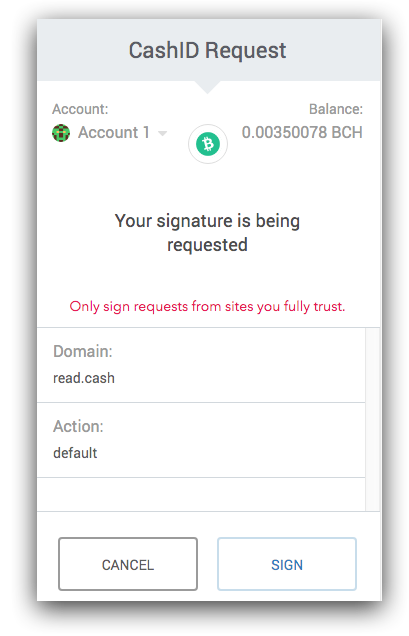
If the user clicks "Sign" - Badger will sign the `request` variable and send a `POST` `https` request to the path from `request`. Request to the server
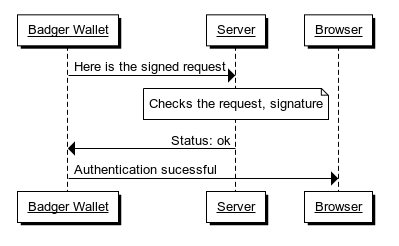
At this point Badger will call your server. If your request is `cashid:yourserver.com/path?x=NIymFmzrktywUGWhcAvGGYyk2BRr2Pob` - the request would be made to `https://yourserver.com/path`. The request will be `POST` to `https://` with JSON payload like this: { "request": "cashid:yourserver.com/path?x=NIymFmzrktywUGWhcAvGGYyk2BRr2Pob", "address": "bitcoincash:qqxksj....", "signature": "6X1Gdzztj1tkUGTAN4hhPfPt6Nk/aMGMdbVSZJ6FGiKUdP..." } **Important:** Badger Wallet **will not send any cookies** with your request. That's why you can't immediately log the user in, unless you can somehow bring their session up using the `a=login&d=123-123` parameter described above. **Note about https and localhost**: The request will always be made to `https`, so when you're developing locally - something like serveo.net can greatly help here. If your local server is running on port 8000 on localhost, run this: ssh -R 80:localhost:8000 serveo.net You'll get `https` URL (for ex. `https://aveo.serveo.net`), which you should use in your generated requests, like this: cashid:ab6eda4f.ngrok.io/path?x=... If you don't have working `ssh` - you can try ngrok. Please note that you can install ngrok, but it's **not open source**, so you don't know what's running. https://ngrok.com/ For the same 8000 example: ngrok http localhost:8000 Check the request On the server: You have issued this request with this nonce (parse the `request` as a URL and check the `x` parameter (nonce)); It has not expired; It was not used before. You can use something like Redis, generate a string, put the `request` string there when it's generated with an expiration of 5 minutes and as soon as it is used - delete the key. Check the signature It's the most important part. Check that the incoming `request` string was signed and that resulting `signature` matches the incoming `address`. Note: the `address` is going to be in CashAddr format ("bicoincash:qq12ab..."), which you need to convert to the so-called "legacy" format ("1AbD..."). Example code in PHP: $address = CashAddress::new2old($cashAddress, true); $b = new BitcoinECDSA(); if (!$b->checkSignatureForMessage($address, $signature, $request)) { return $this->error('signature mismatch'); } // send {"status": 0} The `CashAddress` class is here. https://github.com/Har01d/CashAddressPHP/blob/master/CashAddress.php The `BitcoinECDSA` is from bitcoin-php/bitcoin-ecdsa (`composer require bitcoin-php/bitcoin-ecdsa`). https://github.com/BitcoinPHP/BitcoinECDSA.php **Note (Nov 1, 2019):** Badger Wallet **does not report any 4xx or 5xx server errors** to the user. **If you return 4xx** **code** - Badger doesn't close the "sign" window and just shows the balance to user (which is very confusing) **and it doesn't call your** `(err) =>` **callback** either. You should always return HTTP code 200, even if an error has happened (as clarified by the author of the specification). The specification says that you should return this to indicate success: { "status": 0 } but in our tests, Badger seems to be ok with any text response. The specification lists a lot of status codes that you should return to indicate an error, i.e. `{"status": 142}` to indicate that the request has expired. https://gitlab.com/cashid/protocol-specification#status-codes At this point you should remember on server that the particular `request` is associated with this particular `address`. We can trust this information. If you can bring the session in (via `data` parameter for example, in the note above) you are done now, just associate the `address` with the session, otherwise you need one more step. The user is now logged in
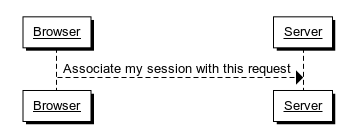
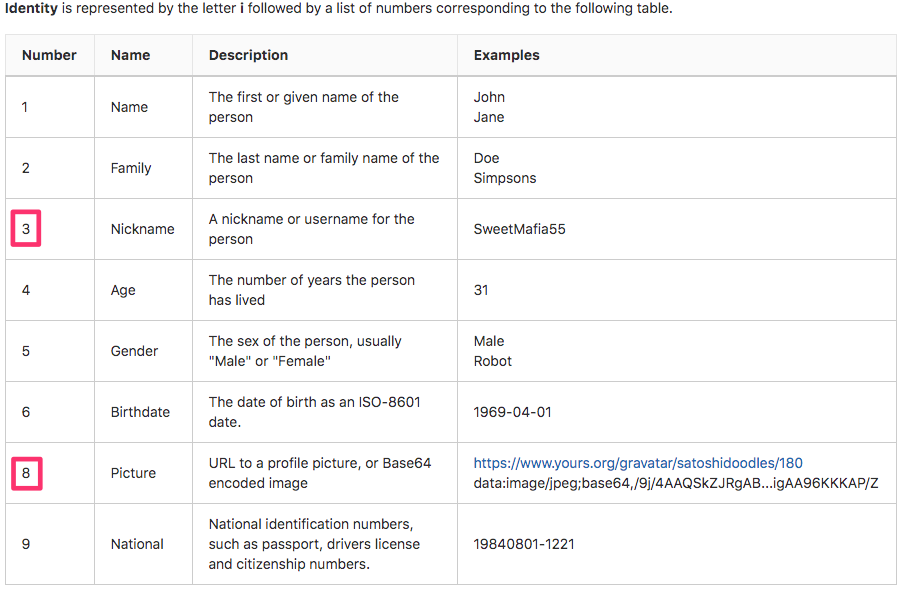
Now we can do a call **with our session cookie** to the server. Remember the code we used for signing? Let's update it to make a second call: web4bch.bch.sign( web4bch.bch.defaultAccount, request, async (err) => { if (err) { alert(`Error: ${err}`); return } const r = await axios.post("/cashid/associate", {request: request}); document.location.reload(); } ); This call will be with our session cookies, so now we can check that we have (on server) a `request` or `nonce` associated with some `address` and now we can assign this `address` to the newly created user or to the logged in user. **Note: At this stage you should definitely delete the "request" on server to avoid "replay" attack - i.e. someone else asking to be associated with your request.** How to get more information, like name, picture, email CashID spec details a few more parameters that you can add to your signing request here. https://gitlab.com/cashid/protocol-specification#metadata-types If you want a nickname and a picture, you can make a request like this:

Where `o` is for "optional" and `r` is for "required" fields. The `38` part actually means "3" and "8" from the `i` "identity" table: https://gitlab.com/cashid/protocol-specification#metadata-types
We haven't yet used this on read.cash, because we need to make sure that the name is unique and follows a specific pattern (letters, dots, dashes, no spaces), so it's no use for us if a user signs malformed or non-unique name, but it's important to know that it's there. We haven't tested yet if Badger supports this part of specification. QR-codes-based authentication https://demo.cashid.info/ You can also use the Android app developed by the CashID author Jonathan Silverblood to try QR-codes-based workflow. We haven't used it yet, but we'll try to implement it too.

18 comments
> You can either request only a "nonce" from the server and build a "request" in browser Actually, this is an invalid implementation pattern - the spec dictates that the backend should only parse requests it itself hands out. While the nonce could be seen as "but it did hand out this request", the odd part is that the backend can no longer verify the integrity of the request since it only handed out a partial request.
Good, we'll update the article.
Thanks!
> The "nonce" is basically the "id of the session" This part is not quite right. The nonce is a unique identifier for the authentication request. There is an action called "login" with which you should pass the "data" field as your session identifier. I think this is the one action that badger has suppoert for right now, but the identity manager supports many more.
Removed the sentence.
> Badger Wallet does not report any server errors to the user. Wow, this is unexpected. This should probably be reported as a bug, as the specification explicitly lists a whole lot of error conditions that the identity managers should be able to deal with.
Maybe we're wrong here. We have only given it 403 and 500 errors. I've somehow missed the part of the spec with the response codes.
reading the specification I see how one might misinterpret the status codes as "HTTP status codes". That is not what they are, use HTTP 200 OK and return these status codes in JSON as part of the body of the response.
Thanks! Updated the article. (Replied to the wrong comment yesterday)
> Now we can do a call with our session information to the server If you use the **login** action, you can carry the session identifier in the **data** field.
Added it to the article.
> We haven't tested yet if Badger supports this part of specification. As far as I know, badger does not support metadata yet, but have it on their todo list. The identity manager for android though, does support metadata and one of the most amazing experiences you can have when you come to a new site is that you loging **before making an account** and the site just makes your account on-the-spot for you, populates it with the data you send and you're ready to do. Why even have an onboarding process when every bitcoincash user already have an "account"? :D
It's almost what we do currently, but since we need to make sure that the name follows a specific pattern (no spaces, unique) - we have currently decided to make it two step process (CashID, then name+optional email), but yes, we can ask for the name in the first step, but we are unable to explain to user that the name is what everybody will see on the site and that it must not have spaces. It just asks for Nickname.
What are you reason for needing a unique name? If it is just to get a unique identifier, the address is guaranteed unique and the profile information could be shown/used as needed in the user interface without needing uniqueness?
Thanks! Updated the article.
Oh wait, I've replied to the wrong comment. The reason is that is's a name in the sense like it's a nickname on reddit - basically same rules - that eventually you'll be able to use type @JonathanSilverblood and get a notification - for that you need to have unique names + no spaces.
o=i3, ask for the nickname. If they don't provide one, or it's not unique, pop a dialog asking telling them that on this platform the nickname is already taken and they'd have to enter a new one?
Yes, we saw it (and written in the article). But currently, it adds a bit more complexity than solves (we need to have two different requests for login and register, whereas now we have one). We might add it in future.