This how to article will help users using vmware to setup a virtual machine running ubuntu linux that will host a staking node for Ghost by Mcafee.
Creating our VM
The article assumes you are currently already running a server loaded with ESX. We will start by getting an ISO of the latest Ubuntu build. You can find that at https://ubuntu.com/
Once downloaded upload the ISO to the datastore of the ESX host.
Next we will right click on Virtual Machines and select Create/Register VM


On the next screen Select create a new virtual machine and click next
Give the VM a name I called mine GhostColdStakpool. Compatability I left set to default. Guest OS family I selected Linux. Guest OS version I selected Ubuntu Linux (64bit). click Next
For the next section I left it as default for storage which was my DataStore0. Click Next
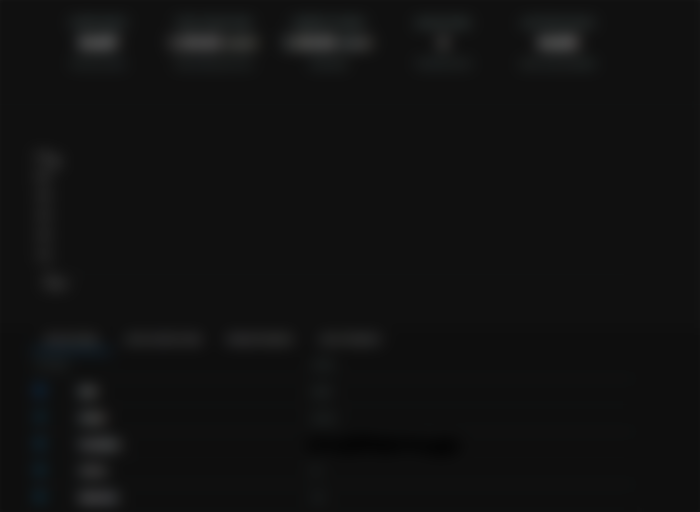
Next Screen is where you configure all the VM Settings


Under CD/DVD Drive change Host device to Datastore ISO image. Go to the folder on the data store where you uploaded the ISO click the ISO and hit Select. Click Next
The next screen should confirm the settings


From ESX click the VM and click Power On then open a Console Window. From here it should try to install Linux. From here it will prompt you to give the VM a name provide your name.
For User use stakepooluser and create a password. Configure disk determine if any additional installs you might want configure network etc. No additional applications need to be installed it will give you the option to update the OS install files before install. Once downloaded it will install Linux. When it prompts you to hit enter to reboot make sure to remove the disk drive from the VM then hit enter.
Once rebooted login.
Once logged in type these commands to verify all packages are updated to their latest patches
sudo apt-get upgradeLet it run.
Next Install dependencies
sudo apt-get install gnupg wget python3 git nginx tmux python3-zmq puthon3-pip lynx htop vim net-toolsNext check the server time
timedatectlIf the timezone is wrong use this command
sudo timedatectl set-timezone your_time_zoneTo list the timezones
timedatectl list-timezonesverify time is now correct it will show in a 24 hour format
If you want to have more accurate time you can use chrony by following the steps at this site: https://www.coincashew.com/coins/overview-ada/guide-how-to-build-a-haskell-stakepool-node/how-to-setup-chrony
Time to download the cold stake pool software to the server. Type
git clone https://github.com/ghost-coin/ghost-coldstakepoolNext install ghost-coldstakingpool
cd ~
cd ghost-coldstakepool
sudo pip3 install .
Setup Mainnet Pool
coldstakepool-prepare -datadir=~/stakepoolDemoLive!! Important: During this process make sure to save the stake and reward wallet recovery phrases as well as the stake address and reward address
Modify the json file that configures the pool info
vi ~/stakepoolDemoLive/stakepool/stakepool.jsonNOTE hit the i key which will allow you to now move the cursor with the arrows and modify the file
{
"mode": "master",
"debug": true,
"ghostbindir": "/home/stakepooluser/ghost-binaries",
"ghostdatadir": "/home/stakepooluser/stakepoolDemoLive",
"startheight": 101,
"pooladdress": "<STAKE ADDRESS>",
"rewardaddress": "<REWARD ADDRESS>",
"zmqhost": "tcp://127.0.0.1",
"zmqport": 20792,
"htmlhost": "localhost",
"htmlport": 9000,
"allowcors": true,
"maxoutputspertx": 64,
"parameters": [
{
"height": 1000,
"poolfeepercent": 2,
"stakebonuspercent": 5,
"payoutthreshold": 0.1,
"minblocksbetweenpayments": 100,
"minoutputvalue": 0.01
},
{
"height": 1000,
"poolfeepercent": 5
}
],
"poolownerwithdrawal": {
"frequency": 720,
"address": "<YOUR Ghost Address for fees for running the pool>",
"reserve": 2,
"threshold": 5
}
}Please note that poolownerwithdrawal can be changed according to your preferences Once this file is modified as needed type this command
Hit the ESC key on the keyboard then type
:wq!
Setup Services so after reboots the applications you need running will start automatically
sudo cp ~/ghost_stakepool/doc/config/*.service /etc/systemd/system
sudo systemctl daemon-reload
Start and enable services
sudo systemctl start ghostd_live.service stakepool_live.service
sudo systemctl enable ghostd_live.service stakepool_live.service
Verify services started
check status of services
sudo service stakepool_live status
sudo service ghostd_live status
Check journal for service if there is a failure
sudo journalctl -u stakepool_live.service
sudo journalctl -u ghostd_live.service
hit shift+G to scroll to bottom of the log
Setup Web server
sudo rm /etc/nginx/sites-enabled/default
sudo cp ~/ghost_stakepool/doc/config/nginx_stakepool_forward.conf /etc/nginx/conf.d/
sudo nginx -t
sudo systemctl stop nginx
sudo systemctl start nginx
sudo systemctl enable nginx
mkdir /tmp/nginx
sudo rm /etc/nginx/conf.d/nginx_stakepool_forward.conf
sudo cp ~/ghost_stakepool/doc/config/nginx_stakepool_production.conf /etc/nginx/conf.d/
sudo systemctl restart nginx
Setup the standard Ghost Pool Website interface
Next install NodeJS
cd ~

wget -qO- https://raw.githubusercontent.com/creationix/nvm/v0.33.11/install.sh | bash
logoff and log back on VM
nvm install nodeNext install npm
cd ~
sudo apt install npm
Install yarn
curl -sS https://dl.yarnpkg.com/debian/pubkey.gpg | sudo apt-key add -
echo "deb https://dl.yarnpkg.com/debian/ stable main" | sudo tee /etc/apt/sources.list.d/yarn.list
sudo apt-get update && sudo apt-get install yarn
Download the cold staking pool front end
cd ~
git clone  https://github.com/ghost-coin/ghost-coldstakepool-front
cd ghost-coldstakepool-front
yarn install
yarn run build
cp -R dist /var/www/html/pool
Setup SSL and FQDN and web domain using dyndns
First you will need to configure a dynDNS to your public IP go to google and type
whats my ipOnce you have identified your public IP from your ISP go to noip.com setup an account
go to dashboard to quick add create a hostname with a free domain


Configure your server to the hostname and domain you created
vi /etc/hosts
hit i-key to insert text
below 127.0.0.1 localhost
type 127.0.0.1 hostname.domain
hit Esc-key then type :wq!
Setup SSL
sudo apt-get update
sudo apt-get install software-properties-common
sudo apt-get install certbot python3-certbot-nginx
sudo certbot --nginx certonly
Note if this fails give it a few moments more for the domain to register.Edit the nginx config file for SSL modify the script according to below
vi /etc/nginx/conf.d/nginx_stakepool_production.conf
type i to insert and modify the file
listen [::]:80;
server_name $hostname;
# SSL configuration
#
listen 443 ssl;
listen [::]:443 ssl;
ssl_certificate /etc/letsencrypt/live/HOST.DOMAINNAME/cert.pem;
ssl_certificate_key /etc/letsencrypt/live/HOST.DOMAINNAME/privkey.pem;
#
# Note: You should disable gzip for SSL traffic.
# See: https://bugs.debian.org/773332
root /var/www/html/pool;
# Add index.php to the list if you are using PHP
index index.html;
location / {
# First attempt to serve request as file, then
# as directory, then fall back to displaying a 404.
try_files $uri $uri/ =404;
}
location /api {
rewrite ^/api(.*)$ $1 break;
proxy_pass http://localhost:9000/;
proxy_buffering on;
proxy_cache STATIC;
proxy_cache_valid 200 2m;
proxy_cache_use_stale error timeout invalid_header updating
http_500 http_502 http_503 http_504;
}
# Any route that matches /api/test will route to the testnet version.
location /api/test {
rewrite ^/api\/test(.*)$ $1 break;
proxy_pass http://localhost:9001/;
proxy_buffering on;
proxy_cache STATIC;
proxy_cache_valid 200 2m;
proxy_cache_use_stale error timeout invalid_header updating
http_500 http_502 http_503 http_504;
}
}
type ESC-key then :wq! to save and exit the fileRestart ngnix
sudo systemctl restart nginxNavigate to your website by typing in the host and domain name you chose


Hello your post is so good can you subs me bazk please. Im new in this