Tips for making Yummy Meatballs
In order for the meatballs to be delicious, they are rested for a while after kneading. The meatballs that are kept are compatible with the ingredients and the meatballs are made more delicious.
Nobody can get enough of the taste of the meatballs, which are beautifully tired and the ingredients are carefully selected.
There are very important techniques and tricks to make beautiful meatballs. One of them is to keep the meatballs in the refrigerator for a certain period of time. If you don't want to consume the meatballs right away and wait and rest, there is a possibility that you will not be able to achieve the consistency you dreamed of.
As you wait, the meatballs, whose ingredients will integrate with each other and will cook in itself, will become a more beautiful girl later on and will taste better. This is one of the secrets of making a good meatball.
Information on how and in what way the meatballs should be rested is given below. One of the most important rules of making a good meatball, resting meatballs is done as follows.
**Ways to Rest Meatballs?**
While making meatballs, you need to continue the kneading part for at least 10 minutes until the meatballs have the properties to fully stretch. After this process is completed, you need to break the meatballs in the shape of walnuts and wait for about 20 minutes on a glass bowl, covered with stretch.
At the end of this time period, you need to take out the meatball you have prepared, knead it for another 5 minutes, and then give the meatballs the Tama state you want. After giving the shape you want to the meatballs, it is a great benefit to cover the mouth with cling paper and wait for another day.
The next day, when you take your meatballs this way and start cooking, you will realize that you make much more efficient and delicious meatballs. Meatballs and meatball types, which can show regional differences, generally have a common resting style. You put plenty of spices in it, and you can extend your rest period by 2 days.
It will become much more delicious as it rests, we can say with a very simple logic from here that the more it rests, the more delicious it will be.
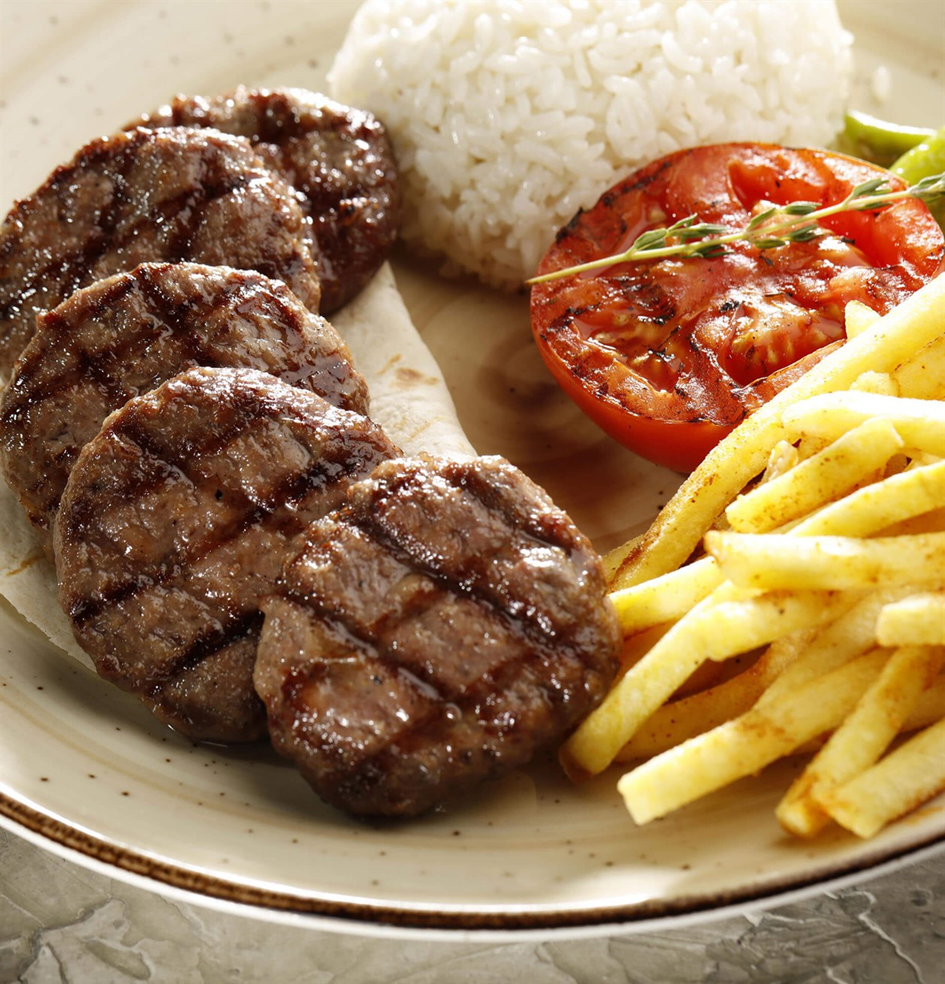
French fries cut into large and small pieces and fried like pomegranate, and meatballs on the side. The meatball-potato duo, which is almost not liked, is strong enough to take you to the most delicious moments of your childhood memories. Regardless of our age, the taste of the meatballs we ate from our mothers is never erased from our palate.
For many of us, the smell of fried meatballs pervading the house was a sign of a happy meal. Now it's time to bring it to our tables in a way that is at least as delicious as our mother's. Have you had a pile of rice spilled on the side and home-style french fries, don't enjoy it. Did we pay attention to the tricks, let's get delicious dry meatballs!
500 grams ground beef
1 cup of dry bread
2 onions
Half a bunch of parsley
1 teaspoon of Black Pepper
3 teaspoons Cumin
3 teaspoons of salt
**Let's grate the onions.**
Finely chop the parsley.
Let's take it on a tray and add spices, ground meat and salt.
Let's knead well. The more we knead, the more delicious meatballs we will have. Let's give it the shape we want and let it rest in the refrigerator if you have time. For your information, rested meatballs are much more delicious.
Let's fry in oil and serve hot.
*Enjoy your meal.*
Enjoyable Hot Chocolate recipe
Who can say no to chocolate? There is no one who does not like any kind of food. Everyone from small to large is addicted to Chocolate.
The chocolate that suits every Dessert recipe is very pleasing to me.
I have a drink recipe that will warm you up and give you pleasure while sipping. Of course, hot chocolate.
If you are enjoying the balcony in a slightly windy weather, or if it is time to chat with your friends, the drink that will accompany you best is hot chocolate.
It must be quite difficult to say no to a warm and sweet drink that warms our hearts.
If it is prepared without additives, this hot beverage will be indispensable for us.
It is very easy to prepare hot chocolate without additives and so quickly at home.
**Ingredients needed for hot chocolate are:**
– 4 glasses of milk
– 4 teaspoons of cocoa
– 4 teaspoons of sugar
-1 teaspoon of vanilla
– Grated dark chocolate
**Preparation of:**
4 teaspoons of cocoa and 4 teaspoons of sugar are first taken into a coffee pot and blended. Then, milk is added to the cocoa and sugar.
The milk, cocoa and sugar, which are mixed well, are taken over medium heat in the stove and cooked by mixing until they boil together.
However, attention should be paid to the boiling point of the mixture on the stove, because the milk, sugar and cocoa mixture that is not sufficiently mixed during cooking will not dissolve in each other, which will cause the beverage to clump together, and not mixing will cause the mixture to stick to the bottom of the coffee pot.
After boiling starts on the mixture, 1 teaspoon of vanilla is added to the mixture. After the addition, mixing and cooking processes are continued.
The best example of this is a steaming hot chocolate.
The mixture, which has thickened while cooking, is taken into the serving cup. Finally, our hot chocolate is made ready by sprinkling the grated dark chocolates on the mixture.
The classic hot chocolate we prepare can be differentiated with various spices according to taste. According to taste, ginger, black pepper, cinnamon, ginger, nutmeg, coconut can be mixed with grated chocolate and added to the mixture.
Depending on our taste and visual taste, a difference can be made in the presentation of hot chocolate. Desired sauces, chocolate chips, cream, liqueur, wafers or cookie pieces can be added to the hot chocolate.
Our hot drink is also consumed cold according to different tastes.
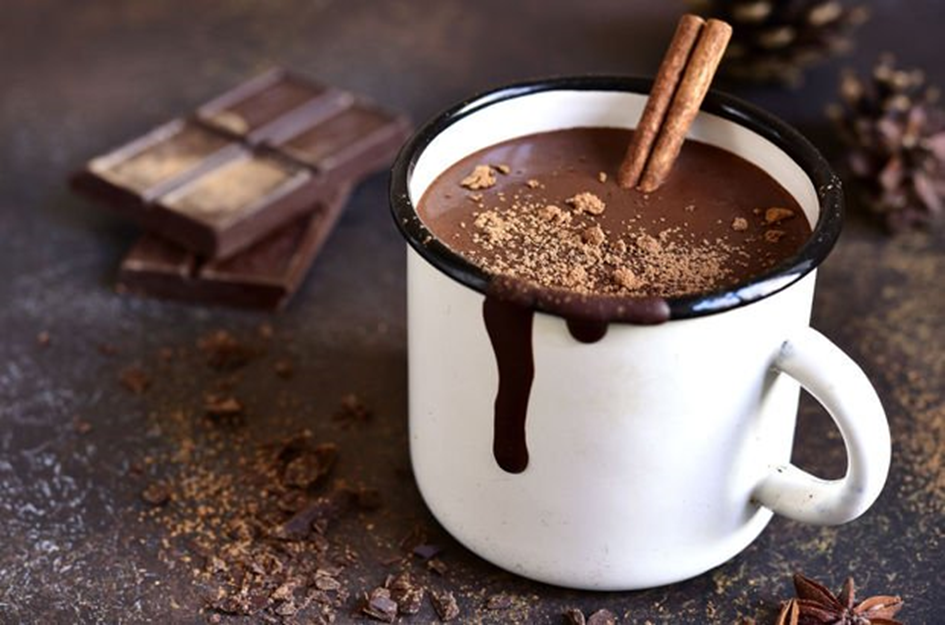
Lemon Cake Recipe / Tips for making cakes
In order for the cake not to become dough, the ingredients must be completely adjusted and the oven temperature must be adjusted properly. If the ingredients are cold, it will cause the cake to become doughy.
Contrary to popular belief, making cakes, which is the easiest pastry to make, is a food and one of the indispensable assistants of tea times, has certain points to be considered. Because some people do not pay attention to the points that need attention, it remains as uncooked dough for your cake. It does not rise as desired and does not have a flavor that dissolves in the mouth because it is not fully cooked.
**Causes of Cake Dough?**
Materials such as eggs, milk, yogurt, and oil used in the cake must first come to room temperature before being added to the mixture. When it is cold, it may cause the dough to reach while baking the cake, as it will not provide sufficient integration.
The cake should be used by sifting through the sieve inside. Otherwise, the desired result will not be obtained. Another important trick is to mix it with flour while adding baking powder. When it passes through the sieve, the lumped parts must be dissolved and it must be made smooth.
What causes the grounding and the scheme of those parts with the dough? For these reasons, those who cannot make a smooth relief while baking the cake when baking powder and flour are mixed, we need to pay more attention to this issue. Otherwise, if you don't pay attention to this situation, one side of the cake knows something as a curve.
One of the other reasons that affect the dough while baking the cake is the oven used. The temperature at which you want to bake the cake must be 180 degrees. If it is above this, it cooks very quickly and remains as a dough. You must have brought your oven to 180 degrees beforehand. Otherwise, it will not work again.
The oven door should never be opened until the top of the cake is browned. If it is opened, the cake will deflate and agglomeration will begin on the inside. When the top of the cake is browned and puffed up, it can be understood whether it is cooked or not by inserting a toothpick into it.
If a toothpick or pasta comes out without dough, it means the cake is baked.
If you pay attention to all these conditions, you can make an extremely healthy cake. You can consume it quite deliciously with your friends in the evening tea and our conversations can be more delicious.
**Lemon Cake Recipe:**
Lemon cake is one of the most preferred practical cake recipes with its unique aroma and fragrant smell that fills the kitchen. Lemon cake, one of the priceless sweet cake recipes for your guests who come to the door with cake batter ready to be baked in 10 minutes, is a fluffy, fluffy cake that everyone will love to eat.
This is a recipe that everyone, big and small, will love to eat, and will love its light taste and softness.
-3 eggs
-1 glass of sugar
-1 glass of water Milk
-1 teacup of oil
-1 packet of baking powder
-1 packet of vanilla
-2.5 cups (300-350 grams) flour
-1 lemon
**To make lemon cake;**
Beat eggs and sugar well.
The rind of the lemon is grated with a small part of the grater. Its juice is squeezed out.
Add milk, lemon juice, lemon zest, oil and vanilla to the egg and mix.
Finally, flour and baking powder are sifted and added to the dough. The cake dough is poured into a greased mold and baked in the oven at 170 degrees for 45 minutes.
You can serve it by sprinkling powdered sugar on the cake and decorating it with lemon peels.
*Our lemon cake is ready, bon appetit for those who will try it...*
For those who don't like celery, a recipe that will make you love celery
The stems of celery, which is a plant belonging to the parsley family, is known for its nutritious taste and smell, in which its roots are used, and it is a world-known and consumed vegetable.
Unfortunately, the value of celery is not known enough. After all, we are talking about a vegetable that is very good for our digestive system thanks to the nutritional fiber it contains, cures many problems from stomach acid to reflux, and has many benefits from strengthening bones to supporting skin health. Celery is a food that should be consumed in summer and winter.
This nutrient, which reduces cholesterol levels and lowers high blood pressure, also helps to lose weight. It is one of the most important vegetables, especially as it is good for constipation and is a plant that helps to lose weight.
Especially, many people do not consume celery, which is one of the indispensables of the Mediterranean diet. Do not reject the health that comes from the soil, you can experience a healthy weight loss process by trying to consume it abundantly. Many vegetables offer health. As much as celery itself, its leaves and stems contain an incredible wealth of vitamins and minerals.
Celery vegetable contains many different health benefits, I would like to talk about its diuretic and edema-relieving effects. Celery, which helps you get rid of harmful toxins in the body, is very effective for regulating bile secretion and intestines, especially the digestive system. It increases your satiety level by suppressing your appetite.
If you never put celery in your kitchen, if you can't love it, or if you have a child or acquaintance, you should get acquainted with these recipes as soon as possible. We are sure that even those who do not like celery will enjoy these celery dishes, perhaps celery will now see the value it deserves.
Celery's best friends, potatoes and carrots, aren't alone this time. Together, they are on the threshold of the melting flavor of cheddar cheese. This combination turns into a delicious taste. Plenty of celery stalks add healing to its healing.
**Yummy Baked Celery...**
**Ingredients for Baked Celery Recipe**
3 celery pieces
1 tablespoon of olive oil
1 potato
1 carrot
1 teaspoon salt
100 grams of grated cheddar cheese (as desired)
2 cloves of garlic
1/2 bunch of parsley
How to Make Oven Celery Recipe?
Clean the celery and remove the stems.
Finely chop the celery. Chop the carrots and potatoes to the same size as the celery. If you cut them in small and equal sizes, they will both keep cooking time and be cooked more evenly.
Grease the heatproof baking dish.
Combine all vegetables in a bowl. Mix well with salt, pepper and olive oil. Add the crushed garlic last.
Take the flavored vegetables in the baking dish and cook them in a preheated 180 degree fan oven for 40-45 minutes under control.
When the vegetables are soft, take them out of the oven and add the grated cheddar cheese if desired and bake again for 5-10 minutes.
When the cheeses melt, take them out of the oven and serve with finely chopped celery stalks. That's it, bon appetit
Endless harms of carbonated drinks
Fizzy drinks, which have become a part of our lives, cause great harm to health due to the substances in their content, they are addictive.
Today, the consumption of carbonated beverages has increased considerably, and it has almost started to be consumed instead of water. In order to meet the specific fluid need of the human body for water, it is necessary to consume water, not carbonated drinks or caffeinated beverages. Carbonated drinks, also known as carbonated drinks, are drinks that have very little nutritional value, but contain a lot of energy in low volumes, that is, they are empty calorie drinks.
These drinks, enriched with acid and sugar, come in different colors and flavors. The ingredients in many acidic beverages are not disclosed by the manufacturers. For this reason, there are many drinks that are not known exactly what they contain. Although these beverage brands have released lower-calorie products called light or sugar-free in recent years due to the reactions, they are still not completely harmless.
With the increase in fast food eating habits in the society, the consumption of acidic beverages has also increased. Due to the increase in the consumption of these beverages, the consumption of water, milk and dairy products has decreased. In recent years, the increase in diseases such as obesity, reflux, fatty liver, which are more common in the society, is among the factors that increase the consumption of acidic beverages.
Fizzy drinks have very different effects on the body. These drinks, which have almost no beneficial effects, are generally harmful to the body. Moreover, due to the chemical additives used to prolong the shelf life of these beverages, it is on the agenda to prepare the ground for various diseases. There are studies that the consumption of carbonated beverages close to 2 glasses a day ages the cells for about 6 years.
Carbonated drinks contain carbon dioxide, phosphoric acid and sodium citrate to provide acid content, caramel as a colorant, sugar, aspartame, sucrolose for flavoring, and sodium benzoate as a preservative to extend their shelf life. It also contains caffeine and natural flavorings. Sodas are usually available in cans or plastic bottles. The harmful effects of bifesanol A, another harmful substance found in cans, are also known.
***Phosphoric Acid***: It contributes to the negative effects of acidic beverages on tooth and bone health. It reduces the body's absorption of calcium. Decreased calcium absorption leads to problems such as osteoporosis later on. Phosphoric acid, which makes digestion difficult due to its chemical effects in the digestive system, prevents the absorption of beneficial substances in the body. Due to its phosphate content, excessive consumption causes kidney stones.
***Aspartame***: It is found in diet foods/drinks for flavoring or also as a sweetener tablet. In the studies conducted, there are data on the carcinogenic effects as well as causing diabetes and epilepsy.
***Sugar:*** These drinks cause serious problems in the body due to the high amount of sugar they contain. Unfortunately, one of the sectors where sugar is used the most is the acidic beverage sector. Since most of the daily calorie intake is taken from these beverages, people experience deterioration in insulin levels, increase in blood sugar and serious weight gain. Obesity, which is one of the most important health problems of our age, is seen more frequently with the increase in consumption of these beverages. Excess calories taken due to acidic beverages taken during the day are stored as fat in the body
Recent studies have revealed the relationship between obesity and soda in all age groups. Because of the fructose syrup in sodas, blood sugar levels can rise especially in diabetics, and the risk of diabetes increases in healthy individuals.
It has been shown that those who consume soda are approximately 1.6 times more likely to develop obesity.
***Caffeine:*** Increase in blood pressure, increase in heart rate, insomnia, nervousness are considered as effects of caffeine in soda. This substance shows its effects by disrupting the hormonal balance in the body. Caffeine in sodas is habit-forming, which causes them to be consumed more.
Intense consumption of sodas, due to the amount of acid in their content, has a negative effect on tooth development, especially in childhood, and causes bone demineralization. Tooth enamel is worn 2-3 times more than normal in people who consume soda.

Roastbeef recipe for your guests
Today I will tell you about a delicious roast beef prepared with little fried beef. This is a very delicious and elegant dish. This is the right choice for our kitchen.
Roast beef, which is flat and cylindrical in appearance, is one of the dishes unique to British cuisine. Today, it is a very popular meat dish in the USA, Canada, England, South Africa, Australia and Ireland. It is traditionally consumed for lunch or dinner on Sundays. The leftover parts of the roast beef, which is consumed as a main dish, are also used in sandwiches. A delicious roast beef recipe that will be perfect for a crowded New Year's Eve dinner or your invitation tables. It is first sealed and then cooked for a short time in the oven.
Roast beef is a meat product, which, by its nature, is cooked in the oven for a short time and then sliced thinly after cooling, adding flavor to all kinds of ingredients, from hamburgers to sandwich recipes.
Roast beef, a traditional British dish, is roasted beef. Roast beef prepared with beef tenderloin is usually served as the main course. The remaining small pieces are used in making sandwiches. After the roast beef is cooked in the oven, it is waited for a while to cool down. It is then served in thin slices. It can be flavored with fresh thyme or rosemary. So beautiful, so hearty. Although there are many varieties such as thyme and black pepper, in addition to all these, try preparing it with breadcrumbs.
A recipe that meat lovers should definitely not miss.
**Ingredients for Roast Beef Recipe**
1 whole beef tenderloin (or nuar)
3 sprigs of fresh rosemary
1 teaspoon freshly ground colored black pepper
2 tablespoons mustard
1 teaspoon sea salt
3/4 cup panko (Japanese bread crumbs)
1 teaspoon brown sugar
3 tablespoons of olive oil
For the roast beef coating; Extract the fresh rosemary branches one by one by holding them horizontally and pulling them from the opposite side towards the tip.Thin the rosemary pieces you removed with the help of a sharp knife. Mix it with freshly ground colored black pepper.
Spice mix; Mix with mustard, brown sugar and finely ground sea salt.After applying olive oil on a whole beef tenderloin, spread the spice mixture you prepared on it.Ingredients for Roast Beef Recipe
1 whole beef tenderloin (or nuar)
3 sprigs of fresh rosemary
1 teaspoon freshly ground colored black pepper
2 tablespoons mustard
1 teaspoon sea salt
3/4 cup panko (Japanese bread crumbs)
1 teaspoon brown sugar
3 tablespoons of olive oil
For the roast beef coating; Extract the fresh rosemary branches one by one by holding them horizontally and pulling them from the opposite side towards the tip.Thin the rosemary pieces you removed with the help of a sharp knife. Mix it with freshly ground colored black pepper.
Spice mix; Mix with mustard, brown sugar and finely ground sea salt. After applying olive oil on a whole beef tenderloin, spread the spice mixture you prepared on it.
After heating a cast iron skillet on high heat, put the tenderloin on it. Turn and seal over high heat so that a crust forms on the outside. Place the pre-cooked tenderloin on greaseproof paper laid on aluminum foil. After wrapping it carefully, place it on the baking tray. Sprinkle Japanese breadcrumbs on the tenderloin, which will give the tenderloin a crispiness during baking.
Bake in a preheated 220 degree oven for 10-20 minutes to your taste and desired cooking degree. After it comes out of the oven, cool the roast beef without opening the baking paper. If desired, after resting in the refrigerator, press with the help of a meat fork and share with your loved ones cold in thin slices.If you like the meat undercooked, 15 minutes, if you like it well done, 30-35 minutes will be enough.
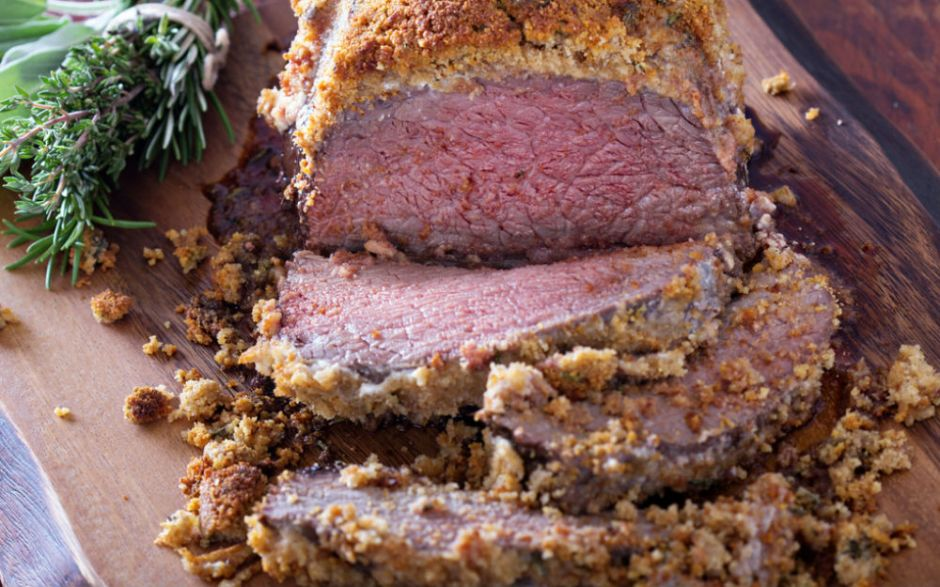
Do you know how old the cheese we eat is based on?
The history of cheese, which is the indispensable taste of our lives, dates back to 8500 years ago. There are different assumptions about its origin and invention. Some historians think that the first cheese was found by an Arab traveler turning the milk into cheese, which he put in a bag made of sheep stomach. When we look at the history of ancient Greece, it is claimed that the first cheese was made by the Scythians from mare's milk by souring the milk. In this context, around the 7th century BC, where the Scythians lived, traces of cheese were found in containers made of goat and sheep skins on monuments covered with ice.
Some sources claim that the first cheese was made in Central Asia. Tibetans consider the idea that Tatars made the first cheese before the Arabs. When different historical sources are examined, there are assumptions that the first cheese of the Finnish nomads was made in the Mediterranean countries. Although different sources say that different nations made or discovered the first cheese; During the archaeological excavations, cheese remains and cheese making tools and containers dating back to 4000 BC were found.
When cheese was first made, it was generally consumed in temples, and due to the speed of development of later civilizations, its usage area expanded. At this point, cheese production increased even more with the collapse of the Roman Empire and the increase in immigration to Europe. The cheeses made in monasteries here have formed the cheese variety of European countries.
Cheese is a food that has its origins as old as humanity. Although there is no exact information on how old it is, possible origins are estimated as Central Asia, the Middle East or Europe.
It is thought to have spread during the times of the Roman Empire.
The proposed date for the first production is BC. It ranges from the 8th millennium BC (the date the sheep were domesticated) to the 9th millennium BC. At that time, the skin or internal organs of the animal were used because of its food storage feature. One of the theories about the first formation of cheese is that the milk stored in the stomach (tripe), which is one of these internal organs, turns into curd upon fermentation with the enzymes (culture) there. A similar story has different versions of a merchant Arab hiding cheese.
Another theory is that cheese making is the result of salting and pressurizing milk. Yeast may have been deliberately added to this mixture upon the change of milk kept in the stomach of the animal.
The first written source about cheese making is BC. It dates back to the 2000s, the tomb inscriptions in Egypt. It is estimated that the cheese made in ancient times was sour and salty and resembled today's feta and white cheese.
In cheese production in Europe, less salt is used due to the climate. These cheeses contain different and interesting flavors due to the ability to grow a wider variety of beneficial microbes and enzymes in less salty environments.

Creamy Mushroom Recipe
Many different types of food can be obtained with cultivated mushrooms, which are easily accessible compared to other mushrooms. It is not poisonous like mountain mushrooms. It can even be easily grown at home with a mushroom kit.
Cultivated mushrooms, which were first started to be cultivated in the 1960s, were applied with the support of the state, especially in this period. In general, it is possible to say that it is a mushroom that is grown with a mixture of fertilization and time. Among the mushrooms that are widely used especially in the Far East and evaluated for healing purposes, cultivated mushrooms are included.
Today, I have a recipe for those who are looking for different, delicious and practical recipes alongside meat dishes. This recipe is also an indicator of how you can create wonders by adding cream and a few spices to the plain mushroom sauté you always make.
I started the article to make it next to meat dishes. But you can even make it as a main dish, depending on the situation. It is so delicious and satisfying because the food. I have no doubt that it will go incredibly well with chicken.
The best part of the meal is the water that slowly drains under the mushrooms. There are moments when you only have a short time to cook and eat. That's why we wanted to have a meal that will save us in such situations and that we cook with our hands at home. From this idea was born creamy mushroom sauté. It has turned into a dish that is both very practical to make and that has jumped in size in taste. First, we welcomed our mushrooms and brought them together with finely chopped onions. The final touch we made with the cream gave it an exquisite air. In a short time, it was ready to cheer up our stomachs. Here you go, meet your emergency meal.
It is true that we contradict ourselves very much when we say about picking, cleaning and washing the mushroom. Yes, mushrooms cannot be washed, the reason is that it darkens in direct contact with water and spoils the appearance of your food. But since we cannot digest it, we have made it our duty to clean it in the most intimidating way without direct water contact. The easiest method is to hold it very briefly under thinly running water, then dry it thoroughly and even peel the heads of the mushrooms from the stems. These are all yummy ways we've come up with to eat mushrooms safely.
Ingredients for Cream of Mushrooms:
1 package (400 g) mushrooms,
1 onion,
2-3 tablespoons of oil,
100 ml of cream,
chopped parsley,
1/2 teaspoon of black pepper,
1/2 teaspoon of cinnamon,
Salt.
Brief recipe:
Chop the onion,
Heat the oil and fry the onion,
Wash and slice the mushrooms,
Add the mushrooms to the roasted onions and cook on high heat, stirring constantly,
until the water is released and absorbed,
Add the cream and bring to a boil,
Add salt and spices and remove from fire,
Garnish with chopped parsley when serving.
Do not add salt and pepper after adding cream. Otherwise, you may cause the cream to cut.
You can make pasta with sauce next to creamy mushrooms or pasta with spinach in the oven.
Tomato rice pilaf can be a good option.
French fries or mashed potatoes will also go well with creamy mushrooms.
You can complete your menu with any meat dish. Marinated ribeye goes well with this menu.


Sweet French Kiss; Macaron
The last stop on our journey of taste is Macaron!
There is no one who does not like the French flavor macaron, where you will get the unique taste of almond after it disperses in your mouth.
I can never say no to cream cookies that are both small and delicious.
Macaron, the most famous of the French desserts, is actually a dessert whose recipe was taken from Italy and cost the French. Even its name means "thin dough" in Italian (macaroni-maccherone).
Today, macarons, which are colorful and available in various varieties, are primarily made with a mixture of sugar, almond, rose water, musk and egg white. It is very difficult to keep its consistency, so it is a dessert that requires mastery. The macaron was first seen in Europe and the Middle Ages in its known history. At that time macaron was a small dessert made of almonds, egg whites and sugar, crunchy on the outside and soft on the inside. Although macaron is known as a French dessert, it was first produced in Venetian monasteries in 1791, according to Larousse Gastronomique. In 1533, the French Queen Catherine de Medici II. The history of macaroon in France began when she married Henry and came to France. Catherine de Medici brings her Italian cook with her to France and asks them to make these small desserts to be presented to the guests at the ceremony. These little sweets, which are liked by everyone, start to become popular. With the French Revolution, with the two Carmelite nuns making and selling macarons to make a living, the consumption of macarons began to become more and more widespread and became one of the indispensable desserts of the French people, and the nuns began to be known as the "Macaron Brothers". The macarons made at that time did not contain any decorations, flavors or ganache.
The macaron as it is known today, consisting of two almond meringue discs filled with a layer of buttercream, jam or ganache filling, was originally called "Gerbet" or "Paris pasta". The story of Ladurèe begins in France in 1862, when Louis-Ernest Ladurèe opens a bakery in the 16th District of Paris - Rue Royal. After a fire in 1871, Louis-Ernest Ladurèe and his wife Jeanne Souchard decide to turn the bakery into a patisserie. Pierre Desfontaines, one of the partners of the patisserie at the beginning of the 20th century, began to add ganache, chocolate and creams of different flavors between two meringues, and they have preserved their recipes ever since. Laduree; It is still the most popular patisserie that comes to mind when macaron is mentioned. Pierre Herme, one of the world's most famous pastry chefs, declared March 20 as Macaron Day in 2005. Since then, it has been celebrated with tasting events in different cities of the world.
I hope you have the opportunity to eat in France one day.. until then, you can try this simple macaron recipe at home.
**Ingredients for Macaroni Recipe**
For macaroon dough
100 g finely ground sugar
50 g finely ground almonds
2 egg whites
4 tablespoons of sugar
**For the chocolate cream**
1 pack of dark chocolate (80 g)
1 teaspoon of cream
30 g butter
**For the pistachio cream**
40 g unsalted pistachios
1 glass of sugar
100 g butter
1 packet of vanilla
**For the orange cream**
100 g butter
1 coffee cup of orange juice
2 teaspoons of Sugar
3 egg yolks
2 eggs
1 orange
2 tablespoons of starch
First, put the finely ground sugar and almonds in the food processor and grind them to a fine flour consistency (stop the food processor from time to time and blend in your hand). Beat the egg whites at medium speed of the mixer for five minutes until foamy. Increase the mixer speed and add 4 tablespoons of sugar little by little over a total of two minutes. Sieve the almond mixture. Add the almonds to the mixture you prepared with the egg white. Stir without interfering too much with a wooden spoon.
Add the remaining almond mixture and mix again until a smooth and uniform paste is formed.
Transfer the dough to the piping bag. Press in circular motions with a diameter of about 2 cm on a baking tray lined with greaseproof paper. Put the first tray in the oven at 170 degrees; Bake for 10 minutes on the middle rack of the oven.
Take it out of the oven and cook the macarons on the second tray in the same way. Keep the cooked macarons aside to cool.
Take the cooled macarons out of the tray and put the sauce you want in the middle. Then close it in the form of toast.
You can serve cup-sized macarons with peach ice cream.

Consider a grain of corn and how many products can be obtained from it?
Think of a grain of corn. Corn is the only product that can remove such contradictory products as oil, sugar and flour... Is it produced only for food? Of course not. Miraculous grain corn, which is used in many fields from animal husbandry to industry, benefits humanity with its presence on earth.
Many grain products produced in the world are grown. The most grown agricultural product is wheat. Corn, which comes after wheat, is among the most frequently grown agricultural products in the world.
Corn is one of the few plants that has been cultivated for thousands of years. If we do a short research;
Its homeland is the continent of America and it is known that it has spread all over the world from here. In the archaeological excavations carried out in the US state of New Mexico, it has been determined that the corn kernels and corncob fragments found in the shelters and caves made of rocks are about 5000 years old. On the other hand, in the archaeological excavations carried out in Mexico City, the capital of Mexico, in 1954, corn pollen, which was determined to be approximately 7000 years old, was found at a depth of 50-60 m in the soil. Since wild maize has not been found so far, no definite information about the origin and history of maize has been obtained, various theories have been produced on this subject, and all of them are still discussed today. However, the findings obtained from all archaeological excavations show that the corn plant has a history of 8,000 to 10,000 years.
In the years when the new world was discovered, corn was cultivated in many parts of the Americas. Horse tooth corn, hard corn, flour corn, sweet corn and gin corn types were also grown at that time. In particular, it was the most important plant used in the daily diet of the indigenous people living in the high regions of Mexico, Central America and South America. The Aztecs, who lived in ancient times in the region where Mexico is now, worshiped many corn gods and even offered humans as sacrifices in their rituals for greater yield. In the mythologies of the North and South American Indians, maize was seen as a gift from the gods. After the discovery of America, Spanish and English settlers who settled in that region learned how to cultivate corn and the usage areas of corn from the red-skinned local people.
When Christopher Columbus returned to Spain with the corn material he brought with him in 1493, corn was brought to Europe from its homeland in the New World for the first time. A few years after its entry into Spain, it found its place in large areas of Southeastern Europe and North Africa, especially in Portugal, France and Italy.
The Portuguese, a maritime nation, brought corn to the west coast of Africa at the beginning of the 16th century, and later to India and China. From there it spread to the whole of Asia. The corn plant has spread easily all over the world very quickly thanks to its high reproduction rate (from one to about a thousand) and its high yield potential. In many areas it has entered, it has replaced some existing plants. For example, after maize entered the African continent, it was replaced by one of the main crops, maize.
Since it can be used as a raw material in human nutrition, animal feed and in different branches of industry, it can easily find its place in the agricultural product pattern of many countries. About 90% of the corn produced in the world is used for human nutrition and animal feed. 65-70% of this is consumed as animal feed and 20% is consumed directly by humans. The remaining 8-10% is used in industry.
Many products are obtained from corn in industry. Hundreds of products, especially flour, oil, starch, sweeteners, can be counted in this context. Each part of the plant has a separate economic value.
Minestrone Soup history and recipe
Soups are the crown of all cuisines. Since each country has its own special dishes, there are also special soups. In world cuisine, examples such as French Onion Soup, Japan's Pearl Ramen, Morocco's Harira Soup, Spain's Gazpacho Soup can be given.
Most soups are protein stores. Since most of these soups are consumed as the main course due to cultural habits, chicken, red meat or fish/seafood are used in them. Especially if there is no meat in the soups in the Far East culture, boiled eggs are never added.
My topic today is Minestrone soup of Italy.. Minestrone soup, which is one of the hot beginnings of the famous Italian cuisine, takes its place on the tables as a healthy vitamin rich vegetable soup. This soup, which dates back to BC, was discovered by people who wanted to get all the vitamins and minerals in a single bowl, especially during the Roman Empire. The soup, which was originally cooked with flour, legumes, water and vegetables, was generally used to evaluate the vegetables left in the kitchen and then evolved to its present form.
Minestrone soup, which comes from the word "minestra" meaning "soup" in Italian, is actually an impromptu poor soup prepared by Italians with plenty of vegetables.
Apart from the vegetables at home, a little pasta or rice, if any, or both are added depending on the situation. Vegetables generally used in Minestrone; beans, onions, carrots, peas, zucchini, garlic, lentils and tomatoes.
It is a dish made up so that leftover or perishable vegetables are not wasted. If you want to make it more delicious, you can add chicken, meat or marrow juice to the broth of the soup. Italians already consider this dish in the category of "Cucina povera", that is, poor cuisine.
Allegedly, the history of Minestrone soup dates back to the Roman Empire. Of course, the recipe in those years was still just what the ingredients were, but the ingredients used in the soup changed over time. For example, potatoes and tomatoes came from America after the 16th century, and these ingredients began to be used in soup. Minestrone soup, whose starch is concentrated by passing into water according to the grain used in it (pasta and rice), is a traditional Italian dish that differentiates the vegetables used according to the materials at hand and the season.
In fact, the Italians call the soup "Zuppa". For example, “tomato soup”, “fish soup” take their place on the menus with the name zuppa.
Minestrone Recipe
If you are looking for a soup full of vegetables and vitamins, you should definitely try it.
In terms of calories, 33.1 servings per 100 grams of Minestrone is about 87 calories.
The ingredients and preparation of this soup, which changes according to the season and the person making it, are as follows;
**Materials**
1 carrot
1 zucchini
1 onion
3 stalks of celery
1 capsicum pepper
1/2 cup of boiled dried beans
2 tablespoons of olive oil
1 cup of beef broth
If you do not have 1 tea glass of tomato sauce, you can use tomato paste.
If you don't have 100 grams of homemade noodles, you can use pasta.
fresh basil
Half a teaspoon of black pepper, turmeric, chili flakes
3 cups of boiling water
1 pinch of nutmeg
**Fabrication:**
Chop the onion, zucchini, capia pepper and carrot into small cubes.
Let's crush the garlic well and crumble it with a knife.
We need to chop the celery stalks into small pieces and roast all the vegetables in order in accordance with the cooking order.
Let's get our olive oil in our pot.
First, let's fry the onions until they turn pink, add the carrots and fry them, add the peppers and zucchini and continue frying, and when the vegetables are roasted, add the garlic.
Let's add the tomato sauce first and then add the broth and spices. Let's add boiled beans and noodles and add water to adjust the consistency. Let's cook on medium heat for 15 minutes until the ingredients are identical with each other and the noodles are soft.

We make crispy french fries
I know you love it and you feel better when you taste it, who can say no to this crunchy flavor?
The best accompaniment to every meal, try the french fries, which we can't get enough of, at home!
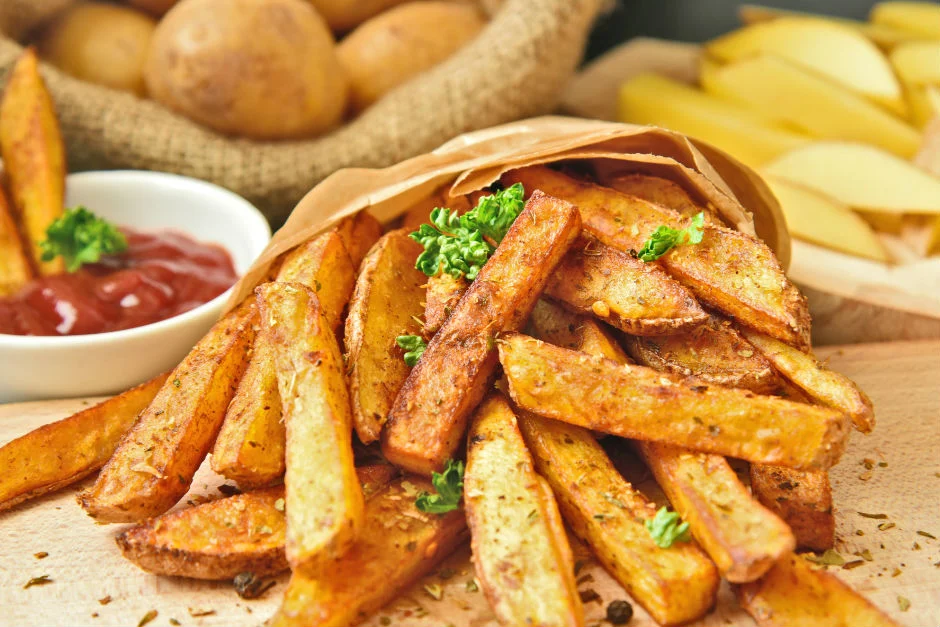
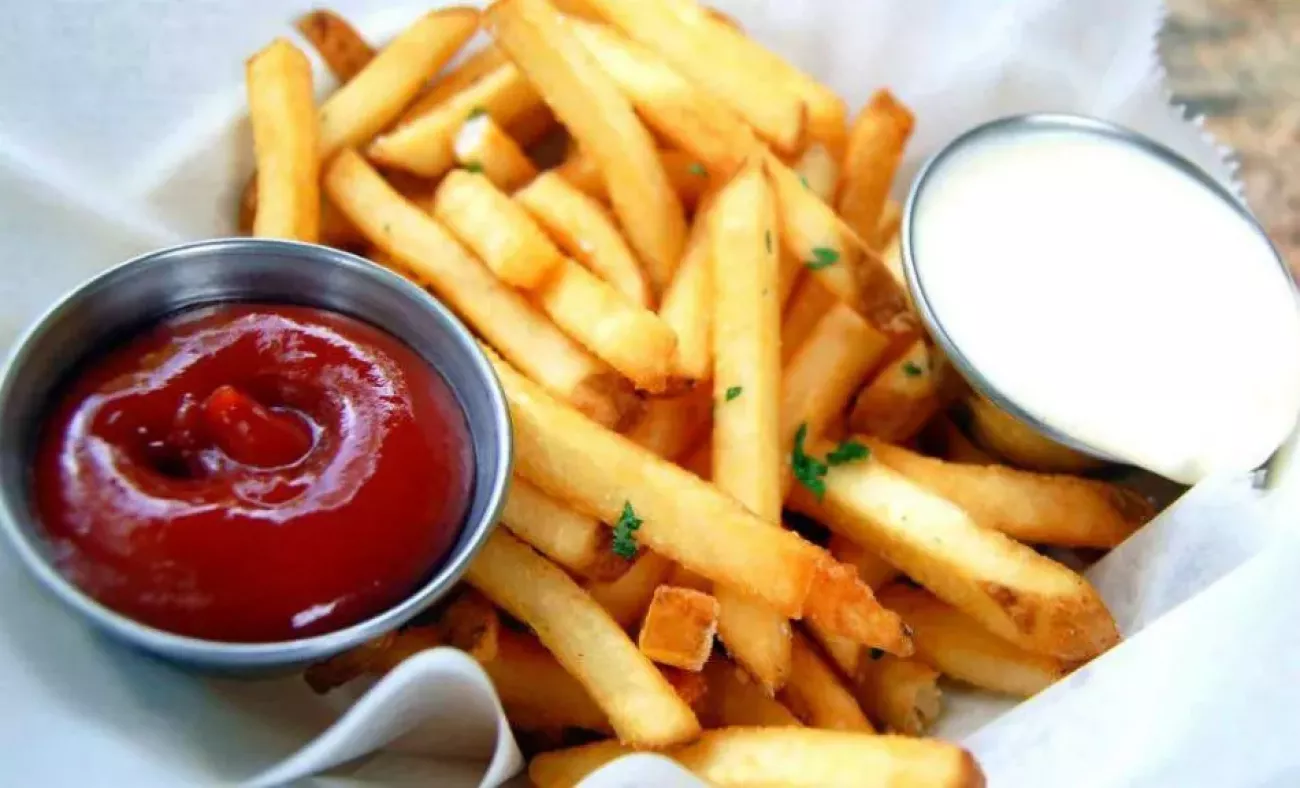
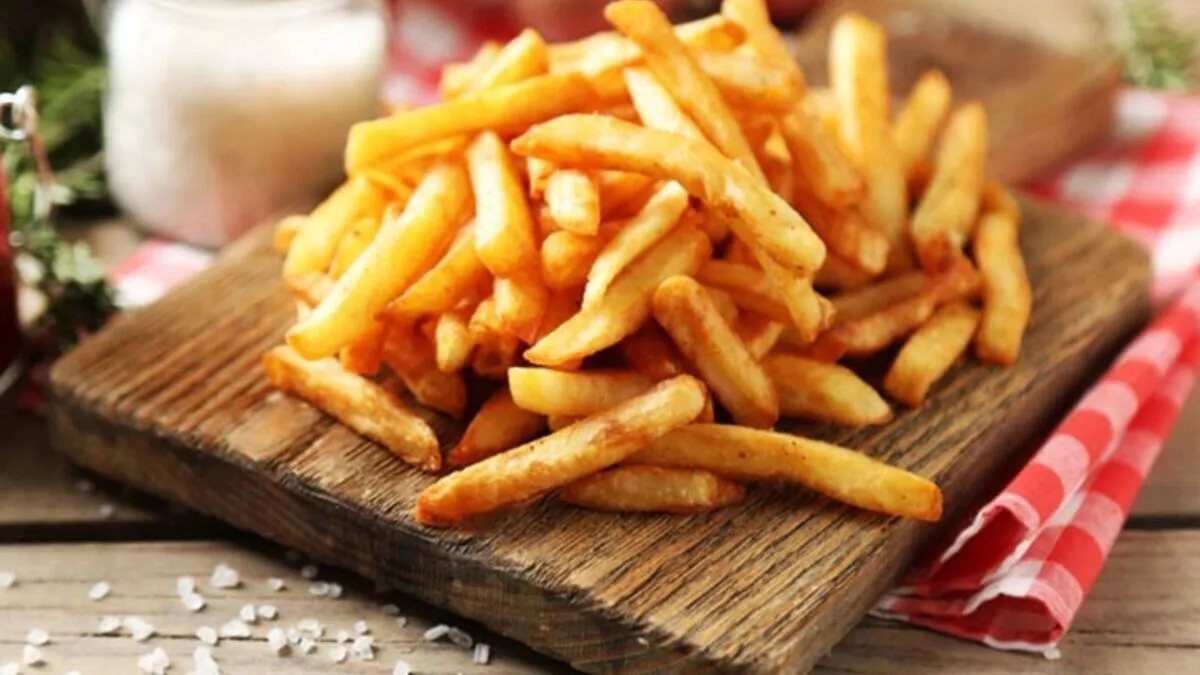
French Fries, which are among the favorite foods of almost everyone, can be prepared easily and quickly. However, the tricky part of the job is turning the french fries to a crispy consistency. We are here with a recipe that will look like the french fries you eat out in fast food restaurants with just a few practical tips. And we guarantee that it is much healthier and tastier! If your potatoes are ready, let's get the recipe right without making you wait any longer.
**Make Your Own French Fries Sauce!**
To surprise both yourself and your guests, you can prepare your own ketchup and mayonnaise at home. If you need a more practical recipe, you can prepare honey mustard mayonnaise by mixing ready-made mayonnaise with honey and mustard. You can try different sauces by blending ready-made french fries spices such as cajun with yogurt and mayonnaise.
It was all in order to have a more delicious, crispy french fries, and it was time for the recipe where the little secrets were hidden.
Right to the kitchen!
Ingredients for French Fries Recipe
4 medium french fries
2 cups of sunflower oil
1/2 teaspoon of salt
***For service:***
1/2 teaspoon dry spice mix (optional)
French Fries Recipe Tip
Make sure that the potatoes you cut are of the same thickness and length so that they are fried at the same rate and in equal time. Flour will also give it a crispiness. It is important that the frying oil is at approximately the same level as the potatoes you take in the pan. Fry the chopped potatoes in several batches.
**How to Make French Fries Recipe?**
After washing the fried potatoes that you brushed in plenty of water, peel them thinly. Cut the potatoes you cut into large rectangles, cut them lengthwise and prepare finger-shaped potatoes.
Soak the potato slices in salted cold (ice) water to release their starch. Take the frying oil in a deep pan or saucepan and heat it slowly.
Cook the potatoes, which you have drained and dried with the help of paper towels, on low heat for 3-4 minutes in deep oil. Do not stir or fry in between. Cook it.
Take the drained potatoes on a paper towel-lined serving plate. Close the bottom of the oil. Leave the potatoes to cool. Season them with powdered spices at this time, if desired. Fry the pre-cooked and cooled potatoes, this time in really hot oil, until they turn golden brown. After adding its final flavor with the addition of salt, share it with your loved ones.
Did you know the interesting history of the Margherita pizza?
The indispensable taste that everyone loves to eat is MARGHERİTA! The story of pizza, which is prepared with the unique harmony of mozzarella cheese and tomato and consumed by the poor Italian people for centuries, is quite interesting. It is a fact that when pizza is mentioned, calorie calculations are shelved and flowing waters stop. Pizza, which we are addicted to regardless of small or big, is one of the most cult flavors of Italian cuisine, which is very close to our taste. How would you like to take a look at the history of this legend, which has a huge fan base and can't get enough of its taste?
When it comes to pizza, we think that there is no one who does not accept that the margherita pizza has a special place. The margherita pizza, which is quite plain and delicious, is the real star of the pizza, which is literally an Italian legend, in our opinion. No matter where we are in the world, the first thing that comes to mind when talking about pizza is the margherita pizza, which is the biggest proof of this.
According to official records, this feast of taste was introduced to the world in 1889, and since then, the margherita pizza has become the world's favorite. Well, have you ever thought about the reason why the margherita pizza stands out from all pizza varieties and is so famous globally? It's time to open the door to the famous story of Margherita pizza. When it was first consumed, it was made with only mozzarella cheese and tomatoes,
Did you know that it is the indispensable taste of the poor Italian people?
So, how did Pizza become a world-renowned delicious food for poor Italians, and how did it diversify and change so much?
To find out, we'll have to go back quite a bit in history, to 1889. While King of Italy Umberto I and Queen Margherita were eating delicious meals prepared by talented cooks in their magnificent palaces, there was a pizza oven called "Pietro", which prepared pizzas suitable for the budget of the poor, next to the palace. And one day, Queen Margherita wanted to eat pizza. However, the skillful cooks of the rich palace did not know how to cook the pizza that the poor people ate...
Esposito, the owner of the pizza oven "Pietro" located right next to the palace, was asked to make a pizza for the queen. More meticulously than ever, Esposito presented the queen with a pizza made with Mozzarella cheese, tomatoes and basil. When the queen asked the name of the pizza, Esposito forgot what to say out of excitement and hurriedly pronounced the queen's name. Thus, the name of the first pizza in history was recorded as Margherita with this event.
The queen, who liked pizza very much, wrote a thank you letter to Esposito, and pizza became a flavor that entered the palace kitchen.
In fact, Italy has no effect on the rapid spread of pizza around the world. When the Italians who immigrated to the USA at the end of the 1800s continued their food culture here, pizza began to be recognized in the USA as well. Here, the small pizza restaurants opened by the Italians were followed by the big pizza shops and chains opened by the Americans. The flavor has diversified, the ingredients have changed and Pizza has become a flavor that spread all over the world from the USA...

History of rice grains used around the world
Today, I wanted to research the history of rice grains used in almost all world cuisines. Who discovered how these diversifiable rice grains were found? How it came to be today was my curiosity. And I got various information, for example, there are dozens of theses about the historical process of rice, but it is not known exactly when and where the first rice was planted. Until recently, 6,000-year-old fossils found in the Yang Tse-Kiang Valley in China were considered the oldest rice grains. But then, older ones came to light… The rice grains found in the Ruhr Cave in Thailand date back exactly 10 thousand years…
The most reliable archaeological find describing the transition to rice farming in Southeast Asia belongs to Wilhelm G. Solheim, who excavated here in the 60s. Broken pots with rice grains and paddy husks printed on them, which Solheim found in 1966 in the Korat Region of Thailand, date back to about 4000 BC.
The Romans used brass in various places, from ship parts to armor, from jewelry to belt buckles. Rice production, which dwindled after Rome lost its territory in northern Europe, was revived in the Carolingian period. Pitcher, basin, lamp, bowl, jug etc. made of brass, which is more malleable than bronze. Various household items such as From the 13th to the 17th centuries, brass plates were used in the cult of the dead. Relief brass plates with the picture of the dead, patterns, writings, and heraldry related to his life and works were placed on the grave. Most of them have survived to the present day. In the 16th century, brass basins and dishes were among the most important household items of the middle class. These were hammered with a hammer and some patterns were embroidered on them. When silver and gold brought from the New World replaced brass in the production of decorative items, brass began to be used in the manufacture of items such as chandeliers, candlesticks, walls and sundials. Brass is also used in astronomy, geodesy, navigation, etc. It has become the basic material of scientific instruments used in fields such as
Rice is a plant that feeds nearly half of the world's people today. So much so that the history of rice dates back to ancient times. We can also say with certainty that it has fed more people than any other grain or vegetable in all of human history.
The paddy obtained after the harvest is polished by removing the husks and turned into white rice grains. The polishing process, which is carried out to smooth the appearance of the grains, actually causes the product to lose its nutritional value to a large extent. Because during this process, the outer layer, rich in protein, fat, thiamine (vitamin B1), niacin (nicotinic acid), riboflavin (vitamin B2), iron and calcium, surrounding the surface of the grains is lost. Only a starch-rich product remains. China, India, Bangladesh, Indonesia, Thailand take the first place. USA, Vietnam, Brazil, Philippines are other important producers. Rice, which is widely cultivated in tropical, subtropical and temperate regions, is the only cereal plant grown in water. Although other cereal crops cannot survive in water for a long time and lose their vitality, rice develops by using Oxygen dissolved in water.
The paddy obtained after the harvest is polished by removing the husks and turned into white rice grains. The polishing process, which is carried out to smooth the appearance of the grains, actually causes the product to lose its nutritional value to a large extent. Because during this process, the outer layer, rich in protein, fat, thiamine (vitamin B1), niacin (nicotinic acid), riboflavin (vitamin B2), iron and calcium, surrounding the surface of the grains is lost. Only a starch-rich product remains. Here is some information..
How to make easy appetizer carrot tarator
I think the first thing that comes to mind when it comes to invitation tables is appetizers. Various appetizers not only enrich the appearance of the dishes, but also increase the flavor of the main dishes. Everyone has a classic appetizer, but mine is unquestionably the carrot tarator. I also love eggplant appetizers, but Carrot tarator suits every main dish. And it's pretty simple and with few ingredients. Both meat and chicken dishes can never say no to a creamy carrot tarator.
Great taste with few ingredients, that's what it's called! It is possible to create very delicious recipes from a simple material. The important thing is to take some care. You might think how delicious a carrot can be. But it's not like that, a few touches turn it into a perfect taste. A very good meal does not mean that it consists of abundant ingredients. this is a misconception. Or not all difficult meals are good. It gives good results in meals that can be prepared easily and simply. This chemistry may not work in every meal. Therefore, tasting and understanding every step of the food is the way to a delicious meal.
Carrot tarator is a simple but catchy appetizer with few ingredients, with features such as shedding praise. Our mothers mix carrot tarator right before guests arrive so that there are various snacks on the table. If you want this secret favorite appetizer to be a guest on the tables you set up, here is the recipe, bon appetit!
***Ingredients for Carrot Tarator Recipe***
2 large carrots
5 tablespoons of yogurt
3 tablespoons of strained yogurt
1 clove of grated garlic
2 tablespoons of olive oil
5-6 walnut kernels
1 teaspoon of salt
First, wash the carrot well and grate it. Put it in a non-stick pan. Pour a small amount of olive oil on it. Fry for 2-3 minutes on medium heat. Then set aside to cool. Take yogurt, strained yogurt, garlic, olive oil, salt and walnuts in a large bowl. Add the cooled carrots and mix. Divide the mixture into serving bowls. Serve after adding mint or parsley leaves on top. You can also add powdered red pepper, if desired. If you want to add a different flavor to the carrot tarator, you can add zucchini. You can increase or decrease the amount of walnuts. To enrich the tarator, you can also add finely chopped parsley. Before serving the tarator, you can drizzle olive oil on it. One serving of carrot tarator is worth about 155 calories. You can also add it to diet lists as it is low in calories.
If you want to try this appetizer with zucchini, let me share a short recipe with you; Zucchini and walnuts with yogurt Grate two zucchini. Roughly crack a handful of walnuts and roast them in a pan. Add two tablespoons of olive oil to it, add the zucchini and fry over high heat. Turn off the heat when the zucchini turns brown. Whisk six tablespoons of yoghurt and one tablespoon of mayonnaise, add one teaspoon each of salt and pepper, and zucchini. Chop all five sprigs of dill and mix it all together. Enjoy your meal, hope to meet you at beautiful tables..
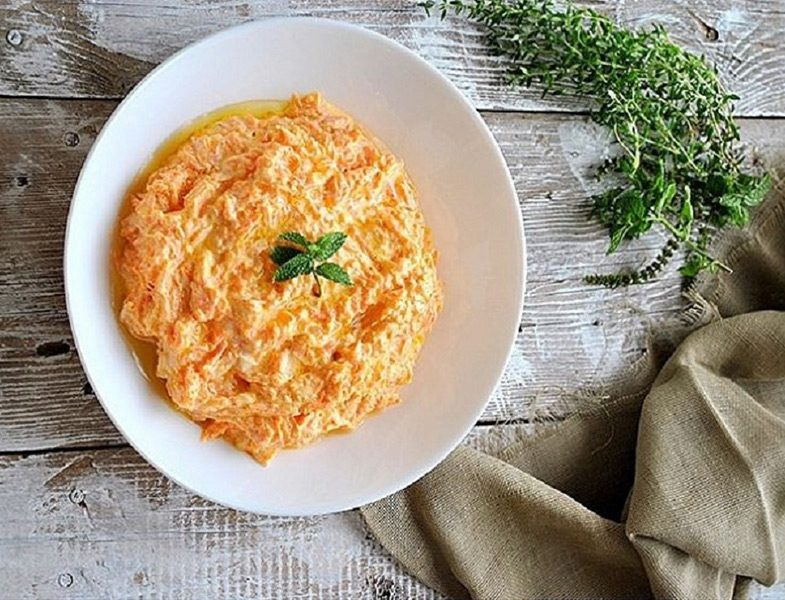
How to use St. John's Wort Oil
Alternative medicine has recently come to the fore. Plants and herbs have natural healing properties. It has therapeutic properties when used consciously. Chemical products cause damage in the long run. For this reason, I prefer to use natural products. I researched the benefits of centaury oil that I used and tried on my skin and wanted to share it. Centaury oil is a product that has many benefits in the body. It is an oil obtained from the St. John's Wort plant and colored according to the color of its flower. There are two types as St. John's Wort oil or St. John's Wort oil. It has an antiseptic property. For this reason, it prevents microbes from taking place in the body. With the use of inflamed areas in the body, it prevents possible infections that may occur in these areas. It provides easier healing of spots and wounds on the skin. Along with its cell renewal feature, it also makes the scars formed in the body disappear. If consumed orally, it regulates blood sugar. However, although this effect has been stated, it is useful to get a physician's advice before using it.
In the same way, it is among those that are effective in stomach wounds when consumed. It is also known to have positive effects on the digestive system. In particular, it prevents the occurrence of conditions such as indigestion and constipation. It has a natural pain relief feature. It provides relief from pain in muscles and joints. When we look at what are the harms of centaury oil, it is seen that if it is used more than necessary, the benefits will have the opposite effect. Therefore, it is important to use the recommended dose and amount. It is a known fact that St. John's Wort oil is among the oils with important benefits for the body. When this is the case, the question comes to mind how many times a week centaury oil is applied.
It can be used daily depending on the skin structure and the area of use. However, if you have sensitive skin, it is recommended to be used a little more carefully. For this reason, it is appropriate to use it 1 or 2 days a week for sensitive skin. People with sensitive skin who research the benefits and harms of St. John's Wort oil will encounter these results. With regular use, scars and burn marks can be eliminated. It is ensured that the skin spots are eliminated and the color imbalance in the skin is eliminated. Therefore, its use is much more common. In daily life, blemishes, especially on the skin, can become a very big problem. For this reason, methods of coping with the problems that occur in this subject are mostly sought. In this regard, the positive effects of centaury oil come to light. Centaury oil is also an effective helper in terms of getting rid of acne. Acne and acne scars are eliminated. For this, it should be used regularly and in the recommended amount. Since the blood flow rate will increase in the applied area, an effective use will be ensured.

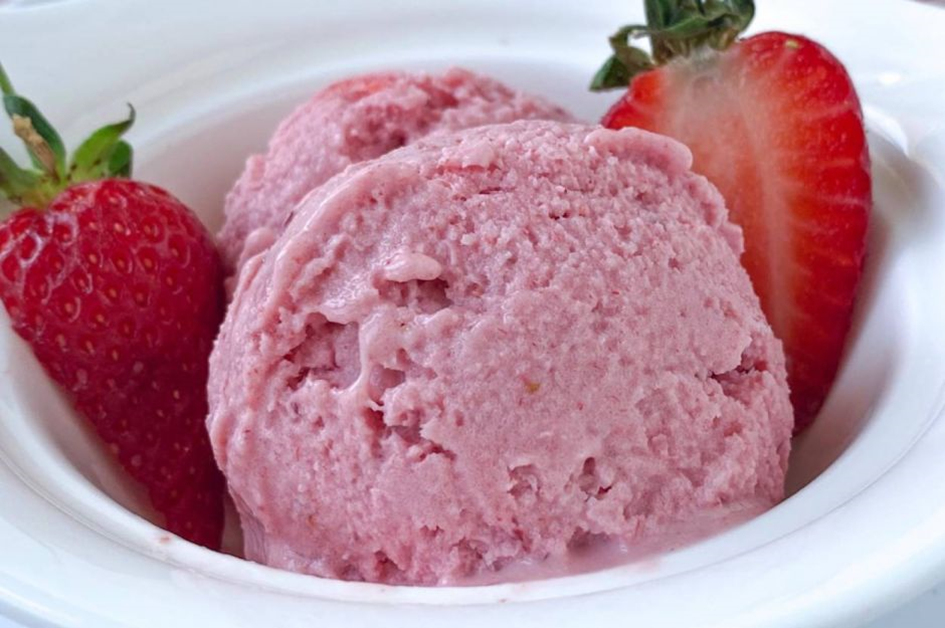
Homemade healthy strawberry Ice cream
Strawberries are waiting for you on the counter with their ripe taste and sweet smell. Without making them wait too long, it's time to share a sweet coolness while the heat is starting to make itself felt. Come on then, let's welcome the strawberries freshly picked from the field and lined up on the counters in our kitchen.
You will not even guess that making ice cream at home will be so easy. You can make a big bowl of ice cream with only 5 ingredients and proudly serve your homemade ice cream to your family, spouse and friend. Strawberry ice cream recipe that you will both cool and enjoy.
Homemade strawberry ice cream is preferred because it is healthy and delicious. You can apply the recipe with an average of 8-10 strawberries and other ingredients.
Undoubtedly, stuffing is one of the most refreshing delicious foods of summer months. In many searches and in many brands, ice cream is sold a lot in the market today because it is the food that everyone loves with its nutritious feature and taste in summer months.
Some of the non-homemade ice creams may contain additives and added sugar and may contain carcinogens. For these reasons, it is necessary to be careful.
Don't mind them as most people know they are delicious. Sada You can make tastier ice creams easily and simply at home. Strawberry ice creams with its lightening flavor can be made very simply in this area.
Ingredients (for 1 serving)
7-10 strawberries
Milk
3 tablespoons of sugar
4 eggs,
Yogurt or sour cream
When you start making strawberry ice cream, it will be useful for you to divide the strawberries you want to pass through the blender into 45 small pieces so that they can be shredded more easily. After passing through the blender, this process is continued until it reaches the consistency of juice.
The milk is mixed slowly in a bowl over low heat and this process is continued until it boils. However, it is very critical that the bottom does not stick during this process. Sugar eggs and other berries are added to the boiling milk.
It is mixed for a few minutes in the pot with the bottom part of it being closed. This process is continued until you are sure that all the ingredients are mixed homogeneously from each other.
The obtained mixture is then taken at once and passed through the blender many times. The mixture, which is emptied in the containers you have previously set, is kept in the freezers for about 6 hours.
Strawberry ice cream after being taken out of the freezer can be served with fruit if you prefer. At the same time, it will be very delicious if served with cakes, syrup desserts and other products. You have the chance to consume healthy and delicious homemade strawberry ice creams easily in this way.
The Tip of Strawberry Ice Cream Recipe
If you take your ice cream out of the freezer and mix it once an hour and do this 4-5 times, you will ensure that it freezes more quickly and evenly.
Enjoy your meal
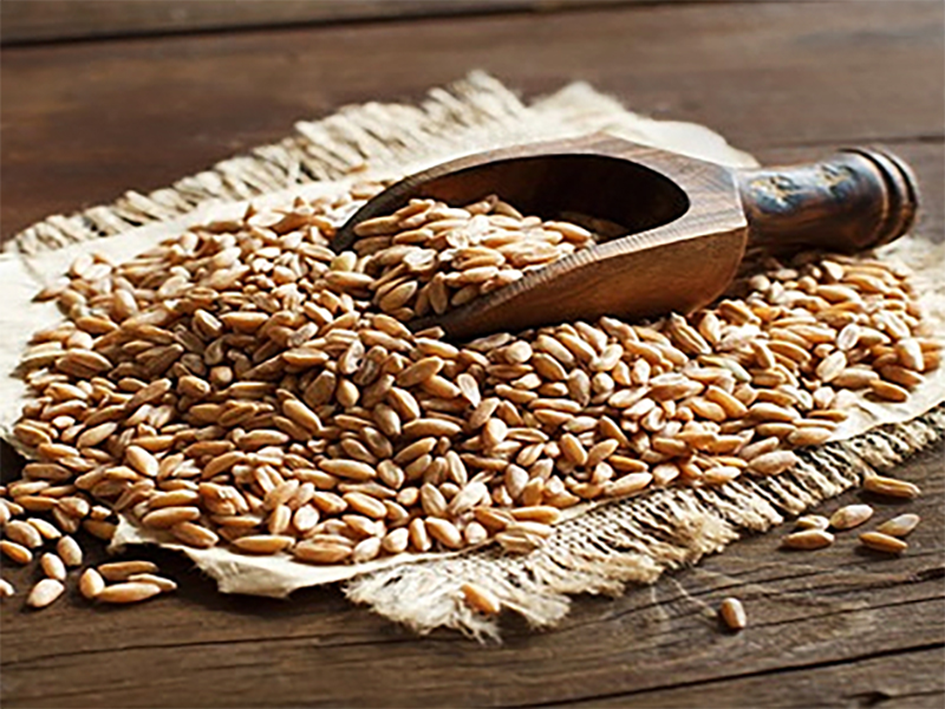
Rye, a Healthy Grain Product
When we think of grain, the first thing that comes to mind is wheat. but it is available in more valuable healthy grains. For example, underused rye. We should put this very healthy and nutritious cereal product on our tables more often.
We have seen rye in bread types recently. However, it is used in many dishes such as soups, salads, pastries. Why should fiber and vitamins be consumed?
Rye, which is among the wheat varieties, is one of the cereal species produced in the continental climate and is of great importance for human health. Rye, which is one of the most resistant plants to cold weather conditions, is therefore easily grown in a continental climate.
Although it resembles wheat grains in appearance, its distinguishing feature from wheat is that its grains are longer. Rye is nutritious and healthy with its protein, carbohydrates, fiber and B vitamins. Rye, which is used as flour and animal feed, is one of the materials used in the production of beer and other fermented beverages.
Usage Areas of Rye;
1- In Making Brown and Grain Bread
Rye is a gluten-containing grain like wheat, which means it's a vegetable protein. The nutrient required for the dough to reach its consistency in bread making is gluten, which is found in rye and wheat. Gluten in flour makes the dough rise, while it also causes it to be light and soft.
Rye flour is used in making healthy brown breads to make the dough rise. It can be used with rye flour, wheat, bran, etc. flour mixtures, or it can be used alone to make bread.
2- In Pastries
Rye flour is used for the preparation of leavened and unleavened doughs other than bread making. It can be used by mixing rye and wheat flour in many products such as pastries, cakes, pies, quiches, cookies, pancakes, tarts, etc. and obtained with dough. Rye flour is used for salty doughs rather than sugary doughs.
3- In Soups and Salads
Rye can be used instead of wheat flour in dressings and sauces prepared for the consistency of soups. Apart from sauces and seasonings, ground rye grains can also be added to the soup. Rye is one of the most frequently used grains in winter soups prepared with dry legumes and in multigrain soups called cold ayran soup.
Boiled rye grains added to salads make it both nutritious and healthy. A nutritious aroma is added to the sauce prepared with olive oil, lemon and rye on various greens.
4- Fermentation of Alcoholic Beverages
Rye, being one of the grains with the feature of fermentation, is important in the production of beer, gin, whiskey, etc. produced all over the world. It is used as the basic material in the production of kvass, which is used in traditional Russian drinks.
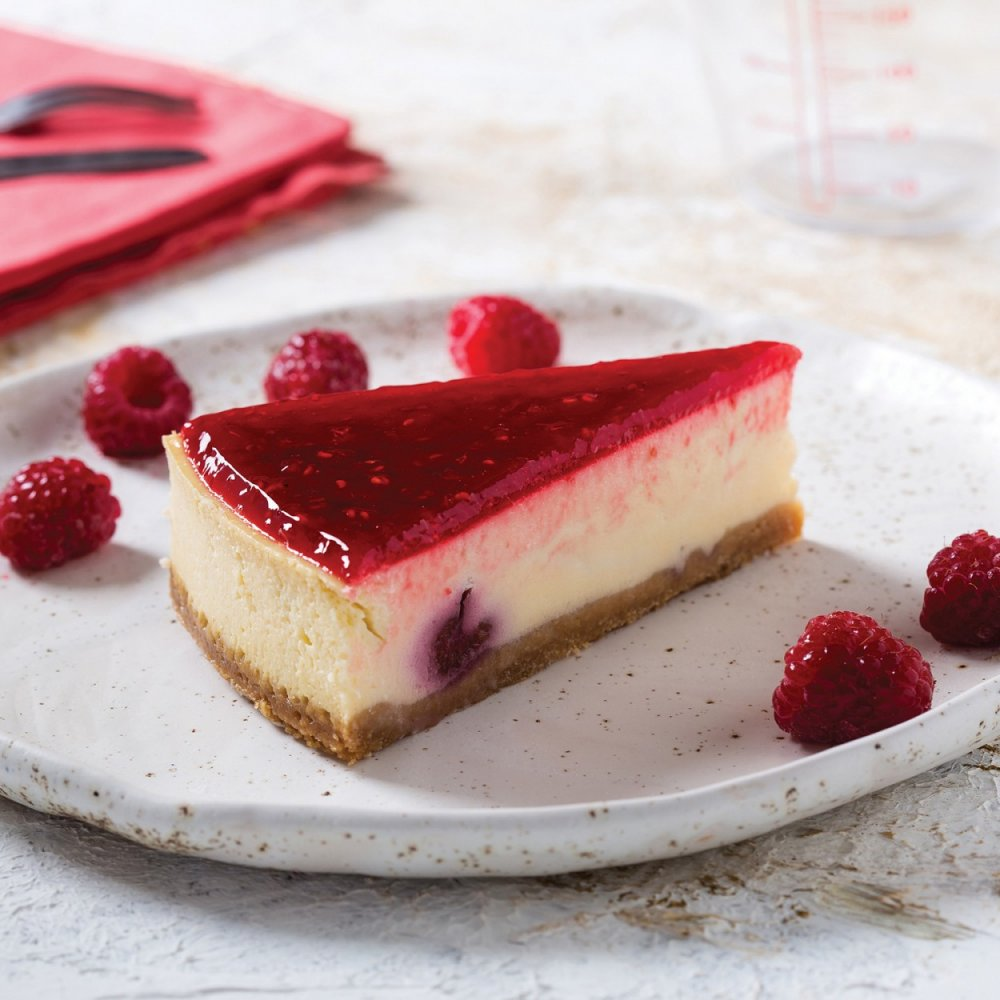
Red flavor! Raspberry Cheesecake
Hello everyone, I give good news to those who ask what is in our kitchen today. Raspberry Cheesecake!!
I have an appetizing recipe with red sauce that will enchant everyone with its appearance! With the raspberry cheesecake recipe, you will cheer up your tea and coffee hours and make even those who do not like cheesecake love this flavor. Although its preparation will make you a little tired, your eyes and palate will love this taste with the wonderful dessert that comes out afterwards. Here are my recipes that you can't get enough of, Raspberry Cheesecake..
We prepare a soft base with oat biscuits, a plain mortar with cream and labneh. We cook in the oven for a long time. We pour the sauce prepared with raspberry on it, and we create a dessert that deserves to be set on the table. Your raspberry cheesecake, which looks like a work of art, is ready!
Go to the kitchen for our recipe that will keep you waiting for a while, but you can't get enough of eating with a spoon and start the preparations right away. Good luck to you now.
For the Cream:
1 tablespoon of starch
3 eggs
Zest (and juice) of 1 lemon
1 glass of sugar
1 box of liquid cream
600 grams of labneh cheese
1 packet of vanilla
For the Base:
2 packages of whole wheat biscuits
125 grams of melted butter
For the Sauce:
1/2 cup of sugar
2 tablespoons of cornstarch
1 glass of water
1 packet of vanilla
300 grams of raspberries (frozen or fresh)
The Tip of the Raspberry Cheesecake Recipe
Using lemon zest and water while making cheesecake will allow you to catch that sour taste peculiar to cheesecake.
Cooking Suggestion for Raspberry Cheesecake Recipe
If the cheesecake shakes when you open the oven door, it means it is not cooked. You can cook a little more. Baking time may vary depending on the oven. Also, be sure to use a clamped container.
How to Make Raspberry Cheesecake Recipe?
Cut wax paper to cover the side walls of the springform pan. Cover the base and sides with greaseproof paper and apply margarine.
Then cover the bottom of the mold with aluminum foil to ensure water does not penetrate.
Mix the raspberries with half a glass of sugar and a glass of water and wait in the refrigerator.
For the cake base, pass 2 packets of whole wheat flour biscuits through the rondo.
Add 125 grams of melted butter to it and pass it through the rondo with the biscuits.
Spread the biscuit mixture in the mold you have prepared by pressing it well with a spatula or glass.
Try to create a smooth surface. Keep the cake base with the mold in the refrigerator to rest.
For the cheesecake cream; Take 3 eggs, 600 grams of labneh cheese, 1 glass of granulated sugar, 1 box of liquid cream, 1 lemon zest and juice, 1 packet of vanilla, 1 tablespoonful of starch in a bowl.
Blend until smooth with mixer.
Pour the creamy mixture into the mold you took out of the refrigerator.
By placing the mold in a deep baking tray filled with water, at 180 degrees for 25 minutes; Bake at 150 degrees for 25-30 minutes.
Then turn off the oven and leave it in the oven for an hour. This way, the cheesecake will cook without cracking.
While the cheesecake is cooling outside, start preparing the farmbush sauce. Crush the raspberries you took out of the cabinet with a blender.
Open a tea glass of water and 2 tablespoons of starch in a bowl.
Add it to the pot. Mix and cook on low heat.
When your sauce comes to a thick consistency, add a packet of vanilla into it, mix and leave to cool.
When the cheesecake and raspberry sauce have cooled, pour the sauce over the cheesecake and leave it in the refrigerator for 1 night.
You can take the cheesecake out of the refrigerator and serve it by decorating it with fresh or frozen raspberries and mint leaves. Enjoy your meal.
Magnolia Recipe With Silky Texture
Hello people in our kitchen :)
Today I will talk about one of my favorite desserts, magnolia.
I think this dessert, which has been popular in recent years, is actually a taste that we all know. How about trying this dessert at home, which is available in chain coffee shops and almost every cafe I visit.
While I was thinking about what magnolia means, why did they name this dessert, I found myself in a research.
After doing some research, I found out that it has a different story. But before moving on to the story, I would like to give some information about pudding. Because it's very interesting. Pudding comes from pudding in English, while pudding comes from boudin in French, while boudin comes from botellus in Latin.
Boutellus means small sausage in Latin. The meaning of pudding is meat, and the use of meat in puddings in Medieval Europe. For a long time pudding was made from butter, flour, eggs and grains. So it's not a sweet dish. Later, over time, it took the form we know, made with materials such as milk, sugar, corn flour.
After this preliminary information, I move on to the story of Magnolia Pudding. There is a bakery/patisserie called Magnolia Bakery in New York. It's a bakery that most New Yorkers know, and has appeared in many TV shows and movies like Sex and the City.
The banana pudding called Magnolia Bread Pudding, which is the product of this place, is very famous.
It is served in a cardboard bowl and eaten by spoonfuls like ready-made ice creams. According to what I read online, it contains milk, cream, sliced banana pieces and sponge cake blended into pudding.
Magnolia Pudding, on the other hand, takes its name from the famous banana pudding of Magnolia bakery in New York, as you have already guessed.
Let's go to dessert :)
It has a soft pudding inside. But it is much more delicious than the puddings we know, and its consistency is much different. The secret is to add cream after cooking the pudding. It tastes much lighter this way. It's not enough, it also includes baby biscuits with a taste that we can't get enough of. If it is in season, fragrant strawberries are also included in the work.
Ingredients for Magnolia Recipe
5 glasses of milk
1 cup of granulated sugar
1 packet of vanilla
1 egg yolk
2 tablespoons starch (corn or wheat starch)
2 tablespoons of flour
1.5 teaspoons of cream
For inside:
1 pack of baby biscuits
15-20 strawberries or 2 bananas
According to preference.
Transfer milk, sugar, starch, flour and egg yolk into a saucepan. Mix it well.
Cook over medium heat, stirring constantly, until it reaches the consistency of custard.
Remove from heat, add vanilla and mix.
Add the cream that starts to warm up and continue mixing.
Meanwhile, pass the biscuits through the rondo. Remove the stems of the strawberries and cut them into the sizes you want.
Take a few scoops of your cooled pudding. Spread on the bottom of a cup. Make layers by adding biscuits and strawberries on top. Divide into cups like this until all the biscuits, pudding, and strawberries are gone.
Then let it cool for 3-4 hours in the refrigerator.
Worth to try:)
Enjoy your meal

That Cake is a Classic.. Banana Roll Cake
Hello dear kitchen readers.
Please bring the banana cake lovers here. A fresh cake recipe that you can easily roll, which will be a whole with 1 glass of freshly squeezed orange juice or lemonade, no different from what you eat outside. I will share with you the recipe of banana roll cake, which is the childhood favorite of some and still the favorite dessert of some.
When I was little, these banana roll cakes used to decorate the window of the patisserie on the corner of our neighborhood. Every time I passed by, I wanted to eat them all. And every time I ate, I passed out. It was a delicious combination with the creamy cream that melted on the tongue of the soft sponge cake and the sweet banana inside.
I can't eat from the patisserie in the neighborhood today, but when I make it at home, it's so good, I get the same taste.
This means that the banana roll cake, which is one of the cakes called patisserie style, can be made at home.
Your children will love my cake, which you will enjoy while making the banana roll cake, those who have breakage problems while making the roll, will put an end to this situation, and which you can offer to your guests. This cake that will put a stop to your sweet crises is a candidate to be everyone's favorite.
Let's start preparing our cake in the kitchen.
Ingredients for Banana Roll Cake Recipe
For the sponge cake:
4 eggs
1 cup of granulated sugar
1/2 cup of milk
1.5 cups of flour
1 packet of vanilla
1 packet of baking powder
For the cream:
3 glasses of milk
1 cup of granulated sugar
2 tablespoons of flour
2 tablespoons of wheat starch
1 packet of vanilla
1 tablespoon of butter
For inside:
2 bananas
For the above:
2 packs of whipped cream
2 cups cold milk
First, let's prepare the cream. Put all the ingredients except the butter in a saucepan. Stir constantly until it thickens.
Turn off the heat when it starts to boil. Add the butter and mix well, then let it cool. Refrigerate the cream for at least 1 hour.
For the sponge cake, beat the eggs and sugar for at least 5 minutes until it becomes like white foam.
Add milk and continue whisking. Then add the sifted flour, baking powder and vanilla and mix well.
Pour the mixture onto a baking tray lined with greaseproof paper. Smooth the top with the spatula.
Bake in a preheated 180 degree oven for 15-20 minutes in a controlled manner.
After it is cooked, wrap it in the form of a roll, cover it with a cloth and leave it to cool.
After cooling, spread the cream into the sponge cake. Place the bananas on the tip.
Separate the sponge cake from the greaseproof paper and wrap it in the form of a roll. Let's cut and flatten the edges and transfer to a serving plate.
I sprinkled powdered sugar on it. You can also garnish with pistachios if you wish. You can serve it by slicing after keeping it in the refrigerator for at least 1-2 hours.
Enjoy your meal.

Tips for Cleaning the Refrigerator
How to Clean the Refrigerator? Tips for Removing Yellow Stains. The cleaning and hygiene of refrigerators, which is one of our most important white goods that prevent our food from spoiling, is very important. This is important for the cleaning and hygiene of your household goods, as well as for the efficient operation of the product, which is an expensive household appliance. When it comes to cleaning the refrigerator, the first question that comes to mind is what are the tricks of cleaning the refrigerator? It will.
The factors that cause the contamination of this white goods can be accidentally dripped or spilled while putting our vegetables and fruits or leftover food in the cabinet. Stains such as fingerprints will also cause the cabinet to become dirty while you take and put things in. In addition, in some cases, our cabinet may smell bad even though there is no visible dirt.
The question of how to clean the refrigerator is frequently asked by women, especially. At this stage, we think it is useful to make a very important reminder. Before starting to clean the refrigerator, we must unplug your refrigerator from the socket. We should never apply any action to an item that has not been disconnected from electricity.
How to Clean a Refrigerator That Keeps Ice?
How to clean the refrigerator is a very comprehensive topic. When we decide to clean our refrigerator, we must first unplug the refrigerator from the socket. How to clean a frozen refrigerator? This is a question that can be asked at this stage. The icing problem is especially common in old-style models.
Cleaning refrigerators that hold ice will be a little more troublesome than cleaning regular cabinets. It can be tiring both in terms of time and physically. If your refrigerator is old-fashioned, you probably have a problem with keeping ice in your refrigerator. You can clean it up very nicely, just by spending a little more time.
It will help you to make your cleaning more comfortable if you can put your cabinet out of the socket a little bit if possible. It is also necessary to clean the back of the cabinet. You can start by emptying the ice in the refrigerators when the ice is loosened.
How to Clean Yellow Stains Inside the Refrigerator?
While discussing how to clean the refrigerator, how to clean the odors in the cabinet and yellow stains inside the refrigerator? It is among our main topics that we will try to explain with all the tricks. igrus.com is the center of attention of everyone with its researches and articles on all kinds of topics that may attract the attention of women.
Let's continue to provide information on how to clean the refrigerator.
Let's empty the refrigerator completely by removing the food in the refrigerator that we have unplugged.
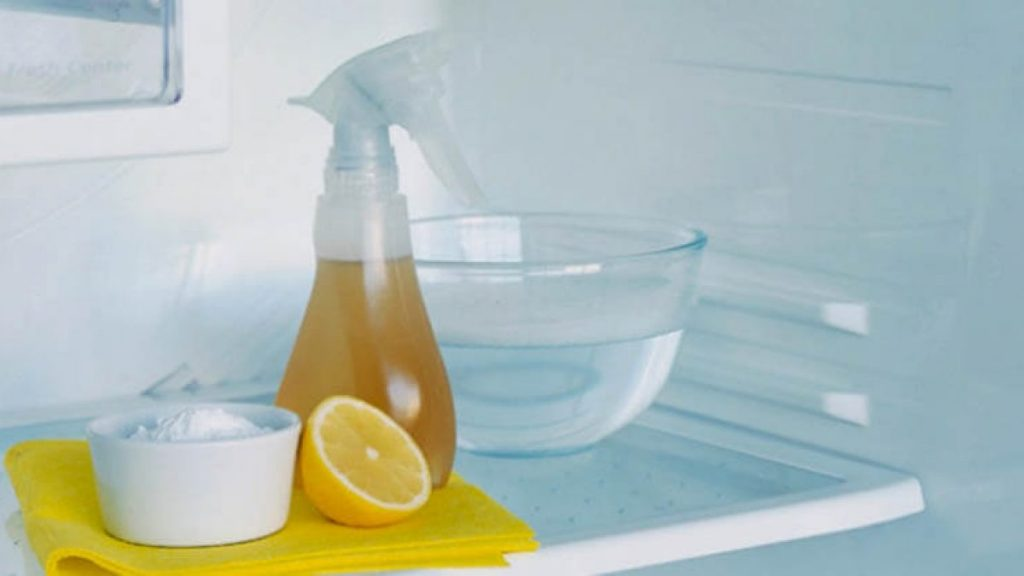
Let's wash the removable shelves and covers in the cabinet. In the meantime, we should not use dish soap or any chemical-containing substance to wash the interior parts of the cabinet. Cleaning with vinegar will be the most natural and hygienic. Cleaning the inside of your refrigerator with the mixture you obtain by throwing vinegar and baking soda into a cleaning bucket will be sufficient in terms of both hygiene and cleanliness.
Cleaning the outside of the refrigerator is as necessary as cleaning the inside. We think that the cleaning will contribute to our health in terms of both appearance and hygiene. How to clean yellow stains inside the refrigerator? It is a question that ladies who complain about yellow spots in the closet are curious about and ask to have information.
It's actually not that hard to get rid of annoying yellow spots. The mixture we prepared to clean the inside and outside of the cabinet will be sufficient for this.
It will be enough to clean the freezer section of the refrigerator with a mixture of vinegar and carbonated water.
How to Wipe Refrigerator Tire?
How to wipe a refrigerator tire? It is another important issue. the rubber of the cabinet should be cleaned very well. This is necessary in terms of contributing to the cooling feature of the cabinet.
Can the Refrigerator be Wiped with Cream Detergent?
Can the refrigerator be wiped with cream detergent? No, it cannot be deleted. In cleaning, not only cream detergents but also no chemical products should be used. When you use these and similar products to clean your cabinet, their smell will permeate your food and will also cause your cabinet to be scratched.
Tips for Cleaning the Refrigerator
When the refrigerator is cleaned by knowing the tricks of cleaning, we will be less tired and we will finish the cleaning in a shorter time. How to clean the refrigerator, which is an issue that all ladies care and care about, is very important for all ladies. This cleaning, which is necessary for both appearance and hygiene, will be easier when the necessary tricks are known.
Here are the key points:
Before you start cleaning, be sure to unplug it.
If there is icing, defrost it
When cleaning your cabinet, make sure to use a vinegar-water mixture. Bacteria does not form in the cabinets you wipe with this mixture, and you get a cleaning that is free from detergent odor.

We reach Italy, following the scent of this sweet bread.
Once again we reach Italy together. We made our first trip with polenta, today we are in Italy with the Panettone recipe :)
A very fluffy bread/cake type panettone recipe that is baked once a year as a Christmas classic due to its laboriousness. Making the bread, which is consumed frequently in Italy and its surroundings, requires patience. Sugary and dry yeast dough is rested for a long time at suitable temperatures and fermented. It turns into a delicious bread with lots of candied oranges along with eggs, butter and raisins. We thought that there would be people who would like to make the bread, which requires mastery and has become a tradition for centuries, at home before the New Year. I would like to say that the ingredients in this rich bread also have symbolic meanings. Raisins mean money, candied oranges mean love, and lemon peel mean eternal health.
Panettone is a high round sweet bread speckled with raisins, citrus and almonds with a plush, buttery texture popular both here and throughout Italy during the winter holidays.
There are multiple facts about Panettone. I have researched the question of what is Panettone in detail and I am here with a wide content.
Makes a dramatic Christmas dessert or breakfast treat. Its Milanese origins date back to the Renaissance, when wheat was said to be very scarce and valuable and only made at Christmas.
These days, beautifully wrapped versions of this long, round cake seem to be appearing just about everywhere in Italian and even casual grocery stores in December. These editions vary in quality; many of them are more repulsive with artificial flavors.
What is Panettone? Is it Dessert, Bread or Cake?
There are two different stories about Panettone. When you ask the Italians, they tell them through these two stories, but the thesis they defend is the second story. I will write both stories, but what is certain is that Panettone was found in the Middle Ages in the 15th century. It is also consumed at Christmas time. It has become widespread in countries such as Italy, Spain, France, Portugal, Latin America and Australia. French and Spanish colonies were involved in this expansion.
There are a couple of stories about Panettone Sweet Bread, but I think the story accepted by the Italians is as follows; Ludovico il Moro was an italian renaissance prince who reigned as duke of Milan since 1499. While the duchess of dreams were flying in the air, one of the cooks burned the dessert that he had thrown in the oven, in a night attended by the nobles prepared for Christmas. Kitchen boy and insignificant Toni's main job is to help the cooks. Bring what we know. But after Toni saw this incident, she started kneading with sugar, eggs, raisins and candied fruit to soften the yeast she had set aside for pre-made. He also added the leftover fruits from the cellar. Afterwards, they brought this sweet bread to the presence of the duke. Meanwhile, Toni watches the Duke and his noble guests from behind the curtain. The Duke said that he was very pleased after tasting it and that he wanted to meet the cook who did it. At the same time, he invited this cook to reward him. But our boy Toni isn't even a cook. He's just a chef's apprentice. He appeared before Ludovico il Moro and said that it should be called "pan del toni" from now on. It is also known as Toni's sweet bread. Buddha is the story you will hear most often from Italians.
Spreading in this way after the 15th century, it is now popular all over the world as Christmas Sweet Bread. In some of the articles I read, it is written on New Year's Day, but this is not true. It is a Christmas dessert that is celebrated on the 25th of December every year. Apart from the bread eaten every day, Panettone specific to that day is taken and eaten. The dessert, which Toni accidentally brought to such popularity, has now become a food that millions eat on Christmas Day. At the same time, it is a sweet bread that is eaten in celebrations. Of course, since it is very popular, it has become a bread or cake that is always found today. It has ceased to be bread eaten only during Christmas. I think the best answer to the question of what is panettone can be sweet bread.
How to Make Panettone Recipe?
Take the raisins from which you have removed the stems in a deep bowl. Wet it with hot water and freshly squeezed orange juice and keep it aside to swell.
Mix the solid ingredients, sifted flour, granulated sugar, dry yeast, grated lemon peel and salt in a bowl.
Mix the egg, warm water and honey in a separate bowl with a mixer. When the liquid ingredients get a homogeneous mixture, reduce the whisking degree and add the flour mixture little by little, then continue the mixing process.
Add 4 tablespoons of soft butter little by little and continue whisking until you get a flexible and soft dough.
Drain the excess water from the raisins that have been soaked in water and swelled well. Stir in the dried fruit mixture and remaining 1 tablespoon of butter. Add the mixture you have obtained to the dough and use a wooden spoon to help Mix it until it's incorporated.
Take the dried fruit bread dough you have obtained in a deep bowl, cover it with cling film and leave it at room temperature for 12 hours.
At the end of the time, knead the dough, which reaches almost three times the dough height, with small movements. On a lightly floured kitchen counter, take its air and bake it 12-15 cm. in diameter, 15-20 cm. Place in a mold high. Cover it with a slightly damp kitchen cloth and leave it for another 2-3 hours at room temperature for the process we call tray yeast.
When the dough rises to the surface of the mold in the specified dimensions, transfer the mold to a large baking tray. Lower the baking wire a level or two, keeping in mind the height of the dough.
Draw a shape on the dough and place cold butter in the middle. Gently push inwards. Bake in a preheated 180 degree oven for about 75 minutes until it has a dark crust.
At the end of the cooking time, carefully remove the panettone from the mold, lay it on its side on the wire rack and cool it by turning it in between. Share it with your loved ones after slicing.
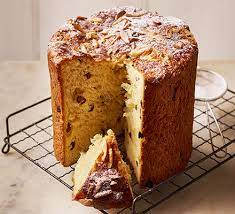
Jumbo Shrimp With Butter and Lime Flavor
For those who love seafood, we have a very delicious shrimp recipe with lots of garlic, butter, and you can eat your bread with a flag. If you can't get enough of the buttered shrimp that we order as hot starters in fish restaurants, if you want to catch this taste at home, this is the recipe! It is possible to prepare the shrimp recipe with thyme, cream, garlic, lemon and different ingredients you want. The shrimp recipe takes on a completely different beauty, especially when it is buttered and garlic is supported. Butter shrimp recipe amazes those who eat it
While lemongrass and lemon peel pieces, which are very suitable for seafood, especially shrimp, add an appetizing taste to the shrimp; Jalapeno peppers, garlic and soy sauce help to balance the taste. Shrimp pan recipe is a candidate to push the top ranks in the recipe books with its delicious balance and nutritious feature!
One of the favorites of seafood lovers, especially fish, is shrimp! It is one of the foods that should be on the table more often with its delicious meat, recipes that are very suitable for fish tables, and being rich in saturated fats. Maybe “how to cook shrimp?” Since it is not known very much, its value can sometimes be said to be underestimated.
A list of recipes that will bring shrimp to the tables seems to give this delicious taste the value it deserves. You will find the most well-known recipes such as shrimp pan, shrimp pasta and shrimp casserole at the top of the list. Following the recipes made with shrimp, there are varieties from the World Cuisine. Spanish food paella and Italy's famous risotto took their place among these recipes.
You need jumbo shrimps or classic shrimps for this flavor that you can't get enough of. When cooking shrimp, be sure not to cook it for too long. Without further ado, let's take you straight to the kitchen for this beauty that is dipped in butter.
Ingredients for Butter Shrimp Recipe
500 grams jumbo shrimp (de-oiled)
5 tablespoons of butter
1 tablespoon of oil
3 garlic cloves (finely chopped)
1 teaspoon of salt
1 teaspoon ground red pepper
1 teaspoon of black pepper
1/2 lime juice (optional)
2 bay leaves
Melt the butter and oil in a pan. Leave 1 tablespoon of cold butter for later to add.
When the butter starts to heat up, add the garlic and bay leaf.
After the garlic smell is gone, add the shrimps and cook both sides of the shrimp by turning them inside out.
Finally, after squeezing the spices and half a lime on them, add 1 tablespoon of cold butter and mix it while it melts, heat it once and take it off the stove.
Enjoy your meal


Growing Tomatoes in Pots
Those who try to grow as many flowers, fruits and vegetables as possible at home know that there is nothing like spending time with plants, taking care of them, seeing their refreshing colors and inhaling their scents. If this situation is not only limited to flowers, but also extends to fruits and vegetables that will make great contributions to the home economy and health, do not let us enjoy it.
If you are one of those who say that they can grow the most natural, most delicious and most economical at home, you should definitely try this process of growing tomatoes in pots, which we will explain step by step, the most practical methods.
When you learn all the stages of how to grow tomatoes in pots, from soil selection to the frequency of irrigation, from the relationship with the sun to the collection, you will want to try it immediately, and after you make your first application, you will say, "Why have I never done this before?"
Come on then, don't be too late, first learn how to grow tomatoes step by step, then prepare the necessary materials and take action right away!
Ingredients you need to grow tomatoes:
organic tomato seeds
Germination tray or plastic cups
deep pot with drainage
garden soil
Fertilizer
That
Step 1: Fill the germination tray or plastic cups with fertile garden soil and plant the seeds inside
Fill your germination tray, which you can obtain from florists or the garden-plant aisles of DIY stores, or your plastic cups that you can use instead, with fertile garden soil if you do not have a tray. Open the top of the filled soil slightly, place your tomato seeds inside and cover it with soil about 1 centimeter.
Seeds need to be neither too deep nor too surface, 1 centimeter deep is the ideal depth to consider while waiting for germination.
Step 2: For the seeds to germinate, keep them in a warm, sun-drenched environment and keep the soil constantly moist.
Germination can also be done in sun-exposed areas, but if you do this in a dark area, the germination process of your tomato seeds will be shortened, and you will be able to move on to planting the seedlings more quickly. If you wish, you can also close a black bag on the germination tray so that it does not prevent air from getting in.
You should make sure that the soil of the tomato seeds you keep in the germination tray or glasses is constantly moist during this process. For this, you can test the soil on your index finger so that it does not harm the germination of the seeds, and if it does not remain moist when you dip your finger into the soil and remove it, you can immediately water it. After a while, you will notice that the tomato seeds have germinated and started to show themselves green on the surface of the soil.
Step 3: Leave the germinating tomato seeds in the sun for about 1-1.5 weeks.
When the tomato seeds waiting in the dark area start to germinate, you should not put them in the pot immediately, but wait for a while to root in the germination tray or plastic cups. Thus, you can obtain much stronger and healthier tomato seedlings. However, after the tomato seeds start to germinate and show themselves on the surface of the soil, it will not be right to keep them in the dark. For this reason, you should not neglect to move it to a sunny area after germination starts, and you should wait for 1-1.5 weeks in this way. Of course, you should take care to keep the soil moist during this time.
Step 4: Fill your pot with fertile garden soil and some fertilizer, carefully transplant the seedlings
It's time to transfer your tomato seedlings germinated in a germination tray or plastic cups to the pot. First of all, place tiny stones in the hole parts of your pot with drainage, which has holes under which excess water can flow, so that it maintains its drainage structure. Then add the garden soil and fertilizer you supplied on it. Make sure that the fertilizer and soil are mixed homogeneously.
After this process, dig 2-3 cm holes at the top of the soil to match the root size of your tiny tomato seedlings, carefully leave the germinated seedlings into these holes without damaging their roots, and cover them with 2-3 cm soil again. At this stage, be careful not to leave the soil you cover too loose or too pressed so that your seedlings and roots are not damaged.
Step 5: Water your planted tomato seedlings regularly and ensure it receives adequate sunlight
After planting your tomato seedlings in their pots, continue the irrigation process so that the soil remains moist. Water the tomato at the same time as most other plants.
Set a routine for yourself because you like to water and water accordingly. For example, water at 08:00 every morning, the plant will grow and develop more efficiently as it gets used to this time. Of course, you can change the time according to your own schedule, but keep in mind that you should do the watering in slightly shaded areas where there is no direct sunlight.
Let's talk about its relationship with sunlight: Your tomato plant does not need direct sunlight until it blooms, and even strong sunlight can damage this process. However, it should still be kept in a bright, sunny place for at least 8 hours during the day, for example, on the windowsill.
Step 6: Fertilize your tomato plant, which will bloom after about 3 months, to produce tomatoes efficiently.
If you follow all these steps completely, your tomato plants will start to bloom in about 3 months, and fruit will form right after. After this stage, when the fruits start to show, you can move your pots to areas with more sun. In this way, the green colors of the tomatoes will turn red in a much shorter time and your tomatoes will be delicious. That's it!

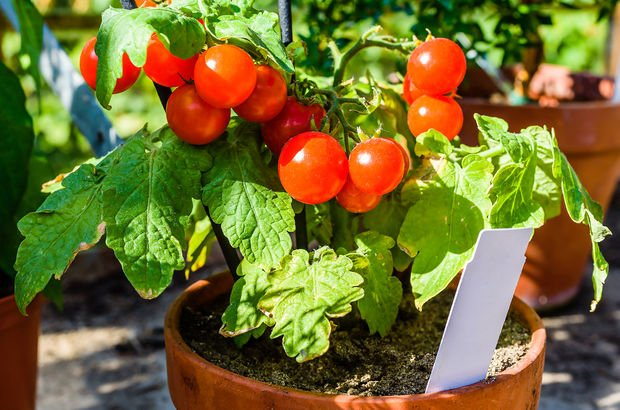
Hibiskus Tea With its Magnificent Color
Now I would like to tell you about hibiscus, which is a very colorful plant and a delicious tea is obtained. I would definitely recommend you to try this refreshing tea, which I prefer to be cold in summer and warm in winter.
I met this tea at the famous chain coffee shop. I drank it as an iced tea and I absolutely loved it. I bought it from herbal and now I consume it by brewing it myself at home.
Hibiskus, which has a delicious smell, exotic and relaxing effect, is a special plant with many health benefits. There are hundreds of species of hibiscus, varying according to its location and climate. The bright red hibiscus flower known as “hibiscus sabdariffa” is used in tea making.
Hibiscus is a very popular beverage around the world and is often used as a medicinal tea. Hibiscus flowers have various names. Also known as "Roselle" in some places. This plant, which is well known by tea lovers, can be consumed hot or cold, depending on preference. This low-calorie and caffeine-free tea manages to whet appetites with its eye-catching beverage color.
Hibiscus tea is made from the dried parts of the hibiscus plant. This tea is consumed as a useful beverage with a dark red color. It is sweet like cranberry and has a tart aroma. Hibiskus tea, which can be consumed hot or cold, is very beneficial for health.
How to Use Hibiscus Tea in Meals?
Hibiscus tea is a tea that is consumed by brewing rather than meals. This tea has an aroma and a sharp smell. It can be brewed alone or in combination with other herbal teas such as green tea, cinnamon, lemon, linden and sage. A teaspoon of dried hibiscus herb and hot water will be enough to brew hibiscus tea.
Another tea is tea made with dried hibiskus. The tea is then taken to the refrigerator and cooled thoroughly. It can be flavored with mint or lemon upon request.
Hibiscus tea is a popular drink used in many countries. It has many benefits for our body. Instead of using drugs, you can invest in your body with natural teas.
How to Brew Hibiscus Tea?
The brewing process of the hibiscus plant is generally done with hot water. When preparing hibiscus tea, natural sweeteners such as sugar, honey or agave can often be used to balance its sourness and bitterness. It is served with blends prepared with rosehip tea from time to time. Since they both have a red color and a sour taste, these two teas are completely different plants, even if they are mixed together. Rosehip is a red fruit obtained from the buds of wild roses. Although they are used together in harmony, their contents are different.
When brewing hot Hibiscus tea:
In teas prepared for a single person, 3 teaspoons of hibiscus is sufficient for 200 ml. If you are preparing for more people, you can add 2 cups of hibiscus per 1 liter of water. Place the mixture of flowers and leaves into the teapot with a strainer. In general, a brewing time of 3 to 4 minutes will be sufficient.
You can increase the density of the tea by extending the brewing time. After brewing time, remove the tea strainer from the teapot and add honey or sugar to sweeten it. You can use 2 teaspoons of sugar per 200 ml or 1 glass of sugar per liter. If you want to serve the tea cold, wait a short time after brewing hot and put it in the refrigerator. You can also add ice cubes if you wish. Your delicious tea is ready to drink!
Whether you're brewing a hot or cold cup of hibiscus tea, here are a few general tips to keep in mind:
Use fresh, pure and filtered water.
Similar to black tea and other herbal teas, hibiscus tea gives its taste and flavor to the water when it meets with boiling water between 95 -100 degrees.
It is best to brew by measuring the temperature. If you do not have such a possibility, boil the water and add it to the tea immediately after turning off the heat.
The more heat meets the hibiscus, the more intensely the plant will give its aroma. So keep the mouth of the teapot closed.
The longer the hibiscus is infused, the stronger its color and flavor becomes. Be sure to taste the tea after the suggested brewing time and decide if you need to brew it for a while.
You can use lemon slices to enhance the flavor and aroma in both hot and cold hibiscus teas.
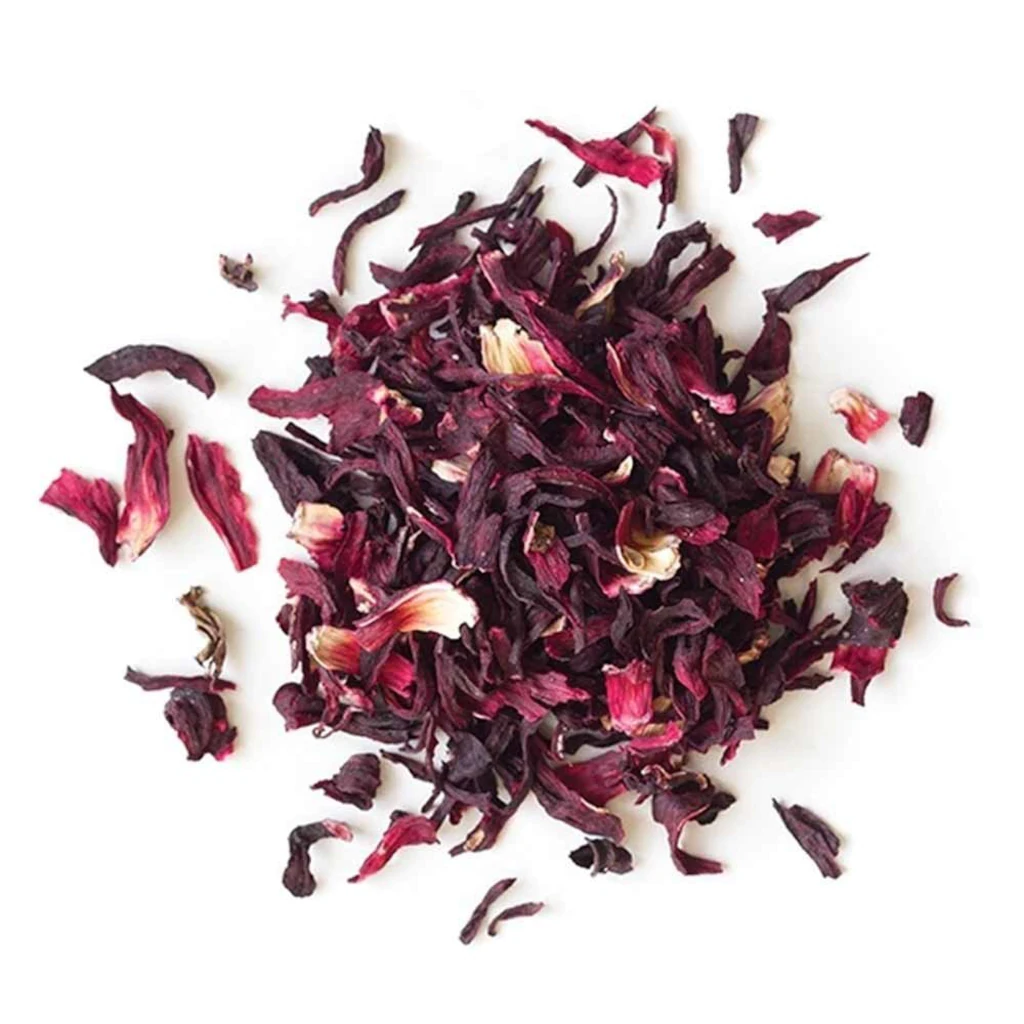

How About Making Healthy Potato Chips at Home?
As with all packaged foods, the packaged form of chips is much more unhealthy than its natural form.
Due to the nature of this snack, it cannot be said that it is healthy because of the intense starch in it and the fact that it is cooked by frying. In addition to all these, it turns into a product that should not be consumed completely with the additives and protection materials used while packaging. So do it at home.
If you're one of those who say that they don't go through a night without consuming potato chips, and conversations get off the beaten track, here's a simple and much more convenient, home-made chips recipe for you.
For this recipe you need equipment. After you have this tool called a mandolin grater, you can cut potatoes as thin as you want, you can make smooth, serrated or match chips. With the recipe of baked potato chips, you can prepare delicious snacks for match pleasures or TV series. The potato chips that we will prepare using very little oil will be healthier than the chips you buy from outside.
Moreover, you can flavor the chips, which we will cook in the oven in half an hour without frying, with the spices you want, and have a pleasant time with your loved ones. You can use a vegetable slicer to obtain thin potato slices, or you can prepare them with a knife if you wish. The secret to obtaining crispy chips is to soak the sliced potatoes in cold water, even for a short time, and then dry them. After blending the potatoes with a little olive oil and spices, it is ready to be placed on the tray and baked. Go to the kitchen and start the preparations. Good luck to you now.
Baked Potato Chips Recipe Tip
If you want to cut the potatoes in equal size and finely, you can get help from vegetable slicing tools such as a mandolin. By soaking the sliced potatoes in cold water, you can release their starch and make them more crispy. You can increase or decrease the spices as you wish, and you can use many different spices.
Baking Tip for Baked Potato Chips Recipe
After cooking in the oven for the first 15 minutes, you can turn the potatoes on the tray upside down so that both sides are cooked equally.
How to Make Baked Potato Chips Recipe?
Peel the skins off the potatoes and wash them well.
Make thin slices of potatoes with a peeler. If you wish, you can also do this with the help of a knife or a vegetable slicer.
Take the potato slices you have obtained into a bowl filled with cold water so that they release their starch.
While the potatoes are waiting in the water, take the olive oil in a bowl. Mix in the black pepper, thyme, sweet paprika, salt and garlic powder.
Drain and dry the potato slices that have been waiting in water for ten minutes.
Then, combine the potato slices and the sauce you prepared in a deep bowl and mix them.
Place them evenly on a baking tray lined with greaseproof paper. (You can use two different trays)
Bake in a preheated 200 degree oven for about thirty minutes.
You can prepare different dipping sauces on the side and add pleasure to your viewing pleasure.
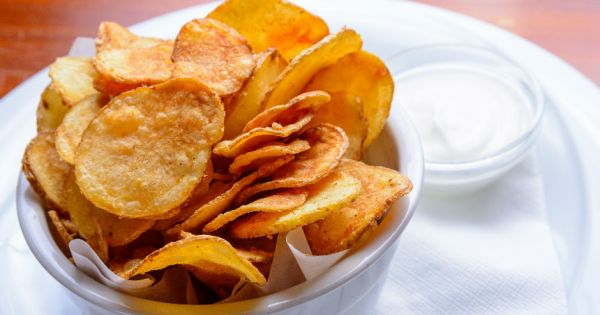
Cake is ready in 3 minutes in the microwave..
Microwave ovens are used not only for heating food, but also for cooking food. Especially cakes and cup cakes, which have become increasingly popular lately, can be prepared quickly using microwave ovens.
You craved an easy-to-make, delicious dessert with few ingredients. But when you say the cooking time, preparation and preparation, you are thinking of dessert recipes that will take you at least half an hour. I wish it would take a little time to make a slightly liquid cake, right? In fact, it is possible to realize this sweet dream in a very short time.
The biggest feature of this cake is that it cooks in the microwave in just 3 minutes. So, let's take a look at the preparation stage of our recipe, which will make you very happy with its few ingredients. The reason for that wet texture is hidden in the mixing of dry materials separately and wet materials separately and then bringing them together. Although using a microwave is not always one of the first choices, you can use this recipe in cases where you want to save time. Good luck to you now.
Recipe for Making Cake in the Microwave?
Different types of cakes can be made in the microwave. The ingredients to be put in the cake may differ according to preference. In addition, the cake mix can also be cooked by pouring it into a glass. However, the most important point to note about making cakes in the microwave is that the cake tin or glass to be used should not be metal or quality plastic.
Materials:
1 egg
1/2 cup of flour
3 tablespoons of cocoa
1/2 teaspoon of milk
3/4 teaspoon granulated sugar
4 tablespoons of melted butter
1 packet of vanilla
1.5 teaspoons of baking powder
2 tablespoons
chocolate chips
For the above:
1 tablespoon
powdered sugar
How to Make Microwave Cake Recipe
Mix flour, cocoa, baking powder and vanilla, that is, all dry ingredients except sugar, in a bowl.
Crack the egg into a separate bowl. Add powdered sugar and mix well.
Then add the milk and melted butter and continue whisking.
Add the dry ingredients you have prepared in a separate corner onto these mixed ingredients and mix well with the help of a spatula.
Finally, add chocolate chips into this mixture. Divide the batter into buttered heatproof mugs or glassware.
Set your microwave oven to its highest heat setting (1000 watts). Place your cakes in the oven and bake for 3 minutes. Take it out, let it rest for a while at room temperature and serve with powdered sugar.

Miraculous benefits of cinnamon water..
Dear our culinary readers, while drinking the cinnamon water I prepared for myself today, the idea of doing research on this topic came to my mind. I enjoy sharing what I find beneficial. Cinnamon is an indispensable spice for me. It is a good alternative especially for sweet cravings.
Cinnamon Water helps to lose weight as it reduces the need for sweets. It also has benefits for the skin. If you do not consume the water excessively, the harm will be less.
What does cinnamon water do?
Cinnamon Water People try many ways to lose their excess weight. Different formulas and various nutrients are used by people to lose weight. Drinking cinnamon water can also be a method you can use to lose weight.
The cinnamon water you drink regularly can help you lose weight quickly. The benefits of cinnamon water can activate all the activities in your body that are necessary for you to lose weight.
Cinnamon water recipe will be very important in order to make your metabolism and digestive system faster. Slow operation of these systems is the first factor in weight gain.
For this reason, you should speed up the fat burning process with such recipes in order to lose weight faster. Since cinnamon is a very effective and beneficial food for your body, you can use it with peace of mind. Cinnamon water sour is a subject discussed by those who use it in the dictionary and its benefits are discussed.
Drinking cinnamon water regularly will create changes in your body in a short time. It can not only help you lose weight, but also help you achieve a healthy life. Those who drink cinnamon water say that they have lost a lot of weight in a short time.
This is possible with the effects of cinnamon on the body systems. Thanks to the substances in cinnamon, it allows you to remove excess water from your body in a short time. In addition, you can have the chance to get rid of permanent weight by accelerating your fat burning metabolism and digestive system.
If you want to start a cinnamon water diet, you must first learn how to prepare cinnamon water. The content of the recipe is quite limited. All you need to have is cinnamon and some warm water. Throw enough cinnamon into the warm water and start mixing. Afterwards, you can speed up your metabolism by drinking that mixture.
It doesn't really matter when you drink cinnamon water, but according to recent studies by scientists, doing things that will speed up your metabolism and digestion in the morning on an empty stomach will accelerate fat burning during the day.
Cinnamon water effects will become obvious after regular use. Within a week, you will be surprised at your image in the mirror. You will get rid of your excess water, especially the edema on your face and waist area.
If you have cinnamon sticks in your hand, you can lose weight with powder and cinnamon stick water. Cinnamon sticks are just as effective on your metabolism as powdered cinnamon. For this reason, the mixture you will prepare well will be good for your body.
Benefits of Drinking Cinnamon Water
Cinnamon water is often used by people to lose weight. In addition, it affects many parts of you positively, from your skin to your brain functions. Cinnamon water plays an important role in preventing cancer.
It suppresses the formation of free radicals in your body. In this case, it prevents the emergence of cancer. On the other hand, consuming a certain amount of cinnamon every day will help you to increase the endurance of your immune system.
Cinnamon water is very useful in passing inflammation in your throat. The mixture containing cinnamon, which you can use as mouthwash, will lead to the death of microbes. Cinnamon stick water is an important factor in increasing your health as a whole.
The effects of cinnamon on brain signals are also quite large. The use of cinnamon eliminates the sweet desire of the body. In this way, you will both eat less sweets and suppress your cravings without adding extra calories to your body.
However, cinnamon water plays an important role in making your memory stronger. As a result of the researches, regularly drinking water mixed with cinnamon causes your memory to work well. After all these benefits, you must have thought that it has important effects for your skin as well.
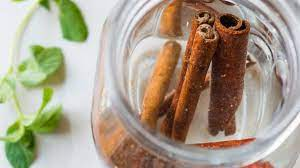

What you eat matters! What is an alkaline diet?
Cooking and eating is of course very simple. What matters is what we eat in what consciousness. Sometimes we have to listen to our body and put it through certain tests.
Our research today is alkaline nutrition.
What is alkaline diet? Alkaline nutrition is given in order to apply a regimen against some nutrients that the body needs. Within the scope of these applications, a healthier structure is ensured by the use of products that do not cause acid accumulation in the body. In addition, the destructive effects of acid in the stomach and blood environment extend to the cells. For this reason, it is aimed to provide the body acid balance by taking foods with a lower pH value.
These foods are called alkaline foods. With these foods, it is ensured that the stomach sensitivity is created or the expectations of the patients are met. Today, the nutritional habits of patients cause many health problems, especially stomach diseases. For this reason, new regimes emerge every day and it is possible to reorganize people's eating habits.
Alkaline nutrition is a system that has emerged recently for these reasons. With this diet, which is recommended to remove acids that cause diseases from the system, an acidic environment for foods is prevented. In this way, the habits that have brought us in many places recently due to health and disease-based factors are eliminated.
Maintaining the acid and alkaline balance of the body is also important in order to avoid diseases. For example, it is known that cancer cells generally prevail in acidic environments. For this reason, the harmful effects of diets made in acid environments are seen as problems such as stomach problems and allergy problems. Thanks to these nutritional habits made with alkaline foods, solutions that meet the expectations of the patients are provided.
Alkaline nutrition also prevents the acidic body environment from inviting diseases. For these reasons, it is necessary to know which foods are acidic and which foods are alkaline and to regulate daily eating habits accordingly. For these reasons, knowing the acidic values of foods and protecting the body against acidic problems come to the fore. The presence of metabolism in an acidic environment causes weight problems such as excessive weight gain. Thus, many diseases occur as a result of people's living habits. With fast eating habits and fast food foods, the issues required for treatment in patients are determined.
Alkaline Nutrition Against Acidic Nutrition
For an alkaline diet, it is not necessary to constantly consume alkaline foods. In addition, the 20 percent 80 percent rule is applied to ensure the balance. In other words, while 80 percent of the foods we eat are alkaline, a maximum of 20 percent should be acidic. The important thing is to prevent these acidic foods from damaging the stomach and other organs in some way.
For these reasons, alkaline eating habits come to the fore. Thanks to these habits, it is possible to live a long-term healthy life without suffering from various diseases. At the same time, since there is more or less acid in every food, a desired level of nutritional habits can be achieved by taking foods with alkaline content.
Alkaline Diet Habits and Alkaline Water
At this stage, the habits often used for alkaline nutrition take place. For example, alkaline water consumption is recommended. At the same time, it is recommended to use alkaline foods due to their benefits for human health. You can stay healthy by adopting habits such as alkaline water consumption to meet these usage needs.
With the use of alkaline water, acid-based damages in the body are eliminated. At the same time, since nutritional habits have important effects on people's lives, alkaline nutrition is important in the prevention of these diseases in order to stay healthy. It is possible to get rid of the harms of alkaline foods and dietary habits, together with the effects of the damage of acids over time.
Alkaline nutrition and its benefits
Along with the benefits offered, alkaline nutrition provides many benefits in people's lives, especially heart and digestion. At the same time, alkaline foods have significant effects on the circulatory and digestive system. For these reasons, with the use of alkaline foods in many areas, getting rid of illness or similar problems is ensured.
Alkaline Foods, Some of them are:
* Lemon – 9.9 pH.
* Lime – 8.2 pH.
* Avocado – 15.6 pH.
* Garlic – 13.2 pH
* Mango – 8.7pH.
* Tangerine – 8.5pH.
* Pineapple – 12.7 pH.
* Dandelion – 22.7 pH.
* Orange – 9.2 pH.

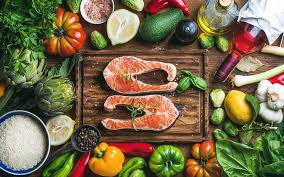
 @OurKitchen