Takoyaki Japanese Street Food
Today I continue my search for street flavors, which I started with Taco, with Takoyaki, a Japanese street food.
World street flavors may vary according to the geographical conditions and cultures of the countries. Sometimes the logic is the same at the stage of preparing the food, but that food prepared with the same logic can take on a completely different flavor in another country.
Street food is prepared food or drink sold by peddlers on the street, individually or in public places such as markets. It is usually sold from a portable food store, a food cart or crate, or a ready-to-eat food truck for rapid production. Some street foods are regional, but most have spread beyond their region. Most street food can be classified as both regular food and fast food. It is also cheaper than restaurant meals.
When it comes to world street tastes, Japan comes to mind, offering extraordinary experiences.
Takoyaki is one of the best street foods in Japan. In the country where seafood is widely consumed, street foods are also made with seafood.
Takoyaki, which you can consume as a snack, is obtained by frying octopus, spring onions, pickled ginger and tempura scraps in the dough.
Takoyaki is one of the most important street food especially in Osaka.
they are basically ubiquitous in Japan and are quite popular in North America as well.
I hope one day you will have the opportunity to buy and eat the original on the streets of Osaka. I am sharing a recipe for those who are curious and want to try it.
**Ingredients for Takoyaki Recipe**
-300 g octopus
-3 leaves of spring onions
-3 tablespoons of pickled ginger
***For the crispy;***
-20 gr flour
-30 ml of water
**For the dough;**
-250 ml of water
-1 egg
-10 g soy sauce
-10 g sugar
-10 g salt
-90 g flour
-10 g rice flour
-10 g baking powder
Mix the flour and water in a bowl for the crunch.
For frying, oil is heated in a pan. Small pieces are thrown into the hot oil with the tip of a spatula or whisk and small pieces are fried.
The octopus is cleaned and washed, and boiled in hot water for 10 minutes. It is sliced and kept.
Fresh onions are finely chopped and set aside.
Pickled ginger is also sliced and set aside.
The dough begins to be prepared; The liquid ingredients for the dough are whisked in a bowl. Then dry ingredients are added and whisked until a homogeneous consistency is obtained.
Oil is applied to the round pancake pan and the dough is poured in half.
It is filled with octopus, ginger, onion and crispy dough. Put the dough on it and turn it upside down.
Balls are prepared from octopus.
Served with takoyaki sauce and mayonnaise. Enjoy your meal.
***Takoyaki tips and tricks***
Make the dough ahead of time. It can be refrigerated, covered, and the flour can really hydrate, making the dough smooth. It will help crisp the outsides.
Use lots of oil. The oil is what will make it crispy on the outside and easy to flip.
Use a generous amount of dough. Professional takoyaki sellers almost always overfill the rounds of their grills and fill the excess into the ball so that each ball is perfectly round. Stuff the dough if necessary.
Move the balls. After the balls are lightly browned and hold their shape, drizzle them in the pan. Many household takoyaki pans have uneven heat, so keep them moving with the help of browning.

Flavor from the Sea: Sea Bass Ceviche
Ceviche is a healthy Peruvian dish often served as an appetizer. It is usually made from raw fresh fish or shrimp marinated in lemon and/or lime juice. The acid in the citrus cures the fish, causing it to denature the proteins and become tough and opaque while absorbing flavor.
The origin of ceviche is certainly South America, but it is debatable which country first used this method on raw fish. It may have been an Inca preparation used where the countries of Peru or Ecuador are now located. It is a staple food in all Latin American countries, and each treats it with a slightly different preparation.
Sea bass, which is rich in vitamins A, B and D, is known to strengthen bones and joints. Sea bass fish, which supports mental development, is also effective against winter diseases.
It's also the kind of dish people don't normally think of making at home, so restaurants charge a small fortune for it.
It's up to us to break this perception, it's possible to make any meal as long as you can get the ingredients, and of course, making ceviche is super easy - and super fast too!
In Mexico and other parts of Central America, it is often served in small "cups" or plates, cocktail style, with corn chips or a crispy tortilla.
-2 sea bass fillets
-Juice of 1.5 limes (or lemon)
-1 lime zest
-½ zest of orange
-1 orange juice
-1 tablespoon of grain mustard
-1 onion
-1 teaspoon of black pepper
-1 teaspoon salt
-1 tablespoon of sugar
-3 tablespoons of olive oil
-1 bay leaf
*****Specification:*****
Get the sea bass as a skinless fillet. Cleanse your bones. Finely chop long.
Finely chop the onion and rub it generously with salt. Add plenty of cold water and leave for 1 hour. Wash and drain the onion.
For the sauce, mix the lime and orange juice, mustard and olive oil, peels, salt and sugar.
Be sure to taste the sauce and add more acid, salt or sugar if needed.
Pour the sauce over the sea bass. Add onion, black pepper and bay leaves and marinate in a closed container in the refrigerator for 1 night.
Strain half the sauce before serving. Cut the sea bass into long thin slices. If you like too juicy, strained can be eaten. Serve with fresh mint and capers.
It can be served by mixing and adding mango, cucumber, avocado, red onion, tomato, jalapeno and chives.
To marinate the sea bass, you can add orange juice in addition to the lemon juice.
Add orange zest and lemon zest to add flavor to the fish meat.
To remove the fishy smell, you can use bay leaves during cooking.
If you take the sea bass as a fillet, you can prepare the recipe in a short time.
Enjoy your meal :)
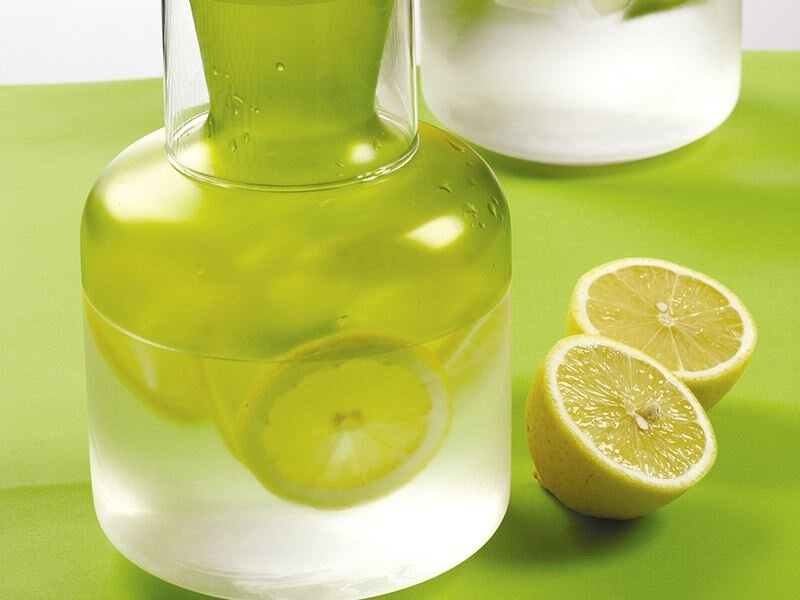
Importance of drinking lemon water in fat burning
We all know the advice of experts, dietitians and life coaches about the benefits of drinking lemon water for years. It has been engraved in our memories that it has a strong role in weight loss and fat burning.
What about the miracle of lemon or Vitamin C that burns fat?
One of the most frequently asked questions is; “Is water with lemon slimming?”
is the question.
The answer is simple; If it is supported by a regular and balanced diet program, it is a fact that it should be "yes" as it will speed up your metabolism.
Vitamin C is actually one of the nutrients that takes part in many functions in the body. There is a remarkable role among these functions, which is among the common concerns of all of us: fat burning.
Since it is not produced in our body, we must get it through food. A healthy body can get enough vitamin C with a healthy diet. Many vegetables and fruits are rich in this aspect. By consuming more of these, we can meet our daily vitamin needs.
Examples of these nutrients:
Green pepper
Orange, tangerine, citrus, lemon, grapefruit
White potatoes and sweet potatoes
green leafy vegetables
Melon
Papaya
Mango
Watermelon
Brussels sprouts
Cauliflower
Cabbage
Red pepper
Raspberry, Blueberry
We can say winter squash and pineapple.
But when it comes to vitamin C, the first food that comes to mind is probably lemon.
Lemon is a food with many rich content such as vitamin C, vitamin B, phosphorus, protein, carbohydrates.
Lemon Water is one of the best quality waters for our body, as experts say.
Especially in the morning, the quality of the first sip that enters the body is very important. Your body, which has been dehydrated for a long time, needs a glass of water with high alkalinity, not coffee or tea. There are many benefits of adding lemon to your water to increase the alkalinity of the water.
Drinking lemon water helps in activating the digestive enzymes in the liver. It also helps in regulating the oxygen status of the blood.
This Miraculous Drink is simple and inexpensive.
All you need is water and Fresh lemon
If you wish, you can slice it and add it to drinking water. Those who want to drink only 1 glass can take the juice of half a lemon and mix it with drinking water. A special time is not recommended for drinking lemon water. You can feel better by drinking this water whenever and wherever you want. Drinking warm in winter cold; It will be good for you to drink it with ice in summer heat. Drinking lemon water fresh will give better results.
For example, a glass of water with lemon; It contains 25 percent of the vitamin C you need to take daily and is extremely useful because it has only 9 calories. Thanks to the vitamin C it contains, it strengthens your immune system due to its antibacterial and antiviral properties.
Lemon water, which creates a detox effect, renews the body in every way. You can consume lemon water to look younger than your age, prevent intestinal problems and get rid of toxins.
What is Surf and Turf, How is it Prepared?
In surf and turf recipes, which are enjoyed by those who love to eat meat, protein-heavy plates are balanced with vegetables and the presentations are enriched with sauces.
Seafood can be squid, lobster, shrimp or scallops. Usually, shrimp and tenderloin are combined as a combination. Surf and turf, a protein-rich meal, is both nutritious, stylish and delicious.
It is especially known for making invitation tables and luxury restaurants. Surf and turf has no fixed recipe. Different components can be used according to the request of the person who prepared it. Products can be cooked on the grill, in the oven, in a pan or boiled.
In Australia and England, surf & turf presentation is made under the name of reef and beef.
The meaning of the popular food presentation surf and turf is “seafood and red meat”. The word surf is the name given to the seafood category, especially lobster and shrimp. Turf word includes the red meat group.
The history of this trend dates back to the 1960s. This form of presentation, which was designed as a nutritious and satisfying meal plate for the middle class in America at that time, is now being offered as a chef's plate even in luxury restaurants.
Things to Consider in Surf and Turf Making
For surf and turf production, you need to choose products that are compatible with each other. At the top of these are shrimp and tenderloin.
You can choose crab, scallops, lobster from seafood, and tenderloin and steak from red meat.
To avoid the risk of cross-contamination, never mix seafood and red meat together before cooking.
You can make it more delicious by cooking the red meat in a way that it is low-medium and the seafood is very soft.
You should use marination sauce that will suit red meat and seafood very well.
Take care to keep meat and seafood in marination sauce for 2-4 hours.
Start the meal by cooking the red meat. Red meat takes longer to cook than seafood.
After taking red meat and seafood on the serving plate, you can increase the flavor with boiled vegetables and garnishes.
How to Surf and Turf?
Materials;
4 beef tenderloins
4 jumbo shrimp
16 shiitake mushrooms
4 foie gras
2 tablespoons of beets
4 clams
2 tablespoons of pumpkin
2 spoonful butter
2 tablespoons of mashed potatoes
Black pepper
Salt
For the tempura sauce:
4 tablespoons of flour
2 egg whites
1 glass of water Milk
Fabrication:
First, salt the meat and grill it.
Cut the pumpkin and beets into cubes and sauté them in butter.
Cook foie gras in a different pan.
Fry the mushrooms in the pan.
Put the sauce ingredients in a bowl and mix.
Dip the scallops and shrimp in tempura sauce. Then cook in oil.
Put the beef tenderloin on the serving plate. Place mushrooms and foie gras on it.
Add the cooked shrimp and scallops next to the tenderloin.
Finally, serve with mashed potatoes and sautéed vegetables.
This recipe is given for making an example surf and turf. You can change the ingredients according to your own taste.
Mexican Street Food Mince Taco
There is a reality in the world called street delicacies. The delicious street food of each country attracts a lot of attention.
Today is Mexico!
Mexican; It is among the favorite countries of tourists with its festivals, bullfights, sports activities, cultural events and plenty of spicy cuisine.
Mexican cuisine is one of the indispensable tastes of the streets with its different tastes. Taco is just one of the street delicacies that you will encounter frequently on the streets of Mexico and that you should definitely try.
Taco has become a traditional flavor that has been around for centuries.
Taco, one of the most loved Mexican cuisine, is actually a recipe that can be prepared in many different ways. Although it is usually served with a lot of spicy, tomato and minced meat stuffing and various vegetables between crispy fried bread, it can be prepared with different fillings and different breads.
Generally, chicken, red meat and vegetables are used in the interior.
Mince Taco Ingredients
4 tortillas
Olive oil
Ingredients for Minced Ham
2 tablespoons of olive oil
1 large onion
300 gr. mince
Salt
Black pepper
1 teaspoon cajun seasoning
2 tablespoons of ketchup
1 teaspoon ground garlic
5-6 pickled gherkins
1 tomato
3 tablespoons of boiled corn
1 teaspoon of granulated sugar
Salt
Black pepper
Ingredients for Top
1 handful of melted cheese – grater
1 handful of cheddar cheese – grated
2 spring onions
Cut the tortillas using a 10 cm circle.
There will be 8 tacos in total.
With the help of a brush, grease one side with olive oil.
Then, place it on your oven wire with the oily parts coming out.
Bake in a preheated oven at 200 degrees for 10-15 minutes.
For the minced mortar;
Take your pan on the stove and heat it.
Add olive oil and finely chopped onion and sauté until soft.
Add ground beef, salt and pepper and start cooking by crushing.
Add the Cajun seasoning, ketchup and ground garlic and mix.
Add small diced pickles, diced tomatoes, boiled corn and granulated sugar and mix.
Turn off the stove.
To combine;
Arrange the baked and crispy tortillas in your square glass baking dish.
Divide the minced meat mixture into the lavash.
Add cheddar, grated cheddar cheese and finely chopped spring onions and bake in a preheated oven at 180 degrees for 5-6 minutes.
Tricks:
You should make sure that all the ingredients you chop are of equal size and not too big.
If you're having trouble finding taco bread, you can easily find and use 10 cm tortillas.
You can increase the spices you will use in it and flavor it with the spices you desire.
It is beneficial to have your minced meat with little or medium fat. The oil should not flow too much and should not spoil the image.
You can sweeten the tacos by applying sauces such as sour cream and salsa sauce.
You can flavor it even more with grated cheddar cheese on it.
French Dessert :MİLLE FEUİLLE
French cuisine is one of the most loved cuisines in the world with its different flavors.
The wide range of French Cuisine inspires other cuisines around the world.
If you are asked what comes to your mind about French Cuisine, I can say many food names that come to mind without thinking.
The first thing that comes to mind in soups is French soup,
Another famous dish is Ratatouille.
This dish is among the indispensables of French cuisine. It is made from tomatoes, onions, zucchini, eggplant, peppers, carrots and thyme, basil, rosemary, black pepper and olive oil. It is among the favorites with its finely and evenly chopped colored appearance and its very light weight.
Souffle was the first thing that came to my mind in desserts, I think because it is my favourite, but the recipe I want to share today is another French classic, MİLLE FEUİLLE...
It is a classic French cake known as millfoglie in Italian. Both names mean "a thousand leaves" due to the cake's appearance of multiple layers of fluffy, buttery pastry. Mille-feuille is an extraordinarily appealing blend of flavors and textures; it is rich and light, flaky and creamy at the same time. Although it is not very sweet, it will satisfy your sweet cravings at tea time or while drinking coffee.
Like a Napoleon who traditionally uses almond cream, the mille-feuille consists of layers of crispy puff pastry topped with rich custard pastry cream.
These delicate pastries are a stunning addition to any table. Light and airy puff pastry is the perfect accompaniment to that rich creamy pastry cream.
Of course, puff dough, which is perfect when prepared at home, can be tastier.
But I don't think that much effort is needed. It is such a simple dessert that it can be made anytime when you buy the oily puff dough that is sold ready in the markets. The only problem is some time, as there are factors such as cooking and cooling.
HOW TO MAKE A MİLLE FEUİLLE?
Open the vanilla pod with a knife, then use a spoon to remove the seeds. Add the milk and vanilla seeds to a medium saucepan and place over medium-high heat. Give it a whisk to break up and boil the seed clumps, then remove from heat and set aside.
Whisk the sugar and cornstarch in a large bowl, then add the egg yolks and whisk until smooth and pale yellow.
Temper the mixture by drizzling over about 1/4 cup of hot milk while whisking. Whisk in the remaining milk, then strain back into the saucepan and place over medium heat.
Whisk through the heat until it thickens and foams, then remove from the heat and stir in the butter. Transfer to a bowl and cover with thin plastic wrap. Refrigerate for about two hours.
On a lightly floured surface, gently roll out the puff pastry into a long rectangle the thickness of a thin piece of cardboard.
Cut the dough into three equal parts with a sharp knife.
Transfer the dough to a baking tray (or pans) lined with greaseproof paper and pierce all over the dough with a fork.
Cover the dough with another piece of parchment paper and place a baking sheet or tart weights on top to reduce the weight of the dough as it bakes.
Bake in a 200-degree oven for 4-5 minutes without fully browning.
The weights and the top layer of the parchment paper tray can be removed during the last 5 minutes of baking to help the dough crisp up.
Combine Mille-Feuille:
Start squeezing the pastry cream between the layers of puff pastry and place one of the dough pieces on top.
3 layer cake ideal
It's up to you to decorate later.
In the original, royal icing is made.

Two Delicious Bowl Recipes for Summer
One of the trends of recent years, bowl consists of the combination of all meals in one bowl. The bowl, which is a favorite of those who want to eat healthy and exercise, originally came from Asian cuisine, but it met with Western cuisine with immigration.
A name we come across often is "smoothie bowl". It is formed by the combination of fruits, nuts and healthy burners. It turns into one of the most indispensable tastes of fast breakfasts and healthy snacks. It destroys the perception of healthy means boring, with its colorful appearance and wonderful taste.
With easy-to-prepare and practical smoothie bowl varieties, you can make all your meals more enjoyable and delicious, from breakfast to dinner.
Smoothie, which is an ideal option for taste lovers who like to live in the moment and whose time is valuable, is indispensable especially on hot summer days. Smoothies, which provide a fresh aroma with varieties suitable for every taste, turn your meals into a feast with their colorful appearance.
Consumed both for breakfast and other meals, bowl has different varieties. 'Smoothie bowl' for breakfast, 'buddha bowl' for other meals and 'poke bowl' prepared with seafood are the most popular varieties.
Standing out with its delicious taste, satisfying content and lightness, smoothie bowl recipes are an alternative option for those who want to share their happiness with their practical and easy preparation.
Today, not one, but two recipes!
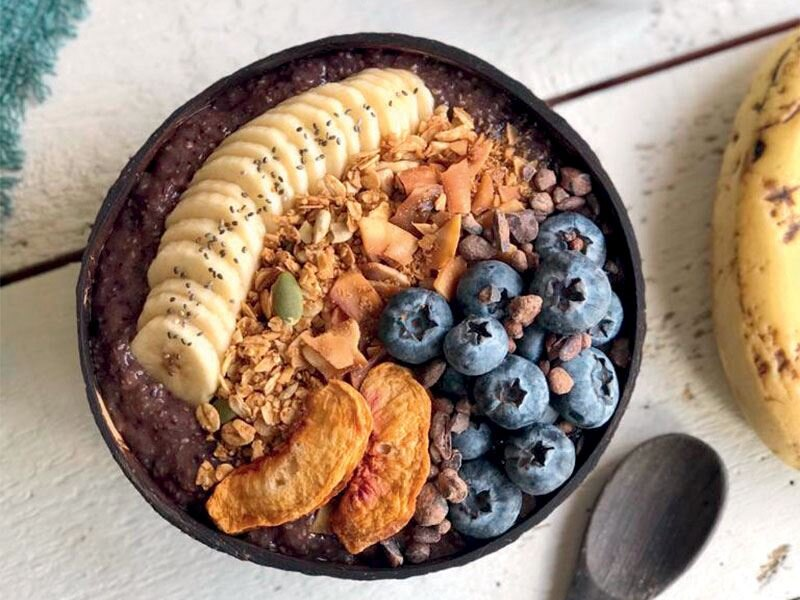
1. Recipe:
100 g of blueberries
1 small banana
1 cup of coconut milk
2 tablespoons of chia seeds
1 teaspoon of Public Powder
1 teaspoon of organic ground cinnamon
For the above:
Banana, chia, granola, organic caramel coconut chips, peach chips, organic cane sugar coated cocoa chips, blueberries
Add the ingredients in the order above and pass them through the blender.
In this way, the consistency becomes thicker, but if you wish, you can keep it in the refrigerator and consume it when it reaches a thicker consistency.
Then take the pudding into a bowl and decorate it as you wish.
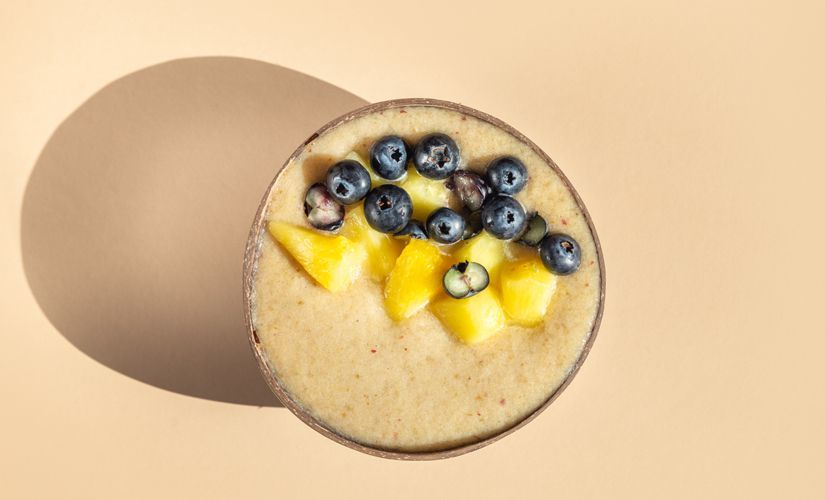
2. Recipe:
1 and a half slices of pineapple
half a banana
4 tablespoons of yogurt
1 teaspoon cinnamon
1 teaspoon turmeric
1 teaspoon ginger
half slice of pineapple
1 tablespoon of chia seeds
3-4 chopped walnuts
4-5 red forest fruits
Transfer all the ingredients to the blender or rondo, mix for a few minutes to create a viscous mixture. Garnish this mix with finely chopped pineapple, chia seeds, walnuts and raspberries as you wish. Here is your pineapple Smoothie Bowl that you will enjoy is waiting for you!
For those who are in search of a light and healthy meal, do not waste time trying these beautiful Smoothie Bowl recipes that can be consumed at every meal and impress with their appearance.
Enjoy your meal
Italian Dessert: Panna Cotta
Panna cotta is the kind of dessert recipe that looks complicated but is actually so easy that you can make the base in less than 30 minutes.
pannacotta; A light Italian dessert made with very little granulated sugar, containing no carbohydrate group products, and flavored with vanilla beans. The milky dessert, which means "cooked cream" and has existed since the discovery of cream, takes its consistency from leaf gelatin and its calories from cream.
Panna cotta is a very simple pudding made from milk that has been thickened with gelatin. It originates in Italy and its name literally means "cooked cream", as early versions were sometimes made of thick cream thickened with fishbones.
Unlike creme brulee, this simple, elegant won't cook even in a freshwater bath—all you have to do is chill the mixture until it freezes and has a creamy, slightly rocking texture. Whether topped with fresh fruit or sweet fruit sauce, it's the perfect instant dessert to finish off a low-stress dinner party.
Panna cotta means "cooked cream" in Italian, and that's essentially the base—heated heavy cream (usually a little half-and-half or full-fat) mixed with gelatin powder and flavored with vanilla extract or vanilla bean paste. The mixture is then poured into ramekins or small molds and cooled. Unflavored gelatin, which holds everything together and gives the dessert its smooth texture, is easy to find in any supermarket.
Flavored with a sweet taste of vanilla and milk, panna cotta is remarkably smooth and creamy, melts in the mouth, leaving no trace of grit or clumping.
You can eat it straight from a cup, but it's usually unmoulded on a plate and drizzled with sweet sauce and garnished with fruit. Best of all, you only need a handful of basic supplies to make it.
So, how is panna cotta made? If your ingredients are ready, we can move on to the Italian panna cotta recipe.
1 envelope unflavored gelatin (about 1 tablespoon)
2 tablespoons of cold water
2 cups heavy cream
1 cup half and half
⅓ cup sugar
1½ teaspoons vanilla extract
In a very small saucepan, sprinkle gelatin over the water and let it sit for about 1 minute to soften. Heat the gelatin mixture over low heat until the gelatin melts and remove the pan from the heat.
In a large saucepan, bring the cream, half-and-half and sugar to a boil over medium-high heat. Remove the pan from the heat and stir in the gelatin mixture and vanilla. Divide the cream mixture into eight ½-cup ramekin and cool to room temperature. Refrigerate for at least 4 hours or overnight with the containers closed.
Dip one at a time into a bowl of hot water for 3 seconds. Run a thin knife around the edge of each mold and invert the mold in the center of a small plate.
Note: In the original recipe of panna cotta dessert, which is made using plenty of cream and milk, gelatin is used as a thickener. Although starch is used to thicken some recipes, we recommend that you stick to the original. Therefore, you should definitely prepare panna cotta recipes with gelatin.
How to take perfect food photos
Undoubtedly, there are food sites at the top of the most frequently visited sites.
Cooking is so easy now because all the information is now at your fingertips.
In the past, we used food magazines and cookbooks. In fact, I mostly followed the food columnists in the newspaper. I used to cut out the recipes I read in the newspaper and paste them on my fridge.
Now I see how quickly we can access everything we want.
Everyone is a cook :)
So now the photo shoot..
So, how are the articles written on these food sites we visit?
When we photograph the food we cook at home, we cannot get the image we want.
So, how are those appetizingly perfect dinner plates photographed?
When you say what is food photography, we can say that it is a shooting technique that consists of the art branch called still life or still life and photography.
The purpose of photographing food is to photograph the food in a more delicious and realistic way than it is. No matter what photo we take, there is a natural effect in the photo.
Sunlight is the best light source for a photograph that can be photographed, looked at or even read. In addition to creating a very natural effect in daylight food photography, it is also inexpensive…
The use of light in food photography is very diverse. In compositions prepared by looking at daylight, lighting your meals in this direction will make the photograph more professional.
If you do not have any light equipment; We recommend that you direct the sunlight coming from the window to your food with the help of your wall or another reflector (or a white cloth). If you use light equipment in your shots, you should pay attention to their position. The lights to be directed from the side of the food to be shot, behind it or behind it at 45 degrees will ensure that you illuminate your composition correctly.
Before we forget, don't use flash in any shot!
Contrary to popular belief, the best photos are not taken with the most expensive cameras or the latest mobile phones. Device quality contributes a lot to photo quality, but the best photos are taken in the best light.
Unlike many photography disciplines, when photographing food, side light is often used. In other words, the window to be used as a light source should be on the side and, if possible, on the left. Each photograph taken is read by the person looking at the photograph, like a text or a book. Since the texts are read from left to right, using the light from the left makes the photo more readable.
Knowing what kind of material the object you are going to photograph is, what it consists of and how it will appear under what conditions keeps you one step ahead.
Nobody knows the food you cook better than you, but if you are a photographer who only shoots the food that comes to your set, your job can be a bit difficult. First of all, you should learn about the food you are going to shoot. Knowing how long it loses its fresh appearance, with which objects it will become more prominent, in short, knowing the chemistry of the food will take your photos to a whole new dimension.
Everything is ok. Our light, our funds, our composition are ready. Our food is fresh and waiting to be photographed. At this stage, despite all these preparations, is it possible to shoot in the automatic mode of the camera or not?
In manual mode, after color adjustments suitable for the composition, we can press the shutter button with either single or burst adjustments.

Refreshing Melon Sorbet
According to some, it is the best friend of appetizer tables, according to others, it is the most refreshing after-dinner table.
What is this fruit, of course, melon.
An ice-cold melon recipe for those who are overwhelmed by the heat. Those who try may be addicted, attention!
Ice cream is the first thing anyone who needs to cool down in the summer is looking for. It's actually a lot of fun to do. But there is another flavor that can replace ice cream, which is beautiful. You guessed it right, our topic is sorbet
So what is sorbet?
Sorbet with a short description; It is the name given to a frozen dessert made with fruit, fruit puree, water and sugar without dairy products such as milk and cream.
The main difference between ice cream and sorbet is that ice cream contains milk and dairy products.
Sorbet can be made with all fruits, but not with the same formula and technique for all fruits.
When making sorbet, first of all, the total sugar ratio of the sorbet should be decided. Then, the sugar content of the fruit is deducted from the total sugar ratio, and thus the amount of sugar that should be added to the sorbet is determined. For a sorbet with an ideal texture and consistency, sugar should be cooked with some water and turned into syrup, and then mixed with the fruit product using a mixer. An important point to remember is that no matter which fruit we make sorbet, some lemon juice must be added to it. How much this will be can be decided by looking at the taste. The reason for adding lemon juice is to bring the taste of the fruit to the fore even more.
Sorbet can be made from any kind of fruit. The important point here is that since the sugar content of each fruit is different, the sugar to be added to the sorbet should be balanced accordingly. Therefore, the sugar ratio of the fruit to be sorbeted should be known very well. In addition, adding a little lemon juice to each fruit sorbet is another flavor-enhancing trick. As the acidity increases, the taste of the fruit sorbet comes to the fore even more. While preparing the sorbet, ice crystals form, the smaller these ice crystals are, the more successful the sorbet will be.
Now here's the recipe:
Ingredients for Melon Sorbet Recipe
1.5 kilograms of melon
1 glass of water
juice of 1 lemon
How to Make Melon Sorbet Recipe?
Cut the melon in half. Clean the cores.
Peel the skins of the melons that you have thoroughly cleaned the seeds. Be careful not to get the green parts.
Slice the melons into small pieces.
Put it in the blender and puree your melons.
When it becomes puree, add water and lemon juice and mix.
If you have an ice cream machine; Process for 10 minutes on medium speed until the mixture thickens. Place the mixture in a medium bowl, keep it in the freezer for 24 hours and serve.
If you do not have an ice cream machine; Put the sorbet in a glass bowl. Take it out 1 hour apart, mix it quickly and place it back in the freezer.
After repeating this process 3 times, leave it to listen for 12 hours. You can serve when it gets the consistency of sorbet.
Enjoy your meal
What is emotional eating?
Emotional eating is a form of eating that is dependent on the hunger felt even though we are physiologically full, and often occurs with an irresistible desire for a particular food. There is a strong emotional hunger behind our emotional eating behavior, and the stresses caused by our emotions lie behind it.
On the basis of emotional hunger, feelings of loneliness, anger, aimlessness, anxiety, failure, guilt, fear and inadequacy are prioritized. In addition, the stress of daily life can also be effective.
Why do we feel the need to eat when we experience negative emotions?
The thought of "eating makes you relax" provides physical and emotional relief from the moment we are born, just like we are satiated in our mother's lap. And it continues for life. If, as children, we were soothed by food every time we whine, idle, or cause problems, our bond of emotional relief is strengthened by this meal. If the methods of coping with emotions are not known, eating seems to be the best solution, as sugar and carbohydrates increase the release of hormones that provide positive emotions in the brain.
What are the differences between emotional hunger and physical hunger?
Emotional hunger comes on suddenly, immediately creating a feeling of eating something. You will feel the physical hunger gradually, first your stomach will start to make noises and you can wait for this hunger. Emotional hunger is more related to certain foods (chips, chocolate, pizza), while any choice for your physical hunger will feel positive to you. When there is emotional hunger, even if your stomach is full, your desire to eat continues. In physical hunger, the hunger disappears as soon as your stomach is full. After emotional hunger; You feel feelings of sadness, guilt, powerlessness, and shame. When you are physically hungry, you do not feel bad for eating.
How should I recognize my emotional hunger behavior?
Having too much appetite and being insatiable brings with it the behavior of eating until you explode. Our aim is to fill the void, but this void is not in the stomach. Emotional hunger may be present if we often prefer to eat alone and experience feelings of guilt and punishment after the eating behavior.
Have you ever noticed that you eat for your feelings, not your stomach?
According to a study, people were asked to keep a special diary by asking how they felt when they ate, and according to these results, it was seen that they preferred only certain types of food in certain emotional states. In this case, it can be said that the factor that determines our eating behavior is our emotional state.
How Can We Cope With Emotional Hunger?
Watch your tendencies just like a detective. The best way to change a habit is awareness. Identify what you want to eat in which emotional state. Take control of your emotions. It will be easier to control your emotions if you know which emotional state is pushing you to eat which food. Break the link between emotional state and the food consumed by not consuming the food. While eating a large pizza every time you are unhappy, weaken this bond by not eating pizza in your next unhappiness.
Choose healthy alternatives and exercise will not only help you lose weight but also help regulate your negative emotions. In an emotional hunger crisis, first assess whether you are really hungry and how hungry you are. You can rate your hunger level on a scale of 1-10, with 10 indicating that you are incredibly hungry. Then determine when you last ate.
If it's longer than 3-4 hours, it could be physical starvation. In the current crisis, the most important thing is to understand the emotion behind emotional hunger. “It's only been half an hour since I've eaten and I'm not supposed to be hungry; so what do i need? What am I feeling?” Asking can help us understand ourselves and notice our emotions.
If we are angry, it will be much better to understand what we are angry about, and if we are bored, to think about what we want to do. Trying to lose weight with uncontrolled diets will not benefit in the long run as long as you ignore your emotions. Seeing your emotions and accepting them will increase control. Despite everything, allow yourself to get away with it once in a while, eat something when you are alone with a feeling that is difficult to handle once in a while. Most importantly, give yourself opportunities to recognize your feelings.
Sometimes it's best to just allow ourselves to experience that feeling.
If you think that you cannot cope with emotional hunger crises despite your experiences, you can get professional support.
Refreshing Peach Iced Green Tea Recipe
While we mourn the fact that summer never came, the sun showed its face so beautifully that we are now looking for a shade to take shelter :) the sun is starting to warm us up to our bones. Well, we will see more sunny days
Of course, our eating and drinking habits vary according to the season.
I am looking for a variety of drinks to get rid of the heat of the heat, to relax and to help you feel like you are jumping into cold waters.
Even though a hot brewed tea has a special place, it is more in the foreground with its refreshing feature on these hot days.
A fruity and healthy option for those who do not want to consume soda. Although it is easily found in the markets, the taste of cold tea prepared with fresh fruits at home is completely different!
It's easier than lemonade and at least as delicious as it is, and it's a perfect way to evaluate the tea left over from breakfast.
Of course, making a difference in our cuisine, we make cold tea with peach flavor and green tea.
As I always say, creativity is in your hands.
You can create your own cold tea recipe right away by combining tea and your favorite fruit. Once you determine your favorite recipe, you can adapt it to the ingredients you have at home at the moment. If you want, you can add ice to consume your cold tea without waiting, or you can consume it by resting it in the refrigerator for a while.
Along with your meals, at tea times, at picnics, along with your desserts, you can prepare cold teas that adapt to every meal the night before you consume them and serve them whenever you want.
You can prepare your cold tea with apricot, lemon, strawberry, pineapple, kiwi or enrich its aroma with more than one fruit. We have prepared a very delicious peach iced tea recipe using peach, one of the sweetest of summer fruits! We can add freshness to its taste by adding fresh mint to our peach iced tea recipe.
You can increase the natural sugar rate by using ripe peaches in the peach iced tea recipe. At the same time, you can use peaches, which are difficult to eat because they soften, while preparing peach iced tea.
If your fruits and teas are ready, let's move on to the recipe for this drink:
Materials
2 cups brewed plain green tea
2 peaches
2 sprigs of mint
1 bowl of ice
1 teaspoon of honey
Preparation of:
Steep the green tea for 5 minutes and let it cool. If you want to peel the peaches and pass them through, you can sweeten them with 1 teaspoon of honey.
You can add sugar at this stage. This is entirely up to your preference. If you want it to be healthier, honey will suffice. Mix the cooled green tea with the mashed peach and sweeten it with fresh mint leaves. Serve chilled in the refrigerator for at least two to three hours. I preferably make it the night before.
Serve with lots of ice.
A recipe that will refresh you, Bon appetit in advance..
If you do not have a large garden, you can grow vegetables in pots.
Living in a house with a garden is everyone's dream.
Those who have a garden full of organic healthy vegetables and fruits are very lucky.
A peaceful nature, a table adorned with fruits and vegetables you produce
It would be easier for us to grow vegetables if we had large gardens in our homes.
But if you have a balcony, if it sees some sun and is suitable for growing plants, we can create our own little garden there and grow our vegetables.
If growing your own vegetables and herbs sounds appealing but you don't have a lot of space, pots and containers are viable alternatives to the traditional kitchen plot. If your vegetable garden is limited to scant or unsuitable space, you may want to consider growing fresh, nutritious, homegrown vegetables in containers.
A window sill, patio or balcony will provide enough space for a productive mini garden. Also, gardening in pots is a surefire way to introduce kids to vegetable gardening.
The advantages of growing your own vegetables at home can be that grown produce tastes better than store-bought and is often more nutritious, while vegetables grown on your doorstep are more readily available.
Almost any vegetable grown in a typical backyard will also do well as a container grown plant. By choosing the right variety of vegetables and following some basic tips, you can be well on your way to growing and harvesting your own farm fresh food at home.
You must create a suitable environment for growing vegetables and fruits. You should choose an environment that sees the sun and protects the plants from the winter cold and bad weather conditions. If you wish, you can create a suitable environment by covering your balcony with glass.
If the balcony gets sun partially or at certain times, you should adjust the arrangement of the plants accordingly. In addition, damp areas are not suitable for fruits and vegetables. For this reason, make sure that the area you will use as a garden in your home is both ventilated and has the appropriate humidity level.
For example, we can grow vegetables such as tomatoes, cucumbers and peppers in pots quite easily.
Tomatoes are one of the easiest vegetables to grow at home. After collecting the seeds of the tomatoes, you need to keep them in a damp cloth. If it is difficult to collect seeds, you can cut the tomatoes into round slices and bury them directly in the soil. You can then plant it in 'peat' soil, an organic soil, and water it regularly and wait for it to grow.
You can plant pepper seeds with seeds, just like tomatoes, but planting them especially in spring gives you more pepper. It is also important that the soil is warm when planting the seeds! When we observe germination, we need to protect it from the sun's rays.
Growing cucumbers is also quite easy. We sow the seeds 2-3 in each pot and then just wait for them to germinate. We do the irrigation in the form of sprinkling. Now we can consume our fresh cucumbers as we wish!
We prefer peat soil for onions as well as tomatoes. You can grow the onion in a plastic bottle or in a pot. We plant the shallots in the soil with their tips out, and then we continue to irrigate so that the soil remains moist. We should be careful that it is in a cool environment that receives the sun!
Healthy Alternatives to Fast Food
Let's admit it, almost all of us have become addicted to ready-to-eat foods.
Although it is unhealthy, we consume it abundantly, sometimes for convenience and sometimes just because we are delicious.
Fast food can save our lives especially when we don't have time.
As adults, we criticize the children the most, but I think this is the biggest mistake made because the eating habits start by taking the family as an example and we push our children to make mistakes.
Fast food type foods generally contain a very high amount of calories to provide you with energy in a short time. The inevitable result of consuming such calorie-dense foods frequently is weight gain. Fast food returns to you first as weight and unwanted weight, and in the long term with more difficult diseases such as obesity.
Fast food, or fast food, is becoming an established culture.
These ready-to-eat foods and beverages, which are easy and delicious to eat, can cause various health problems due to low nutritional value, high calorie content, and almost no pulp.
These foods, which already have a high energy content, also cause them to be eaten more in quantity when consumed quickly. Then come the weights...
Hamburger, pizza and crispy chicken, which entered our lives with the fast food chain years ago, are very popular today. Although we constantly talk about the harms of fast food that we consume without saying big or small, in fact, we get the damage from outside.
At least as an alternative to these meals, we can try to make it at home in a healthy way.
**Now I will give examples with a few simple recipes**
-Crispy Chicken Legs Ingredients:
-12 pieces of chicken thigh meat
-1.5- 2 cups corn chips
-4 tablespoons of olive oil
-1 tablespoon of honey
-Salt
-Red powdered pepper
Preparation of Crispy Chicken Legs
Take the corn chips in a large bowl and mash with a meat grinder to obtain fine pieces. Mix olive oil and honey in a separate bowl. Dip the chicken thighs you have washed first in olive oil with honey and then in corn chips.
Place the chicken meat with chips on a baking tray lined with greaseproof paper.
Bake in a preheated oven at 200 degrees for 35-40 minutes. Serve hot.
**Or a perfect pizza that you will enjoy;**
-For the pizza dough:
-1.5 cups of flour
-half a glass of water
-1 teaspoon of fresh yeast
-1 teaspoon of granulated sugar
-1 teaspoon of salt
-2 tablespoons of olive oil
**For the tomato sauce:**
-1 tomato
-2 sprigs of fresh basil
-1 sprig of fresh thyme
-half clove of garlic
-1 pinch of salt
-1 pinch of black pepper
**For the above:**
-Half a glass of grated cheese
-10-11 slices of sausage
-4-5 slices of sausage
-4-5 slices of ham
-4-5 shallots
-10-12 pieces of mozzarella cheese or ball cheese
**Preparation of pizza with plenty of ingredients:**
For the dough, dissolve the yeast in warm water. Sift the flour into a wide bowl. Add salt and powdered sugar and mix. Open the middle like a pool. Add olive oil and knead until you get a smooth dough. Cover the dough with a damp cloth and let it rest in the refrigerator for two hours.
Put all the ingredients for the tomato sauce in the food processor until you get a smooth sauce. Take the rested dough on a floured counter and open it. Spread the tomato sauce you prepared on it.
Sprinkle the grated tongue cheese over the tomato sauce. Add the sausage, sausage, ham sliced into strips, shallots cut in half and mozzarella cheese. Bake in a preheated 180 degree oven for 35-40 minutes. Slice and serve hot.
Coffee Americano
Let's take coffee lovers here..
I open my eyes in the morning and the first thing I do is brew coffee. Working in the Office My coffee cup is always full and on my desk. And of course, when I come home from work in the evening, I try to forget the tiredness of the day with a cup of coffee.
It's not over, it doesn't matter business meetings, family finds, my farovi drink is usually Americano.
Americano coffee, which is one of the most trendy drinks in cafes, is the coffee most preferred by those who count calories. There is a lot of misinformation about the americano, which has only 15 calories in a cup.
Although it is overshadowed by other popular and extra flavored drinks such as Mocha, Latte and Frappuccino, it is among the first choices of those who like to drink coffee in a plain and thin way and those who prefer to consume coffee without calories.
During the Second World War, American soldiers in Italy used to drink Italian espresso with water to meet their daily caffeine needs. Because espressos in Italy were too strong for Americans.
Italian coffee shops began to serve espresso softened by adding water under the name of americano to turn this habit of American soldiers into profit. Over time, Americano-type coffee became increasingly popular and began to spread in Europe. Soldiers returning to their country also popularized americano coffee in North America, and one of the world's favorite coffee types was born.
Americano coffee, obtained by mixing espresso and hot water, is one of the easiest coffees you can prepare at home. There are some tricks to consider when preparing an Americano with equal proportions of water and espresso.
There are two ingredients you need to prepare Americano coffee; espresso and boiling water. Before preparing your coffee, start from your cup. Put boiling water in your cup and let it heat up. Coffee put into a cold cup may lose some of its aroma and taste. Therefore, your first step when preparing coffee should always be to warm your cup.
*****Contents:*****
20-25 ml of espresso
Hot water (recommended preferably with a steam wand rather than any kettle)
Preparation of:
For the Americano recipe, you must first obtain espresso. Obtain 25-30 ml of espresso by flowing water at 90°C temperature from 7gr of ground coffee for 35 seconds with 9 bar (atmosphere) pressure.
Heat the drinking water with the heating rod of your machine or by using a different source (such as a kettle).
Add the heated water to the espresso with a maximum of 100ml.
Your Americano coffee is ready.
Do not add hot water to the espresso while it is boiling, make sure that the water you will use is rested for one or two minutes after boiling.
You can ask the person who wants to drink an Americano about the amount of hot water to be added to the espresso, and leave the amount adjustment to the drinker.
It is recommended to add a maximum of 100ml of hot water to the single espresso.
Natural apple cider vinegar at home
If you have too many apples in your house, what is the first thing that comes to mind, of course, an apple pie :)
We ate the pies and gained weight. Well, have you ever thought that we can use apples to lose weight again?
*When I say apples, of course with apple cider vinegar :)*
Apple cider vinegar, which has been used in different civilizations for centuries with its healing, maintains its popularity today. Vinegar, which is a solution to many problems in health and care fields, is also preferred to provide hygiene and add flavor to meals. The benefits of apple cider vinegar are endless.
It has numerous benefits, many of which are backed by scientific evidence. Among the benefits of apple cider vinegar; There are important benefits such as accelerating weight loss, lowering cholesterol, fighting infections, controlling blood sugar and relieving other symptoms of diabetes.
**Between the lines**
Apple cider vinegar is the most popular type of vinegar preferred for natural health. It has numerous benefits, many of which are backed by scientific evidence. Among the benefits of apple cider vinegar; There are important benefits such as accelerating weight loss, lowering cholesterol, fighting infections, controlling blood sugar and relieving other symptoms of diabetes.
Apple cider vinegar contains only three calories per tablespoon. It does not have many vitamins or minerals in it. There is only a small amount of potassium. A quality apple cider vinegar also contains some amino acids and antioxidant substances. apple cider vinegar; It has a long history as a traditional home remedy used in different areas such as curing sore throat, reducing fever and cleaning wounds.
I saw that the excess apples at home were starting to rot, and I thought of making apple cider vinegar.
Since I always know the faults of apple cider vinegar, I use it often, but of course, home made is better.
4.5 liters of drinking water
2 kilos of red apples
6 tablespoons of honey
**First,** rinse the apples with plenty of water. Then cut it in half and remove the seeds.
Chop the apples into small pieces. Add the chopped apples into the pre-cleaned large glass jars.
Add drinking water to the jars, leaving some space.
Add 2 tablespoons of honey into each jar and mix with a wooden spoon.
Cover the jars with a clean cotton cheesecloth. Make sure it is fixed by putting rubber on the edges.
Keep the jars you prepared in a dark and sunless environment for approximately 45 days (1 and a half months).
Mix your vinegar with a wooden spoon every other day in the first week and once a week in the following days.
Mix it intermittently until all of the apples have settled to the bottom.
As time progresses, you will see that the apple slices that rise to the top rot and flies form around the vinegar.
When these symptoms appear, the vinegar has begun to ferment. In this case, filter the vinegar and discard the apple pulp.
Put the filtered vinegar back into the glass jar and add the salt and the remaining honey on it. After mixing with a wooden spoon, close the lid and store in a cool place.
A white circle will form on the vinegar. This is called the mother of vinegar. Take the mother of vinegar into another bowl with a wooden spoon and strain the vinegar again.
You can start using your vinegar by pouring it into jars.
Organic Life 2
I wanted to continue the topic I shared earlier.
I also support Organic life, but of course, like everyone else, I was complaining about the pocket-friendly prices. But as a result of my research, I realized that it was actually the value it deserved.
Today, those who want to eat healthy, regardless of their costs, prefer organic foods, which is extremely important in terms of certain nutrients. Especially with important components; Consuming organic types of tomatoes, olives, honey and similar products will help to get many vital components.
Yes, purchasing power and economic reasons make us think twice about our wallet and we complain about the prices of organic foods. But in fact, the prices of organic foods are not that expensive. Let's look at the reasons together.
The journey of organic agriculture and organic food begins with its seeds and land areas. Even seeds are used as seeds that adapt to the ecological balance and their production is quite expensive. Everything from the feeds used in feeding the animals to the breeding areas respects the ecological balance. Even the destruction of the water resources used is tried to be prevented, and appropriate irrigation systems are used. The input of genetically modified organisms is not accepted. We can say that this is the first and main effect on the prices of organic foods.
In addition, while producing these foods, chemical drugs etc. manpower is used instead. Instead of lower cost things like chemical regulators, plant growth drugs, hormones, natural warriors (insects, bees, etc.) are used alongside human power. These cause much higher costs.
Instead of the abundance of food, it is tried to obtain quality food. Therefore, little and limited amount of food is obtained. This also affects prices.
Demand is low, market share is low. Of course, the purchasing power of the consumer also comes into play here. But the greater the demand, the lower the price of food will fall in the same direction. The low demand also increases the cost of logistics activities such as packaging and distribution. Therefore, the prices of organic foods are much higher than the prices of other foods.
There are also certification and control dimensions of the job. Fees are also paid for these. In addition, the producer, within the framework of laws and rules, has to turn his soil into a form suitable for the ecological system. This causes yield loss. Because first foods are not sold because they are transition products. The loss rate is serious. Compared to the yield obtained in conventional agriculture, it can experience yield loss between 3-10 years. This situation of the producer is another factor that increases the prices.
In addition, they have a short shelf life as there are no preservatives in foods. They break as expected. The manufacturer, who cannot sell and whose product remains in his hands, has to let his products deteriorate. When the deterioration of the products obtained is added to the production cost, the prices increase.
Considering these situations, we can conclude that the prices of these completely nature-friendly products, which are obtained with labor, are actually not very expensive.
Let's assume that the price of a regular yogurt we buy is 1 unit, while the price of organic yogurt can be 12 units, that is exactly 3 times. But we have plenty of reasons to try to buy less, consume more, and add more organic foods to our basket.
For one thing, there are completely healthy organisms in those yoghurts, cheeses and milk. As with other products, they do not go through long industrial processes and lose their nutritional value. Vegetables and fruits carry all the beauty and flavor of the soil. All the vitamins and minerals our body needs are hidden in them.
Our body balance depends on the balance of the soil. The root cause of many diseases we experience today depends on what we eat and drink. When we eat organically, we do not take the chemicals used in the production of fruits and vegetables. Moreover, we support the work behind it. Supporting these producers also means protecting nature.
So, let's turn to organic foods as much as you can. We know, we have financial obstacles. But the more nature-friendly we are, the more producers we support, the lower the costs and the more widespread organic agriculture will be. Everything is in our hands.
What is organic food and agriculture?
Organic foods have gained immense popularity over the past two decades. Many people think that organic food is safer, healthier and tastier than regular food. Others say it's better for the environment and animal welfare.
Lately, we've been hearing some common phrases. Organic farming, organic nutrition, Organic baby products etc. What is this organic?
Of course, there are also Roaming Chickens, Unfortunately, chickens haven't been able to travel for years :)
Soil, which has been the symbol of fertility for centuries, is one of our most important sources of life. Our life and health are based on the balance of nature and soil. We can breathe and survive with the beauty that comes from them. The slightest harm to them is a harbinger of the changes that will occur in our body. In recent years, these differences in soil have always been on the agenda.
We have added words such as GMO, organic nutrition, natural life to the dictionaries. We met and welcomed foods that were quite foreign to us, such as quinoa, chia seeds, and avocados. Even when buying fruit, vegetables, chicken, eggs and even flour from the market shelves, we tried to buy the most organic and healthy ones. We started to think twice.
So, how did these new concepts enter our lives? What are the differences between organic and natural? Why are foods sold under the name organic so expensive?
In fact, everything started when nature and soil began to be damaged and the ecological balances changed. Afterwards, we frequently used the words "organic agriculture, organic nutrition". Sections where organic foods are sold began to appear on the market shelves.
Televisions, magazines, celebrities… They all told us about the importance of organic life. But for people with an average income, eating organic has always been a pocket-friendly thing. So what was "organic agriculture, organic food"? There are many definitions of this concept, which is actually on our agenda.
According to the definition made by the United States Department of Agriculture (USDA), organic farming; “Organic agriculture is a production system that prohibits or largely avoids the use of synthetic fertilizers, pesticides, growth regulators and animal feed additives.”
In the continuation of the definition, we come across the following phrases: "Organic farming systems are used to cultivate the soil as much as possible and protect its fertility, to provide plant nutrients, to control harmful insects, weeds and diseases, to alter food, plant residues, animal manure, legumes, green manuring, It is based on organic farm residues and biological pest control processes.”
As seen in this definition and all other definitions on organic, the perception of sustainability is one of the most striking points. Over the years, the deterioration of the soil and ecological balance with chemicals and various other factors has also affected sustainability. For this reason, it can be said that organic agriculture is an economically and socially balanced agricultural system that aims to protect the ecological balance in the long term while ensuring sustainability and productivity.
Organic foods are also called foods produced within this system. The most important feature of the foods is that they are grown without the use of any synthetic pesticides or inorganic fertilizers. It is based on feeding animals with organic feeds in an organic environment.
Chicken and Vegetable Wrap Recipe
I hardly had time to breathe this week. Whenever I was at the computer to share a recipe, another job intervened and distracted me. Unfortunately, we can't always be in the same mood. When there was a lot of fuss such as workload, family problems, travel preparations, I stayed away a little.
One day when I got out of my busy work schedule, when I opened the cabinet, there were a few vegetables left in the cabinet. If I had collected them all, I could only make one meal. It was a logical option to combine some chicken and vegetables and make a wrap. And so it happened.
I love recipes like this because they are both savory and delicious.
As I always say, food for me is not just a tool to fill the stomach. A little for the eyes, a little for the palate.
I only care about this order, if only for myself.
It seems that I started the operation to make room in the refrigerator by evaluating the leftover vegetables one by one, as I do before every shopping.
So Try this excellent Wrap Recipe with me.
Ingredients for Vegetable Chicken Wrap – Wrap Recipe
3 pieces boneless chicken thigh
1 tablespoon of soy sauce
3 tablespoons of olive oil
rosemary
salt
black pepper
For sautéed vegetables
1 medium zucchini
1 medium size carrot
1 red bell pepper
2 sweet green peppers or 1 green pepper
1 medium onion
1 clove of garlic
4 tablespoons of olive oil
1 tablespoon of vinegar
salt
Vegetable Chicken Wrap – Wrap Recipe How to Make?
For the vegetable saute, cut the zucchini into 4 parts. With the help of a knife, remove the seeds and chop julienne as in the photo. Peel the carrot and cut into zucchini-sized pieces.
Remove the seeds from the red and green peppers and chop them just like carrots. Cut the onion in half and slice thinly into half moons.
Put the onions and carrots in the pan. Start sautéing by adding olive oil to it. As the onions turn colour, add the vinegar and continue sautéing until they are lightly browned.
Add the peppers on the carrots and saute for a minute.
Finally, add the zucchini and finely chopped garlic and sauté for another 4-5 minutes. When the vegetables are soft, transfer from the pan to the plate.
Slice the chicken into finger thickness. Mix it with salt, pepper and rosemary and put it in the pan with olive oil.
Cook over medium heat, stirring, until it turns brown. Add the onion sauce on it and sauté for 3 more minutes and turn off the stove.
Take the lavash bread on the counter and spread about a third of the vegetable sauté you prepared in the middle. Spread one-third of the chicken you prepared on the vegetables.
Fold the lavash inwards from the right and left as much as a finger and start to roll from the exposed end. Divide the roll you prepared into 2 parts and place it on the serving plate.
Do the same with other wraps, serve with salad or french fries.
Asparagus Recipe: With hollandaise sauce
When I say vegetables, I stop. Because they are all very useful. And I think eating shouldn't be a necessary action just to fill your stomach. This is not in my understanding of food. A balance of carbohydrates, proteins and vitamins is necessary. In this context, I like to try all kinds of vegetables and include them in my kitchen. For example, it was not very good for me to meet avocado. The first time I ate it, I peeled it and put a slice in my mouth and it was like I had bitten fat :)
The taste is something like this, I'm eating it with love right now. But I didn't say goodbye to avocado because I didn't like it. I thought how do I make it loveable, I thought a little bit of sourness would be good, and I tried it with lemon and it wasn't bad. Then I developed it, of course, I made dipsos and added it to salads. It was very good on toast. And my favourite. Spread a sour avocado dip on toast, put poached eggs on top and bite..
Again, I talk too much. Another chatty day for me.. :)
No one should question my love of vegetables! I am writing this article with the slogan
Because today I'm going to talk about Asparagus, a vegetable that I mentioned before, which is exactly in season.
He divides people into two with his tall, thin, lush appearance: "Is this something edible?" those who say and “I eat this like a cracker!” Those who say… Although it may seem like a stomach-friendly and refreshing snack that you can eat or not, it is actually a plant with vision that can exist in every detail of a classic dinner menu.
Wow so cool :)
Asparagus, which is rich in vitamins, minerals and protein, is also a complete vitamin store.
Asparagus, which has a metabolism-regulating effect with its direct consumption, is also considered the solution of many diseases. If you have never consumed asparagus before or if you do not like to consume asparagus directly, you can create a fit and healthy lifestyle by only drinking its water.
Here's a little note.
If you are a strict asparagus consumer or want to present asparagus with different techniques, you are in the right place!
My favorite asparagus recipe; Here you go Asparagus with Hollandez sauce..
Ingredients for Asparagus with Hollandez Sauce
300 grams of fresh asparagus
1 tablespoon finely ground sea salt
For the hollandaise sauce:
2 large egg yolks
100 grams of butter
1 teaspoon white wine vinegar (or 1 tablespoon lemon juice)
1 ice cube (or 2 tablespoons of cold water)
1/2 teaspoon of salt
Remove the skins on the stems of the asparagus, which are especially thick, by pulling them lengthwise with the help of a peeler.
Boil it in boiling water to which you add sea salt for 6-8 minutes, with the thick parts on the bottom. Shock the boiled asparagus by placing it in cold, iced water so that they do not lose their nutritional and color values.
To prepare hollandaise sauce, which is a bit troublesome to make but also delicious; Heat the water in a deep saucepan. You will need this to cook the egg yolks in a bain-marie.
First of all, to obtain plain oil; Take the butter in a small saucepan. Melt the oil over low heat without burning it and not allowing it to foam too much.
Clean the white particles (milk froth) on it with the help of a spoon and take them to a separate place for use. Strain the melted butter and keep it warm.
Place carefully separated egg yolks, white wine vinegar and ice cube in bowl.
Start the mixing process quickly with the help of a whisk and be careful to mix the egg yolks in the same direction.
Place the glass bowl on the water, whose temperature is around 50 degrees in the pot, and continue the whisking process here as well.
The temperature of the bowl should stay around 50 degrees maximum, so try to keep the heat balance by lifting the glass bowl in between. After 2-3 minutes, when the egg yolks become creamy, take the bowl on the kitchen counter.
After waiting for a short time to cool, add the oil you have obtained to the egg yolks by flowing it like a string and continue the mixing process without interruption.
When the sauce is fully creamy, add salt and mix one last time.
Take the boiled and shocked asparagus on a serving plate. Serve with hollandaise sauce on it and add freshly ground black pepper.
A suitable recipe for brunch; Eggs Benedict
Hello my friends;
Due to the laziness of waking up late on weekends, my breakfast time is always in the afternoon. Yesterday was Sunday, I woke up late and thought of a delicious breakfast.
I prepared a delicious breakfast table, but it makes me sad that you think I ate it alone :)
Of course, it was a table prepared for my dear friends.
I've organized a brunch :)
After the word brunch has been used in daily life recently, I seem to hear the questions of what is brunch. For those who don't know, what is brunch?
A word that has its origins in British food culture and that we have used frequently for a long time: brunch. Well, nowadays, brunch, which we hear frequently both around us and in places, is used by the British to express the time between morning and lunch. Of course it's global now.
We can answer it as a kind of late breakfast meal, which has the power to unite morning and lunch.
In England, the home of brunch culture, there are alternatives such as potato chips, eggs, baked beans, mushrooms, pudding and milk tea, including omelettes. In addition to these alternatives, a recipe called 'Eggs Benedict', which originated in the American culture, has become indispensable for British brunches.
So, an eggs benedict recipe from me too..
Ingredients for Eggs Benedict
2 tablespoons finely chopped parsley
4 eggs
2 tablespoons of rice vinegar
1 tablespoon of butter
2 bases
8 pieces of bacon
1 portion of hollandaise sauce
Heat a large skillet over medium low heat. Add bacon strips or Canadian bacon slices. Fry slowly, turning occasionally, until bacon is browned on both sides.
Use tongs or a fork to remove the bacon from the pan, placing it on a paper towel to absorb excess oil.
While the bacon is cooking, fill a large sauce pan with 2/3 of water and bring to a boil, then add the vinegar. Boil it first, then take it to low heat.
Take one egg at a time, break them into a bowl and slide them into the slowly boiling water. When the egg starts to harden, add another one. Remember to remember which egg came first.
Turn off the stove, cover the pan and leave for 4 minutes. Gently lift with a spoon, starting with the first egg.
Start frying the English muffins as soon as all the eggs are in the steaming water. If all the cakes cannot be fried until the eggs are ready, gently remove the eggs from the steaming water and put them in a bowl.
Butter one side of an English muffin to hold it together. Top with two slices of bacon or 1 slice of Canadian bacon. You can cut the bacon to fit the cake if you want.
Put a hard-boiled egg on top of the bacon, then pour some hollandaise. Sprinkle some parsley on top and serve immediately.
***I leave a recipe for those who want to make their own hollendez sauce..***
Melt 10 tablespoons of unsalted butter.
Put 3 egg yolks, a tablespoon of lemon juice, 1/2 teaspoon of salt in a blender, blend for 20-30 seconds on medium to medium speed until the eggs turn pale.
Set the mixer to its lowest setting, slowly adding the hot melted butter while continuing to mix. Taste the salt ratio and add a little more salt or lemon juice if less.
Transfer to a pourable container and place in a warm place on or near the stove.
A refreshing recipe for summer; Hibiscus Tea
Hello friends
These days when we need to get rid of the heat, I came up with an alternative recipe to carbonated drinks.
Tea recipe, but it is a tea that I prefer to consume cold, not hot.
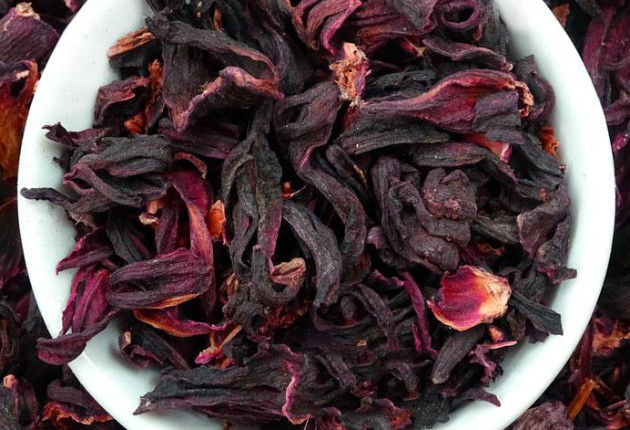
And its name is Hibiscus Tea
First of all, I love the color of this tea.
This is a beautiful plant of the world, whose name you have heard a lot, but you do not know exactly what it is, maybe you have never even heard of it before: Hibiscus!
It is a miracle flavor that you will love when you get to know it, and that you will not want to miss a day from your home when you see its benefits.
It is possible to use it as a refreshing tea, which is consumed in the winter season to protect against winter diseases, and in summer, like me.
Hibiscus is actually a plant full of healing, too many to count behind its beauty.
Hibiskus, which has a distinctive aroma and pungent odor, can be consumed alone or with other herbal teas such as green tea, cinnamon, lemon, linden and sage.
How to brew hibiscus tea?
Materials:
1 pinch of dried hibiscus flowers
1 glass of water
* You can increase the amount of material at the same rate according to the number of people.
How to make hibiscus tea: Boil water and set aside, then add dried hibiscus and let it brew for 10 minutes. Filter and enjoy.
If I talk about the Benefits of Hibiskus according to the information I have obtained;
One of the most impressive and well-known benefits of hibiscus tea is that it helps lower blood pressure. Over time, high blood pressure can put extra strain on the heart and cause it to weaken. Hibiscus tea helps to minimize these effects.
In addition to lowering blood pressure, some studies find that hibiscus tea may help lower blood fat levels, another risk factor for heart disease.
It helps to destroy free radicals in the body. In this way, it can be said that it helps to delay the effects of aging.
Hibiscus tea, which contains a high amount of vitamin C, helps to strengthen the immune system. For this reason, it is consumed a lot as a winter tea.
It contributes to the regular functioning of the digestive system by supporting the increase of bowel movements.
Hibiscus tea slows down the absorption of carbohydrates. Thus, it provides a great deal of balancing of blood sugar. In this way, hibiscus tea helps to lose weight.
It helps to heal diseases such as flu, cold and common cold.
Thanks to the antioxidants it contains, it has effects that increase body resistance. In this way, it helps to protect the body against diseases.
It helps the digestive system to work. It has the effects of reducing problems such as gas pain and indigestion.
Conditions such as menstrual cramps, hormonal disorders, pain and cramps that are common in women can be relieved.
Thanks to its antibacterial feature, it contributes to the internal cleansing of the body and supports the beautification of the skin.
Easy healthy salad prepared in jar
These days when the weather continues to get warmer every day, my appetite is about to turn off. Eating Eating has been a torture for me.
Even eating my favorite hamburger, which I ordered for lunch at the office, I felt nauseous. because such greasy food is not good for me in hot weather.
Of course, as summer came, holiday plans began to appear in my mind.
For this reason, I have to be careful about what I eat :)
I am aware that my meals should now be based on carbohydrates, very protein and vitamins.
My weight is not much, but we women believe that we should definitely go on a diet before wearing that swimsuit :))
Again, I don't know how I managed to bring the subject elsewhere.
If I'm back for dinner.
A super delicious, healthy and practical recipe for those who are bored of eating at school, at work, outside or in the cafeteria, and for those who are on a diet and cannot find what to eat.
The most important thing when preparing this recipe is the jar. Yes Yes, the jar we know. It is enough to keep the mouth tightly closed so that it does not get air.
The dish called salad is a combination of your favorite ingredients according to your taste. As I always say, material choices are up to you. I'm just giving my opinion.
But for this recipe, we have to follow a certain way so that the ingredients are not crushed and mixed with each other.
These:
1- First of all, if we are going to use it on the bottom, we place the boiled legumes or the hard salad ingredients (grated carrots, finely chopped purple cabbage, etc.). We also add our bee sauce here.
2- If vegetables are to be used, they are listed here. If we are not going to use vegetables, we can add colorful salad ingredients such as red capia pepper etc.
3- On this floor, there are materials with high protein value such as cheese etc. If you want, you can also put the nuts on this floor.
4- Here comes the greens. After washing the greens in plenty of water, we take out the excess water with the help of a towel paper or a salad dryer. We tear it off with our hands and put it on this floor. Tomatoes that can easily be crushed will also be here.
Now let's come to my salad recipe:
Ingredients for Jar Salad (Grain) Recipe
4 tablespoons of boiled buckwheat
fresh mint
parsley
dill
optional cucumber or purple cabbage
string cheese or feta cheese
1-2 cherry tomatoes
2 teaspoons of olive oil
lemon juice
3 whole walnuts if you are not going to use olive oil
How to Make Jar Salad (Grain) Recipe?
Place the boiled buckwheat at the bottom of the jar with the help of a spoon.
Those who will use the sauce can whisk olive oil and lemon juice and add it on top of the buckwheat.
Place the cheese you want to use on top.
Put the greens and dried fruits you have washed and dried on the top and close the lid.
This way it can stay in the refrigerator for 2-3 days without spoiling.
When you use it, turn the jar upside down on a serving plate, add salt and spices as desired and consume.
Bon appetit now
I am sharing this recipe for those who ask if they are full by eating salad :)
Hello, we are in the times when I prefer light meals in these days when the weather is getting hot due to the arrival of summer.
Of course, there are many recipes that I will share in this category.
But today's page is reserved for artichokes..
Artichoke is a quality and cool vegetable :) As it is indispensable by some people (I am in this segment), some people do not prefer it at all and there are those who do not know its taste. This sounds interesting to me.
Tuna fish and artichoke salad offers a taste you have never experienced with its raw artichoke content. On the one hand, it is both a healthy and incredibly satisfying meal with its high protein and quality fat content.
Anyway, back to the topic, without further ado, let's start to explain the unique recipe that will leave you with different tastes on your palate thanks to the raw artichokes it contains.
Salads are very practical to meet our vegetable needs, and they can turn into a meal on their own with the protein and fat-rich foods we add.
It will be an excellent meal, especially for people on a ketogenic diet, because it contains very high quality fats and protein, thanks to tuna and artichokes. However, this salad, which contains a high amount of fat (tuna fish oil, olive oil, flaxseed oil, mayonnaise) and a serving of high calories, will not appeal to people on a low-calorie diet or low-fat diet.
With its vitamin and mineral values, it is one of the health-friendly vegetables that heralds the spring as if it has a special place in all recipes and olive oil dishes.
Before I forget: If you are one of those who consume artichokes not only for its taste, but also for health, do not waste the leaf parts. They may not have a place in this recipe, but you can use them raw or with olive oil to make salads.
Let me warn you from the beginning, do not be afraid of the long list of materials. Because as I always say, you can change the ingredients according to your taste or according to the materials in your cupboard.
***For the salad:***
¼ bunch arugula (chopped coarsely)
1 cup mediterranean greens (chopped coarsely)
1 handful of fresh mint
1 carrot (sliced with peel)
4 cherry tomatoes (halved)
2 almond cucumbers (diced into small cubes)
For Artichoke and Salad Dressing:
1 artichoke (sliced with peel)
3 tablespoons of olive oil
Juice of ½ lemon
½ teaspoon of salt
1 teaspoon flaxseed (ground)
1 handful of dill (chopped)
For Tuna Mortar:
160 grams of canned tuna (drained, preferably with olive oil)
1 tablespoon of mayonnaise (light)
1 teaspoon mustard
2 small pickled gherkins
½ capia pepper (roasted)
Juice and rind of ½ lemon (grated)
1 handful of dill
For Crispy Lavash:
1 small size lavash
1 tablespoon of olive oil
1 teaspoon ground red pepper
***Tuna Artichoke Salad Recipe Preparation***
Add olive oil, salt, flaxseed, lemon juice and finely chopped dill for salad dressing into a jar and start shaking. This process will allow the sauce ingredients to mix well and integrate their flavors.
Cut the artichokes into small pieces with a peeler. Pour the sauce we prepared in the jar over the artichokes, mix and set aside.
In another bowl, add the canned tuna that you poured excess oil from. After adding lemon juice, lemon zest, mayonnaise, mustard, pickles, roasted red capia pepper and finely chopped dill, mix all the ingredients.
Take the lavash on the counter and cut it into small triangles with a knife. Prepare a sauce by putting some olive oil and ground red pepper (if you don't have it, you can also use paprika) in another bowl and mixing it. Then, with the help of a brush, spread the sauce you prepared on the lavash. Immediately after, fry the lavash slices in a pan for about 3-4 minutes so that both sides change color.
Mix the arugula, carrot, fresh mint, Mediterranean greens, cherry tomatoes and cucumber that you have thoroughly washed, drained and chopped/grated and put on the serving plate where you will serve. Add the tuna fish mixture and artichokes that you have prepared in other containers on the base consisting of these vegetables. Add the lavash slices that you have fried and brought to the form of chips (you can also decorate by dipping them in the tuna mixture).
Delicious Salty Cake with Potatoes and Cheese Recipe
Have you ever thought of trying the delicious and satisfying potato, which is found in every home, as a cake?
It is true that we are generally fond of potatoes and consume too much, regardless of whether they are big or small. I believe that you cannot say no to potato cake with this delicious recipe.
When you think of cake, you all think of cakes with cocoa, chocolate or raisins, but there is also a salty version of this. Moreover, it is so delicious that this is a very satisfying cake recipe that you can eat for breakfast or as a snack.
It has feta cheese and dill in it, and of course, this combination also has a wonderfully appetizing scent that spreads around. This beauty, which you can think of as a kind of bread, is as delicious as you can become addicted once you try it.
A breakfast cheesecake recipe with few and essential ingredients, where cheese shows itself in all its glory. In fact, we can call it an easily set up breakfast table, a bread with herbs and cheese. Break eggs, add feta cheese, fresh herbs, olive oil, yoghurt... Add the cheese and spice types you want without hesitation, don't get used to being scared.
Prepare a donut-like salty cake that is open to new flavors.
If you believe that using too much flour is a must for making cakes, you are wrong. In this recipe, the main ingredient to prepare a fluffy salty cake is the potato that we all love. This potato cake recipe has a legacy of being able to keep up with every meal, every guest, every meal, every order. Yes, unlike the known cake recipes, we can also make cakes from potatoes.
Being an economical and very satisfying practical cake, it collects all the points on it. You can prepare and serve it as an easy cake recipe not only during tea time, but also in your morning breakfast or next to your meat dishes.
**Materials**:
3 eggs
1 cup of yogurt
1 water glass measure of oil
1 onion
3 potatoes
Small bowl of feta cheese
Half a bunch of parsley
half a bunch of dill
2 teaspoons of paprika
1 teaspoon of black pepper
1 teaspoon salt
1 packet of baking powder
2 cups flour
Cheddar cheese for topping
**Recipe**:
After washing the peeled potatoes, cut them into small cubes. Keep it in a bowl full of water.
Finely chop the parsley, dill and mint. Slice the spring onions into thin rings.
Mix the egg, yogurt and sunflower oil in a separate bowl with a whisk.
After adding the sifted flour and baking powder, continue mixing until you get a consistency.
Add finely chopped greens, chopped scallions, salt, chili flakes, freshly ground black pepper and coriander seeds.
As you can see, we managed to make a cake batter with a small amount of flour. Drain the starchy potatoes and add them to the cake batter.
With the help of a wooden spoon, pour the cake batter that you mixed one last time into a deep tray or round cake mold.
Bake in a preheated 180 degree oven for 30 minutes. For the finishing touch, remove the baked cake from the oven and bake for another 10 minutes with the addition of grated cheddar cheese.
Give voice to the long fried cheese. Share the cake you sliced with your loved ones and make them happy too.
Note: You can also prepare the cakes in portioned muffin tins. Operating the oven on the fanless program is a longer but best method for even cooking.
Practical and satisfying chicken sandwich recipe
Hello, our culinary readers. Again, I am writing a hearty recipe that can be prepared in a healthy and simple way. Don't forget to save this because it's a recipe we will all need :)
If you are tired of eating similar cafeteria meals every day at work, or if you are tired of being a regular at restaurants around you, you can try to take food from home to work.
Maybe you tried it before, you did it for 1-2 days and got bored with it right away, we understand. But we want you not to give up right away. You're tired all day anyway, wouldn't it be good to have delicious meals and snacks that will provide you with energy while working, and will also give you vitality while filling your stomach?
For almost all of us, getting into the kitchen after work is not the easiest job in the world. From time to time, our love of food rises, we start running to the kitchen as soon as we get off work, but not every day. The end point of those runs is usually for practical recipes.
Again, such a run, we are on such a journey again.
Whether it's a lunch snack for the workplace, you can put it in your child's lunchbox at school, or if it's difficult to prepare a meal when you get home in the evening, it's a great recipe that you can quickly turn into dinner.
You should definitely try this hearty recipe that you can prepare at home in a healthy way instead of consuming processed foods, ready-made foods, fried foods in harmful oil.
1 piece of chicken breast
6 mushrooms
a handful of mixed pickles
3 tablespoons of pickle juice
4 leaves curly
1 teaspoon of yogurt
1 teaspoon of thyme
1 teaspoon cumin
1 teaspoon paprika
3 tablespoons of garlic mayonnaise
3 tablespoons of pickle juice
Cut 1 piece of chicken breast into cubes.
• Season the chickens with one teaspoon each of yoghurt, meatballs spring and thyme, one teaspoon each of cumin and cayenne pepper, and 1 tablespoon of olive oil. Add salt according to your own taste and cook on high heat for 4-5 minutes in a pan poured 2 tablespoons of olive oil.
• Cut 6 large mushrooms the same size as the chickens.
• Add the mushrooms to the chicken and continue cooking. Add a few spoons of water to remove the flavors sticking to the bottom of the pan.
• Cut 1 sandwich bread in width with a knife and dip both sides of the bread into the delicious water in the pan.
• Mix 3 tablespoons of garlic mayonnaise with 3 tablespoons of pickle juice.
• Spread the mayonnaise mixture you prepared on both sides of the bread.
• Chop 4 leaves of lettuce into strips.
• Roughly chop 1 handful of mixed pickles.
• Put the pickles first, then the chicken, and last the lettuce, and cover with the bottom side of the bread facing up.
• Then cover a plate and quickly turn the sandwich over.
Enjoy your meal..
Watch out for these when buying fish
Regular consumption of fish meat, which is one of the richest foods in terms of vitamins, contributes to human health.
Fish, which is indispensable for healthy nutrition menus; It is a very rich food in terms of minerals such as folic acid, phosphorus and calcium. Therefore, fish is healthier when consumed in season.
Fish meat continues to maintain its popularity among the most basic nutrients of the body, thanks to its protein and many unsaturated fatty acids.
Since fish is a perishable food, it should be kept in the freezer and should not be consumed when it is found to be spoiled. The way to understand stale fish is to look into their eyes.
Since fish is a perishable food, it must be stored properly. If there is a large amount of fishing, hide-and-seek tents are used in shock warehouses when they are sold by the fishermen during the day. If we are not different in accordance with the health conditions, the fish will spoil quickly and if fish lovers do not know the difference between fresh fish and stale fish, food poisoning will occur.
In order to understand that the fish is defective, you must first pay attention to the eye part of the fish. In stale fish, the eyes will remain flat while they lose their brightness, while in fresh fish the eyes are in a semi-circle shape. Fresh fish's eyes are brighter, and stale fish's eyes become flatter than half-circles due to the loss of water in their bodies.
In addition to the eye structure, you can perform the sniffing process to understand the deterioration of the fish. Stale fish has a very unpleasant odor. Sharp and irritating. Fresh fish, on the other hand, has a pleasant smell because it is like the smell of the sea, similar to the smell of deprivation.
Mouth structures are also different in deteriorated fish. Since their physiological characteristics are lost, their mouths stay open and the gas formed in the fish is the main reason for this situation. You can search for your fish by just looking at this situation.
Another important clue showing that the fish is stale is the structure of the scales on the gills and outer surfaces. While the scales on the gill surface of fresh fish look bright, the gills and outer surfaces of stale fish have a more opaque color, which you can easily distinguish.
When you hold the tail of the fish and lift it upwards, it should stand upright. The other thing you should pay attention to at this point is If there is a stunned fish, it may also stand upright due to the cold, but it does not mean that it is not stale.
Fresh fish can stand upright, so you can easily understand the quality of the fish by looking at its temperature and standing upright.
Fresh fish sinks to the bottom of the water because there is water in it. The fish will stay up when it is bad. This is another important factor that allows us to distinguish it quickly.
When buying fish, definitely sea fish should be preferred and cultured fish should be avoided. Recently, protective chemicals have been sprayed on fish. This situation adversely affects human health. Small fish grown in the sea should be preferred instead of large and farm-raised fish.
How about trying delicious crispy chicken nuggets at home?
Nugget is actually the name given to natural nuggets of precious metals that come out of the ground in English. However, over time, this name has also been used for small pieces of fried chicken. Probably because chickens are golden on the outside when they are fried. Crispy on the outside and soft on the inside, the nugget is a chicken dish that is both very practical and very tasty.
Those delicious crispy chickens we ate for me, for garlic mayonnaise, for ketchup... When we try to make it at home, it is never as delicious as what we eat outside. Aside from its taste, we can never catch that crispy, pomegranate-like fried look. The fact that it absorbs too much oil is another problem.
Although we know that frying is not very beneficial for our health, we cannot stop ourselves from eating them. In fact, it is possible to make delicious fries at home at least as much as what we eat outside. Making perfect fried chicken is a recipe that takes time, contrary to popular belief.
So, can yummy nuggets be made at home? The answer is definitely yes. Moreover, it is so easy to make… Here is a practical and delicious recipe for those who say how to make nuggets at home…
Those who are looking for a crispy outside and soft inside chicken nuggets have come to the right place now. Chicken marinated in vinegar, salt and sugar tastes like Turkish delight. I recommend keeping the chickens in the marinade in the refrigerator for at least half an hour, or two hours if you can. It is possible to increase this period up to 12 hours. For example, you can marinate chicken in the morning and fry it in the evening.
It may have caused the concern that the vinegar in the marinade will cause an odor.
There are two smells that people fear the most; eggs and vinegar. I don't know which one they are more afraid of, because they both compete against each other.
Half a teaspoon of vinegar used to marinate two whole chicken breasts is still not felt when the chickens are cooked. You have to have a cat nose, or you have to be obsessed with smelling vinegar (in which case you can smell vinegar even from the food without vinegar), but just in case, if you say that you don't like vinegar, you can also use lemon juice instead of vinegar. The important thing is to marinate the chicken with a material with high acidity.
After marinating the chickens well, we fry them first in flour, then in egg and finally in breadcrumbs, and this way we get chicken nuggets that are soft on the inside and crispy on the outside. You can serve your chicken nuggets with homemade ketchup, avocado salad with yogurt or guacamole sauce.
Materials:
2 whole chicken breasts,
2 teaspoons of salt,
2 teaspoons of sugar,
1/2 cup of vinegar of any kind,
1 cup of flour,
2 eggs,
1 cup of breadcrumbs,
Oil for frying.
Recipe:
Chop the chicken breasts to the size you want and put them in a deep bowl,
Add salt, sugar and vinegar and mix,
Remove it to the refrigerator and let it rest for 30 minutes-2 hours,
Beat the eggs in a deep bowl,
Dip the chicken pieces first in the flour, then the egg and finally the breadcrumbs,
In a wide pan, heat oil at a finger depth,
Slowly drop the chickens into the oil and fry both sides.
Bon Appetit :)

The indispensable delicious bagel recipe of Americans
Today, I am here with a flavor that Americans cannot give up. Together, we'll make a bagel.
Just thinking about this homemade bagel recipe makes my mouth water. It's easy to make and delivers delicious, chewy bagels every time.
I teach you how to make homemade bagels with just a few basic materials and kitchen tools. Today you will overcome your fears about yeast and bread baking and I am here to guide you!
Bagel is a type of bread made from leavened dough, widely consumed in Canada, the USA and England.
Similar bagels in the world are called bublik and sushki in Russia, naan in China, and beugel in Austria.
a little more fluffy food. It is really interesting to cook, you will see it in the recipe; however, it is extremely easy to make and you need very few materials.
To make bagels; First, we prepare a very practical dough. Then we shape it and leave it to ferment. Afterwards, we throw the dough into the boiling water with molasses and take it out of the water after a short time. Then we sprinkle poppy seeds on them and bake them in the oven.
When it's done, we have a fluffy, fluffy bread that looks very appetizing and is very tasty.
If you want to serve the bagel as in America; You can serve it with a little cream cheese spread in the middle, smoked salmon and some spring onions and capers.
Ingredients for Bagel Recipe
For the dough:
3 cups flour
2 tablespoons of granulated sugar
2 tablespoons of dry yeast
3/4 cup warm milk
1/4 cup sunflower oil
1 egg
1 teaspoon salt
For the above:
1 egg white
1 tablespoon of poppy
1 tablespoon sesame
2 tablespoons of oats
Recipe:
Take granulated sugar, warm milk and dry yeast in a deep mixing bowl. Let the dry yeast mixture, which you mix well, stand for 10 minutes for the yeast to become active.
After adding sunflower oil and egg to the yeast that has started to foam, mix all the ingredients well.
Add a glass of flour with salt and mix the ingredients slowly with your hands. Add the remaining flour little by little and mix the dough until it comes together.
Knead the dough for 5 minutes after taking it to the floured kitchen counter.
Leave the dough in a lightly oiled mixing bowl to rest at room temperature for 2 hours to rise.
Take the dough that has reached a sufficient size and rested on the kitchen counter after two hours. Take the air out by punching the dough gently.
After dividing the dough into 8 equal parts, form a roll, then combine it from the ends to give it a bagel shape.
Rest the dough you have shaped on wax paper for 15 minutes. Bring plenty of water to boil in a deep pot.
After reaching sufficient heat, boil the bagels you have prepared for 30 seconds by turning them upside down in the water that you have turned down.
After placing the short-boiled breads on a baking tray lined with greaseproof paper, brush them with beaten egg white.
Bake the bagels, on which you sprinkle oats, poppy or sesame, as desired, in a preheated 220 degree oven for 20 minutes.
Cut the hot bagel out of the oven in half and prepare it as a sandwich with the ingredients you want and share it with your loved ones.
Note: The bagel you keep in an airtight, vacuumed container will keep its freshness for 1-2 days, but if you leave it outside, it will dry out and harden.
You can also bake the bread type bagel by adding sea salt, caramelized onions, raisins or blueberries, if desired.

Mexican Beans Recipe From Dried Legumes
I'm here with Mexican beans from Mexican cuisine.
I cooked Mexican beans according to my own recipe and taste. Famous for its hot sauces, Mexican cuisine has introduced a new flavor to many cuisines of the world. Red colored beans, known as Mexican beans, are guests of delicious salads and meals.
For those who eat vegan, prefer low-calorie meals, and love salads and colorful dishes, we are reviewing Mexican beans in these lines. When you come to the end of our article, you can add health to your plates with the benefits of Mexican beans.
Mexican beans are a useful food discovered by Spanish explorers.
This bean, which is frequently consumed in Central America and around Mexico, draws attention with its red color.
Mexican bean, which has been in our lives for almost 7000 years, also flavors healthy dishes with its nutritional value.
Mexican beans are often sold boiled and effortlessly used in salads and savory recipes.
This bean has been the cure for many diseases from cancer to infection.
Red kidney beans are poisonous if they are not furiously boiled for 20 minutes during initial cooking. The trick is to never cook them in wet water, but to rinse them thoroughly before draining them and placing them in clean water. The soaking water absorbs most of the gut-irritating components.
Mexican Bean Dish Recipe, How To Make
**Materials:**
1 Cup of Mexican Beans
5 Tablespoons of Olive Oil
1 Medium Onion
1 Large Clove of Garlic
1 Teaspoon of Tomato Paste
1 Medium Potato
1 Medium Carrot
1 Teaspoon of Powdered Sugar
1 Teaspoon of Black Pepper
1 Teaspoon of Paprika
1 Teaspoon Cumin
1 teaspoon salt
A pinch of Parsley
1 Piece Lemon Juice (at the service of the meal)
3 Cups (600 ml.) Boiling Water
The flavor of dried Mexican beans is similar to our kidney beans and is extremely delicious. If you try, you will discover another taste.
**Preliminary**:
Onions and garlic will be chopped for edible. Potatoes and carrots will be peeled and cut into cubes of appropriate size. boiling water will be prepared.
**Boiling Mexican Beans**:
The Mexican beans will be soaked overnight in cold water and the water will be changed in the morning. Then, after boiling a stone in the pot; On the lowest heat setting, the pot lid will be boiled for 45 minutes intermittently.
Put olive oil in the pot and heat it. Onion, garlic, carrot, tomato paste will be added on it and roasted at medium heat. Then, Mexican beans, potatoes, 3 glasses of boiling water, granulated sugar, black pepper, chili pepper, cumin will be added and mixed. The furnace temperature will be raised. After the pot starts to boil, the lid will be closed. The stove temperature will be set to the lowest temperature position. Watch will be noted. After 90 minutes, your meal is ready. You can now salt the dish and sprinkle the parsley.
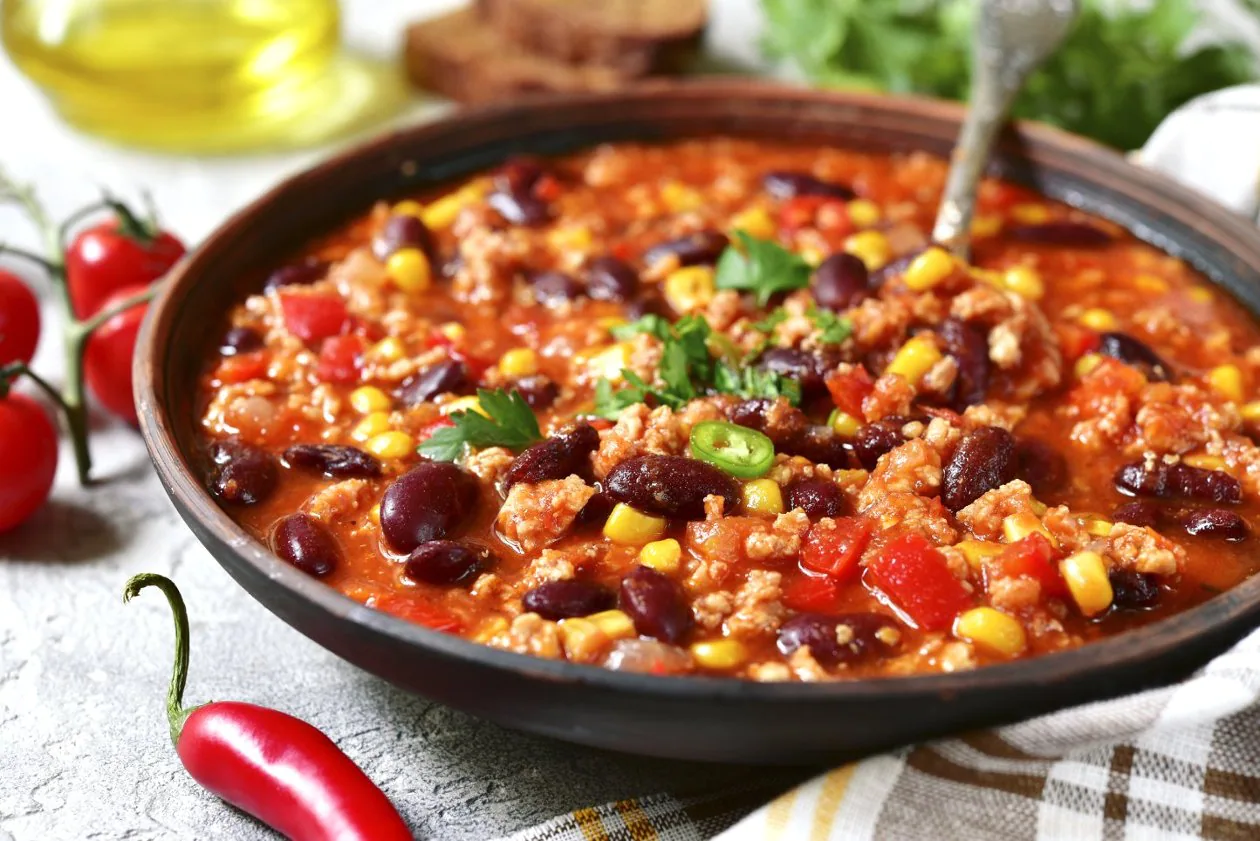
 @OurKitchen