Table Of Contents
Part 1: Understanding Tools, Resources, And Functionality Of NFT Creation On The Bitcoin Cash Blockchain
Part 2: Minting BCH NFTs Using Electron Cash SLP
Part 3: Assigning The NFT Its Content
Part 4: Submitting Your Parent NFT To The Blockchain Services
Part 5: Creating Additional NFTs
Part 6: Using Juungle Marketplace
PART 1: Understanding The Tools, Resources, And Functionality Of NFT Creation On The Bitcoin Cash Blockchain
Introduction
The Bitcoin Cash blockchain is very new to NFT creation and is still under development to create a more user friendly process for creators and consumers. The blockchain developers are currently working on all aspects of advancing several aspects of the community. From functionality within the blockchain, to creating an adequate marketplace for NFT’s, the small amount of developers work endlessly to further the advancement of the community. It is a great time to become an active member of the community and establish yourself as a creator and NFT ambassador!
NFTs On The Bitcoin Cash Blockchain
Although new functionality is being developed daily, there are some key things that NFT creators must be aware of. I will make it a point to update all information as it becomes available. Improvements and new procedures are being developed at a fast pace. Currently there are several factors that have become a standard in BCH NFT creation for one reason or another.
1. There is currently 1 marketplace for NFTs on the BCH blockchain. That marketplace is known as “Juungle.” You can visit Juungle at https://www.juungle.net/#/ .
2. Juungle marketplace and NFT development in general on the BCH blockchain has several positive and negative aspects. Benefits include inexpensive transaction and creation fees (which currently amount to $.01 USD or less), and fast transactions. It’s a great platform to start creating NFTs with little or no budget. The negative aspects (which are currently being actively addressed) are the somewhat difficult process of creating NFTs and the limited capabilities of the functionality side of the blockchain to support NFTs. These negative factors are simply due to the fact the BCH development and NFT creation within the blockchain is all very new. Developers are working hard to advance the platform. With that being said, it is a great time to become an NFT creator on the platform and establish yourself early, before it becomes a populated and saturated environment like other NFT markets, which it will as development progresses.
Understanding The Tools
It’s important to understand when creating NFTs on the BCH blockchain, that there are several compatible and also non-compatible tools on the functionality side of the blockchain. There are several different teams of developers that have developed different sets of tools and functionality at different times for the BCH blockchain. Not all tools are compatible with the NFT end of BCH. Recently we have seen more coordination from within the community to streamline development as factors present themselves and different developer teams work together on topics that have become popular over time. Here we will take a look at the most popular tools and functions that support NFT development.
Wallets
It’s important to understand that not all wallets that work with Bitcoin Cash work with SLP tokens or NFTs. Some wallets can even cause serious negative issues for people trying to use them with NFTs. The most popular BCH SLP NFT compatible wallets are…
Signup.cach: This is a wallet that can be used on a computer or mobile device. Visit https://signup.cash/
Zapit: This is a popular mobile wallet. Visit https://zapit.io/#/
Both Signup.cash and Zapit display the NFT artwork. Not all SLP/NFT capable wallets display the NFT images.
Minting Devices
There are options for minting SLP tokens and NFTs on the BCH blockchain, however, “Electron Cash SLP” has become the standard creation tool for minting BCH NFTs. Electron Cash is also a fully functioning wallet. Electron Cash SLP however, does not currently have a mobile version. It also does not display the NFT images within the software. It is also very important to note that “Electron Cash” and “Electron Cash SLP” are two different softwares.
Much of the information and tutorials dealing with Electron Cash SLP can seem very confusing to a person new to this. Its very simple though. An advanced understanding of the API is not necessary to begin working with Electron Cash SLP to start minting NFTs.
You can download the latest version of Electron Cash SLP here: https://github.com/simpleledger/Electron-Cash-SLP/releases .
Go into the most recent listed edition. Scroll down to the list of files inside that edition. Find the largest .exe file in the list. Download and install the file. We will cover this process in detail later in this tutorial.
Blochchain Explorers
In order to view the details of a transaction, SLP token, or NFT asset on a blockchain, you need to use a blockchain explorer designed for use with that blockchain. There are several blockchain explorers for the BCH blockchain. However, we will limit our discussion and endorsement to just one. SLP Explorer. SLP Explorer is the only fully functioning explorer compatible with BCH NFTs at this time. This is primarily because SLP Explorer allows viewing of the NFT image. SLP Explorer was designed by the same creators as the NFT marketplace Juungle.net and as such, Juungle relies on SLP Explorer to pull its information from. You can visit SLP Explorer here: https://simpleledger.info/?lng=en .
The NFT Market
The only market that currently exists for NFTs on the BCH blockchain is Juungle. Juungle was launched around March of 2021. It is still being developed but is an up and running NFT market website. Juungle features fast and easy NFT listing, purchasing and transferring. You can visit Juungle here: https://www.juungle.net/ .
Telegram
Telegram is a social media communication platform that the BCH community relies heavily on. From SLP development to NFT advertising, Telegram is the key for communicating and keeping up to date with the NFT community. Telegram is available in a desktop version as well as a mobile version. You can visit the Telegram homepage here: https://telegram.org .
Once you have a Telegram account set up, you can find some great group resources here:
https://t.me/BitcoinCashNFT : This is a discussion group where new NFT creators and consumers can seek resources and get questions answered. It is focused on helping new creators and members of the BCH NFT community get setup and established.
https://t.me/juungle_net : The official discussion group for the Juungle NFT marketplace.
https://t.me/juungle_net_listings : This channel (not a discussion group) is a live feed of all listings and sales that happen in the Juungle NFT marketplace.
https://t.me/simpleledger : This group is focused on Simple Ledger Protocol (SLP) development. This group focuses more on discussion of advanced SLP development.
There are also several Telegram groups that are created by individuals for specific BCH NFT projects and interests.
PART 2: Minting BCH NFTs Using Electron Cash SLP
Introduction
Electron Cash SLP is currently the best option for minting NFT assets on the BCH blockchain. It also serves as a wallet. Currently there is no mobile version of Electron Cash SLP. A PC is required to use the software. It is also important to note that Electron Cash SLP is not the same software as the standard Electron Cash. It is crucial to use the SLP version to mint NFTs.
Tutorial For Installing Electron Cash SLP
1. Visit https://github.com/simpleledger/Electron-Cash-SLP/releases . Click on the most recent version of Electron Cash SLP listed at the top of the page. After entering the most recent version, scroll down to find the largest MB sized .exe file.

2. Click on this file and download it.
3. Next, open/run the .exe file to install. The installation wizard will ask if you want an “Automatic connection” or to “Set the server manually.” Select “Automatic connection.” That’s all it takes.
4. Now, open Electron Cash SLP for the first time. You will see a prompt that asks you to select a wallet. Since there is no current wallet you need to create one. You can enter a name for your new wallet or keep it as “default wallet.” Then click “Next.”
5. You will now be asked what type of wallet you want. For the purposes of this tutorial we will assume that you are a new user creating a standard wallet. Just select “Standard wallet” and click “Next.”
6. Next, you will be asked to select a seed option. Choose “Create a new seed.”
7. Copy and save your new 12 word seed phrase. This is very important if you need to restore your wallet in the future.
8. Confirm your seed phrase.
9. Decide if you would like a password on the wallet. Note: if you choose to use a password, you will be asked to enter the password not only when you open the wallet, but also every time you attempt to make any kind of transaction, token creation, or send function.
That’s all that you need to do to install and set up Electron Cash SLP. You can create additional wallets if you want.
Fund Electron Cash SLP
1. The first thing you need to do is fund the Electron Cash SLP wallet that you will be using to mint your NFTs. Transaction fees on the BCH blockchain are very small. $1.00 USD (worth of BCH) will last a long time and cover many, many transaction fees with BCH. However, you can begin minting NFTs and cover all the costs of minting and sending with as little as $.05 USD (worth of BCH) in your wallet. To get the funds into your new wallet, you will need to have some pre existing Bitcoin Cash BCH cryptocurrency. If you do not have any BCH already, you will need to have an account at a cryptocurrency exchange and purchase/obtain some BCH cryptocurrency. I personally use Coinbase as my exchange of choice. Coinbase is simple to use, has low fees as far as exchanges go, and I can send my BCH earnings to Coinbase, convert them into USD, and have them deposited into my real world bank account, all in the same day. You can visit Coinbase here: https://www.coinbase.com . There are many options when selecting an exchange to use or getting BCH into your Electron Cash SLP wallet. We will assume that you have been able to accomplish that much on your own. Once you have available BCH somewhere such as at an exchange or in an existing wallet, proceed to step 2.
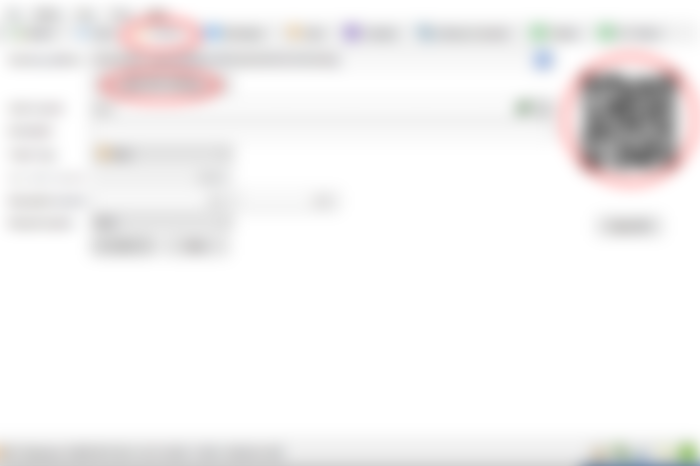
2. Open Electron Cash SLP. Select the “Receive” tab on the horizontal menu.
3. Click the “Show BCH Address” option.
4. Once you have clicked “Show BCH Address”, you can either copy the address and use it as the receiving address to send the BCH to, or scan the QR code. NOTE: If scanning the QR code, make sure to change it to “Show BCH Address” before scanning. Electron Cash SLP allows you to send and receive both SLP/NFT tokens and also BCH. These are 2 different address formats.

5. Send your existing BCH to the BCH wallet address. You will then receive an Electron Cash notification of an incoming transaction. You can view the balance of your wallet by selecting the “History” tab on the horizontal menu.
Minting The Parent/Group Token With Electron Cash SLP
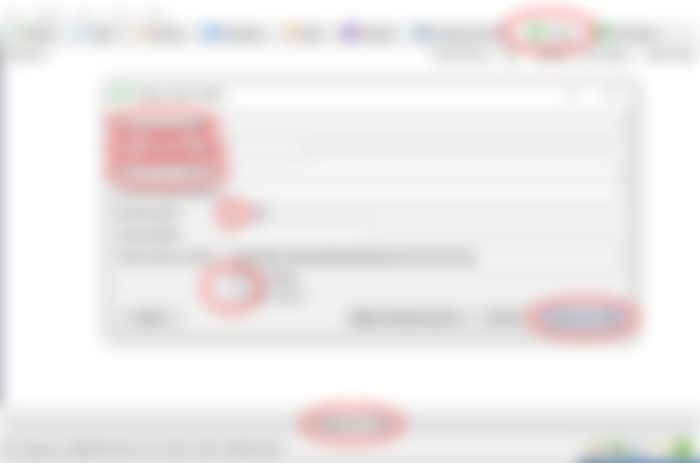

1. Select the “Tokens” tab on the horizontal menu.
2. Select “Create New Token” at the bottom. Keep in mind that you are now creating a “parent” or “group” token. This is not an individual NFT. This is a set of tokens that are for the project as a whole.
3. Give the group token a name. Give it a broad name, or the name of the project/collection. Don’t name it as a specific piece of art within the collection. NOTE: You can give the individual NFTs in the collection their own name when you mint them.
4. Give the group token a “Ticker Symbol.” This is the letter code that will appear in tickers, exchanges, and explorers. The standard identifier in many places. I don’t know exactly how many letter characters will work, but 3-5 are optimal. Use all capital letters. NOTE: You can give each individual NFT in the collection its own unique ticker symbol.
5. If you have a supporting website, or any online documentation for the project, you can include any standard web link in the “Document URL” section. This field is optional.
6. Set the decimal places to 0. NFTs can not be broken up into values less then 1 whole unit.
7. Enter the desired “Token Quantity.” NOTE: You can have as many tokens as you like. This number does not determine a cost or fee. You can have millions of tokens if you so choose. NOTE: Every time you create an individual NFT in this group, it will cost you 1 parent token. 1 parent token will be burned each time you mint an NFT. So make sure you set an initial quantity to a number that will allow you to mint the desired quantities of NFTs for your project.
8. Check or uncheck “Fixed Quantity.” This determines if your overall token quantity can be added to in the future. This is determined by the overall specifications of your NFT project. Some people like to have the option to add more tokens later. Some people like to create a fixed amount so that people know only a certain predetermined number of NFTs can ever be minted under this parent token. The choice is yours.
9. Check the “Is NFT Parent” box. This box, in combination with the “0” decimal places, is what indicates that this is a NFT parent token as opposed to a regular SLP token. When this box is checked, the decimal places should automatically change to a “0” setting.
10. Click “Create new Token” in the token creation window.
The transaction will then process. You will be charged a small transaction fee in BCH (this fee should be only a fraction of $.01 USD). This fee will be deducted from your Electron Cash SLP wallet’s BCH balance. You have now created the governing token for your NFT project. Your new parent token and its properties will now appear in the “Tokens” tab of the horizontal menu. You are now ready to create the actual NFTs.
Minting NFTs With Electron Cash SLP
Now that you have created a parent/group NFT token, you can begin minting the actual NFTs in your collection.
1. Enter the “Tokens” tab on Electron Cash SLP’s horizontal menu.
2. Right click on the token ID of the parent/group token you created in the previous steps.
3. Select “Create new NFT.”
4. Click “Prepare Parent Group.” This will prepare the group token in a manner that will allow it to create the child/sub (actual) NFTs. This will charge you a small BCH transaction fee that will be deducted from the BCH balance of your Electron Cash SLP wallet. You will need to reprepair the parent token occasionally. I believe this occurs about every 20 times you create a child NFT.
5. Enter the name of your NFT. This can now be a name unique to the specific NFT being created.
6. Enter a “Ticker Symbol.” This serves the same purpose as the ticker symbol described previously in creating a parent token. You have several options here. No matter what ticker symbol and name you give your child NFT, the child will always appear in the parent token when the parent token is viewed in SLP Explorer. This allows you to give the specific child NFT its own unique ticker symbol, yet still be identified as part of a parent token. The concerns here should be relative to your specific NFT project. For example… You can give your child NFTs the exact same ticker symbol as your parent token if you like. This streamlines things and makes identifying all the tokens in the group easy. Or, if you like, you can give the children unique ticker symbols to make them appear as a individuals or sub groups of the larger project. This is good if your overall project contains smaller projects or divisions within it. Regardless, the choice of how you organize this is yours to make based on your projects specifics.
7. Enter a “Document URL.” This field is optional and only applies if you want to point people to a specific web link.
8. Click “Create NFT.” This will process the transaction and create the actual NFT. You will again be charged a small transaction fee that will be deducted from your Electron Cash SLP’s BCH wallet balance.
You have now created your first actual NFT. This NFT will appear in the horizontal menu’s “Tokens” tab, under the parent token. You can now assign the content to your NFT.
Part 3: Assign The NFT Its Content
Unlike NFTs on other blockchains, BCH NFTs do not permanently bond the content to the token. This may change in the future, but for the time being it is the case. As the creator of the NFT, you are responsible for hosting its content. This will require a dedicated directory. Essentially you need a hosting service/server that can store all the content of the child tokens under the parent token in a single, dedicated location/directory that is accessible with a web URL to that directory. This requires a hosting server. You cannot link each child NFTs content from different locations. You cannot link to random content in random locations. The location of the content will be set to the parent token, and all the child token’s content must be in that location. This can be accomplished several ways. Lets say I pay for standard web hosting to host my own website. On the hosting services server, I can add a folder to the standard directory where the publicly accessible files are kept. For this example, I will call that folder “NFTcontent.” Now, inside this folder/directory, we need to create 4 key folders. These folders will be used to retrieve the content and display it as part of the NFT in wallets, Juungle marketplace, and SLP explorer.
Inside of the “NFTcontent” folder we are using as an example, we need to create 4 folders. Name one folder “original”. Name the second folder “128”. Name the third folder “64”. And name the fourth folder “32”.
Each of these folders need to contain a PNG image file that is the size of the name of the folder. For example the “32” folder needs to hold the NFT image in a 32x32 pixel size. The “64” folder needs to contain the same image in a 64x64 pixel size. 128x128 for the “128” folder. The “original folder can contain a file of any dimensions. Don’t make it too large, but its specific dimensions are not a set number.
Every NFT you create will have 4 images. One image in each of the folders. Each of that NFTs images need to be named with the child token’s token ID. The various devices like wallets, or SLP Explorer are programmed to retrieve the appropriate sized file, from the appropriate folder, for the appropriate token ID.
For this example we will use Github for our hosting directory. Github is popular because it is free. It is also convenient since we will need Github in the next step to submit our parent NFT to the appropriate databases. If you are using your own hosting options to host your images, skip this Github specific parts and simply create the folders and resize and rename the contents as described, on your own hosting server.
1. Go to https://github.com .
2. Create a free account. It is a simple, fast, and a pretty standard sign up process that only requires an email address. Complete the sign up process by verifying the email and log in to the new account.
3. Go to “Create A Repository.”
4. Name the repository. For this example I will name the repository “NFTcontent”. NOTE: As you name your repository, notice that you are creating its web directory URL.
5. Set the status to “Public”.
6. Click “Create Repository”.
7. Now click your repository title to enter it.

You are now inside your new repository where you will host your image files. Lets set that aside for a second and create some files on your desktop.
8. On your desktop, create a folder titled “original”. Also create a folder titled “32”, “64”, and “128”.
9. Put your original master NFT image into the “original” folder. NOTE: Make sure this image file is a .PNG image format file. At the current time, NFTs only support the .PNG image file format. Any other file format will not work.
10. Rename the file to the name of your child NFT ID. Copy and paste this from Electron Cash. NOTE: Use the specific child token ID, Not the parent token ID.
11. Resize the original image into a 32x32 pixel .PNG and place it in the “32” folder. Also give it the same token ID name.
12. Create a resized and renamed .PNG for the “64”, and “128” folders as well and place them in the proper folders as well.
13. Now lets go back to the web browser with Github open to our new repository.
14. Click “Add File” and then choose “Upload Files.”
15. Drag the 4 folders that contain the 4 images into the Github upload prompt. When they have finished uploading, scroll down to the bottom and click the green “Commit Changes.” button.
You have now created a proper directory and uploaded your images files to it. If you are using Github to for the hosting, there is one more step we must complete to make your directory publicly accessible.
16. Click your repository name to enter your repository if you are not currently in that repository. Then on the horizontal menu click the “Settings” tab.
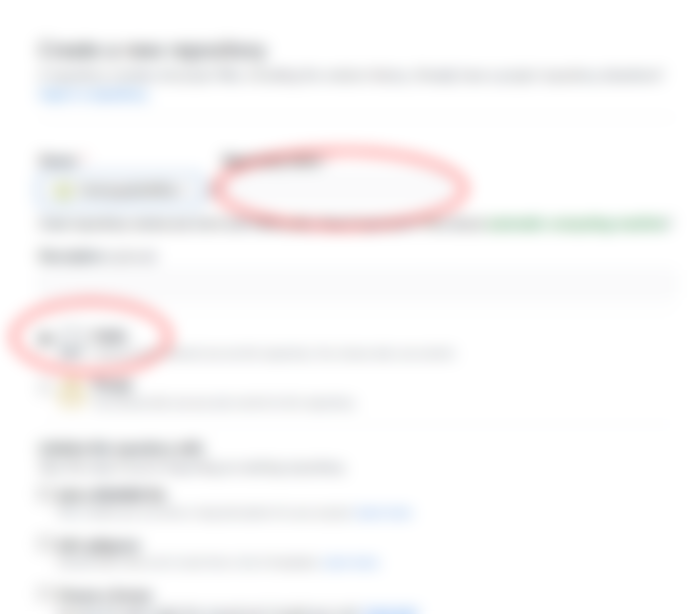
17. Inside the “Settings” page, scroll down until you see the “Github Pages” section and click “Check it out here.”
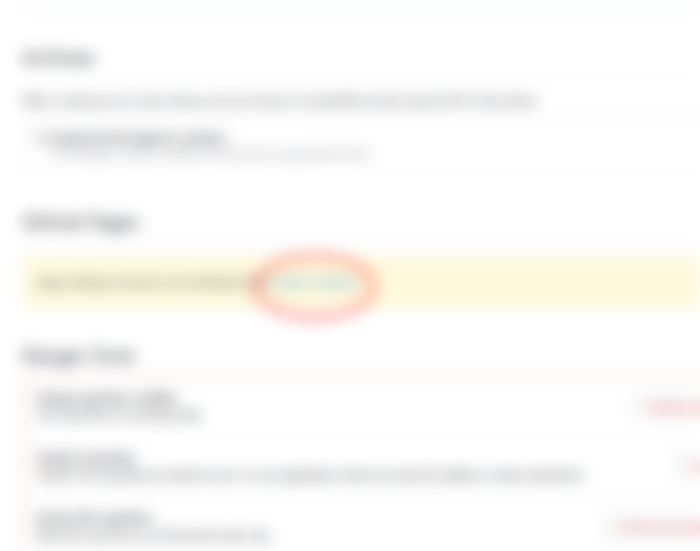

18. You will see a “Sources” section that indicates that Github Pages is currently disabled. Change the selector from “None” to “Main” and then click “Save.”
19. You will now come to a message that says “Your site is ready to be published at….”
20. Click the “Refresh” button in your web browser to refresh the page.
21. You will now see a message that says “Your site is publish at…”
This is the location of your image directory. Copy this web URL and save it. You will need it for the next steps. For our tutorial example, the web URL to the example directory we have created is “https://unstoppablemila.github.io/NFTcontent” . NOTE: do not copy the last “ / “ at the end of the URL. The functionality of the services we will use next will add this automatically.
This will lead to the 4 folders we created. The functionality of the services retrieving the specific images will choose which of the 4 folders, and which image inside those folders to further select.
If you are not using Github as an image hosting server, copy and save the URL to your directory in the same way we have done here. The URL should stop at the last location prior to the folders themselves, as shown in the example URL. The functionality of the specific services used will retrieve the appropriate file from the appropriate folder within the directory.
Part 4: Submitting Your Parent NFT To The Blockchain Services
NFT creation and support on the Bitcoin Cash blockchain is not yet as automated as it is on other blockchains. It will be in the future, but the functionality is still currently being developed. As of now, a creator must interact directly with the developers of the services to activate the NFT parent token they have created. In this section we will show how to get your parent token entered in the appropriate services databases.
1. You need Github for this process. If you do not yet have a Github account, create one as described in the previous tutorial. You do not need to create a specific repository for this step, just a general account that will allow you access within Github. If you already have a Github account, log in.
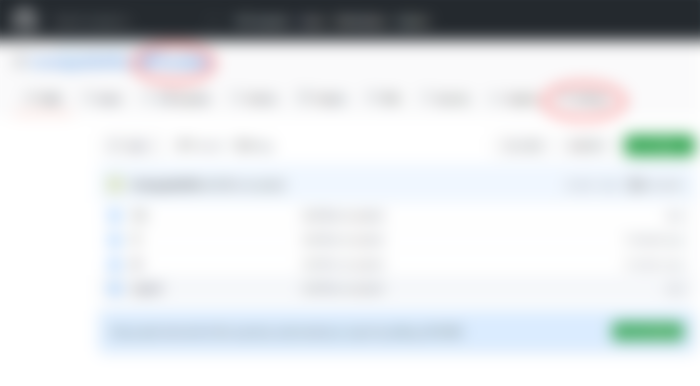
2. Go to the search field and type in “blockparty-sh/slp-explorer”. Use the “Search all of Github” option.
3. Select and enter the repository.
4. Locate the “Public” folder and enter it.
5. Locate the “group_icon_repos.json” file and enter it.
Here you will see a list of every parent NFT that is currently active in the database. In the next steps we will submit a request to the maintainer of the database to add your parent token to the system.
6. From within the “group_icon_repos.json” file, click the “Fork and Edit” option in the upper corner. This will create a copy of the file that you can edit to include your token.
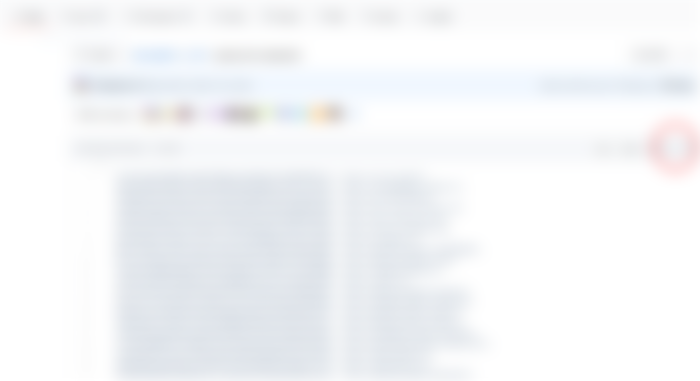
7. Now that you have created an editable copy of the file, scroll down to the bottom. You will now enter your token info as the next/last entry in the file. NOTE: It is very important to follow these steps closely, as the data must be exact.
8. Place your cursor immediately after the closing quotation marks of the last entry. Do not leave a space.
9. Type a single “ , “ (comma). NOTE: The last entry never has a comma after it. You are now editing the document to make your entry the last entry, so the previous entry now needs a comma after it. Make it look exactly like all the other entries with commas.
10. Press enter/return to move your cursor to the next line.
11. Now copy your parent NFT ID from Electron Cash SLP. NOTE: Make sure to copy the parent token ID and not the Child NFT ID you have created within the parent token.
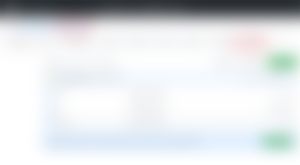
12. Go back to the editable Github document in your browser and on the line directly below the previous entry, type a quotation mark “ followed immediately with your parent token ID and then another quotation mark after it.
13. Type a colon : immediately after the closing quotation mark.
14. Type a single space after the colon
15. Then type another quotaion mark and paste the web URL of the directory we created previously, immediately followed by another quotation mark. For this example in the photo, we will use our sample directory/repository URL we created previously.
This process should give you an entry on the last line of the document that looks EXACTLY the same format as the other entries (except your entry will not have a comma “ , “ after it. )


NOTE: Pay close attention to the closing bracket that is on the very last line of the document as well as the fact that your entry has no comma after it.
16. Next, scroll down and click the “Propose Changes” button at the bottom of the page.
17. On the next page, click “Create Pull Request.”
18. On the next page, click “Create Pull Request” again. Here, you can also enter an optional comment to the maintainer of the database if you wish.
You have now created a request to the maintainer of the database, asking to submit your parent NFT token to the approved token list. The maintainer will look at your request and inspect the folders/image files in your directory. If everything was done properly, your request will be approved. NOTE: This is not currently an automated process. An actual person will manually review/approve the request. This will take some time to accomplish. Currently it can take up to a week to get a pull request approved. You can follow the progress/results by looking at your current pull requests in your Github account.
We will now create 1 more pull request within Github. This pull request is more simple than the last. This pull request will allow your token to appear as “Verified” in several blockchain services.
19. In the same repository you were in previously (blockparty-sh/slp-explorer) Go back in to the “Public” folder.
20. In the “Public” folder, locate and enter the “verified_tokens.json” file.
21. Like before, click the “Fork and edit” icon in the upper right corner to create an editable copy of this file.
22. Edit the file to include your parent token ID. Use the same parameters as discussed previously. Place a comma after the previous entry. Start and end your entry with quotation marks. And make sure your entry follows the same formatting as the other entries. Do not put a comma after your entry. And make sure the closing bracket is in the same final position as discussed previously.
23. Follow the same procedure for creating a pull request as described previously. Click “create pull request” when finished editing. Click “Create pull request again on the next page.
You have now finished everything in Github necessary to get your NFT submitted and approved.
NOTE: You must wait until your parent token pull requests are approved before your token images will be viewable by the blockchain services. Once approved, you can go to SLP Explorer and input your child token ID into the search field. It will then return the child token information along with the image.
Part 5: Creating Additional NFTs
When creating the actual child NFTs within your newly created parent token, all you need to do is create a new child the same way as discussed previously. Go into the tokens tab of Electron Cash SLP, and right click on the parent token. Select “Create New NFT” and fill out the information for the new child NFT.
Once the new child NFT is created, copy the child token ID. Then resize and rename your NFT images for that child as you did previously. Add these properly sized images, with the appropriate token name to the corresponding folders as you did before. Only 1 set of folders is needed for each parent token. All of the child tokens within that parent will use the same set of folders. There is no need to do any more pull requests when creating additional children under the previously approved parent. Once your parent token is approved, each new child token will immediately fully function as soon as it is created and the appropriate images are added to the appropriate folders.
If you wish to create additional parent tokens, you will need to follow the same steps as previously discussed and submit new pull requests applying to your new parent token.
Part 6: Using Juungle Marketplace
Now that you have an approved and fully functioning parent token, and have appropriately created child NFTs within that token, you are now ready to put those child NFTs on Juungle marketplace and list them for sale. This process is very easy. Just follow the steps below.
1. Go to https://www.juungle.net .
2. Click on the “Account” tab in the top menu.
3. Click the “Create a new account” option. Creating a new account is fast and easy. All you need is a valid email address.
4. Verify the email.
5. Log in to your new Juungle account. Then go into the “Wallet” tab in the menu.
6. Here you will see a wallet deposit address as well as your current BCH balance. Juungle requires no BCH funding to send/list your NFTs. Copy the deposit address.
7. Go into Electron Cash SLP and enter the “Send” tab on the horizontal menu.
8. Paste the Juungle address you copied into the “Pay to” field.
9. Go to “Token Type” field and select the appropriate child NFT ID.
10. In the “Token Amount” field, enter “1” or click “Max” to auto enter a quantity of 1.
11. Click send.
You will then be charged a small BCH transaction fee for sending, which will be deducted from your Electron Cash SLP wallet account. The token has now been sent to Juungle.
12. Go back to Juungle. Enter the “My Assets” tab of the menu.
13. Next, enter the “Unlisted Assets” tab of the menu.
14. You will see a list of your current NFTs in your Juungle account wallet. You can simply select the “Sell” option to enter a price you would like to sell the NFT for. Then simply click confirm to have that asset listed.
Once you list the NFT, it is for sale and that is all you have to do. Your NFT will also immediately appear in the Telegram channel feed https://t.me/juungle_net_listings , allowing other members to see that there is a new NFT asset for sale. You can check the status of your assets and edit them by navigating in the menu to the appropriate tabs (Unlisted Assets, Listed Assets, Sold Assets…). When one of your NFTs sells, the sale amount (-2% fee) will immediately be credited to your Juungle wallet and available to be withdrawn if you choose. You do not need to perform any additional action when your NFT sells. Juungle will instantly transfer your NFT to the purchasers account.
If you choose to withdraw BCH from your Juungle wallet, a very small transaction fee (like with Electron Cash SLP) will be deducted from the Juungle account balance to pay for the blockchain transaction. You can send/withdraw your Juungle BCH balance to any BCH capable wallet.
NOTE: If you choose to “Withdraw” the actual NFTs from your Juungle account, and send them to a different wallet, you will need a small amount of BCH in your Juungle wallet to cover the blockchain transaction fee. This fee will be deducted from the BCH in your Juungle wallet. If there is no BCH currently in your Juungle wallet, you can send BCH to it. If your Juungle BCH wallet is empty, you can obtain the BCH address of your Juungle wallet by clicking on the “Withdraw” option of one of your “Unlisted Assets.” This will show you the BCH deposit address of your Juungle wallet.
In closing, I hope that this article was able to answer any questions that may arise during NFT creation and help people become NFT creators on the BCH blockchain. Any further questions can be directed to our Telegram group, which I am an Administrator. https://t.me/BitcoinCashNFT
The author of this article, Mila Martin, is an NFT creator on the Bitcoin Cash blockchain. She is the creator of the ANFTA line of animated NFT assets which introduced fluid animation into the BCH blockchain market. She is the Administrator of the the ANFTA Telegram group as well as the Bitcoin Cash BCH NFT Developers Telegram group.
This is very detailed and helpful! Thank you. I have bookmarked it because I'm going to be using it a lot.