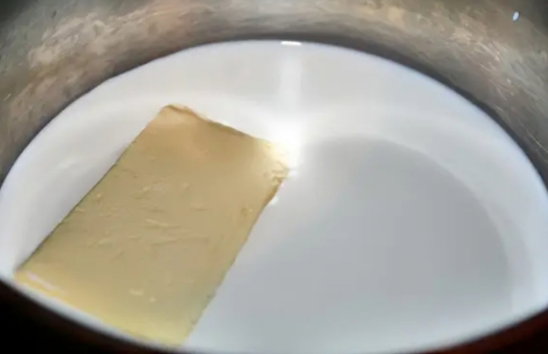
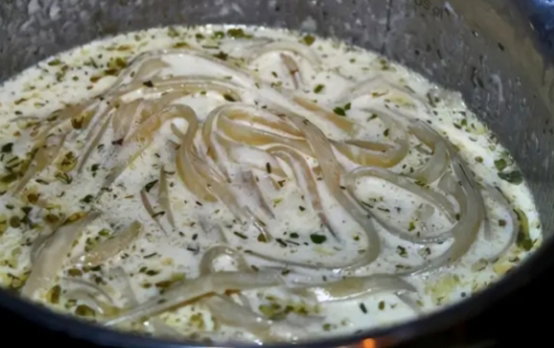
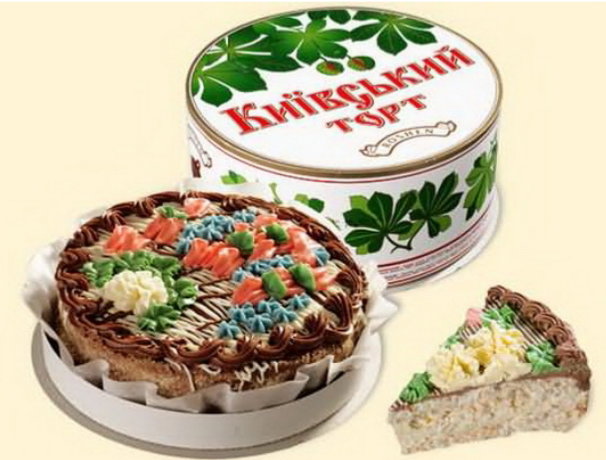
What a man will do for the woman he wants.
Life, especially today, is like a roller coaster, every day there are ups and downs you have to put up with.
But in one way or another, everyone is looking for someone to share all these joys and troubles with. And in such a chaotic world it is so difficult to find the "one and only", because "love" can not be driven into a box, it is always different and depends on your character, psyche and life experience.
Everyone expresses his feelings in his own way, but nevertheless there are certain patterns that everyone follows. And among them is something that a man will do for a woman who managed to win his heart.
*He is not afraid to show his vulnerable side*.
Public stereotypes say that men should hide their feelings, especially sadness, because everyone has heard the trite phrase that "boys do not cry." That's why most of them avoid seeing you when they mentally feel bad, or try to hide their feelings behind a "strong guy" mask.
If your partner has no problem expressing how he feels, then he thinks you are at least his man.
He wishes you happiness.
He is "sacrificing" something to make you feel good about yourself. Selfishness is in the nature of men, but real, sincere love allows you to overcome it. And if a man really cares about you, he will put his ego aside to make you happier. Of course, that doesn't mean he has to change everything in his life for you, but every such sacrifice, no matter how small, is a demonstration of love.
Remember that even what sometimes seems insignificant can be very important.
When a man really loves you, he will support you in everything just because he wants you to be happy, and your success will be his merit. A man in love will not compete with you, he will strive to see you progress and succeed with as much passion as he has for himself.
Even if he does not approve or understand your steps, he will support you because he will understand that you care.
*He pays attention to small things*.
Men pay attention to the little things that make you happy and try to make you smile, even when you least expect it.
Fight for your love and relationship, no matter how strong your bond is. It always takes effort to settle down and overcome obstacles and difficulties that arise.
When your connection has a solid foundation and your partner really loves you, they will fight for your relationship even when things seem to be going badly.
Happiness, when you live in your house, sleep in your own bed, you eat from your own bed. You're happy when you're walking on a familiar street. When you have family waiting at home. Family, and outside the window peaceful silence.
If you take someone else's money, it will not be good for you. Give your own - you will receive it. If you do evil, you will reap misfortune. If you live with God, you will be happy. Don't be proud of your glory, don't be afraid of the poor and the poor.
Why doesn't the man give you gifts?
All women are conditionally divided into two categories: some girls literally bathe in flowers and constantly show off gifts for girlfriends and colleagues, while others receive something very rarely and often it happens only on duty.
If you work as a senior manager, then, of course, on Women's Day and any other holiday you will surely receive a gift and a magnificent mimosa, and on your birthday you will put in front of you, for example, a bright orchid. But if you change jobs, none of your old colleagues will think of you...
What about personal gifts? And here you have been waiting for years for the prince on the couch to finally think to make you morning coffee, cook you breakfast, dare to hand you a bouquet and a beautiful box of precious jewelry? You expect such a miracle in the new year and March 8, and the anniversary of acquaintance, and just because. And it still does not happen.
Why don't you give gifts and show signs of attention?
Of course, to change the situation and enter the number of the first beauties bathed in gifts and male generosity, you can use the advice of experts in manipulating hearts:
Place a fashion magazine with a picture of jewelry or a beautiful handbag in a prominent place.
Tell him in passing exactly what and how your lover gave your girlfriend as a token of gratitude for this attention.
Give him something insignificant as a hint of a response from him and get him used to giving you gifts.
Such advice seems naive, trite and predictably unrealistic. If only because the gifts obtained with the help of complex manipulations and feminine wiles, you will not like. After all, every girl wants a man to come to her with a bouquet of roses unexpectedly and give it to her sincerely, out of soul and admiration for her beauty, as well as with great love.
But psychologists and esotericists tend to blame women for this kind of situation, pointing to their lack of self-love, low self-esteem, choosing a manipulative partner, and as a result a huge amount of accumulated internal trauma.
You lack self-esteem and inner joy, so the man senses this and runs away from you.
You are too self-sufficient, closed, absorbed in yourself and your work, and your man thinks you don't need anything.
The common curse of poverty is upon you. True.
But it's much simpler than that! The truth is that much of the trauma of childhood is not related to you, but to your partner, who was brought up in constant restriction, strict limits, forbidden to want and dream. Most likely, in his family, his father did not admire his mother, sister, wife and other women in his environment, and the other men in such a family were stingy, closed and cold characters.
Of course, on the red days of the calendar he will give you gifts, but they will not be gifts, but rather follow the traditions, rules of society or something like bribery for the sake of benefit and the desire to get something in return. And he won't do it out of the goodness of his heart or because he would like to pay more attention to the woman he cares for!
Maybe later he will be able to recognize and understand this difference. For example, if he sees that all men treat his beloved daughter as consumptively as he treats his own wife! But even in that case there is little chance of that insight ever happening.
And the only way to restore your peace of mind, inner harmony and balance - to turn to yourself, listen to yourself and your desires.
And if you don't get gifts, better give them to yourself. After all, this has a huge advantage - in this case, you will never make a mistake when choosing a gift for your loved one.
A great way to overpower the enemy and the enemy's enemies
There is a good way to get revenge on your enemies. Strip them of their strength and energy, force them to use all their resources like a broken reaper or a broken Trojan horse. This is a very simple and effective method.
The healer suffers terribly for his own sake, it is scientifically proven. He uses all his energy, all his resources to outdo you and spoil you. It is truly an unenviable fate. If it is good for you, it is bad for him. As bad as you are, you are good. So the easiest way to deal with adversity is to simply live well. Account for all your efforts and keep improving your life.
Dress well. Watch your clothes, look at your clothes, your jewelry, your purses and wallets, and don't take your eyes off your pictures or yourself. His gaze will pierce you. So you need to dress well, even if it's not that important to you. But it's worth it in the end to update your wardrobe and buy yourself some nice new things. The best you can afford.
***You need to rest and travel.*** This especially pisses off the nerd. First of all, when you go somewhere, you "disappear off the radar". The attacker gets lost in your thoughts, suffers because they are in thought with you, in sync. You are a very important object to him. And then the evil ship is out of sight. Where is it? Restless, it's about the enemy's plans, he can't find you. And scientists have learned that distance or proximity plays a role in mutual influence. The patient has lost you and is distraught. He is weakened.
Otherwise, if the patient finds out where you took him, he will rush to look at the pictures if you posted them. And ask people you know about the details of their holiday. The child's head will be full of wild fantasies. He will go beyond everything, rozfarbovavuet all his zdorostyu. A modest hotel room at the Taj Mahal, a walk on the beach - a round-the-world trip on a cruise ship. He shows how he ate lobster and drank "Widow Clicquot" in the company of mulattos... Well, let him fantasise. It gives him energy and improves his mood.
***You have to be cheerful and happy.*** The nurse will know all about your condition. About your worries and your mood. She will be happy to see you. So be energetic and happy. In time you will lose your tendency to nag, you will feel the glory and the rush of energy. You will be attracted to it, everyone is attracted to energetic and successful people. And the observer will lose power when they realise you are cheerful and happy. If you feel uncomfortable, tell only those closest to you, never say anything in public.
Reach out to your friends, meet more often with those who are dear to you. Go as a guest, ask to visit, meet at a café or party. Don't sit indoors. Be in the community more often. Take pictures and post them. And your friends will say they saw you in good company in a nice place. Your client will especially appreciate it. They want you sitting at home like an oyster in a shell, afraid to stick your nose out, sick and weak. But no. That won't happen!
And you know you'll feel much better in an hour. Because all these activities are really good for you. And the patient loses a lot of strength. Because health is a great source of strength. But then you just forget about the patient. It will mean nothing to you. Because your strength will increase and your life will change for the better.
It is not a phase. It is simple self-defense, cruelty-free and environmentally friendly. It's also good for the patient - they might change and not be angry. Although this is unlikely... But it will certainly be less unpleasant - both for you and for other innocent people.
Every person who appear In our lives is a teacher! Someone Teaches us to be stronger, someone wiser, someone teaches us forgiveness, someone teaches us some teach us to be happy and to rejoice in every day Some teach us don't teach us at all, just Breaks us, but that's what we experience. Appreciate each and every person, even if they show up for a moment. After all, if they it's for a reason!!!
What would I do if I were alone in the universe?
I can't even imagine.) Logic in my head fights desperately for the idea that there is a low probability that my body is the only one to repel some threat from which everyone died, and therefore refuses to look for a strategy for such a development.
Although, in principle, to survive on my own, except for force majeure, only one factor is needed: electricity. If you settle next to the windmills, then heating, food and other things - not a problem) And then you can already live for decades) In singles, and spend more) And here you have a lot of free time and a bunch of different movies, games, books, and other snippets of civilization. I think I would savor my last hours, nostalgic and kindly remembering how cool it was when there were people around))
What else would I do if I were the only person left on Earth??🤔 Hmmm. I think for the first seven hours, I'd run around the stores grabbing the products I liked, get in the first car I liked on the street, drive to the candy store and get full of custard cakes...? And then??? And then I'd get bored. Man is a social creature, which means we need human society. If I were left alone on the whole Earth, then such notions as friendship, family, love would instantly disappear. If there is no one around, who is there to love? Who to be friends with? With whom to communicate? Scientists have established that a person cannot not communicate with other people without compromising his mental health. You have to communicate with someone to tell them about how fun it was to eat a case of custard cakes and take a ride in a Lamborghini... Remember the wonderful Robert Zemeckis movie "Outcast" (2000), starring Tom Hanks, remember how the main character lived alone on an island, and from the lack of communication began to communicate with a ball, gave him the name Wilson, drew a face on it? It also comes to mind "Robinson Crusoe" by Daniel Defoe, and the film with Will Smith, "I am a legend. In the latter, by the way, the slogan was the phrase "The Last Man on Earth Is Not Alone," but the hero of the film had a friend-dog, and the goal-to exterminate vampires. The moment where he plays golf-proof of his great boredom, his thirst for companionship...
I will realize that in a few days the water, goose and electricity will be cut off and vicious and hungry animals will race through the streets and I have to get away from this planet🤣.
Immediately I was reminded of Ray Bradbury's short story "Vacation." I would have been terrified and wouldn't have lasted long. Man is a social creature. Only the most resilient among us manage to survive all alone and not go crazy. Apparently, I'm not one of those.
We are essentially alone in the world as it is. If all your relatives die, you're all alone in the world, nobody cares. It's scary.
In fact, I'm not used to loneliness, I would survive as long as I could, as long as I had food and drinking water, I would entertain myself with all sorts of things from stores, then I would die, but I don't know how, I wouldn't have the guts to commit suicide.
It would be too boring on its own. On the one hand you can do what you want - the world is at your disposal and no one would say anything to you, on the other hand, the lack of communication can simply go crazy. Without long-term communication you can turn into some kind of savage, running around the deserted city without clothes and screaming like a monkey.
You wake up in the morning and find that everyone has disappeared, and you are alone on this beautiful planet, your first action?
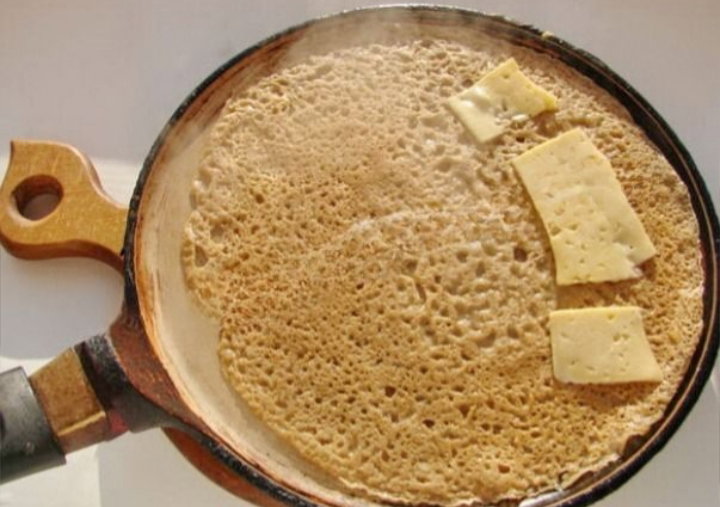
Cheese and Coffee Pancakes
Have you ever tried pancakes with coffee? No, no, no, no, no, not with coffee, just with coffee. This amazing recipe for Dutch pancakes with coffee and cheese was an instant hit in my kitchen because our family loves pancakes, coffee and cheese and combining them in one dish is a unique culinary feat.
I stumbled across this unusual pancake recipe by chance when I was looking for something interesting for breakfast. Coffee batter and cheese filling - a great combination! I love coffee and cheese, don't you? We've made coffee pancakes before, but we hadn't thought to fill them with cheese! Try it - it's incredibly delicious and reminiscent of hachapuri or cheesecake... Very tasty! Especially if you cook the pancakes until they are crispy. Crispy edges, moist, salty cheese filling... This dish is worth a look!
While the mixture was baking for 15 minutes, I decided to search for more information about Dutch pancakes. And I found a lot of interesting stuff! It turns out that pancakes are a national dish in the Netherlands. They are not only baked and eaten on the eve of summer, as we do, but all year round (and rightly so :)). And the most interesting thing is that Dutch pancakes can be big (the big pancakes Pannenkoeken, as "pancake" sounds) and small - Poffertjes, which are baked in a special deep-dish pan, and small but fluffy: about 4 cm in diameter and 1 cm thick. Can you imagine how cute they are? I understand that the pannenkuken are similar to our own milk pancakes (the basic recipe is translated from Dutch), while the poffertier are made from a dough of wheat and buckwheat flour. We'll try them all, but for now we'll make coffee pancakes with cheese!
Image
Ingredients:
***For 8-10 pancakes, depending on the size of the pan:***
200 ml milk,
300 ml instant coffee (instant coffee can also be bought),
1 egg,
1.5 cups flour (= 200 g, 200 ml cup without lid),
¼ teaspoon of salt,
1 teaspoon sugar,
1 teaspoon vegetable oil,
120 g hard cheese.
How to bake:
Mix sifted flour, salt, sugar and eggs in a bowl. Mix coffee and milk in a separate bowl. The coffee was freshly brewed and the milk was from the fridge and had just been warmed up after being mixed :).
Pour the coffee and milk into the flour mixture, stir and whisk to avoid lumps. Add a teaspoon of vegetable oil to the mixture. The original recipe was missing oil and sugar, but I added them anyway - how about sugar-free pancakes? A little sweetness is a good counterbalance to the salty taste - I like sugar-free pies filled with light puff pastry, for example, so they taste better that way. Add butter to make it easy to get the pancakes out of the pan.
Let the mixture sit for 15 minutes (and in that time read all sorts of interesting things about pancakes :)). Cut the cheese into thin slices. Grease a dry and clean pan with vegetable oil, wipe off excess oil with a tea towel to get a thin layer. Heat it well and pour it over the coffee paste. Shake the pan to distribute it in a thin layer.
Fry the pancake until lightly browned on the bottom. Then put a few slices of cheese on one half of the pancake and cover the other half with the other half. When the pancake is browned, flip it over on the other side. A little more and you can transfer the Dutch pancake to a plate. The cheese on the half-folded pancake melts and forms a delicious cheese filling (like on a pizza). A hot pancake with hot coffee is a great snack!
A simple and hearty breakfast with easily available ingredients - delicious coffee pancakes with milk and cheese. Such an interesting recipe for unsweetened pancakes with filling is definitely worth paying attention to, because it is original, not complicated and most importantly - very tasty!
This recipe is for those who want to start the day with the thinnest dough ball, but who are tired of monotony. All housewives have their tried and tested pancake recipes, but sometimes it's worth taking a step back and breaking the routine - when you do, you'll discover interesting perspectives, unexpected flavour combinations and new favourite recipes.
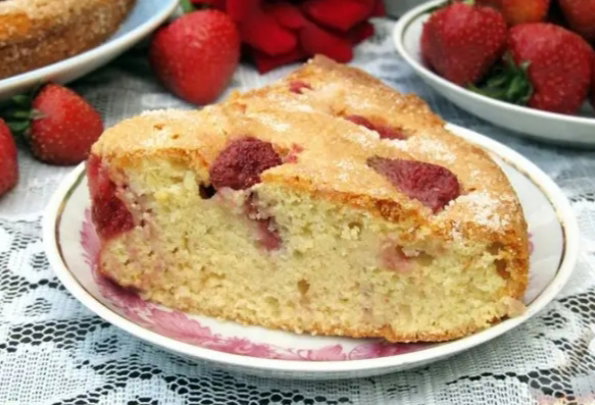
Strawberry cake
Hi read.cash! I've made strawberry cake with sour cream and milk many times, but now I'm going to try strawberry cake with kefir! The simple ingredients and easy preparation make it incredibly delicious.
I was pleasantly surprised! After baking the pie for almost an hour instead of the 20 minutes planned, and after baking it halfway so the bottom was a little burnt, I wondered if I should offer the recipe to readers. But after tasting a slice, I was determined that not only can I do it, but I must! It's such a wonderfully delicious pie!
Soft, airy, with a lovely creamy flavour and moist thanks to the kefir and fruit. I think strawberry kefir pie will be a favorite from now on! I will try to bake it not only with strawberries, but also with cherries and other fruits, it will definitely be good!
Ingredients:
For a 20-22 cm pie dish, the height of the dough depends on the baking time:
200 grams of flour (1.5 cups 200 ml, as 1 cup contains 130 grams of flour),
150 g sugar,
1 teaspoon of baking powder,
¼ teaspoon of baking powder,
¼ teaspoon salt,
vanillin on the tip of a teaspoon,
100-110 grams of butter,
100 ml kefir,
1 egg,
A handful of strawberries
***How to bake:***
Strawberry kefir pie dough is made in a very interesting way: it is something between a traditional kefir dough and a pasta dough. First mix the dry ingredients: sift the flour, baking powder and baking soda into a bowl, add the vanilla, salt and sugar. The baking powder is needed in addition to the baking soda because the dough contains fermented milk products. Kvas already contain bicarbonate of soda and citric acid, and the ratio is chosen so that they react without residue. However, if the batter contains yogurt, sour cream or honey, a pinch of baking soda will improve the initial effect - the baking soda will react with the acidic medium and the cake will become even more foamy.
Add the butter in cubes to the dry mixture and crumble it with your hands - do you recognise the dough?
Now pour in the kefir, add an egg and knead it all together. This makes a fairly thick dough.
Spread it on a greased baking tray with baking paper and flatten it. Put the washed and dried fruit on top. If the strawberries are large, you can halve them.
Place the strawberry tart in a preheated oven at 170-180 C and bake until the centre is dry (you can check with a skewer) and the surface is golden brown. The baking time depends on the size of the pan and the oven's characteristics. My cake was baked for about 50 minutes. Try earlier - you might get a faster pie in a different oven.
After letting the pie cool for a few minutes, transfer it from the pan to a plate and sprinkle with powdered sugar.
Cut the pie into portions.
Bring the pan to the boil and invite the family over for a tea party with the delicious strawberry cake!
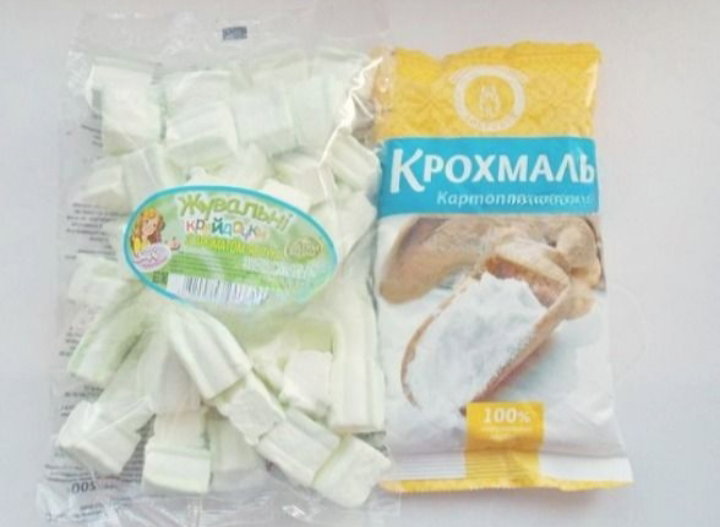
Homemade marshmallow meringue
I've been following your recipe for homemade fondant for a long time and admire the cakes you can decorate with it! I thought it was hard to make real fondant at home. And there are so many recipes online that you don't know which one to choose. But once she shared a simple and good fondant recipe for marshmallows - chewy marshmallows - with me. I quote this formula: "Melt these marshmallows in the microwave with 2 teaspoons of butter and 2 teaspoons of milk. Then I mixed about 1 cup powdered sugar and 1 cup starch and kneaded it together into a dough.
I made the dough ahead of time, so I had to refrigerate it in a plastic bag, tightly wrapped, and then briefly microwave it, but enough to keep it in the fridge for 30 minutes, and then it's ready... Roll it out like a dough and shape, shape, shape)))).
Fondant allows you to make all the birthday cake decorations you want. Completely surround the cake, make shapes and sugar flowers - there are no impossible things with fondant! This kind of decoration will appeal especially to small children and lovers of original solutions. A cake in the form of a glittering bag, a fish, onion bacon for the strongest half of humanity or a rainbow unicorn - do not limit your imagination. Thanks for this recipe, it's delicious!
I tried to make it... yes, I did! My first cake decorated with fondant was a boat-shaped cake; I immediately went for a more elaborate version - a mosaic of different colored pieces. It turned out really well, although the fondant broke in places. But then I got used to choosing the optimal ratio of wet to dry ingredients.
So I'm sharing a tried and tested recipe with you - try it, decorate your kids' cakes!
Picture of the marshes and starch. You will also need powdered sugar, a little oil and water.
Ingredients.
120-150 grams of marshmallows,
120-120 g sugar sugar, 2 teaspoons water,
2 teaspoons oil,
Sugar for icing and starch - 1 cup each.
The dry ingredients are approximate, can be a little more or less. The fondant should be soft and smooth, not sticky in the hand and not too dry. When stretched, this fondant is smooth and even and will not crack.
How to make fondant at home:
Put the fondant in a large microwaveable bowl, add the milk and butter and heat at 680-850 degrees for 1-1.5 minutes - until the fondant is soft and starts to melt.
Remove and knead the starch and powder alternately, a little at a time - first with a spoon until the mixture is warm and sticky, then with your hands.
When the fondant is not sticky, but still elastic, soft and smooth - that's enough. The ingredients must not dry out too much, otherwise the dough will be too thick and difficult to roll out.
How to colour mastic:
The easiest way is to buy coloured marshmallows: there are white, pink, green and chocolate coloured marshmallows. Coloured marshmallows come in chocolate, green, chocolate, green and green.
If you want a stronger colour or other shades, you can add food colouring or natural pigments: berry juice, spinach, cocoa, activated charcoal - yes, yes, black, if you want to make a cake in the shape of a football or a chessboard, for example.
For example:
chocolate - add cocoa powdergreen, green - food colouring diluted with water. Adjust the amount of dry and wet ingredients accordingly. Adding cocoa means less starch or powder. If you have added juice - add a little more instead.
Wrap the prepared mastic in a bag or foil and refrigerate for 30 minutes. And then - freedom to create! It's more convenient to roll it out in a layer of silicone. Not only can you roll it out into a roll, but you can also shape it like plasticine. Once dry, they become solid.
Before I made them, I read a lot of recipes for homemade fondant and the different shapes. And that's where I learned some of the nuances. Here's one of the most important.
***IMPORTANT:*** Put the fondant on top of the buttercream: spread it on all sides of the cake, press it flat with a knife, put the cake in the fridge, press it flat again with a knife. Spread 2 layers of cream in this way. Spread the fondant over the cream. Do not use jelly or sour cream - it will "float". Do not put it on an ungreased cake - it will be uneven. But butter and condensed milk make the perfect cream...
Mastic.
***Tip.*** Mastik can be stored tightly wrapped in cellophane in the fridge for up to 6 weeks,
Wrapped in several layers of cellophane and wrapped in foil, it can also be stored in the freezer - fondant can keep for months in the freezer.
Finished dried mastic figures should be stored dry in a tightly closed box - these figures can be stored for several months.
Take the finished fondant out of the freezer, place it on a stiffened board and roll it out into a thin roll. You can use the prepared fondant to make different shapes, flowers, leaves and rosettes for cakes, or you can cover the cake with thin fondant.
What else can you do with marshmallows:
**A cool topping** for croissants and cakes that won't break. Place 200 g marshmallows in a water bath with 2 tablespoons of lemon juice and 2 tablespoons of vegetable oil. Melt over low heat until liquid, adding more juice if necessary. Stir in 2⁄3 cup icing sugar. Immediately begin spreading the fondant over the products.
**Creamy soufflé .**You only need 2 ingredients - double cream and chewy caramels. Whip one cup of cream until the desired consistency is reached. Melt the jam into the cream: Pour the cream into a bowl and add 150g of jam. Put it in the microwave or water bath. Stir in the water bath until dissolved. Set the microwave to pulsing and stir. Wait until the mixture has cooled, then carefully add it to the cream in small portions, stirring gently.
There are more ways to decorate marshmallows than you might think. You can make beautiful marshmallows with barrels on skewers. Make mosaic patterns with small colourful circles. If you use a knife and your imagination, you can make all sorts of shapes. Just wet the glue spots with water. You can make beautiful swans from a large half of an ordinary marshmallow.
How much is edible fondant?
Do you know how much homemade fondant costs? Calculate how much marshmallows, icing sugar and colouring cost. It's not that cheap, is it? It's easier to buy ready-made fondant for about 60 rupees for 0.5 kg. It's especially worth buying black, red and brown mastic. They are very hard to come by on your own! Where can you buy it - easily - in a pastry shop.
*Let's cook with love!*
Froggy buns
Grandma's pancakes, mom's rolls, friendly cake baking and meatballs - something we always remember and which will remain among the best childhood memories! Homemade delicacies preserve "the" taste you like and give you a feeling of happiness when you taste them again after many years:) A bite of grandma's cake and the trees seem tall again and the world seems big and wonderful! And what happens if we are all grown up? Let's enjoy life with our children, nieces, nephews and grandchildren like little kids! And cook delicious meals together:)
And the best thing is that we girls and boys (yes, yes, yes! there are some wonderfully talented cooks among the boys!) - we are all little wizards:). You guessed it, cooking is magic, right? And now imagine baking something with the kids - cakes, cupcakes, shaped cookies - that the big kids will remember with excitement years from now! That's the real magic - spoiling your beloved family members with treats that have your love and warmth as an essential ingredient. Simple pancakes or apple pies, cookies that are so fun to cut out, or a wonderful birthday cake - any recipe made with love will be magical! :) And if you're creative and come up with something unusual!
In any case, homemade baking is definitely more beneficial for kids than cookies, chips and biscuits! Right? So let's not go to the store for cookies, let's go to the kitchen and with our little (or big) helpers make something delicious for the teen! Even a kid can make simple muffins almost by himself. And kids of all ages love to make cookies or bake cakes!
Let them do what they want and they'll end up with little cookies and candies, it's just a matter of getting everyone excited and helping their mom. And how delicious is it if you make it yourself! Well done: the kids eat, and the grumpy kids quietly become helpers :). What cooking magic! Even the most ordinary day becomes warm and festive when warm scones or delicious cookies are served for the evening.
And on holidays like New Year's Day or birthdays, you can create a family tradition and cook something more substantial and sophisticated together! For example gingerbread, gingerbread houses or original cakes! Imagine, create, enjoy and make your family happy! And then your children will be creative and happy, and our world will be a better, kinder and friendlier place:)
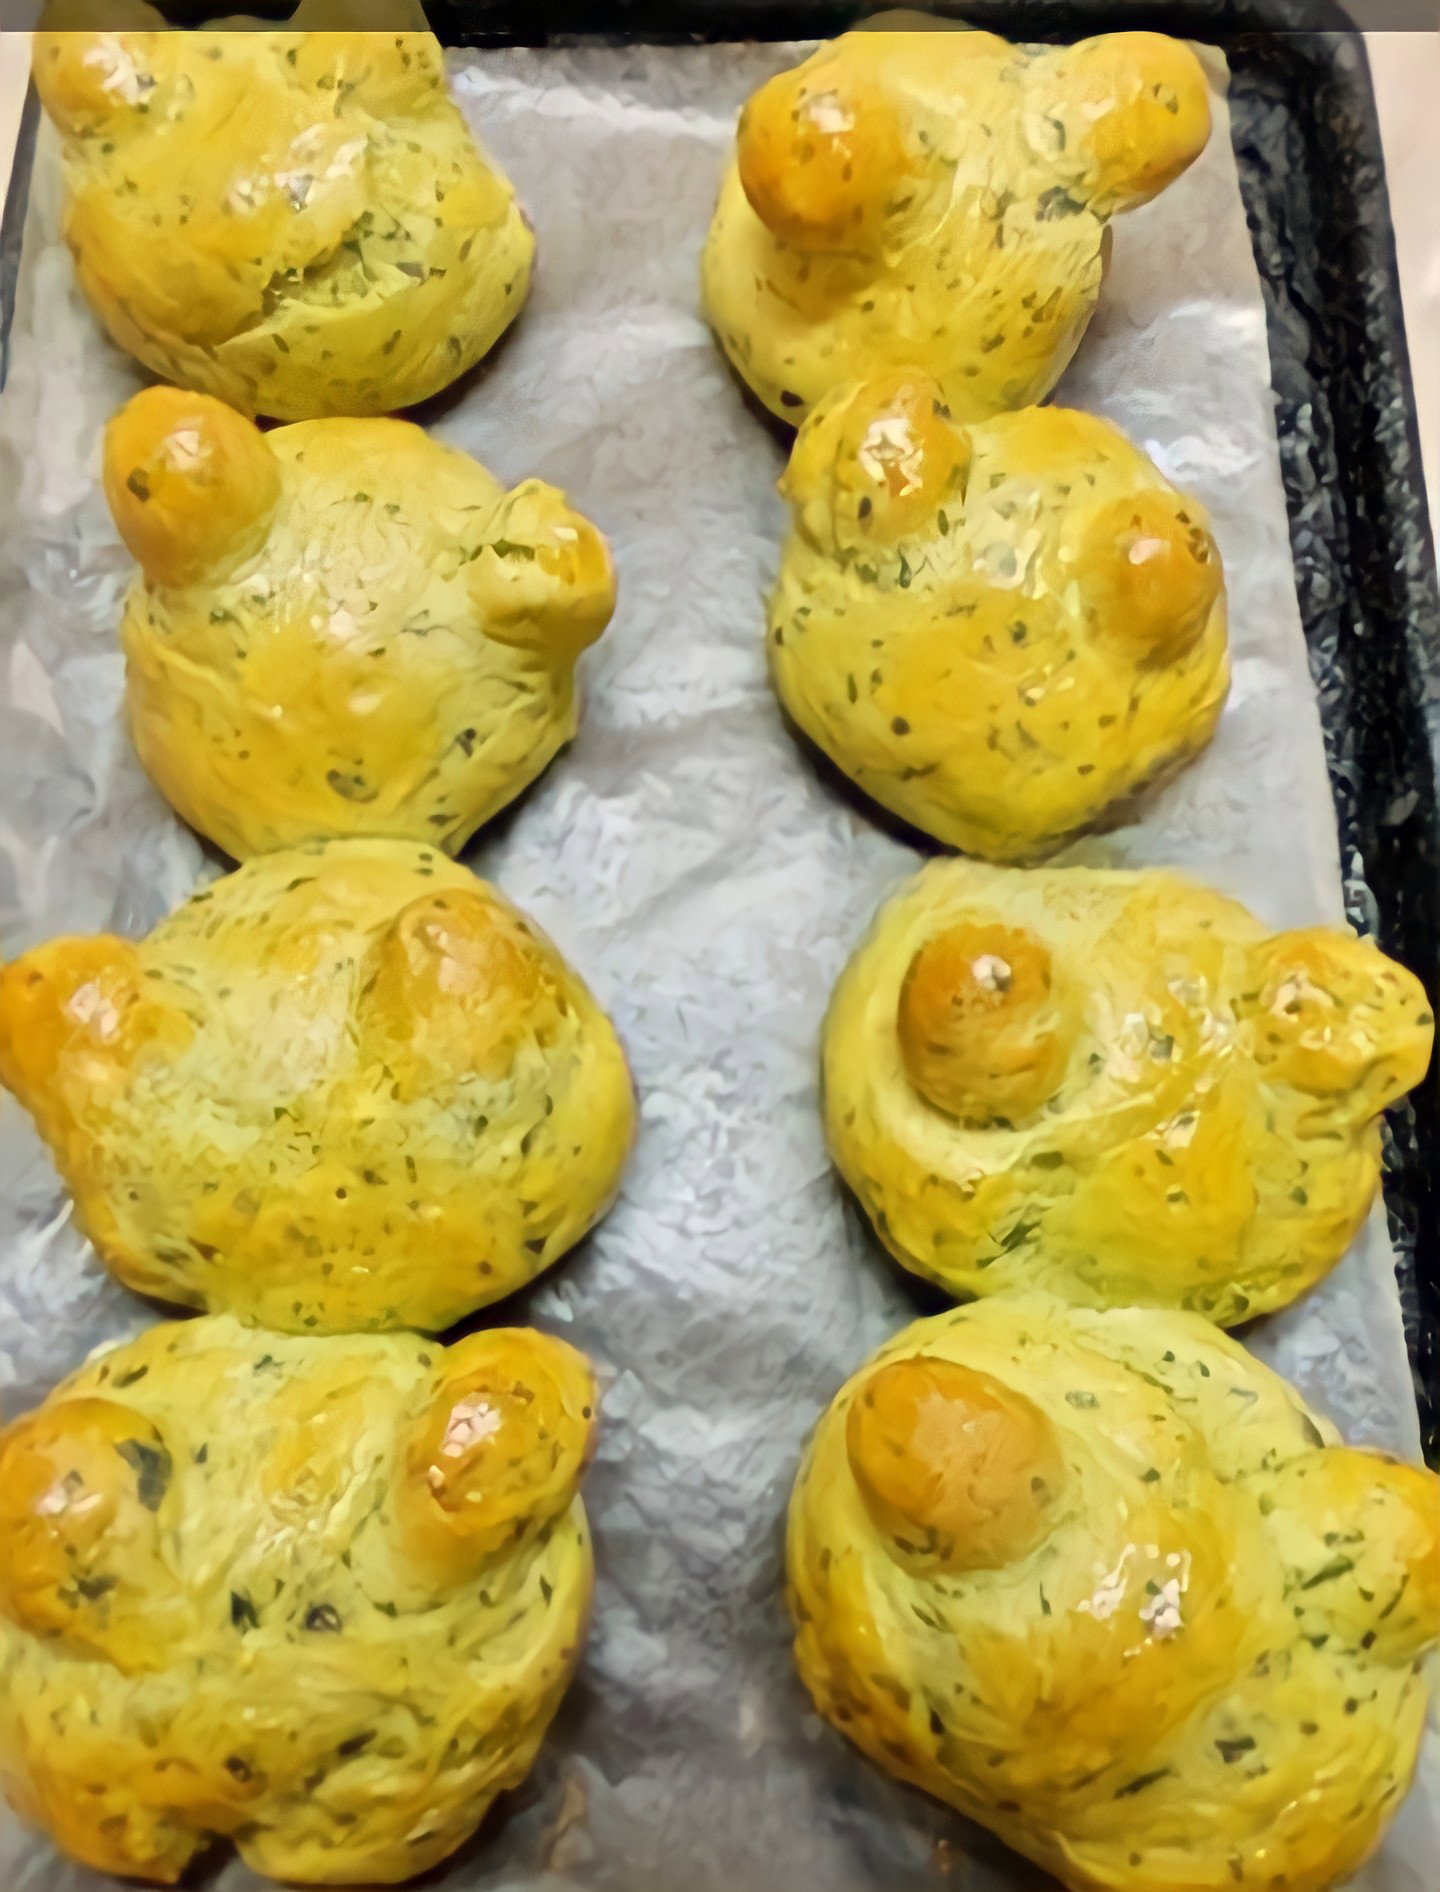
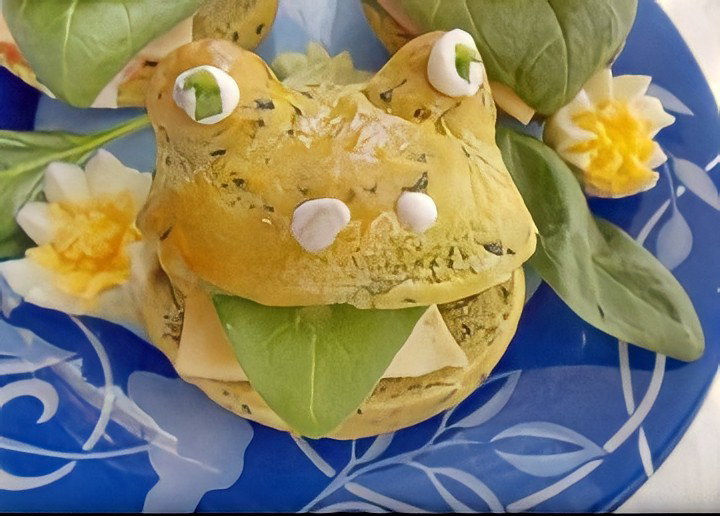
Today we decided to play stork and eat frogs for breakfast 😀 !
Look at the original and happy squacco frogs sitting in the blue pond, and there are green water lilies and white water lilies with yellow center!
The kids will love these unusual sandwiches. Not all kids will eat a regular sandwich, but they will eat a seed bun like this, and if you shape them together! And the bread, cheese, ham and even the healthy green spinach leaves will "crunch" a lot.
The decorations for the pretzels are amazing! And as always, I've changed the recipe:))))) In the original, the buns are white with a red crust, but our seed leaves are green!!!! That's because they are spinach:))) I've added spinach puree to the dough. So our buns are not only interesting, but also healthy! I replaced the lettuce leaves in the filling with spinach leaves. Instead of ham you can use cooked meat pieces, bacon or chicken slices.
***Ingredients:***
**For the dough:**
15 g yeast,
1 tablespoon of sugar,
150 ml milk,
200 g spinach,
200 g butter,
1 small egg,
1 teaspoon salt,
1.5 tablespoons vegetable oil,
350-400 g flour.
***For the filling:***
Cheese,
350 g lettuce or spinach leaves.
***To bake:***
Activate the yeast: crush it in a bowl, rub it with a spoon and sugar, pour in the lukewarm milk and mix.
Now sift a little flour - about a cup - into the bowl, and stir again to make a lump-free, light dough. Put the casserole in a warm place for 15-20 minutes and cover with a towel.
While the casserole is rising, you can make spinach puree for the dough - remember how we coloured the dough green for the braided lanterns? And the same principle applies here. Soak fresh spinach leaves in cold water for 5 minutes, then rinse under running water and dry in a colander. Cut them into strips and blend them in a blender. You can also use frozen spinach - defrost it so it's not cold when you add it to the dough, and drain off any excess water. But with fresh greens, the colour will be brighter!
Here the stew rises, full of air bubbles. Add the softened butter and half the eggs and stir. Now gradually add the sifted flour, salt and spinach puree. Knead the dough and add the flour until it is almost sticky, but still soft and smooth. The amount of flour depends on the water content of the flour and the water content of the spinach purée, so the amount of flour may vary. It's important not to overflour the dough so it doesn't get too stiff - if it does get sticky, it's best to brush your hands with vegetable oil occasionally while kneading, or to add a spoonful of oil to the dough. Once the dough has been kneaded for 10 minutes, place it in a bowl brushed with vegetable oil, cover with a towel and leave in a warm place for 1 hour.
In this way the dough rises - it doubles in size. Perfect! Now it's time to roll the rolls. Divide 16 small pieces of dough of 7 grams each and roll them into a ball. Divide the remaining dough into 8 larger equal pieces, and shape into balls.
Roll out the small balls in your hands so that they are elongated on one side and round on the other. Poke two holes in a large ball with your finger, close together. Place the eyes in these holes, round side up. Place them close together so that the eyes do not move away from each other during baking.
Place the pieces on a baking tray with greased baking paper and leave for 10-15 minutes to set. Meanwhile, preheat the oven to 180 degrees. Once the scones are baked, carefully straighten the loose crusts and return the baking sheet to the oven. Bake them on a rack in a medium oven for 25 minutes, then brush them with the remaining egg and bake them in the oven for a further 5 minutes. Check the tenderness of the meat with a skewer. If it's dry, the bun is done! Let the buns cool, then decorate them. Cut a slit in the middle of the bun, but do not cut across the entire bun. Cut the cheese and ham into thin slices. Place a slice of cheese and ham on a clean spinach sheet and fold it in half. And put them in a container. Make a green spinach tongue:).
Paint eyes and noses of sour cream and finish frog tail! 🐸
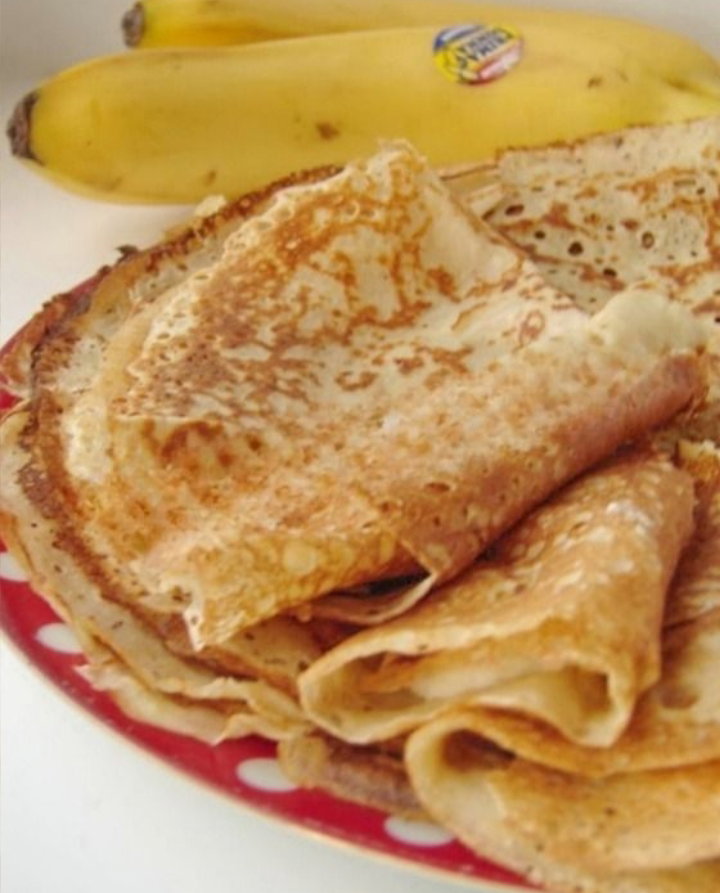
Banana pancakes on milk
A very simple recipe for delicious banana pancakes with milk for banana lovers - banana lovers! The thin, thin, blonde banana-flavoured pancakes come off the plate in no time... what happens to the plate straight from the grill:) They're very soft and delicious, but if you leave them in the pan longer, they get crispy! We are very pleased with this unusual recipe for banana pancakes, and we suggest you try it too.
It's basically a traditional milk pancake, but with a twist - bananas are added to the mix. Otherwise, here's another way to use overripe or unripe bananas - and also other baked goods like banana bread, cakes and pies. Just one slice is enough to give the pancakes an intense banana flavour.
Baking and eating banana bread is a real pleasure! The kids will love helping in the kitchen and tasting the result too:) By the way, my daughter has found a way to wrap the finished pancakes in banana pieces with honey. It turned out even tastier than a traditional pancake!
**Ingredients:**
0.5 litres of milk,
0.0 ml milk, 2 eggs,
1 banana,
1 cup of flour (130 g),
a pinch of salt,
2 tablespoons vegetable oil.
It is not necessary to add sugar to the dough, as the banana is sweet in itself. We halved the white flour and durum wheat flour, which has a yellowish color and, like spelt flour, makes a particularly tasty and healthy dough.
***How to bake:***
Pour the milk into a bowl, add the eggs and a banana cut into small pieces.
Blend everything in a blender until smooth. Sift in the flour, add the salt, whisk (to avoid the flour shaking in the kitchen when the blender starts working), and whisk again until there are no lumps. Yes, this is the recipe where you use a blender instead of a mixer:)
Add two tablespoons of vegetable oil to the mixture and blend. The banana pancake mix is ready! You can bake it.
Grease a dry, clean pan with vegetable oil (before you make the first pancake) and heat it well over medium heat. Scoop out the mixture, shake the pan and spread it in a thin layer.
Fry the pancake until golden brown, then turn with a spatula and fry the second side until golden brown. Place the finished banana pancakes on a plate.
Eat them on their own or with banana filling!
Milk and banana pancakes are my kids' favorites. Serve these delicious, fluffy, flavorful and very soft pancakes with chunks of fresh banana and sweet syrup, you'll love them! Make pancakes with this successful recipe and I'm sure you'll love it!
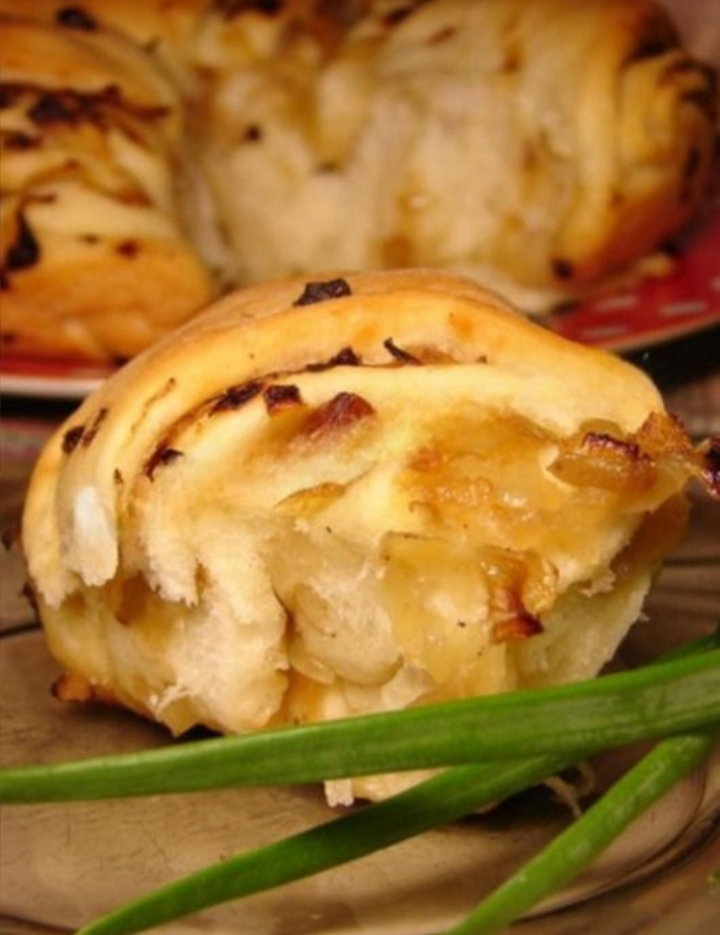
Very tasty onion pie!
My son chose this onion tart instead of sweet baguette for breakfast :D I think it's the best way to promote baked goods! Even though the onion tart is low fat and sugar free, it is incredibly delicious. I recommend it to all readers - you must try it! For sugar-free candy and fried onion lovers like us, this is absolutely delicious!
The dough in the low-fat onion tart is surprisingly soft and especially delicious thanks to a secret ingredient:) Despite there being no eggs or butter in the batter, it tastes like it's filled, doesn't dry out and doesn't get soggy at all (at least the next morning the cake tastes like it's freshly baked, we'll see - but I think it'll be ready by evening and experiment)))) doesn't work.
What is the secret ingredient? It's rice soup used instead of water to make the batter for the onion cake dough. It turns out that in the original rice soup, just like in potato soup, the dough, although thin, becomes thinner, softer and more tender than in water. But the original rice congee had 75 ml and 125 ml of water, while I used more rice (not 100 grams of rice to 600 ml of water, but 1 cup - 200 grams of rice to 1 liter of water, which became rice porridge for dinner)).
I was also impressed by the unusual shape of the pie. Similar to the grated apple pie: instead of slicing it, you can cut it into pieces. Very practical and original!
The onion tart can be baked in a 20x25 cm rectangular dish or in a 24-26 cm round dish or in an ovenproof dish.
Ingredients:
**For the dough:**
15 g fresh yeast (or 5 g dry yeast = 1 teaspoon),
1.5 teaspoons of sugar,
200 ml rice broth (add water),
1 teaspoon of salt,
2 and 2/3-2 and 3/4 cups of flour (350-380 g),
1.5 tbsp vegetable oil (mustard is best, but sunflower or olive oil can also be used).
For onion filling:
0.5 kg onions (about 6 medium onions),
0.5 teaspoon salt,
¼ teaspoon ground black pepper,
1,5-2 tablespoons sunflower oil.
**How to fry:**
Pour cold water over the rice (1 litre of water per 200 g of rice) and bring to the boil. When the porridge boils, lower the heat from medium to low, put the lid back a little to prevent water from escaping, add salt (a few pinches) and continue cooking until tender, stirring occasionally.
Rice cooked in boiling water is particularly tender and tasty, and the leftover stock is good for pasta. When the rice is cooked, carefully pour the stock into a bowl. I poured the rice in by gently moving the lid, but if you're worried about the rice suddenly falling out of the pot, pour it into a colander:) Pour 200ml of water over the resulting soup and leave to cool until relatively lukewarm.
Then crush the yeast in a bowl, mix with sugar and pour over the stock. Stir and then sift in a little less than a cup of flour. Stir again. The dough is as thick as sour cream. Let it stand in a warm place for 15-20 minutes covered with a towel. Meanwhile, peel and chop the onions and fry them in vegetable oil until golden. When the onions are soft and lightly browned, season the stuffing with salt and pepper and leave to cool.
Sift the remaining flour into the mixture and add salt first, then vegetable oil with the next batch of flour. You can use any oil - sunflower oil or olive oil, but the best cakes are made with mustard oil. This aromatic oil gives even unsweetened cake a cakey flavour.
Knead the dough until it becomes sticky and smooth. I have patience for 3-5 minutes, but the longer you knead the dough, the better - the dough will be fluffy and soft and more beautiful. Leave the bowl of dough covered with a towel in a warm place for 1 hour. Lift the dough and divide it into 3 parts. Sprinkle the table with flour. Roll out each part of the dough into a thin circle (2-3 mm).
When you have rolled out all three sheets, divide the onion filling into three parts and distribute a third of the onion evenly on one of the three sheets. Cover with the second circle of pastry and spread the other part of the onion on top. Cover with the third circle and spread a third of the fried onions on top. Cut the circle into 8 pieces, like a bun. It is a good idea to cut first into halves, then into quarters, so that the eight pieces are equal in size.
Roll each part like a pretzel - from the wide end to the middle. Place the onion croissants in a bowl lightly oiled. Arrange them as desired. Let them cook for 30 minutes - you can put them on the stove while the oven is slowly heating up to 200 °C.
Place the pie in the preheated oven and bake at 200°C for about 30 minutes, until the skewers are dry and the crust is crisp. If you want a soft crust, you can cover the hot pie with a towel or a lid. Let the onion tart cool a bit and it's ready to be enjoyed!
This is a delicious pie, next time I want to make it with toasted pecans, I think that would be a great addition)👌.
"Bird's Milk"
Good morning, dear readers of read.cash! Today is July 17 and July is a beautiful day. Yesterday I baked a delicious "Bird's Milk" cake that I want to tell you about today, maybe some of you would like to make it too and get the recipe.The most complicated cake I have ever eaten.That I have ever had to make. Period of my own creation.I became mathematician, chemist, physicist, not.I don't know what else)))) the result is stunning!A good recipe for double poultry milk.Everyone liked it very much!Pie!
Ingredients
This cake is a classic cake. Light and harmonious in flavor, easy and quick to make. Thanks to my detailed masterclass with all the steps, even a beginner will be able to make this wonderful cake. The main thing is to buy good quality agar. However, this is not a problem today.
Oh, bird's eye, I've probably made this cake a thousand times! Different variations, different recipes, which nevertheless still look like sisters, usually just different in proportions. I've tried with more and less sugar, with more and less agar, with cream, with butter, with condensed milk.... I've even tried it with gelatin). I've added layers of berries and currants! With milk and dark chocolate, with cream frosting, with butter frosting.... And not because I like this cake so much. Yes, my family loves it, but I'm not a big fan myself. But my interest in sports, my obsession with baking and my desire to find a recipe that I say, "Great!" have done the trick). Anyway, now I am definitely a master of bird's milk cake).
Many people say it's too sweet and try to cut down on sugar. Some people say it's too oily, so they choose cream instead of buttercream for the soufflé. I have probably tried all these combinations and I can tell you this: no matter how much sugar you reduce in an agar soufflé, it will still be sweet, in fact, I think it will be almost as sweet. Because the syrup has to be made at a certain temperature (110 degrees) and therefore has to have a certain consistency, using less sugar simply means less syrup, no more, and that (with the same protein content) already has an effect on the texture of the soufflé, which in my opinion is even greater than the infamous sweetness of bird's milk. That's why I didn't like the cream version at all: the soufflé barely held its shape. Yes, it melted in the mouth, but that's not all! In my opinion, a real "bird" soufflé should be slightly elastic, light and airy, but not completely weightless; it should have a rather noticeable density. The sponge cake pieces do not fall apart when cut, but retain their shape well when transferred to the plate. They resemble the candy of the same name. I would also reject the poultry milk cake with jelly: also delicious and even very tasty, just not the same.
Of course, it all depends on taste. You may disagree with me. Nevertheless, I highly recommend "my" version of butter cake, which of course I did not invent, but which I found, tasted and chose from many others. I have filmed the whole process of making this cake step by step in a video, so you can understand it as best you can, even if you have never made a cake before! It's hard to go wrong, as it's one of the easiest and fastest cakes in the world).
***Let's get started!***
**I'm making cookie dough!**
By the way, I've also tried different cookies with this cake. Gostoff's version is a shortbread dough, many bakers make homemade bird's milk with a classic cookie and let it soak well, I came across a version with almond biscuit....
And we will bake something between the dough and the sponge. Specifically, we will make the dough from egg yolks (we still need a soufflé white, so we will also use egg yolks). When baked and cooled in thin layers, it is medium-thick and crumbly, but it does not crumble like "sand" and goes well with a soft soufflé.
For two cakes with a diameter of 16 cm, you will need 80 g of butter at room temperature and 80 g of icing sugar or powdered sugar. Put them in a bowl.
Mix well in the mixer on high speed until the mixture becomes light and fluffy. You can add vanilla extract (1 tsp) or vanilla sugar (10 g).
Add the 3 egg yolks one at a time, beating well after each yolk.
Sift 100 g flour, 0.3 teaspoons baking powder and a pinch of salt into a separate bowl. Mix well with a whisk.
Add the dry ingredients to the butter-egg mixture.
Mix with an electric mixer at low speed until smooth.
Fry the crust!
Now take a 16cm diameter tin (I have a pasta pan), line the bottom with baking paper or place on a baking tray/silicone mat. Spread half of the dough (it's best to measure it so the crust is even!) as evenly as possible. It's easiest to use a small curved ink knife, like the ones artists use for oil painting. If you're struggling, you can use a silicone spatula to help you.
Put them in a preheated oven at 180 degrees for about 15 minutes - until lightly browned. The exact time depends on the oven!
Do the same with the other crust. If your oven can bake two pies at the same time, you're in luck, so use it).
Freshly baked pies are very fragile, so handle them with care. They'll firm up a bit as they cool, but they're still pretty brittle, so be careful.
While the pies are cooling...
... we're making soufflés!
For this we need a very important ingredient - agar-agar. This is a natural thickening agent of vegetable origin. It comes from seaweed. It is considered to be analogous to gelatin, but only the work with agar is very different, and products made with agar have a completely different texture than gelatin. Agar-agar has different strengths, but I have never seen the strength level indicated in any way, nor have I ever seen the gelatin packaging indicate how long it blooms (a measure of gelatin strength). Unfortunately, you have to learn all this yourself.
It's also good to remember that agar fades with long-term storage. Fresh agar is stronger. So if you buy a lot at once, plan in advance where you will use them and don't leave them unused; it's very handy that they are sold in small 10 gram packets. For example, one packet is enough for three standard cakes, like Bird`s milk!Put it in a medium (not small!) saucepan. Pour in 270 g of cold water. Stir and set aside.
Now take 180g of butter at a good room temperature and 80g of good quality condensed milk.
Beat at high speed until you have a light, fluffy cream. If you are using vanilla extract, add it now (1 teaspoon). Set aside.
Remove any remaining egg whites from the yolks once the cakes are baked. I remind or tell those who don't know that the whites must be separated very carefully in a dry bowl so that not a drop of yolk gets into the whites. Put the egg whites in a large bowl and add a pinch of citric acid.
Prepare the baking tin
You can easily make this cake directly in the tin. Put an 18 cm diameter cake tin (or a bottomless cake tin) in the bottom and line the sides with acetate or other thick, smooth baking paper, not foil: if it's too thin and soft, it will curl and the sides of the cake won't be straight.
*Back to the bait.*
Bring the agar and water to a boil. Pour in 430 grams of sugar (don't worry, I thought it was too much, but the soufflé wasn't cheesy, it was very balanced, as it should be!)Bring the food to the boil. The syrup bubbles up and starts to fizz! This is why you shouldn't use a small container.
Continue to boil the syrup. When it starts to bubble actively, it will settle down a bit, but will continue to bubble. Boil for about 10-12 minutes, up to 110 degrees (if you have a thermometer), or until the syrup is what is called "thin" when a spatula or spoon holds the syrup like a thread.
But! Until the syrup reaches the right consistency and temperature (about 105 degrees or 8 minutes, but this depends very much on the pan and type of fire), the egg whites should be stiffly beaten frothy.Here, the syrup is ready! This was hard to do, but I hope it's clear: the syrup is actually on the unbroken string behind the whipped cream. You'll see!Turn the mixer back on and, beating the egg whites at high speed, pour the syrup in a thin stream. Try not to pour it over the whipped cream!
The dough will get lighter and bulkier before your eyes!Mix with a mixer for another minute or two. The dough will continue to rise and firm up.When you see that the puff has risen in the whipped topping, you can stop at this point.
Add the buttercream you prepared earlier.And, using the mixer, fold into the white mixture on low speed.The mixture liquefies immediately, but not too much. Blend until you have a smooth mixture. The soufflé is ready! And now...
...assembling the buttermilk biscuits!The soufflé will be ready quickly, so the waltz will be appropriate. But if you've prepared everything beforehand, don't worry, don't worry, do everything right, everything will be fine.
Remove the pre-prepared mould with the lining. Lay the first sheet on the bottom.
Pour half of the soufflé on top. If possible, measure the cake with a scale and assemble it so the layers are even. I haven't done this, but it's better if I have everything handy and can measure the plate I'm making the soufflé on beforehand. Once you've measured the soufflé with the bowl, simply subtract the weight and divide the resulting number in half.Insert the second cake. It pushed easily into the soufflé, I didn't have to help it.
Pour the second part of the souffle over it. That's it! Put the cake in the fridge or freezer and keep it there until the souffle is done. This happens very quickly, but it's best to keep it longer, at least an hour or two. When the time is up.
The icing is done
Oh, this is a must! Dark chocolate definitely sweetens the sweetness of the soufflé and makes the overall taste of the cake more harmonious. Take 65g of good dark chocolate (mine has 54% cocoa, but you can go higher).And 40g of good butter.Defrost everything in the microwave or water bath. Be careful: don't overheat! Heat in the microwave for 15-20 seconds, then remove, stir and heat again for the same time. And so on until the chocolate and butter melt. Otherwise, there's no need to try to melt everything: it will simply "boil" in the bowl due to its heat.
Stir everything together until smooth. The glaze should be nice and shiny and fragrant. Let it cool a little, it doesn't have to be hot, just a little warm, but it should keep its liquidness!
Remove the cake.
Now you can remove the tinfoil, but not the acetate foil! Pour the icing over the cake. Lift the cake, holding it by the lining, and turn the weight so that the icing is evenly distributed over the surface. Put the cake in the fridge or freezer to set the icing. This will take at least an hour. I don't have the smoothest frosting, but that's okay (I've practiced 1001 times), because if you make samples, you still won't see any bumps.I make samples with plain, unpainted chocolate. Break about 30g of chocolate into pieces or buy muddled chocolate and put it in a piping bag.
And soak it in hot water for a few minutes.Then wipe the bag with a paper towel (chocolate is very afraid of moisture!), cut off a small end and paint) There's a "but": if something goes wrong, you can't paint it again, and if you remove it, you'll damage the surface of the glaze. Think about what you want to represent. I couldn't think of one and made it up as I went along) But it was still good. I actually fell in love with this cake while baking, photographing and tasting it). It's so soft!
By the way, the buttermilk cake tasted even better the next day - yay! So you can make it in the evening. And it tolerates room temperature perfectly: the soufflé doesn't puff up in the agaric heat, unlike the gelatin foam, and the cake doesn't warp. By "warm," of course, I don't mean 30 degrees in direct sunlight (you get that, right?).
**Try this cake!** Unlike all other cakes that need to be baked and stored in advance, cakes and cream need time to "harden" once assembled, long before they are set, shaped or whipped..... This cake doesn't need it, but it's elegant, festive and very delicious. Material and labor costs are quite reasonable compared to other cakes.
Have fun in the kitchen and delicious results!🥞👋
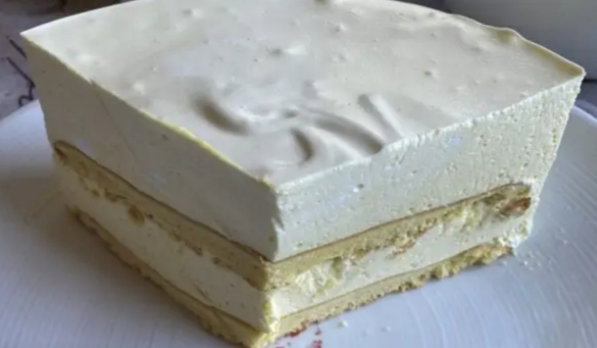
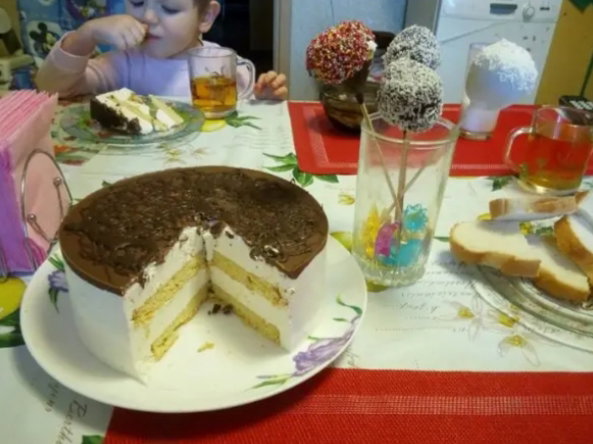
BCHpizza as a way to implement BCH
Hello to all lovers of pizza, as well as the cryptocurrency BCH!
No, today we are not talking about how to make pizza. But about something interesting! It's about an interesting project that introduces our favorite cryptocurrency BCH.
History of bitcoin and pizza
The first commodity in the world to be sold for bitcoin was pizza. The sale took place in 2010. At that time, American Laszlo Hanjeks paid 10,000 bitcoins for two pizzas. At the time, one bitcoin was worth 0.5 cents.
***But today is not about bitcoin, but about BCHpizza***
BCHpizza is a website dedicated to the growing adoption of Bitcoin Cash by merchants. Here's how it works: anyone can post a BCH reward to reward a pizza place in any city of their choice. The pizzerias can then claim half of the reward by starting to accept Bitcoin Cash. The other half of the reward is for the person who convinced the pizzeria to start accepting BCH.
***What is BCHpizza?***
Instead of having a Bitcoin Pizza Day, BCH Pizza allows cryptocurrency enthusiasts to buy their pizza using bitcoin cache. Although it may seem complicated at first glance, cryptocurrency enthusiasts will get help from the BCH Pizza catalog, which tracks Bitcoin Cash payments in exchange for pizza.
***How BCHpizza works to buy pizza with Bitcoin Cash***
Right now, the **BCH Pizza platform** offers an incentive that allows anyone to post a Bitcoin Cash reward due to the desire for a particular pizza restaurant in a particular city to accept Bitcoin Cash as payment for their pizza. If the pizza store officially allows BCH payments, those in charge are allowed to claim their reward.
BCH Pizza currently lists several locations in the U.S., Canada, the Middle East, Europe, Oceania, Africa, Asia, Central and South America.
***Benefits of BCHpizza***
There are many reasons why pizza restaurateurs should be excited about the BCH Pizza initiative, and here's why:
Using BCH eliminates the costly transaction fees associated with using fiat.
Unlike paying with credit, BCH allows no chargebacks, refunds or cancellations.
Regular BCH customers are becoming increasingly popular, and with this popularity, pizzerias using BCH can attract new customers.
By adopting BCH, pizzerias can also gain access to free marketing and press opportunities through a decentralized structure. They can even get publications in the local press to spread the word about their establishment and expand their customer base.
***Benefits of Bitcoin Cash for Restaurants***
Bitcoin Cash (BCH) is a new type of money that was created in 2009. It began as just Bitcoin continued in 2017 under the name Bitcoin Cash. It is a peer-to-peer electronic money system with low fees that operates independently of any banks, corporations or countries. It is truly money "of the people, by the people, for the people."
Ultra low fees. The network transaction fee for a typical Bitcoin Cash transaction is less than one cent. If you want to convert BCH to fiat currency such as U.S. dollars, you can easily do so through a merchant processor such as Bitpay for an additional fee, but it will still be much lower than the cost of credit card settlement.
No chargebacks. Unlike credit cards, there are never automatic cancellations, chargebacks, chargebacks, or other annoying fees. You're virtually 100% fraud-proof at zero cost.
New customers. Bitcoin Cash patrons are some of the most passionate people in the world. They will do everything they can to support your business as a BCH seller.
***Free marketing and press opportunities.***
In accepting BCH, you will be listed in several web directories and apps. We'll even contact the local press upon request to feature your establishment as an example of the growing MPB trend.
***Keep it free.***
Bitcoin Cash is decentralized, voluntary and non-aggressive. We believe it is an inherently humanitarian project that will enhance peace and prosperity for all.
***You can get an award here!!!!***
Only pizza places that serve customers in the location listed in the award are eligible for the rewards.
To receive an award, you just need to contact them and provide a short video confirming that you accept BCH.But they may also decide to ask for more information about the claim.
When you send them a video they prefer that you upload it to a video sharing site like Youtube and send us the link rather than mailing them a big video file.
You can also post your award
**This requires three steps:**
**One way:**
**Step 1:** Enter the BCH address from which you will send funds for the reward.
**Step 2:** Select the city for which you want to offer the award:
**Step 3:** Sign the message using your address.
The content of the message must be the exact name of the city as selected. Make sure there is one space between words and there are no extra spaces at the beginning or at the end of the message.
Insert the signed message and click "Send". A few words about the project itself:
*Why is this project just for pizza and not for other food vendors?*
You have to start somewhere. By focusing only on pizza, the project will have more attention and more buzz. Everybody loves pizza. And the first bitcoin transaction was for pizza, so it's an extension of the meme. We're going to try to change the world, one slice of pizza and satoshi at a time.
***Why Bitcoin Cash and not BTC?***
Bitcoin Cash is much better for sellers because it tends to be a peer-to-peer electronic money system and has consistently low commissions. The BTC network is unreliable because of congestion and volatile commissions.
**Why are they doing this:**
They have a lot of faith in Bitcoin Cash, and this is one way to help the seller accept it.
***Are the rewards secure from hackers?***
While there is no perfect security, we do use a cold storage system to protect BCH funds from being hacked or stolen.
Is there any way to get rid of the need to trust them with depositing money?
Yes. They plan to add a multi-signature feature in the near future so that multiple trusted members of the BCH community can handle the funds. There will also need to be an escrow feature.
***Can I place reward in another currency than BCH?***
No, but you can always use websites like Evercoin.com and Shapeshift.io to convert other cryptocurrencies to BCH.
BCH is probably one of the most popular altcoins , whose steady growth is evident from its market capitalization. While using cryptocurrency for pizza may not be the intended use, the concept remains important to help cryptocurrency become mainstream. Nevertheless, there is still a long way to go before BCH can compete with its Bitcoin and Etherium counterparts .
Attention! This article is not an advertisement for the above mentioned project, it is given just for information about one of the ways of BCH implementation.
*BCH!!!!!- I love your big block!!! I also love pizza* 🍕
Homemade pita bread for pennies
This recipe for homemade bread pie in the pot will be handy if you need bread for dinner and don't want to go to the store if you are fasting, or if you just like to bake homemade bread and taste national desserts from different countries of the world.
Almost every nation has its own bread recipe. Now I suggest you try Georgian lavash - a thick, round, fried lavash that you can make at home.
The homemade pie can be eaten hot or cold, just as you like it, with a slice of cheese, meat, salads or as a first and second course instead of bread.
***Ingredients:***
**For 2 loaves, you can make a pie 18 cm in diameter:**
7 grams of fresh yeast (or half a teaspoon of dry yeast),
0.5 teaspoons of sugar,
125 ml hot water,
165 grams of flour,
¼ teaspoon salt.
***How to bake:***
Crumble the yeast together in a bowl and rub in the sugar.
Then add the remaining flour and salt and knead the dough. It may seem very sticky at first, but don't add any more flour or the lava will harden. Knead the dough for a few minutes - it will soon stop sticking to your hands.
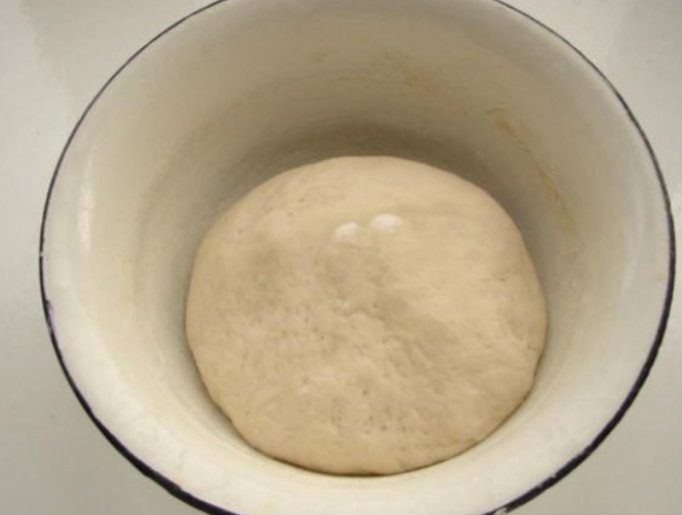
You can cover the dough with a towel and let the bowl warm up for 1 hour. After this time, knead the dough and rest for another hour - until it rises.
Image
When the dough rises for the second time, do NOT knead it. Instead, separate the halves as gently as possible and roll in flour on all sides while heating a clean, dry pan in the oven.
Place the dough in the very hot pan and spread it with your hands on the bottom of the pan while kneading and stretching it with your fingers. Don't worry, you won't get burned, and the pan won't burn your fingers through the dough either. Try to do it as quickly as possible.
Once you've spread the dough, cover the pan and bake the cake over medium heat for 5 minutes.
***Next.***
Flip the cake and bake the other side for another 5 minutes without the lid. Arrange the lavash on a plate. Delicious hot or cold. You can make it into a pie sandwich. Or cut a piece and eat it with a bowl of soup.
I must admit that I never thought it was possible to make a thick lavash at home, which is a favourite of many, with a flavour similar to the famous Georgian choti bread, but I was wrong. I used a simple and inexpensive recipe. I'm happy to share it with you.
Image
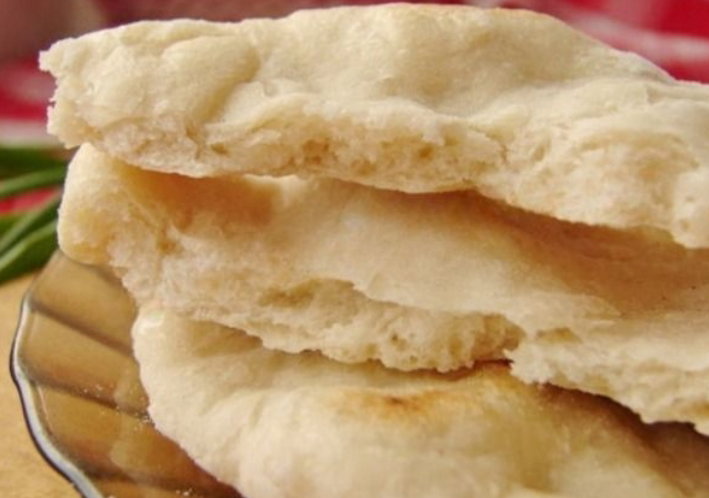
A thick, thin pie with a thin crust and soft crumbs inside is a great alternative to bread. This type of pie will be appreciated by many, so try it!
Mini pizzas
One day there was half a roll of salami, a piece of cheese, a mushroom and a bunch of spring onions in the fridge. What can you cook with this stock of ingredients? That's right, pizza!
But when I was about to roll out the dough, I had an idea: What if I didn't make one big pizza, but several small ones? And I was so excited to make these mini pizzas that I immediately put my idea into action. I divided the dough into 8 pieces, made a pizza dough for each, put the toppings on a plate and invited the family to pick something of their choice and make the pizza.
Everyone loved the idea, and the pizzas were so cute that we made them twice in one week! You should try it too! Easy, interesting, fun and delicious:) Mini pizzas are perfect for parties with friends, so everyone can make a unique, exclusive pizza with their favorite toppings. And how delicious to treat yourself afterwards with something you helped make! Kids especially love these little pizzas, and little chefs will love helping to make them!
***For 8 pieces -.***
For the dough:
15 g fresh yeast,
2 teaspoons sugar,
170 ml hot water,
2 cups of flour (260 g),
1 teaspoon of salt,
2 tablespoons vegetable oil.
This time I used 1.5 cups of wheat flour and 0.5 cups of durum wheat flour (it's more yellow in colour, healthier and tastier!). Also 1 tablespoon of sunflower oil and 1 tablespoon of mustard. It made the pizzas delicious!
Ingredients:
For topping:
Tomato sauce,
Tomatoes: tomato sauce, tomato sauce, salami,
Sautéed mushrooms,
Tomatoes,
paprika,
cheese,
peas,
green onions.
And anything else you can think of (almost anything you can find in the fridge:)) Fresh peppers and frozen tomatoes are equally suitable. When the idea came in winter, I made mini pizzas with frozen tomato slices and frozen pepper slices. No need to defrost - just put the vegetable slices on the pizza just before you put it in the oven. That way, the cold topping won't stop the dough from rising and the pizza will be juicy and delicious.
How to bake:
The pizza dough is based on a recipe for a very tasty green onion pizza. I now use it as the base for all my pizzas:)
The yeast is crushed together with the sugar, warm water is added, mixed, a cup of flour is sifted, mixed again and the dough is left in a warm place for 15 minutes. When the dough is light and fluffy, sift in the second cup of flour, add salt and vegetable oil, and knead the dough. Knead the dough for at least five minutes to make it smooth and elastic. Place in a bowl, cover with a towel and leave to rise for about 40 minutes. During this time you can prepare the ingredients for the filling - you can fry the mushrooms, slice the salami, grate the cheese.
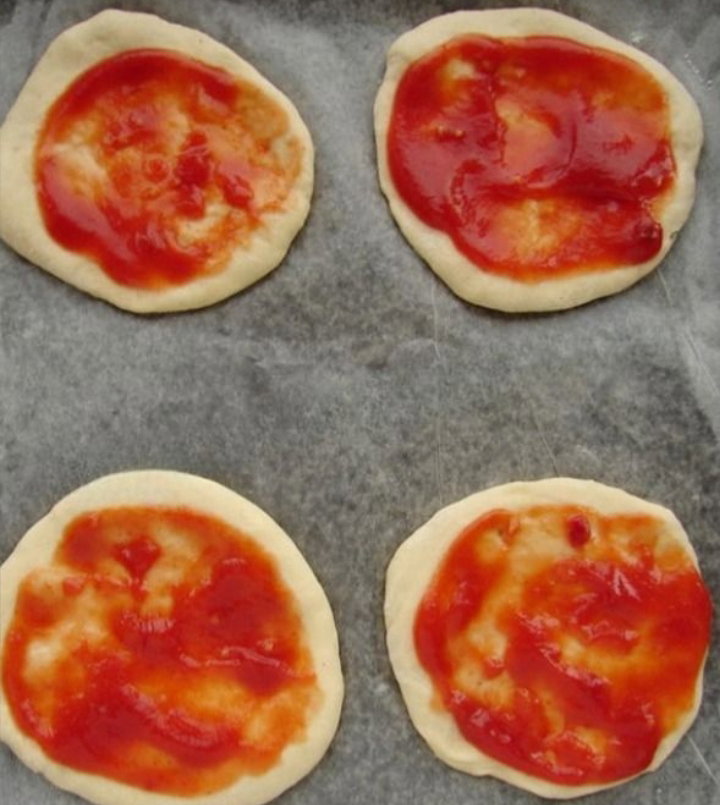
Divide the dough into 8 parts. Roll out the dough into a circle. Place it on a baking tray with baking paper and leave to rise for 10-15 minutes. Meanwhile, preheat the oven to 200 C.
Spread 1-1.5 tablespoons of tomato sauce on the pizzas.
Put the filling on top: tomatoes, peppers, salami and a little grated cheese. At this point, everyone can join in and use their culinary imagination! Work for us... And we added more frozen green peas.
Then we sprinkled the pizzas with onions.
Four pizzas fit in the pan, and the other four can be placed on baking paper on a baking sheet until the first batch is done. Then put the baking paper on the baking sheet and put the second portion on the baking sheet and bake it.
While the first portion is baking, place 4 pizzas on the baking sheet and the other 4 pizzas on the baking paper on the baking sheet. Then place the parchment paper on the baking sheet and bake the second batch.
Place the pizza crust in the oven for 15-20 minutes, until the cheese is melted and the pizza crust is a light golden colour. You can prevent the pizzas from drying out and burning by placing a baking tray or ovenproof pan of water in the bottom of the oven.
Remove the mini-pizzas with a spatula and place them on plates.
***Enjoy your meal! 🍕***
When you see the pizza - warm and delicious - you'll want to cut it open and eat a big slice right away. For a children's party, make cute little pizzas and hand them out to all the guests.
Treats for kids should be bright and appetising. Such a delicious snack will not be missed by children, will fill them up and give them energy for further games.
Mini pizzas are an excellent choice for a snack at school and fit easily into a lunchbox.

Magic poop or how to make $765 on shit!
Hello read.cash, hello my dear readers and writers.
Someone is laughing at the mouth right now, someone will be surprised and say: "This can not be! But after reading this, you'll change your mind. I will tell you how to poop (real!) Turn into real money. And as you know, "money never smells". No. This is not about Poocoin (💩).
Today we're going to talk about the products of life's waste, but not ours, the human waste, but the animal waste. Namely about manure and at the same time making good money.
How to make manure a financial tool and what is the profitability of "ambre"? Read about this and more right now!
***Waste as fertilizer***
It is often said that manure is the manure of the past. It is not very effective, its composition is not balanced, it is unpleasant to handle and frankly it smells unpleasant. But organic fertiliser can do for soil what chemical fertiliser cannot - it 'heals' the soil. Fertilizer improves soil fertility, while inorganic fertilizer, for all its benefits, reduces it.
Regular use of organic fertilisers increases the nutrient content of the soil many times over. The various elements in fertiliser remain "open" in the soil for 5-7 years, which is twice as long as "mineral" fertiliser. In short, with fertilizer you can create a real black soil on your land within ten years!!!
In addition to the chemical composition of organic fertilizers, the physical properties of the soil are improved: its structure, permeability and moisture content, its biological activity is increased and the reproduction of beneficial microorganisms is activated.
Manure is the best vitamin cocktail for arable soils. But to take advantage of it, a smart approach is needed. You need to know the mineral content and have a clear understanding of the application process: when to apply it, to which crop and in what quantity.
Image
***Alone on the field in the mud. The other side of the coin.***
It's basically the most dangerous waste, pig manure. Very aggressive to the environment. Before spreading the manure on the field (in strictly limited quantities!), it has to be incubated for a long time to inactivate pathogenic microbes, worm eggs and weed seeds. Waste from industrial pig farms requires special treatment: it contains dangerous substances such as heavy metals, antibiotics, hormones, pesticides as well as worms, swine fever pathogens, salmonella and foot-and-mouth disease. The manure-like effluent causes soil erosion, groundwater pollution, waterlogging and air pollution with emissions of hydrogen sulphide and ammonia.
***Recipe.*** It then passes through a small device. This device uses the energy of a rotating electromagnetic field and produces a number of effects: acoustic waves, electrolysis, microfoam, magnetosynthesis, cavitation, etc. It can be compared to the work of a large stirring machine, which grinds all the contents into a molecular state. At the same time, a silver solution is injected into the plant for further disinfection. The sterilised biomass is then enriched with "beneficial" soil bacteria, dried and the bifido is ready.
The rest is simple: Organic fertiliser is transported to the fields and can be applied directly to the straw. The bacteria do their job by recycling plant residues and restoring soil fertility. With this technology, you can forget about buying expensive mineral fertilisers forever. Yields of barley treated with this fertilizer show an immediate increase of 8 bushels/acre. And the cost of growing grain has been cut in half!
But processing manure into fertiliser is a real goldmine. The price of a ton of "raw material" is 3,000 grivnas, while abroad it is $400-500 per ton.
***A bit of maths with my example***
As a mini farmer, of course I have animals.
Every year we sell our "stinking gold" with 5-6 KAMAZ trucks. One of these trucks can carry 10-15 tons. We have 153 dollars for one truck and 5 of them!
To me 153×5 = 765 dollars a year for crap!
My husband spent most of the day washing up in the bathroom after loading this "stinking gold", but with a big smile on his face because he now has almost 1000 dollars in his pocket🤗.
I'm a mini farmer and the agribusinesses clearly have a lot more. What do you make of these figures, dear reader?
Fresh pig manure is very aggressive to plants, so it should not be used as fertilizer until it has decomposed.
However, humus-producing bacteria - the main players in the decomposition process - break down the aggressive substances, extract nutrients from them and then produce humic acids, which are used to make humus.
After decomposition, the manure becomes a well-composted fertiliser, which supplements the humus used for plant growth and enriches the soil with various trace elements, without which the growth and production of different crops would not be possible.
***Conclusion.***
Money is literally under our feet, but not everyone knows how to use it wisely. All that glitters is not gold, and sometimes it does not smell good. But real money (fiat) doesn't smell😉

How to cook: Christmas tree with cheese and egg
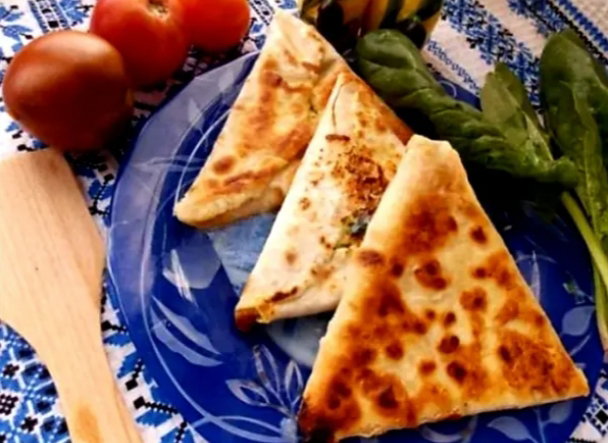
I came across a recipe with an interesting name: yoca. Does it sound unusual? It's the name of an Armenian appetizer, lava with cheese and eggs. It's very quick and easy to make, and it turns out delicious, beautiful and filling! Rum triangles filled with cheese and eggs are perfect to take to the village, to work or to give to the kids at school.
I deliberately searched for round loaves. But the pies at the store were only rectangular, so I didn't use pies like in the original yoki recipe, but tortillas! These are also thin, flat breads made from sourdough dough without the sourdough starter and made from wheat or cornmeal. So the result is not just an Armenian yoke, but also a little bit Mexican! You can also use a square pie... but I really liked this way of wrapping it.
The cheesy flatbread went quickly - for some reason things like pancakes, flatbreads and fried scones are very popular - and I have a feeling we've got another favourite dish that we'd like to repeat. And you know what? Yoka has now become one of our favorite snacks when we need something quick for school or the holidays. I've made it 5 times :) Try this recipe!
Ingredients:
For 4 servings:
The diameter of the bread is about 20 cm.
4 thin round loaves (pita bread or tortilla),
4 small eggs,
About 150 grams of cheese,
Pie (pita bread, pie or tortilla), about 150 pieces of pie, some pie or tortilla, some pie, some small pieces of bread, some pie or tortilla,
butter or vegetable oil,
dill, green parsley.
Image
The eggs should be small, as large eggs laid flat on flat bread will run out at the edges. However, this is easily solved: do not beat a large egg on the tortilla, but beat it in a bowl with a fork, then spread half of the egg on the tortilla. I need 4 eggs for 8 tortillas. I recommend washing the eggshells with soap and water. Use a hard cheese for the filling; I think brie would be good too! You can add sliced ham, cooked meat.
How to bake:
Crack an egg into the centre of the loaf. Spread it all over with a fork, just around the edges. Sprinkle a handful of grated cheese on top, mixed with chopped herbs. Season with salt and sprinkle with pepper. You can also add pieces of ham. Now fold the flat bread into a triangular envelope, fold the edges in half and press down slightly. Meanwhile, the oil is already heated in a pan.
In the original recipe it is recommended to use oil. Because of the unusual shape of the yoki, it does not fill the whole pan and the oil starts to burn in the places where it is exposed. The pan must be washed each time the yoki is cooked. When fried in sunflower oil, it doesn't burn as badly, so I prefer the vegetable oil version. Place the yoki in a pan of hot oil, seam side down. Fry them for a few minutes over medium heat - until they are crispy on the underside. Then turn the yoku over with a spatula and fry the other side in the same way.
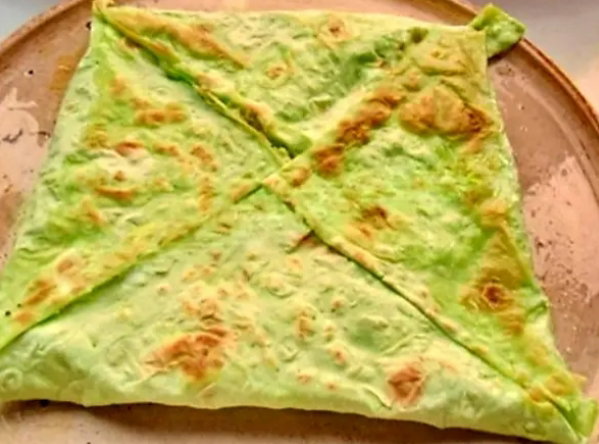
Place on a plate and leave to cool slightly. Yoku with egg and cheese is delicious when it's hot! The next day (if you have any left!) you can reheat the bread in the microwave or on the stove. You can also eat it cold. But a square pie is green because it's spinach:
Image
So you can make such delicious flatbreads from a flat, not round, pie! It's just the envelopes that are not triangular, but rectangular. I loved Yoki's recipe! It's so simple and delicious! Now I'm thinking of trying to make yoku with cottage cheese? A savory version with spices and a sweet version with sultanas? What about the cooked apples? I'll let you know when I try it!
If you have no friends
Making friends can be difficult, and keeping them can be even more difficult. While some people find it easy to do both, not everyone is so lucky.
You may not know what's keeping you from making friends, but the great news is there's always time to find out and fix it! The fact that you're reading this article shows that you're ready to take the next step. There are several reasons why you may not have friends. Understanding them can show you what you need to do to have real friends.
You think you are superior to others.
People like to be with people they feel comfortable with. Most people feel more comfortable when they are with people they know who act like them. If you act like you are superior to others, like you are on a different level than the people around you, they don't feel comfortable with you. If you guess that's something you should work on, try to be a little more down-to-earth. After all, we're all just people.
You're insecure.
Everyone has insecurity, no matter what anyone says, it's just that in some people it comes up rarely in certain situations, and in others, it becomes a constant feature of the person. Confidence is what attracts people, while insecurity is what people avoid. Although it will take time, try to see your best sides, remember them more often, and know that everyone has flaws.
If you're constantly complaining or thinking the worst and constantly sharing that negativity with others, it can be upsetting to your interlocutors. Stop seeing the bad in everything, look for the good, talk about the good, make jokes, and you will find it easier to communicate with others, which will attract more people who will want to meet and be friends with you.
You are selfish everyone needs to take care of themselves before they can truly take care of others as well. It is important to strike a balance between your needs and those of your friend. If you feel like you only take care of your own needs, people won't want to be around you. If you want to change, try to also take into account the needs of others. Try to do for them what they would do for you.
You create conflicts on nothing.
Friendships are definitely not conflict-free, but they don't have to be solidly conflicted either. If you are a person who often causes conflict in groups of friends, try to think about why that is. Try to reduce the drama in your life that you cause, and people will be more inclined to communicate with you.
You're trying too hard.
While you do need to make an effort to make friends, there is such a thing as trying too hard. You may think that the only way to make friends is to try to reach out to everyone, even if they aren't people you can really relate to. Pretending to be super cool just to get people to like you is not the best way to make friends. The best way to make friends is to just be yourself and find people who like the same things you do. The best friends are those who accept you anyway.
And, of course, if you spend all your free time at home, where do your friends fit in?
Most of the time you have to make an effort to get to know people and make friends with them. Although you may be shy or worried about what others may think of you, take risks and put yourself out there more. Talk to people in your class, at work, or in your neighborhood. Who knows, maybe one of them will become your best friend in the future.
In general, friendship takes effort. The fact that you may have some of the problems listed does not mean that you are a bad person, it just means that you have something to improve on, just like every person.
Photo taken from:
pinterest.com
9.07.2022


Uncut diamond
Good day to all and good mood my dear readers read.cash.
Today is my next article on a free theme. This is a reflection on life, different situations and the like.
In comments to my articles you can ask questions, as well as give your opinion on the subject of this article.
And before we begin, I thank my sponsoring friends!
My sponsoring friends, thank you!
No matter how strong we are, support increases our strength! It's like a breath of fresh air when difficulties pile up and don't let us breathe! Thank you for your support. I will always remember and thank you.
Since I get my hair cut once every 4 weeks, that is, I use the services of hairdressers on average 12-13 times a year, I can safely be called a regular at such establishments and a connoisseur of this industry.
In general, I have noticed that the shorter a person's hair, the more chances he has to become a connoisseur and a regular. The owners of thick and sparse braids are far from us, and for the hairdressers we, the clients with ultra-short haircuts, are inexhaustible minerals.
Unlike the ladies who are meticulous about their hair, I keep it simple.
I am lucky with my hair: it is malleable, it does not require blow-drying and styling. All care comes down to a daily wash and a quick combing. No additional manipulation is required.
None, except for the monthly haircut, which involves visits to hair salons.
Sometimes I am "attached" to some salon and visit it for a long time. The main criterion for choosing is the location close to home, and that everything looks decent, but without pretensions.
Occasionally inside the salon I "attach" myself to a certain master, first choosing him at random, and then signing up with him as a sign of appreciation.
When the epidemic situation was quite sad (although now it's back to worse than ever), and the city was sitting on lockdown, my husband and I switched to self-service, getting accustomed to cutting each other's hair.
By the way, my husband still prefers our home barber shop. He is convinced that it is not only fast, safe and without an appointment, but also comfortable. And I'm in no hurry to dissuade him, as I fear that when he shows up at the professional master, the professional will drop the scissors with the words "who did that to you?"
In short, so far regular visits to beauty salons resumed only me.
No matter where I come, when I sit in the chair, I immediately know whether I get a good or bad haircut. Every time I assume that the haircut will be successful, and every time my expectations are fully met.
Sometimes I go out and think, "It's a little short." But short doesn't mean bad!
Oddly enough, all hairdressers use different techniques.
Some begin by carefully cutting the area around the ears, and only then move on to the back of the head.
Someone, on the contrary, starts with the back of the head, then rises to the crown and ends the tour of the scalp at the temples.
Some masters divide the head into zones by horizontal partings, others by vertical and U-shaped partings. And the degree of pulling of the hair strands varies from barely perceptible to very expressive.
There are masters who constantly twist the client's head, then bending it to the side, then forward; and there are those who do not touch it at all.
There is also a great variety in the use of additional devices. I remember a couple of times they attached some big clips to my hair. This was unusual, as none of the hairdressers had done this before.
Some masters use only scissors, others use only a machine, while others combine both.
I never interfere with the process or tell the master how I was cut by his predecessor. I am quite sure (and my confidence is backed by experience) that whatever technology the hairdresser uses, and at what speed he would not move towards the goal, the result will be the same.
Even if they cut my hair for twenty minutes or an hour, the result is the same and I always like it.
However, wherever and however I cut my hair, always - strictly by appointment.
And then the other day I literally had to cut my hair. In the morning I did not think about it, and on the way home from work the desire to go to the barber and cut my hair suddenly seized my mind.
I didn't feel like calling my salon or going to it for good luck. And I didn't want to change my route at all, but, at the same time, I didn't want to postpone the realization of my wish.
And then I saw a hairdressing salon with such an out-of-the-way look, which does not promise a high level of service and does not guarantee a flawless result. The window, just below ground level, showed a female figure sitting in a chair, knitting.
I boldly entered and, walking down into the semi-basement room, generously decorated with artificial plants, I asked a simple question: "Can I get a haircut?
The answer was affirmative.
The woman put away her knitting, put on her mask, and invited me to her seat.
From there, everything was standard - new technology and the usual results. Along the way she asked me only two questions: whether to shorten my bangs and whether it was cold outside. I answered "yes" twice.
That was the whole dialogue. No intrusive questioning, no perfume, no music and no TV broadcasts (like, for example, in a semi-elite salon, which I went to at one time). Would you agree that this is perfect?
An inconspicuous facade with outdated signage, modest interiors, no customers - and a result that does not step up to the results of the masters with numerous certificates, designer interiors and pre-registration.
Yes, friends - just because something doesn't shine doesn't mean it can't be gold!!!! 😊
Unprocessed diamonds are not only different places, but also people!
Uncut diamonds are stones, which do not attract attention to themselves, because their appearance does not differ from the one of ordinary stones, but it does not change the essence - it is still a precious stone😉
It is the same with people: there are beautiful people with outward appearance, but their gut is all "rotten". And there are people who are not attractive, but talented and skillful, who are worthy of respect, but they are modest and their true essence is very difficult to see, maybe such people do not have enough money, education, courage to express themselves (cutting).
Dear friends, readers of read.cash if you know and maybe there are such people in your environment "as an uncut diamond" then write me about it in the comments below.
Image sources:
facebook.com pixabay.com jewellerymag.ru and edited by me and my foto
"Macaroni and Cheese."
The morning didn't start with coffee: My cat climbed onto the baguette and ripped the middle retaining hook out of the wall with all its might. The baguette quacked and sagged sadly in the middle. Now, come on, figure out how to reattach the hook back (I tried just to stick it in, not held, of course), or go to the store to look for a new one.
Lord, well, if you're a cat weighing almost 5 kg, why play the gymnast?
He lies there and does not understand the extent of his moral degradation. He doesn't want to respond to "fat-assed bastard."
But that's not what today is about, it's about a simple recipe.
That's what I love about Macaroni and Cheese, is that, The name has it all - the ingredients and the recipe!
Easy to make. Good as a side dish as well as a stand-alone dish:
But, not for every day!))
Minimum set of products:
Fettuccini, tagliatelle - in a pinch, simple pasta will do))😉
Cream
Butter
Cheese (parmesan would be perfect)
Fresh or dried herbs - as you wish.
Naturally, we cook pasta.
***Simultaneously with the process, put the cream on low heat:***
Dip the butter into it and stir it slowly. There is a theory that you should first melt the butter and then pour in the cream - but, it is checked, the result will be the same.
Keep on the heat stirring for 5 minutes, until the sauce begins to thicken
Add grated cheese (a little can be left for decoration)
Keep on low heat, stirring constantly, until the cheese is completely dissolved. In the process, if desired, you can add dried herbs (fresh is better when serving)
Drain the water from the pasta. And pour in the sauce. Stir thoroughly:
You can serve it right away. But I usually let it stand for another two or three minutes under a closed lid over low heat. Just to get them to "make friends".
And that's it. "Three days' worth of calories in one bowl!)). Above, recurring, abundantly black, freshly ground!
**Good luck and don't get sick! Eat right!**
Pros and cons of online friendship
In the internet age, there is less and less time for live human communication, which is replaced by a large number of social networks and phone messages.
Mobile apps' voice messaging capabilities, for example, allow you to keep in touch with family, real friends and make new virtual acquaintances.
It's obviously very convenient and saves you time and money on travel, transport and meetings at cafés. On the other hand, this form of communication also has its drawbacks. I will talk to you about the positive and negative sides of virtual meetings and chats.
**Why do these friendships happen?**
Former friends.When all adults have family or live far away from each other, they simply do not have an extra evening to meet with an old friend. They no longer have the opportunity or time for each other. At the same time, many people's life values and social circles are changing, resulting in former close acquaintances moving away.
Home online dating. Some people deliberately seek out virtual friends without meeting them in person. It's more convenient because you can communicate online at home, at work, while studying, travelling or working. In real life, these virtual friendships rarely cross paths, and sometimes they don't even meet in person.
Regardless of how people make friends online, both parties should agree. Otherwise, you'll remain a victim of circumstance.
The benefits of online friendship
Time constraints and the modern pace of life - studies, work (sometimes simultaneously), appointments, home and childcare and a lot of entertainment - force many people to communicate exclusively online. With such busy schedules, there's not even an hour left for real-life appointments and leisure activities with friends.
This format is ideal for people with families and commitments, as well as students who want to learn more, make new friends and travel the world. It's easy to make friends when you don't have to meet any requirements, all you need are a few common interests.
Search broadly geographically. You can search for partners from other cities and countries and visit each other), You can broaden your horizons, you can find many interesting people with different views on life and learn something useful from them, there's no time commitment - just choose a friend on a niche site and send messages at your convenience, without distraction, save resources. You don't have to spend money on cafes and restaurants, calling each other and spending money on treats.
All you need is a smartphone or a computer, convenience - you can reply to messages anywhere, anytime, many communication options - voice and text messages, calls or video calls, documents and photos, voice, video and more, you don't have to leave your comfort zone or go anywhere to meet someone.
Realize the value of genuine contact - so you appreciate live communication. Online friendships are not only practical, but also useful. However, this type of relationship also has its drawbacks.
The disadvantages of online chat
If people meet online but don't meet in real life, it's more likely to be an illusion of friendship. Psychologists say you can only befriend someone if you can feel their energy, and that's only possible if you meet them in person. It is difficult to call such a relationship a friendship, but it is a friendly relationship.
If a true friendship takes this form, it is a bad sign that people no longer care for each other, so they see no point in meeting in person and write to each other occasionally. And in this case, there is no need to talk about sincere friendship. Another disadvantage of online friendship is that it excludes real communication, but leads to loneliness, anxiety and depression. It's no secret that communicative people who constantly go on dates do better in life. And being deprived of the opportunity to meet friends has dangerous negative consequences for their psyche and success.
Online communication is not suitable for social people who want to stay in touch regardless of gender and age.
It will also not be suitable for people who have a long-term social circle and are often together.
It will also be unsuitable for people without family, because lonely people need emotional and tactile support. Therefore, online friendship has its advantages and disadvantages. Although the former outweighs the latter, you should not give up on real relationships and encounters, otherwise you may have serious psychological problems and become a tormented loner.
If you are interested in my content, I recommend you to read my other articles:
https://read.cash/@Sage01/gallet-complect-4a7366b4?
https://read.cash/@Sage01/honey-buckwheat-flour-cake-b6ad1cf3
https://read.cash/@Sage01/grapefruit-sand-pie-093be8f3
Gallet-complect
Let's remember the important places on the map, prepare something new or, on the contrary, perfectly acquainted, and wish for new meetings and wonderful journeys:)
Today we have: Galette Complette
Galettes are traditional Breton buckwheat pancakes, and a galette-complette is a galette baked with a filling, a rather light and yet very hearty dish, perfect for breakfast. The filling in a galette-complette can be anything, usually it is different combinations of components such as eggs, cheese, ham, mushrooms, seafood, tomatoes, caramelized onions. The standard option is ham, cheese, and a soft-boiled egg. That's the one in the picture, and that's the one I'll talk about. No one prevents you from using any other cooked meat instead of ham (even a cut-up chicken cutlet - or just a boiled breast, just to compensate for its dryness with something), or mushrooms, or cheese; the egg can be cooked to a dense yolk or replaced with something, too. The recipe allows for these variations.
For about five cookies you will need:
- 100 g buckwheat flour;
- 30 g of wheat flour (if you want, you can do without it, it does not make a difference - then the recipe will be gluten-free, especially if the filling will be without ham);
- 1 egg (if you double or triple the number of servings, do not put more eggs, one egg is enough for 1.5 liters of water; cookies are not very flaky);
- 1 tsp. vegetable oil;
- pinch of salt;
- about 400 ml water.
**For the filling:**
- 5 eggs (the size depends on the diameter of the pan; for a special pancake pan you need selected, for a standard wide pan are better suited to the first grade);
- 10 slices of ham;
- 5 tbsp. grated cheese;
- salt (and other spices if desired; I, for example, often sprinkle thyme and pepper).
For frying we will also need vegetable oil.
Time needs about an hour, buckwheat pancakes do not bake quickly.
**Process:**
- Mix flour and salt, pour 300 ml of warm (not hot) water, mix thoroughly. You will get a mush. It should be left for at least half an hour to let the buckwheat flour swell. (If the morning time is expensive, you can make this preparation before going to bed and leave it in the fridge overnight). After that, introduce the egg and butter, whisk lightly. Now you need to bring the dough to the desired consistency, adding gradually the remaining water (you may not need all of it). The dough won't pour, there's no gluten in buckwheat flour, and a little wheat flour doesn't really help. The dough should be about the thickness of a low-fat sour cream. Let stand for a while (the time, during which we prepare the stuffing and warm the pan, is enough).
-Prepare the stuffing: wash the eggs, cut each slice of ham in half lengthwise, put the cheese and salt closer (you will have to act quickly). Heat the frying pan well at maximum temperature (I cooked on an electric stove, with gas, perhaps medium heat will be enough).
- Pour oil into the frying pan (or grease, if the pan allows). Put 3-4 tablespoons of dough, smooth it out. There are special rollers for this, but you can do with a spatula and the back of a spoon. In a suitable pan, with the right heat (and with some skill), the batter will spread thin and smooth, with small holes. I only get this way on a pancake pan, the dough tears in the pan. It's okay, we even out as much as we can, then pour some more batter into the imperfections, and even out the final pancake. The pancake will be thicker than the Breton, but they are trained since childhood, they make pancake competitions :)
- Next, a little patience: the pancake should bake. Even at maximum heat, it took me about a couple of minutes. The pancake baked, if browned and began to dry.
-Lay the filling (the pancake should not be turned; here it is important to say that the turnover of galettes without stuffing requires or put more wheat flour in the dough, or bake more skillfully, otherwise the dough will tear - for the same reason, an egg or cheese, further binding the middle of wrap-coat, more reliable than a handful of mushrooms, for example). For 2-3 centimeters from the edge of the square put four half slices of ham. If the edges of the slices do not close, pour cheese in the empty spaces - this is needed to hold the protein. Break an egg in the center of the ham well and quickly wrap the edges of the pancake inward with a spatula (to turn out about as in the photo), press lightly. If the pancake baked well, the edges will not come off in the process. After that, it remains to salt and sprinkle the pancake with cheese and cover the pan with a lid. The galette combo will be ready when the egg reaches the desired hardness. It's just like scrambled eggs.
-Take the pancake out onto a plate. The easiest way to do this is with two flat spatulas.
Bon appétit!
I want to thank my new sponsors @Talecharm - thank you for your generosity and support!
There are times when two hands can't cope. It's at times like these that the hands of friends come to the rescue. And their help is so weighty and invaluable that you want to not just thank them, but share a piece of your heart. Here I want to say not just a big thank you, but warmly, from my heart, to express my appreciation and gratitude for help!!!!

Honey buckwheat flour cake
I love buckwheat honey - it's deep in colour, almost brown, and when poured into a nest, it's coloured like dark amber; incredibly aromatic!.... My son and I prefer buckwheat honey, while my daughter and father prefer "golden" honey - herb or sunflower honey. All kinds of dough are suitable for gingerbread, but this time I wanted to bake gingerbread with buckwheat. I also have buckwheat flour! What would happen if you added it to the muffin mix? This would make an amazing buckwheat gingerbread! I wonder how it would taste and smell? I thought so and started experimenting!
From the recipes for buckwheat bread and pancakes, you already know that buckwheat flour should only be added to the mixture along with wheat flour, as buckwheat does not contain gluten, so it does not form the gluten needed to keep the mixture from falling apart. Buckwheat flour makes the dough more fragile and loose. After some deliberation, I decided to use wheat flour and buckwheat flour in a 2.5:1 ratio. You can use more, like 2:1, just a little buckwheat flour:)
All in all, I would say that the buckwheat flour honey cake turned out delicious and yummy (like all honey cakes!), but even though I could taste the buckwheat, my family ate it and didn't notice anything:)
Ingredients:
**For 10 crusts**
1.5-2 tablespoons buckwheat honey,
1.5 cups sugar,
90 grams of butter,
3 eggs,
3 teaspoons baking powder (no additives),
200 grams buckwheat flour (1.5 cups),
500-550 grams of wheat flour (about 4.5 cups or a little more).
The amount of flour may vary as it depends on the moisture content.
200 ml cup.
How to bake:
Knead the honey dough in the same way you would knead a honey cake. Place the honey, sugar and chopped butter in a non-stick pan over a low heat or in a water bath. Heat, stirring, until the sugar has dissolved and the honey and butter have melted.
Meanwhile, in a separate bowl, beat the eggs and baking powder for about a minute on medium speed until light and fluffy.
Pour the rich foam into the contents of the pan and stir to combine. The mixture will begin to foam and bubble. Remove the pan from the heat and immediately add the two kinds of sifted flour, stirring first with a spoon (while the mixture is hot) and then with your hands once it has cooled slightly and become thick. The dough turns into buckwheat flour: light brown, speckled like freckles and fragrant!
The dough is not crisp, but not sticky either, but soft, warm and rich. Divide into balls according to the number of crusts, place in a floured bowl and cover with a cloth. Preheat the oven to 200 °C, sprinkle the table with flour, take a dough ball and roll it out to a thickness of 3-4 mm. Try to shape the dough into a shape that is slightly rounder than the shape you will use to cut the dough (for example, a lid or a plate, but a lid is more practical because it has a handle).
Roll out the dough with a rolling pin, place it on a baking tray lined with baking paper, unfold and place in the oven. However, it is even more convenient to roll the dough between two sheets of parchment paper sprinkled with flour and place the bottom sheet on the baking sheet. Bake at 200°C for about 5 minutes - the crust is relatively thin and bakes very quickly. While the first crust is baking, roll out the second crust.
While the first is baking, cut it into the desired shape while it is still soft. The crusts can be eaten, but not all of them, only the ones sprinkled on the pie. All the cakes are baked. They can keep for several days, so you can bake them in advance.
And if you are going to make and eat the cake right now, you can make the cream. I like the honeydew with sour cream the best: sour cream soaks the cakes well and combines with them in taste, the cake turns out delicate. There are two recipes for this cream: a simple and a complicated one. You can see the complicated one here, but for the quick one, you just need to whip a light 15% sour cream with sugar or powder.
Spread the sour cream on the cakes - generously, so that the cake is well saturated and does not come out dry. The top layer and sides of the cake also smear with cream and sprinkle with crumbs from the trimmings (you can roll them with a shaker or you can knead them by hand). We let the honeydew soak for at least 2 hours.
It is understandable that you want to try as soon as possible, but if the cake does not have time to soak, it will be dry. If it has stood and still seems dry, you can take a trick: pierce the cake in many places with a wooden skewer and gently pour with a tablespoon soaking: wine, diluted berry syrup or what with lemon.
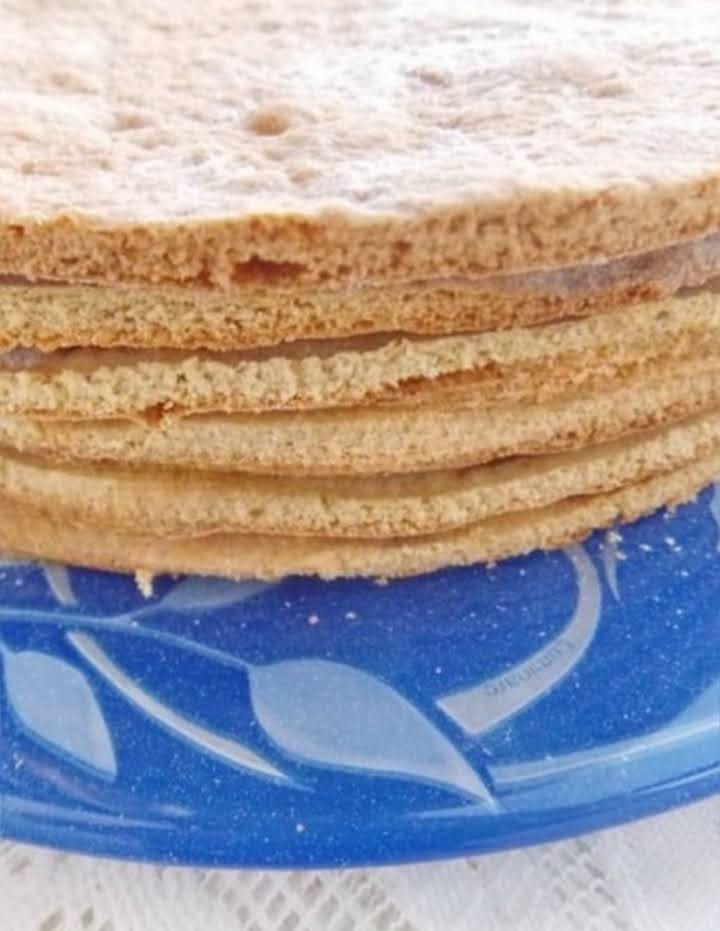
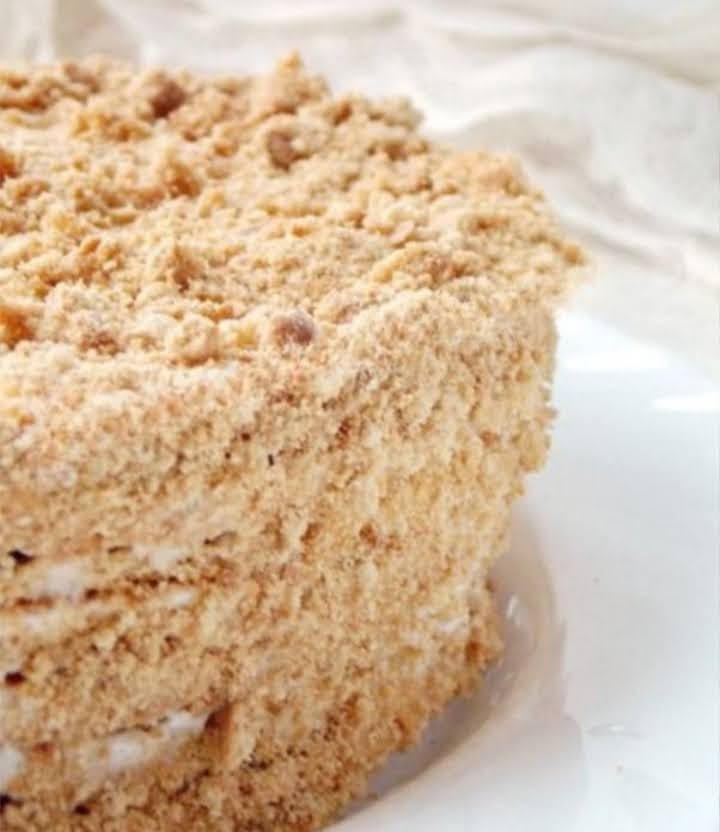
Grapefruit Sand Pie!
The open cake with grapefruit cream is a soft and crumbly cake with a lovely soft and aromatic filling of grapefruit flesh. Perfect as a snack for the kids or for a tea party in the evening.
Grapefruit can be substituted for any other citrus fruit. The original cake tin is 18 cm in size.
Original, isn't it? We've tried baking with lemon, orange and even mandarin, but this is the first time I've made a grapefruit tart! The tart is incredibly delicious and light! Pink like a flamingo! And it tastes amazing:)
Let's try this amazing recipe together - grapefruit tart with soft crust and delicious cream!
Ingredients:
For the dough:
300 g flour (300 g = 2 and 1/3 cups, 200 g cup volume. In the original 200 g wheat flour and 100 g almond flour; but since almond flour is rare in our latitudes, I used wheat flour and some almonds to taste),
Some almonds,
80 g icing sugar,
4 egg yolks,
160 g butter,
160 grams egg yolks, 160 grams butter, 160 grams egg yolks, 160 grams lemon zest (half a lemon).
For the cream:
2 eggs,
50 g sour cream,
100 g sugar,
25 g butter,
1 pink grapefruit,
50 grams of coconut.
How to bake:
Sift the flour into a bowl, mix with icing sugar, softened butter and egg yolks, grated through a sieve or simply crushed by hand. Add the grated lemon zest and nuts. You can chop them, but I don't like hard nuts in my crumble mixture, so I grind the almonds finely. It's almost like almond flour!
Knead and mix the ingredients with your hands until you have a lumpy dough. Wrap it in plastic wrap and refrigerate for 1 hour.
Prepare the cake tin (22 cm, mine is 25 cm): brush with butter and flour or line with parchment paper. Roll out the dough into a round cake 0.8 cm thick. It can be done easily: roll out the dough on the table for a while, roll it gently to prevent it from falling apart, put it on a rolling pin, shape it and make a 2-3 cm high edge with your hands.
Bake the cake at 180 °C for about 10 minutes. To keep it flat, cover it with parchment paper and cover it with dry beans or prick it in several places with a fork.
While the cake is baking, prepare the cream by mixing cream, melted butter, sugar, eggs, the juice of half a grapefruit and coconut flakes. I had white and pink coconut flakes, so I halved them. And I added the grapefruit juice to the cream with the pulp pieces. The result was amazing: the filling turned pink!
Take the cake out and pour the cream over it. Put it back in the oven and bake for 15-20 minutes, until the cream has set.
Allow the cake to cool before placing on a plate - the cream mixture is very crumbly when warm. When the cake is almost cold, open the tin and gently slide the cake between the tin and the wax paper and slowly slide the cake onto a plate.
Garnish the finished tart with grapefruit slices, walnuts and coconut flakes.
This is grapefruit fashion!!!! 😀 In a good way, of course:)
Very impressive and interesting to try! Try to make a grapefruit pie for your family or guests and you will be surprised!!!! I loved everything about this grapefruit tart: the soft, sweet, sandy crust, the filling with the tangy grapefruit flavor and the color!
I highly recommend you try it and look forward to hearing your impressions!
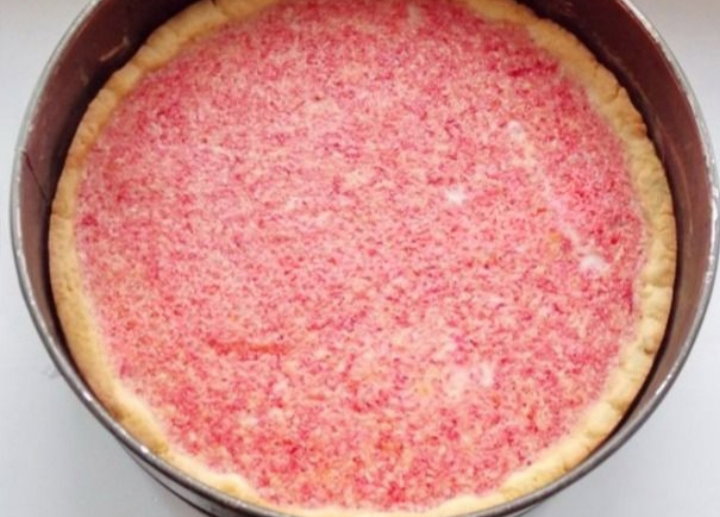
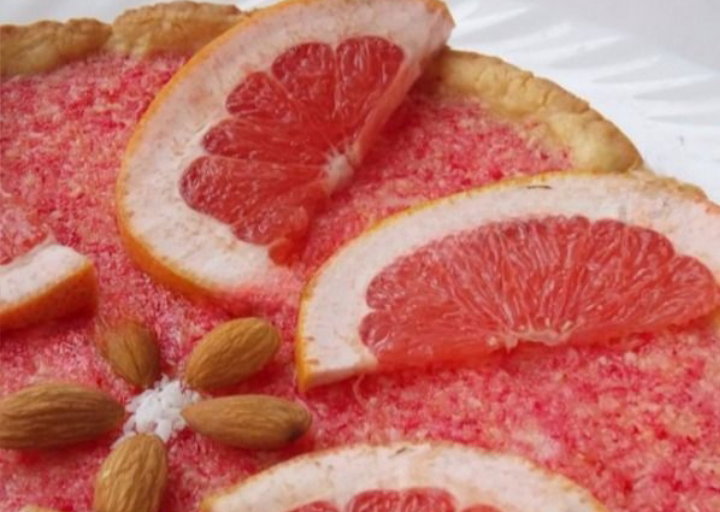
Sinabon cinnamon buns
Recently I was making cinnamon buns and came across an interesting name: cinnabon, also known as cinnamon synnabon. I got curious and looked it up. It turned out to be a cinnamon bun with cinnamon cream, very sweet and appetizing. Their equally sweet name is cinnamon, which is derived from cinnamon. I decided to make them, and here they are, my cinnamon rolls 🙂 Another example that you can make the most delicious baked goods at home, just like in the best bakeries!
And chocolate muffins and brownie buns and creme eclairs, and here's a homemade cinnabon with cinnamon. **Help yourself!**
Ingredients:
I made the dough from my own recipe, which you can see here.
50 g yeast,
¼ cup milk,
3 eggs,
75 g sugar,
½ pack (100 g) butter,
¼ cup sunflower oil,
About 3 cups of flour.
2 tablespoons flour, About 100 g flour, About 100 g flour, About 100 g flour:
Same sugar and cinnamon as for the bun, but with the following ingredients. One stick of butter (about 50 grams). Use the same amount of butter (50 g breadcrumbs): one cup of not too thick cream, 4-5 tablespoons icing sugar. The classic recipe calls for the mustard to be spread with mascarpone cream. But if this delicacy is hard to find in your area, there are several alternatives to mascarpone. From sticky homemade sour cream that has sat overnight, to cream that has been specially heated and whipped with citric acid. Simply type it into a search engine and it will suggest several ways to substitute Italian cheese. However, I decided not to bother and just whipped the cream with powdered sugar. Everyone loved it.
How to make homemade mustard:
When the dough is ready and warm, roll it out on a floured board into a rectangle about 0.5 cm thick. Sprinkle with cinnamon and sugar and grate a little butter on a coarse grater. Freeze the butter to make it easier to grate. Wrap it. Cut the roll into 3 cm thick balls. Place them on a baking tray. It's best to line it with baking paper: that way the buns won't stick to the bottom, even if the melted butter drips! It's easier to take them out and pour the cream on top!
Leave the buns on the baking tray for about 15 minutes while the oven slowly heats up. Then put them in a hot oven and bake at about 180-200 °C until they are dry and golden when tested with a toothpick. I usually put a baking tray with the buns in the middle of the oven and a pan of water at the bottom of the oven to prevent the bottom of the buns from burning. The steaming effect prevents the top crust from drying out and makes it soft. There is no need to brush the buns with egg, they are already well browned. Pour the cream on top as well.
Remove the buns from the tin with a piece of parchment paper and while they are cooling, prepare the cream by whipping the cream and icing sugar with a mixer. Do not beat too hard or the cream will be too thick. But if it thickens, there's a simple solution: thin it with cream-free cream.
Pour the cream over the buns.
*Delicious!!!!*
Enjoy your tea parties with these delicious scones!!!!
I made these scones for the first time yesterday. Make two kinds of sauce. One consists of cottage cheese, sour cream, powdered sugar and butter. The other is made with melted Hoagland cream cheese, butter and powdered sugar. My kids loved it and said it tasted better than the brand name paste. Of course, I think they're exaggerating a bit. But the dessert was excellent!

Apple pancakes
These pancakes are very tender, rich and delicious, and they appeal to both children and adults! It turns out that apple pancakes and apple pancakes are not the same recipe. While "apple" pancakes are those that are filled with a cooked fruit filling (which is also delicious, by the way!), today's apple pancakes are unusual because the grated apple is added directly into the batter!
Why? After all, we make pancakes with apple pieces - why not add them to the pancake mix? I made a trial batch, but next time we'll probably make a double batch - we loved them so much!
I added something to the recipe: where there are apples, there is cinnamon! Pies made with this combination are always incredibly delicious, which means the cinnamon will be useful in the pancakes. And a little vanilla for flavor...
Ingredients:
For 10 pancakes (pan diameter 24 cm):
3 medium eggs,
2 medium apples (we have Golden apples),
1.5 tablespoons of sugar,
1 tablespoon of salt,
400 ml milk,
160 g flour,
2 tablespoons vegetable oil,
0.5 teaspoon cinnamon,
How to bake:
Beat the eggs, sugar, salt and slightly warmed milk with a whisk or mixer.
Sift the flour into the mixture, add the cinnamon, baking powder is not necessary. It is usually added to pancakes with holes, but these are without holes!
Again, mix the mixture well so there are no lumps of flour left.
Now add the unscented sunflower oil and mix everything together.
Rinse the apples, remove the cores and peel, grate them coarsely, add them to the batter and mix.
The dough is quite firm thanks to the grated apple.
Clean a dry pan, brush lightly with sunflower oil (before the first pancake) and heat well. Pour the mixture into the pan (I used about 1.5 tablespoons for one pancake).
Cook over medium heat until the bottom of the pancake is lightly browned. The pancakes are not very thin, so they take longer to make than pancakes without milk and applesauce.
Flip the pancake and fry it on the other side.
Then place it on a plate. No need to butter them - the pancakes will butter and soften on their own.
Apple pancakes with juice are delicious!
I just love apples, it's probably even my favorite fruit. And these pancakes are just super apple! I really liked them, I'll be making them often now, that's for sure. They are easy and quick to make, quite dietary, and most importantly very tasty!
I recommend to everyone!
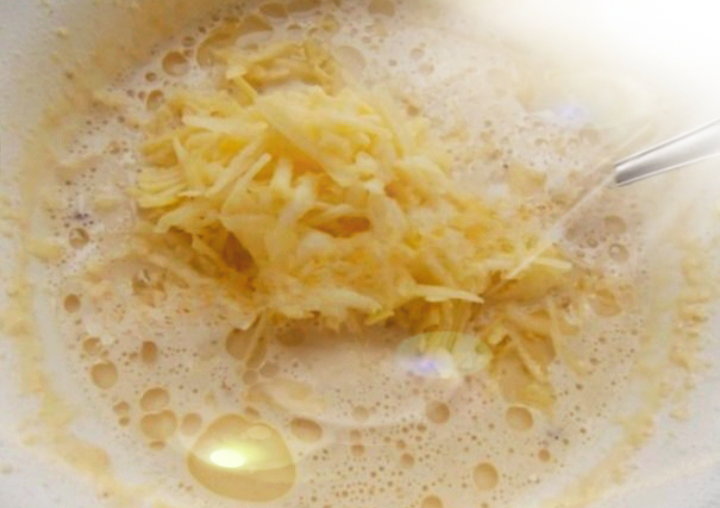
The best baked goods in Kiev!
**The best cakes in Kiev!**
I love Kiev because of the noisy streets and because life here is much more lively, fun and fast-paced. It's like you've just woken up and are on your way to school, and then it's evening and time to go to bed. You go to bed and your head is filled with thoughts about how the day went and how much happened during the day. Sometimes you manage to visit five or seven different places during the day. The metro helps me get around and keep my pace, although I don't particularly like it, but there are no traffic jams here. Recently the city train started, which goes around the city in about an hour.
It's special, intimate, one of those moments when you start to remember the highlights: the green sea and the lush flowering chestnut trees, the smell and air of the metro, Hrescsatys and the café with the delicious puff pastry corners.
The building that housed the café was demolished long ago - a few years ago when Europa Square was expanded - but I remember very well how delicious the delicious puff pastry with icing sugar and even
I remember how delicious that delicious puff pastry dipped in icing sugar was, and I tried to copy it at home. But to this day it is a lovely cake! The same as in the capital from the days when the tram ran on the motorway, when no one heard of traffic jams, and when three bagels cost 3 kopecks! Now I present to you these famous delicacies of Kiev.
Image
Guess which Kiev sweets have been popular for almost half a century? What do friends, family and colleagues bring back from Kiev? Probably not only Kiev residents and Ukrainians, but also residents of neighboring countries will guess that the first place on our hit list is occupied by Kiev cake!
Have you ever tried this cake decorated with pink, blue and white flowers, green leaves and chocolate decorations, also made of cream? The latest "Kiev" cake melts in your mouth with the crispy meringue crust contrasting perfectly with the delicate cream that leaves a slightly cool sensation in your mouth....
The only downside is that the cake only lasts for 36 hours, so you can't take it with you, especially in hot weather. If your friends live far away, there is an excellent alternative to the cake - the genuine Kiev sweets "Evening Kiev", produced in the same factory "Roshen" and recognized on an equal footing with the cake as Kiev's delicious "calling card".
There are many interesting stories associated with cakes from Kiev. This famous delicacy has its origins in... can be attributed to the pastry chefs' mistake of forgetting to put a portion of egg whites in the fridge for the cakes. To help them, the pastry chef and his assistant took the risk of filling the egg whites, which had set overnight, and then adding nut meats to the mixture.
Decorated with cream-coloured flowers... That was in 1965, and now, 48 years later, the Kiev cake is still a big hit! Kiev cake is the best gift! It was given to Brezhnev for his 70th birthday by the Ukrainian Soviet Socialist Republic. The anniversary cake had 70 layers and weighed over 5 kg! He liked the cake so much that the jubilarian asked the chef to repeat it. However, the recipe for the Kiev cake is still a secret from the Kiev bakery. К. Pastry shop Marx Kiev, today - "Roshen". In addition to the cake from Kiev, the factory
Hreschatyi Jar, Hriljazsenyi and Zolotiy Klyuchyk also made other delicious cakes in large supermarkets and branded "
"Big supermarkets and brand stores, for example next to the factory, near the main bus station. Small shops probably do not have genuine "Kievska", but products from one of the many private bakeries: delicious cakes, but bad. And don't shop at the railway station: everything is very expensive there.
What it costs: A Kiev cake costs about 250 hryvnias (11 US dollars) - that's a 1 kg cake, while a small 0.5 kg cake costs half that.
Image
They also make Kiev cakes, which are just as delicious and remarkable as the pastries, but not everyone knows about them. These are nut and fruit cakes: they are soft and delicious and taste like potato cakes, but are more juicy thanks to the added fruit puree. They are sold in cardboard boxes instead of the modern transparent plastic packaging, so the cakes are authentic and nostalgic.
I also recommend the Zavarnier cakes with buttercream and chocolate icing. They are the same creamy cakes that were available in Soviet times and the taste is unchanged. By the way, I also make cream cakes at home, they are not difficult to make and worth trying.
You can buy the same kind of cream cakes in Kiev, but they are filled with boiled condensed milk instead of cream, and the icing on top is white instead of chocolate. Where to buy: big supermarkets (Silpo, Caravan, Velika Kishenya, Roshen brand stores). How much do they cost: sold in sets of 3 and 6 per box for 24-27 and 90-96 hryvnias respectively. A real "Stolichnaya" cake is a rather expensive delicacy, but like all cakes it is worth it! But this "capital" cake is very heavy! Because it is made of an absolutely delicious dough, not biscuity or sweet, but special. I never managed to make it at home, although I baked it according to a recipe from a Soviet book. The real Stolichnaya is certainly full of sultanas! You can buy it in pieces in supermarkets like Silpo.
Small bakeries, however, make their own version of Stolichnaya dough - although it tastes different, is lighter or whatever, it is also delicious and costs less thanks to its light weight. Souvenir gingerbread from Kiev ❤
Another kind of real ***Kiev cake***, definitely worth finding! Delicious, beautiful and heavy melomakarona in different shapes, covered with sweet white icing and after you bite into them - in the middle - filling, milk or jam... The freshest melomakarona are particularly good, although they can be stored for up to a month and harden only slightly - a great gift for distant friends!
Children will love gingerbread men in animal form: roosters, owls, cats and turtles, and older friends can have a gingerbread decorated with a heart or horseshoe for love and good luck and get an edible bracelet as a memento! There are also gingerbread statues with symbols of Kiev, but they probably got them the first time, so there are no pictures.
There are also melomakarons with themes for New Year's Day, weddings, Father Christmas and Easter! Melomakarona is a universal gift because you can find a delicious gift for everyone and for all holidays. Where can you find it. In Kisheni, for example, you can find them in the bakery where melomakarona and cookies are sold, while in Karavan, although it is the largest supermarket, they are not available. On public holidays there are gingerbread shops in town.
Image
The people of Kiev, remember? 80s, cocktail with three cops! These sweet buns can still be bought in Kiev today! Although the price has increased over time, and now 3 chicken buns cost 10 grivnas a week. But the taste remains the same! I love these delicious "malatko" buns. When I left Kiev to visit my relatives, the first thing I did was to treat myself with my favorite Kiev buns! They are perfect for hot sandwiches: put a slice of cheese on a bun, pop it in the oven or microwave for a minute - and you have a delicious bite of bread. It's also a delicious diet toast.
If "Malyatko" has been around since Soviet times, there are now modern buns in Kiev. And patrushki deserves special attention! It is the best!!!! Kids call them "8" because these double-cut waffles are sold in groups of 2, and this double-cut waffle is shaped like the number 8. We get them every time we're here, and we always look for these tricycles when we're in Kiev: They can only be bought in Silpo shops, and you have to go early in the morning to get them, and they're sold out in the evening. But if you look, you'll find them!
In addition to cakes, the same "premium" company offers very tasty stuffed round rolls without filling, large heart-shaped pastes, rolls with jam, poppy seeds and cottage cheese. Another well-established and respected member of the Kiev bread family is the "Dnieprovska bun" - an extremely soft, fluffy, round bun of bread size with a pleasantly shiny crust and sultanas. Delicious with butter, especially with chocolate.
Don't forget to try the ***Kiev rum*** - a delicious, sultana-filled, lightly moistened with rum, sparkling candy drizzled with rich sugar fondant. The more fondant, the more delicious!
Image
Recently, when I was studying at university, a new kind of muffin appeared - raspberry with a strong acidity that goes well with the rich cake and icing. I liked this muffin so much that I sometimes make them at home; there's a recipe for blueberry muffins on the website.
Also new to me are chocolate muffins with poppy seeds, which we've made before.
Kiev Bread.
What, are we still talking about cake? Even Kiev black bread is incredibly delicious!!!! Did you know that 20 years ago "Ukrainian" Kiev bread was brought as a guest to the southern regions (Kherson, Nikolaev) along with "Kiev cakes"? Because such delicious black bread can't be found anywhere else!
Now they also bake rye bread in the south, but it is not so tasty! So when I come to Kiev, I always choose black bread and enjoy the taste and smell of it! The still warm "Ukrainian" bread is especially good, with a unique taste and crispy crust! I also recommend trying "Kiev bread with cream", once called "Borodinsky" or simply "black brick".
This is the best rye bread with cumin. It goes especially well with a boiled egg for breakfast or a glass of kefir for dinner. It is a parade of successes. For those who have never been to Kiev - come and try it!
***Have a nice day and a peaceful sky above your head 🕊***
Pancakes with mushrooms
Hello, friends, welcome to my cooking blog!
Here I will try to collect only the best tried-and-true recipes that I have made at home in my kitchen. Hopefully the information that I will share with you will be useful for you and you will enjoy share it with your friends.
We wake up. By some simple manipulation we wake up the cats, who have been jumping around the apartment all night. We drag them into the kitchen. We brew coffee and enjoy the look on their faces. We let the cats go outside so they don't get in our way and make **pancakes with mushrooms:**
Pancake flour
Milk or water
Mushrooms
Onions
Salt and spices
The rest is easy. We make the dough. Mushrooms and onions chop. Roast until half cooked. Heat a frying pan, grease with oil and put some mushrooms.
Pour the batter:
Roasting. Turn over. Repeat the process as many times as necessary. Consumption. Five to six pancakes are enough for breakfast. It takes 20 minutes at the most. Of course, our youngest member of the family, we do not give mushrooms. So for him, just "clean pancakes" with some syrup or jam.
Good luck and don't get sick! Eat right!
I want to thank @Talecharm for extending my sponsorship, as well as all my sponsors THANK YOU!
There are times when two hands can't cope. That's when friends' hands come to the rescue. And their help is so great and invaluable, that I want not just to thank them, but to share a piece of my heart. Here I also want to say not just a big thank you, but warmly, from my heart, to express my appreciation and gratitude for help!!!!
I thank God for his help in writing this article, and you, dear readers, praise him if your reading has been helpful to you.
I want to know your opinion.
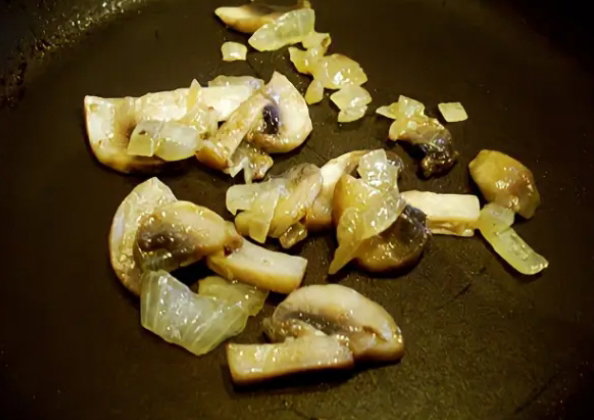
Poppy seed cake
We've made incredibly delicious mini cheesecake pancakes before, but now I have an original recipe for poppy seed pancakes! The idea came to me unexpectedly when I was making poppy seed pancakes and thought: What if I could put poppy seed filling in these amazing spotted pancakes? It would be a super treat with poppy seeds! And it is, try it!
The pancake mix is based on a recipe for buttermilk pancakes; it's my favourite - it's soft, smooth and therefore perfect for packing a filling into, even better than milk-based pancakes. You can use your favourite pancake recipe, just sprinkle with some poppy seeds and roll up the filling.
I don't know exactly how many pancakes you get, because I haven't counted them. We ate some as pancakes, others as pancakes without filling, entertaining our parents and friends... I can only say so much! If you want less flavor, you can halve the ingredients. But poppy seed donuts are delicious, and you can freeze them and just reheat them.
Ingredients:
Volume of a cup 200 ml.
4 eggs,
2 cups kefir,
2 cups hot water,
4 tablespoons of sugar,
2 cups of flour,
1 teaspoon baking powder,
1 teaspoon salt,
4 tablespoons vegetable oil,
4 tablespoons poppy seeds,
How to bake:
Prepare pancake mix. Prepare the pancake mix by boiling water and beating the eggs until fluffy - about 2 minutes. Pour the hot water in a thin stream, whisking as you go. This creates a frothy foam! Now pour in the kefir, pour in the sugar and stir to mix. Once you've sifted the flour into the mixture, stir again and then whisk - making sure it's not lumpy. Add the dried poppy seeds and stir with a spoon.
Finally, add the vegetable oil and stir again. The dough is ready! Now it's time to heat a pan lightly oiled with vegetable oil (just before the first pancake) and continue frying. Put a spoonful of batter on the pan, turn it and fry until golden brown.
Then turn with a thin, wide spatula and fry the second side. Here's a stack of beautiful, hot poppy seed pancakes on a plate! You can either make your own poppy seeds or use ready-made fillings. Cut the pancakes into quarters and place 1.5-2 teaspoons of poppy seed filling in each pancake. Roll up the pancake: edge to edge, then roll up.
You have a mini cake! You can serve with delicious Ukrainian nalistich with poppy seeds! Make tea and invite everyone to the table. You can also pour sour cream or jam over the ice cream - but it's sweet and delicious on its own. Small, beautiful and amazing poppies - the whole family will love them!
Poppy seed pancakes are a great breakfast option. They are moist and have a distinctive poppy seed flavour. They take a little longer to prepare than pancakes, but we're sure it's worth it. The pancakes are delicious and filling!

How to make pancakes with beetroot juice
What a deep, bright raspberry color these unusual pancakes have! They are very original and beautiful, aren't they? Especially if you pour sour cream over them for contrast... Do you know what the natural colour of this recipe is?
No, not tomatoes - it's the tomato juice that makes the pancakes orange. And no berries, although I think cherry juice would have a similar effect. These pancakes with cranberry juice or carrot juice! The useful and bright root vegetables that give Ukrainian borscht its rich burgundy color also color the pancake mixture to delight and surprise the taste buds.
Walnut juice is an excellent natural dye for baking: it can be used to colour batter (as in the recipe for braided pancakes), bread (biscuits) and pancake mix.
Only if you intend to bake it for a long time (bread in the oven), it is better to colour it with boiled beetroot juice to avoid the colour changing from light to brown. Raw beetroot juice is a good way to colour the pancake mix: a short heating does not give it time to change colour, while it retains its original brightness.
Beetroot juice pancakes are thin and tasty, the vegetable juice is not visible, and they are good with both sweet and light fillings.
Ingredients:
For 10 pancakes:
120 ml beetroot juice,
180 ml milk,
2 medium eggs,
2 tablespoons vegetable oil,
50 g butter,
¼ teaspoon salt,
160 grams of flour (1 cup 250 ml).
How to bake:
First, extract the juice. The juicer will not work because of the small amount, it takes a long time to wash it afterwards... but if you want healthy vegetable juice! If you have a sweet, rich color, the juice will be good. Rinse and peel the root, then grate it on a fine grater. Press the grated beetroot through a sieve.
Pour the juice into a bowl, add the eggs, milk, salt and sugar.
Then add the sunflower oil and melted butter.
Sift in the flour.
Mix gently with a spoon and beat with an electric mixer or whisk until smooth. If you whisk it all together, the flour will be spread all over the kitchen. If you mix the flour with a spoon, it won't spread, but will form lumps that the mixer will remove.
Grease a dry and clean pan with sunflower oil - not too much, but evenly (this is only necessary before the first pancake, after that you don't need to grease it - the pancake will be perfectly cooked thanks to the fat in the mixture). Before pouring the first portion of pancake mixture into the pan, heat the pan well. Pour and stir in a circular motion to spread a thin layer of batter over the entire surface.
Cook the beetroot pancakes over a medium-low heat so that they do not overcook, but remain soft and have a nice colour.
If the pancakes are overcooked, they will become crispy, spotty and crunchy at the edges. If you want to soften the finished pancake, brush it with butter as soon as you take it out of the pan and put it with the other pancakes - it will be softer when it is buttered and warm.
Lightly fry one side of the pancake so it browns and is easy to flip - use a spatula to fry it and flip the other side. Fry again until cooked through - some like them crispy, others like them soft - and place on a plate.
This is what a beetroot pancake looks like: festive and colourful!
Beetroot pancakes can be eaten simply with sour cream or honey, salt or sweet cottage cheese, and you can add herbs in the first case and sultanas, prunes, dried blackberries in the second case.
You can cook and freeze the strands and then reheat them and enjoy the pancakes!
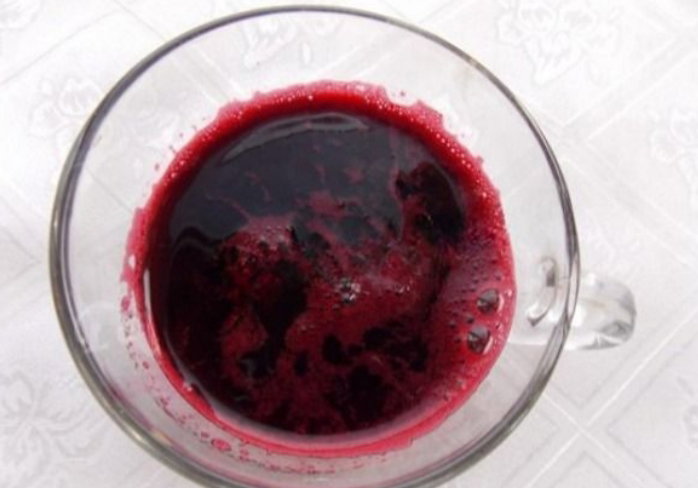
Delicious Homemade Dumplings: Master Class!
Once upon a time, not so long ago, housewives in Kiev were outraged by the history of homemade pasta! I became aware of some details of this really detective story and I will tell you about it, because it is a very educational story and if you think about it in a humorous way, it deserves to be included in the story "Three in a Boat".
In the subway there were some daring guys selling pasta. "Delicious homemade pasta!" they offered their hosts, who hurried home. The pasta was good: white and clean, like pasta. Wonderful - the hosts were thrilled when they bought the bag - no need to make dough, fill it, roll it, and dinner is ready!
When they got home and cooked the pasta and expected a delicious dinner, the hosts wanted the pasta out of the pots and pans... but they weren't there! What happened, couldn't they dissolve?- thought the hosts as they stirred the water with a broom. They can. Pasta is made of plaster!
What happened next is not known in history. But I will. I like to think that the next day a bunch of cheated housewives walked into the subway with the same empty plates and burned with the desire to put them on the heads of the scammers. But, as expected, the scammers were nowhere to be found.
The housewives held a war council on the spot and decided that from now on they would only make their own pelmenia. Only then can we be sure that homemade pasta is truly homemade.
Because frankly, even the pasta we buy in the store gives us some doubts. It's not always clear what the filling is, if it is anything at all. Sometimes you buy it and all you get is pasta and some ground beef. In short, pasta from the shops is suspect. Although sometimes they are a great help when you need to make a quick dinner. But you can also make homemade pasta for later use - it keeps perfectly in the freezer, and then you can just take it out, cook it and eat it!
Ingredients:
***Pasta:***
2 cups flour,
1 cup water,
1 tablespoon flour, 1 cup flour, 1 cup flour, 1 pinch salt.
1 cup flour, 1 tablespoon flour, 1 tablespoon flour, 1 tablespoon flour:
300-400 grams of meat,
1 onion (depending on taste),
salt, pepper.
Recipe for delicious homemade pasta:
We already know how to make homemade pasta dough. We already know how to make homemade pasta. My favourite dough is choux dough, it's soft and elastic, it can be rolled up thin and the pasta doesn't look like pasta. The preparation is simple: pour hot water into the flour and knead until homogeneous. While preparing a portion of pasta, keep the dough in a bowl, covered with a towel to prevent it from drying out.
The best filling for real homemade pasta is meat. Then it's GMO-free and solid. Of course you can buy minced meat, but it's better to chop it yourself, add onions if needed, season with salt and pepper, and you're ready to go. See: Minced meat costs on average 45 grivnas for 1 kg, while meat costs 38-55 grivnas. The point is to buy minced meat, which might be from the area "next to the hut"? So you can choose to make pasta, chicken or minced beef or pork.
So you have the dough and the filling, now let's make the pasta!
There are two ways to make pasta: by hand and with a pasta machine, if you have one at home. I still have a Soviet one. It's a very interesting tool. 37 dumplings in one go!
Pasta with a pasta machine
Image
Here you can see how to use this tool. Roll out the dough into a circle a few millimetres thick, with a diameter slightly larger than the pasta bowl, and place it on top. Press down a little to see the indentations and put some filling on top. Then roll out the second circle of dough and place it on top. And roll it gently back and forth with a rolling pin without rushing.
Press first gently and then harder to separate the dough. Remove the excess dough - you can also roll it up in one piece and roll it up again.
Then flip the dumplings and roll them out on a floured board. They are so interesting, hexagonal like a honeycomb! But I still like to make dumplings by hand. They're bigger, you can put more filling in, and they're a classic pasta shape.
How to make pasta by hand:
Make the dough into a sausage-thick pasta. Cut the sausage into small pieces 1-1.5 cm thick. Roll each piece into a circle by rolling it. Sprinkle the table with flour so that the dough does not stick, but not too much, just a little. If you sprinkle the dough generously with flour, the circles will be covered with flour and have difficulty sticking together. Don't roll out several bowls at once, because once you've put the filling in and stuck them together, the edges of the dough will be dry and hard to stick together. However, you can invite the whole family over and ask them to help you! Especially the kids. It doesn't matter if the dough is round or bag-shaped or round at first - the important thing is that the children learn to help their mother. With practice and skill, they will come!
Put about a teaspoon of filling in the center of each circle. Fold the circles in half and seal the edges like buns. Then curl the "ears" together, press together and... and you have a dumplings! Place the dumplings on a floured board to rub well. Then decide if you want to save the pasta for later or eat it right away. If not, you can put the board in the freezer and you'll have a strategic set of dumplings! The other option is to put a pot of water over high heat. Add salt (about 0.5 tablespoons of salt per 1.5-2 litres of water) and bring to the boil.
Do not add the pasta all at once so that it stands loose, otherwise it may stick together. When the pasta rises to the surface, boil it for another 5 minutes, then remove it with a spatula and place it in a bowl. Or place in a bowl to cool more quickly. Put a knob of butter on the plate and serve with crème fraiche. I like to spice it up a bit.
Now you have the most delicious homemade pasta for dinner!
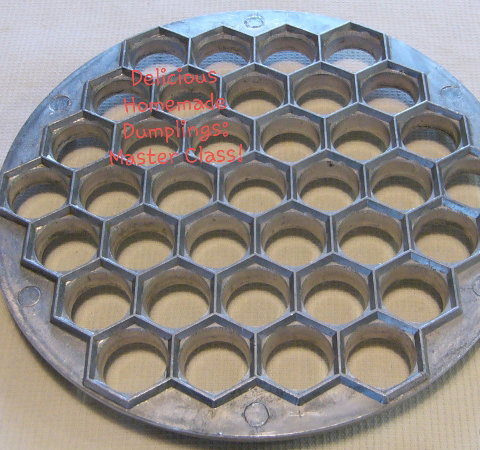
 @Sage01