How to make Frozen Yoghurt; Without Ice Cream Machine
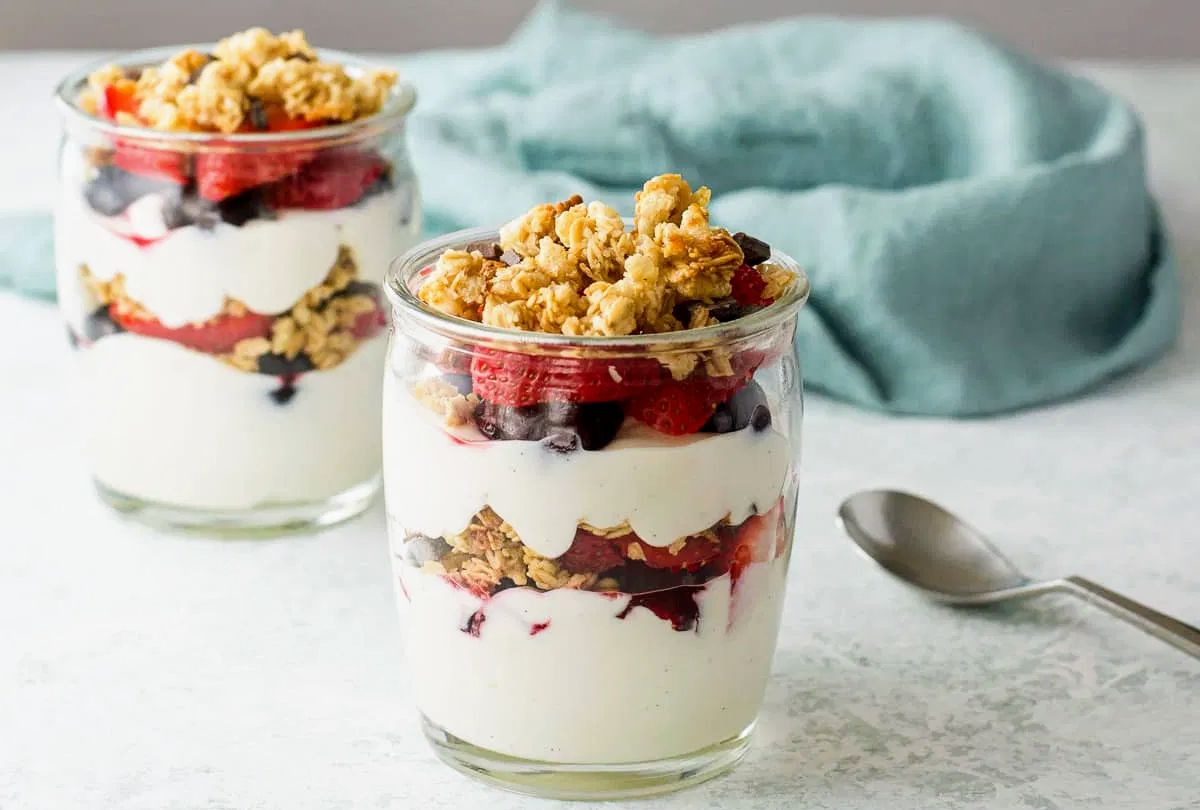
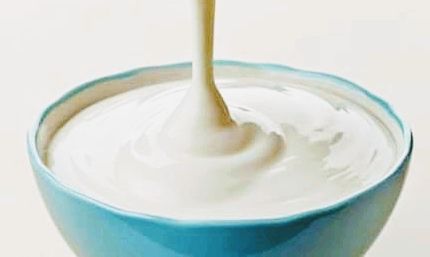
Frozen yoghurt can also be abbreviated to Fro-Yo, and for this frozen yoghurt without an ice cream maker, note that the honey in this recipe is not just for sweetness but it's what makes the fro-yo scoopable, adding or using sugar is what stops the ice cream like crystals to form and keeps the yoghurt soft. So adding honey is still the best option because it's not just to sweeten but it's what makes it scoopable like ice cream. While if you use sugar, it makes the ice not to form in the yoghurt thereby making it too soft or watery.
Another tips to know before delving to making Fro-Yo without an ice cream maker; you can use any type of Frozen fruits, but sometimes it changes the color of the Fro-Yo, you can also use any flavor and percentage of fat yoghurt.
You can add more or less honey based on the sweetness of the fruits and sometimes your taste preference.
How to Prepare without ice cream maker;
And for the Fro-Yo without an ice cream maker, you can get a food processor, and in the bowl of a food processor, combine the Frozen fruits, your Greek Yoghurt, Vanilla Extract and Honey. Then pour all the ingredients in the food processor, process the mixture until it's creamy for about 5 minutes or more until it's smooth and homogeneous. Then scoop the mixture in your preferred cup size, and put inside the freezer or freeze.
Serve the Fro-Yo immediately.
You can also transfer the mixture to an airtight container and freeze it in the freezer until it's ready to be served.
Pls note that; the type and size of Frozen fruits will determine how long it has to be blended in the food processor. Sliced frozen bananas may require few minutes of blending, while larger frozen strawberries or sliced mango (harder fruits) may require upto more minutes to blend.
Serve and Enjoy your Fro-Yo!
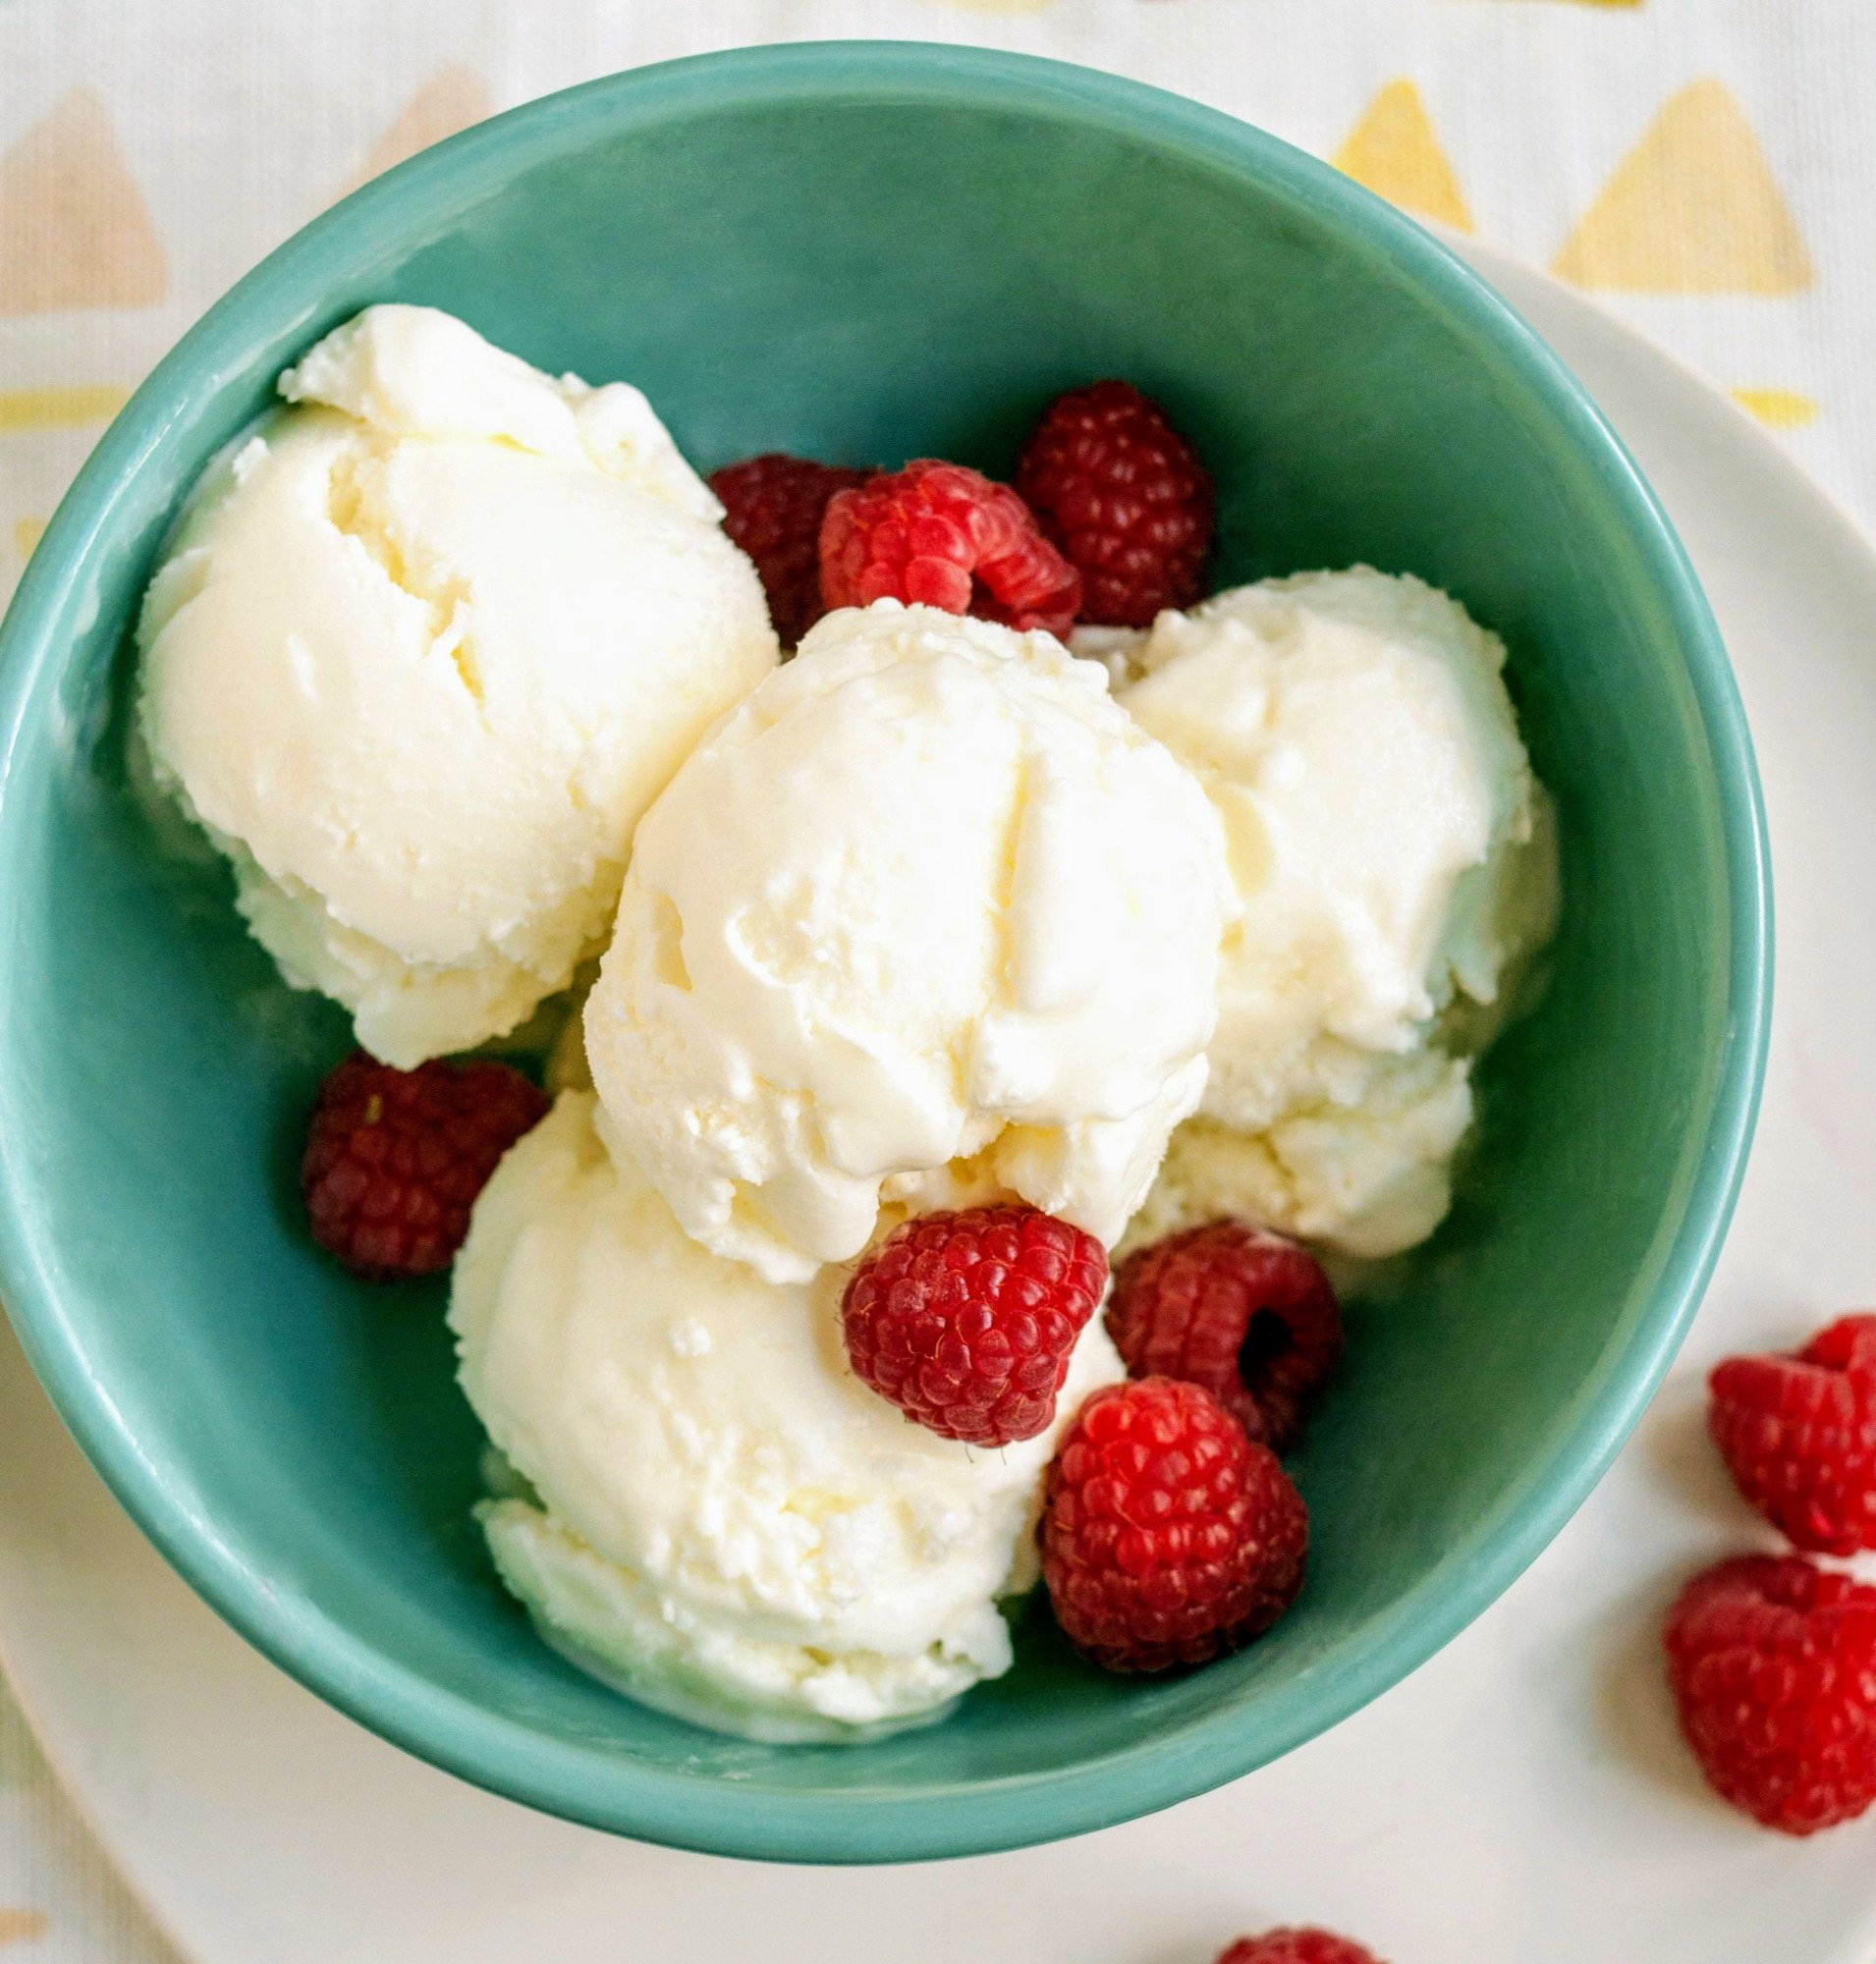
Steps to make Frozen Yoghurt
If you've been following my post on how to make different kinds of types of yogurt, then its time to move on to another type of yogurt, which is the Frozen yoghurt. This type of yoghurt is synonymous with making an ice cream but nutritious more than ice cream.
Ingredients;
Greek
Frozen fruits
Honey
Vanilla extract
Fresh or frozen berries (optional)
Cocoa powder (optional)
Tools Required;
Ice cream maker. We will also talk about how to make it without an ice cream maker.
How to Make;
Get yourself a big bowl to mix all the ingredients you have, the advantage of the big bowl is to enable you to mix ingredients efficiently, mix all the ingredients together until its even and homogenized. Then turn your evenly mixed ingredients into an ice cream maker, when you turn the mixed ingredients into ice cream maker, you will mix again in the maker for about 30 minutes or more until true consistency or homogenization is reached.
After mixing in the ice cream maker, freeze for about 2 hours or more if you are not in haste. Scoop in cups and enjoy!!
*Watch the space for the second part...*
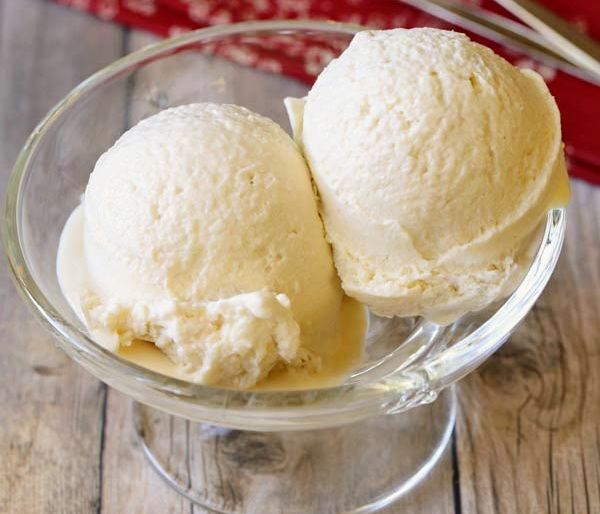
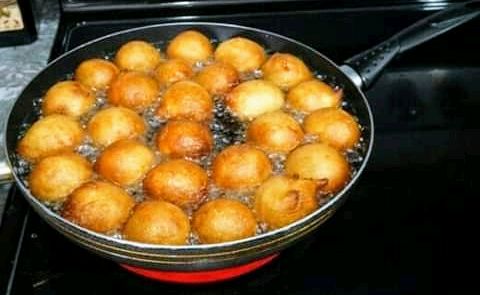
How to make Puff-Puff
You wonder what puff-puff is? This is a West African street snack made from a very simple ingredients of flour, sugar, yeast and combine them to make a dough which is then deep fried. This is called bofrot in Ghana, it's one of the snacks i like so much and very much loved by everyone too, both adults and kids alike. You can also snap in some spices into it like ginger, pepper if you want a slight pepperish taste in it.
Because it's flour, it can be somewhat tricky to get it right, you see someone making it and it comes out flat instead of pulpy. Here are few tips to get it right;
*WRONG YEAST:* getting the wrong yeast makes it go south, just make sure you get a quick rise yeast, though regular yeast works too but it takes few hours before it gets activated.
*CHEWY PUFF:* your puff puff resulting to chewy, it's as a result of leaving the mixing for too long before actually frying it, after mixing, it should never rest for more than 10minutes, that is if you use a quick rise, but when you set the batter in a warm place, it should take you about 45minutes to rise before frying it.
Ingredients involved:
Flour, quick rise yeast, cane sugar
Nutmegs, lukewarm water
Frying oil and frying pan.
How to Prepare:
Get a bowl and mix thoroughly the dry ingredients which is the flour, yeast, sugar and the nutmeg. Then slowly add in water while you combine all, make sure to stop as soon as the water is incorporated and the batter is smooth, don't forget that the batter should be smooth and thick after that.
Then cover the mixture with a clean table cloth and set aside in a warm place for about 45-60 minutes. When that is done, set a frying pan on the burner and put at a medium heat, add the groundnut oil and let it get hot.
Then scoop the mixture with your hand in an appropriate quantity and drop the scooped in the hot oil, repeat or keep dropping it until the pan is filled up, then let it dry until it turns golden on all angles.
When it's fried, serve and enjoy!!!

Oat Meal
Have you been thinking of what to have for breakfast, or a perfect breakfast idea? Why not try Oat Meal today!!
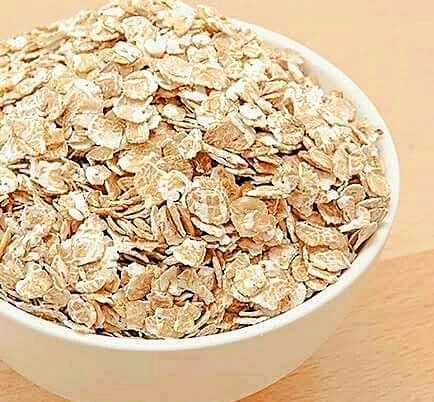
Oats generally are whole grain food, which is commonly prepared as oat meal, oat meals are made by cooking in boiling or milk, and they are very nutritious and at same time excellent source of carbohydrates, minerals and vitamins.
Your ingredients:
Oat Grains
Water
Sugar (to taste)
Salt (to taste)
Milk
Toppings to garnish (coconut, apple, strawberry, banana etc)
How to prepare;
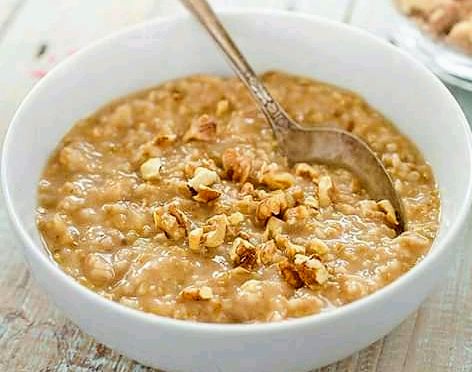
Mix your grain with a little normal water in a small bowl, then add salt and sugar according to your taste bud, then stir together to make it blend or homogenised, make sure your water is boiling already.
When the water is boiled, bring it down from the gas burner, and pour your mixed oat into the pot where there is hot water, then mix vigorously to coagulate and to make it look smooth. The reason why you have to mix vigorously is not to make it have lumps, when you see it's smooth and very okay by you, then it's ready to be served.
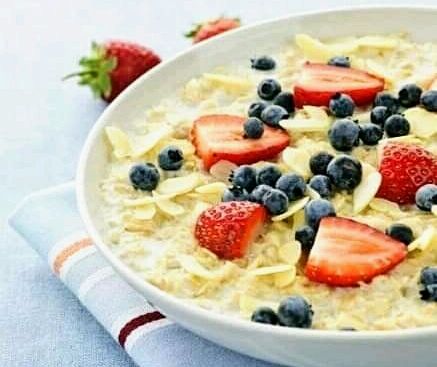
While you serve, that's when to add your desired toppings on it together with milk. Serve and enjoy your breakfast meal!!
Lime Vs Lemon
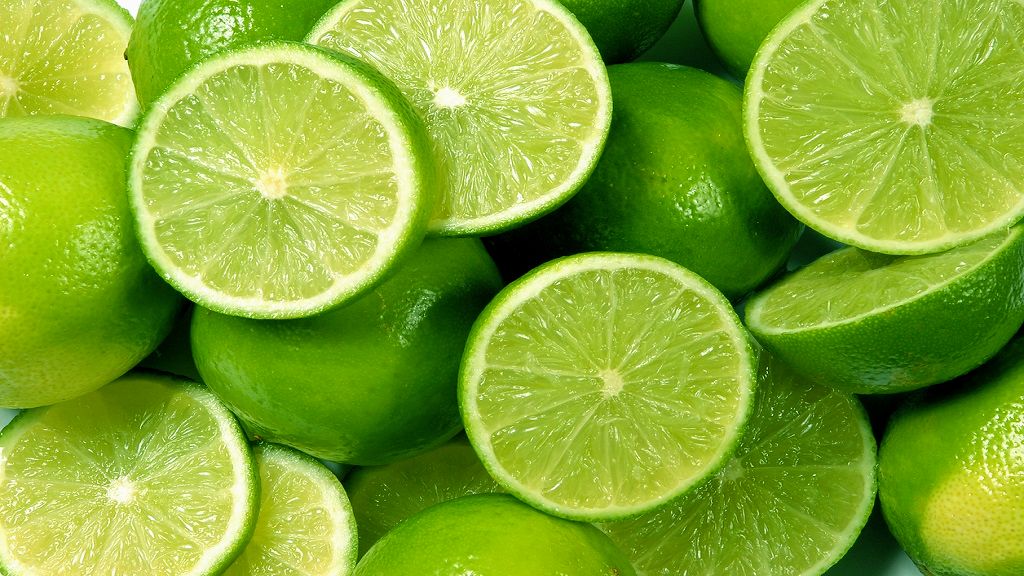
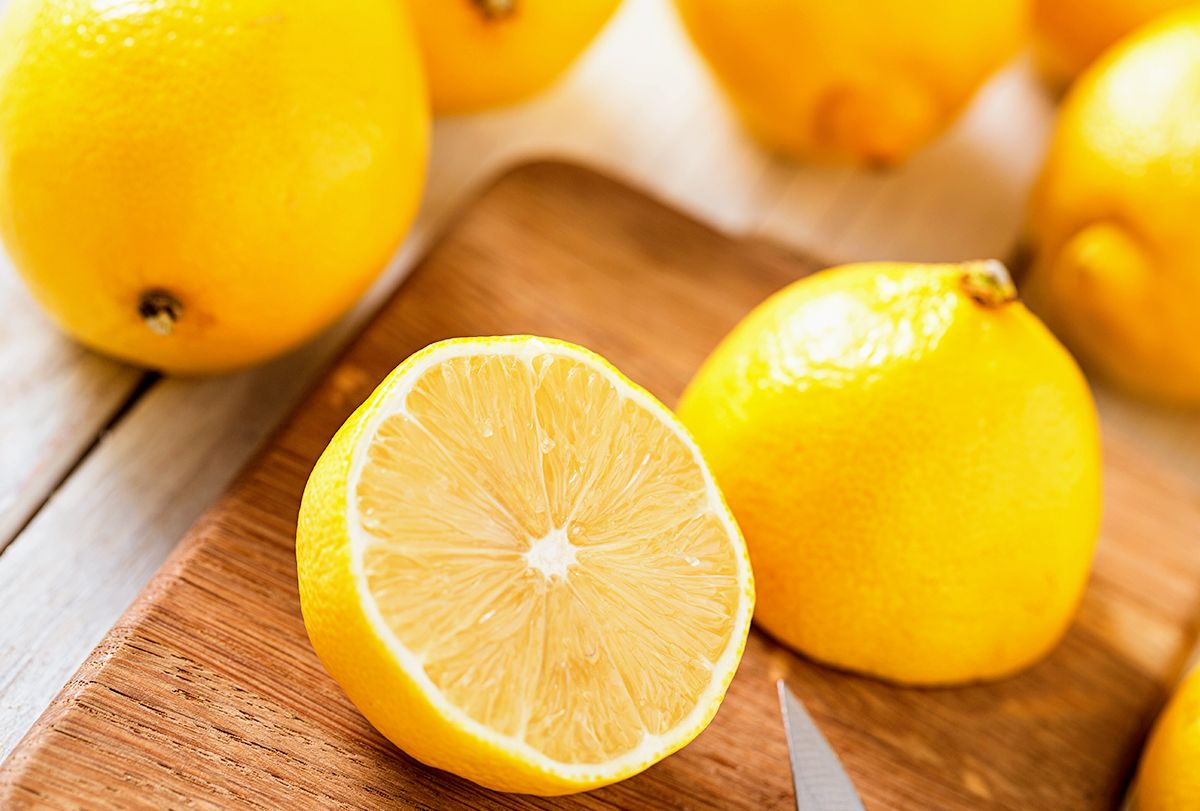
Lime and Lemon can be very close in giving the same nutrients and have the same attributes. Both lemon and lime are very high in Vitamin C and they contain an important antioxidant that helps protect cells from damage.
The high vitamin C that lime and lemon contains also helps our body to absorb iron from foods and helps support the immune system, this vitamin C helps in the production of Collagen which is an important substance for healing wound fast.
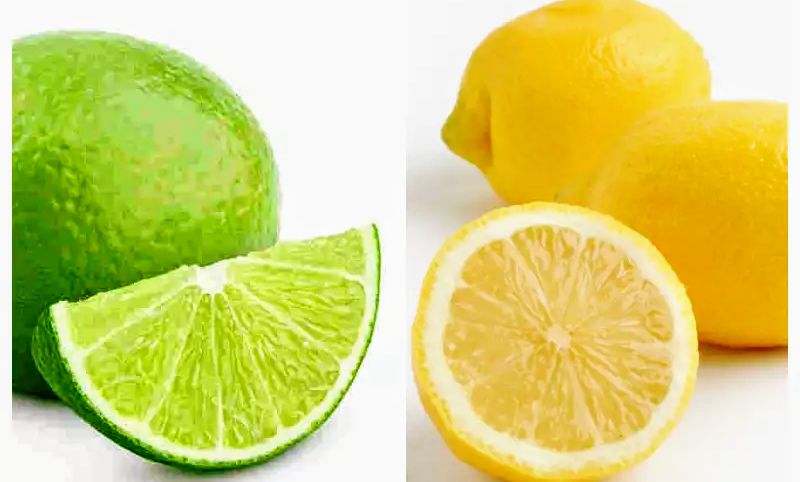
The lines are small, round and always green, while lemons are usually larger with a shape of an oval and often bright yellow. Both fruits have the same attributes of acidic and sour taste, while lemons tends to be sweeter, the limes have a more bitter taste and flavor.
Lime and lemon juice has a useful properties and sometimes both can be used in place of another. Both can be used as lime and lemon juice because of its very similar taste and acidity level, in making a cocktail, lime and lemon are keys and used to garnish the cocktail drinks.
Another important benefits of lime and lemon is that they help manage your weight, because of the citric acid involves which can boost metabolism which in turn helps you burn more calories and have less fat storage, though in addition of losing weight, regular physical activity like exercise are very important too in losing excess pounds and weights.
Lime is also very effective in solving stomach disorder and keep wrinkles at bare minimum. With the vitamin C it produces which our body can't produce unless we get it from the food we eat, it keeps our body springy and full. When we don't have enough, the wrinkle will take up very fast but it can slowed down when we take enough and right vitamins.
Garden egg Sauce
Many people take garden egg raw but not many people actually know it can be prepared as sauce, you need to stop wondering and let's dive into the full explanation of how to prepare.
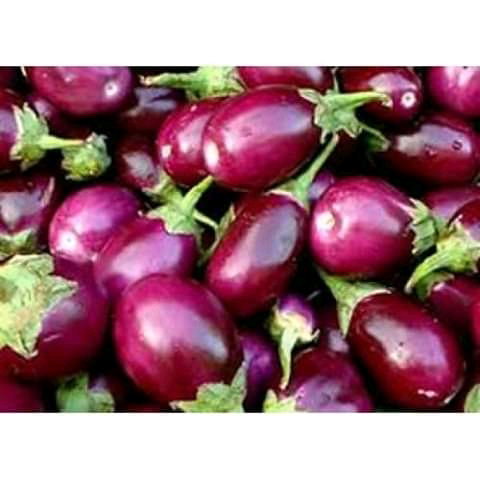
While some take the garden egg like that, some actually make sauce out of it, and don't forget that the garden egg comes out or much available around August through October. The beautiful thing is that you can make your sauce with any type of the garden eggs like the purple garden egg called the "aubergine", the white and green garden eggs, and they belong to the vegetable family.
The green garden egg, it's mostly found in Africa.
The white garden egg, can be found in Africa and Asia.
The yellow garden egg, can be found also in Africa and anywhere.
According to the health expert on foods, raw garden eggs is very good source of dietery fibre, copper, thiamine, potassium and manganese, and it's also a good source of vitamin B6, magnesiums and niacin. Not forgetting the garden egg is very effecting in terms of weight loss, it lowers blood cholesterol, and takes care of glaucoma.
The garden egg also contains nutrients like beta carotene, vitamin B6 E, foliate, calcium, iron and magnesium, and many more nutrients. This is why it's recommended to make the sauce without removing the skin. Now let's dive into the preparation.
Ingredients;
Get your garden eggs (either of the ones mentioned above), your palm oil, your medium size smoked fish, your ground pepper, locust bean, your onion, crayfish, and salt to taste.
How to Prepare;
First Step; make sure you rinse and remove the green stalk, then in a medium size pot, boil the garden eggs for about 10 minutes to make it tender and marshable.
When it's done, chop the boiled garden eggs into smaller pieces with a small mortal and pestle or a small paddle used for turning, make your you blend it with a little water. You can blend it smooth or rough depends on your taste or likeness. After pounding, the set aside.
Second step; Get your pot, and heat up the palm oil till it losens up a little, then add the chopped onion and locus beans, stir until it's fried for about 5 minutes.
Third Step; After heating the oil and pouring your onion and locust beans, then pour the pounded garden eggs, your smoked fish, seasoning cubes, crayfish, pepper and salt into the same pot. Then mix everything together and leave it to cook for about 15 minutes, and when it's cooked, turn off the heat.
Now you are done and it's ready to be served. You can serve with yam and boiled or roasted Plantain.
Enjoy!
Best Fruits Combination
Fruits are very good to the development of the body and its system. Most fruits are very high in vitamin C, while some are very high in fibre, meaning when you eat them you feel filled up but may digest quickly. Fruits are very good to keep the body in shape and equip the immune system to be able to fight against germs that may want to attack the body.
You want to lose or shed weight, then you have to consider adding fruits to your everyday intake. While some has a limit of intake per serving plate, some do not such as vitamin C.
Below are the best fruits combination suggestion;
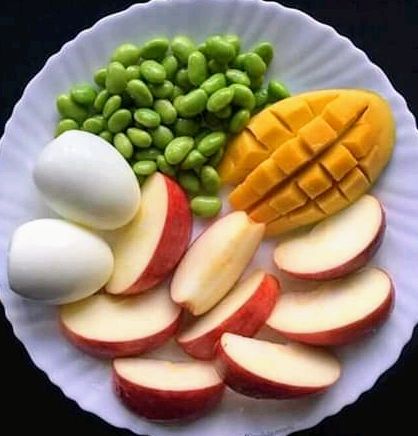
Egg, Green Beans, Apple with Mango.
This is actually a very good fruits combination and accompanied with a proteinous egg.
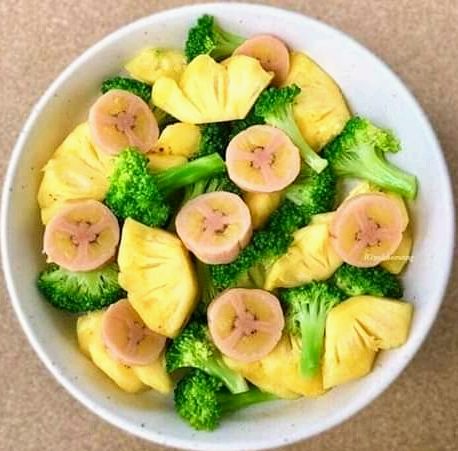
Banana, Pineapple, and Capricot
This is actually a good fruit combinations to supply you with great vitamins, ranging from banana that's full of fibre to pineapple and Capricot. It's a great to try out.
Banana, pear, bean
This is for the pear lovers, those who'd love to have pear in their tray of fruits. Imaging having great selection of fruits served to you.
Dates, Avocado and yoghurts
This is a great selection of fruits, having proteinous yoghurt, vitamins packed avocado and all round vitamin dates.
Egg, corn, pawpaw and green please
Do you find these combination awkward? Do not find it awkward because it's actually a great combination, it contains and give you the needed nutrients.
Peas, corn, mango and dried fried egg
Just like the previous ones, this combination also contains proteinous food, taking proteinous food or item goes a long way in giving your body the much needed nutrients. This is actually a great try!
Tangerine, egg and apple.
This is a full packed fruits to look out for, having citrus which is tangerine, proteinous egg and immune booster apple on your tray.
Hope you found this selection helpful and interesting!
How to make Greek Yoghurt
Yoghurt as we all know is a diary food and needs expertise or basic information to be able to produce it. There are different types of yogurt and we have treated some on here, some of the ones we've treated on here are; drinking yogurt and Yogurt parfait, and we are going to treat other ones with Greek Yogurt today.
If you need to check the previous ones, check through these links;
https://read.cash/@FavoriteFoodie/how-to-make-yoghurt-e09edbae
Without further ado, let's dive down to the real deal and that's how to make Greek Yoghurt. The reason why it is greek is because of the high viscosity and straining the fat to sieve out the whey protein.
Ingredients needed;
Powdered or Liquid milk
Whisk for turning
Sugar (optional)
Lactic or Starter culture
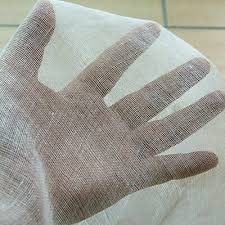
Cheese cloth to strain.
How to Prepare;
Just as we've explained earlier on the process of how to produce a yogurt, the same process is also needed to make greek yogurt, just that somethings will be changed, such as the milk content, inoculation temperature, and incubation time.
Let's explain with 5 liters volume of production. Measure 500 mils of normal water, then pour 2kg or 1.5kg of milk into the water and dissolve, after dissolving, make sure your water is boiling already. When the milk is homogeniosly dissolved, pour the hot water into it and make it full to the bream of 5 liters. Then stir it vigorously to better homogenise it, make it cook and pasteurize it, when its well stirred, cover it and leave it to make it cool down to inoculation temperature. After few minutes check with the aid of thermometer to see if the temperature is dropped to 48/49°c, the reason for this high temperature compare to drinking yogurt is because of the high milk content involved in the greek style.
Then when its cooled, add your starter or lactic culture into it and stir together, then cover and put in a no air place or corner. Then it's ready to incubate.
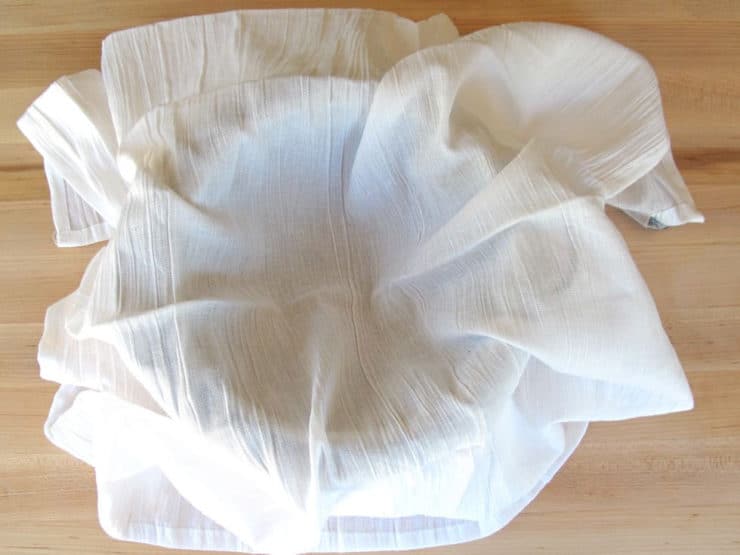
After 10-12 hours, go there and open the yogurt, it would have formed and fermented to yoghurt. Your yoghurt is ready and the next thing is to make it to Greek Yoghurt. After the fermentation, get your cheese cloth and a bowl where the water strained will drop into.
Straining; pour the just fermented Yoghurt into the cheese cloth and let it sieve out the whey water in the yoghurt, they water is green like in nature and it's called whey. You pour the yoghurt in it and leave for about 3-4 hours to better strain any available whey presence in the yogurt. Note that when straining you can put the yoghurt in the fridge so as not to make it taste sour more, because the more it stays the more it becomes tart.
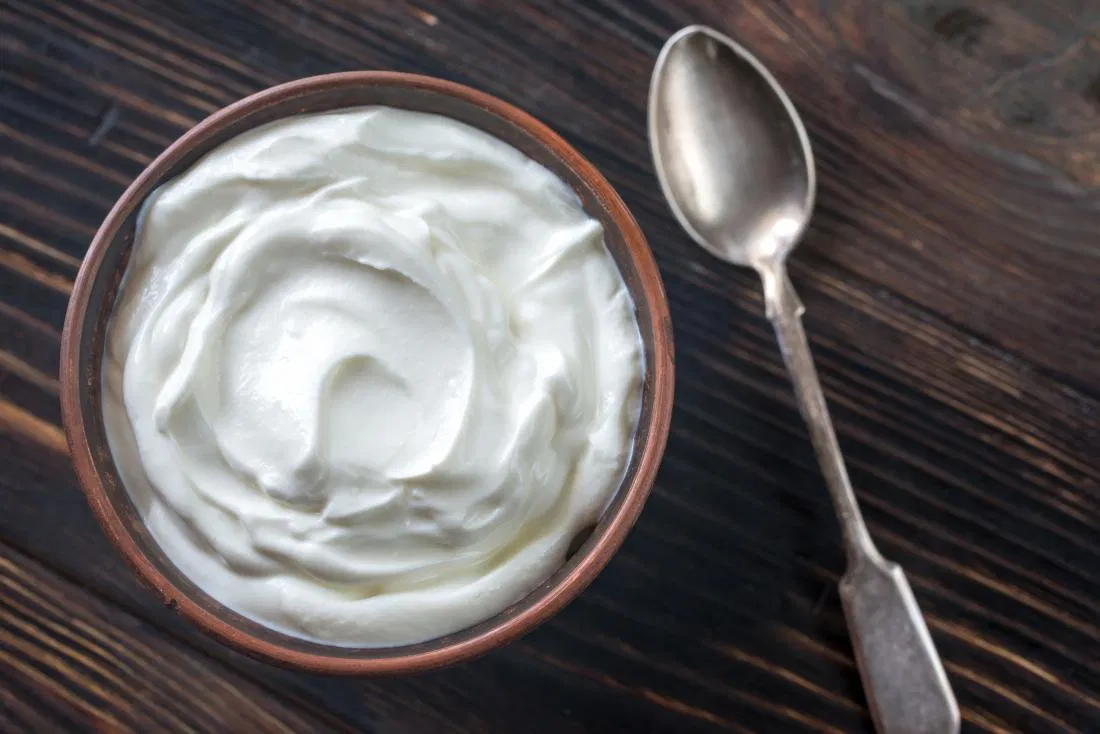
The whey liquid is high in fat, even though that's where the most of the yoghurt protein is, it's called Greek because it's made for those that wants organic and to lose fat and also doesn't want something that add more weight and fat, you leave it to strain for 3-4 hours as said. After straining the yoghurt it looks like this;
After straining , the water drained is called Whey and the Yoghurt remaining is called the Curd. Then you are done straining and the the next thing is to mix it together so as to become smooth and eatable.
Put in the fridge to gain more consistency and gather viscosity. The Greek yogurt can be eaten with a spoon and gulped like a drinking Yoghurt. Dish and serve and enjoy!!
Now you are done making Greek Yoghurt, the next one would be how to make Bar Yoghurt.
Some of the best Cocktails in the World
Have you tasted cocktail before? Not every cocktail is an alcohol though. But in actual sense, a cocktail is an alcoholic mixed drink, which is either a combination of spirits or more than one spirits to give it a unique taste, ingredients such as Fruit juice, cream.
The basic Ingredients for cocktails:
the major and essential ingredients for making cocktails are; liquor, mixers and garnishes. Lime is a very important ingredients when making cocktail, including vodka and lime juice.
You can make your own Signature cocktail by;
Think about the spirits your guests would love
Pairing the alcohol base with a good ingredients or mixture of two.
You may try adding another more ingredients and mix together.
Then make a finish with a nice garnish. And make sure not to forget the name.
Let's dive to the list of best Cocktails in the World
Rainbow Cocktail: This is a super duper cocktail, and has a beautiful site. It's made with different shades of fruit/spirit with vodka.
Vesper: This cocktail was invented by author lan Fleming. The vesper is originally made with a boozy mixture of gin, vodka and kina lillet.
Tom Collins: this drink is made with gin,lemon and soda water. It's a lemonade for grownups and it's a fast rising cocktail.
Gin Fizz: This is a delicious craft gin and can make the gin Fizz shine. It's made with mix of gin, lemon, sugar, egg and soda. It's one of the simplest cocktail drink to make and take.
Americano: This is an Italian cocktail which was created by gaspere campari, may look like a coffee but has nothing to do with coffee at all, and it's done with soda water drink and quickly rising in popularity.
Aperol Spritz: if you are a cocktail enthusiast, you would know the Aperol Spritz. This popular cocktail is pleasing and tasty and easy to make. A great one to enjoy.
Boulivardier: This is a vinepair staff favorite, and it's a twin drink that utilizes whiskey instead of gin. Its best enjoyed when garnished with an orange twist, give yourself the best afternoon.
Sunshine cocktail: This is also an old fashioned cocktail and made up with vodka, spirit and garnished with orange rolls to spice up.
Old Fashioned: This is a timeless cocktail and it's a simple classic made with rye, angostura bitters, bourbon,sugar cube, a thick cube of ice and an orange twist. This is a number one and most popular cocktail in the world.
Blood and Sand: This cocktail was invented in the 1920s. This cocktail is made by combining equal parts cherry and orange juice. Although the proportions can be adjust to tone down it's sweetness. The cheery is the blood while the orange juice is the sand.
Did you find the selections interesting?
How to make Yoghurt Parfait
Parfait as in Perfect, that's the meaning of yoghurt parfait, making a perfect yoghurt with toppings.
I have posted earlier about how to produce a yoghurt, but that was drinking yoghurt, now this is another type of yoghurt called Yoghurt Parfait which is made with Greek Yogurt. Greek yogurt is an advanced yoghurt and involves expertise, it takes some process too before it comes Greek. Subscribe to my profile to see my next post about how to make Greek Yoghurt.
If you already know how to make Greek yoghurt, then you are ready to be on a journey with me in making or knowing how to prepare yogurt parfait. Yoghurt Parfait is a kind of yoghurt that contains toppings and fruits, i will be showing the samples of toppings and fruits required. Now let's dive to how to make the Parfait, remember to caution your cravings.
Ingredients Needed:
Greek Yoghurt
Toppings such as: Granola, chia seeds, wheat germ, almond nuts, groundnut, cashewnuts, plantain chips, potato chips, chocolate chips etc, coconut flakes, fruit jelly, dried fruit
Honey
Cups to dish
Fruits such as; strawberry, banana, grapes, avocado etc
How to prepare;
After making your Greek Yoghurt, get your cups ready. You are going to put the yoghurt in three parts inside it, like covering the yoghurt with the toppings. Then dish a little of the Greek Yoghurt into the cup as a base, and cover it with the toppings you have, then dish the yoghurt on top of the toppings again and cover it with the toppings again till it is filled up to the bream, mostly three steps is okay. Then finish it up with your sliced fruits if there is any, and your toppings and honey if there's any.
Note make sure you are making your yoghurt parfait with a chilled Greek Yoghurt to better enjoy it, because you do not want to refrigerate it after you are done, which could make the toppings in it becomes soft because we want to be taking the parfait and have a feel of the crunchy toppings in it.
Now you are done and ready to enjoy.
Look forward to my next article on how to make Greek yoghurt
Wateryam Porridge
Ever wondered a food wateryam Porridge?? This is actually a nice food with so many richness in it.
I loved this food from the first day i tasted it, the yam balls couples with the sauce like thing in it makes me want to keep asking for more. I actually grew up among the people that eats this food a lot, so they made me fall in love with it, infact i always ask every restaurant i go to if they serve this food. The food is very common to Ijebu tribe of one of the Southwest state in Nigeria, though other countries might have what they call it as per their tribe and culture.
The Ingredients Needed:
Get your Wateryam
Dry fish
Cooked Meat
Tomatoes
Habanero pepper
One large onions
Your palm oil
Seasoning cubes (Maggi)
Salt, thyme and Curry seasoning
*Note that: Wateryam is quite hairy and has a slimy nature on the inside, it has a scientific name; dioscorea alata.*
How to Prepare:
First and foremost blend the pepper, tomatoes and onions then set aside, you can use bell pepper as well if habanero is not close by or available.
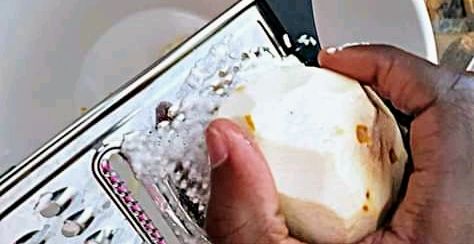
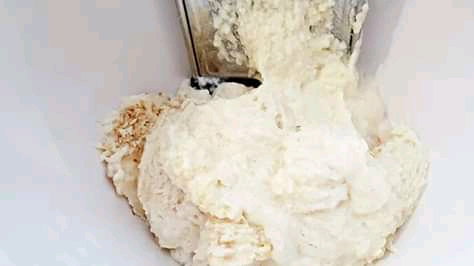
Then peel the yam completely, then cut the yam into a little bit large chunks, the reason is to make the grating a bit more easier because making it small might make the grating a bit difficult and tasky. Then get your grater and grate the Wateryam, you will be grating everything, make sure you use the tiny hole of the grater as want a mush, once done grating set aside.
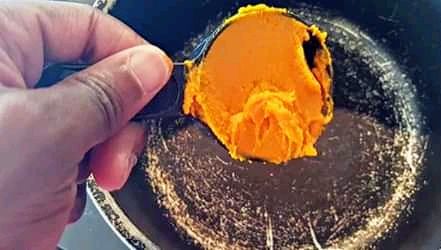
Then get your pot, add in your palm oil in a moderate size, once it's getting hot, add your blended tomatoes and peppers and make sure it's cooked. When it's cooking, add your salt to taste,thyme,curry, maggi, dry fish. Cook for about 20 minutes and in-between the 20 minutes, stir every 3-5 minutes.
*Note that: You can use any meat or fish and you can combine both, but dry fish is always superb and taste great in it.*
Then add in the grated wateryam in little chunks, you can add with your hand or spoon to scoop into it. Then allow it to cook for about 45 minutes, while cooking do not stir, but you can occasionally check the side of the pots to prevent it from sticking to the pot. By not stirring you allow it to form lumps, a kind of making meatballs, great right.
After making sure it's cooked, reduce the fire or heat and leave to settle a bit. Yes you are done!! Ready to serve!!
Try it out and enjoy!
Riped Plantain Pottage
This is yummy riped plantain pottage, this is a very lush and delicious pottage, and its most popular in part of West Africa, you should try it this weekend, it's very simple to make and doesn't take much time. Riped plantain pottage is used to prepare with only riped plantain, though some tends to use ripe and unripe plantain, but the best is to use ripened plantain.
*Ingredients Needed:*
Get your riped plantain, normal size goat meat chunk,few tablespoon of palm oil, dried stock fish and smoked fish, get your prawns, onions, dried catfish, get your few Maggi, few curry powder, few seasoning and salt to taste... Don't forget you can increase or decrease the ingredients depending on the size you are making.
*How to Prepare:*
First and foremost, wash the goat meat very thoroughly including the stockfish and smokefish and the prawns and set them aside after washing it clean. Then season the goat meat with the seasoning and curry powder and few onions that you have sliced. After pouring all that, now cover it and steam on a medium heat for few minutes, while steaming it, don't add water it, the reason is to allow the meat release it's own juices and to make the seasoning to be able to penetrate more into the meat.
Then take your plantain, cut and slice into round shapes and set it aside, then after the few minutes of steaming, add 2 very few cups of water into the goat meat, the boil the meat until it's tender.
In a separate pot, boil the stockfish and catfish till they are both tender, after this you can take out the car fish and leave the stock fish to continue boiling, the reason is because the stockish is more stronger and hard to soften. Then when the stockfish is tender, cut it into small pieces and cut the catfish too into pieces, then check the goat meat is tender already. Then add the rest of the sliced onion,prawns, catfish and stockfish included and make it cook for few minutes.
Now the next thing is to add the plantain, mix it together and cover then allow it to cook for few minutes, after the few minutes, the mix together and add palm oil then the crayfish and mix together thoroughly. Then leave it to cook for up to 8 minutes, pls make sure you stir every now and then to prevent it from burning.
*Now your Plantain Pottage is Ready! Where's your fork?*
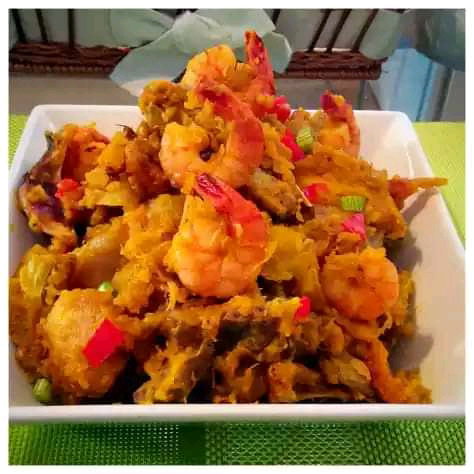
How to make Tigernut Drink
Heard about tigernut juice, milk or drink before? Wondering about how to prepare it? Read till the end!
Tigernut can also be called tiger tuber, it's packed with lots of nutrients our body needs to function. This milk or juice is rich in fiber and vutamin C and E, another important it gives us that it curses erectile dysfunction (ED) and also protect against cardiovascular diseases.
INGREDIENTS:
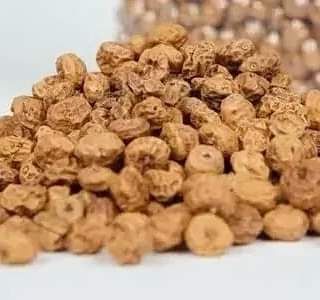
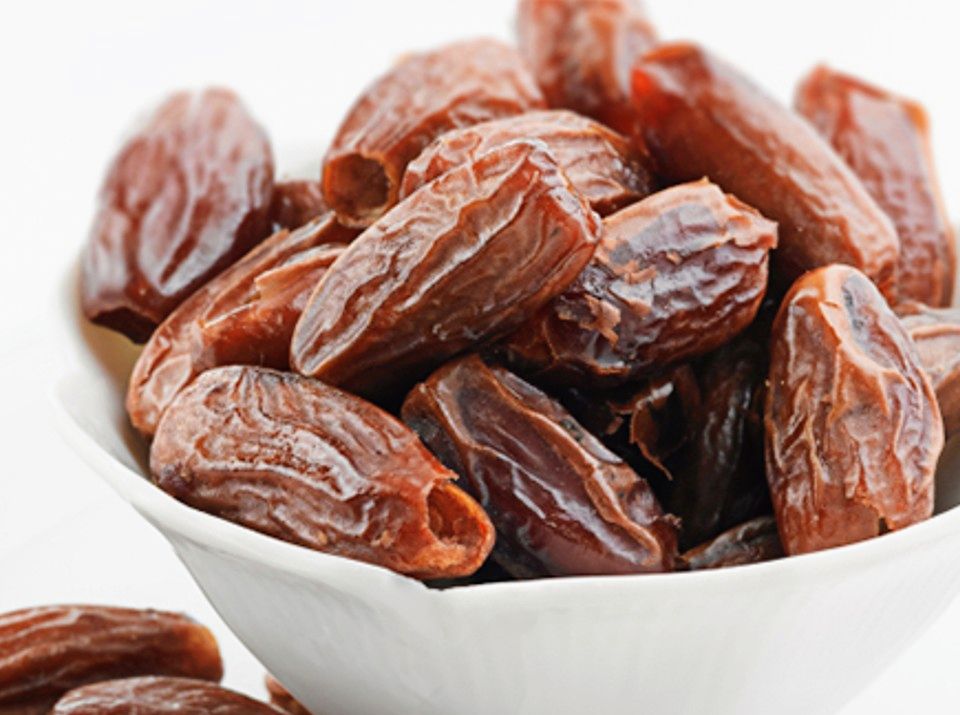
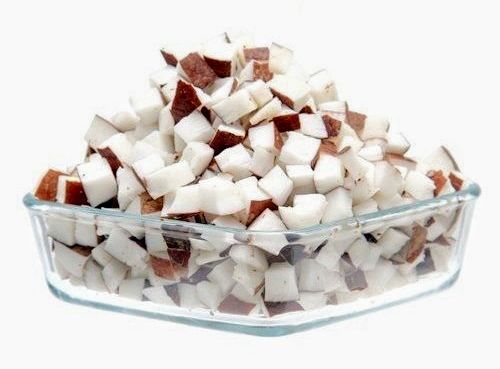
get tiger nuts (dry or wet), and dates fruit (to sweeten), and coconut (optional, though it makes it to be creamy), cinnamon, pepper or honey (optional). Get a deep bowl, a blender, a piece of mesh cloth and a cup..
Now let's dive to preparation;
First and foremost wash the tigernuts because they sometimes contain stones and sand. Then take the bowl and pour the washed tigernuts inside and pour enough water to cover up the nuts inside the bowl and leave in there to soak overnight or even 24hours, remember to cover the bowl, they will become softer after soaking, the reason for soaking is to make it possible for blending.
Then get your date fruit, wash it so as to be free of any dirt and soak it with water as well,this will make dates to be soft, remember to take the seeds out before soaking it because you can't grind the seeds with it.
Then after making the nuts and dates soft, it's time to blend. Pour them into the blender with sliced or diced coconut, cinnamon or honey. Then add glass of water just very little for easy blending.
Once all that is blended, the mixture will be smooth and thick, then put off the blender. Get your cheese cloth or mesh cloth to be used as a strainer to drain the milk which is the drink or juice.
Then sieve into serving cups. Before serving, you can place the juice in your fridge and let it chill.
Serve chilled and Enjoy!!
How to make Kunu Zaki
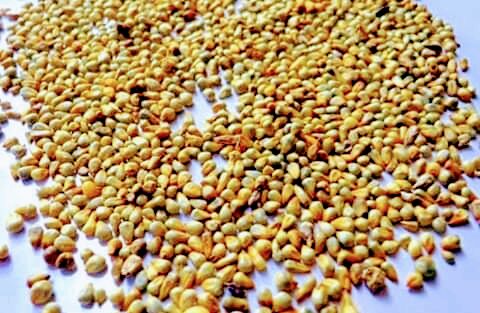
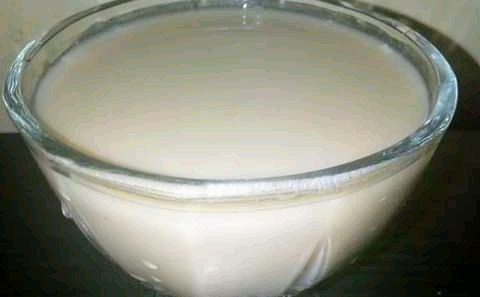
Its a beautiful world of Kunun Zaki and this is a nonalcoholic beverages produced from millet and spices like cloves,ginger,black and red pepper) this drink has another version called kunun aya which means "tigernut drink" and its prepared from tigernut with date and coconut, we are going to learn that aside.
Meanwhile, the key ingredients which is Millet, contains a vital nutrient lignin, which is very effective in fighting cancer and its very potent in the treatment of heart diseases. Its also known to reduce the risk of contracting diabetes.
This drink is also good for women that have reached their menopause because it helps them in muscle relaxation. While its also recommended for the nursing mothers because it helps in the free and abundant flow of the breast milk. The kunun zaki drink which has a ginger content, lowers the cholesterol level and prevents the blood cut. With its high fibre content, it helps to promote a healthy digestive system and also helps prevent inflammatory diseases.
The Ingredients;
Cups of millet, 1 teaspoon of the spices each, sugar to taste, potatoes or sprouted grains, skimmed or full cream milk after preparation and a large bowl with sieve.
How to Prepare;
Pour water in the bowl and pour the measured millet in it then cover to make it soak for 24 hours. Then discard the water and wash the millet very well and make sure its very clean. Then place the millet washed, potatoes, and the spices in a blender, blend until its very smooth, then add some water to the blended mixture so as to make sieving it easier. Then sieve the mixture and discard the results of the shaft, then allow the water beneath to settle for three to five hours and pour away the clear liquid above it, resulting to thick settlement.
Then divide the mixture into two parts; one part should be 2/3 of the mixture while the second part should be 1/3. Mix part A with a small quantity of water then add a boiling water not too much to the first part for partial gelatinization of the slurry. Then take the second part and mix it cold water very few not too much. Then thoroughly the two slurries (parts A and B) then add sugar to taste. You can add milk on top of it for lush and better taste.
Now you are done!! The drink obtained is Kunu.
Sweet Orange; The Health Benefits
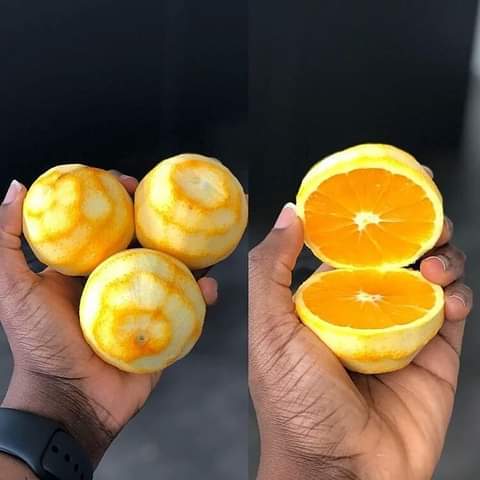
Who else doesn't like to take oranges? Oh you are missing a lot from the sweetness and taste it gives. Meanwhile, orange is known to have lots of health benefits and orange is rated among the most popular fruits taken around the world, from America to Australia to Asia to Africa. Though the discovery was was first from China and India.
Aside from the nutrients, do you know the back of the orange peeled can be used as medicinal herbs, like soaking the back in hot water, that relieves pain and stress. You can share to others for awareness.
One thing about orange is that you can take as many as you want, it doesn't have limit of intake, because of the high presence of vitamin C which doesn't medically have a guage of intake per day. Moreover the high presence of Vitamin C in it can make your wound heal faster, whith the high presence of immune booster, which acts on your white blood cells to give your immune a good power to fight against germs.
One of the most important benefits of taking orange is that it can improve your vision with an amount of vitamin A presence in it, and to treat that acne thats been disturbing you and making you have low self esteem, use the orange peels to solve it
In a nutshell, orange has a high content of Citric Acid which aids in skin exfoliation and helps to dry out acne as said earlier, which improves the overall look of your skin by making it smooth, spotless and mild. The fact is that the orange peel has a high content of vitamin C than the orange itself, so to have a better feel of the nutrients, grind the peel when it's dried and use it as a body scrub daily to achieve that smooth spotless skin/body.
Other Benefits of taking orange are;
Orange is high in Vitamin C
Orange gives your immune system a healthy state.
Orange is good for eye health
Taking orange alkalize the body
Take orange everyday and lower the risk of cancer
Taking orange controls the blood sugar level of the body.
Taking orange lower your cholesterol level.
Taking orange protects skin damage.
And taking orange helps keep body pressure under check.
Note; like they say too much of everything can cause something else, too much of orange can cause you to bloat and make the food you eat not digest very well, so be minimal.
Have you learnt something today?
Sumptuous Irish Potatoe
Oh yes it's a great weekend again, the dayd we always look forward to experience and witness, if not for anything at least for the fact that we get to rest and bond with our family.
All the same, weekends are for special food, bringing out special food ideas and recipes, great right?
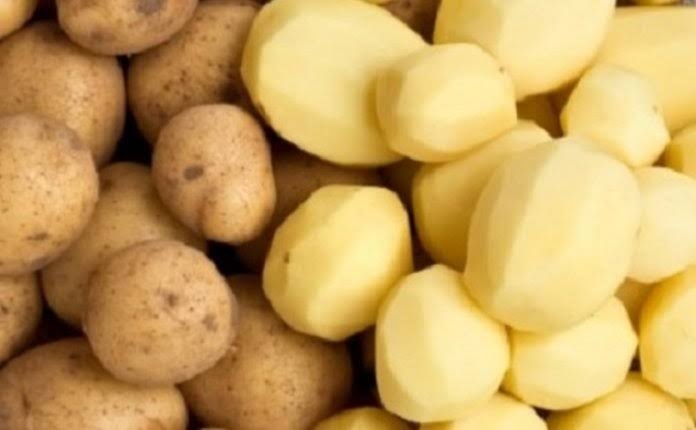
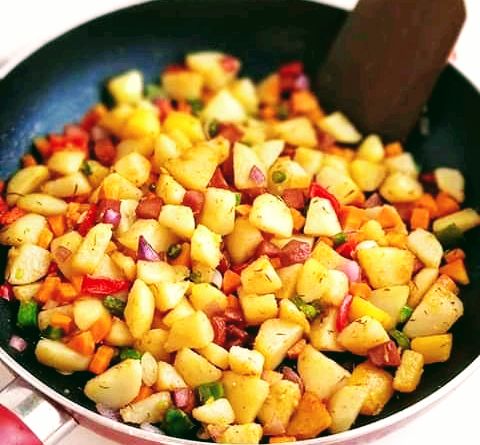
Here is a great idea you might find amazingly perfect for breakfast treat on weekend morning, a sumptous Irish Potatoe!
INGREDIENTS;
Potatoes (Irish)
Green and Red pepper
Onions and Green Beans
Ground pepper and Ginger powder
Carrot
Seasoning cubes, salt and thyme.
Sausage but this is optional
Vegetable oil to fry.
DIRECTIONS;
first and foremost peel your potatoes, after peeling, cut the Irish Potatoe into cubes size, after then pour the potatoes inside a pot of boiling water. After pouring, add some salt and then leave to partially boil. Yes you are doing great, check it it's boiled partially, then when it's lightly tender and you are so sure, drain with a sieve and set it aside.
Then get a frying pan and add some groundnut oil, fry the sausages in it, when it's done, pick out and set aside. Leave the oil in the pan and add the parboiled potatoes in it. Yes you are getting it.
While frying it, gently spread it out and leave it to fry before flipping to the other side fry as well. Then when it's slightly fried, pour your carrot, peas, red and green pepper, thyme, salt, seasoning cubes,onions, veggies, ground pepper, ginger and the earlier fried sausage.
Leave it to seamer for few minutes, then dish out or serve to enjoy! It's going to be a great weekend!!
How to make a Chapman; The African Cocktail
If it's not a Chapman, then it can never be like Chapman, that longing for more taste is heavenly, couple with the fact that it's easy to make.
Welcome to the world of Chapman, this is one of the most popular Nigerian drink, they serve it in cocktail parties, in bars and joints, and can be taken at home as home made Chapman. The beautiful thing is that you can make this drink hard or soft depending on the person or group of people that wants to take it. You can decide to make it alcohol for adults or non alcohol for the children or even adults that doesn't like alcohol.
The origin of Chapman drink is still not clear to many, but all what we all know is it started with a man at Ikoyi club in Lagos, Nigeria.
You want to make it alcohol? Then angostura aromatic bitter is the ingredients to look out for, and it's readily available in most super stored, an angostura bitters used for Chapman drink. Like i said earlier, you can avoid the bitters if you want the kids to take it , instead of the bitters, just use or squeeze in a lime, half lime might be just enough, though this may affect the true taste of Chapman because of the lime being added because of the children that wants to take it.
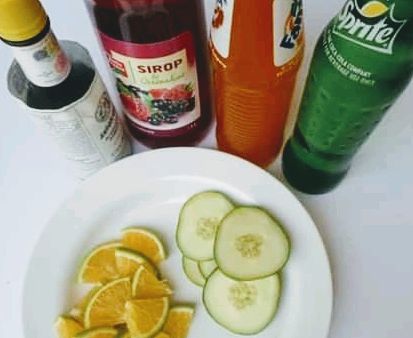
Here is a comprehensive ingredients for making a Chapman, it explains how it serves two persons;
A bottle of Fanta
A bottle of Sprite
Angostura Aromatic Bitters
Grenadine Syrup
5 - 10 spoons of orange juice
1 lemon or lime
Cucumber and Ice cubes
Note that; the orange and cucumber are used for garnishing, you can also use orange, cucumber, grapes, lime, the minimum combination is okay.
How to prepare;
The best thing to use in preparing Chapman is a jug or a big bowl, and don't be confused that the iced cubes and iced blocks are the same, what makes them different is the shape, but they serve the same purpose. Most freezer have the iced cube trays in them, so make sure you have them ready before starting the process. And i will advise that you chill the soft drinks which are the Fanta, Sprite before you use them for a chilled result.
You should understand that the Chapman drink must be served chilled or you won't enjoy taking it, so chill the major ingredients before using them. So let's dive more;
Like I have said earlier, get the giant mug, jug or big bowl, first and foremost pour the full cup of Grenadine Syrup in it, then pour the Sprite and Fanta into the same jug or bowl, then add few spoons of the Angostura aromatic bitters, be mindful of the bitter you add to it because it changes the sweetness taste of the drink and also absorb the sweetness. Without the bitters, be mindful of the Chapman you take or consumes, this is to avoid taking sugar in excess in the body.
Then add the fresh orange juice and stir or mix together with a whisk or a spoon. At this stage, you are almost done 90% with making a Chapman drink. Get glasses of cups to distribute the Chapman in, fill in the Chapman and throw in your granished fruits, then cut the oranges and cucumber into shapes, then throw in the mixture.
Lastly, add the ice cubes and serve chilled with a Straw to sip it. Enjoy yourself!!
How to prepare Lovely Macaroni
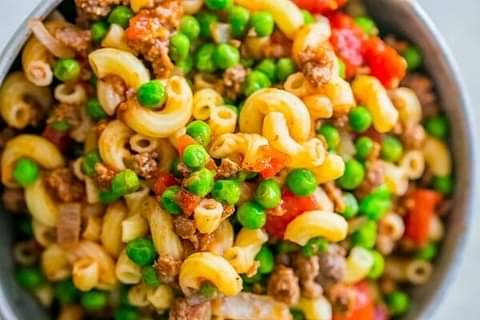
Do you know what describes this? Meaty, hearty and delish! Now i can't wait to share this lovely recipes with you, because of it's beautiful site and scrumptious taste.
This is a great meal for the kids and you are also allowed to add the vegetables of your choice to make it more delicious and nutritious. The kids would like that!
INGREDIENTS;
Get a 450 grams of minced meat.
Get 230 grams of green peas
Get 350 grams of tomatoes
Reserve 2 tablespoon of garlic powder
Get 1 piece of Onions
Get 110 grams of tomatoe sauce
And lastly get 3 cups of macaroni (elbow)
PREPARATION;
First and foremost, cook the macaroni in lightly salted water, dice the onions and set aside.
Then brown the beef in a large pot over the medium heat. Then pour the onions when you know the beef is lightly pink, kindly cook the beef until brown and until the onion is soft.
Reduce the heat of the cooking macaroni, and add all other ingredients, then simmer for about 3 minutes.
Meal is always best enjoyed when its hot. You can serve immediately.
How to prepare GIZDODO
Gizdodo you wonder? Hey don't be confused, this just has to do with Fried Plantain couple with fried Gizzard with peppered stew, what a sweet combination?. The crunchy bite is topnotch and at the same time, eating it is just like eating beef that tastes like chicken, yummy!
Do you wonder how and what to prepare for dinner? Hey relax this might be a great selection and inspiration. Now let's dive;
INGREDIENTS;
Have one Kilogram of Frozen Gizzard, Riped plantains, Large onions, Tomatoes, Jalapeno peppers (use as many as you want depending on your pepperish taste), large sweet bell pepper, Scotch Bonnet, lots of Gizzard stock, cubes of Maggi, salt to taste and vegetable oil to fry.
PROCEDURE;
Rinse or wash your Gizzard and put them in a pot, then chop one large onions, then seasoned with Maggi cubes and salt. Make sure it's well cooked.
You are doing great, then while your Gizzard is cooking, prepare your other ingredients. Then chop your tomatoes, onions and peppers.
It's not ideal you use much of these ingredients, you can just use little of the ingredients. Get at least averagely chopped of these ingredients, with your bell pepper included. Then when the Gizzard is cooked, save the stock, chop the Gizzard into normal sizes and fry.
Now get your plantains, unwrap it and cut into likable sizes, then fry till it turns golden brown , and set aside.
Use some of the oil you used in frying the Gizzard, add the pepper blended, add 1 cup of the Gizzard stock, seasoning cubes, and if it's necessary, add little more cubes.
Turn the heat down completely and add the Gizzard, stir it in well and pour in the fried Plantain. Stir all using a wooden or plastic spoon so as not to marsh up the plantain.
You have tried and done a lot. Stir everything well and when it's even, turn of the heat. Serve warm and enjoy yourself. Serve everyone, Get your juice and enjoy!
Note; I'm not responsible if you feel hungry seeing this.


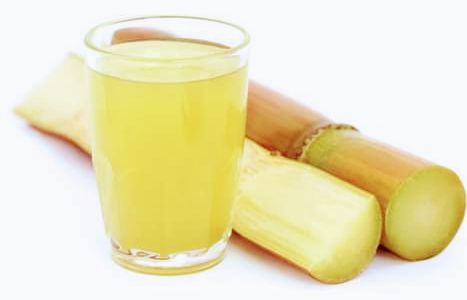
Sugarcane Juice; The Nutrients
How long have you been taking sugar but you have been wondering what the nutritional facts of what you've been taking might be? Dont wonder or feel confused anymore, Your favorite foodie has got you covered, watch as we unfold them.
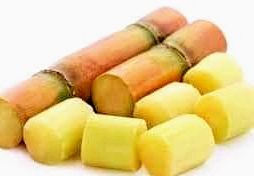
Im sure you've been brainwashed sugarcane might give you diabetes, this is a pure lie, don't be deluded. I trust after this eye opening article, you wont be scared to take sugarcane anymore. Now let's dive to the health benefits of taking sugarcane;
Health Benefits;
It helps boost protein level in the body and helps maintain the health of the kidney.
The antioxidants in sugarcane juice helps to fight against infections and boost the immune system of the body.
Sugarcane juice helps and act as good digestive aid, due to its high mineral contents.
Sugarcane juice helps if you have a brittle discolor nails that have white spots on them, the juice contains everything to give you those strong shiny nails that looks pretty even without using nail polish on them.
The sugarcane juice has been discovered to help those struggling with fertile disorder.
Sugarcane juice is a great source of Glucose, which helps in rehydrating the human body and boost energy.
Yes the sugarcane taste very sweet, even at that it's good and can be taken by diabetic patient.
Sugarcane juice is considered to be alkaline forming food, because of its high concentration of potassium, magnesiums, manganese, calcium, iron.
Sugarcane juice helps to fight and effective in fighting against cancer, especially prostrate and breast cancer.
Sugarcane juice, helps against tooth decay and bad breadth, because it has high mineral contents.
Did you find these educative? Don't be scared to take Sugarcane!
How to make Delish Pancakes
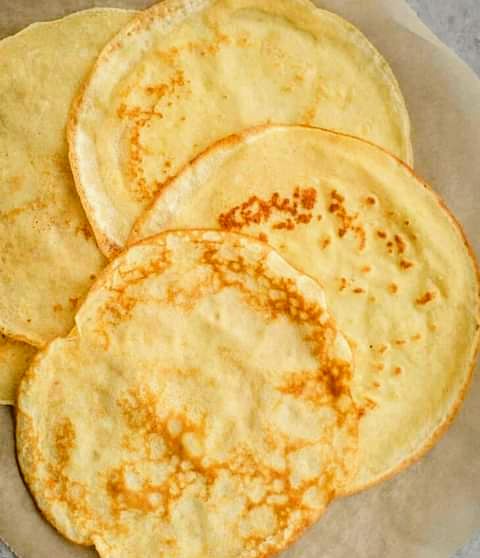
Have you been thinking, wondering about how PANCAKES are made? I actually called this an African Pancakes, because of its pepperish little taste, though just plain pancakes. Do you really wish you can make or prepare your own pancakes, lets dive into the recipe and preparation.
INGREDIENTS;
Measure 2 cups of flour, then 1 and 1/2 cups of water (you can use discretion too). You can add pepper which is very optional, then measure 4 spoons of Butter, then 1 cup of Milk, Have sugar too (use your discretion too), then 4 medium size of eggs, and to top it all measure 1/2 teaspoon of salt.
How to Prepare?
First of all, heat your butter so as to melt it , if its still tough. Then place it in a bowl that can contain your pancake mixture. Whisk and add 4 medium sized of eggs to the butter then mix together, don't mind it if it looks a bit lumpy. Then add 2 cups of flour, mix and then add 1 and half cups of water. Kindly use discretion for adding the water because that can determine how thick or thin your pancakes gets.
Then add 1 cup of milk, 1/2 tablespoon of salt and then sugar to make it as sweet to your taste, depending on your taste bud. You can add pepper if you like it to be a little bit peperish taste, this is optional.
Then mix everything together till it's a smooth, and dont forget the little pumps are the butter, and it will melt when you make the pancakes. Heat a small frying pan and add a teaspoon of oil or better spray the pan with butter, then pour in a little portion of the batter (mixed flour) and leave for the bottom to become solid and that's when you will know its cooked and fried.
Then as you see its getting solid, flip the pancake to the other side of it and keep flipping and turning till the pancake achieve its or your desired brownness. Now you pancake is set when its achieved.
Enjoy and serve with whatever drinks you prefer.. Tasty and yummy??

How to make Yoghurt
Do you really want to know how to produce lush and creamy yogurt? Let me share my very easy recipe and steps with you.. Relax and enjoy learning!
Try to get your equipments ready, you production bucket with tight cover, your whisk for dissolving and mixing, your water boiling equipments, a warmer for best incubation.
Here i will be using 15 liters of production bucket/bowl for ease understanding.
First get your water boiling, when its boiling, sterilize every equipments you want to use to kill any possible germs that might be in the equipment, with your whisk for turning included.
Direction;
Pour 2 liters of normal water in the bucket/bowl , this will be used to dissolve your sugar of 800grams or more, note that it's not a must you start off with a sugar, you can skip sugar if you want to make a non or unsweetened yoghurt.
Note that you can dissolve your sugar with hot water as well, but don't dissolve your milk with hot water so as not to arrive at a lumpy or particles kind of solution or result.
Then pour in your milk of 1.2kg (powdered) and dissolve or mix vigorously to attain homogenised milk solution. Note that when you pour your milk, dissolve instantly to avoid it having lumps, and after pouring in the milk, the liquid level would have increased. And if you are using a liquid milk, you don't need dissolving but mixing.
After dissolving all that, the next is to pour in your hot water to complete the 15liters and mix thouroughly and vigorously, to best homogenised it and pasteurize the milk solution. This process allows the protein to form a more stable gel, which helps in preventing the yoghurt separating into whey and curd during storage.
When that is done, the next is to check the temperature or hotness of the milk solution, and this is done with the aid of a thermometer. And when you check it the temperature would have risen to 85°c - 90°c, this will enable it to cook and form more stable gel. Then leave it to cool down to inoculation temperature of 42°c -43°c, this is to bring the temperature down to ideal temperature for the starter culture. Not that inoculation means the process of adding culture.
When it's cooled down to inoculation temperature, then your milk solution is fully ready and ready to be cultured, meaning it's ready for starter culture to be added to it. Then add 2-3 grams of starter culture to it, add by dissolving the starter with little of scooped milk solution in a cup with a cup, when it's dissolved, then pour it back into the whole yoghurt. But if you are using a life yoghurt which contains live bacterial, just use a 500mils of it, pour it straight in the whole milk solution in the bucket and mix everything together.
Once it's mixed together, cover it tightly, then put it in the warmer and place it in a no air corner, because youghurt needs heat environment to ferment better. When it's placed in a no air corner, leave it undisturbed for minimum of 8hrs and maximum of 12hours, fermenting it longer makes it bring out that tart yoghurt taste and flavor.
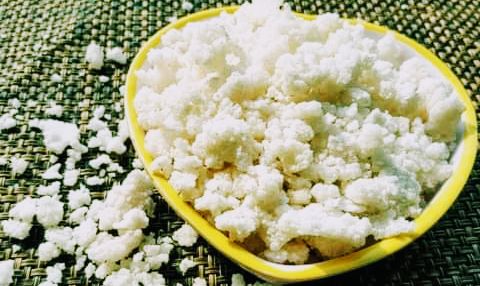
After those hours, meaning after the incubation period, open it and behold would be your YOGHURT, don't break it yet, as seen below
First add your preferred flavors (strawberry, milk, vanilla etc) or toppings if you have any , or preservatives if you want to commercial or sell it. Once you've added the toppings or flavors, or fruits (strawberry, banana, apple etc), mix gently and mildly to avoid the yoghurt turning watery or losing viscosity.
Now your yoghurt is ready. If you want to best enjoy it, chill it and serve. If you want to make it a parfait, add the toppings after serving.
Enjoy!!
Tapioca; A Great Breakfast Recipe
Just like I have promised on my introductory article, this is my first food recipe and i you are all going to love it and perhaps try it when you lay your hands on it.
The Tapioca can act as a food and as a for breakfast and sometimes dinner because of its edible nature. This is derived from the starch of tubers of cassava. The origin is from West Africa, but much of it in Lagos in Nigeria. They are actually sold in dried dehydrated clusters and it's in white or off white color. The nutrient is almost pure carbohydrates, and also contains very little of proteins and fibre nutrients, are you getting it?
When this is cooked, it becomes succulent and gelatinous, this is actually a great food for breakfast and sometimes dinner just like I've said earlier, it's great for kids as well, it is always best taken with Full cream milk. The origin like I said is of West African but you will find it as a stable food in Lagos, Nigwria, they mostly hawk it but can be cooked as home made as qelly. so knowing about this is knowing about West africa.
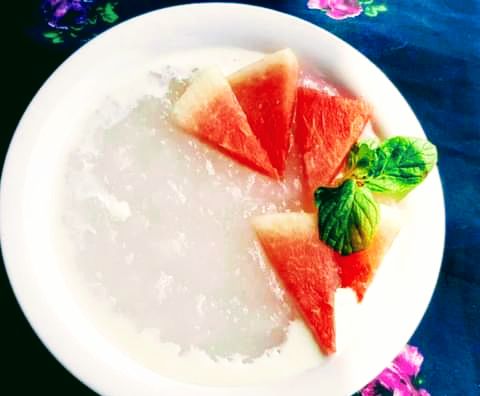
My first time of tasting it was wow, the taste of the clusters and gelatinous kind of texture was not of this world, when cooking, it's always mixed with coconut which goes best with it, but you can also add other toppings of your choice, then covered with the full cream milk, oh what a heavenly.
The taste of this surpass pap in every way, you can actually make it a parfait by adding your required toppings like granola,chia seeds, fruits etc, into it and enjoy. This is a great breakfast inspiration for kids and everyone in general. Now let's dive into the required ingredients and how to best make it.
Ingredients; Get a full cup of dried tapioca, A small coconut which will be shredded, sweetening agents like sugar, honey or date syrup.
How to make it;
Once you have the tapioca with you, soak the required quantity you want in a bowl of water over night, you can make it 8 hours or more, you will be surprised how soaked and swollen up it would have been the next morning, which will make it look double, so measure it accurately before soaking. Then the next day, strain your soaked tapioca and be very careful not to make sands gets into it. Then break the coconut, cut it into pieces for easy shredding, and to have more coconut flavor in it, save the water. Make sure you grate the coconut with the large hole in your grater because you need it to a little bit large chunks.
Divide the shredded coconut into two parts, extract milk from one part using a warm water then when it extracted, sieve the milk out, then put the extracted milk in a pot and warm on a medium heat stove. Then add the other saved shredded coconut into it and add sugar, leave it make it almost boiling then add tapioca. Then the stiring work begins, then after pouring the tapioca, you keep stiring till it thickens just like pap does and it becomes transculent. When it's done, then turn off the heat. You have done well!
When it's served, you can top it with evaporated milk or full cream milk to best enjoy it, oh so yummy, you all need to try it out irrespective of your country, be food adventurous the.
You can eat it whatever you like; bean cake, fruits, or serve as a yummy parfait . I actually ate mine with Ben cake topped with full cream with lots of shredded coconut in it.
Welcome your Favorite Foodie
Your favorite foodie you wonder? Dont mind naughty me, I'm just your favorite food addict. My name is Kennie, from somewhere around the world, and I love everything about food, like they say food is life.
I got know about this platform from the internet, so I decided to try out and see how interesting it would be, and I actually asked some people about it and I was assured its a good site and I would enjoying spending my educative and leisure time on here.
So far, I've tried clicking every button on here taking out self assessment and touring it to know more about what I'm actually going into, so far I've understood the platform needs the original content not copy and paste kind of article writing, I've also learnt the red bell signifies the notification button, the dollar sign or figure stands for the money I earn or the tips I get, thanks for those who donated for the cause and to appreciate writers.
I've also learnt i can join some communities for my article to have a better view and reactions and to learn from other writers as well. My account button have the details of my bitcoin cash wallet, my affiliates have in there my affiliate link and those who join via me. I can link my social media handles on here, and Send my money button stands for sending my money to other bitcoin cash wallet, I can also check my written articles and my saved articles that's awesome, and the most interesting paet is one can get sponsorship on the platform that's wow.
The juicy part of why I'm loving and very inquisitive about this platform is that it gives tips and reward writers just as ive seen and being told, even though that should not be the reason why we are all here, but getting rewarded actually goes a long way and gives you vibe knowing you are being appreciated for something, and every time spend on it will be worthwhile. I will also appreciate if you all can give me other tips to help makes my stay interesting and keep me informed, like they say information is key.
I will be your nutritionist giving you the amount of nutrients embedded in every food we eat, drinks we taste and fruits we devour, and also giving you juicy food recipes on here, we would get to learn more about other countries cuisines as well, from West to asia to Africa, interesting right?
Welcome Your Favorite Foodie, The Newest Bie

 @FavoriteFoodie