A week of charities
A little update about how was my week and what i learnt .
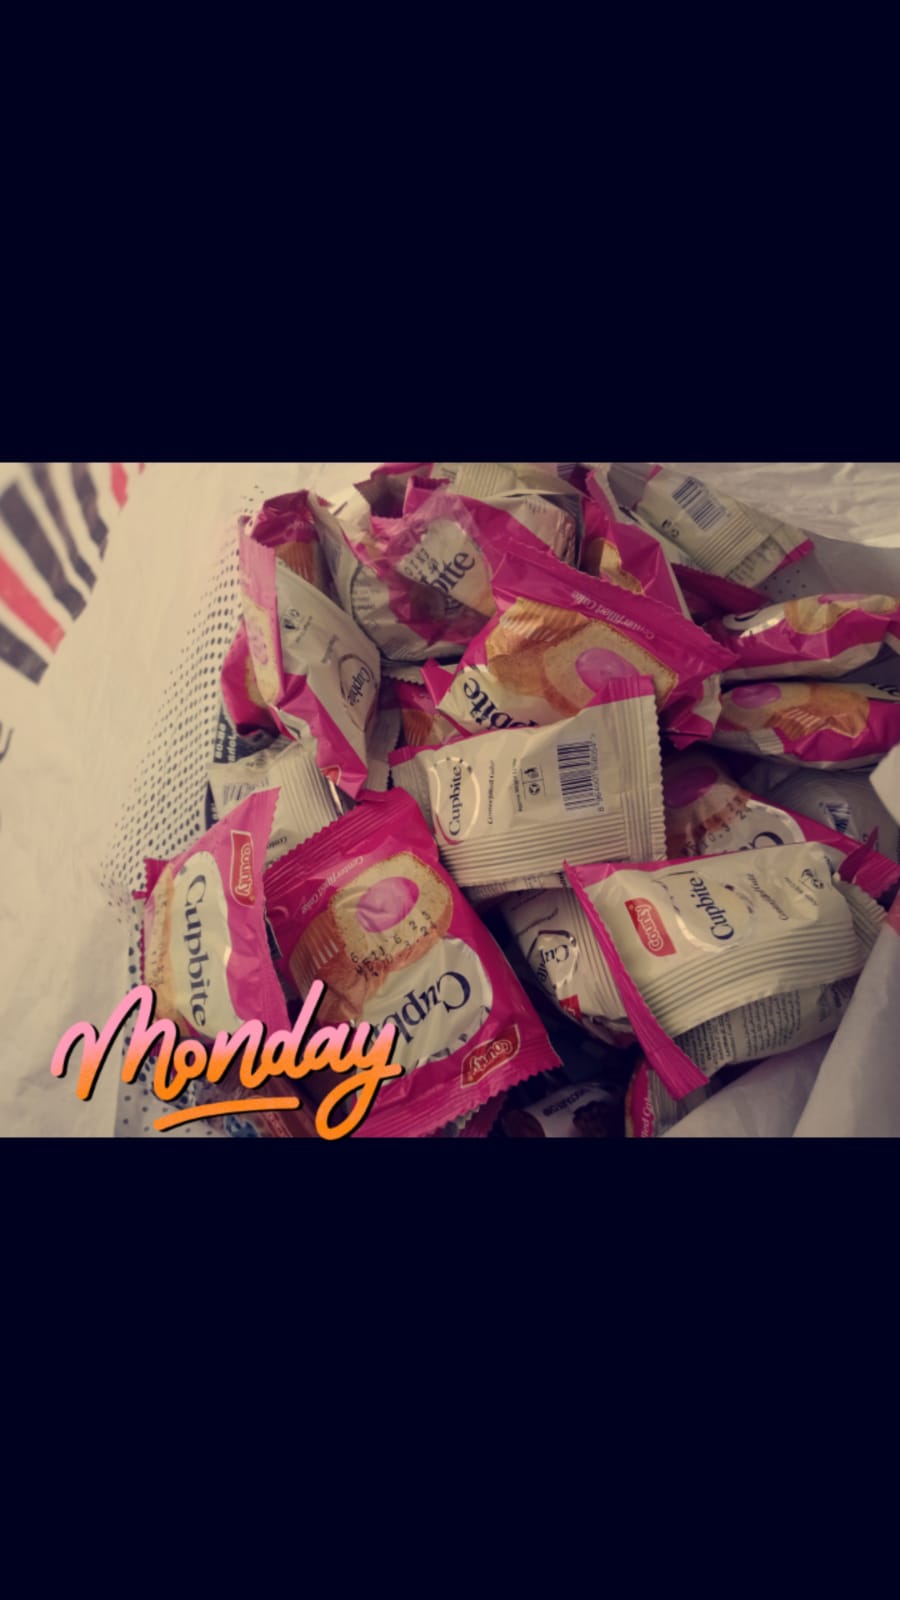
This week was mostly about charity and sharing .I save money annually for charity in Moharam so the charity goes on for 3 days and the first day i distributed cupcakes and treats among orphans and poor kids . Charity always makes me happy and eased at Heart.
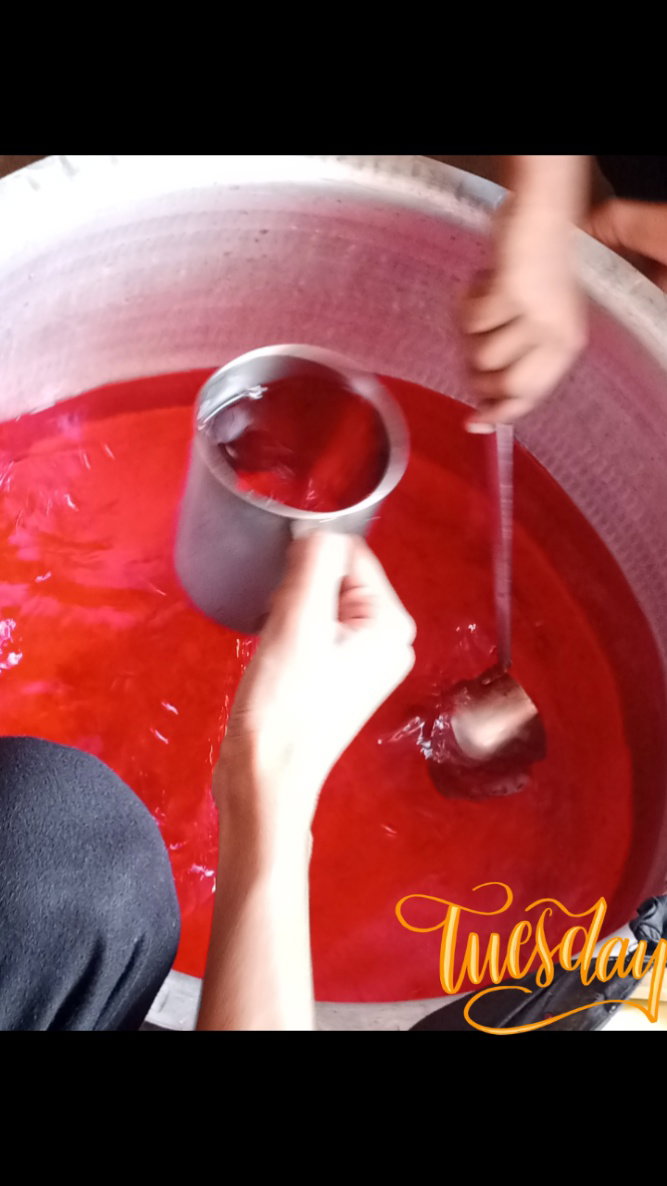
On Tuesday i did another charity this time me n my brother made a pink Rose lemonade stand which had free lemonade and drinks for people passing by who were thristy .
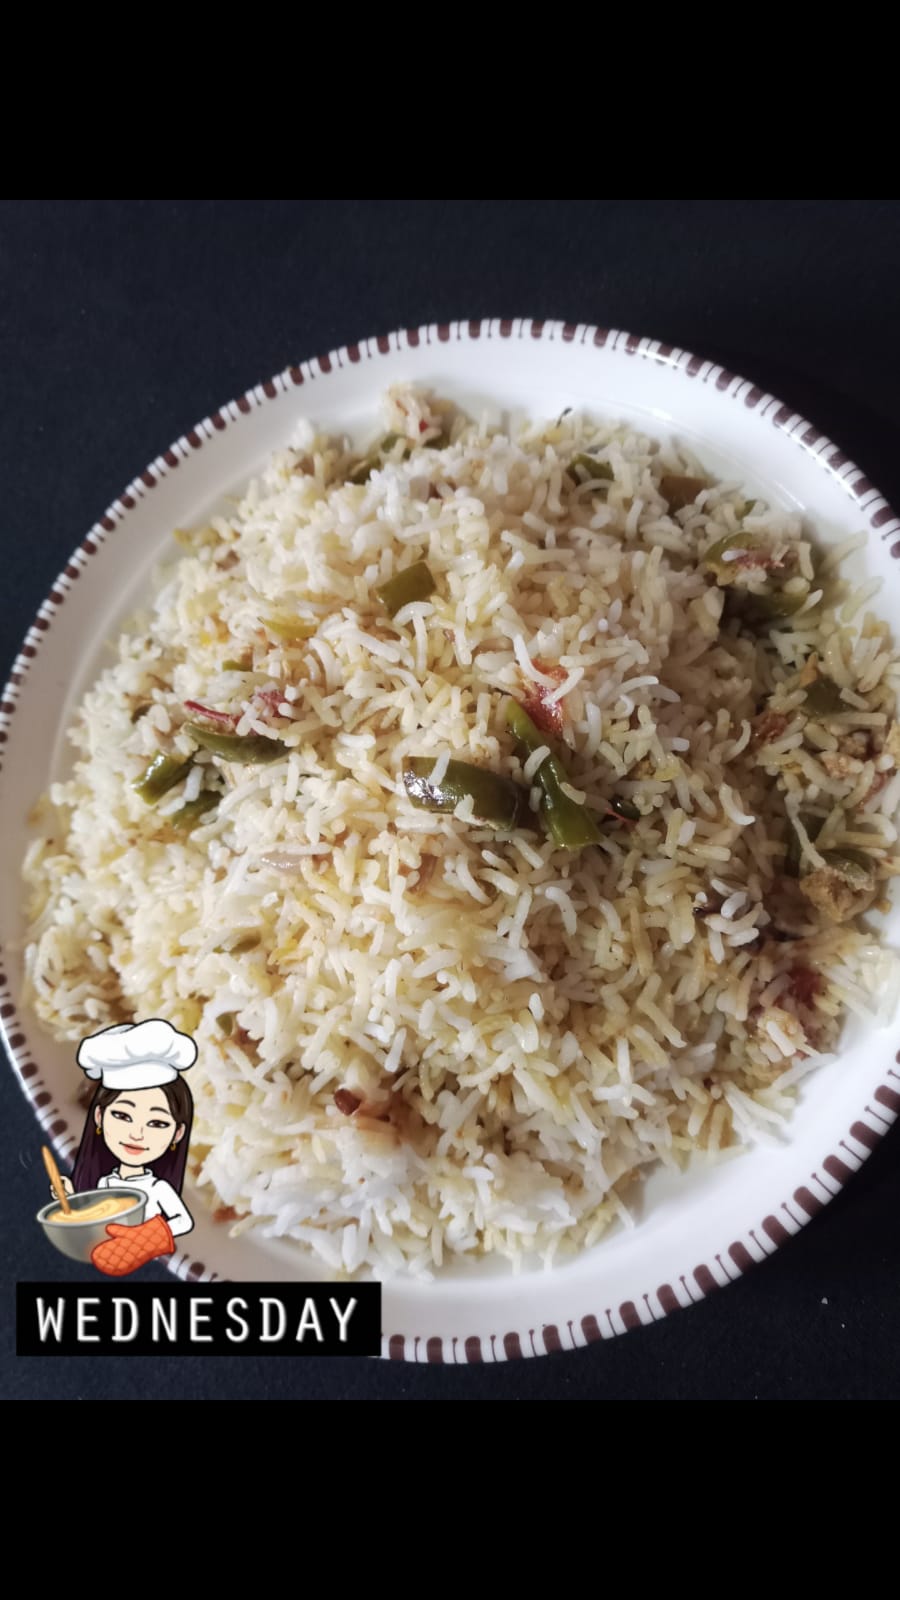
On Wednesday we did a bigger charity this time it was fried rice and It was distributed in the neighborhood , to the orphans and the poor people . The whole day it rained how ever the charity still was a success . I believe the more you give the more comes back to you . Kindness never goes unrewardingly.
Thursday was very humid and a rain was expected here and i captured this cute white cottony cloud it was a sight to see 😍
After raining on Friday as i went up on roof i saw these cute flowers blooming and i wanted to share the moment with u guys . Rain always makes me mood way better
Saturday was also very Rainy here we had a storm the electricity was out but the beauty was just too good these days the red brick walls that were damped and the vines coming out of them my hanging garden has finally grown and it looks magical
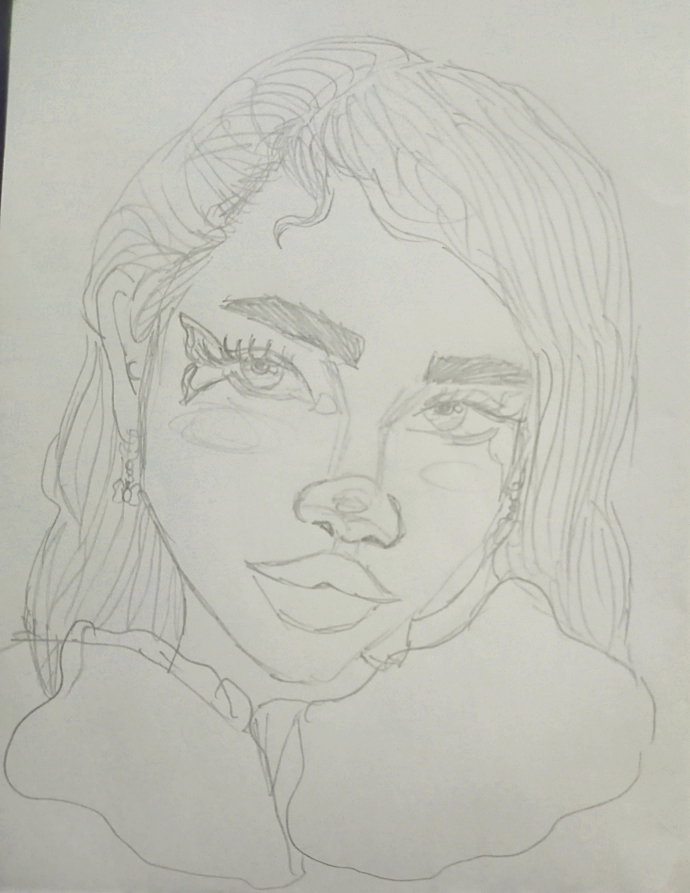
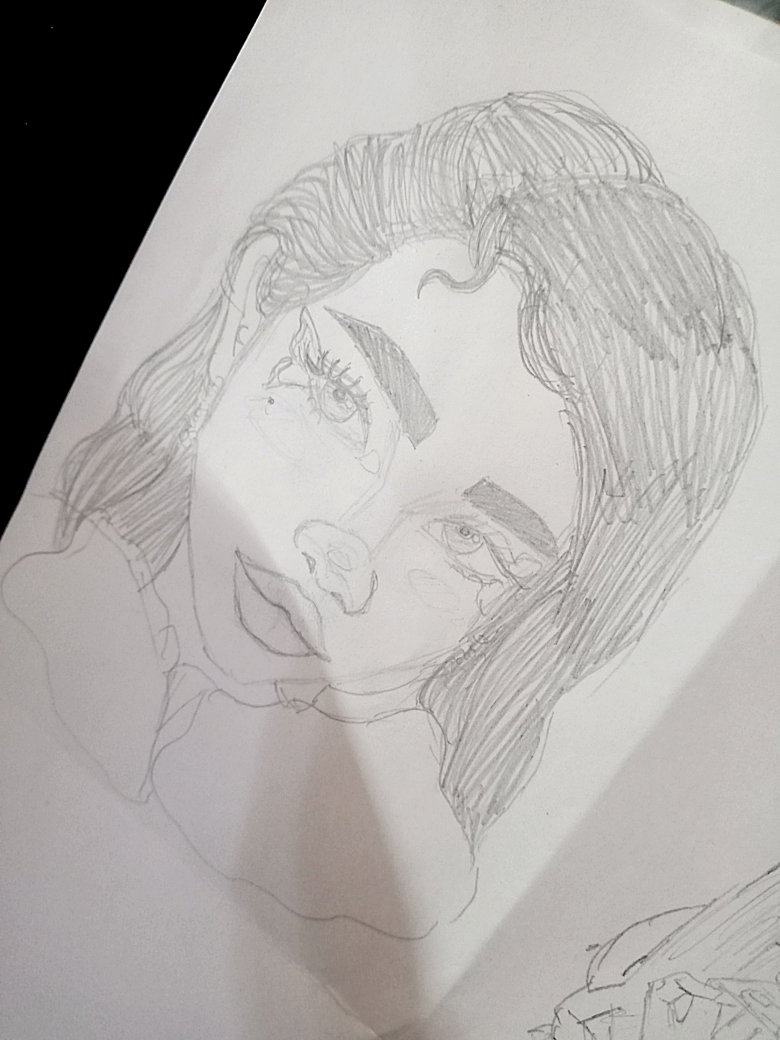
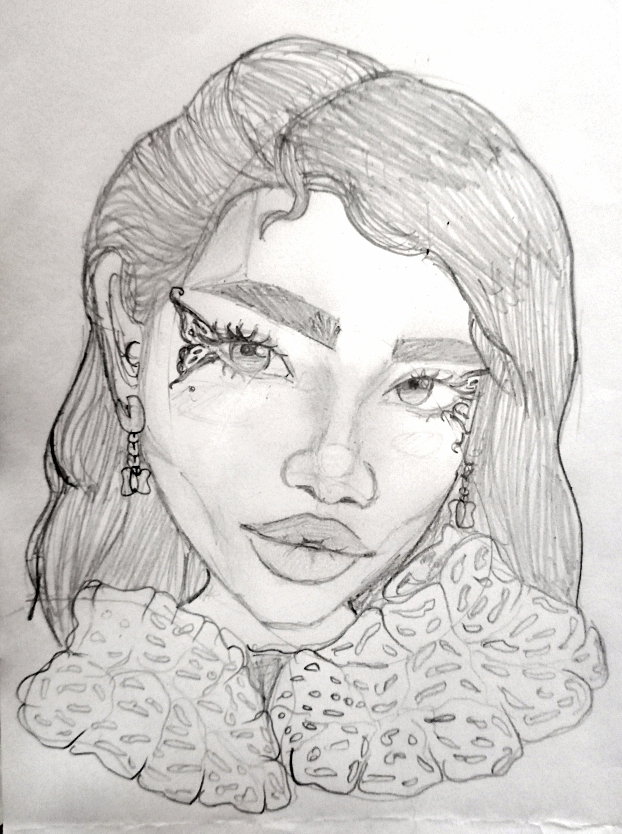
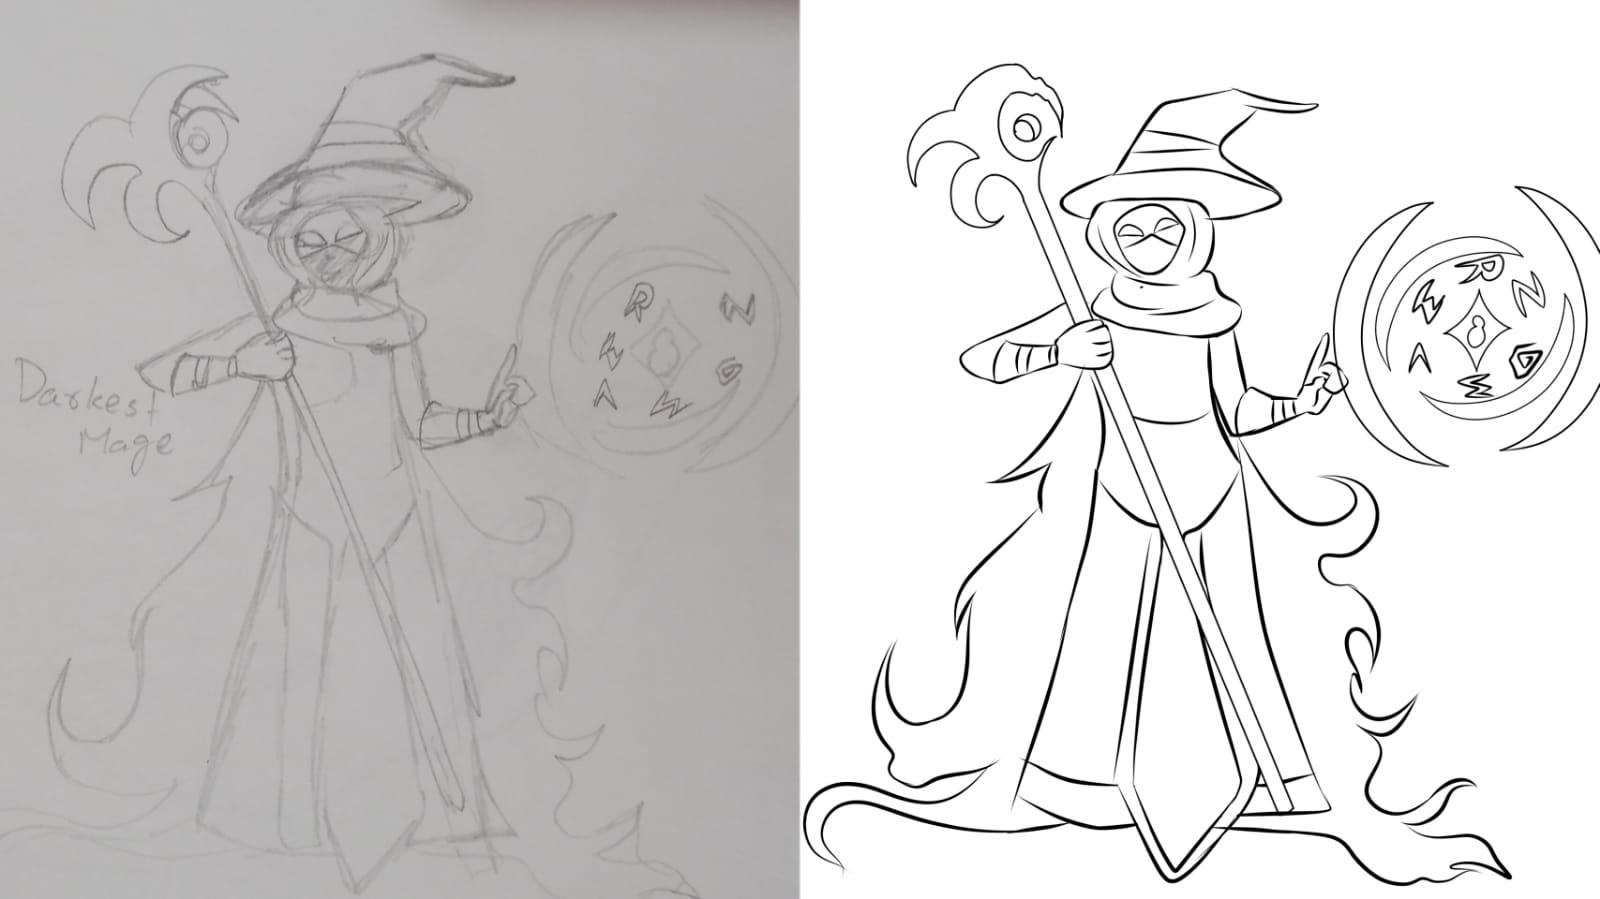
On Sunday i was back to work . And here im doing character studies woth exploration sketches ❤️
The lesson for the week is that . The more you give the more you get . Using your money positively increases it. Because now you see money as saviour and not an enemy .
The more you receive the more generous you become
How was your week?
What did you learn this week ? Do comment below 👇
Diy Paper Roses
So every Ashura i make Roses for my Moms annual flag and here is a tutorial on how i do it .
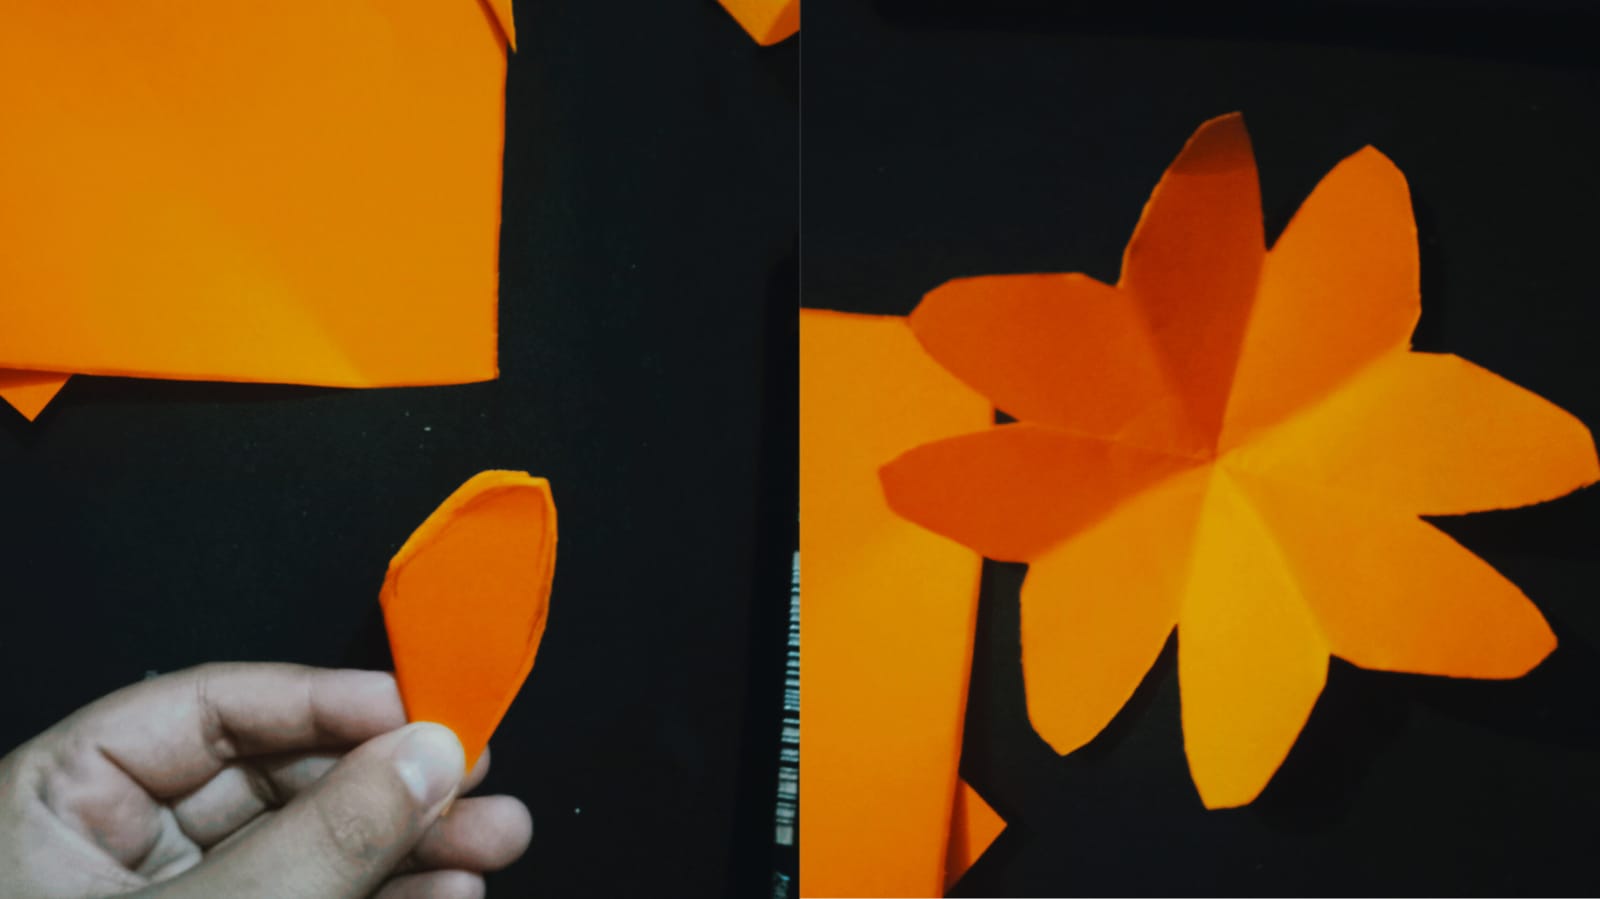
Firstly i took a A4 size colored paper i took orange and folded it twice in half opened it up and now we have 4 equal portions i cut them and shaped them into a square .
Each rose requires just one A4 size paper so i folded the 4 squares into crossway twice and twice in half so we get like 8 different petals .
After folding i marked a petal shape and cut it and there we have our 8 petal flower shape .
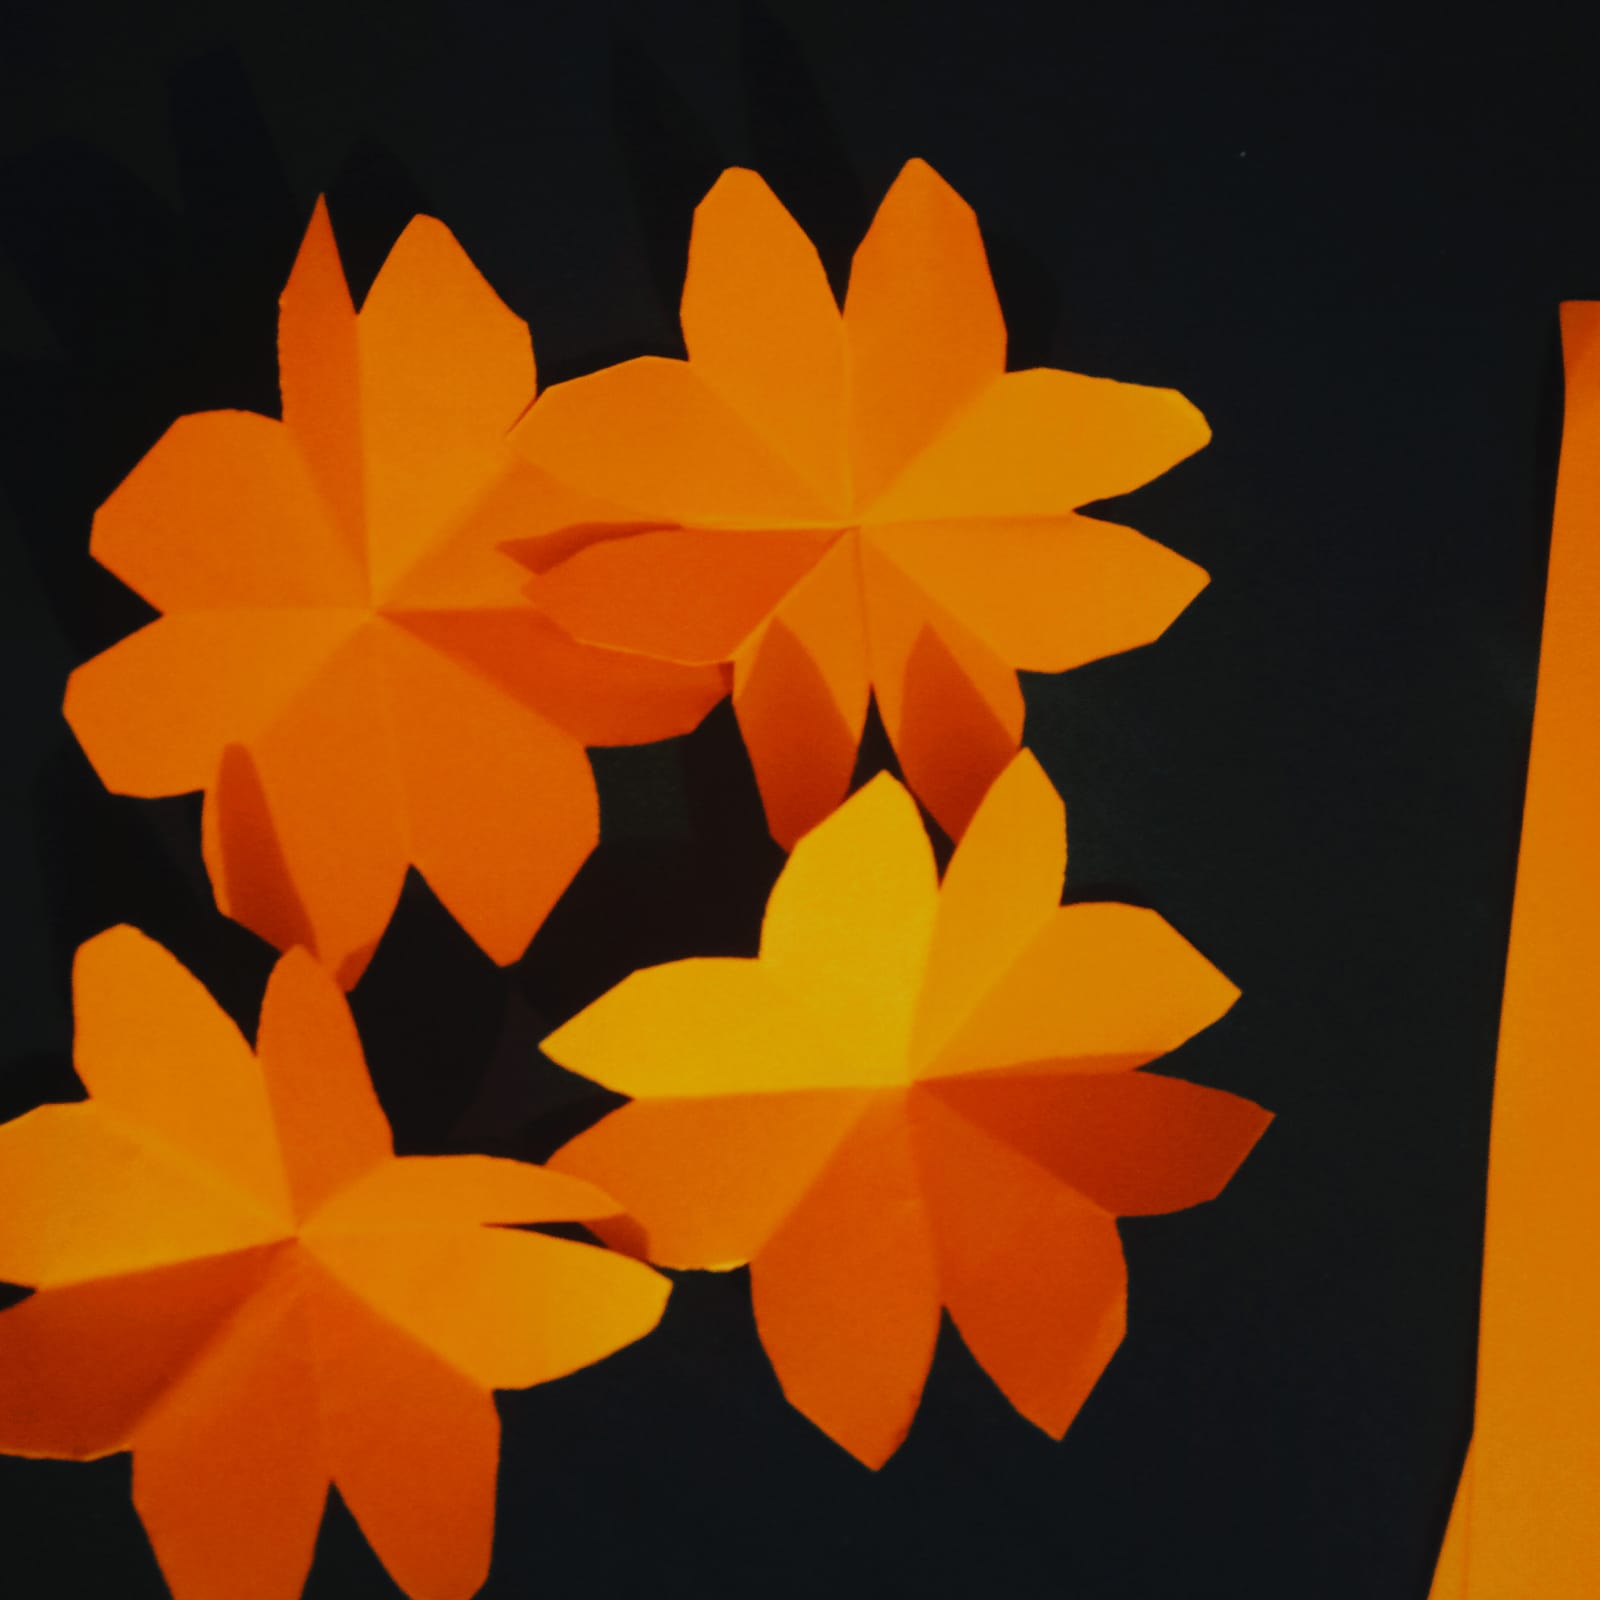
I did this with all 4 squares and i cut the first flower like just a slit after one petal , cut 1 petal from the second flower , cut 2 petal from the third and cut 3 petals from the forth flowers this way we have (8, 7,6,5, 3,2,1) petals
Now we start folding and. Pasting the petals so the 1 petal will be rolled like a paper roll while the 2 petal will be rolled over it .
We paste a petal to the other petal of the 3 petal flower so its 2 petal as folded and do the same for rest .
I took a piece of wire folded it and passed it through all the petals and now we have to glue the bottom part to the upper petals
Lastly i curved the petals so they look more realistic and glued a green paper strip on the wire so it looks real and beautiful .
I made a whole bouquet this way and here is the final look
Drawing a cute Hybrid character
For this week's easy digital drawing lesson we are drawing an animal hybrid.
So many people make you draw certain items with certain things like a bunny coffee or a cinnamon roll cat.
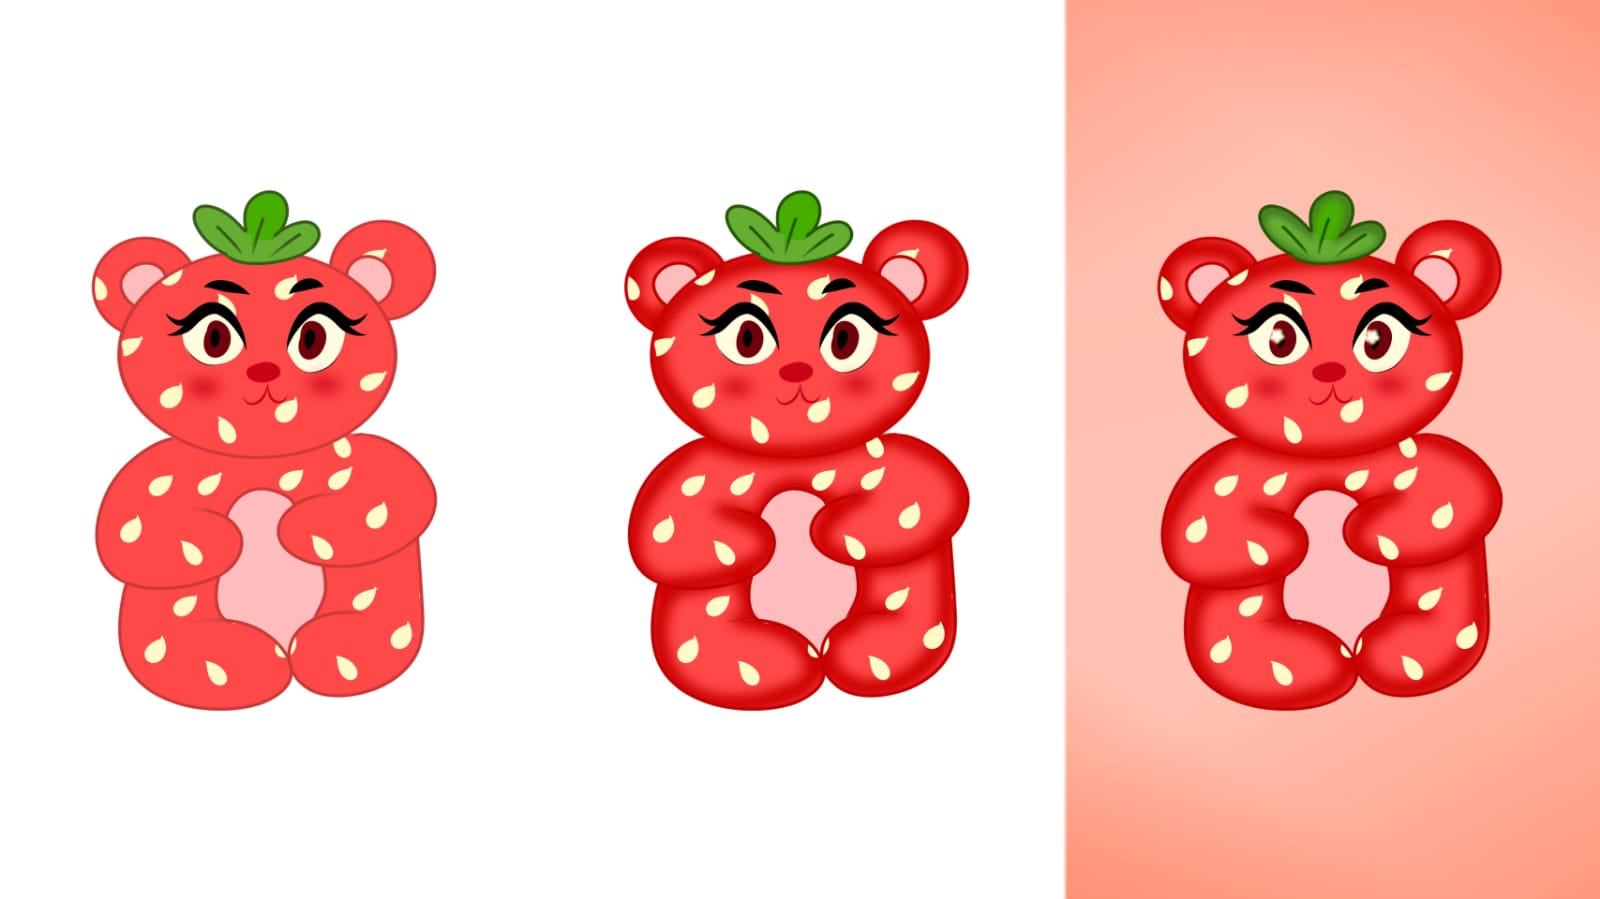
So in today's lesson we are drawing a Cute little Strawberry bear . The thing is before drawing i have tye image in my mind so my bear is gonna be like a cute teddy bear how ever the skin is gonna look like strawberry and i might draw leaves too .
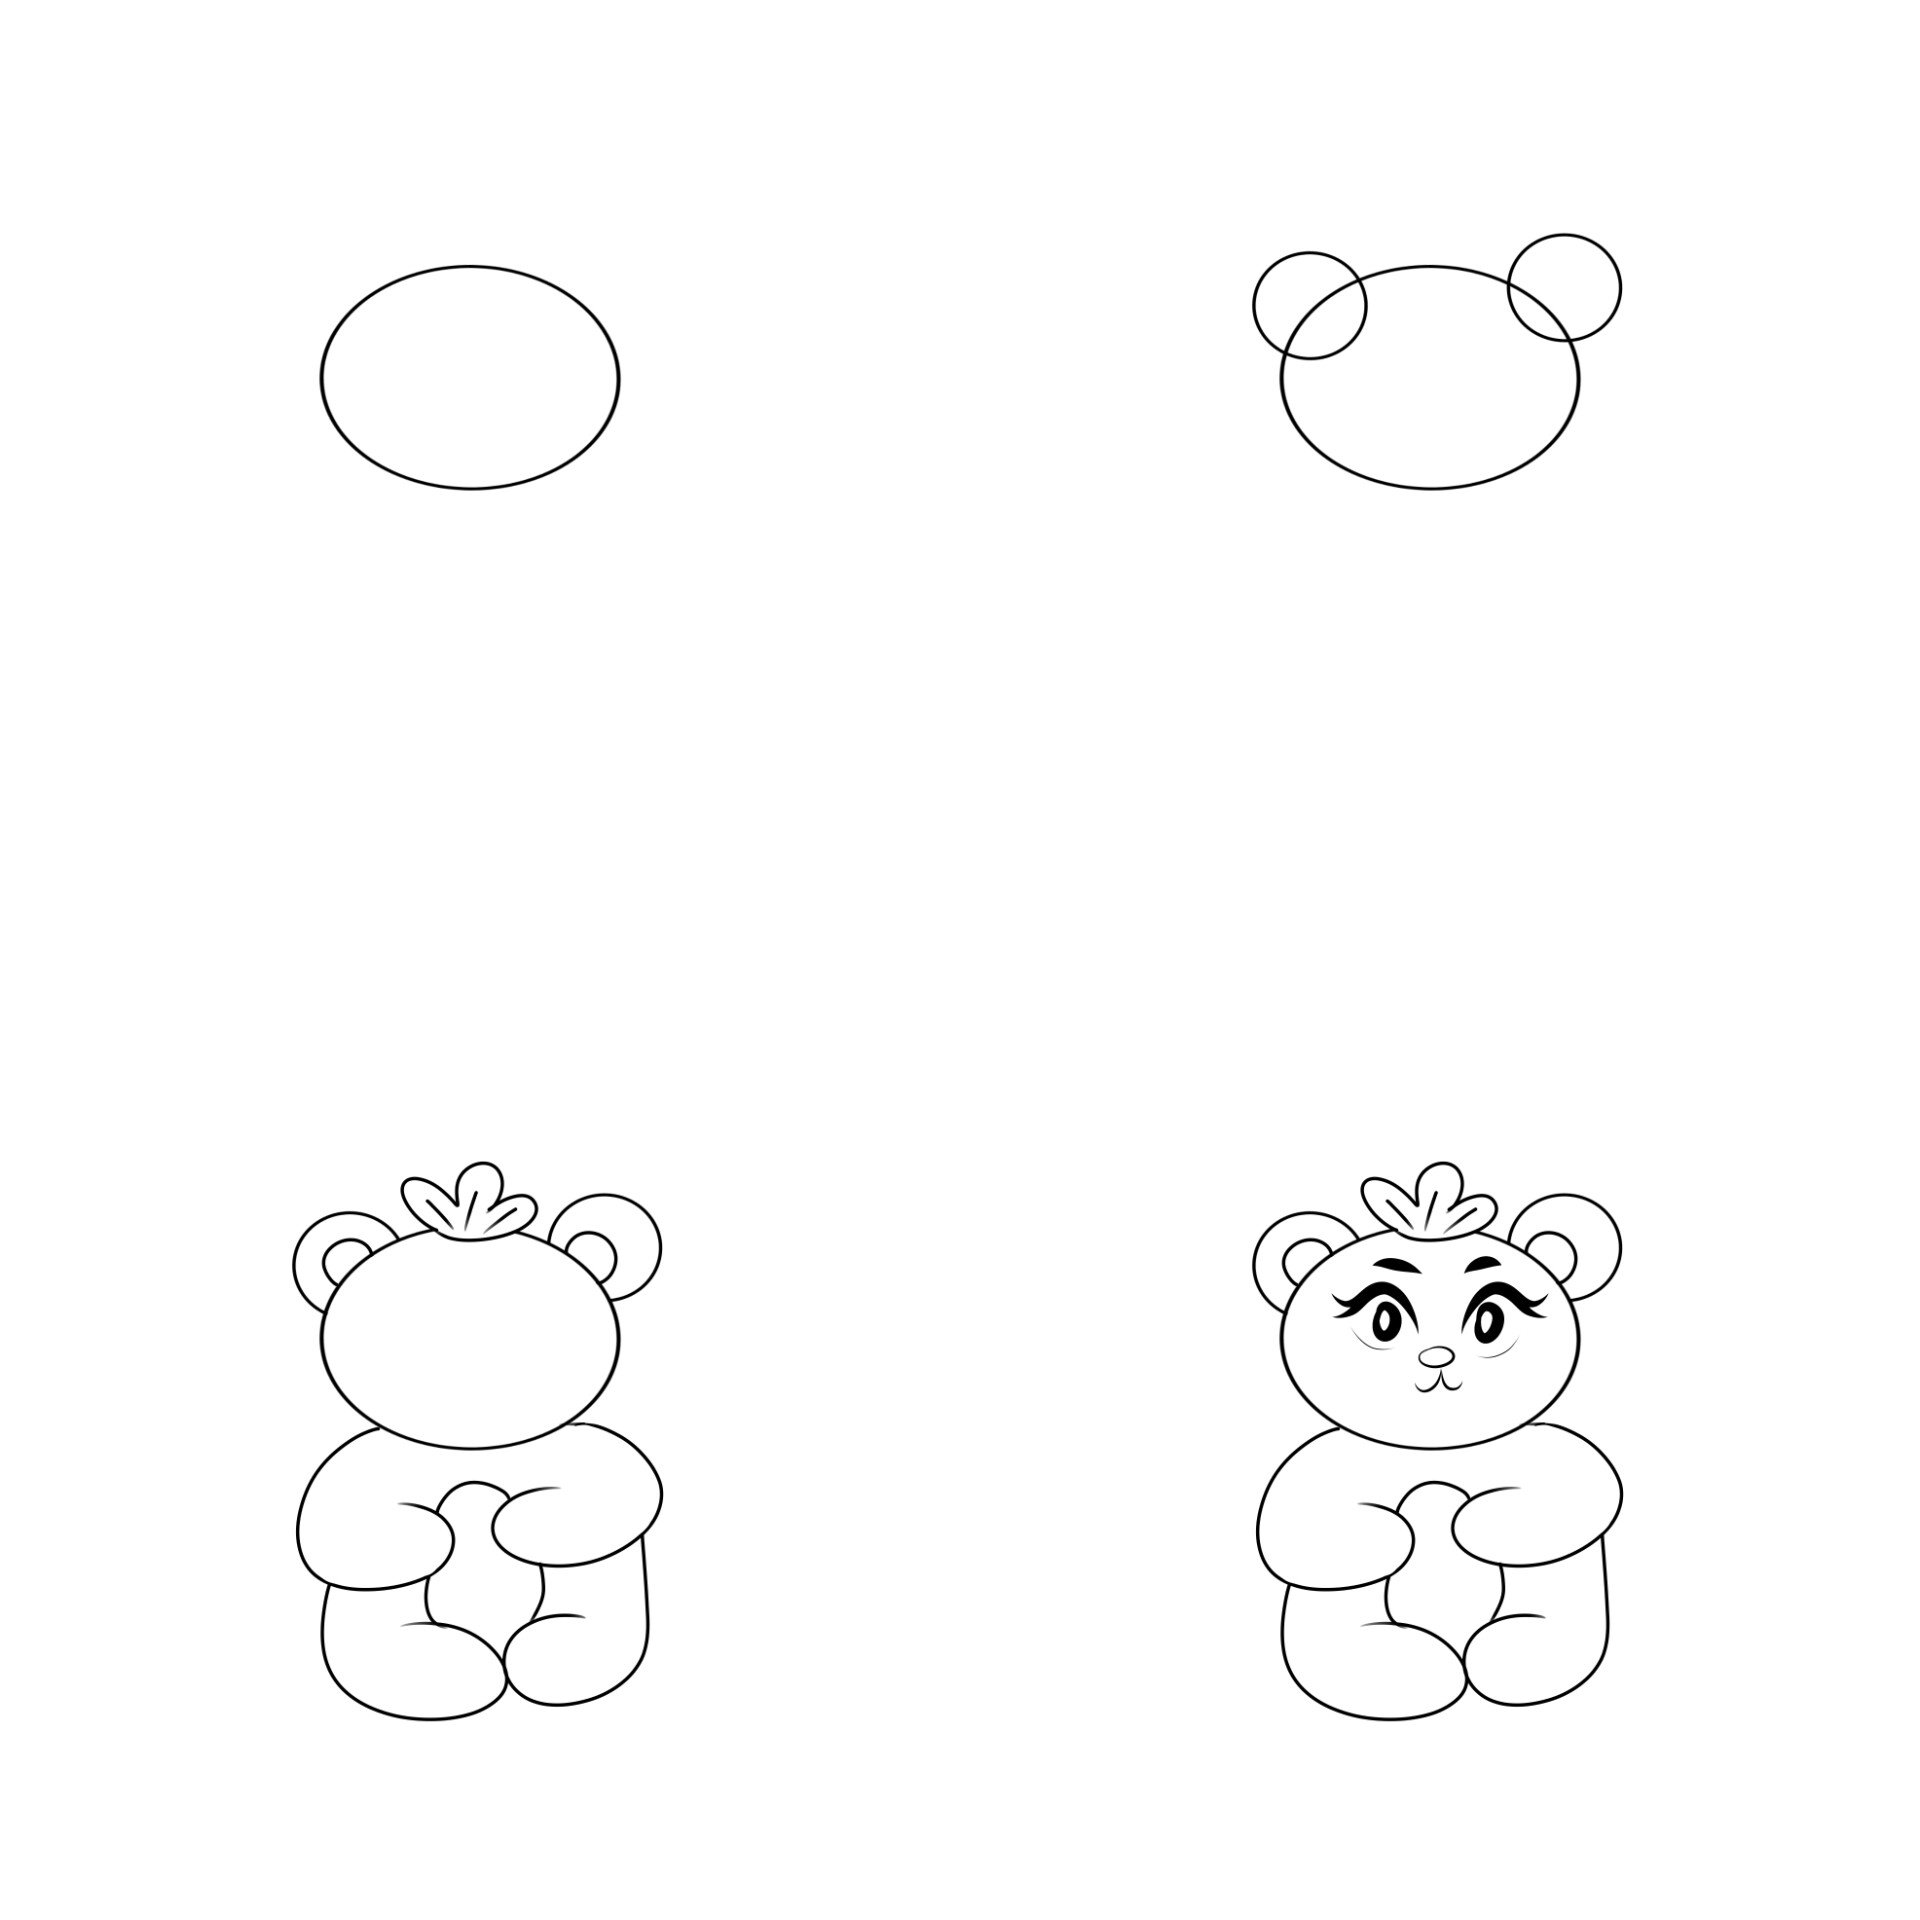
So i start by drawing an oval shaped it a bit with free transform tool. Next i added some teddy bear ears with 2 circles.
After that i drew the body every hand looks like a "L" but in bubble writting i connected them drew an oval at the belly . And for the strawberry leaves i drew them on top of my teddy's head .
Next i added eyes , nose and mouth to our teddy thats our lineart its all done
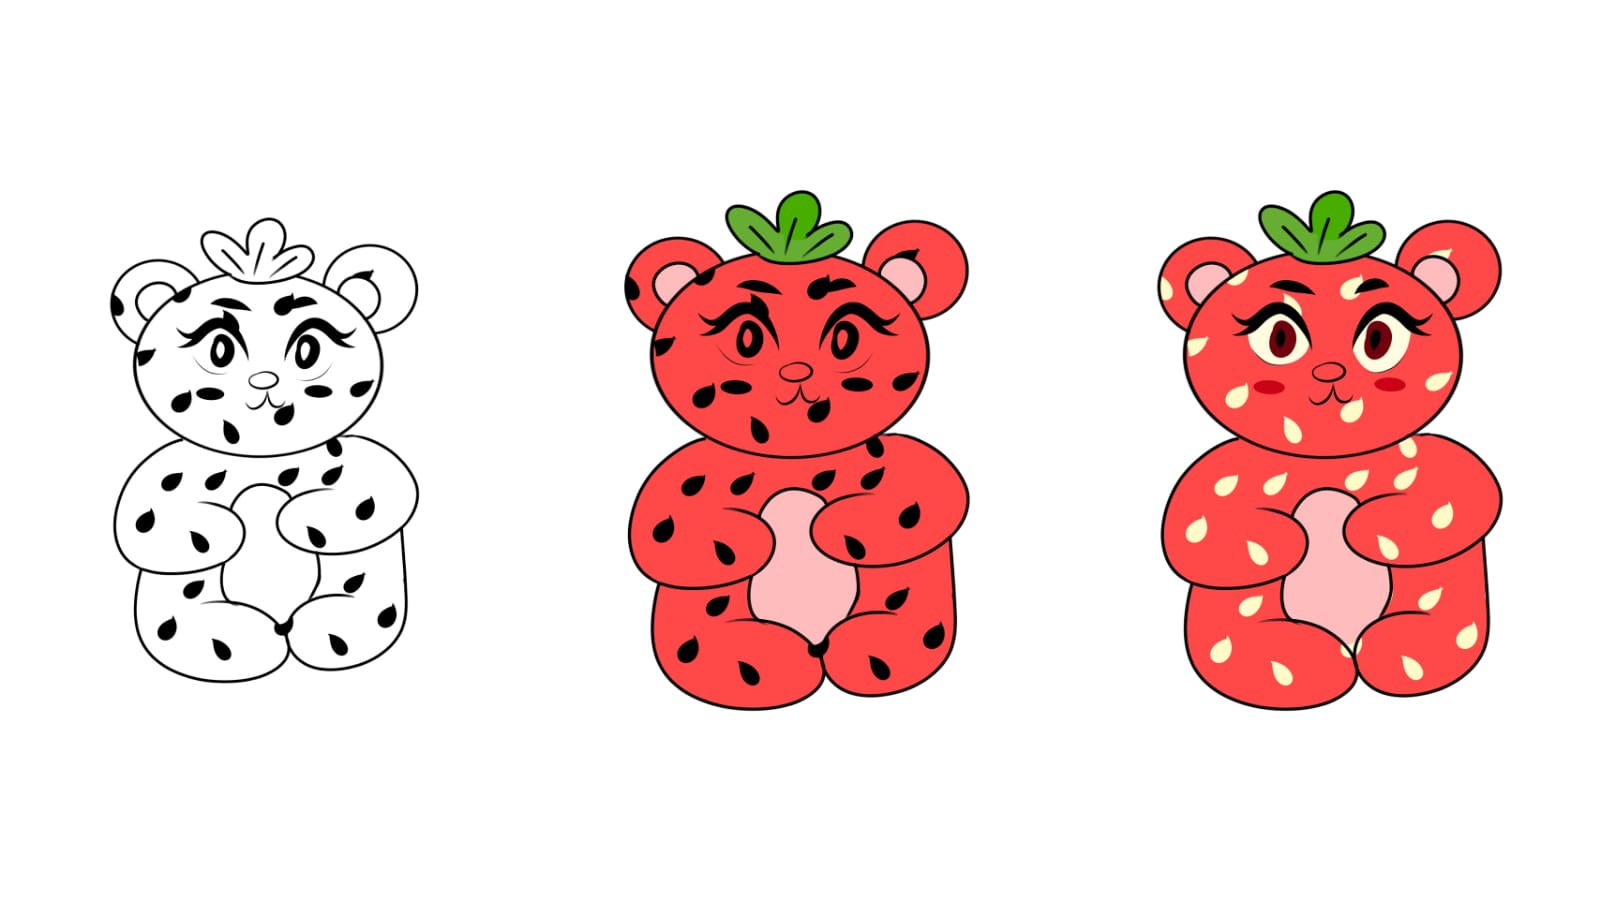
Now another key feature in strawberries is that they all have white seeds
So i made the little seeds all around the teddy on a different layer
Next i filled the teddy with flat colors and after that i shaded everything nicely , now i changed the seed color to a pale white color all the tones i chose to color were warm because that give the teddy a more saturated look
For the shading i airbrushed a darker shade of red all over the edges . I did the same with the leaves .
In the end i added a gradient pink peach background .
In last i added highlights to the eyes so they look glowy now in every cute illustration you need to choose a cute soft pallette to color that just enhances the character more.
Here is the final result ❤️
Sharing financial details and Finances as spouses good or bad?
In my personal opinion i want everyone to be financially independent even like working women or house wives they shouldn't be dependent on anyone for money .
As you know life can give you unpredictable situations like if your other half dies ,what if they divorce you or cheat . Most of the domestic violence cases are not reported because the women endure it just because they have no where to go to no way to earn . They endure to be in that abusive situation so its really important especially for a woman to be financially independent .
Should women share finance and share their personal money ? I believe if you are living in the house men should help around in chores and women should definitely help around in paying bills or any service they can do its between the couple to decide who pays what and who does what chore .
How ever sharing financial details is a big No-No for me . I have seen women saving money daily and making a joint account in banks with their husbands only to find out one of them actually used them all on a personal thing . Which is bad but sometimes that can happen.
So one of my friends husband and her had a joint account and they both used to save money in it for the future of their kids and she was now planning on having kids .
As she was pregnant and had a few complications in her pregnancy she saved for the worst times too the job she had didn't approve her maternal leave and so she left the job . She was very much at ease knowing that she has savings and nothing is to worry about .
Now the husbands family had his sisters wedding and they emotionally black mailed the guy to give the sister a car in A dowry gift (dowry is illegal and highly frowned upon but people still get greedy and want it) so he agreed and bought a car without discussing it with his wife and he didn't want to make her worry he thought that he will put the savings back before she knows when he gets his salary . Now the thing was the wife had an early labour nd her situation got really bad the guy asked his company to give him the salary in advance and they didn't approve it the savings was way less than the medical fees and now when her husband went to his parents they refused to give him any money at all .
The situation was saved because his wife did have gold jewelry and he sold some of it . Gladly the life of my friend and her baby was saved but she had a c-section and was just heart broken when she was told the truth about the whole savings being used and how her jewelry was sold . She regretted trusting her husband on finances .
Its not bad to keep savings together but definitely if you're saving for a cause .It s better to have n own account and your own money . Better safe then sorry.
Thank you for your precious time and support ❤️
Blindly trusting people is bad even if it is an spouse everyone has a priority and some people like her husband leave todays work on tomorrow .
Splinterlands art contest week #252 (Mimosa Nightshade)
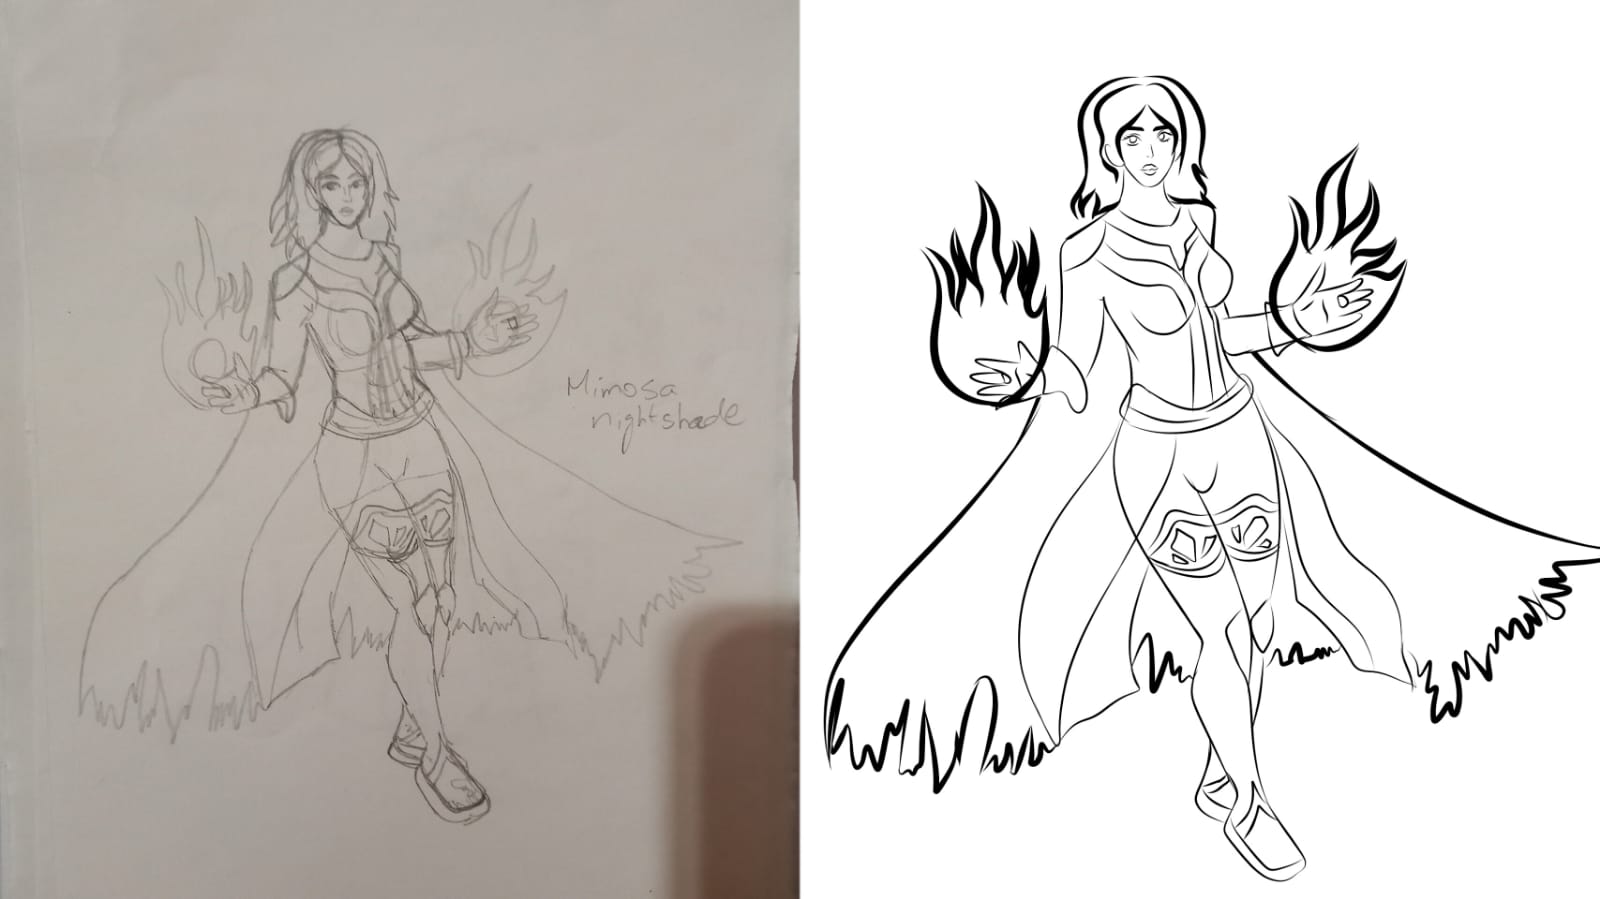
This week for my Splinterlands art contest entry i drew Mimosa Nightshade .
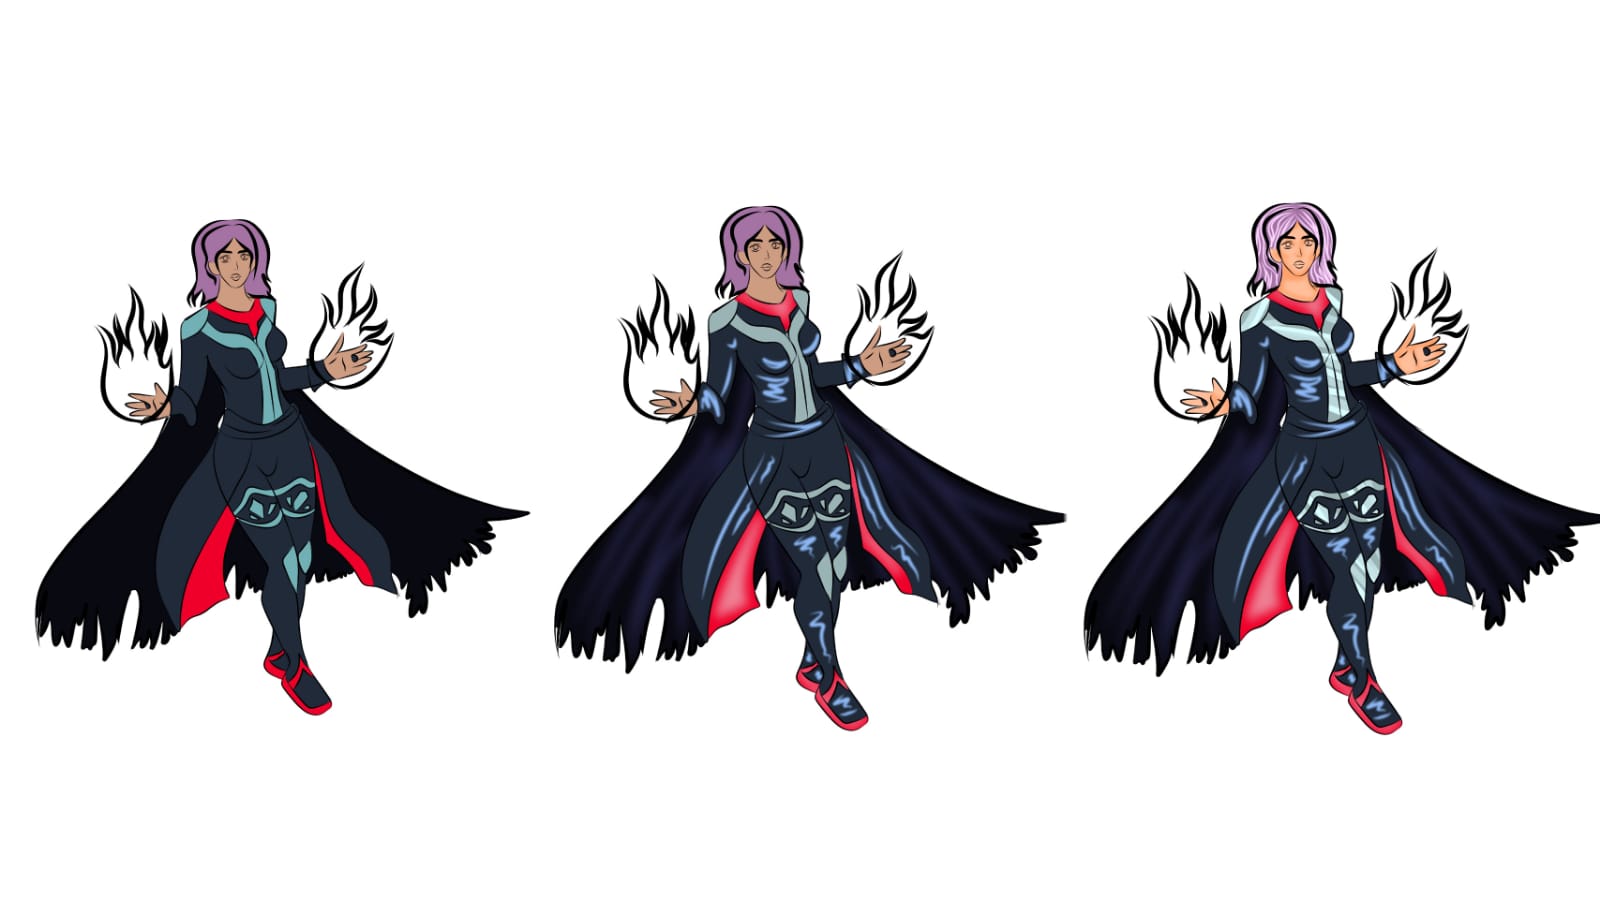
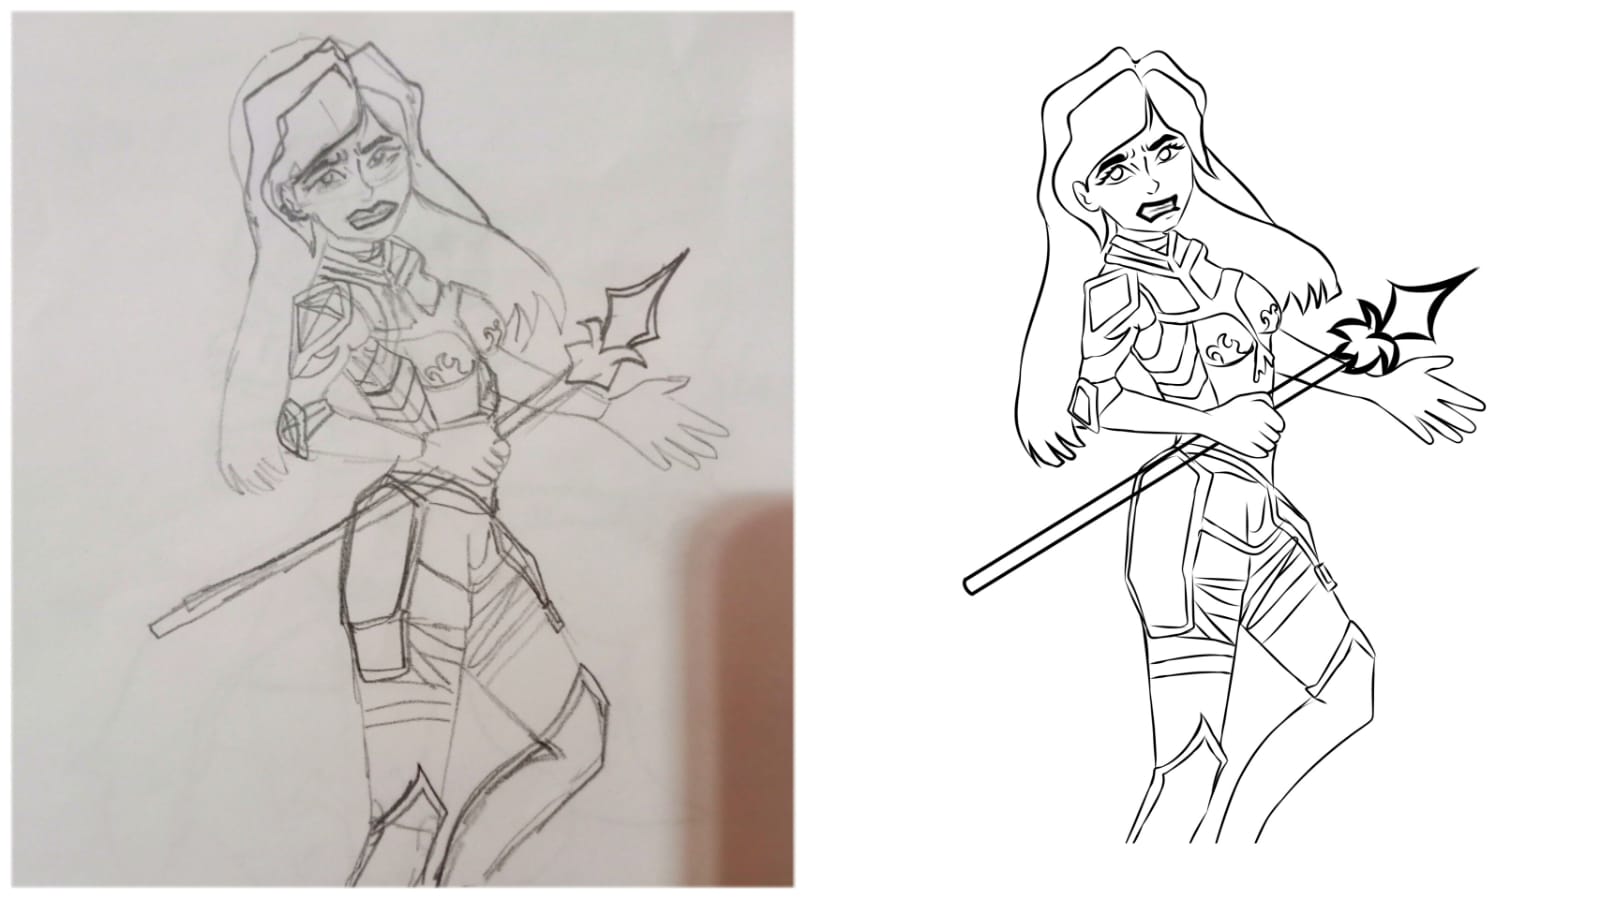
So i really did a rough sketch of this character but in my own style . That requires setting a pose and then making the costume over it that absolutely defines the character of the card im making . So the character was like a super human and with a dark cape her eyes are glowing red and she has fire balls in both her hands . After sketching roughly i took a picture and digitally concerted it by tracing it in Medi bang paint pro. Apparently i had to make some changes in the hair and face .
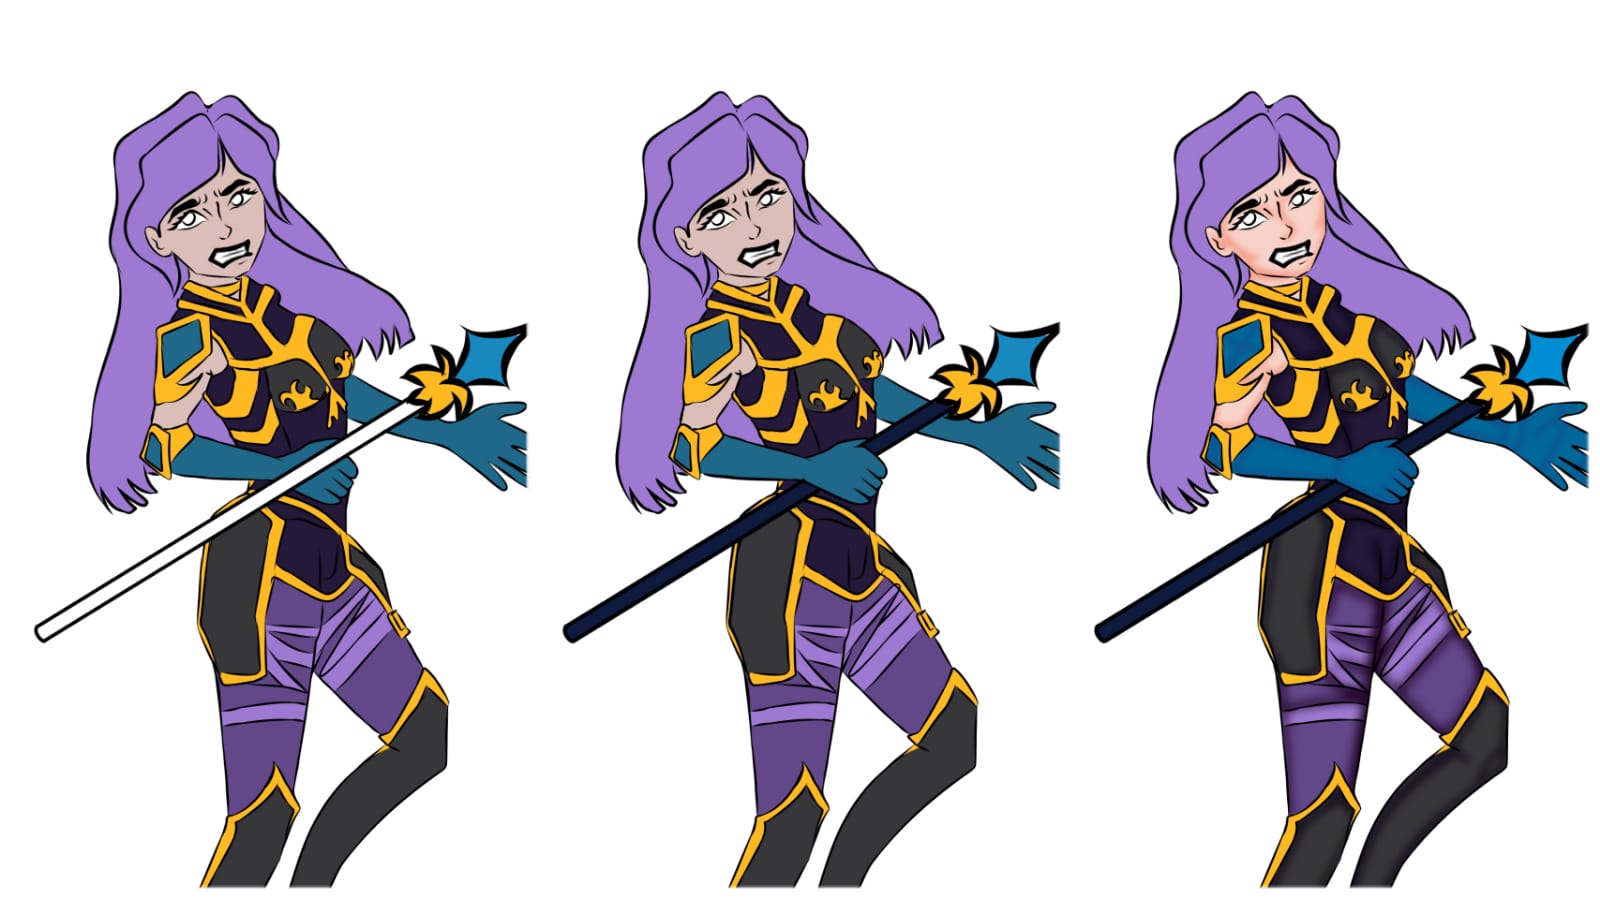
Then i started adding flat colors to her . So the costume is mainly black and red with some silver details . So the highlight in this illustration defines the actual texture of the costume . The highlights on her suit are like wiggly but shiny which means its either leather or latex and the cape inner is red the cape is dark but has some purple shading so we know the fabric is flowy . Another detail is that the suit has very reflective silver details and so the silver foil details are made very shiny
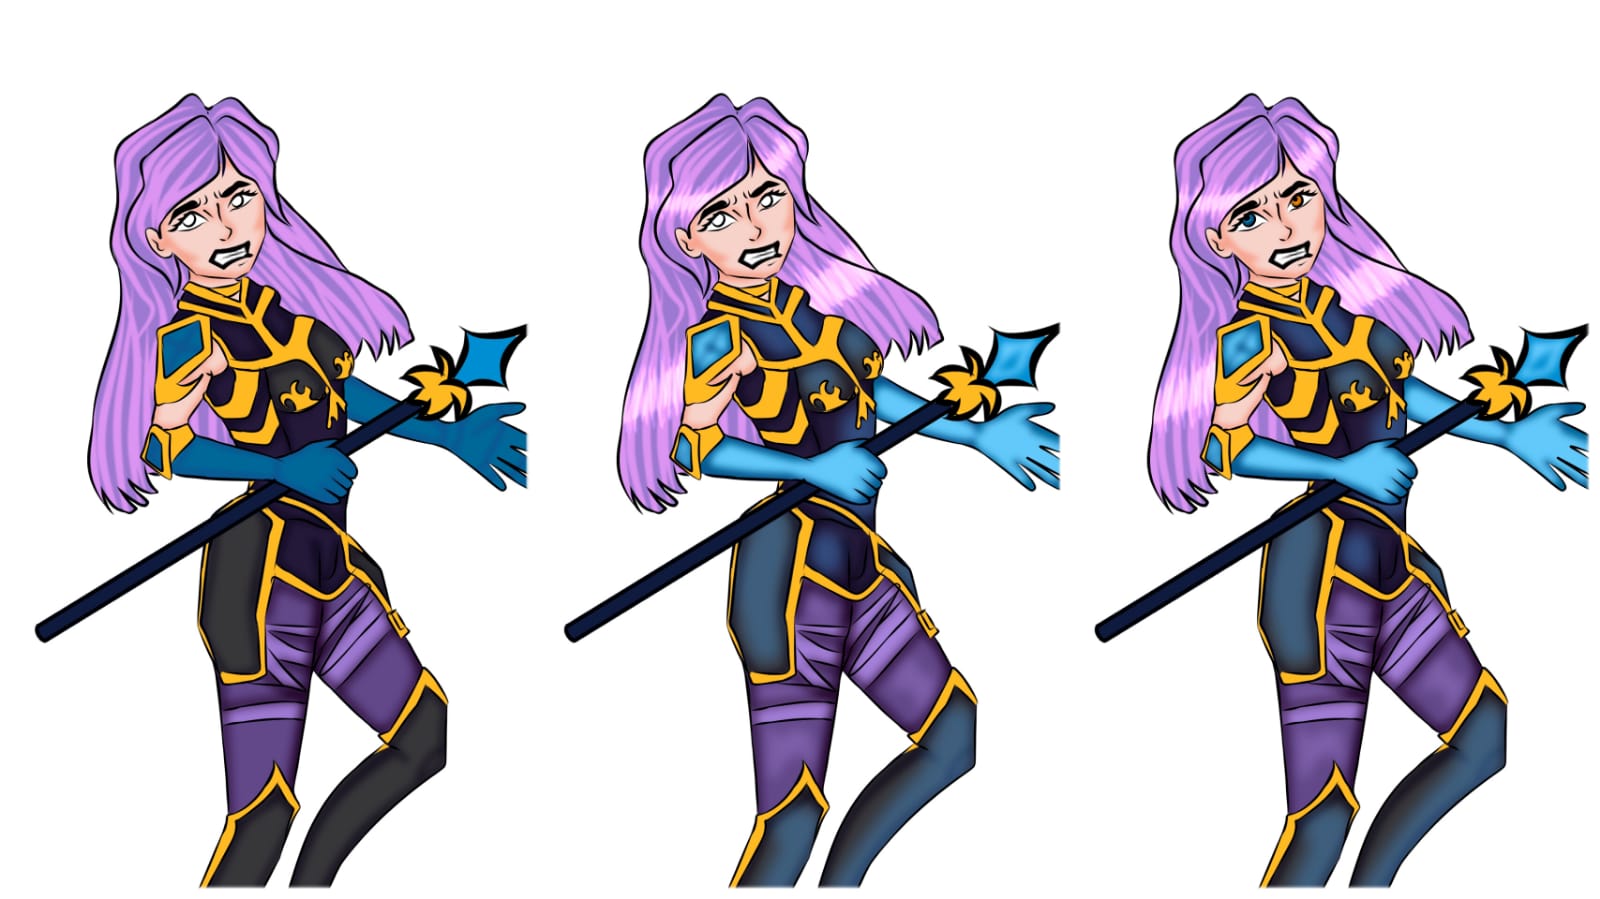
next i shaded her skin and hair color i did a dark purple for hair and then added lilac strands over it this method is great to draw lighter hair.
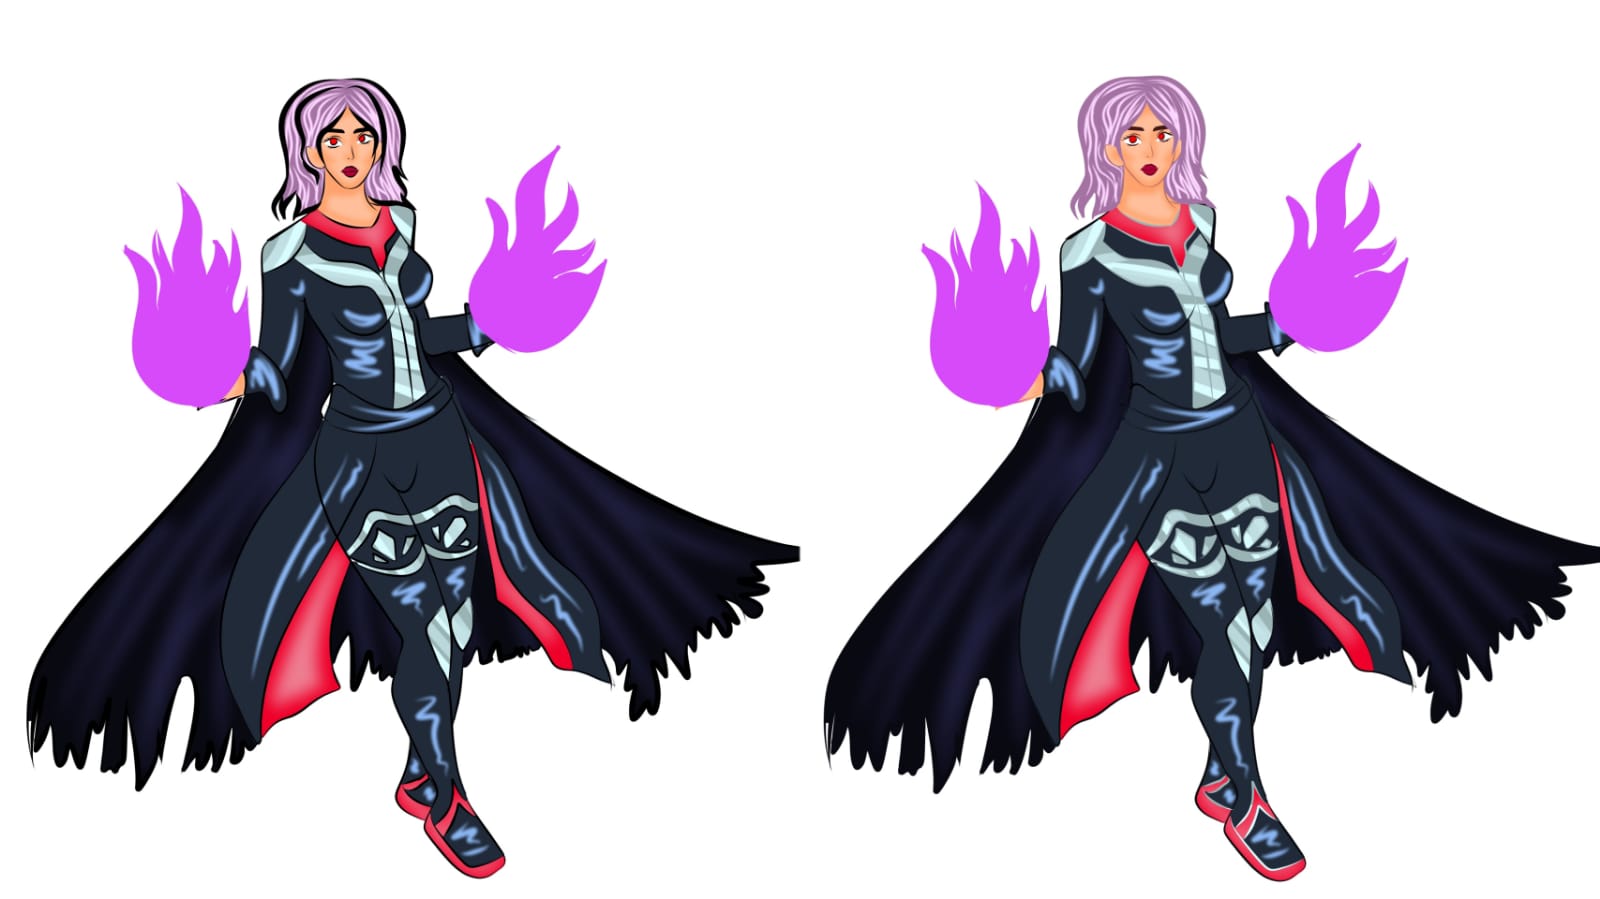
Some more details to the skin and eyes and the lips too i colored the fire balls purple next i colored every layer of lineart differently to enhance the character .
And changed the fire ball to add in layer blending mode so it looks glowy and transparent . Gave her a gradient black background and added a bit red glow to her eyes and this is the final look .
I hope you liked it i loved drawing this alot .
Thank you for your precious time and support ❤️
Giving up this things that take away my peace , time and energy
I have a bad habit of scrolling just like many people these days i give up my precious time , energy and peace to the social world .
Now i m not that active on Instagram as in posting and talking instead everytime i open a social account i just scroll through my feed forgetting why i opened the app im first place and hours pass .
Tbh i have set an habit now i track my screentime and work accordingly however i still do it at hours i should be sleeping in.
Well social media is addictive and very informative too I don't hate it how ever in some useful information there is some useless scandalous gossip too with some tiktok dance reels that just end up in my head but i don't have any use of them .
I know its a problem and i wish to solve it too . Here are some alternatives i tried i set my phone to lock the apps after using it for an hour .
I have started following usefull accounts . That teach me and inspire me to be a better artist and not those Accounts that give you Body dysmorphia over edited photoshopped skin and bodies .
I started scheduling my tasks and i only use social media after completing those .
I have set a constant reminder to make me put my phone away at 10 pm sharp .
Good habits aren't set in a day you have to force yourself but in end it becomes a routine .
Image source : Pixabay
Thank you for your precious time and support ❤️

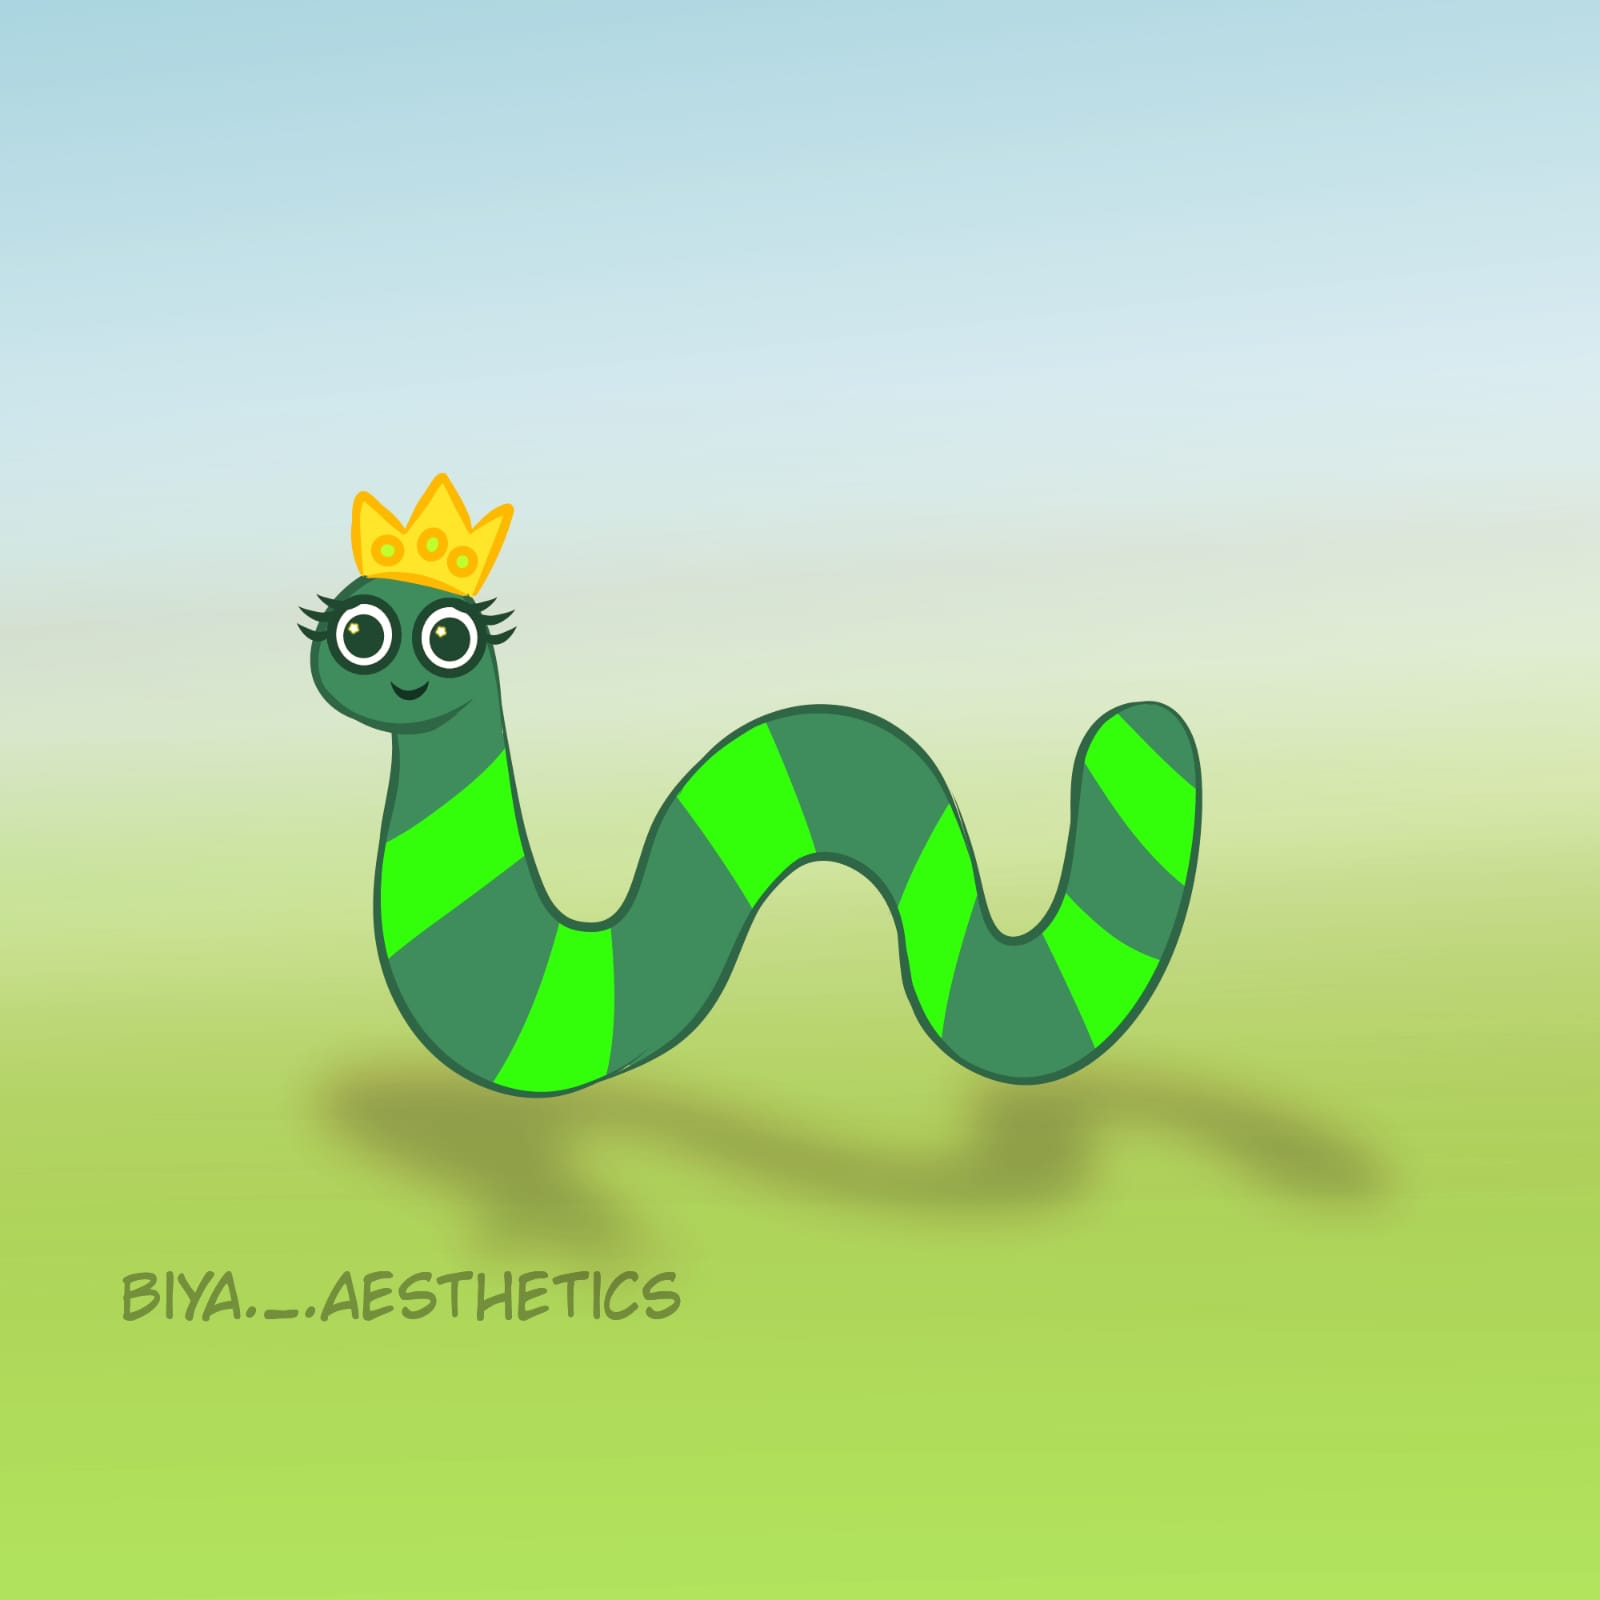
Drawing a cute King worm
Just like every week here is a blog where you can learn something simple but cute and practice with me so this week i drew a King Earth worm . So lets start.
The app i will be using to draw digitally us called Medibang paint pro . But you can use any art medium to draw .
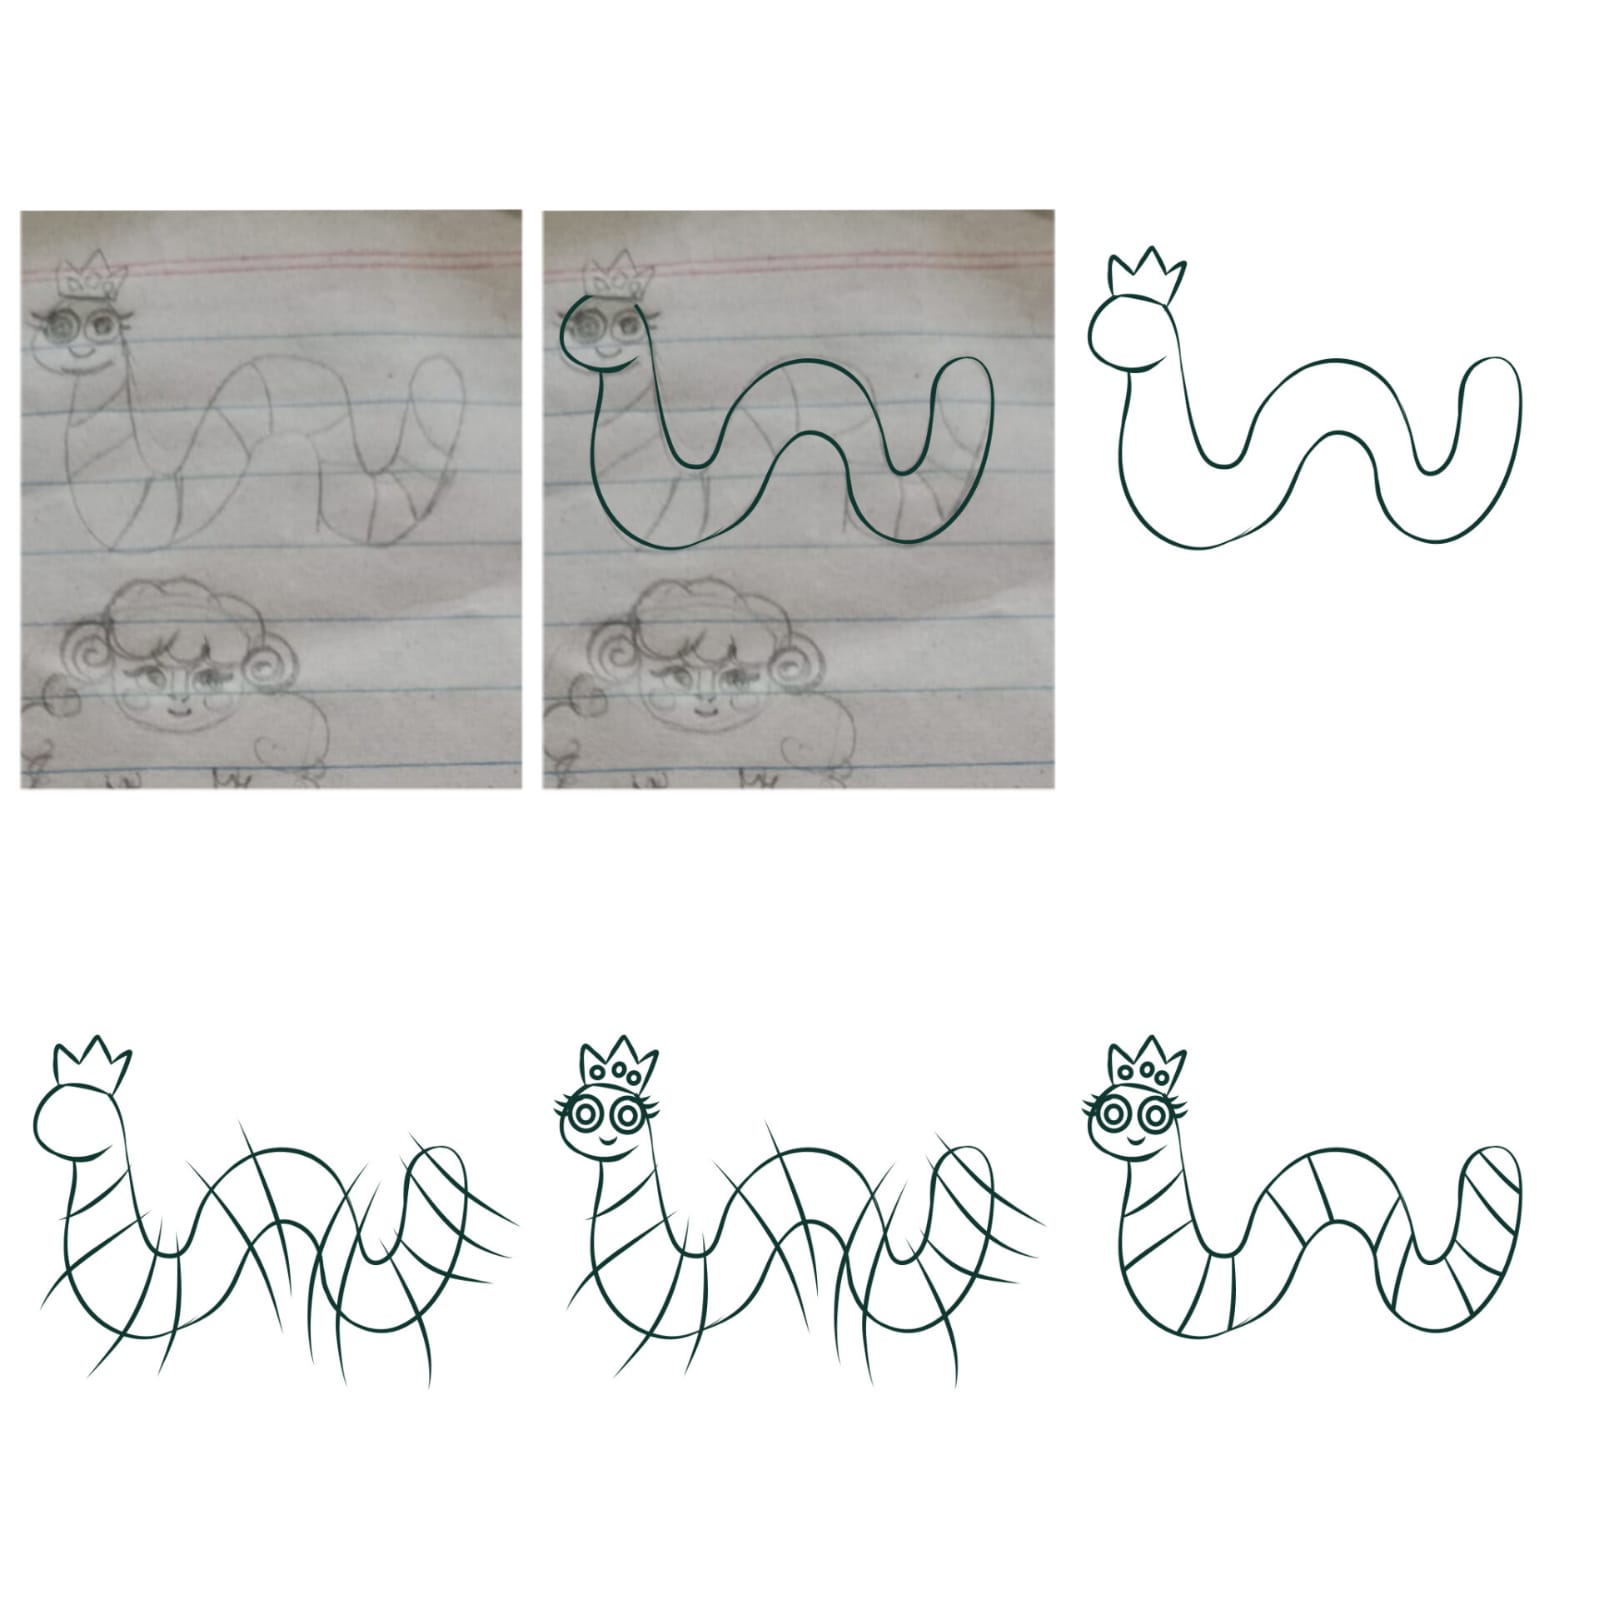
Firstly i sketched a worm on a paper and here is how i did it u can see it stem by step as i traced a wiggly W in bubble writting and made a small head at one side so this is our worms body. Next i made its crown by making another w and joined it with our worms head next i made small sections in our worm's body these will be the stripes i erased the extra stripes and made two O O like shapes for the eyes and a lil smile . Every crown has gems on them so we made some shapes too on the crown
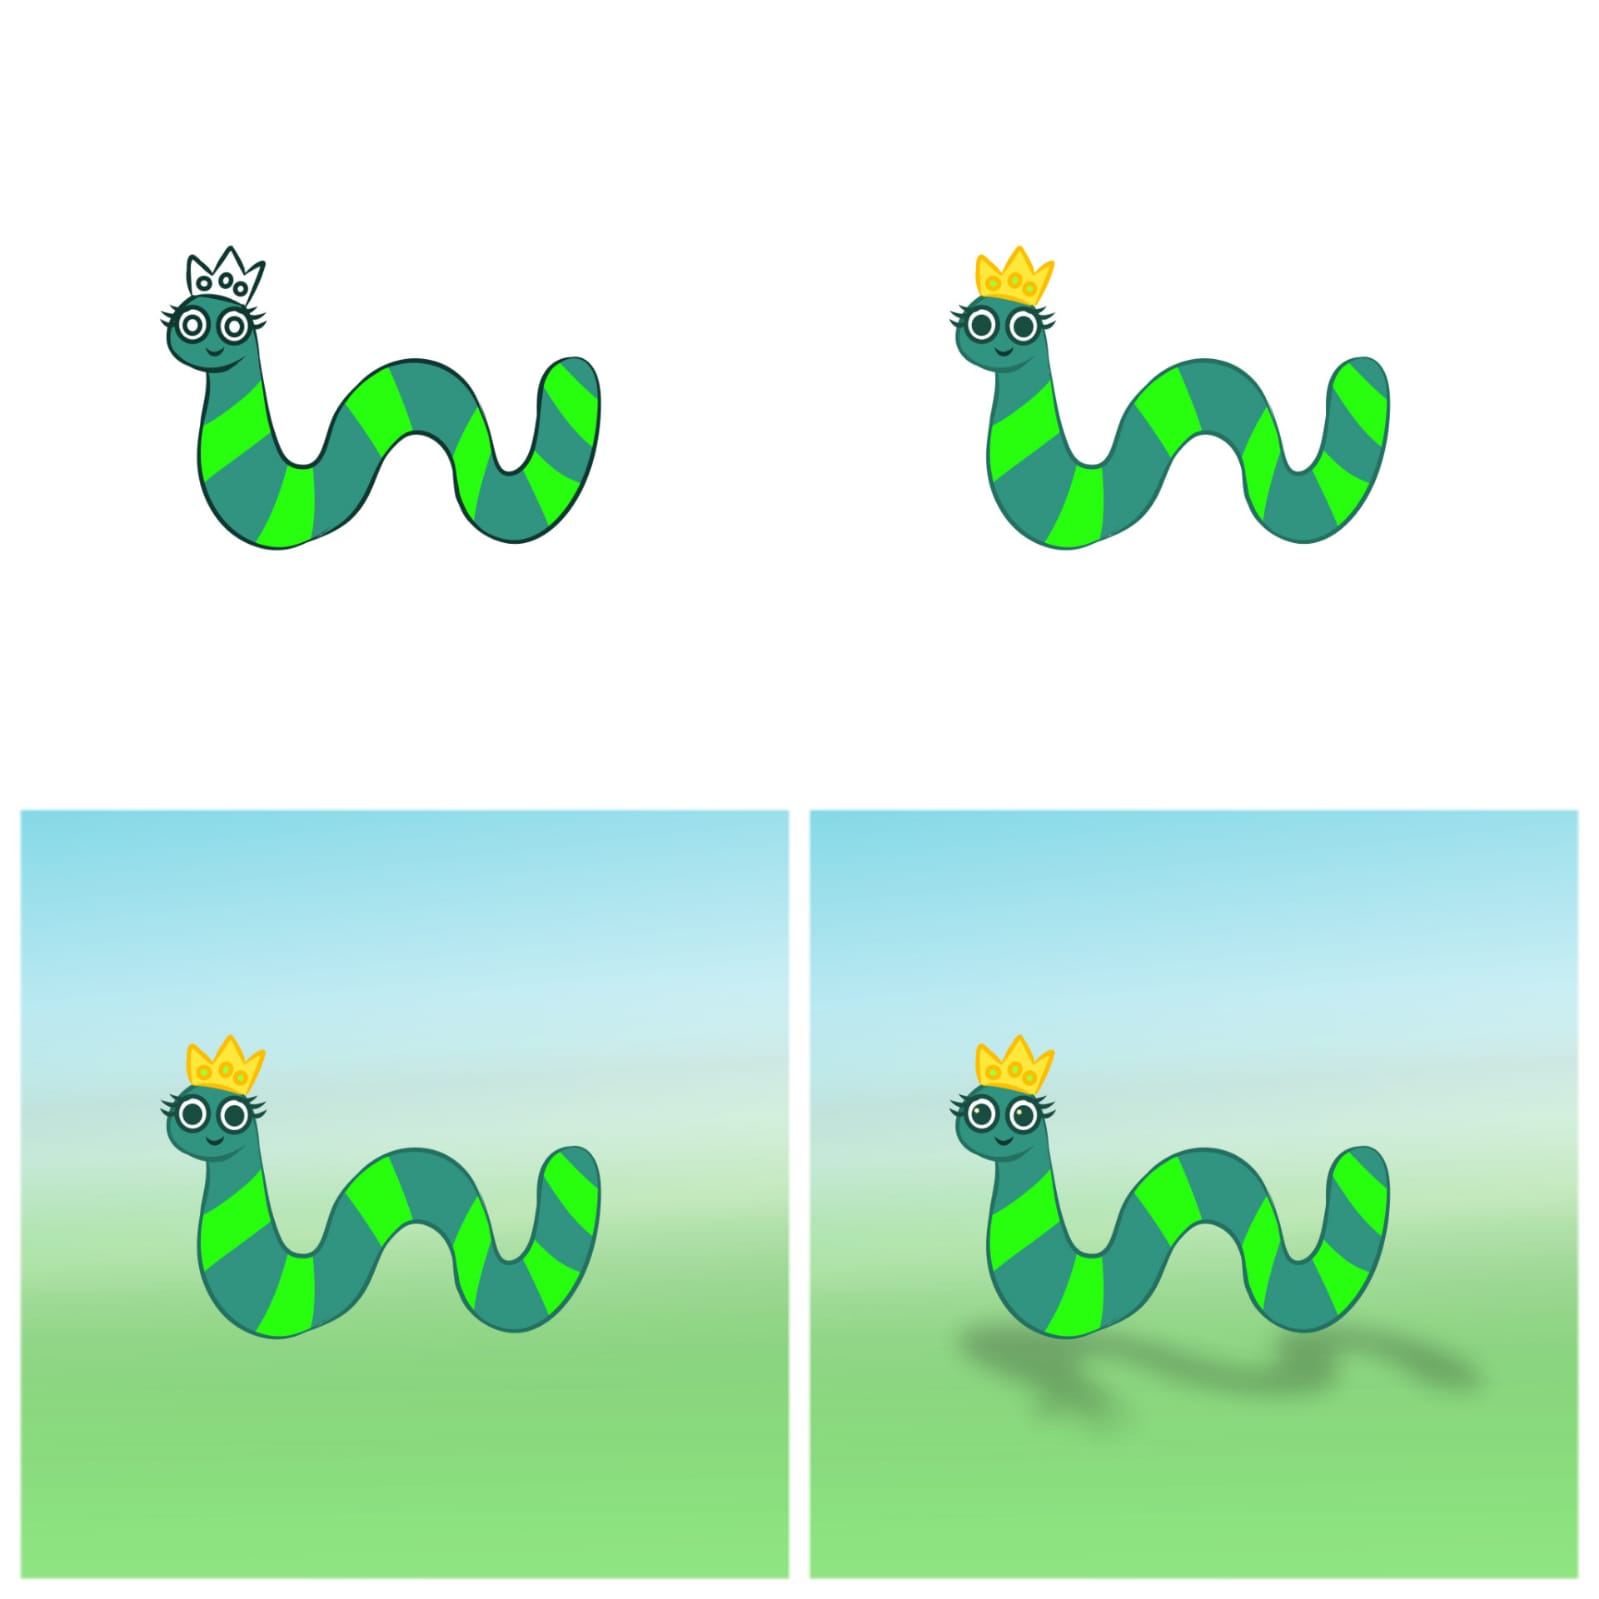
Next i colored our worm with some flat colors the colors i did were different shades of green and i also colored his crown . Gave hive a gradient background which was green at bottom and blue at top which looks like. Sky and grass . I duplicated the colored layer and turned it black by lowering brightness and adjusted it to the ground so it looks like a shadow. This is a way i add shadows to different characters of mine .
Finally i adjusted the colors and there you have it out cute little king worm .
One thing is that these kind of kiddy illustrations are in demand at freelancing market
Cause those can be used in kids illustration books so don't worry keep on drawing and because practice makes you perfect
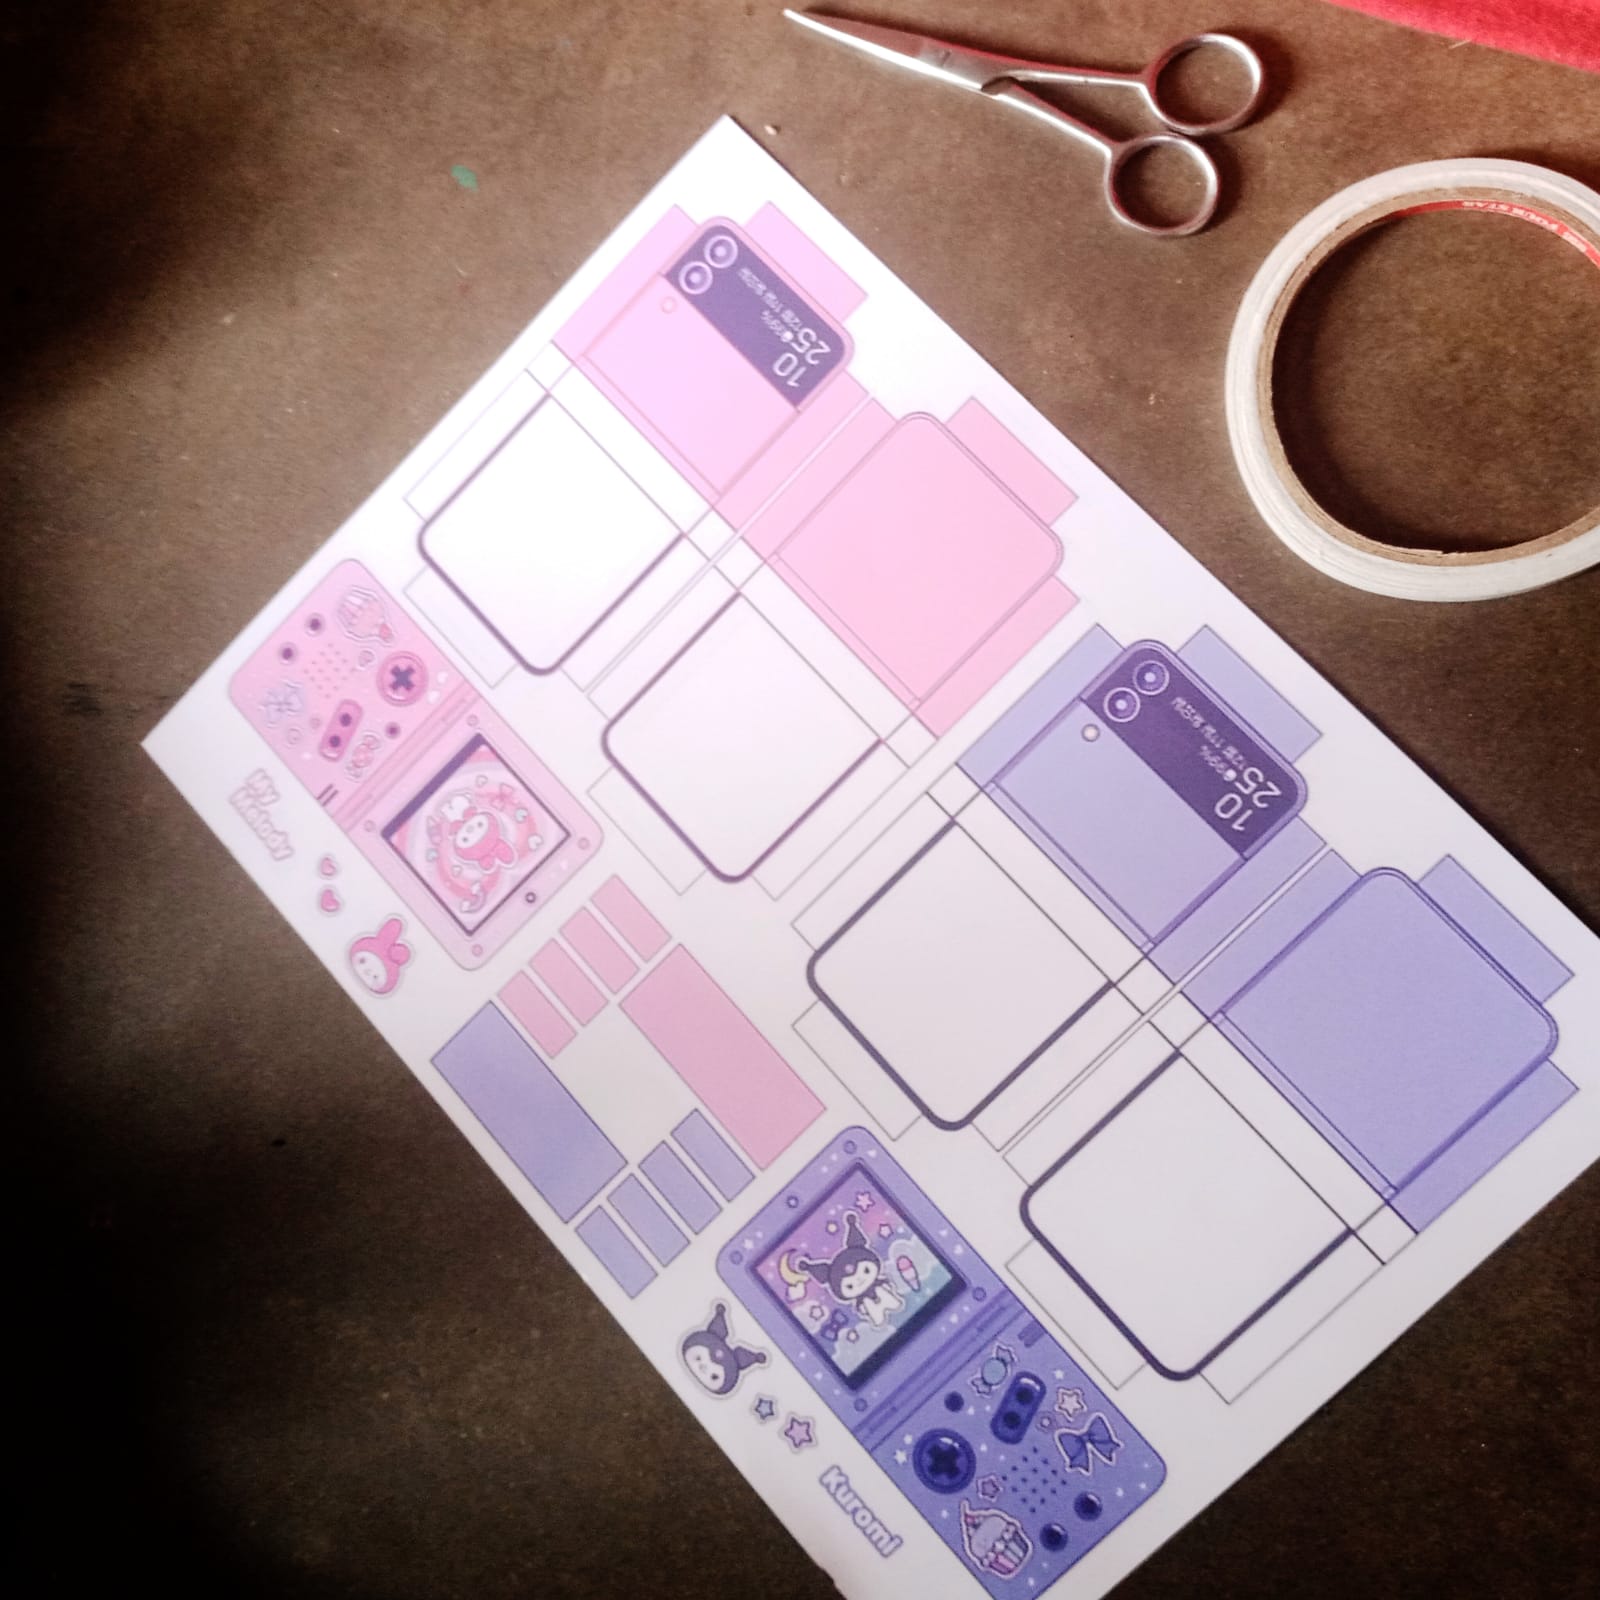
Diy paper crafting a Kuromi phone
So i love doing paper craft alot these days and last Friday i made this kuromi phone for my little sister so i found the template on Pinterest . I printed it on a A4 sized photo card paper .
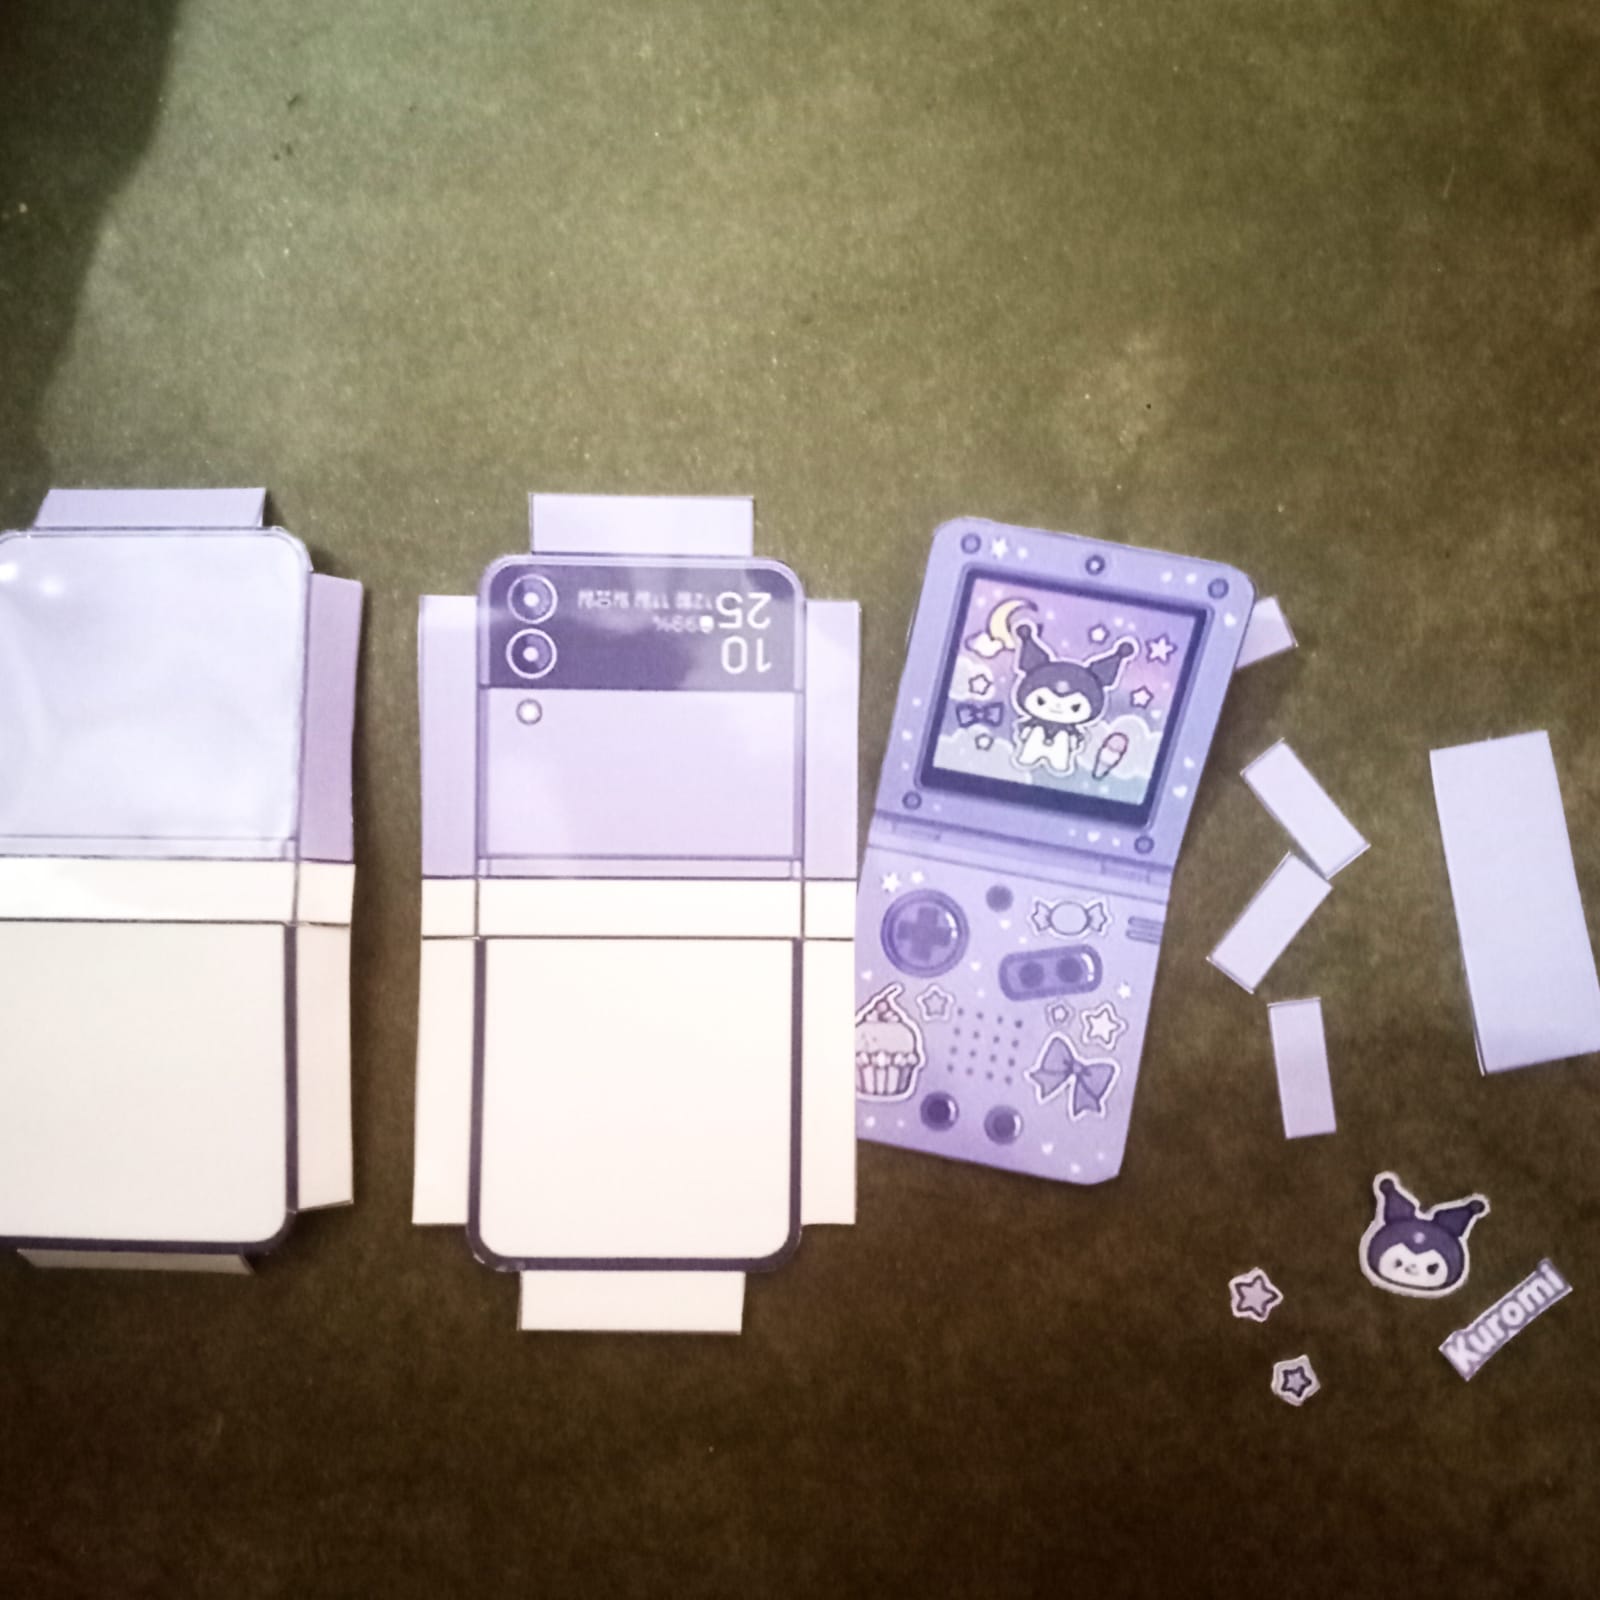
Next i cut out all the parts and this template was to make 2 different phones one pink and one in purple .
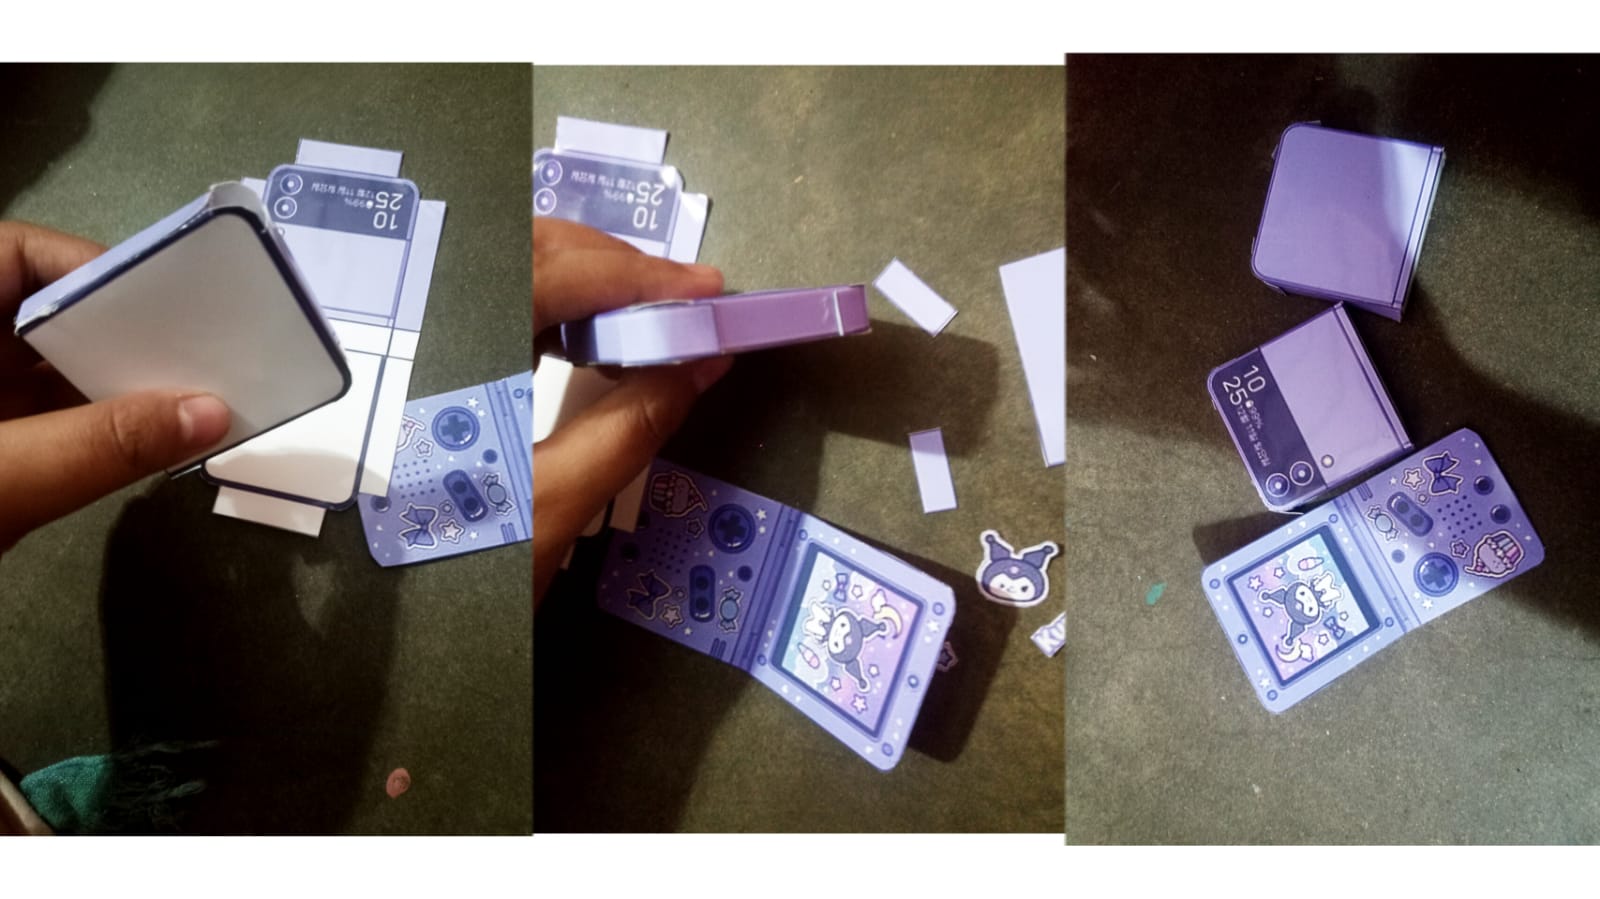
After cutting out i folded all the crease parts and glued them so u see the two holes on top? Well after glueing you are supposed to put cotton inside it to make a squishy phone i put some confetti in there and glued the little Purple rectangles on both holes same way i glued the other part too here u can see the screen and keys and the two boxy squares
So the white part was to be glued with the screen and keys and there you have it
A flippable rattle paper toy thats inexpensive and cute . So my sister really really loved it alot .
Thank you for your precious time and support ❤️
Vegan Brownies (recipe)
So this vegan brownie recipe is really really easy. It was yummy and filled with coconut goodness.
Ingredients:
Cocoa powder half cup
One cup self rising flour
2 bananas ripe
Brown sugar grounded half cup
Coconut oil half cup
Coconut cream half cup
Dark chocolate grated 1 cup
Shaved coconut half cup.
One teaspoon baking soda
One teaspoon baking powder
Pinch of salt.
Method :
For the Brownies i mixed the dried ingredients first i sifted the flour and cocoa powder in a bowl with a teaspoon of baking powder and baking soda a pinch of flaky salt is a must mix it all up .
In a seperate bowl i mashed 2 ripe bananas added half cup coconut oil ,the dark chocolate and brown sugar mixed it all up . (Egg replacement here is banana ) . After this i mixed both wet ingredients with the dry ingredients and carefully folded it up into a thick bater because we don't want alot of air bubbles so do it slowly and don't over do it.
Now in a baking mould put a oiled butter paper and pour in your mixture . Put it in the preheated oven at 350° for half an hour and keep checking it with a tooth pick
Now for the ganache i put coconut cream and dark chocolate with some sugar and melted it up into a sweet chocolate sauce . I also put some red food color in the coconut shaving and mixed it .
After my brownies baked i poured the ganache over it and put the shaved coconut all over its edges . It was really delicious and cruelty free
Splinterlands art contest week #251 (Possessed puppet)
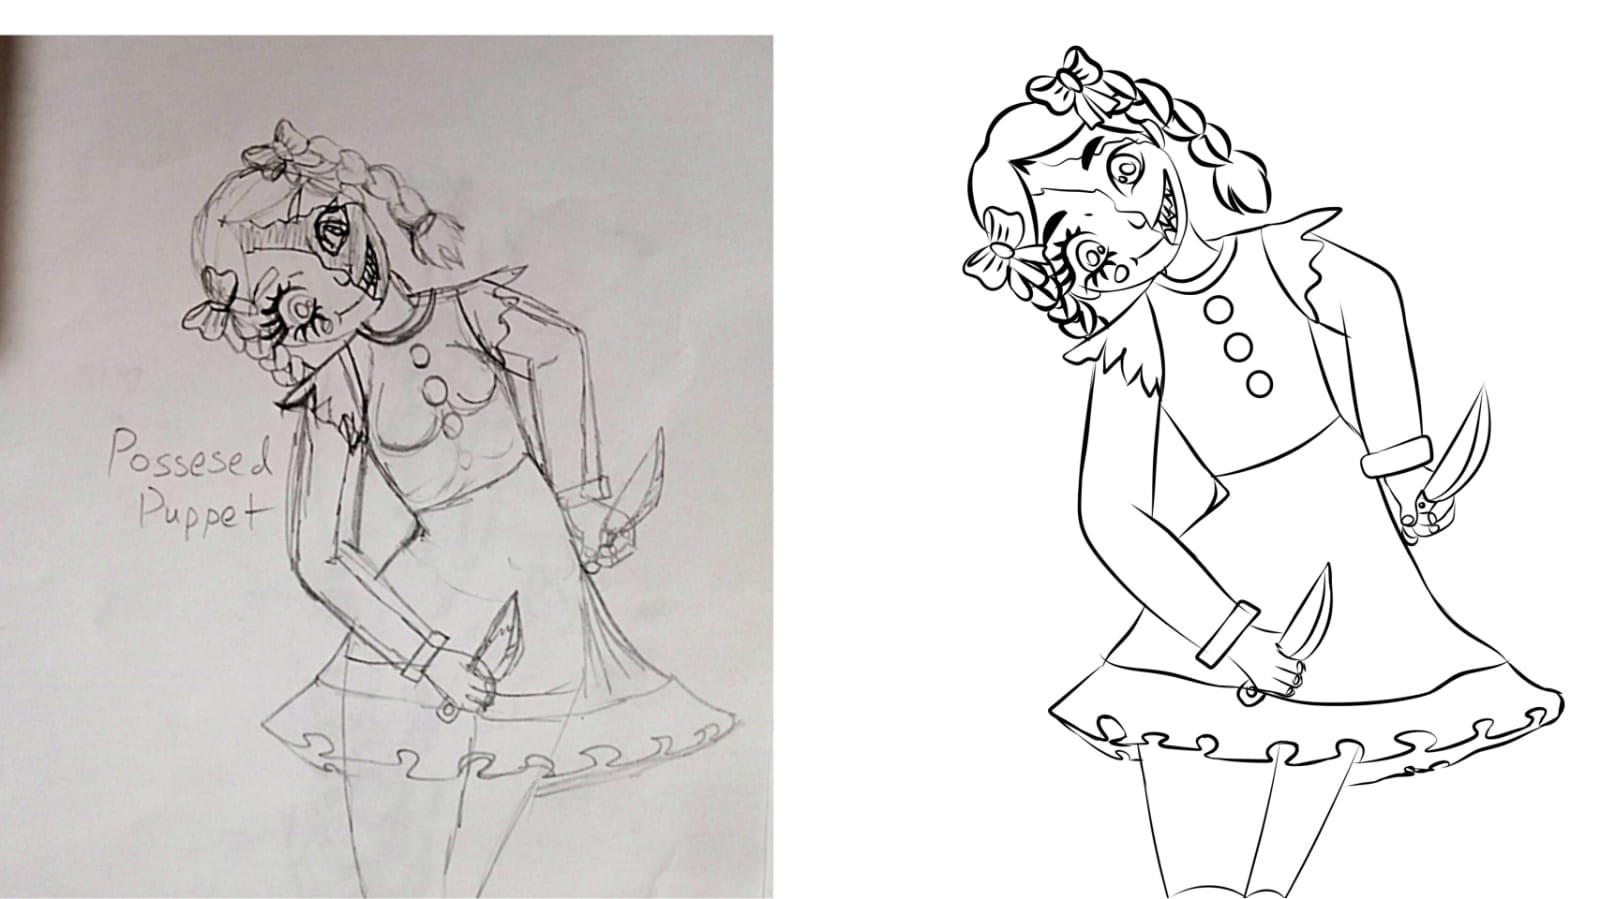
As a horror fan i love drawing creepy stuff and so for my this weeks Splinterlands art contest #251 Entry i drew a card character called Possessed puppet.
So the real character is like a little puppet doll thats been possessed by a demon .
For that i firstly drew my depiction of the character my sketch was more of a grown women puppet dancing with two knives . After the sketch was done i refined it into a lineart Digitally on an app called Medibang paint pro. The brush i used to trace the sketch is called paint sharp brush its one of the default brushes in the app.
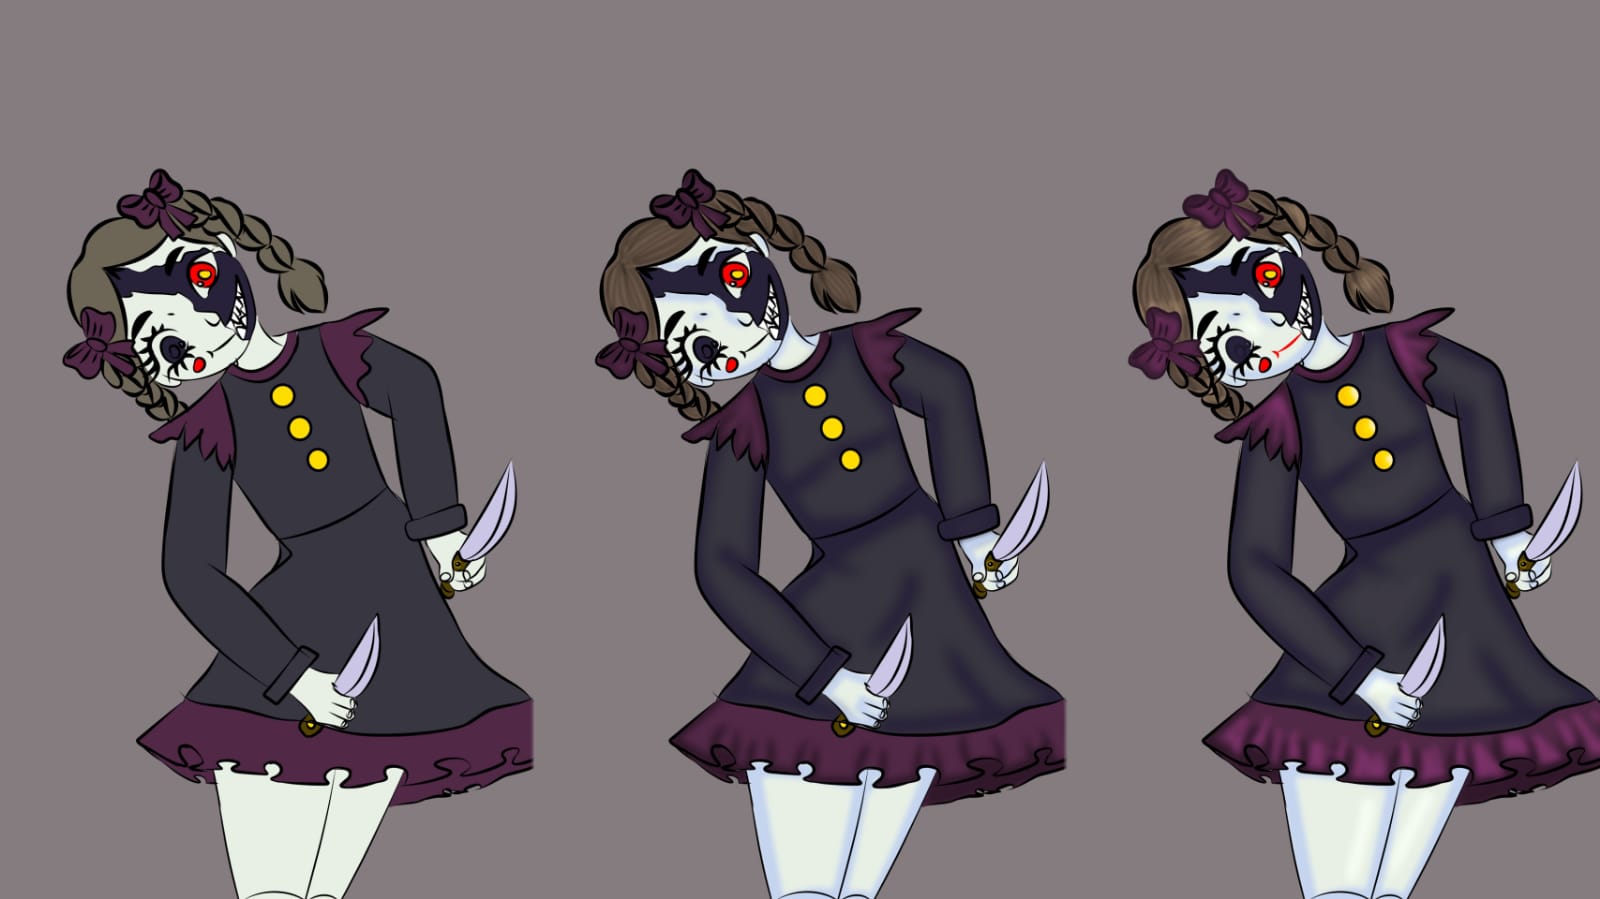
After the lineart was done it was now time to color the character with flat colors
I started by coloring her gown black and frill on it in some maroon color while her skin color has to be like porcelain dolls one of her eye is all black like a void and half of her face is like a broken mask with the demon staring at us .
Next i shaded the character with a darker shade i did shading on her hair and frill on the gown after that i added highlights to her hair and her porcelain skin .
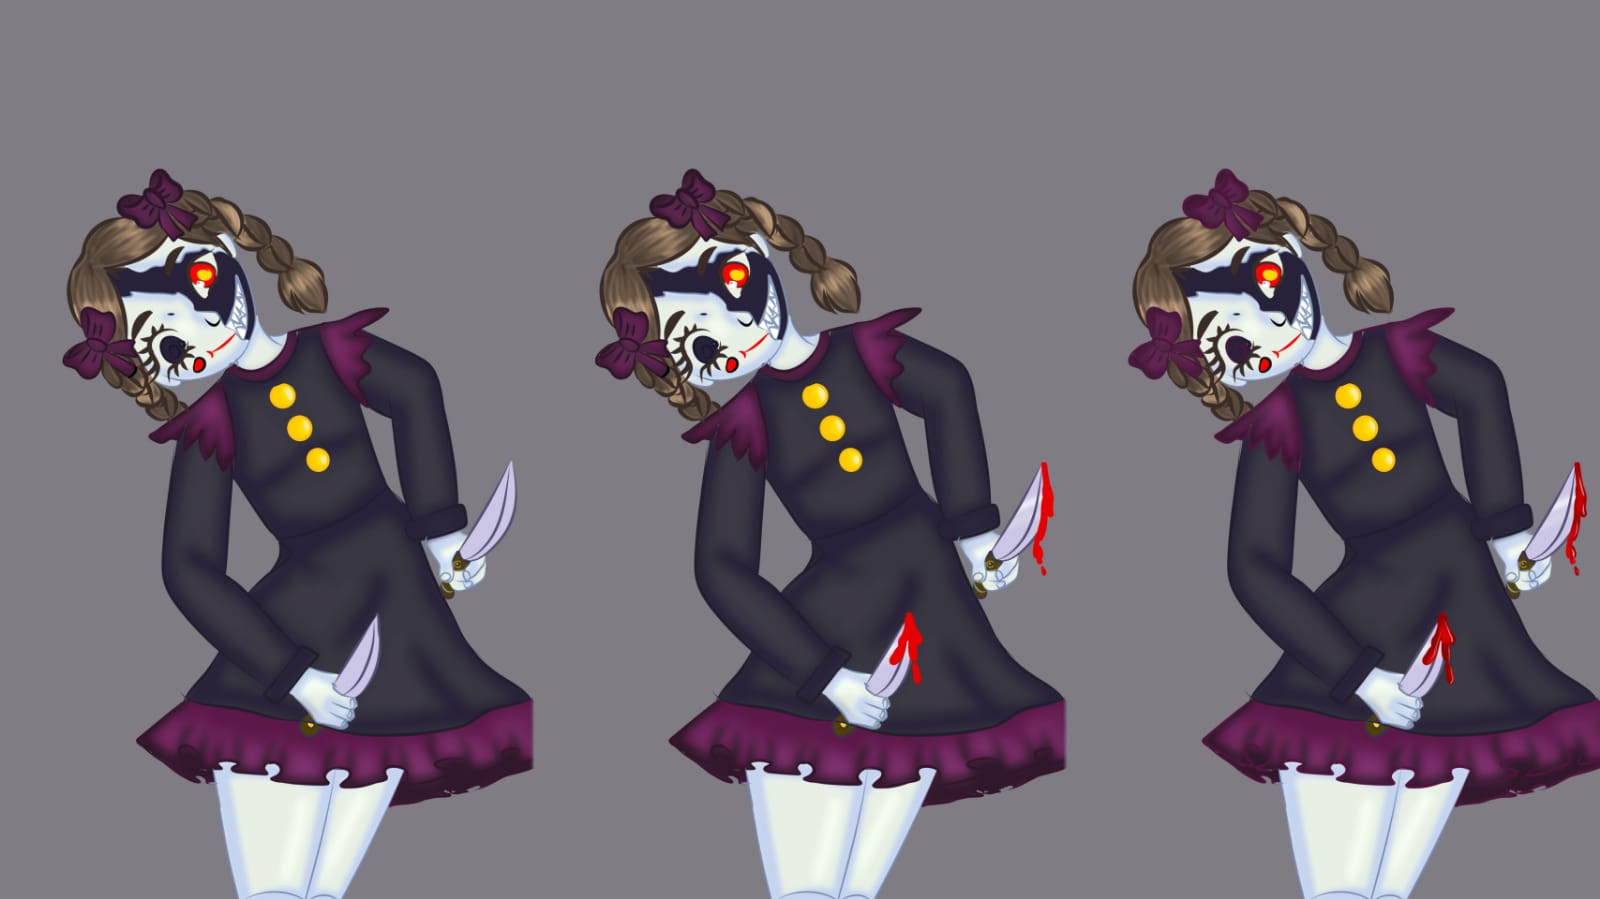
Shading for her was really a task because i had to make her a bit different from the other humanoid character . After this i added more color to her lineart colored each element differently and also added some details like the bloody stains on the knife which was one of the elements that the real character had .
After this i adjusted the background and added a sky blue highlight to one side of her body set it to add in layer blending mode and there u have it
This was the final result .
I hope you liked it
Thank you for your precious time and support ❤️
Procrastination kills the vibe (weekly blog)
This week was a bit overwhelming for me as i was stressed over things that haven't happened.
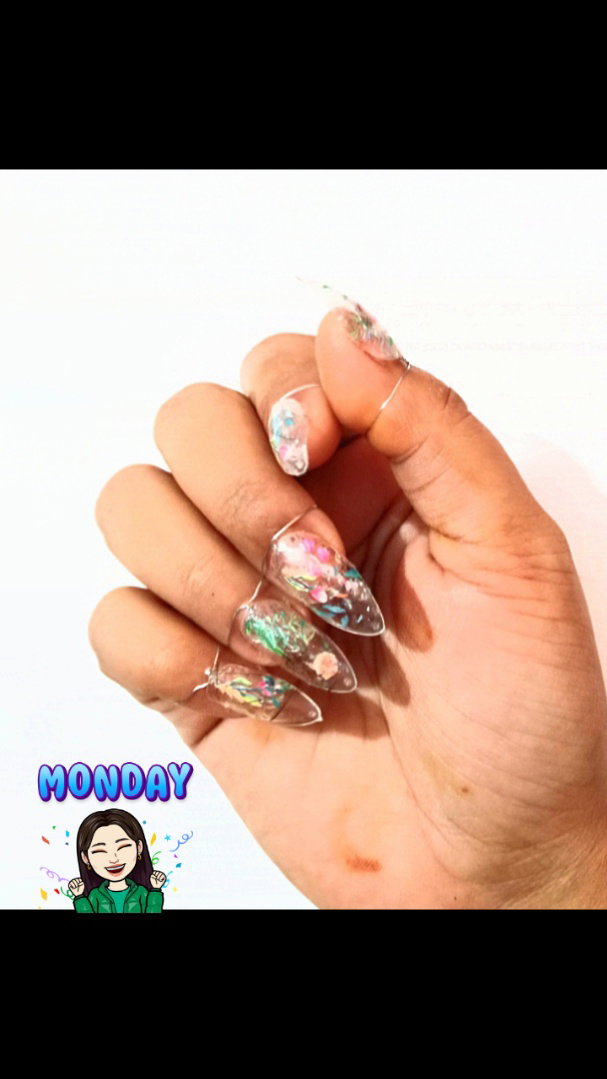
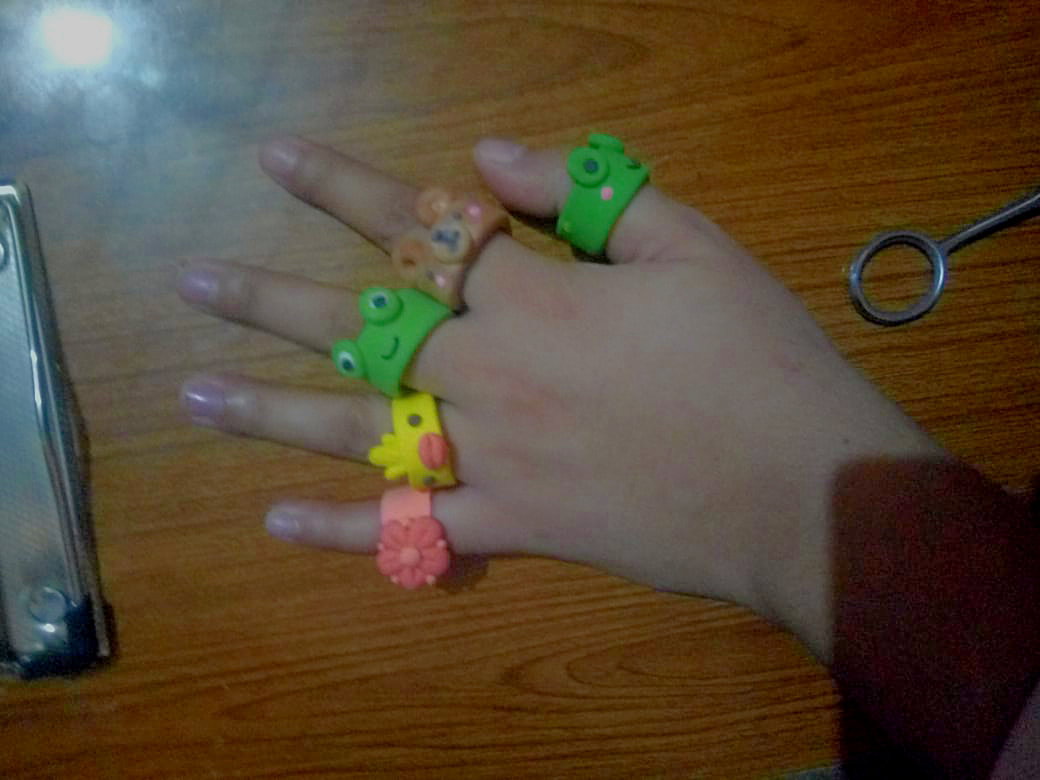
Ladies if you know you know when we get sad its either a makeover or a shopping spree that can cure the sadness . So on Monday i made these cute fairy nail rings .
These nails are actually rings that are detachable and easy to wear without ripping your nail beds off . A blog is coming up just about it Don't worry.
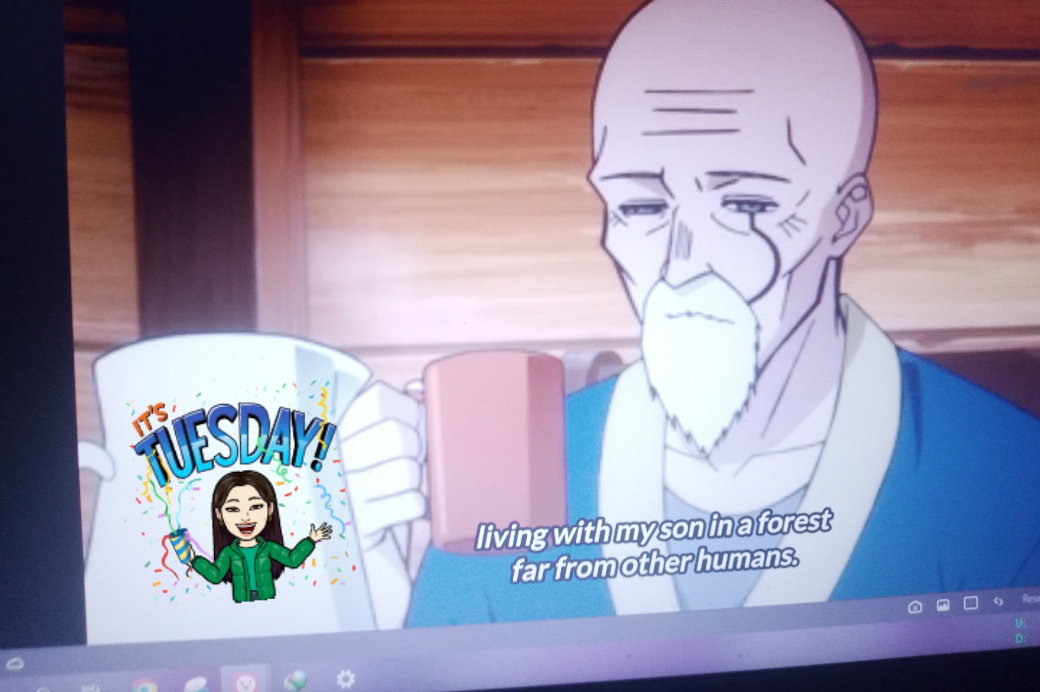
On Tuesday i watched Mashie its an anime . I would say its a crossover between saitama and Harry Potter because the main character is really a muscular hunk but he is in magic school without being a mage . A great anime tbh i laughed alot it was wholesome.
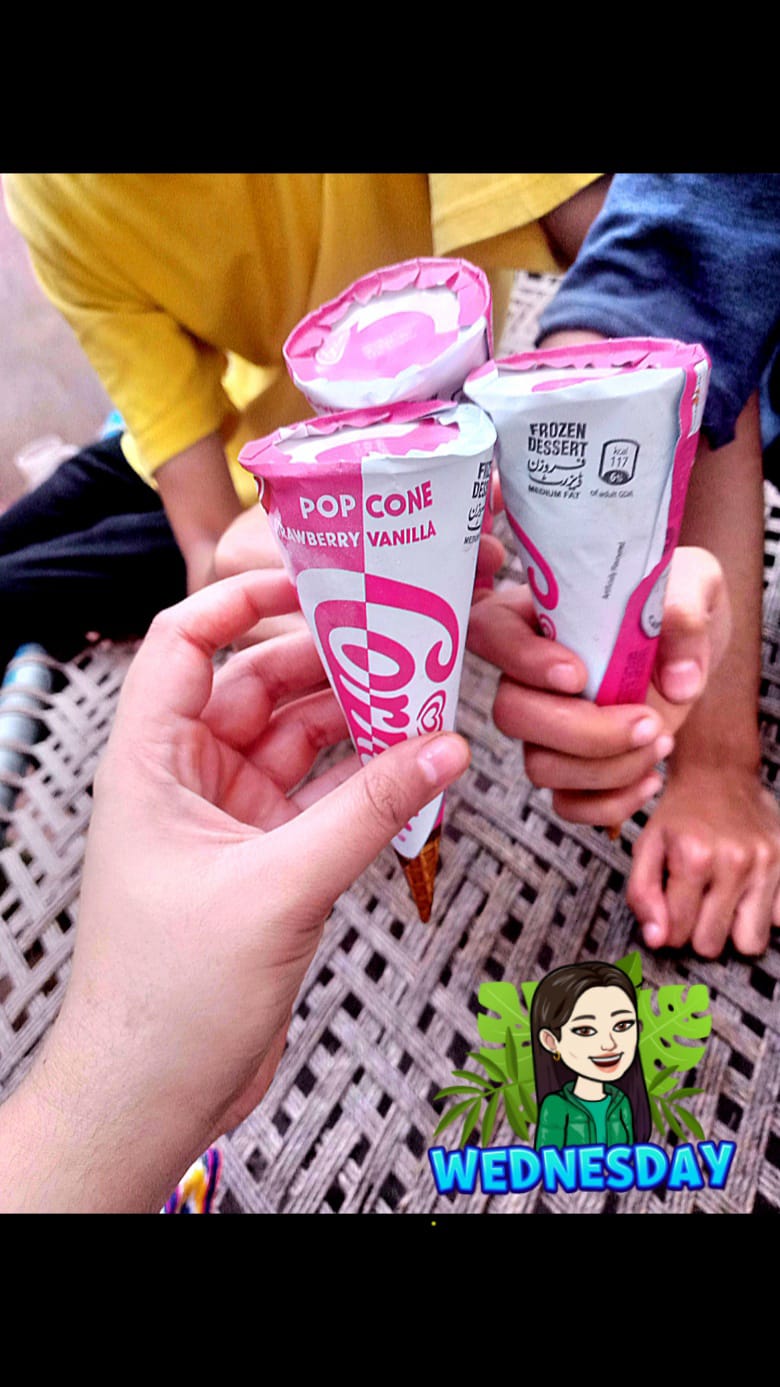
On Wednesday it rained here this was the day i was mostly stressed Because our solar system was literally in danger as the storm approached how ever Thanks to God the storm never came and so we ate these icecreams in rain
Thursday i made these paper roses for my moms annual flag (Alam) its for ashura and they were so pretty i will post how i made these too soon
On friday i made an oil pastel painting . Now not everything you make is an masterpiece but its the time you spent and had fun in that's all that counts .
On Saturday i sketched some heads in my mini book cause o was doing it according to the class o really liked the class it taught me somethings however i still wish to learn about drawing male faces in detail.
On Sunday i did another refrence study and this is not finished yet . Its was a great week sad but i learnt many lessons . Like you need to have fun in the present and not overthink the stuff that hasn't even happen.
Thank you for your precious time and support ❤️
3 things that helped me be Healthy again.
As a person being Anemic and having GERD . I always was stressed and tired .
Everything seemed like its alot to do time seemed to pass fast and i wasn't able to do alot of the work that i wanted too. I couldn't eat much either as i was afraid of something might trigger my pain and i would starve myself .
Here are the 3 main things that i did and it helped me to get healthy again.
1. Exercise.
Exercise is often considered to be something that burns calories or you have to burn fat . For me the exercise i did was for my muscle mobility . I started walking 3 k steps a day . 15 minute of walk after every meal . This made my digestion fast .
I also did some yoga poses like Cobra pose and childs pose that really would relax my mind and body . Another thing i did was bed exercise . It took 5 minutes but i stretched myself moved a little it was easy and i felt like i achieved something.
2. Diet.
Now when you are having GERD alot of people getting stressed on what to eat and what not to eat . I used to do the same but starving means you're not giving yourself enough nutrients so i used to get dried plums , apricots and raisins i would take them as a snack anytime i was stressed about eating . This gave me enough nutrients also it helped my daily iron intake to be boosted too .
I started drinking lots of water atleast 5 litre and i also included pearl millet and super foods in my diet i started using whole wheat and not that store bought packaged flour .
3. Schedule everything.
I started following a routine . I made a checklist of everything i needed to do . 1# was getting up early and sleeping properly. Taking care of my hygiene and diet and i would read and write daily.
Journaling was a must . I also would draw daily this made my mood really great . The list started with 10 things and now its 30 things and it always is an achievement when i see i accomplished all of my goals for the day .
Remember being healthy isn't just eating good its feeling good physically and mentally too
Making a Seamless pattern
So i have talked alot about basic digital art but usually it is about drawing characters today we will draw a basic pattern here is how
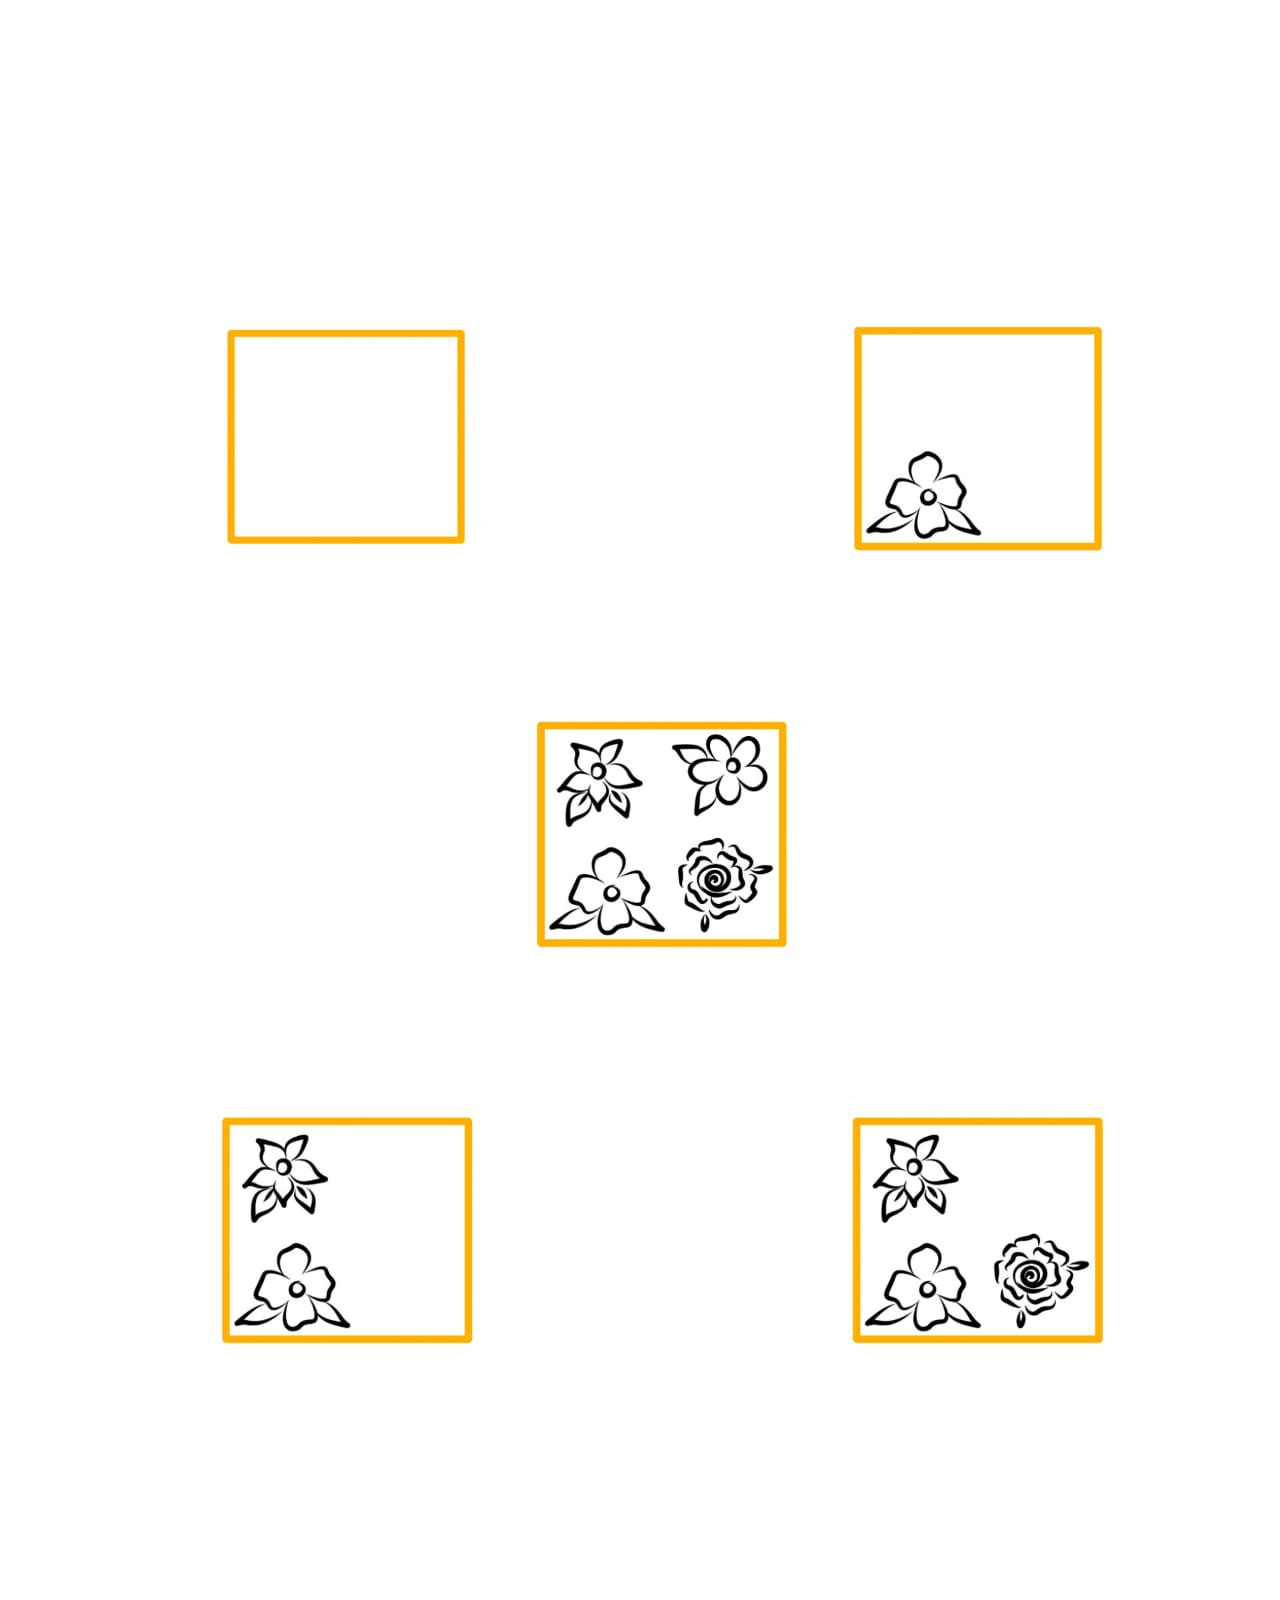
So on a canvas i drew a square and on each corner of the square i drea a flower .
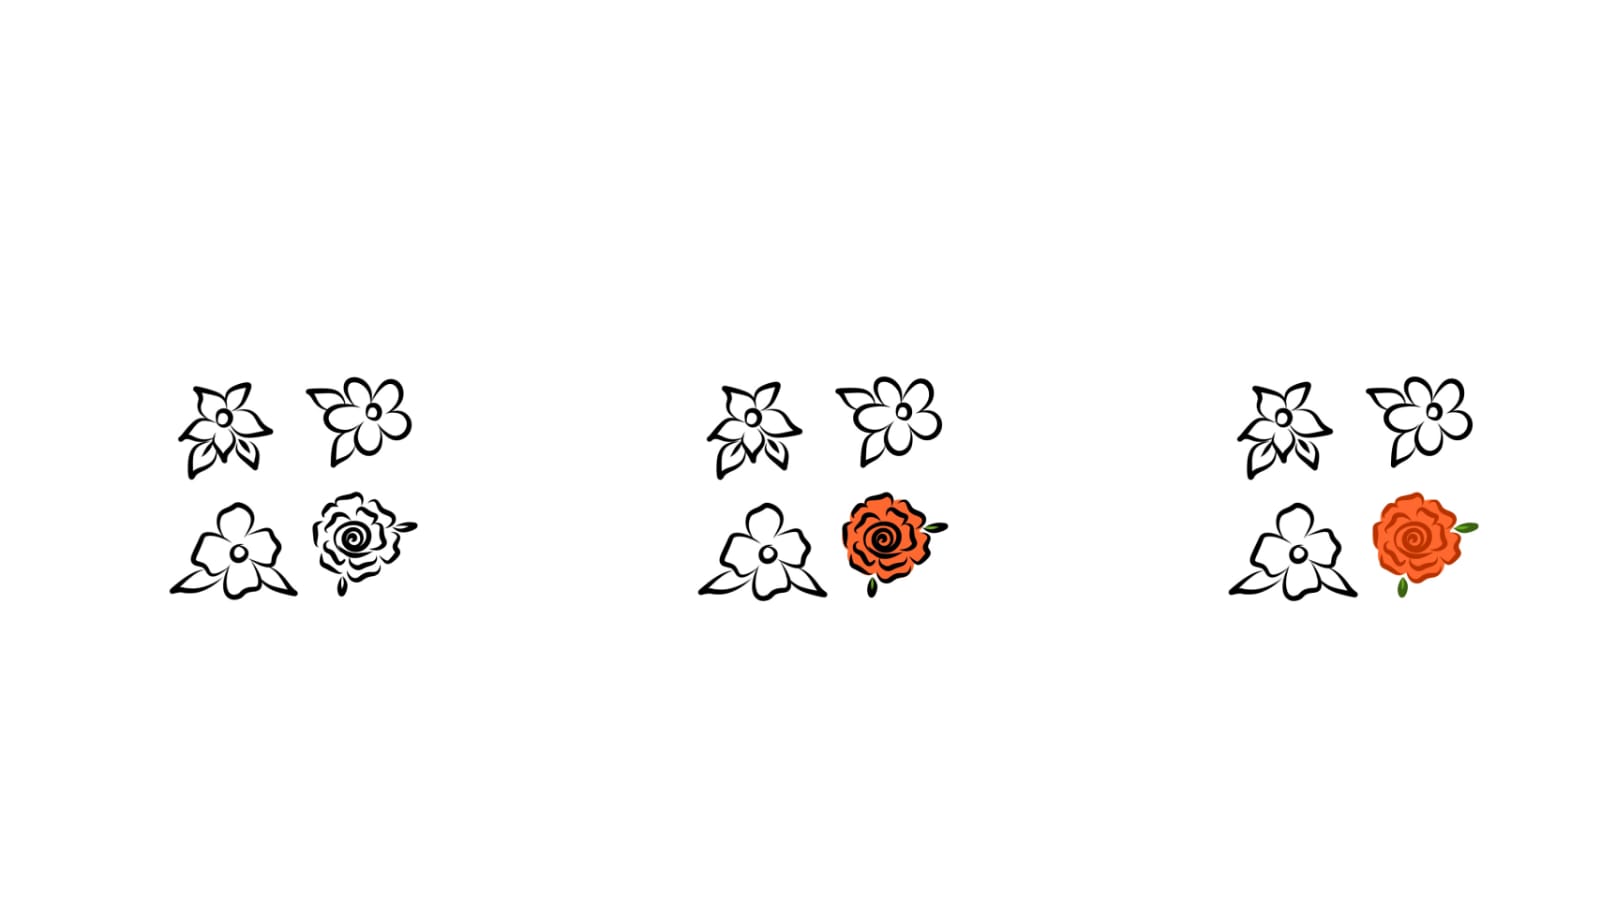
4 different flowers were drawn on each layer with a pen sharp brush . Some had 4 petals some 5 , some had pointy depends on what you wanna draw . I kept the size quite similar
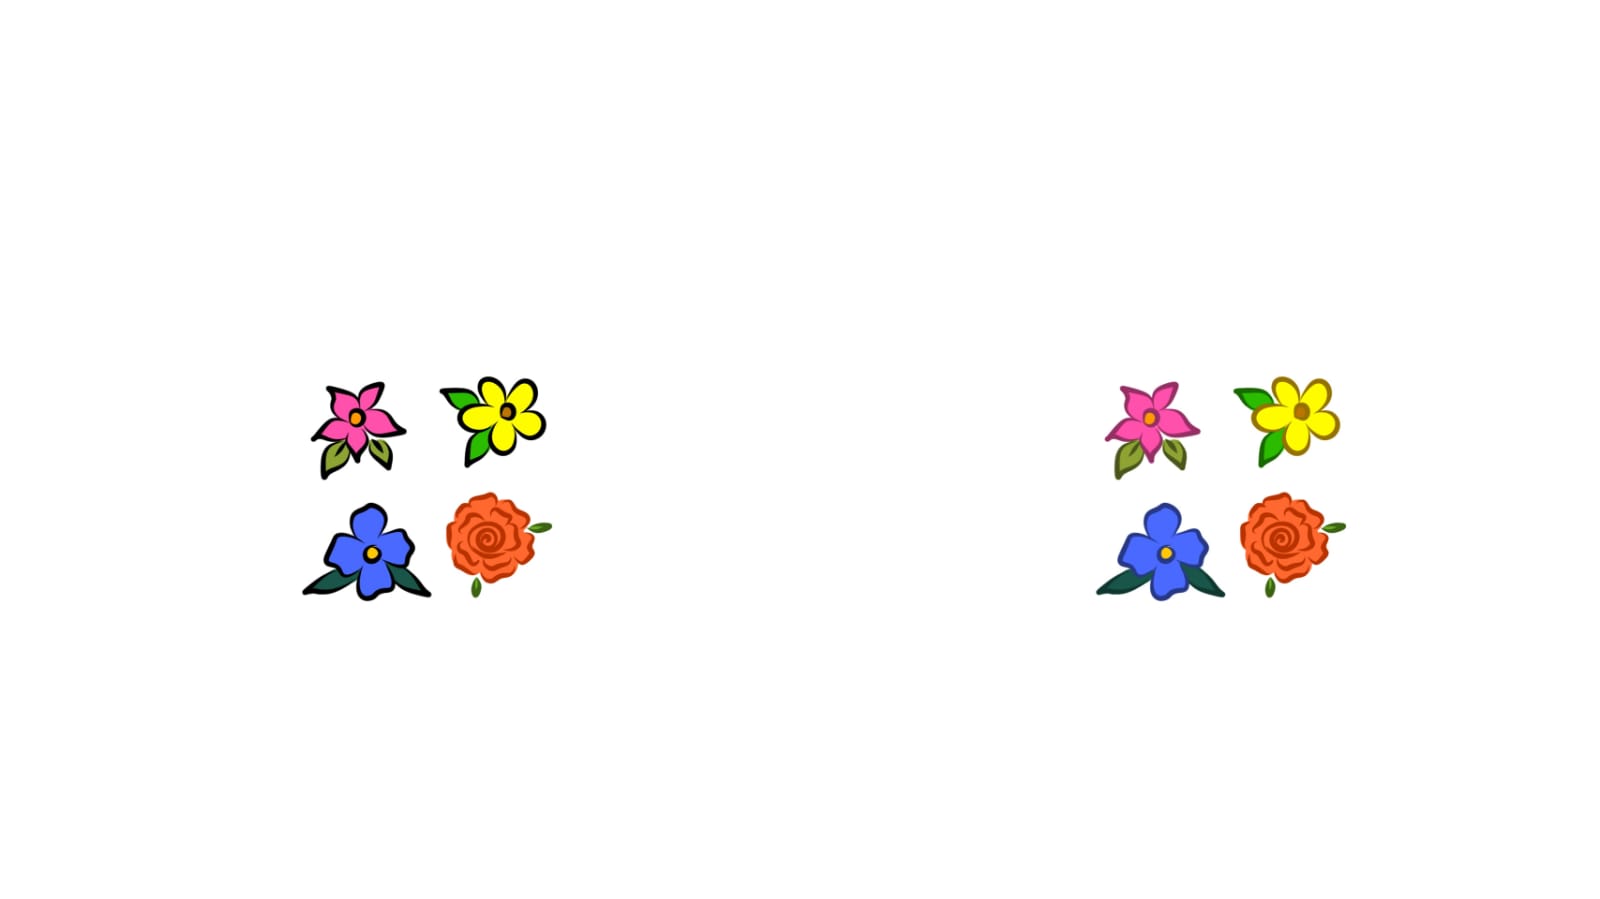
After that i put flat colors in each of them like red for the rose and green for the leaves then colored the lineart in similar shades but a little darker .
Did this for the rest of the flowers and merged them together into a single layer
So i duplicated and repeated the pattern on the paper with the cut paste method but u can just use this in a brush too by selecting it in a pattern brush
And there you have a pretty cute basic floral pattern .Get a little creative and make more patterns it can be stars or hearts or any cute thing and just make a pattern that can be used in different backgrounds .
Thanks for your precious time and support ❤️
Art Makes me feel better
Art had always been a major influence in my life . I was always impressed and moved when i saw any form of art whether an sketch , calligraphy or anime .
Tbh i wasn't born with talent art Wasn't a God gifted trait to me. However i always was a bit creative .
So as a kid i used to fail at only one subject which was art yet in my teenage after being bullied in Highschool i actually started to draw to express myself .
At first the art wasn't so good but i liked doing it because it made me feel powerful and productive .
With time it became a hobby and now its my Career .
In my free time i love Sketching or doodling , my main job isn't this i mainly do covers for illustrated books but Sketching is one of the things that makes me feel like a pro artist and thats why i love doing it.
At first it was about looking at the basic shapes and drawing them but now i dribble and scratch the paper till the shapes are visible
Then i refine them darken the parts that i want blend the parts where i want it to be softer shades and erase the access lines
Now i perfect them by noticing the bony structure of a face that im drawing and i look for clothing details .
Sketching with a pencil is fun for me because u can correct the shade any time its not like colors will mix and make a mess .
So here is my final sketch .
What is an activity that you do in your free time and why?
Thank you for your precious time and support ❤️
Splinterlands art contest week #250 (Darkest Mage)
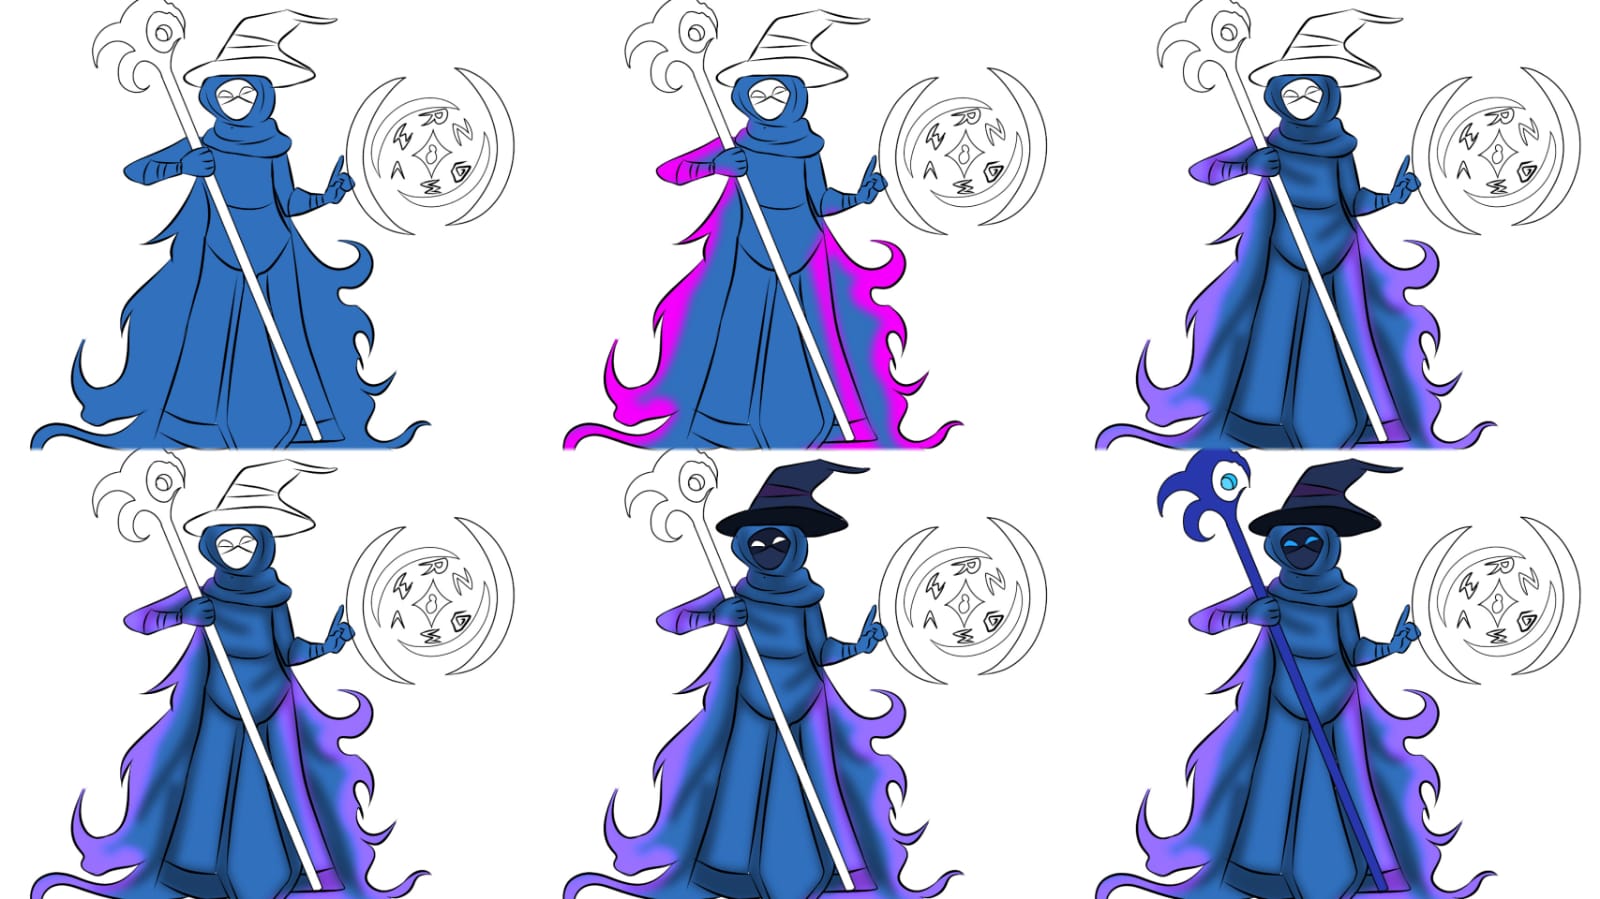
For this weeks Splinterlands art contest entry i drew (Darkest mage ) . So this Character is like a Dark Wizard thats casting a spell not much detail to face or anything just alot of clothe details and glowy highlights .
So i firstly draw the character in my style on a paper sketched it out then i converted it into a clean lineart on Medibang paint pro which is an Android app.
After refining my sketch and converting it digitally
I started by coloring the gown and cape with a dull royal blue shade . Next i added some hot pink color on another clip layer over it and guassian blurred it so the gown looks like its changing colors from the light hitting it . Then i shaded the clothes with a darker blue
After that i colored the hat and the face veil too now usually i add the flat colors first and then shade but here the shading was to be first cause most of the character is just its clothes
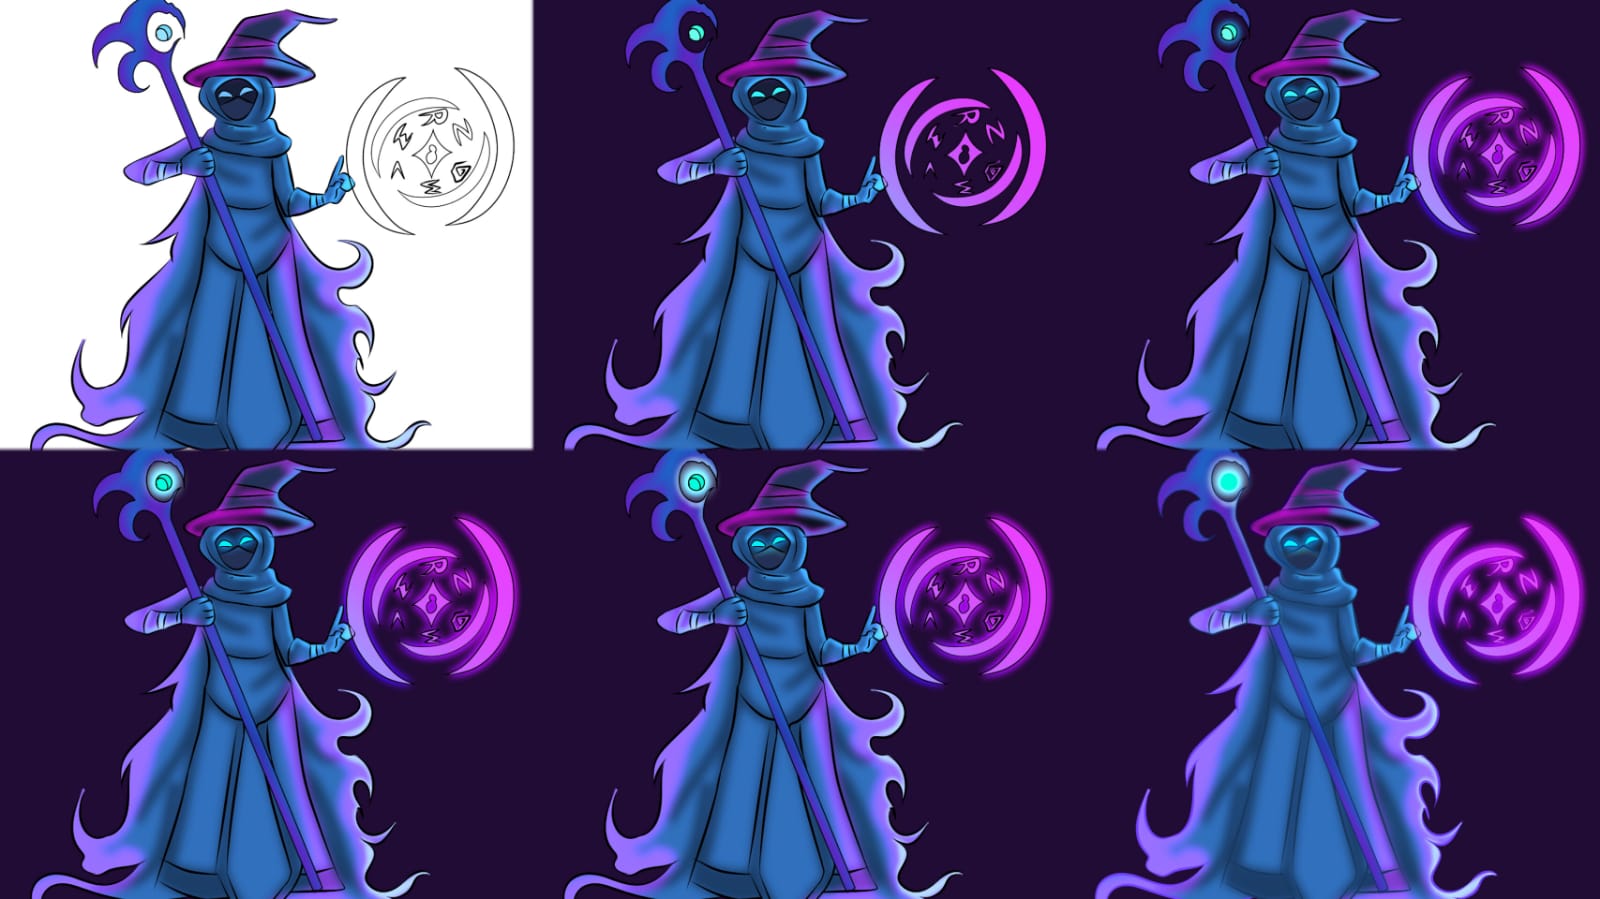
After that i did some holographic highlights yo the hat and the gown somewhere is purple somewhere its turquoise its a mix of both . I added a gradient dark purple background to him . And colored the spell in hot pink and blue gradient . Duplicated it and guassian blurred it set the layer to add so the spell glows.
Same way i did the eyes and the sphere in his wand shaded the wand as well
And here is our final result ❤️
Thank you for your precious time and support
you're never too old to learn ( weekly blog)
This week i spent most of my time in art studies. So im back on domestika to learn something new and as i did that i was super busy most of the week however there were some fun moments that i really wanna talk about.
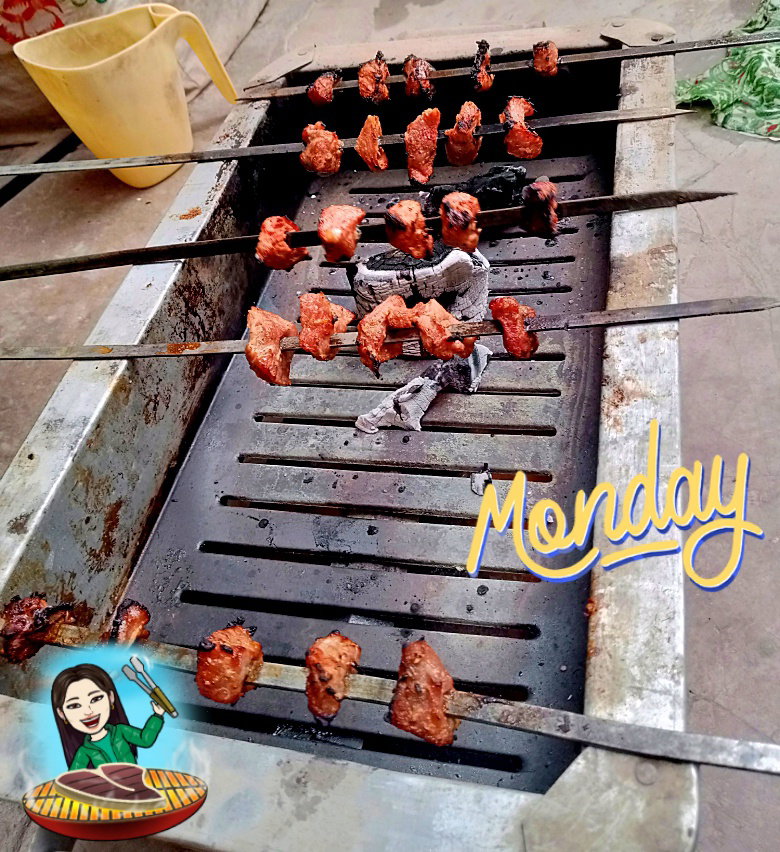
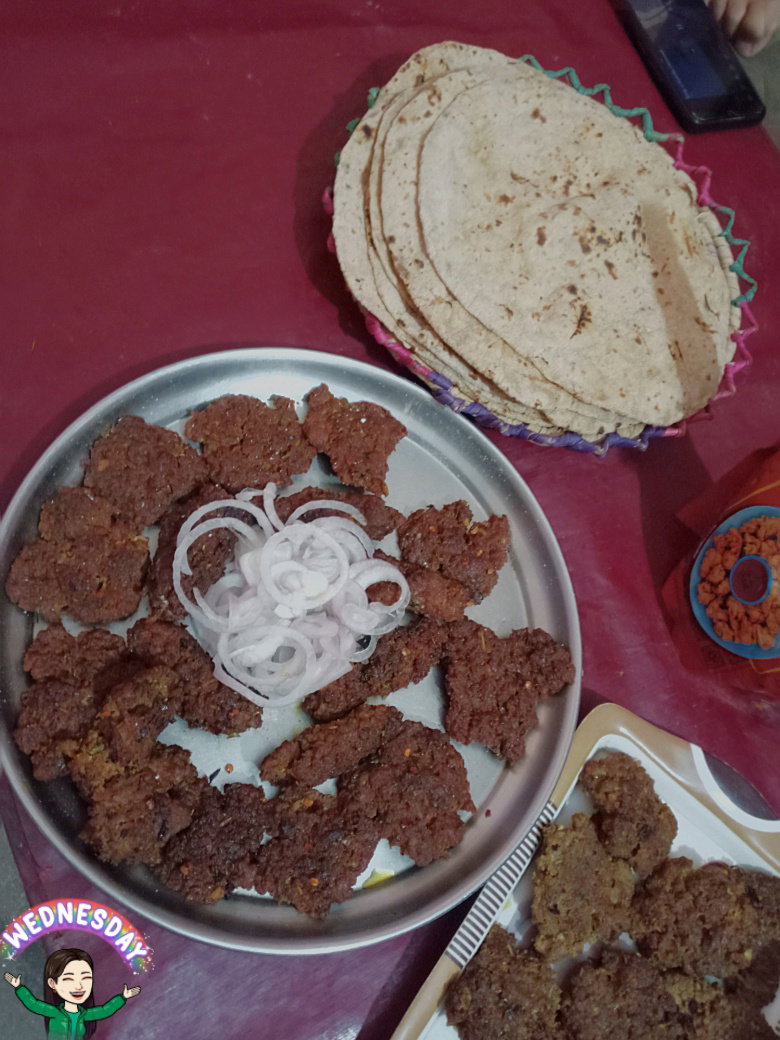
Monday was BBQ my brother is an amazing cook better than me even and especially at grilling. Its a natural dad instinct in every guy i guess . But since im a vegan doesn't mean i start being toxic and lecturing them . They don't force me to eat it . I don't force anyone not to eat meat either . Best part was it was a hot summer day and he made kebab is such a heat i was taking pictures as i chugged on lemonade 😂 . Good for him since im always melting in the kitchen . The day was about family ,laughter and yummy food .
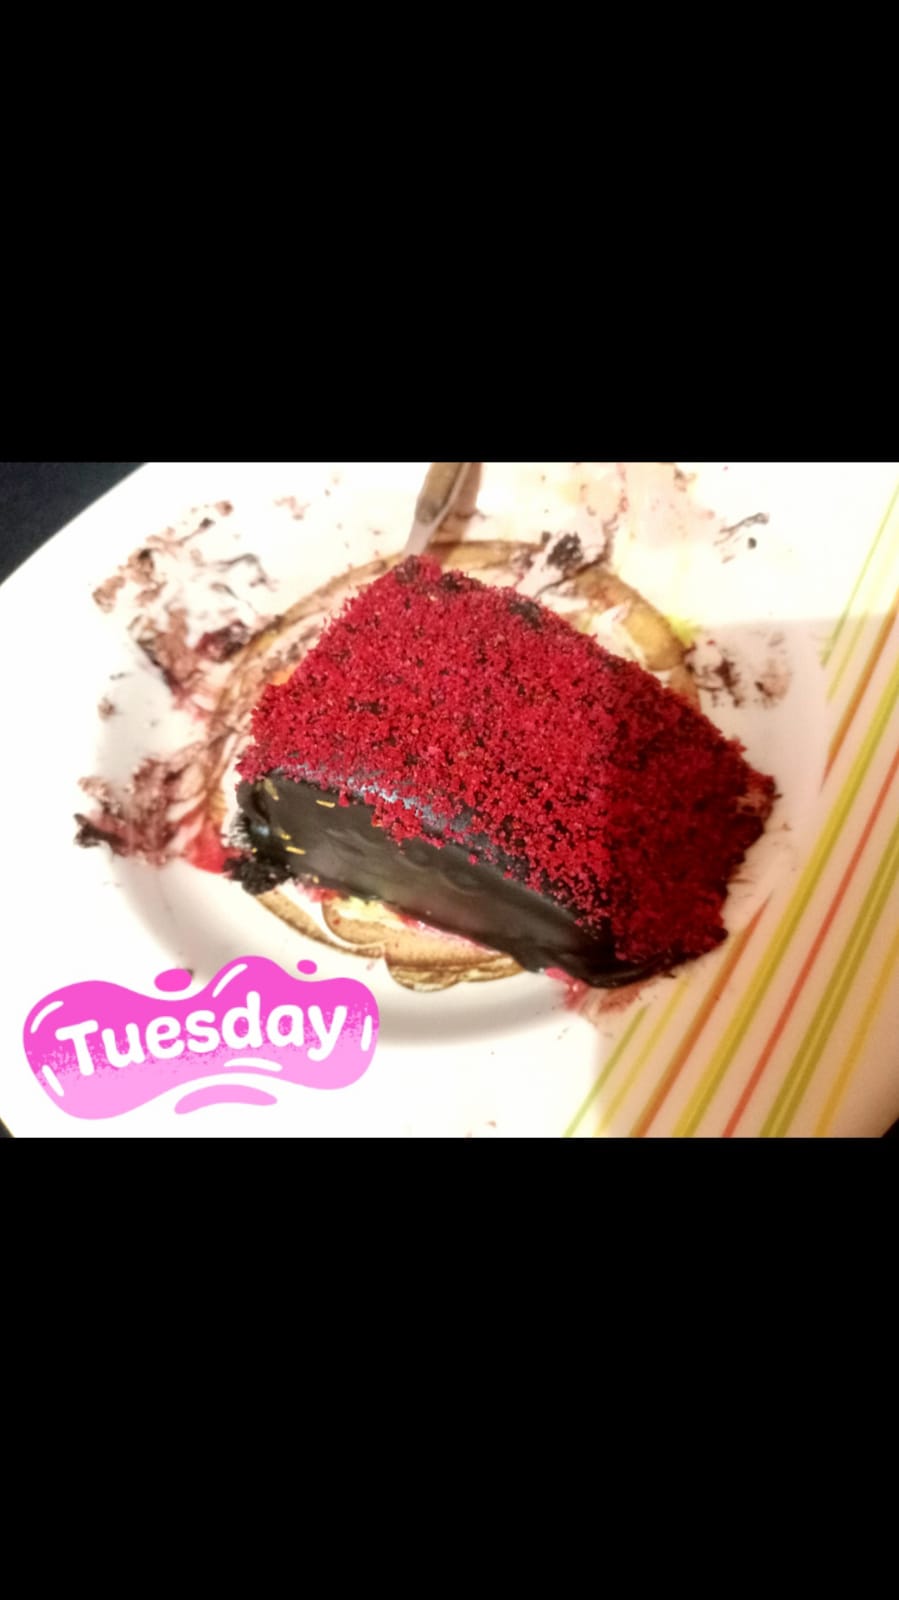
So As i said on Monday at the BBQ my brother did the grilling and i did a vegan desert these were Chocolate vegan brownies and they were just so delicious this is me having a leftover slice on Tuesday . While i stayed on my laptop attending lectures . This surely was a treat
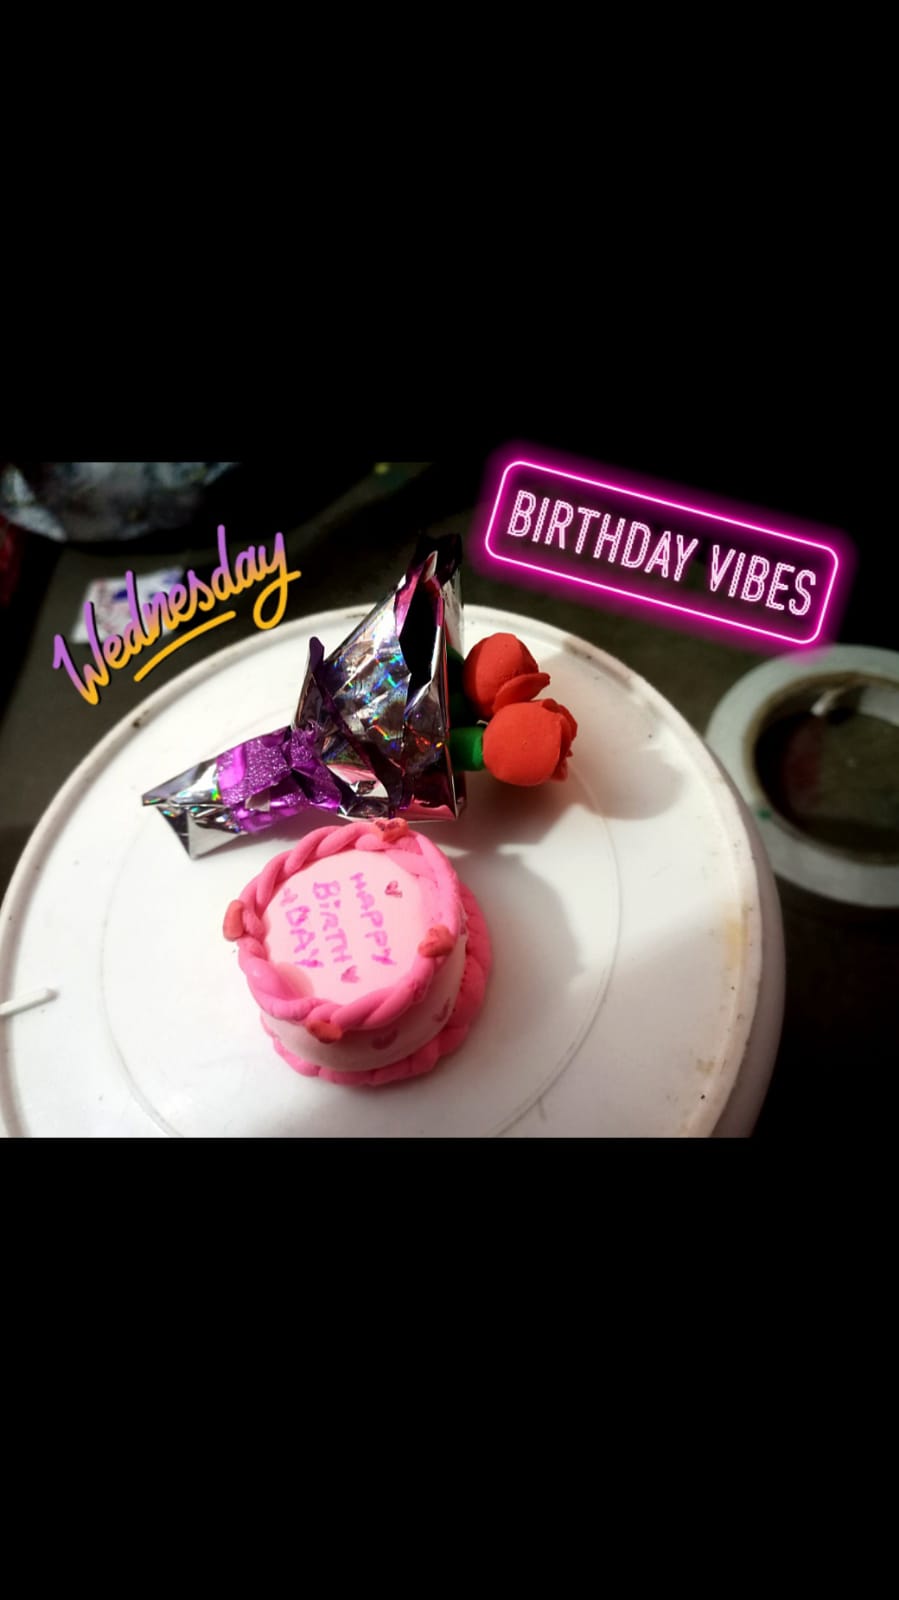
So on Wednesday i actually made cute mini gifts for my Cousin's bday . A mini bouquet and a mini cake these were made with clay and were super cute. I might blog about it upcoming week.
On Thursday i actually made a mini flip phone with a paper craft template and it actually was flipping and looked super cute as a phone . My little sister loved it and it was so adorable when she was playing with it
So on Friday which was my cousins bday i made a mini bag in which i kept some rings nd earrings for her and a mini diary . Everything was pink because thats her favorite color and she also loves miniature stuff so she was really happy to receive them
On Saturday as i was exhausted with the crafting and studies i looked anime and i find that Jujutsu kaisen season 2s first episode was out and i couldn't wait to see it so i watched that and Omg Gojo is such a cutie pie
On Sunday i did some van gogh inspired mini painting . I love sunflowers and Van Gogh's paintings have always inspired me
That was all about my week . How was yours?
DIY cute Mini Cake with clay.
So i saw some Clay cakes on Pinterest that looked so cute and aesthetic i decided to make one too with my sister.
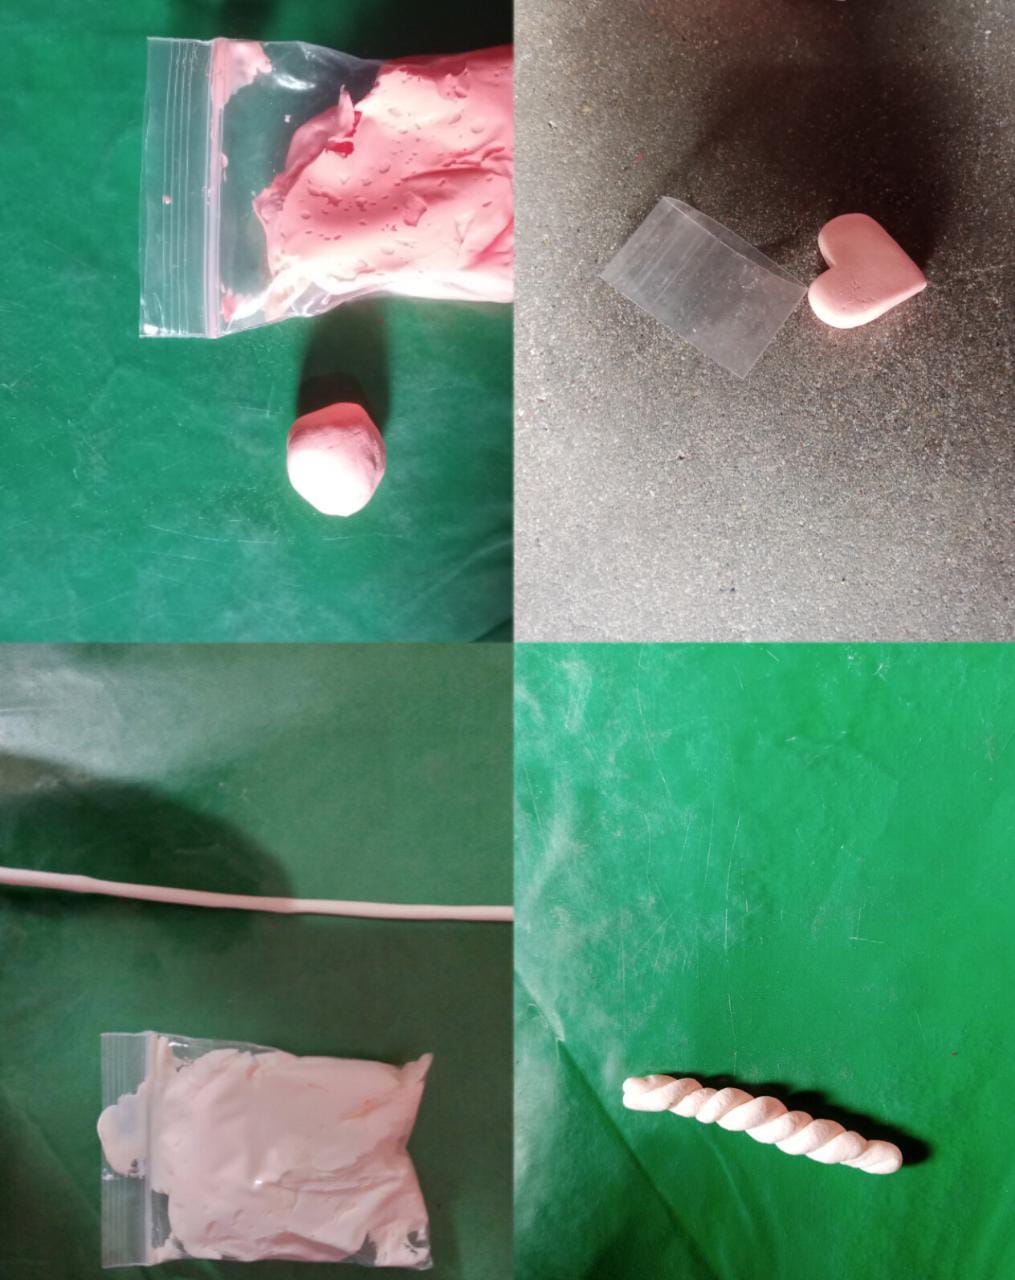
The clay i used is airdry Super clay and the colors i used were pastel Coral and white.
First i made a ball from the coral clay and shaped it as a heart shaped cake base . Flat from both upper and bottom sides .
To decorate it i made a white clay string and twisted it together so it looks like a two strand braid . This will be our icing for the top of the cake.
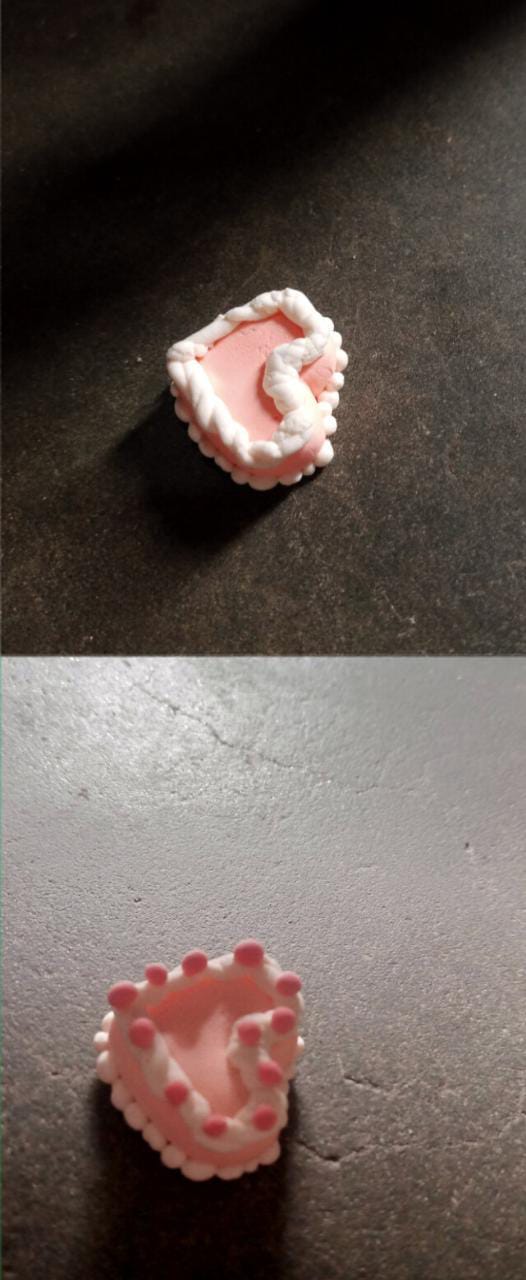
Next i put that twisted clay braid on top off the cake base and made small balls of white clay and attached them to the bottom of the cake so that looks like icing
Next i added some pink balls on top these are our glazed cherries
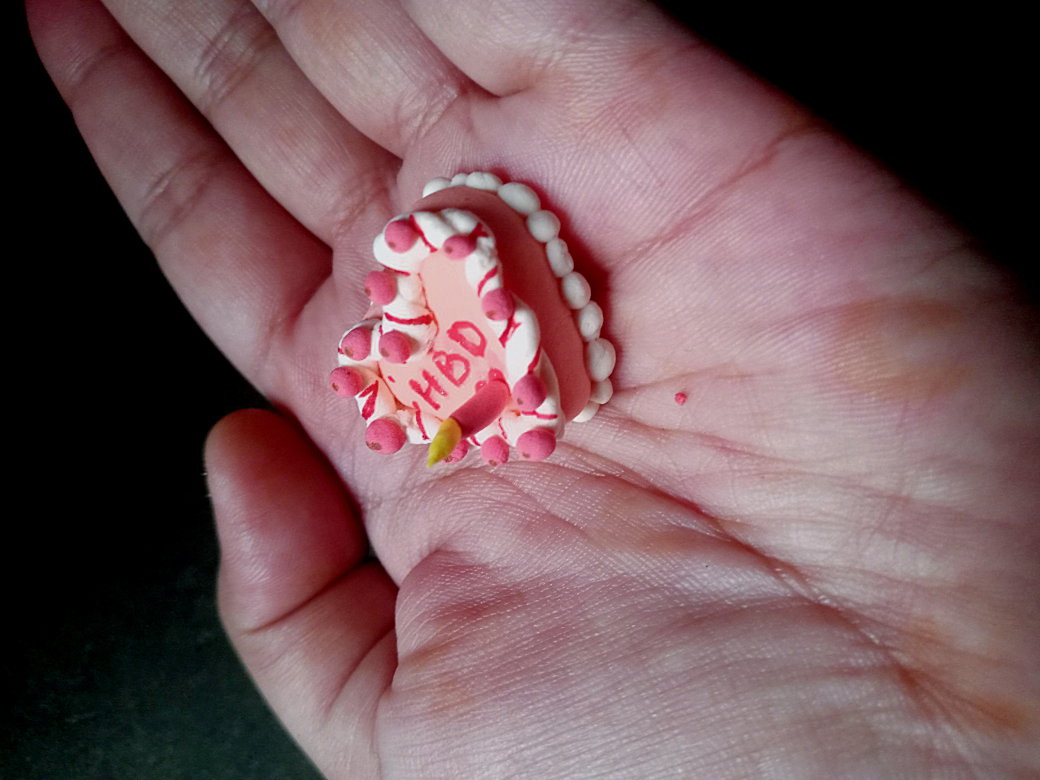
Lastly i added a HBD on top of it with a glitter pen and made a mini clay candle and thats our cake .
So this clay charm and ornament can be used as a gift too im gonna make a pop up box soon and this will be inside it . In the coming weeks that will be a DiY project too Stay tuned.
Thanks for your precious time and support ❤️
Drawing a cute flame character
Every week i make a simple art blog tutorial for the beginner artists so they can learn drawing digitally .
This week im drawing a Cute little flame character inspired from Ghibli studios Character califer .
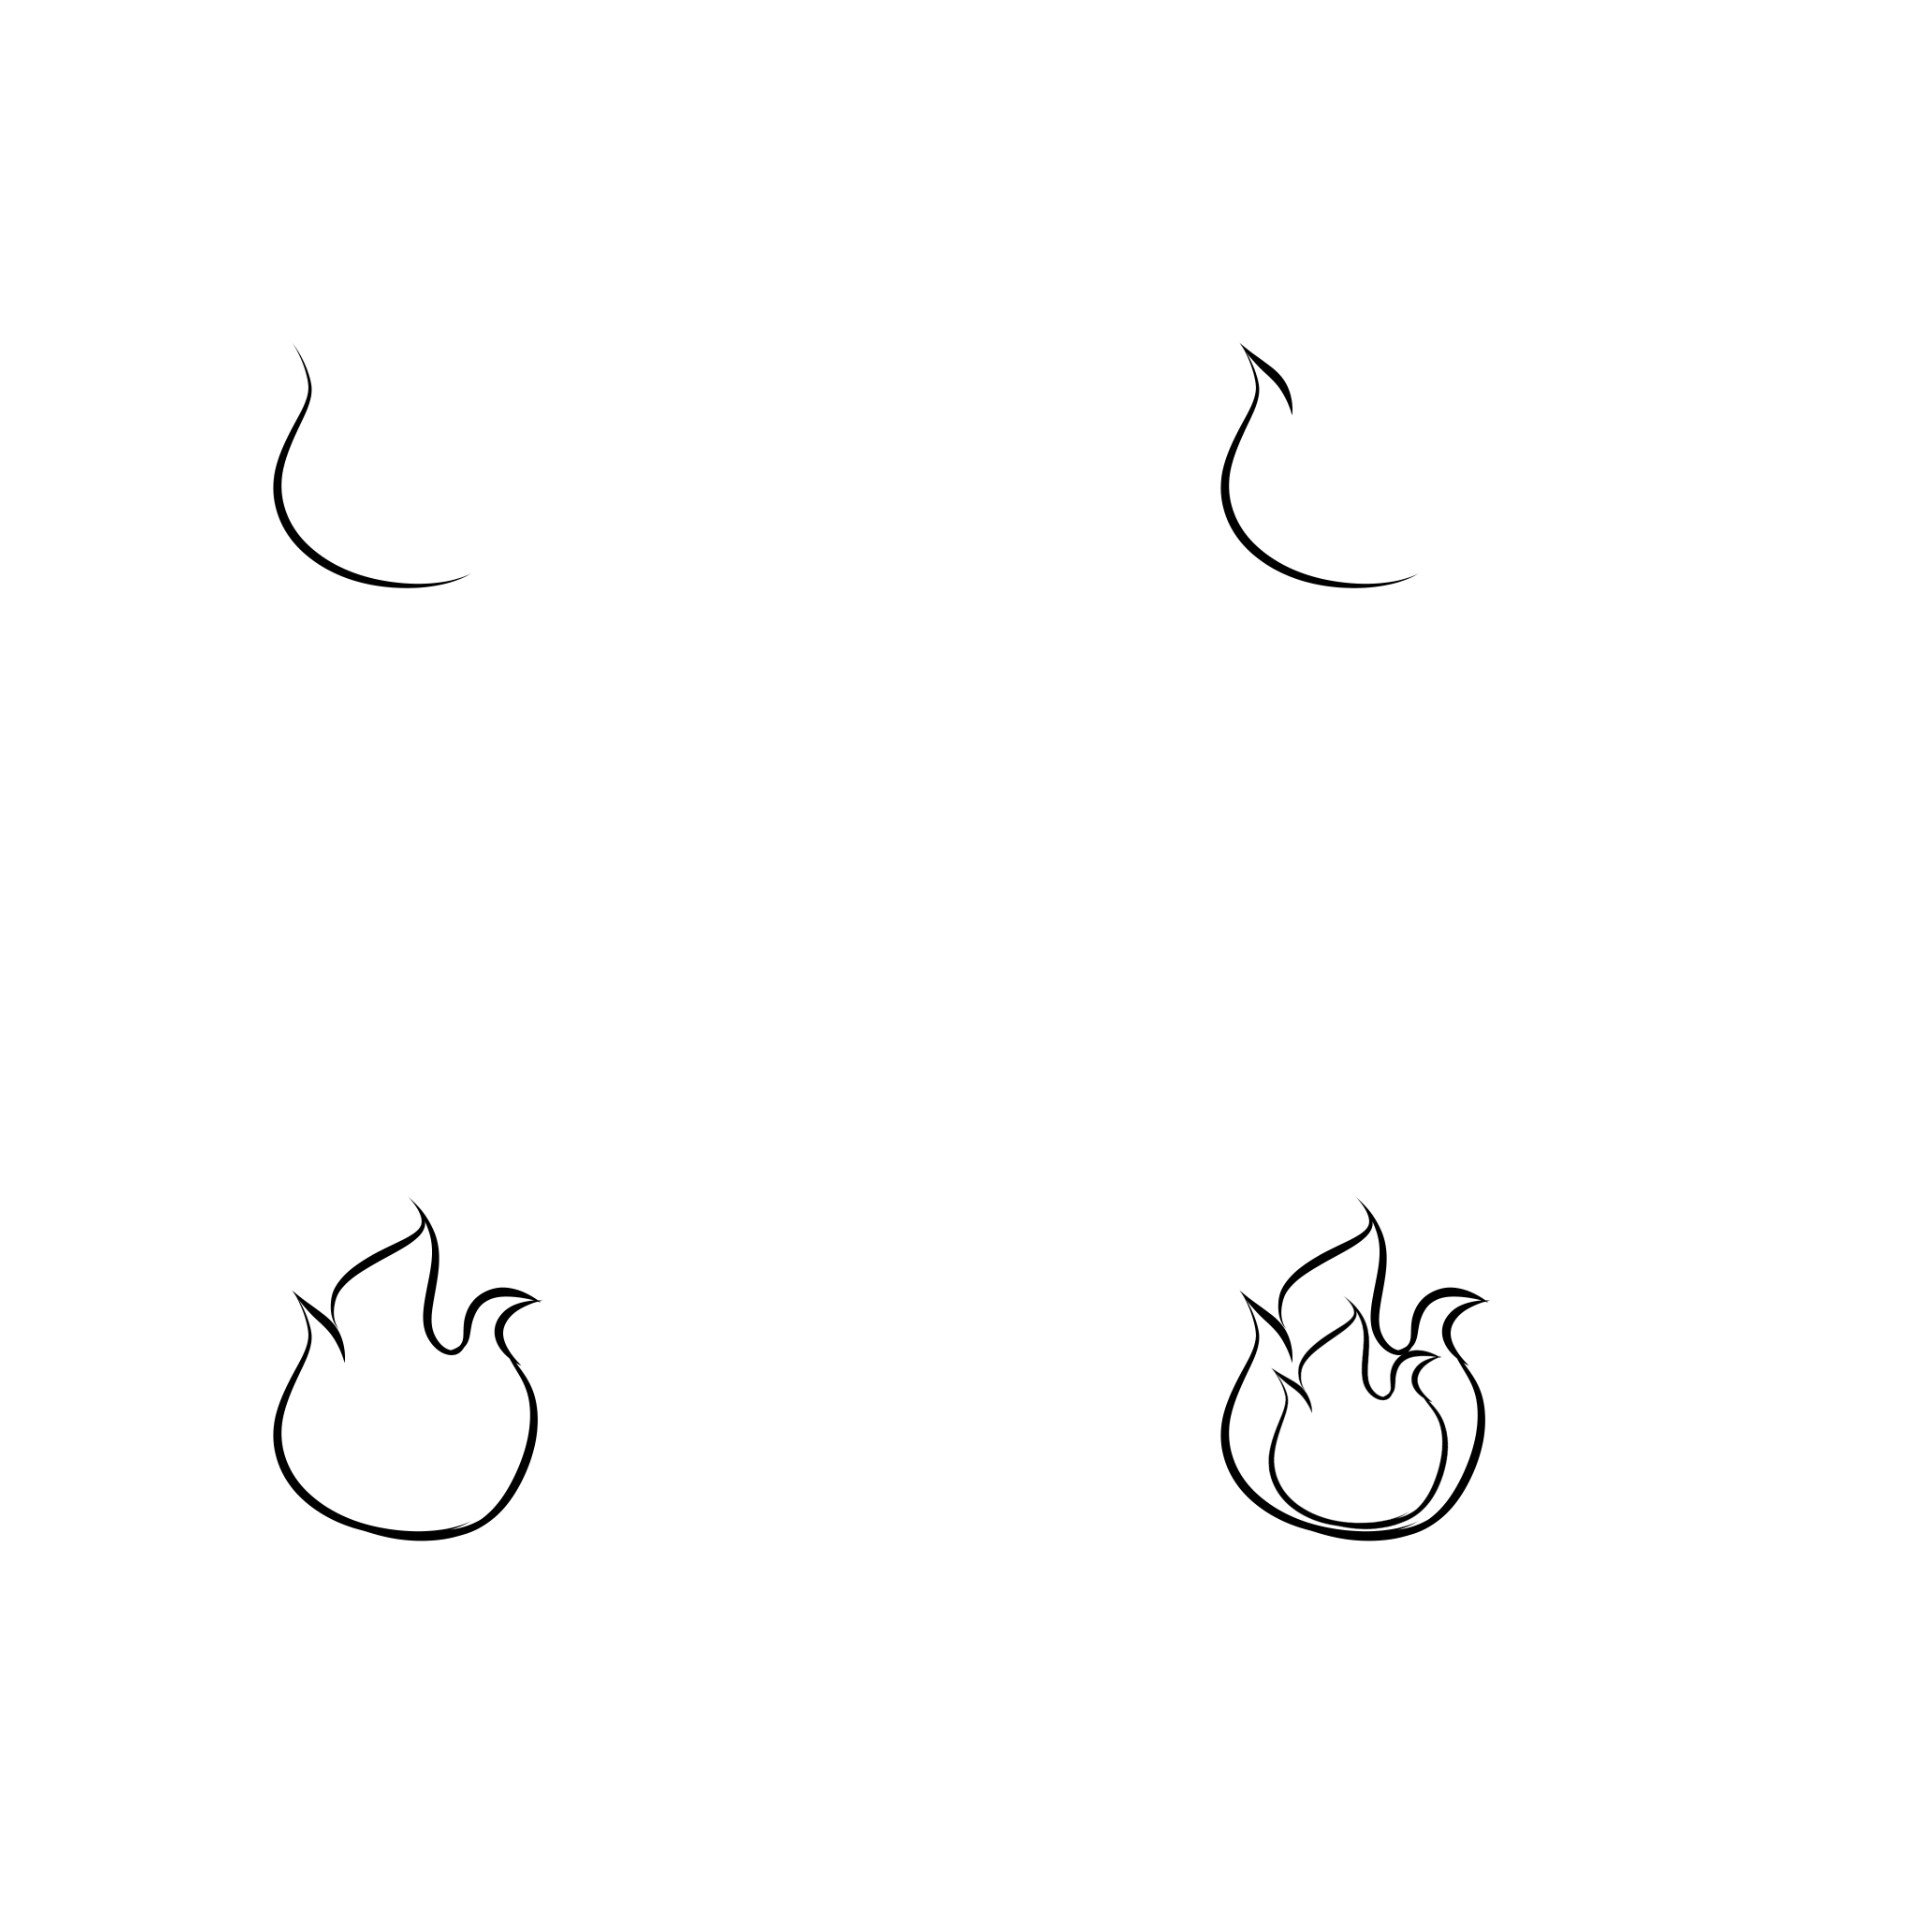
So firstly i made a wiggly "S" figure with the wavy line tool just like that we will make more wavy "S" that join together at the point until we have a flame like figure
Next i duplicated the flame base and made it smaller so this is our base
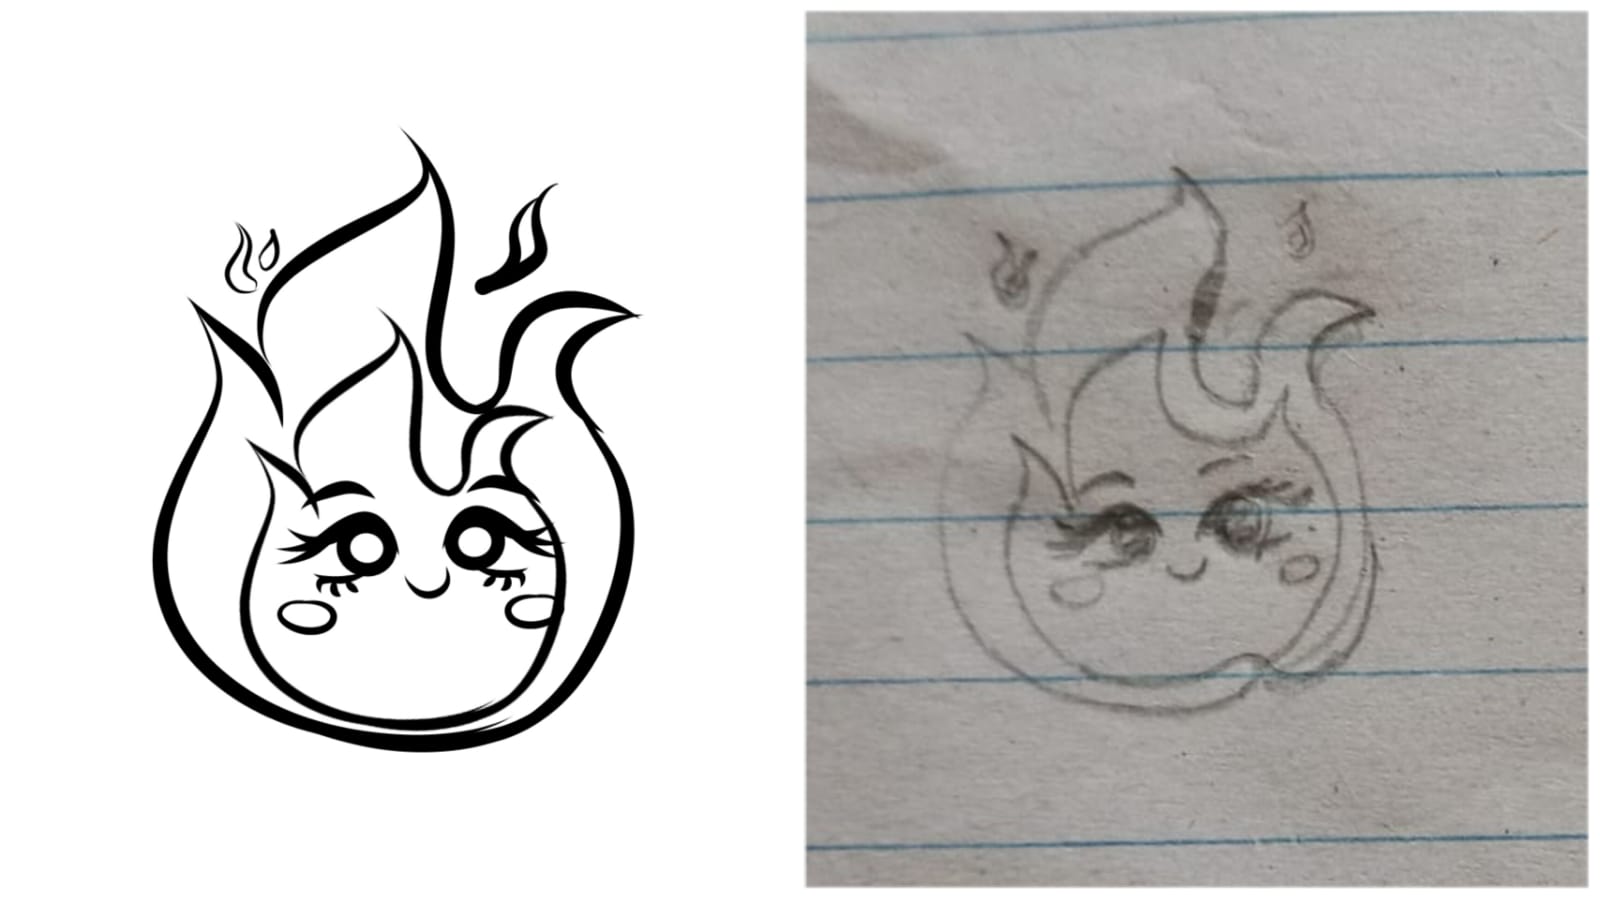
Here is a sketch i did and followed i made the expressions exactly like that again digitally . You can do it by tracing the sketch or u can just make similar shapes and draw . For the eye i made one cute eye duplicated it and flipped it in opposite direction so it looks symitrical. And made some amber like flames on top of it
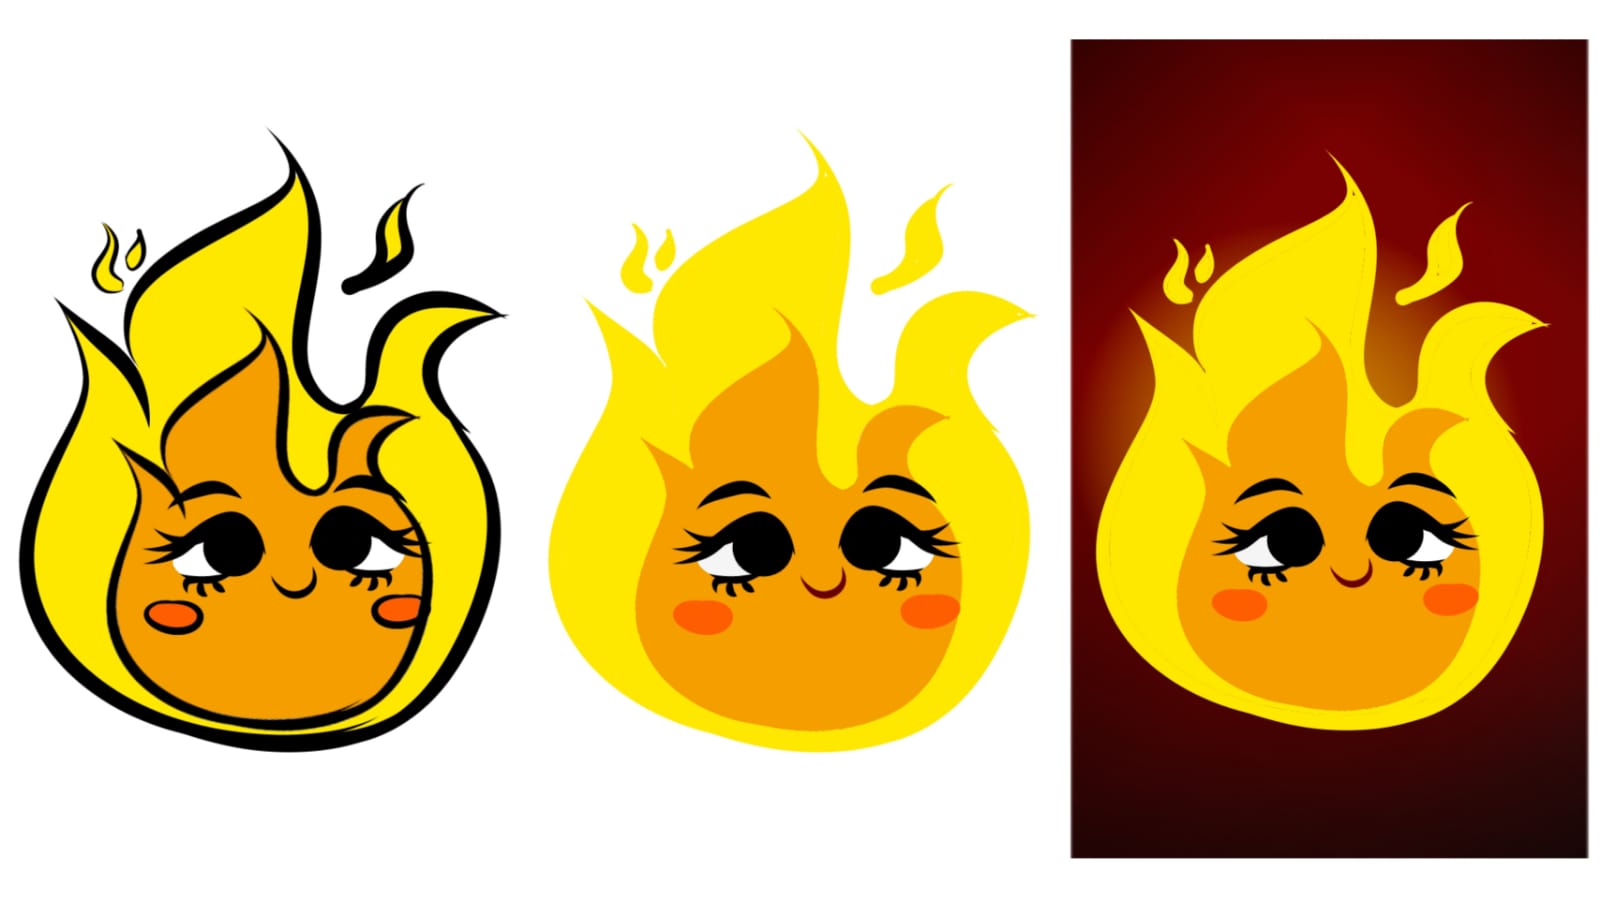
I filled it with flat colors i used Yellow orange colors however you can used blue and green too to make a willow whisp .
For the lineart this time i used the exact same shade and it looks so cute this way . Experimenting with different shades and trying new things is essential that is what makes you discover your art style .
Next i added a gradient thats darker maroon on corners and has a soft pale yellow at the middle
Now for the glow i turned the background off and saved the character as transparent png and imported it after the background layer and i guassian blurred it and set the layer on add . And you can see a the flame is glowy you can use smudge brush to make it a bit wiggly
I also duplicated the layer and made its shape a bit wiggly so now it looks like two wiggly glowy layers this gives it that moving flame look.
Now we added some highlights to our flame's eyes and here is the final look ❤️
Thank you for your precious time and support ❤️
Something i fear since Childhood
I have always loved Animals i hated hurting them . I always picked up spiders and ants too and took them out safely . I love keeping the Environment safe . But there is a certain creature that i see and i wanna throw a slipper at that is a Lizard or gecko you may call it whatever you like . For me its a four legged mini dinosaur that is just pure evil. The Fear i have is called Herpetophobia which is a Phobia of an intense fear from reptiles and lizards but in my case its just Lizards that made me Phobic.
The reason isn't just hate its a deep deep fear i had since childhood . I was a kid that would play with bugs never feared mice even but these mini dinosaurs gave me an heart attack .
It all started when i was a kid i was alone looking for my old toys . As a kid the toys i loved were squishy and cute so i was looking through them in my dimly lit room. Now this basket wad kept over the cupboard i carefully took it down and started playing. Around thats when i felt a certain itch on my leg like something crawled over . I took a closer look at my left leg by lifting the pant up and i see a black adult gecko fully clinged onto my leg with its Nails and claws . I was a bit shocked not scared i tried taking it off but it didn't budge it clenched even more on my skin and i started bleeding that's when i got really scared and i forcefully took her off and while it was in my hand it screamed .
Im so sure that no person has heard a gecko scream its like an old women screeching in pain and it was the most sinister scream ever i still fear it by this day .
I dropped the gecko it went away i started shivering and crying and i looked down and i see how its unattached fallen tail was wiggling in my feet that made me jump back and scream and i fainted .
My mom woke me up as i was unconscious for over an hour i told them all and they took me to doctor got my wounds treated as she feared i might get poisoned . However i did get an infection but what damaged me more was the fear . The constant fear that everytime i see this thing i wanna scream and turn into human ball on ground .
That's one of the incident i never talk about and i absolutely don't like Killing animals but this thing makes my skin crawl and the childhood trauma it gave me still haunts me
Pic courtesy : Pixabay
Thank you for your precious time and support ❤️
Splinterlands art contest week# 249 (Silent Sha-vi)
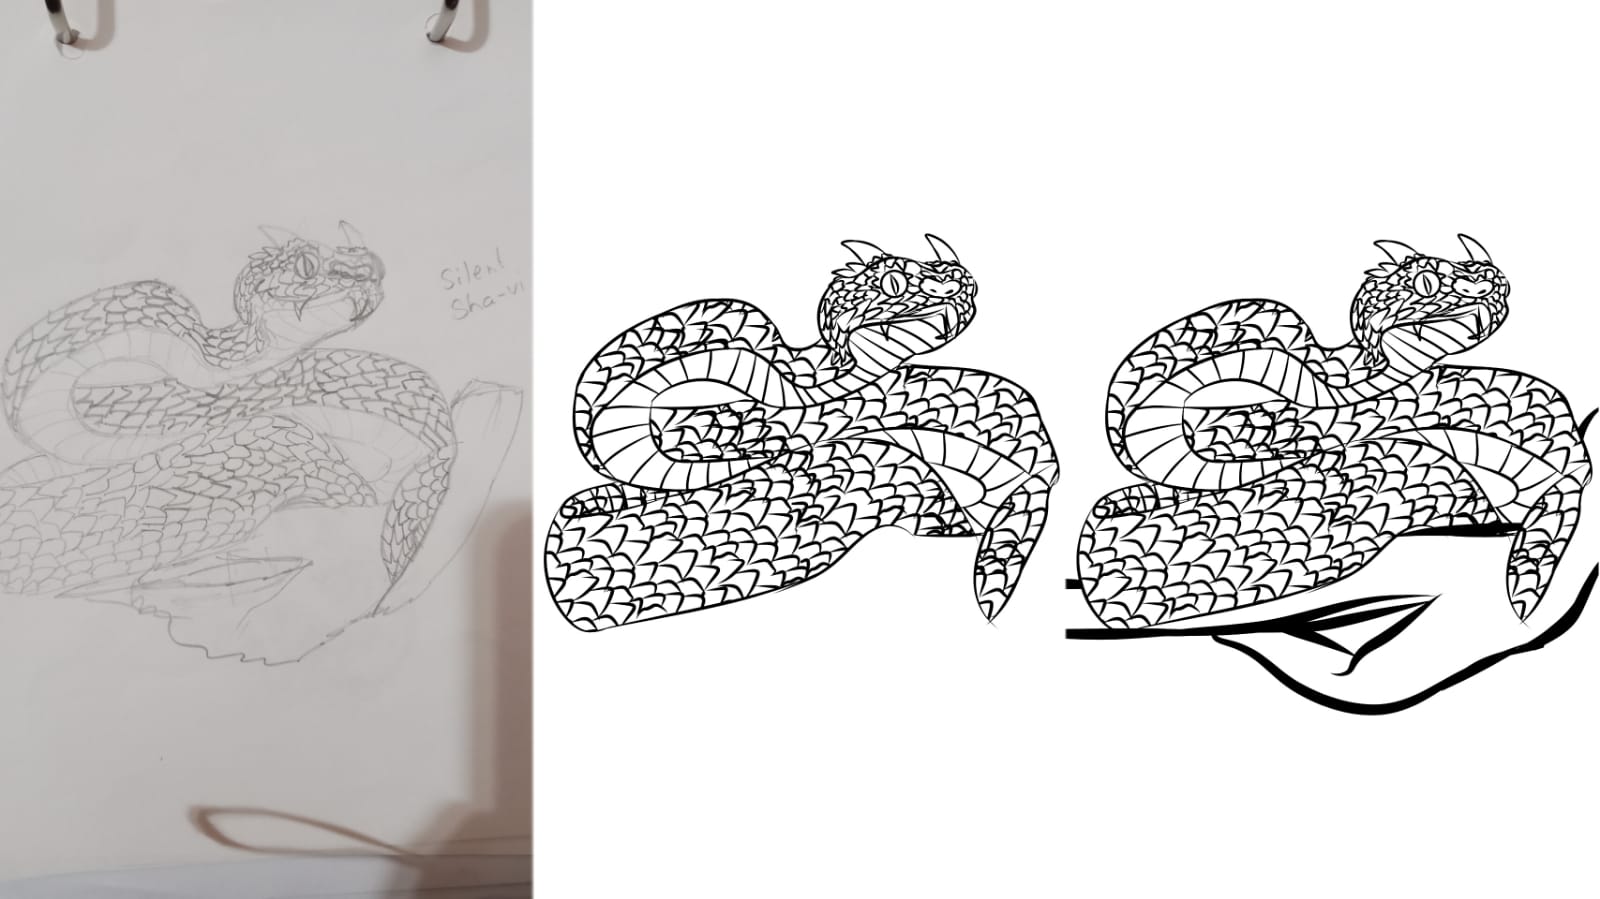
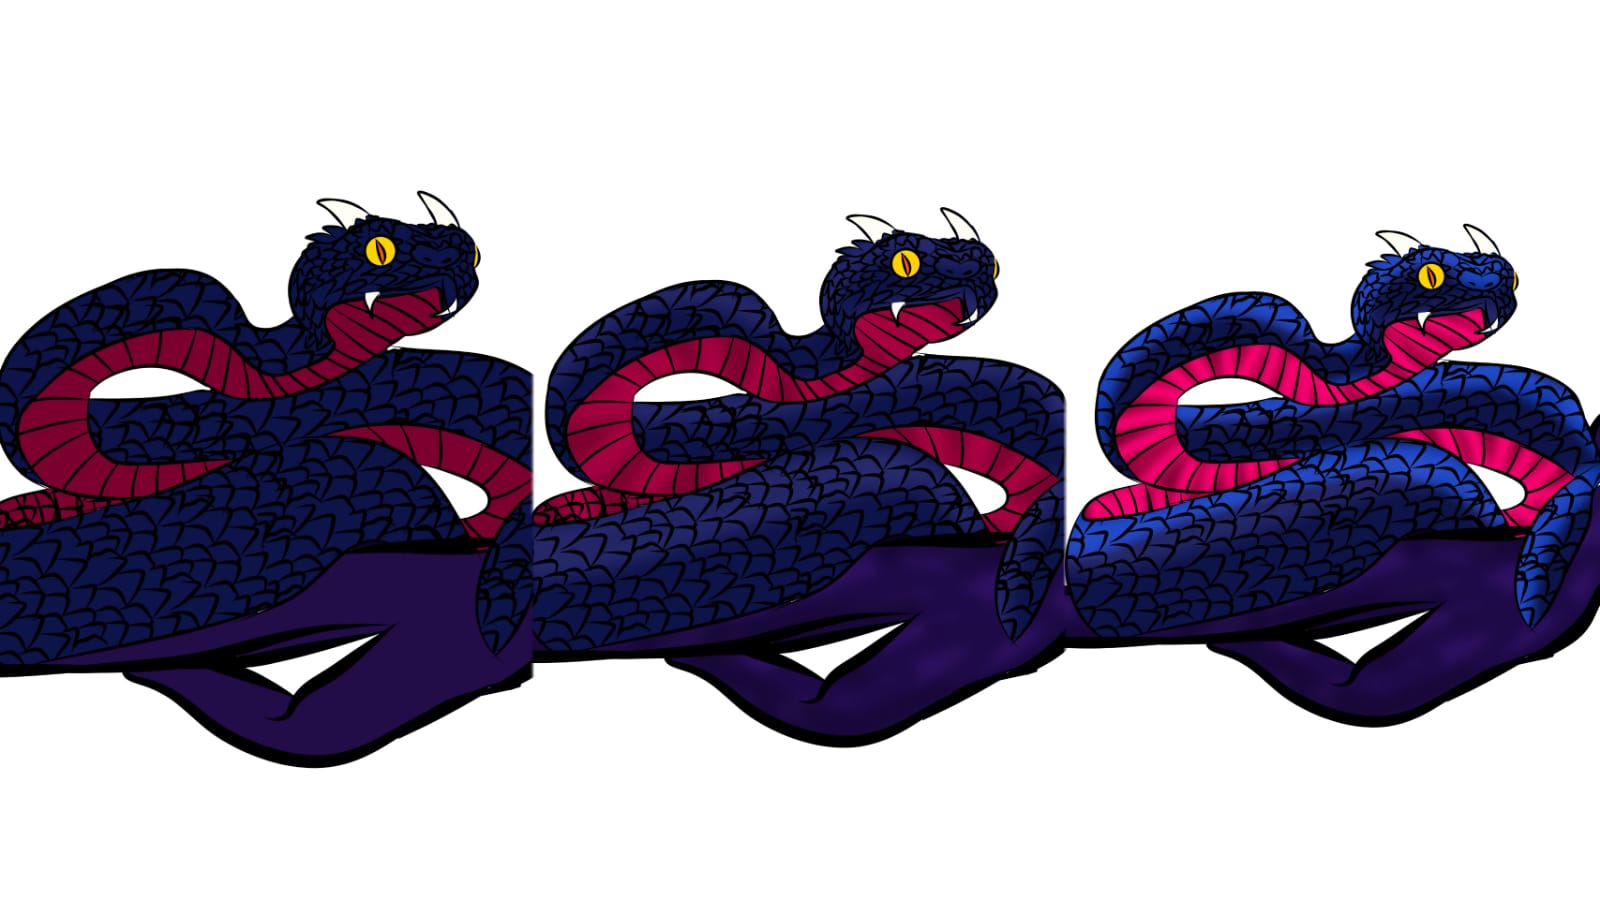
For my this week's Splinterlands art contest entry i drew a character called Silent Sha-vi . So the character looks like an Eyelash viper thats all dark. So i actually love drawing Snakes alot and i sketched it in my own style .
Then i opened a snake pose and saw it mixed it with the actual character and that was my sketch . Next i took a picture of my sketch and imported it in an art app called Medibang paint pro.
I turned my sketch into a refined lineart by tracing it with a pen sharp brush . Each thing was traced on a different layer like snake outline and scales on another so we can color the line art later easily. So this is how the final sketch looked
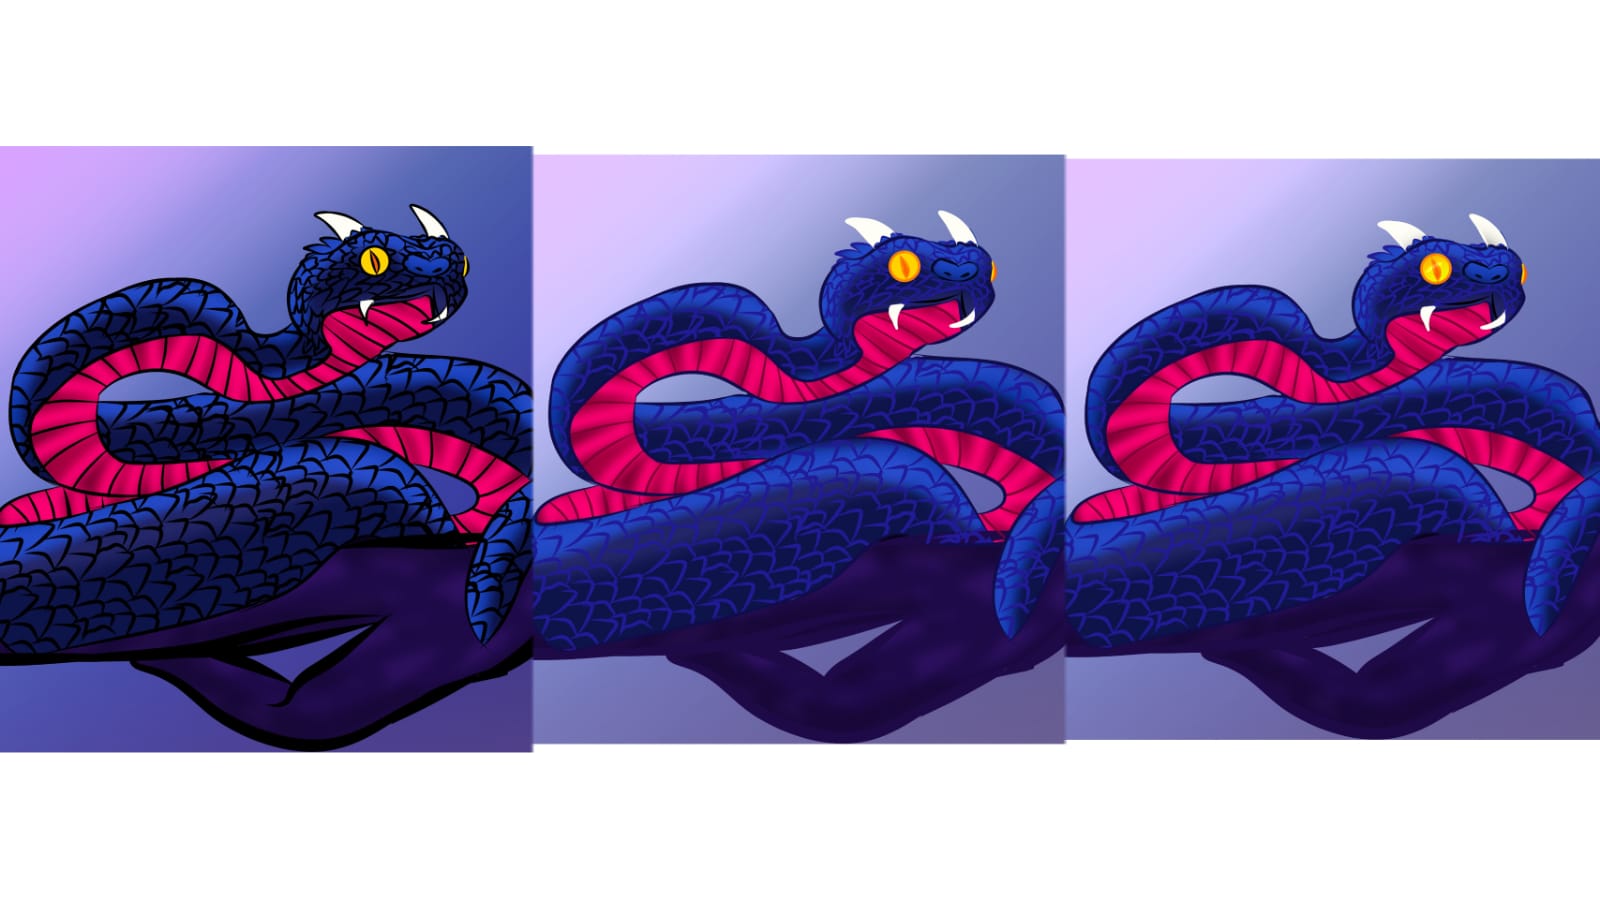
Later i filled flat colors in it and clipped a layer and shaded the snake with a gradient i used two dark shaded of the same color and with an air brush i kept shading the bottom of the snake . I made the eyes yellow with the pupil orange just like the actual reference . After this i clipped another layer on top of this and with a water color wet brush i chose the most saturated dark navy blue and brushed the top of the snake so it looks like an highlight and guassian blurred it . This gave it an effect as if the snake was glowing from the light above.
Next i colored the lineart so i made the snake scales a lighter shade from the snake outline this made the snake pop and gave it a more softer look.
Next i shaded the lineart a little too and added glow to the snakes eyes
And here is the final look
Thank you for your precious time and support ❤️
A week of Get-togethers
This week was all about relatives and get-togethers . While some were toxic , Some were also who we had a great time with .
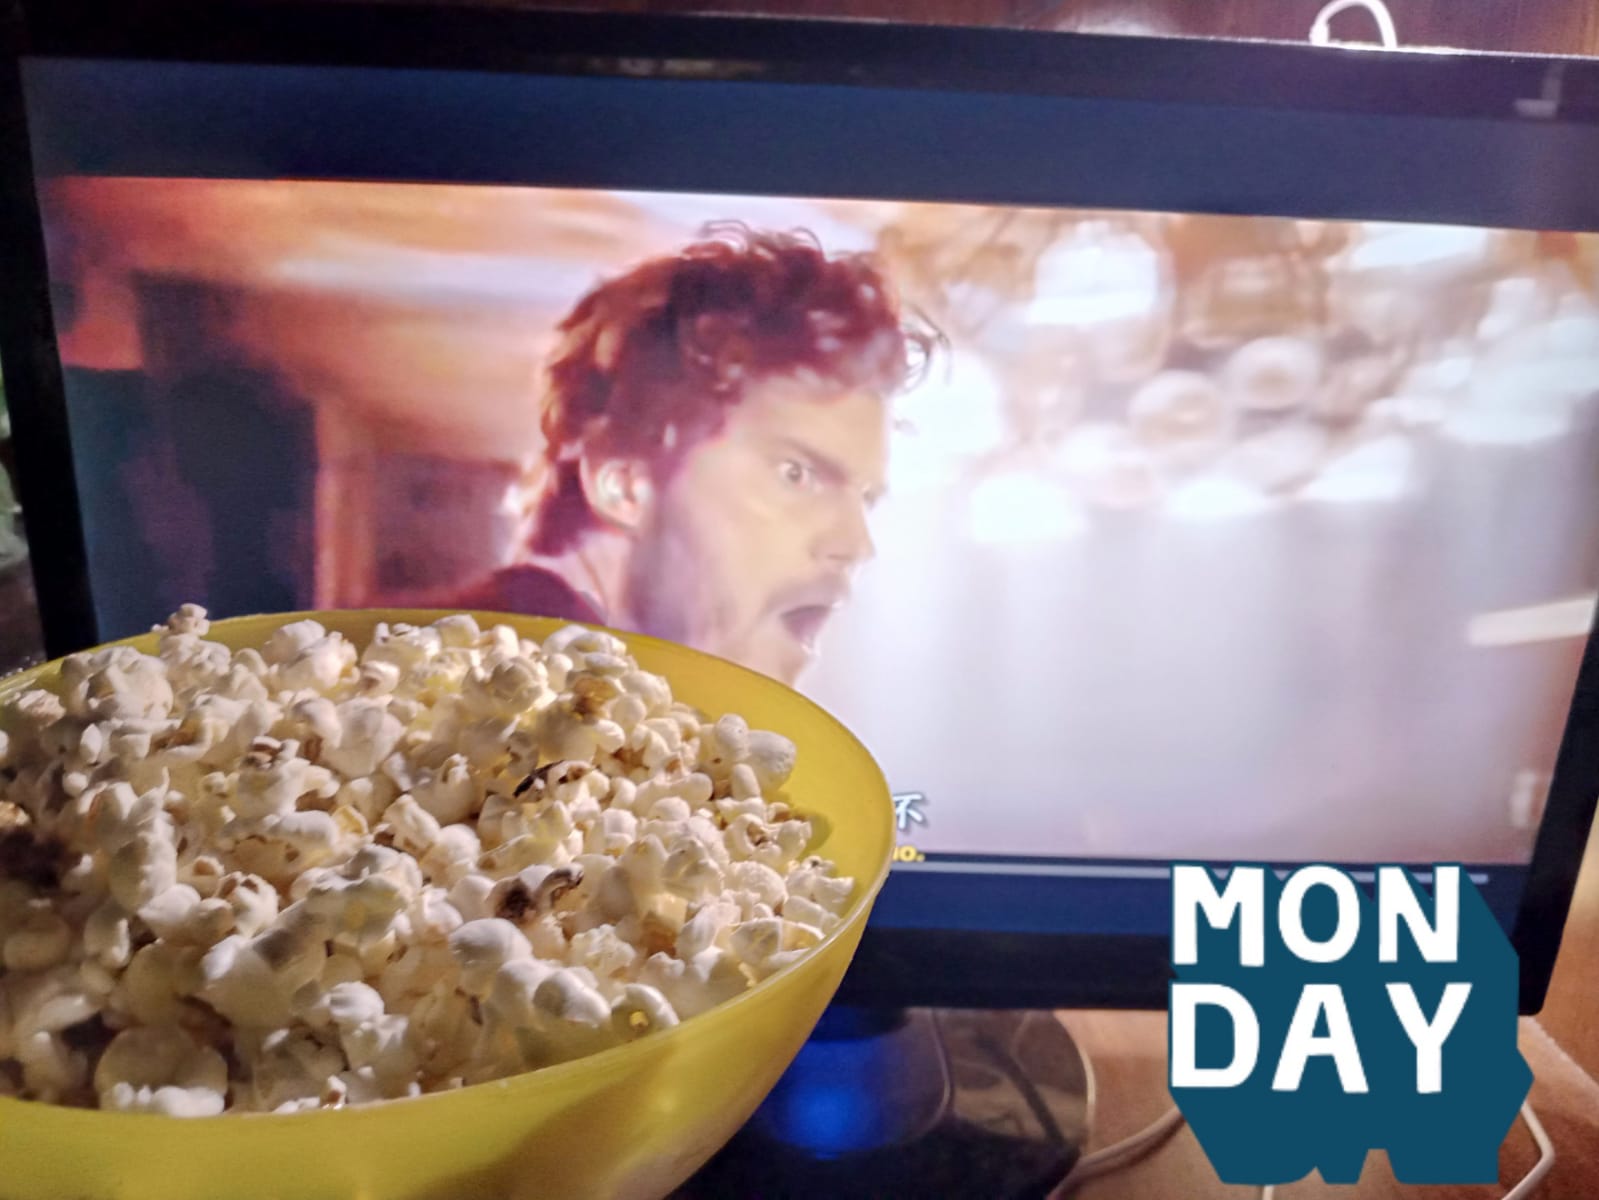
On Monday i made Popcorn it was still eid week so me and my siblings watched "The guardians of the Galaxy 3" it was a fun movie.
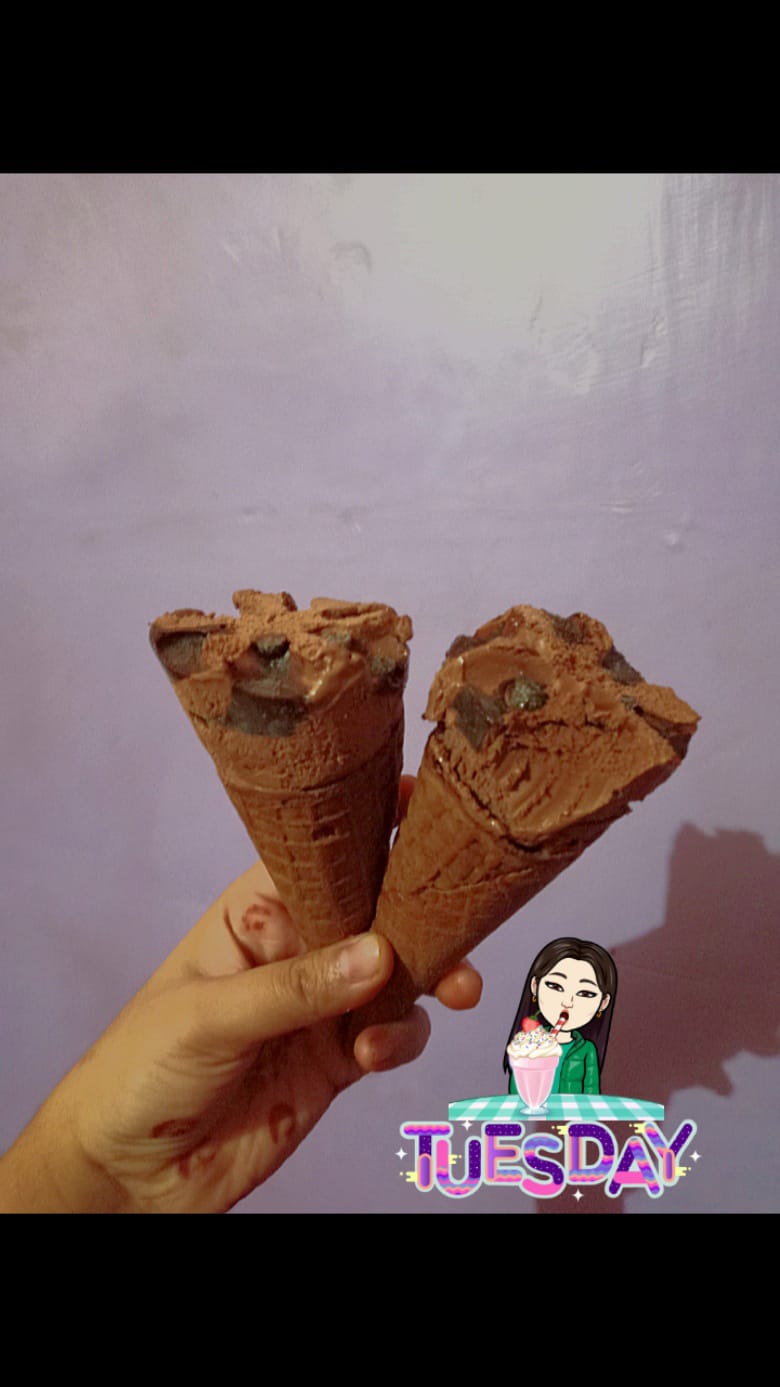
On Tuesday my nephew's came and we had Icecreams with them . Icecreams always remind me of my sweet childhood and double chocolate is my favorite flavor
On Wednesday we had a feast and my mom and my brother cooked these meat patties with bread its has to be eaten like a wrap . Though I don't eat meat now but i don't force or taunt people who are not vegan so i was happy when they ate and liked this . Yes i didn't eat them how ever Humus tasted great with bread too
Thursday me and my female cousins had a sleepover apparently there house had a technician doing some electrical work so al night we watched movies and did makeovers played truth or dare and did henna on each others hands
Finally on Friday the Eid really end but the relative get togethers didn't .So my mom and my siblings went to my grandma's house while i was babysitting my differently abled sister and my youngest sister and we made this mini clay cake together . It was so cute and she had fun
On Saturday i wad finally back on track so i took a furry Commission for someone and i sketched it but apparently the client was in a hurry and I don't have much experience at furries and mechanical characters so i quitted the proposal but now i know exactly what i will practice next 😂
On sunday i was again practicing some eyes on my sketchbook and i think the turned pretty cute . Sketching always reliefs me
Tbh all these stuff make me happy the week was good . Cause we only focus on good . Noticing bad experiences and toxic relative's opinions about you and thinking on it all day will not help you at all but it will ruin your inner peace so never let anyone talk you down .If you're happy and smiling it was worth the while
Thank you for your precious time and support ❤️
Drawing a Cute Rabbit (simple digital art)
Every week i do a simple art tutorial for beginner artist this week I'm drawing A cute bunny .
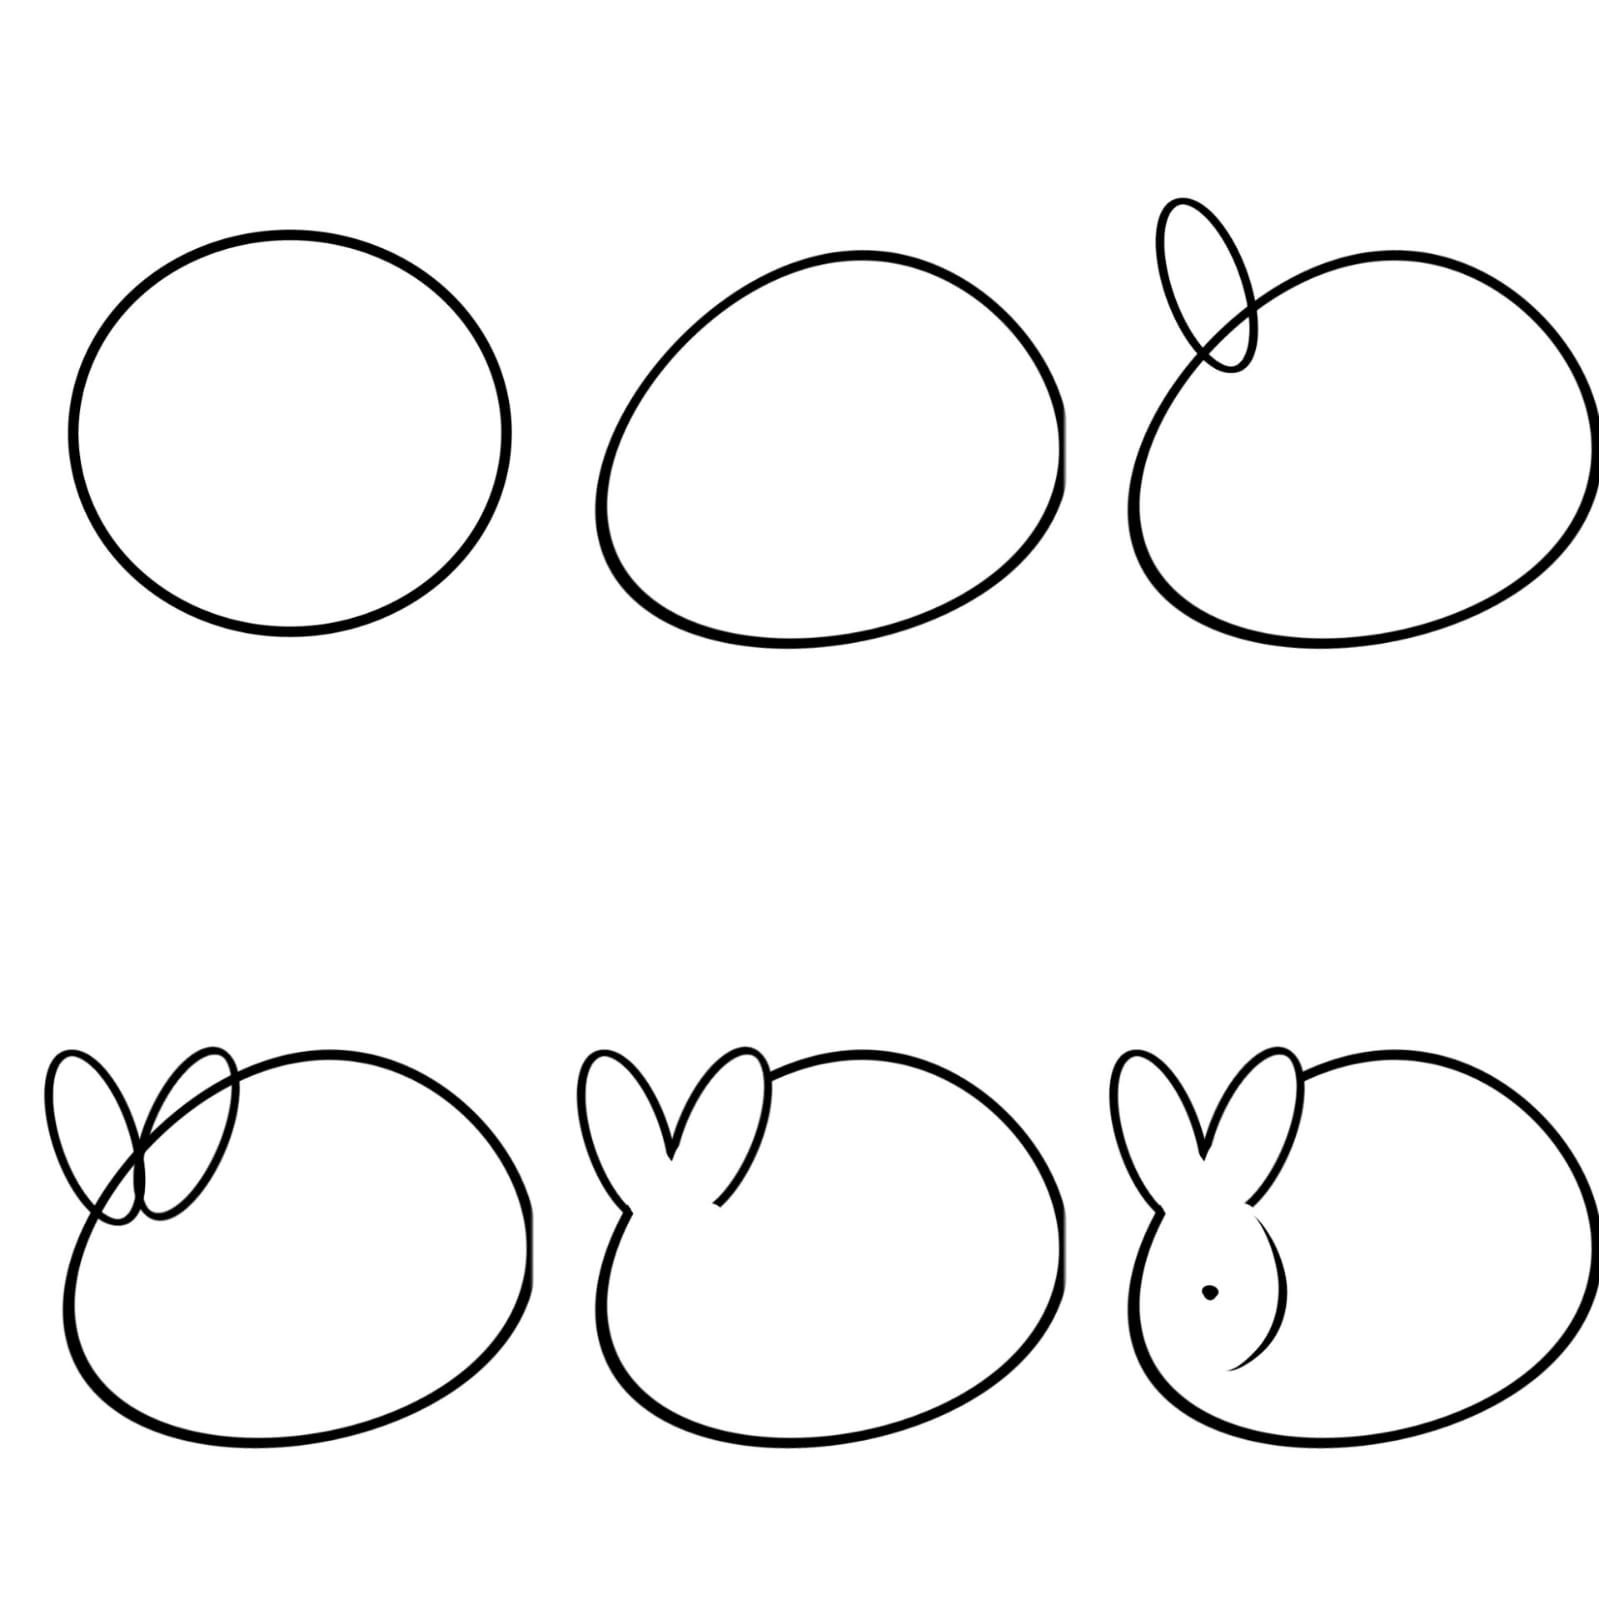
So first i drew a circle shaped it with free transform tool made it like an egg then added two ovals and erased the insides. This will be the ears of our rabbit.
Then i made a little line inside and added a dot as nose so this is our bunny base
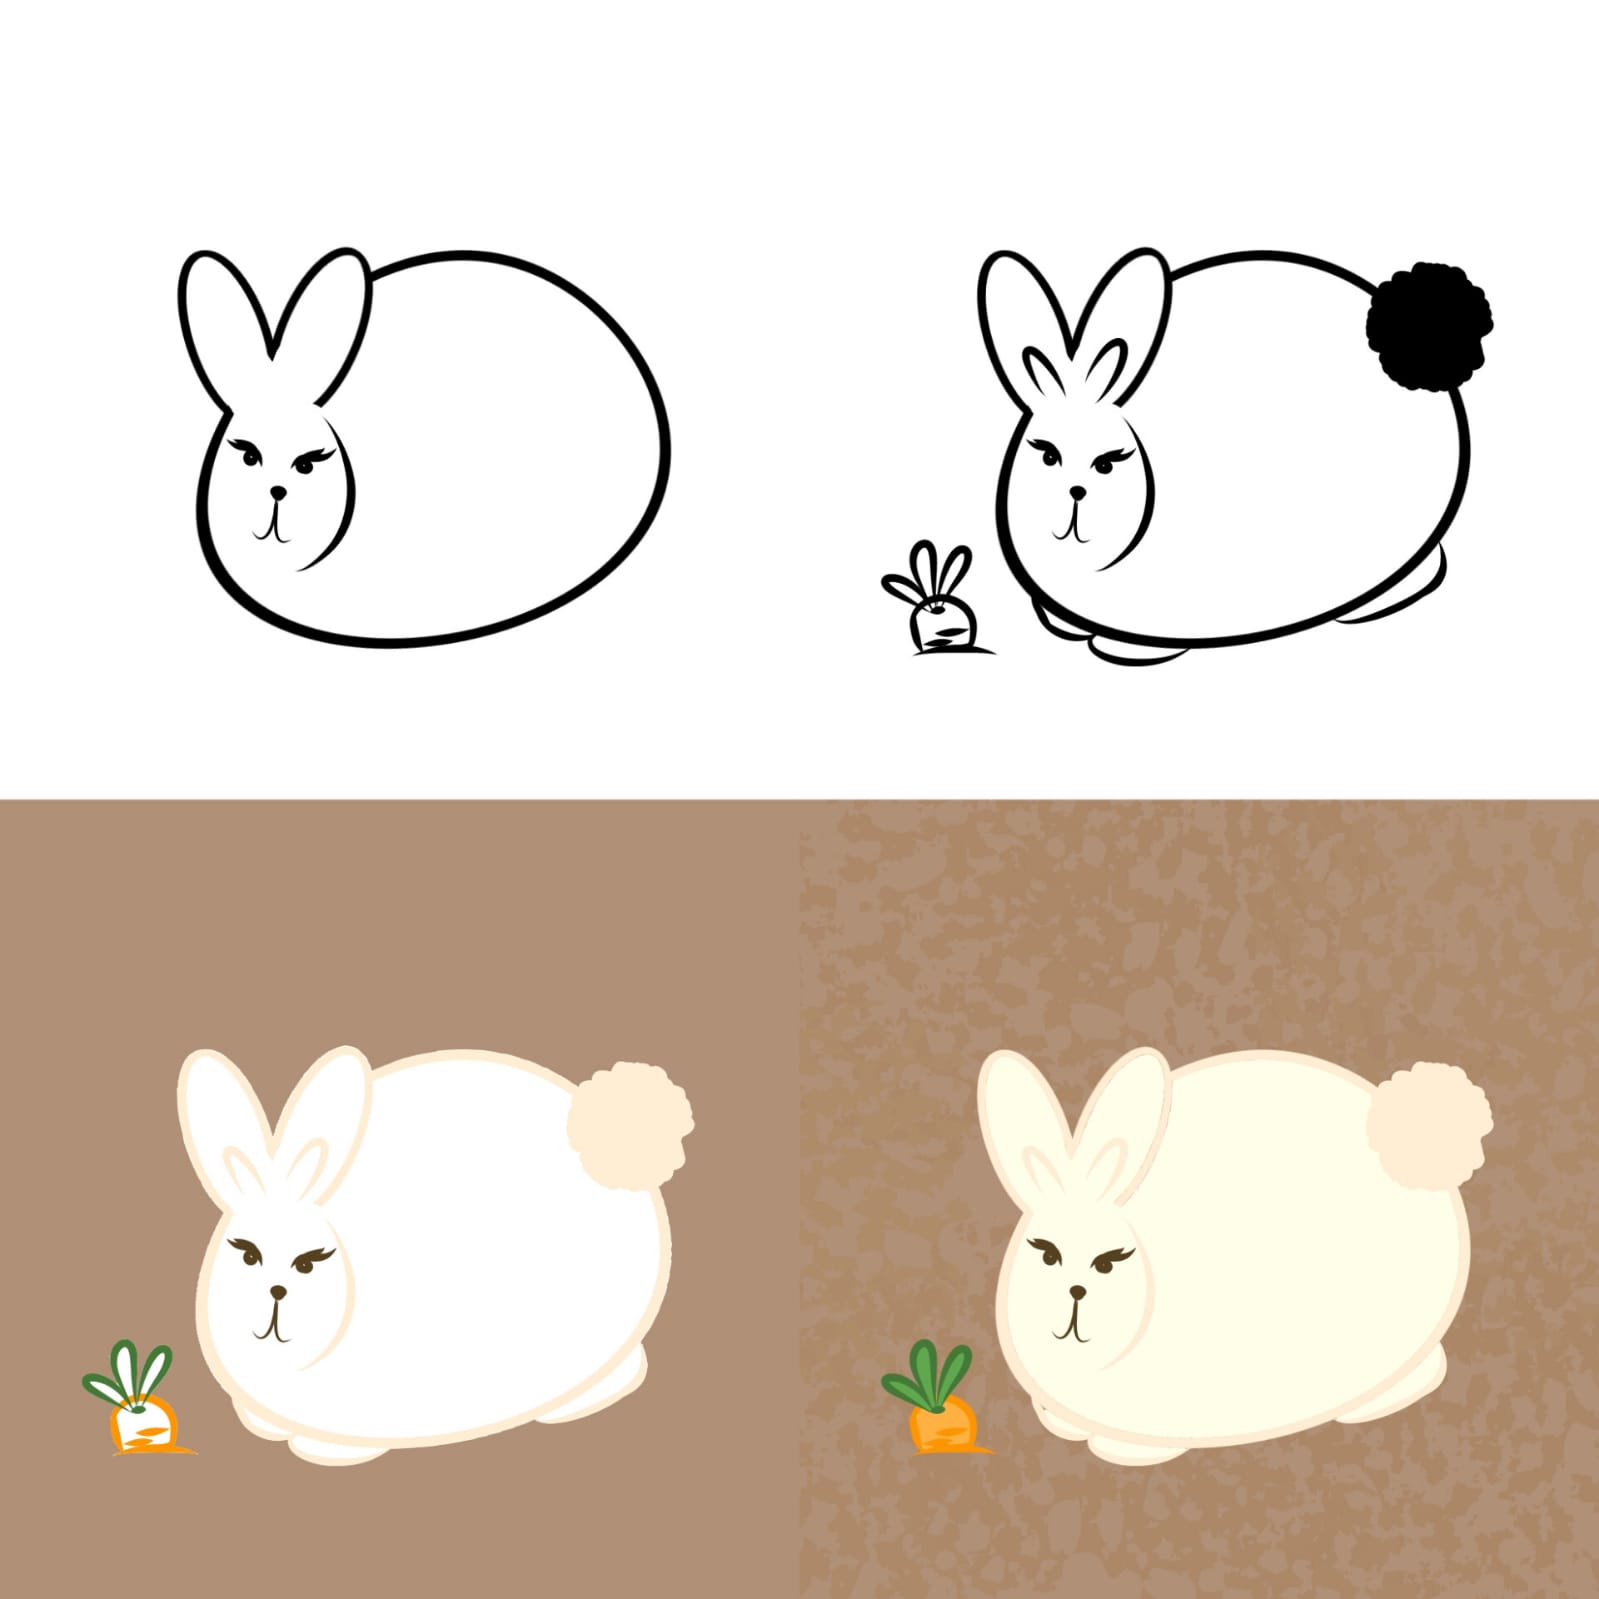
Next added eyes and the bunny's mouth and his tail with his paws .
The use of simple shapes is all that makes any figure . Even if you wanna sketch a persons face you gotta simplify all the features as shapes first.
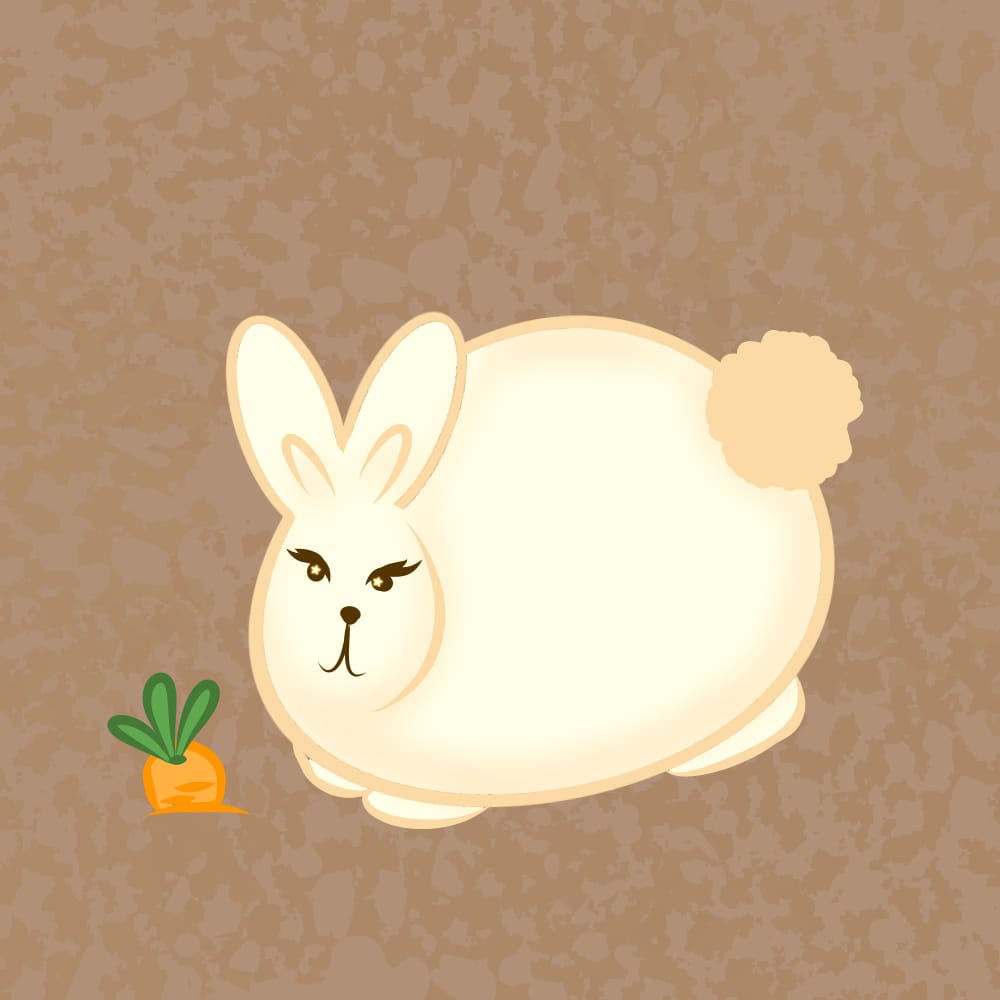
I also added a carrot in the ground and now for coloring i used a brown background because the bunny is on the dirt, i colored the lineart and made the bunny Pale yellow colored the carrot and added texture to the background and here is the final result
You can use any medium to draw this my tutorial is based on digital art but you can just use a pencil to draw this too . No expensive supplies are really needed its just letting your imagination and creativity open . Even i don't consider myself a great artist i never was but practice makes you efficient and perfect . But mostly enjoying the process is the key .
Thank you for your time and support ❤️
30 days Drawing challenge (Mini Sketchbook Tour)
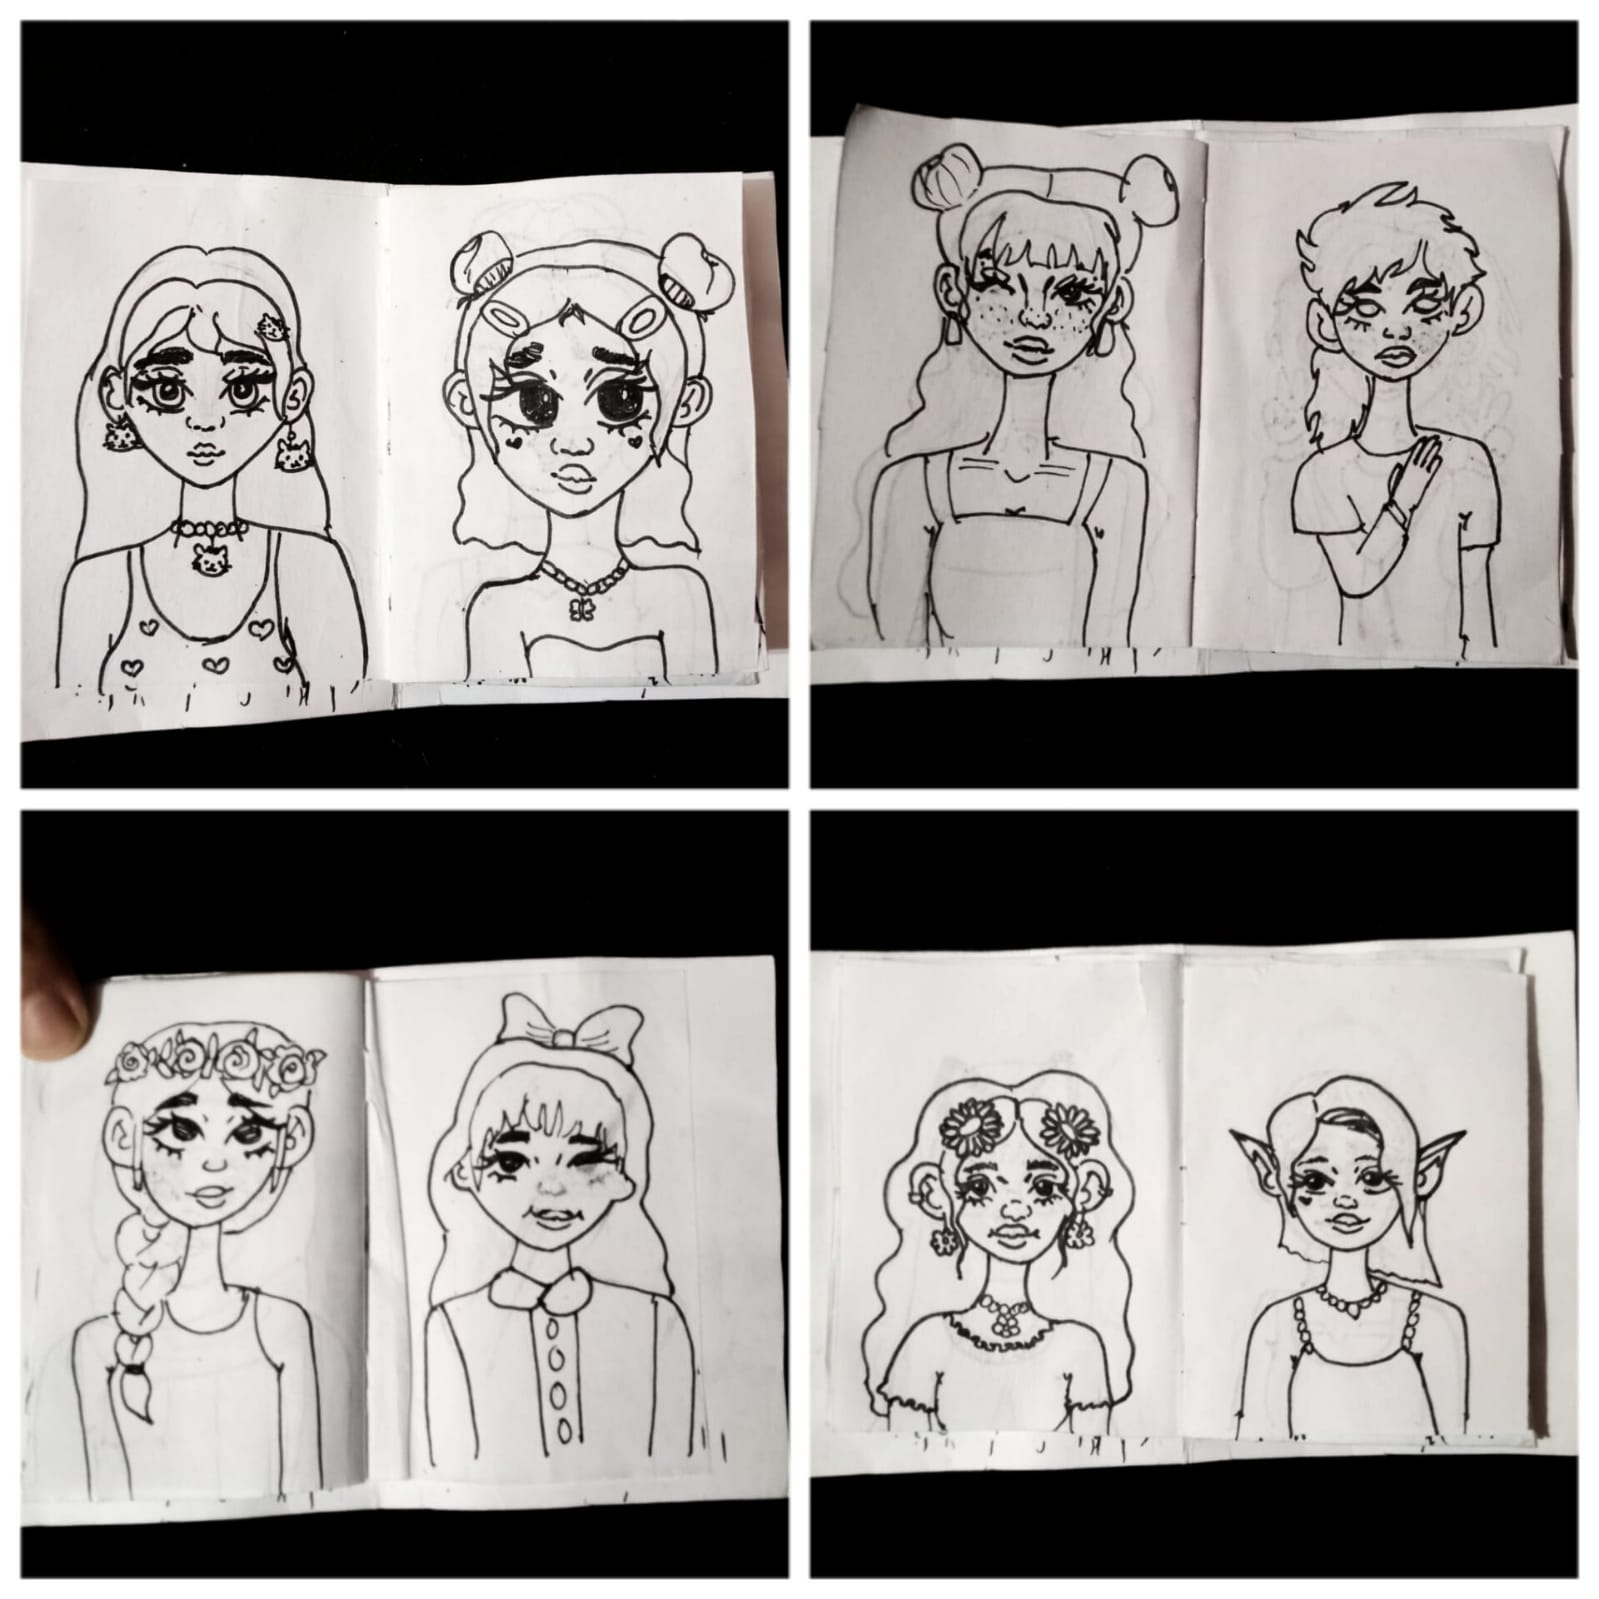
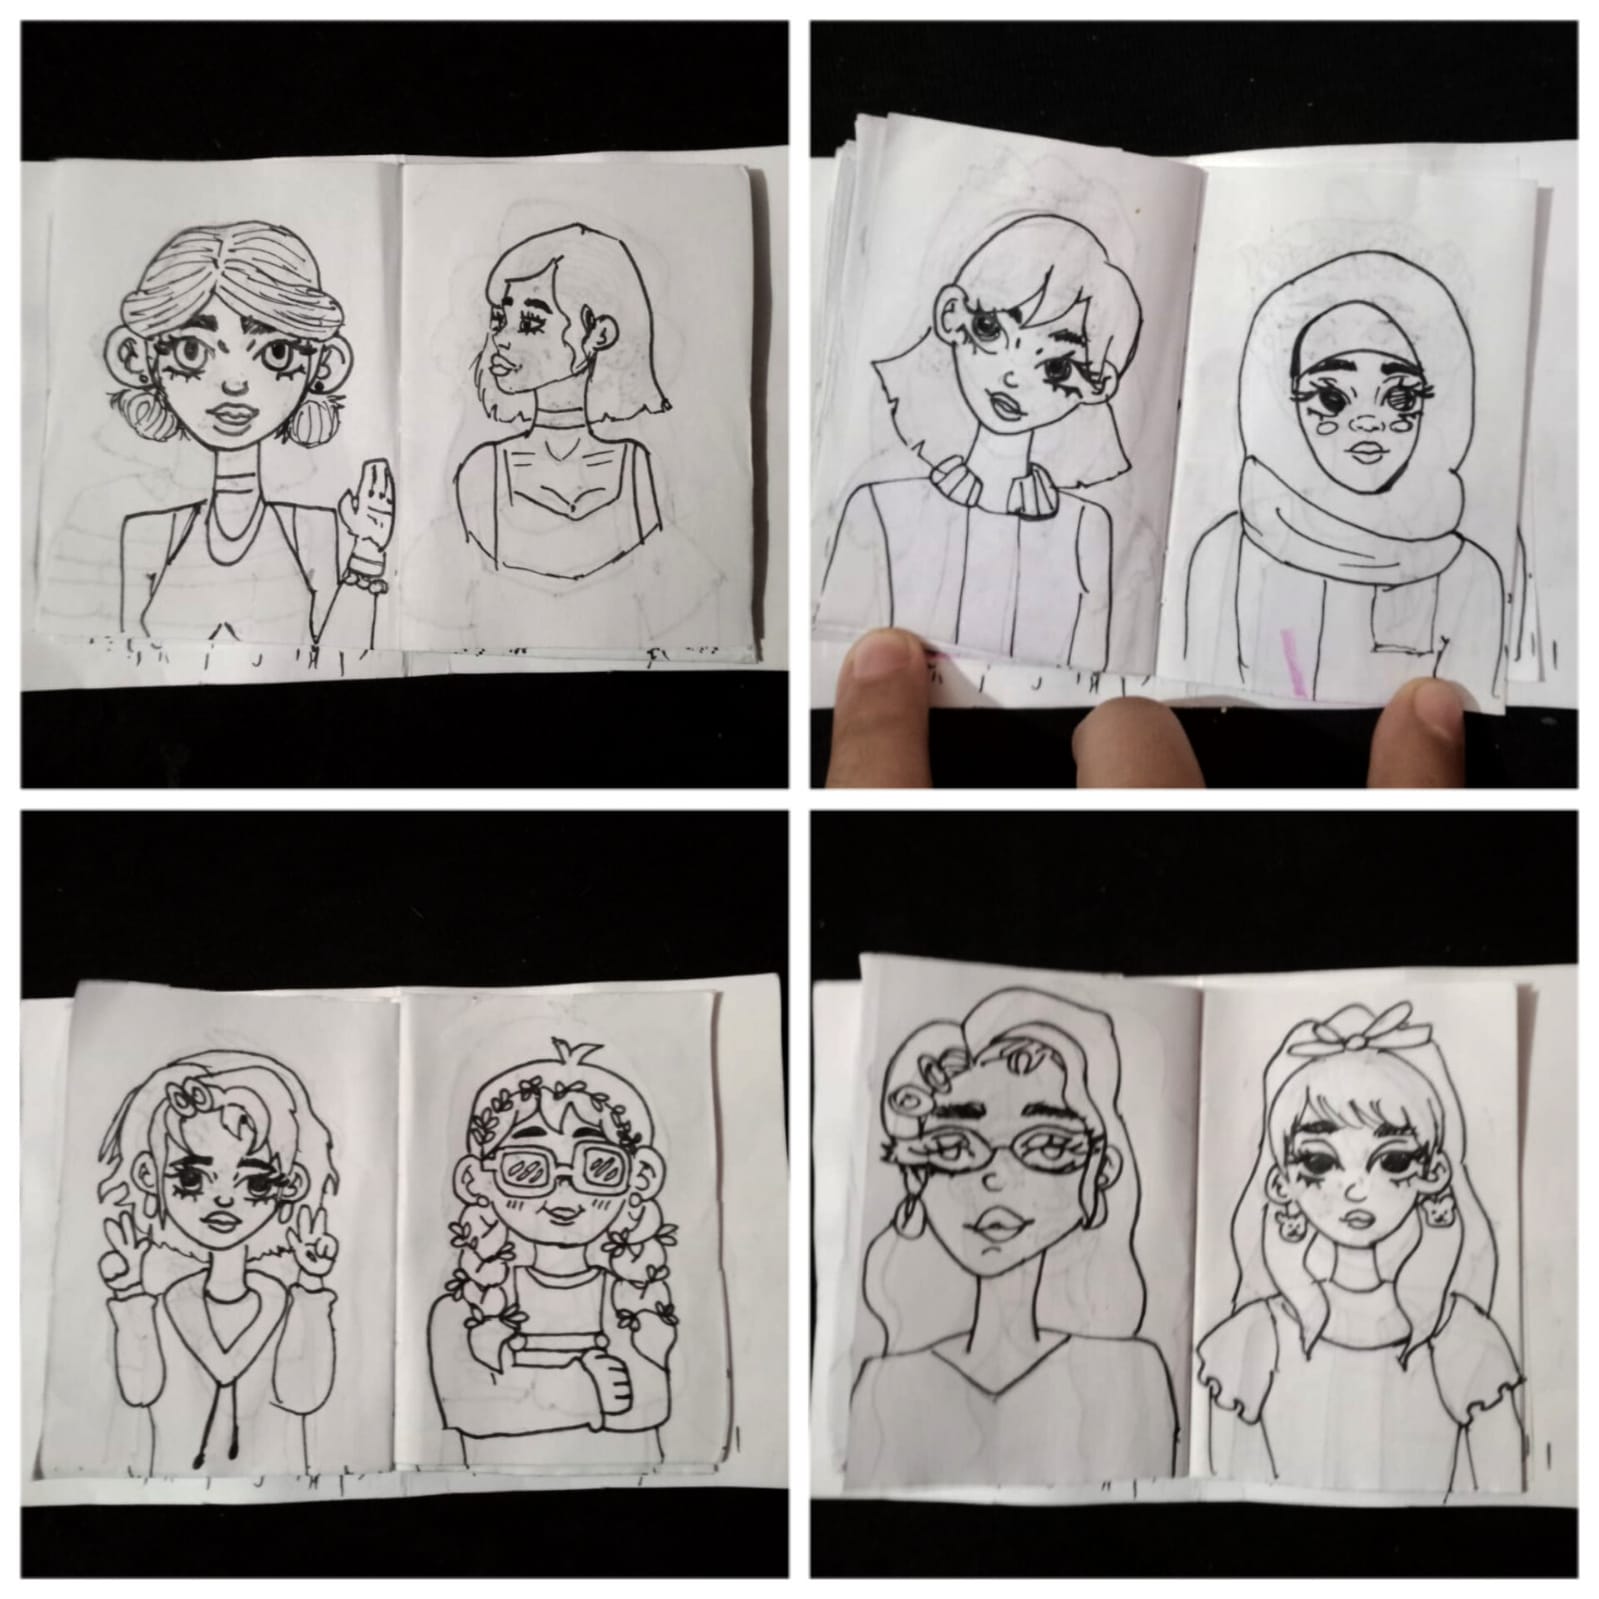
Remember the mini Sketchbook i made last month? Well here is how i utilized it .
So i wanted to practice drawing different female characters and faces . For that i took a 30 day drawing challenge . My mini sketchbook had 30 pages that were mini and the challenge was to draw different female characters .
Each sketch was drawn in just 10 minutes . These were quick doodles.
I used different dresses hairstyles accessories to make each different from one another .
I also tried making the face with different proportions. Shapes and sizes .
Tbh i loved the challenge this practice had made me able to make quick sketches and also now i know what proportions look cute what looks cute and what doesn't it was a great challenge all together and in last i have a sketchbook thats all completed which is an achievement too .
I will color it next soon.
Thank you for your precious time and support
Diy Duck Clay ring
So clay rings are my mew obsession and today i will be writing about how i made this cute little duck ring. Its super cute and an eady DIY project so lets get in to it.
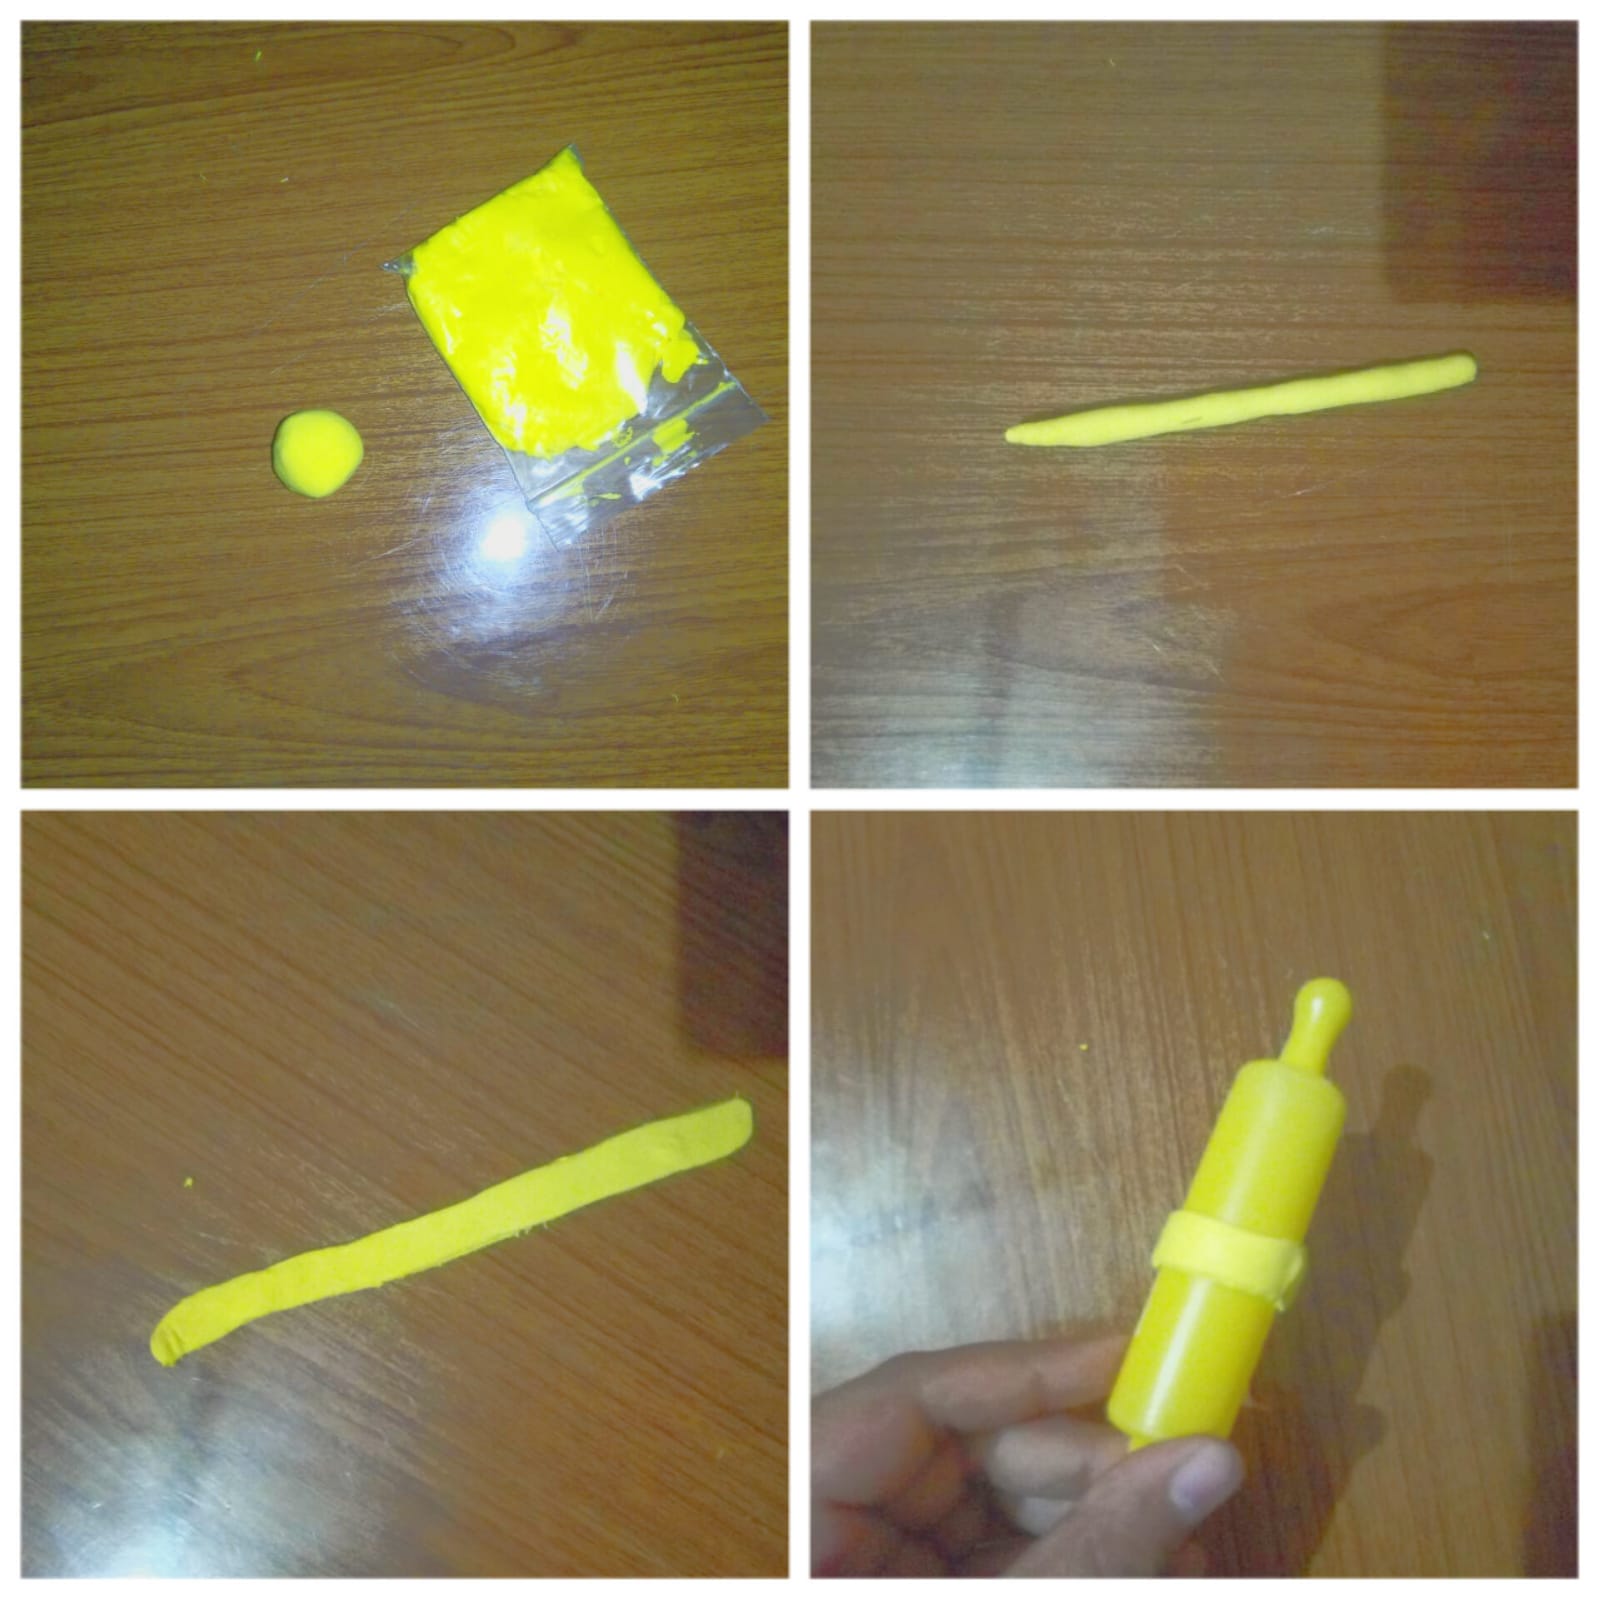
First i took some super clay . Its an air dry clay very light like foam and dries quickly.
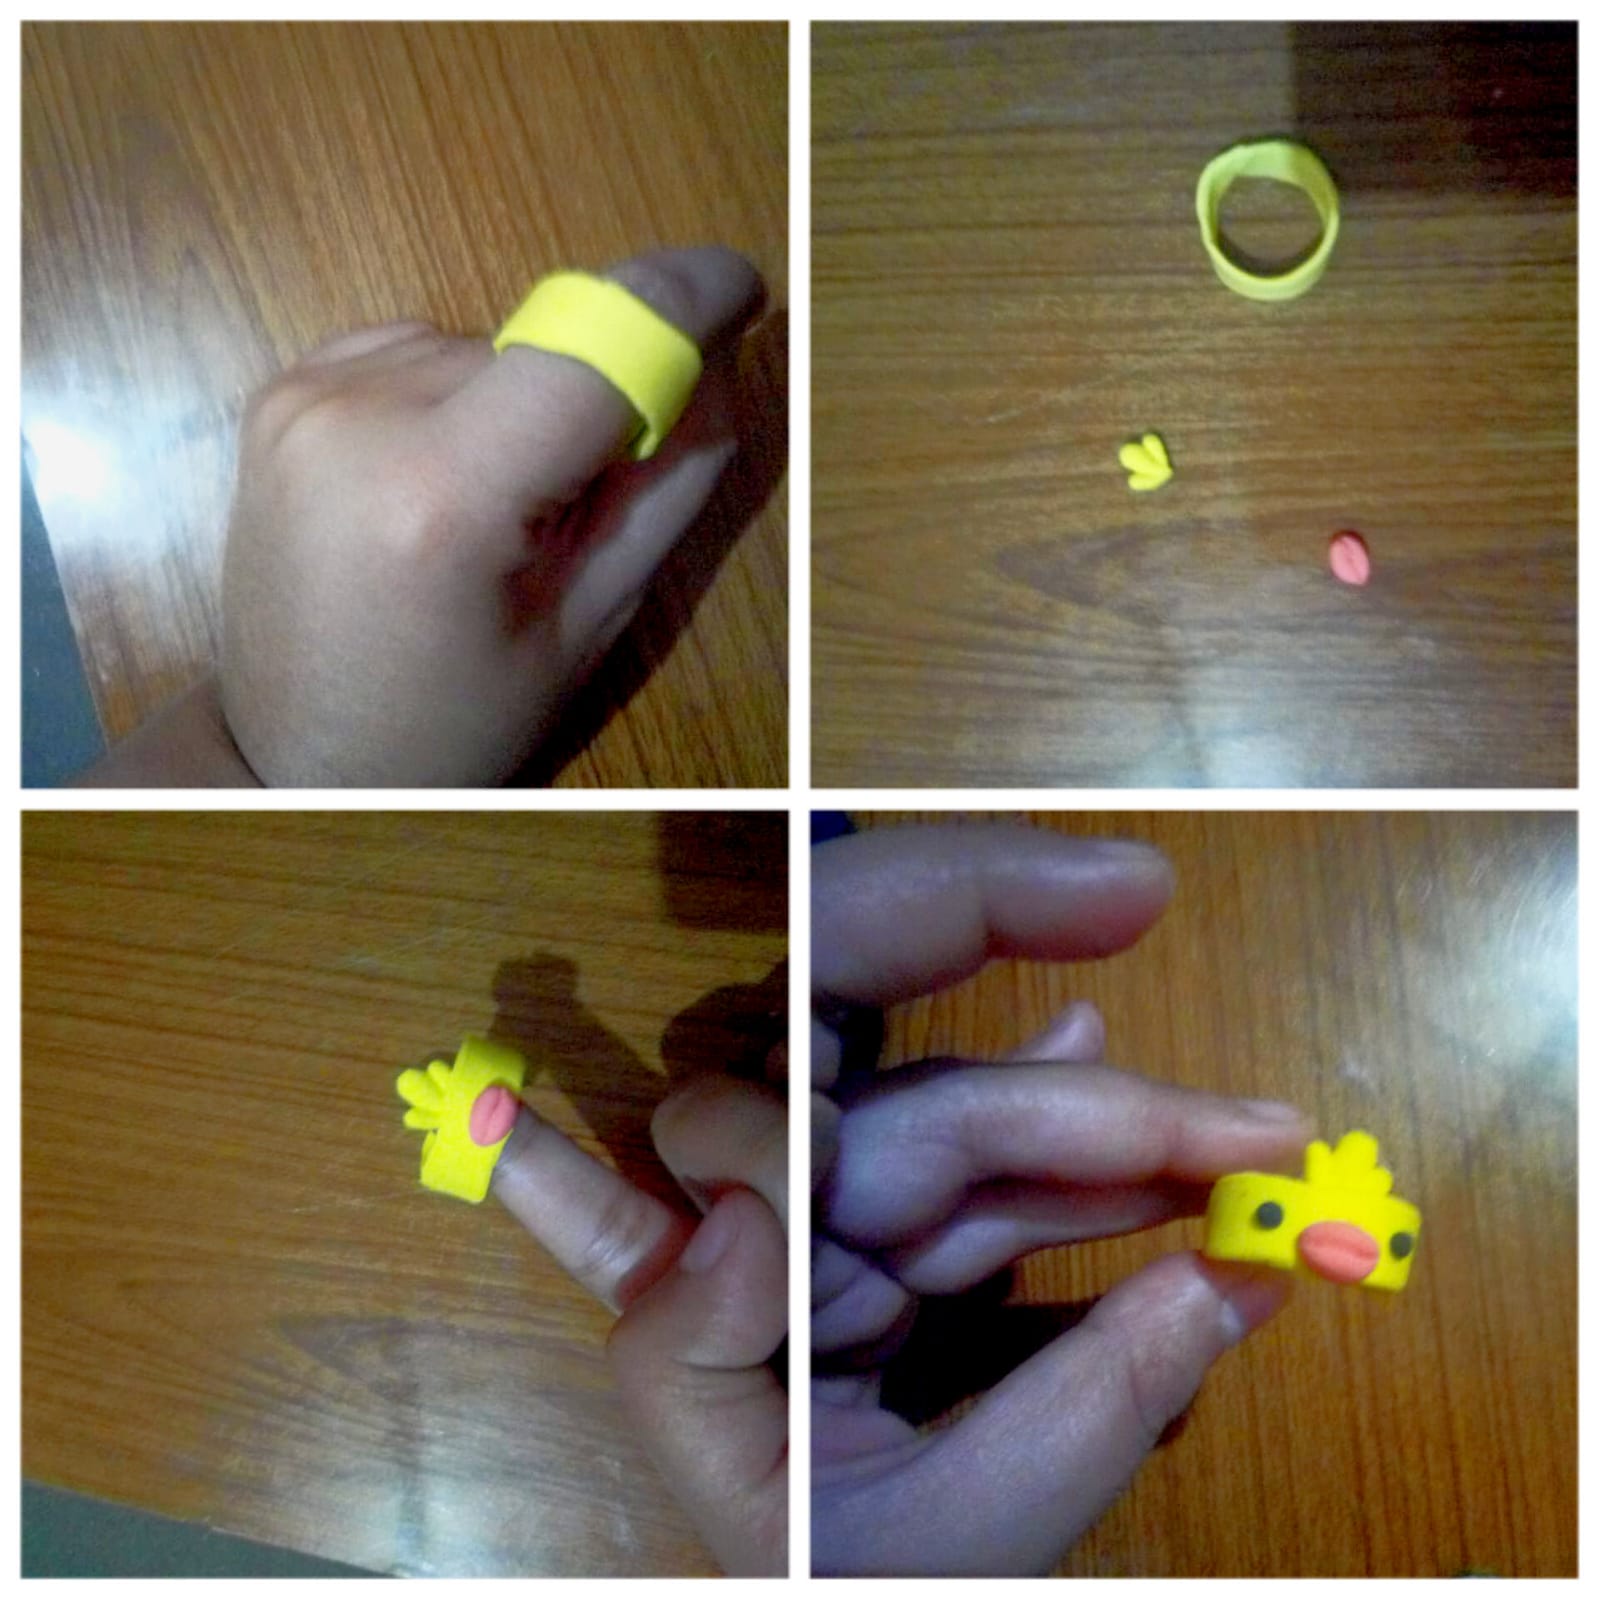
I took a ball of it and rolled it like a thick worm and then with a plastic rolling pin i rolled it out so it looks like a flat little strip . Then i trimmed the edges and rolled it like a ring on the rolling pin so this is our ring base.
Next i wore it on my hand as a ring to see if it fits and it fit perfectly. So i took another ball from yellow clay and orange clay. Made three small drop like shapes and moulded them together this will be like the top feathers for the ducky and i made an oval shape out of the orange ball made a little slit in between so thats the beak for our duck.
Now i attached these to my ring and now for the eyes i took two mini balls of black clay and made the eyes on the sides of the beak and there you have it a cute duck ring .
Make sure to dry it before you wear it. Also i recommend doing a top coat of transparent nail polish over it so it doesn't break easily.
Thank you for your precious time and support ❤️
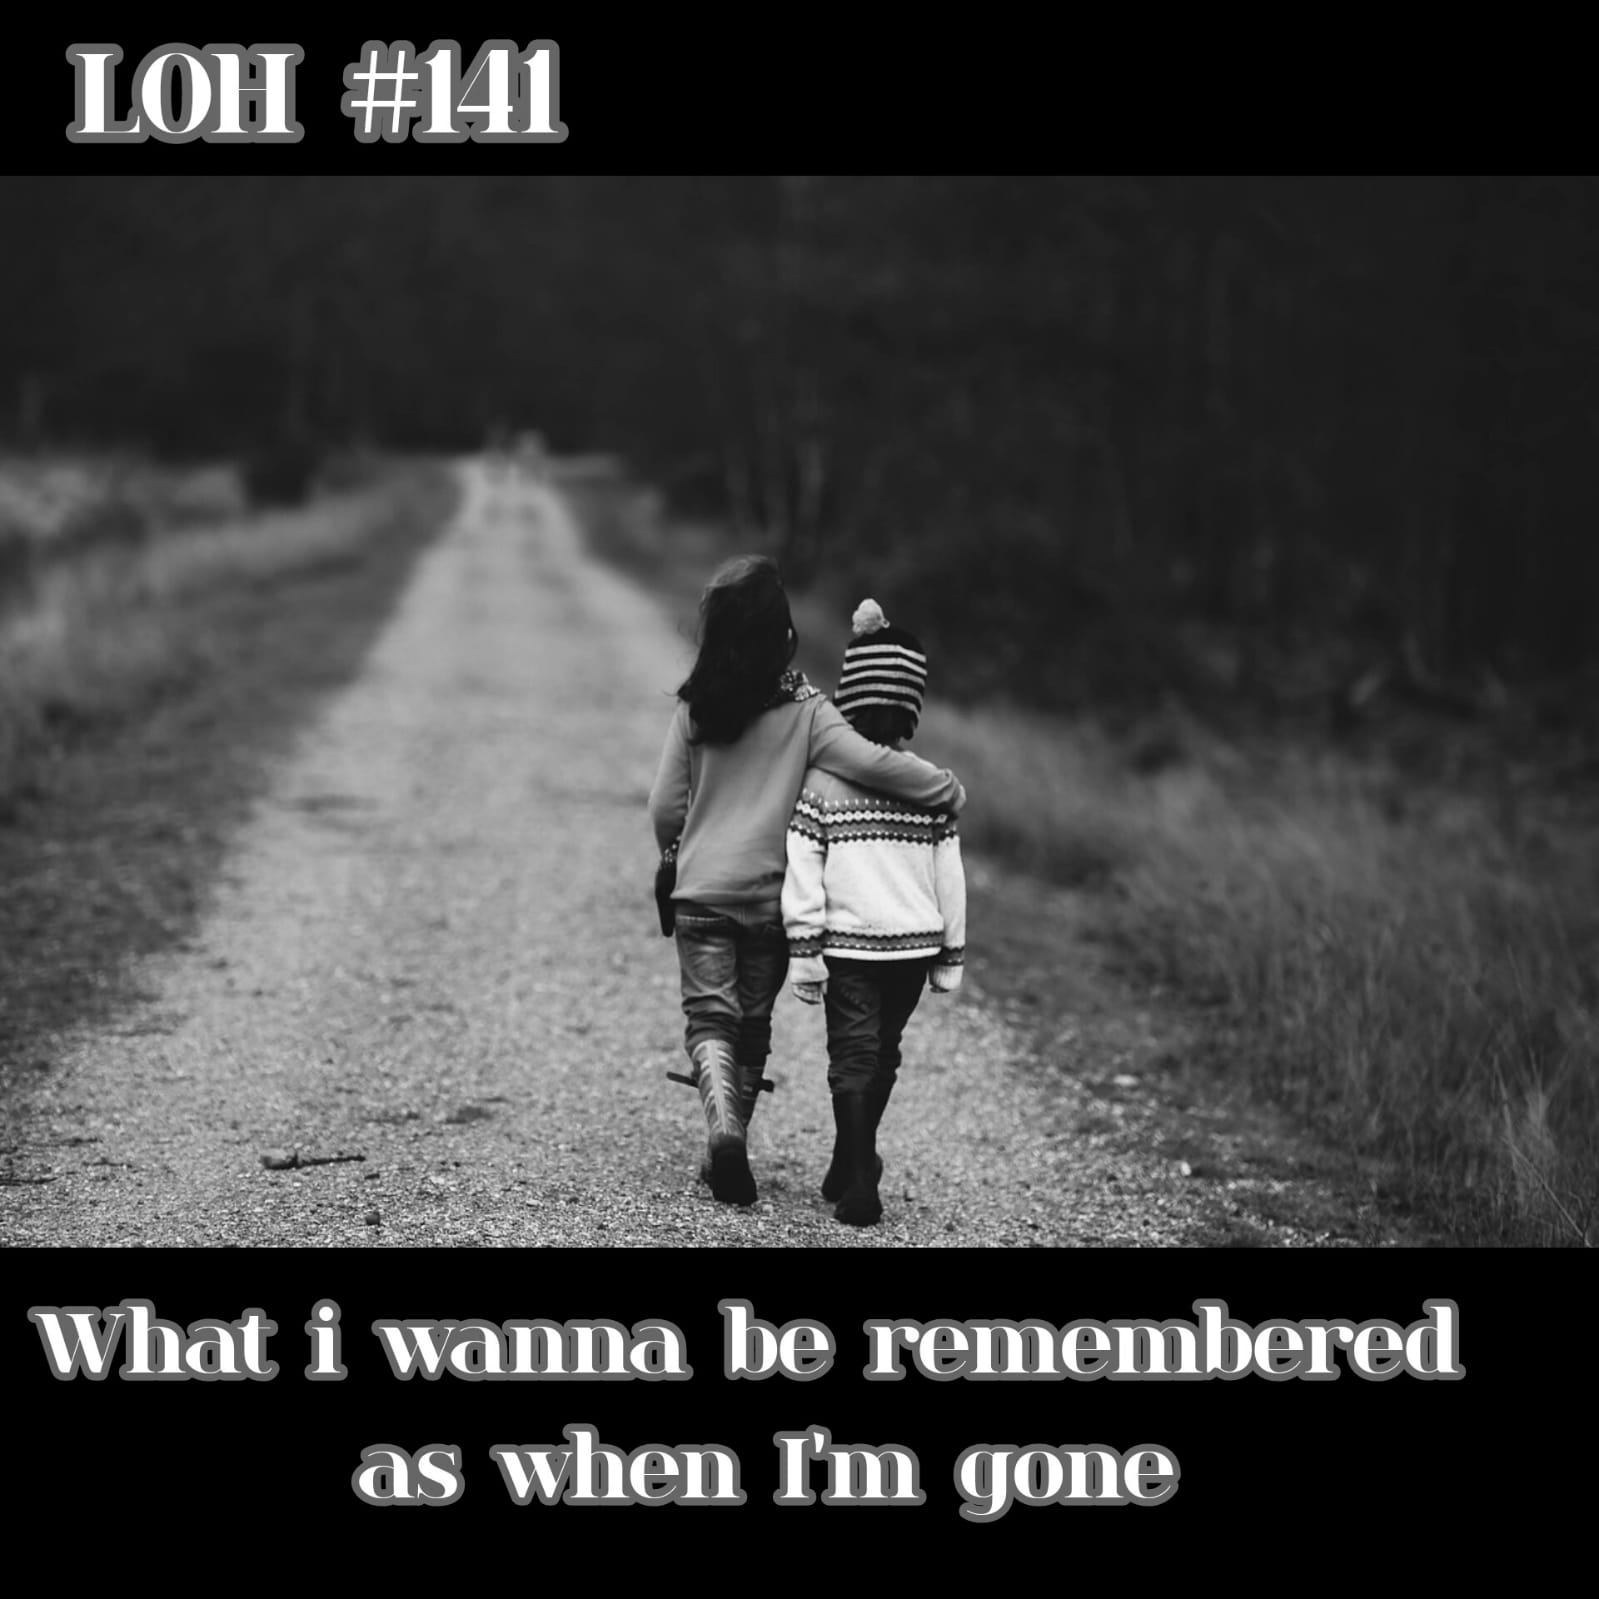
LOH #141 What i wanna be remembered as when im gone ?
It was a tough thing to think of when i read this weeks contest topic of LOH community .
What would i want people to remember me as?
Tbh that is a very deep question .
First i thought maybe an artist? I want to be remembered as an Artist that inspires others but tbh in reality I don't want people to remember me as something i did .
Rather i wanna be remembered like a kind and gentle person . I wanna be remembered as an helper .
In my life i always have been the therapist friend who loves to help the people around her cheer them up , listen to them as the vent , be there as a moral support .
Why because i always wanted to be the person i always needed . As a kid i was bullied in school and that has left a huge scar on my mental health . I get anxious around people band insecure about myself . So i try to be the person that doesn't make others go through that kind of pain alone.
It made me smile when i thought . If my friends ever told their kids about their bad times i want them to tell them about there stories and mention me as the friend that helped them out , advised them , supported them i want my memories to be something that makes you smile .
Being remembered as an artist is good but being remembered as a friend that helped you through thick and thin is Precious .❤️
Thank you for your precious time and support ❤️
Image courtesy: Pixabay
Splinterlands art contest week #248 (Lemell Refugee)
For this week's Splinterlands art contest Entry i drew a character card named "Lamell Refugee"
So first step that i do i look at my refrence and sketch it in my style .Now for that you have to look at the accessories and the detail of shapes that defined the character and draw it but in your own style . The rough sketch had the arrow but it looked a bit bent . So i corrected it when i converted the sketch into a refined lineart digitally.
I used an app called Medibang paint pro to paint digitally.
After converting my sketch into a lineart i started filling the flat colors . After this you can see a bit of definition to the character how ever to enhance it more i added some shadow to each layer with a water color wet brush . This technique creates a subtle shadow to give our 2d image a more defined look
Shadows aren't the only thing that enhance your illustration u need highlights to and every part needs an different highlight texture like for the hair i used a pen sharp brush and drew lighter strands so the hair look lilac colored if i used more darker purple it would look as purple pink hair this is a technique i use when painting lighter hair .
I also added some more highlights with a water color wet brush and smudged it so it looks like the hair have shine and glow to them and i set the opacity of this layer a bit low .
Same way i added highlights to the armor and to the diamond on the armor . Every material has different shading you gotta practice drawing them to know this .
After this i colored the eyes too so Our character has Heterochromia so her one pupil is yellow and the other is blue i painted those and added details to the spear . Now i also painted the Golden details on the armor as u can see now it looks more shiny i used 2 different shades of yellow here .
Next i colored the line art too according to ever parts color just a bit darker . This makes the illustration very soft and makes it pop . another thing i did was i made those writings on the spear glowy .
For this i duplicated the writing and guassian blurred it and on the previous layer i made it less saturated this gave it a more glowy effect .
Lastly i just added a blue purple gradient to all of it and set it on saturation and here we have the final result
Thank you for your precious time and support ❤️
Eid ul Adha ( weekly blog)
Every week i do a blog about my best moments from the week and here is what i loved in this week .
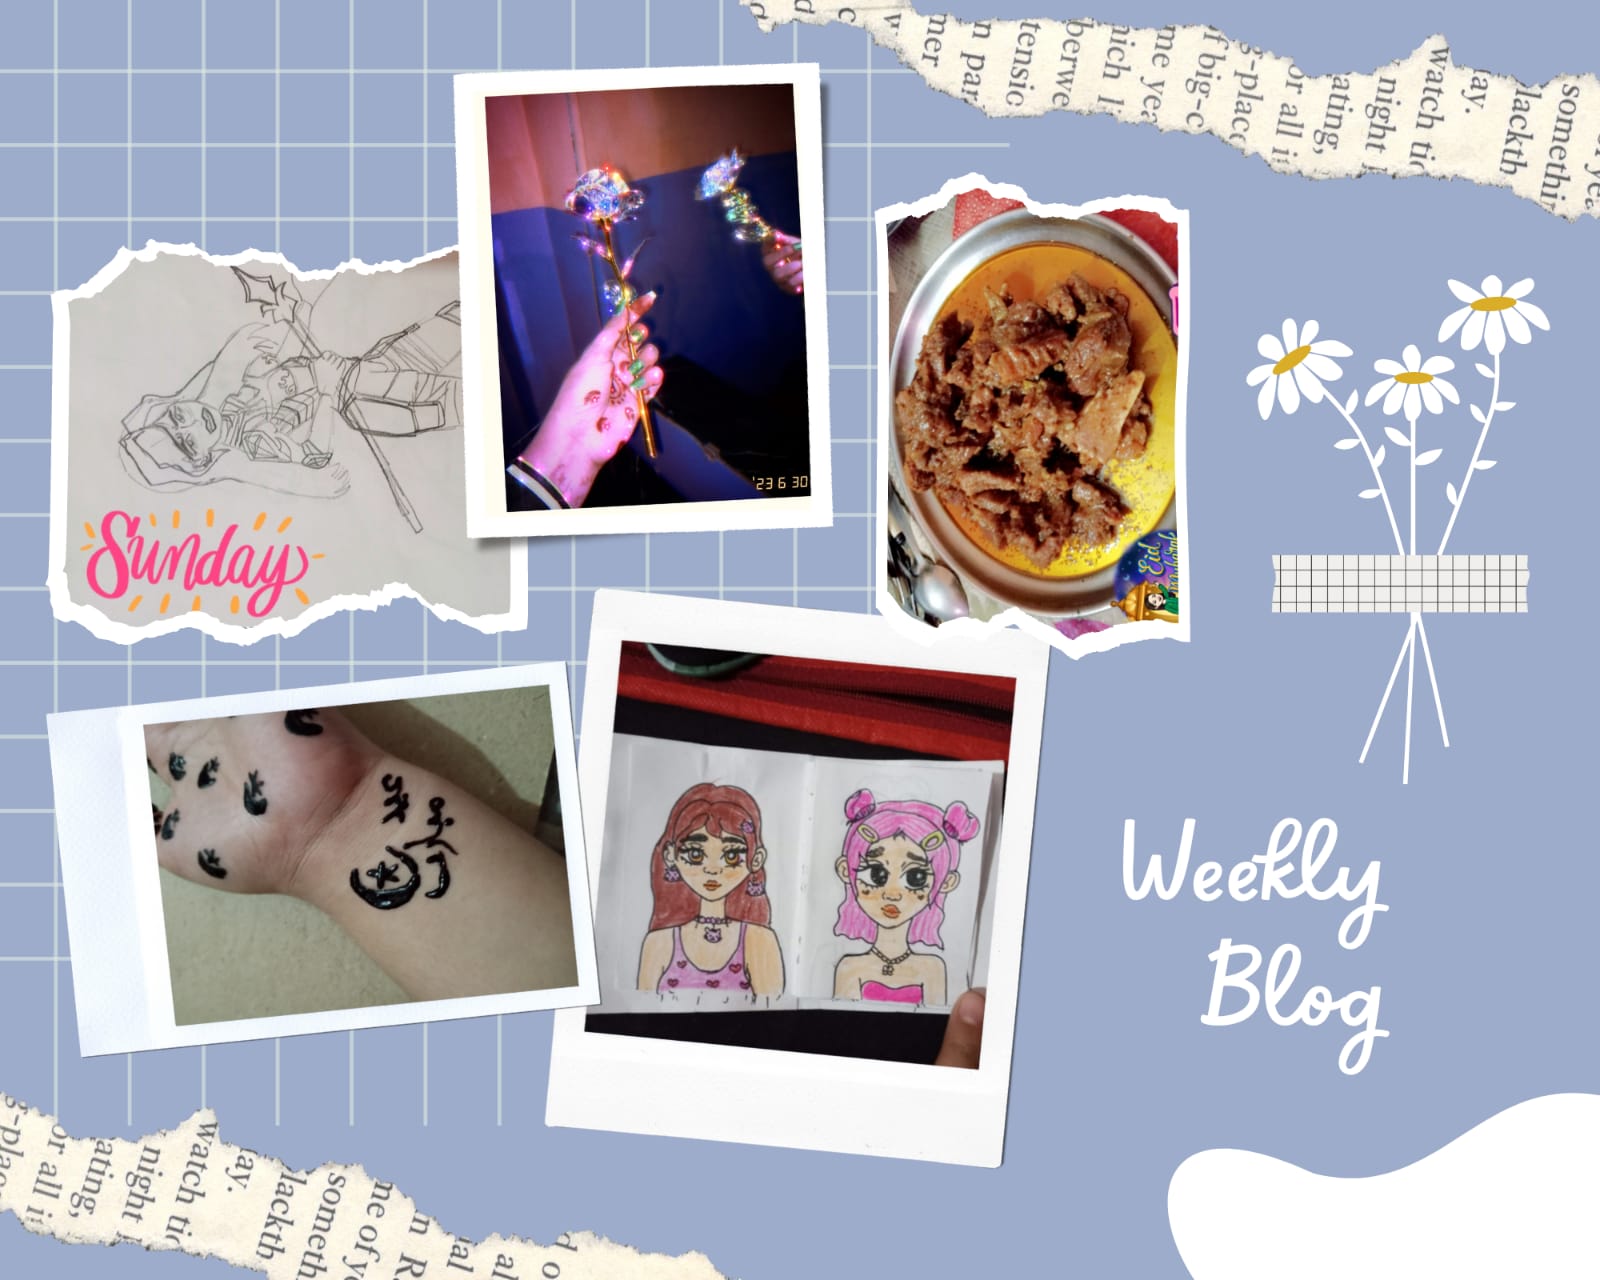
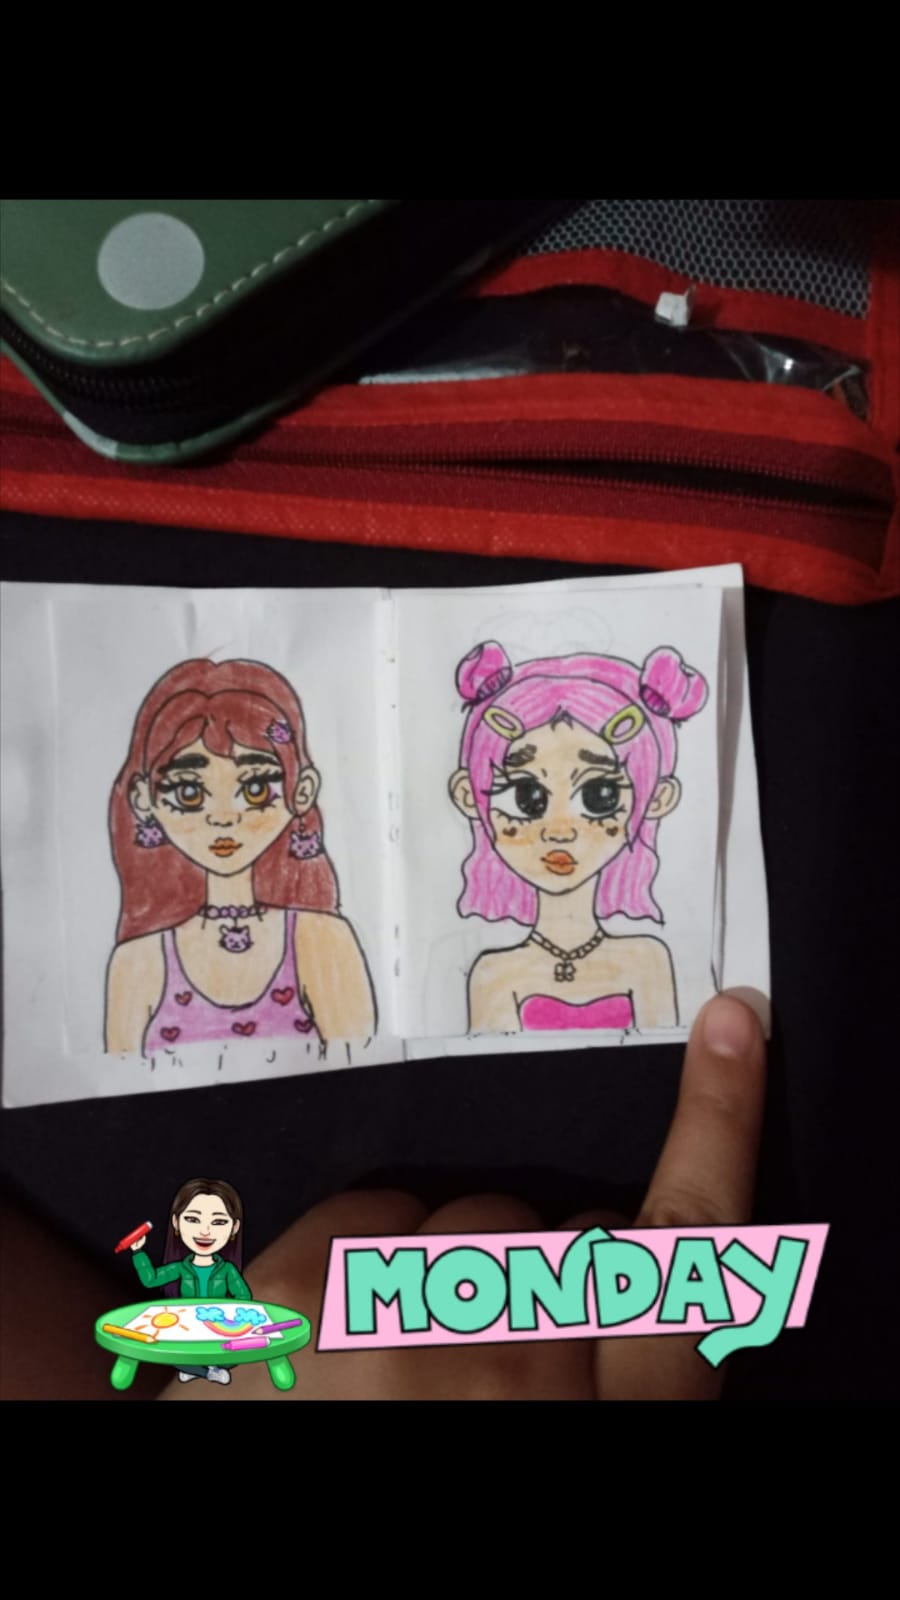
On Monday i colored two of my sketches from my mini sketchbook . I took a challenge to draw daily and fill this mini Sketchbook all 30 days but i was little bored so i colored some from it and they looked so cute 🥰
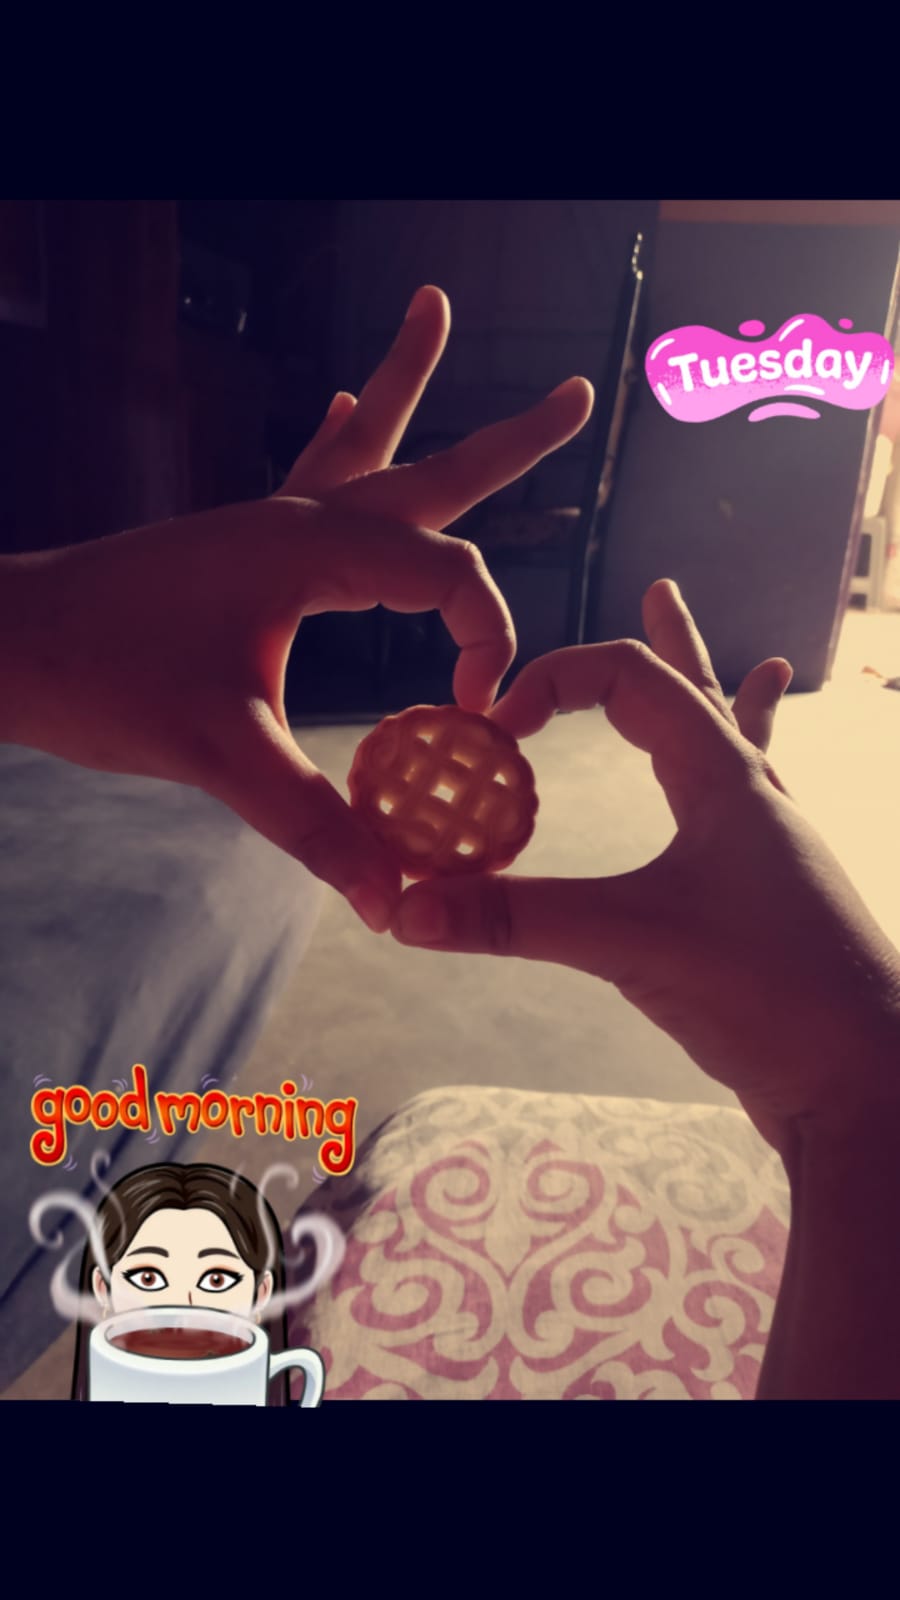
Tuesday was all about deep cleaning the house because Thursday was to be Eid ul Adha and so i was all day dusting and scrubbing everything and it was just so soothing to finally have a warm cup of tea at evening with biscuits that is when i took this picture
Wednesday night was all about self care this is the night before eid so i was doing henna tattoos on everyone including me . This eid i went to minimalistic tattoos. I drew a crescent and a star and wrote Eid Mubarak on Urdu on my wrist
Thursday was Eid Day 1 and as a vegan I don't eat meat how ever i love how my mom prepared This pot roast . Its a tradition after the Meat comes we donate it and cook something good and distribute that in neighborhood and have a family feast so i loved the time spent with everyone and i had ramen that time 😂
Friday was Eid Day 2 and i got my nails done that night i did glittery green nails and took this polaroid picture with my holographic rose i edited it so that it looks like the rose is embellished . Together it all looked so Aesthetic 😍
Eid Day 3 was Saturday and on that day while everyone was out in Barbeque me and my dad had fun Watching (The Old Man ) series its a great series and i had a great time watching it with my dad
So on Sunday which is today im back to drawing and today i drew a sketch for my Splinterlands post
Well thats about my week how was your week ? Did you learn anything new ?
Thank you for your precious time and support ❤️
Drawing an Eid ul Adha illustration
Happy Eid Ul Adha to all the muslims out there .
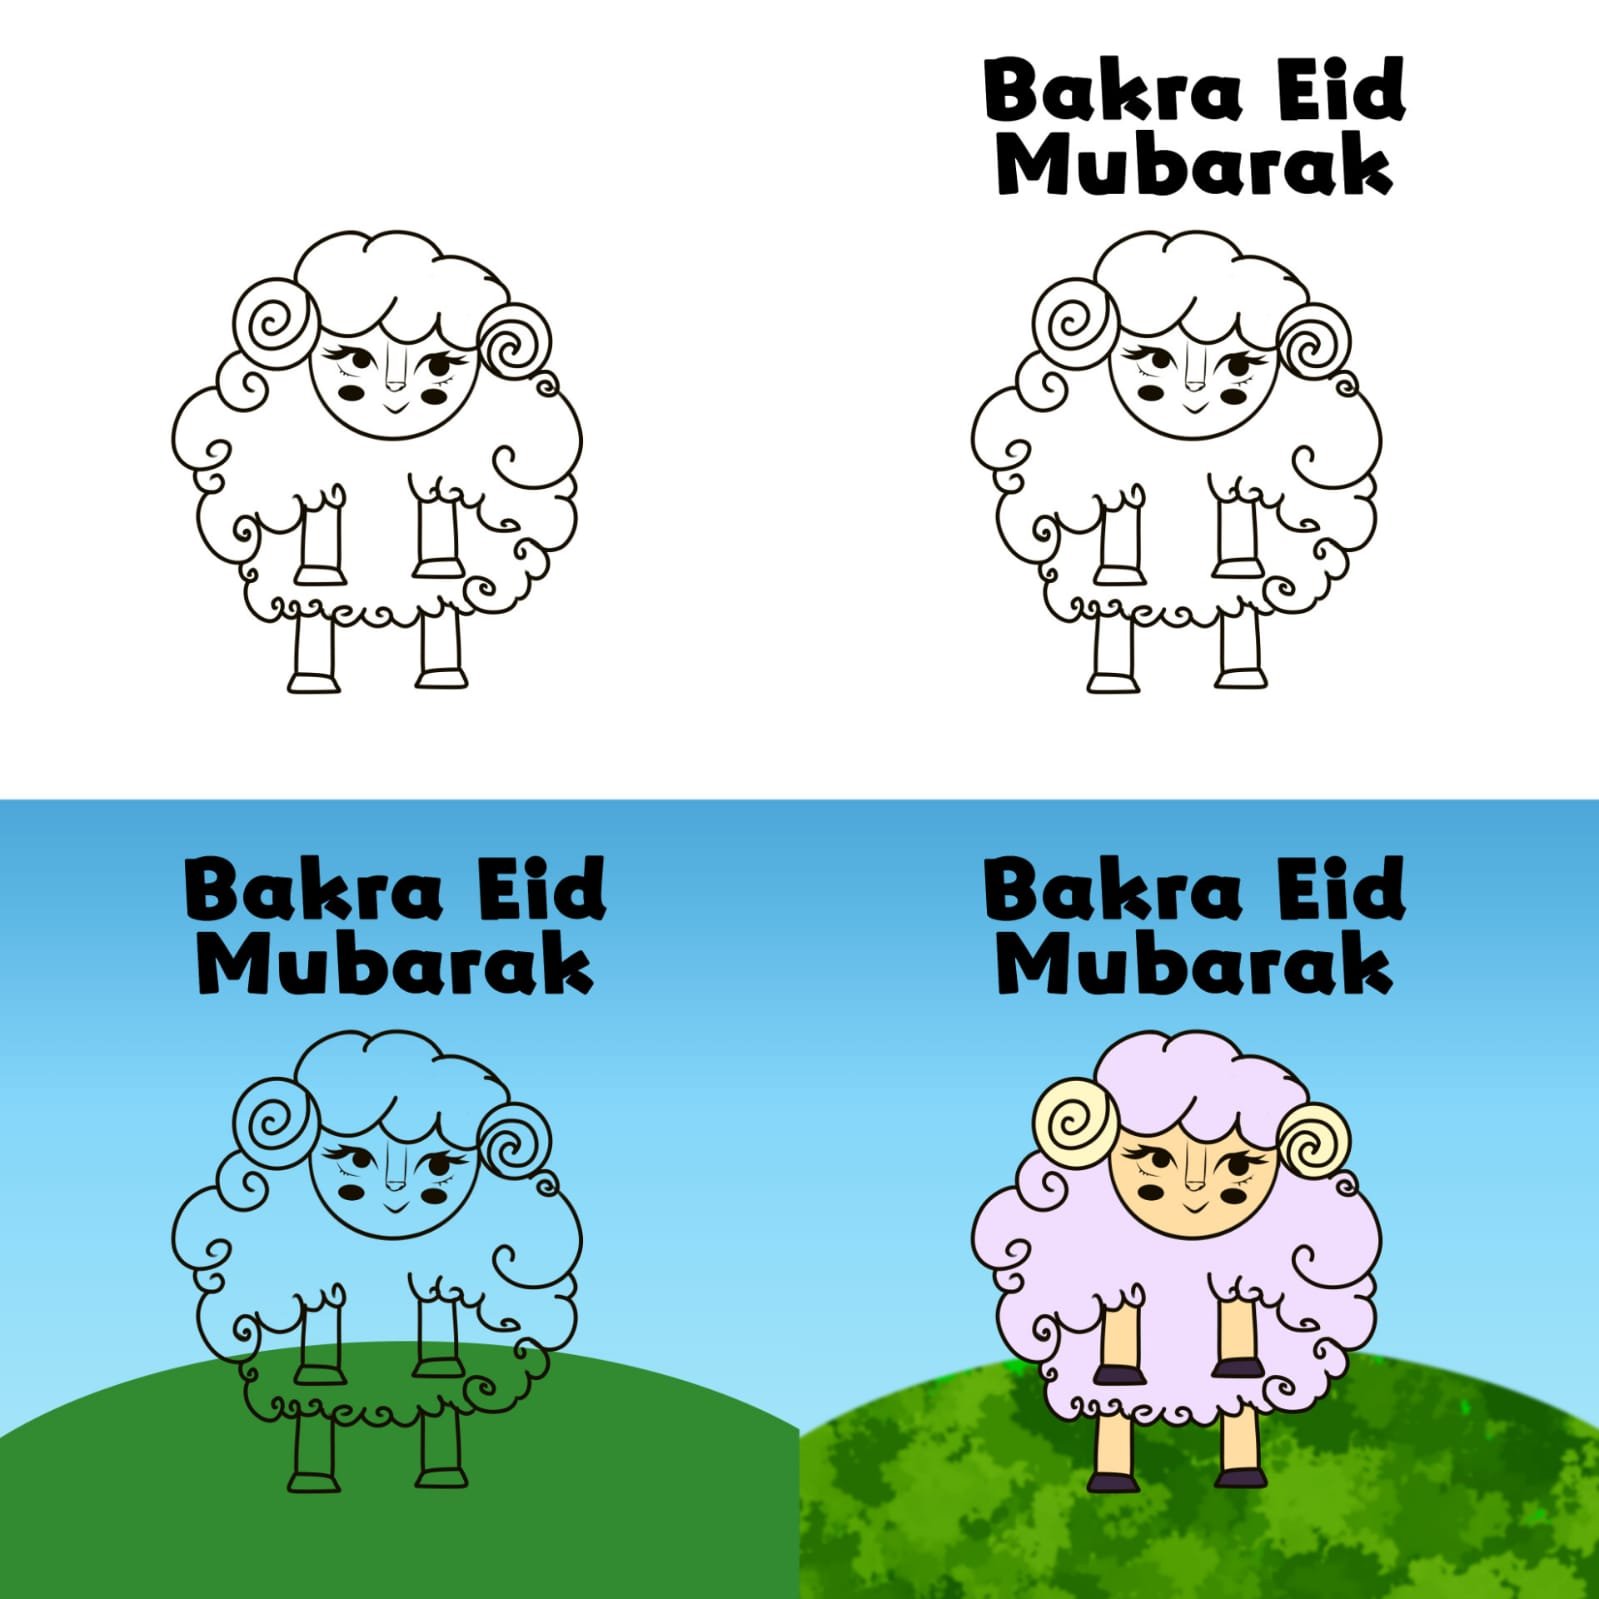
Just like every week this week i also wanted to draw a simple cute illustration so i drew this cute little sheep . These tutorials are for beginner artists .You can use any medium to draw however i used Medibang paint pro app to draw it digitally.
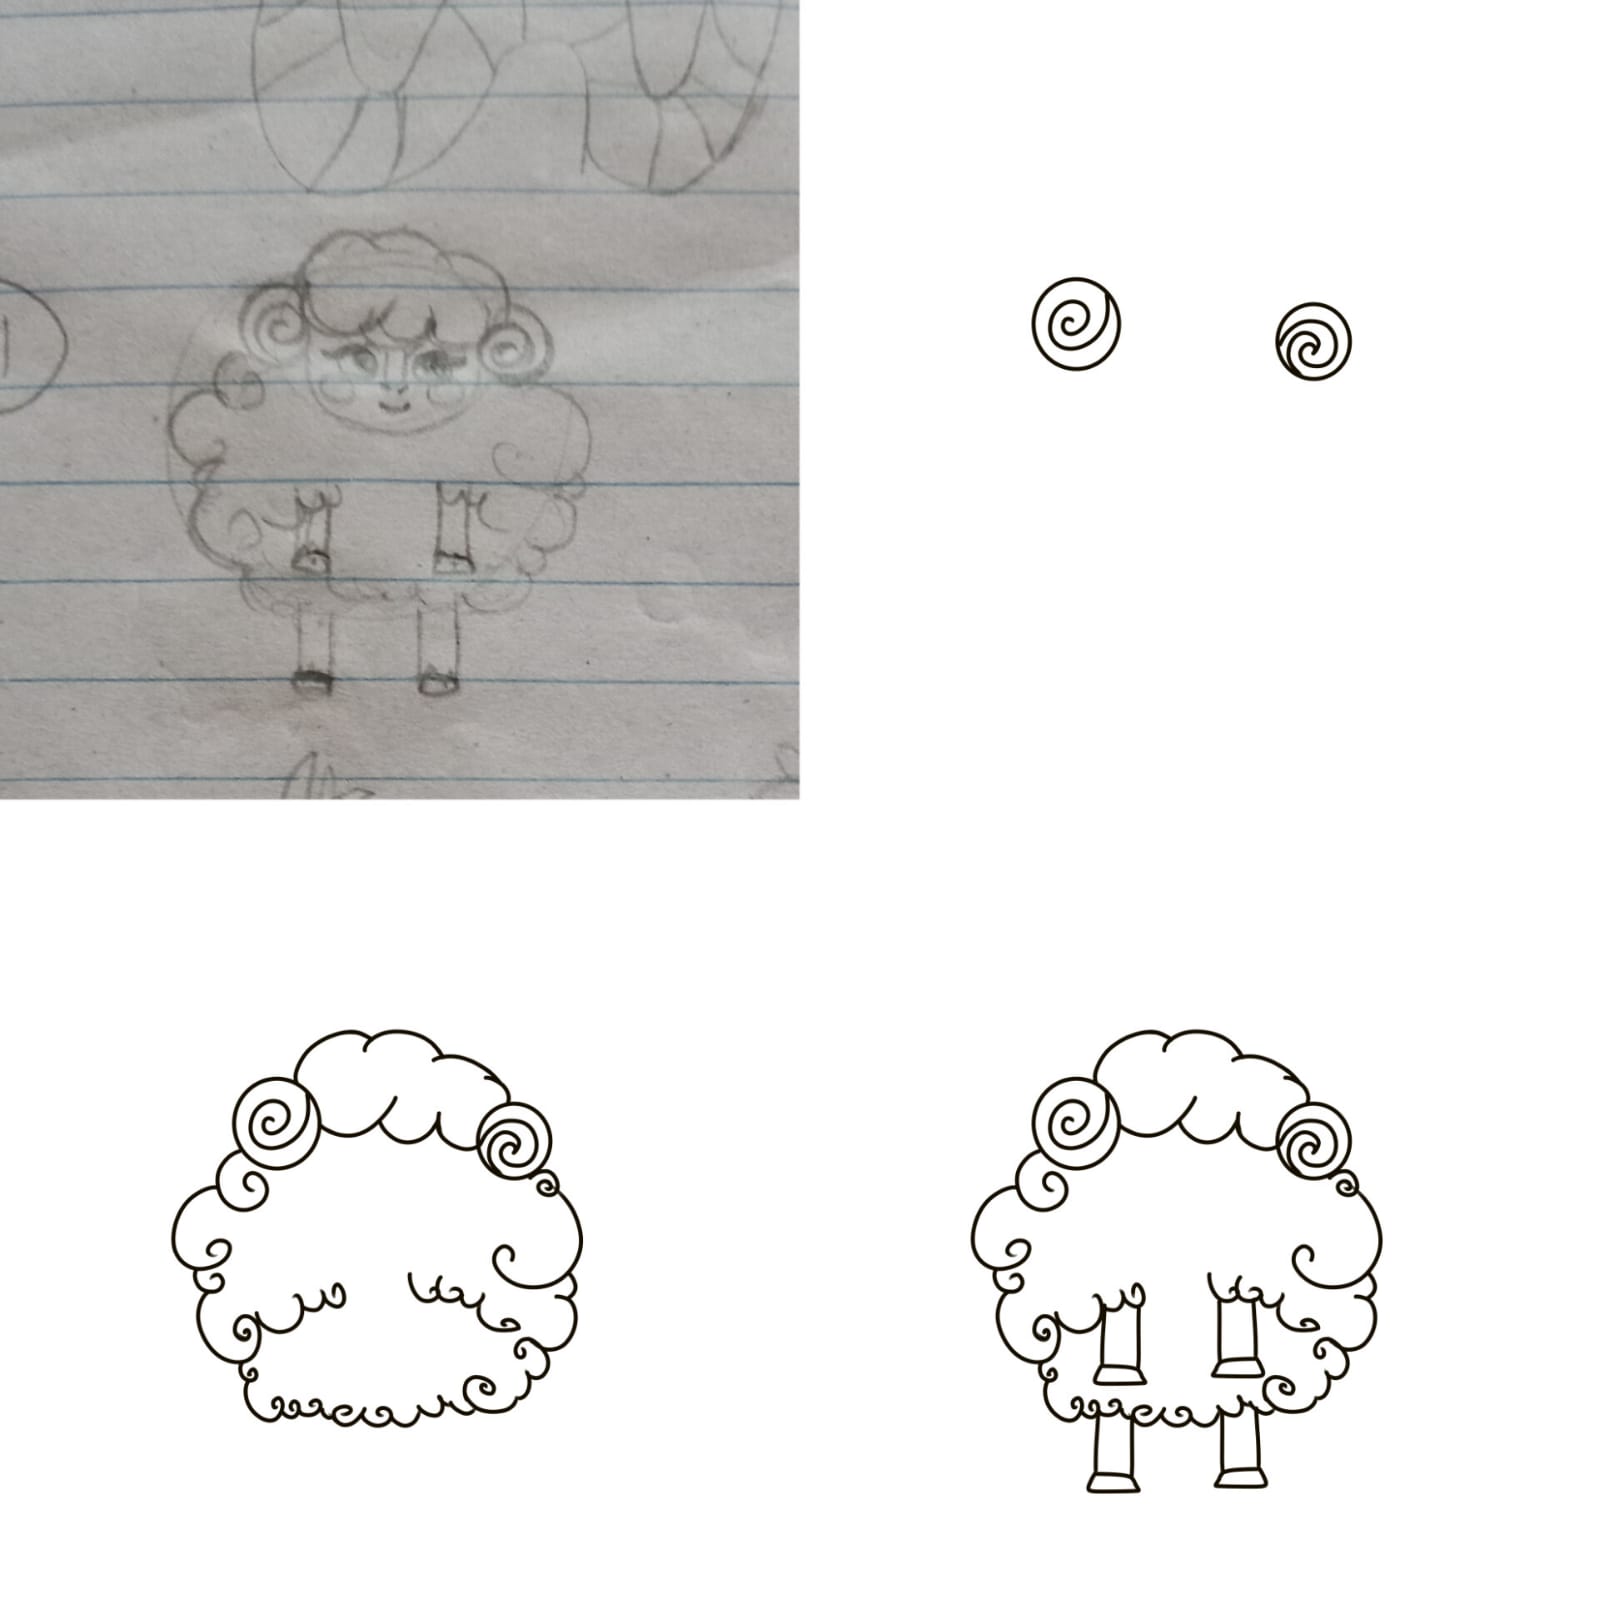
So my initial idea was to draw a cute sheep thats standing on two of its legs so i sketched it on a paper .
Today i will also tell you how you can draw from sketches . You need to draw similar shapes i used a circle shape to draw the horns and drew spiral inside them then i traced cloud like random incomplete circles or "C" shapes this will be our wool next i did a semi circle for its head and drew 4 rectangles for the legs and hoofs thats the base of our sheep. Remember to use shapes to define your character.
After that i drew the sheeps eyes. And expressions everything is drawn on a Separate layer so we can color them differently . I added a text saying "Bakra Eid Mubarak" .
After this i started adding a background to the sheep i added a green semi circle and gradient blue sky for background then i shaded the ground like grass and added flat colors to our sheep
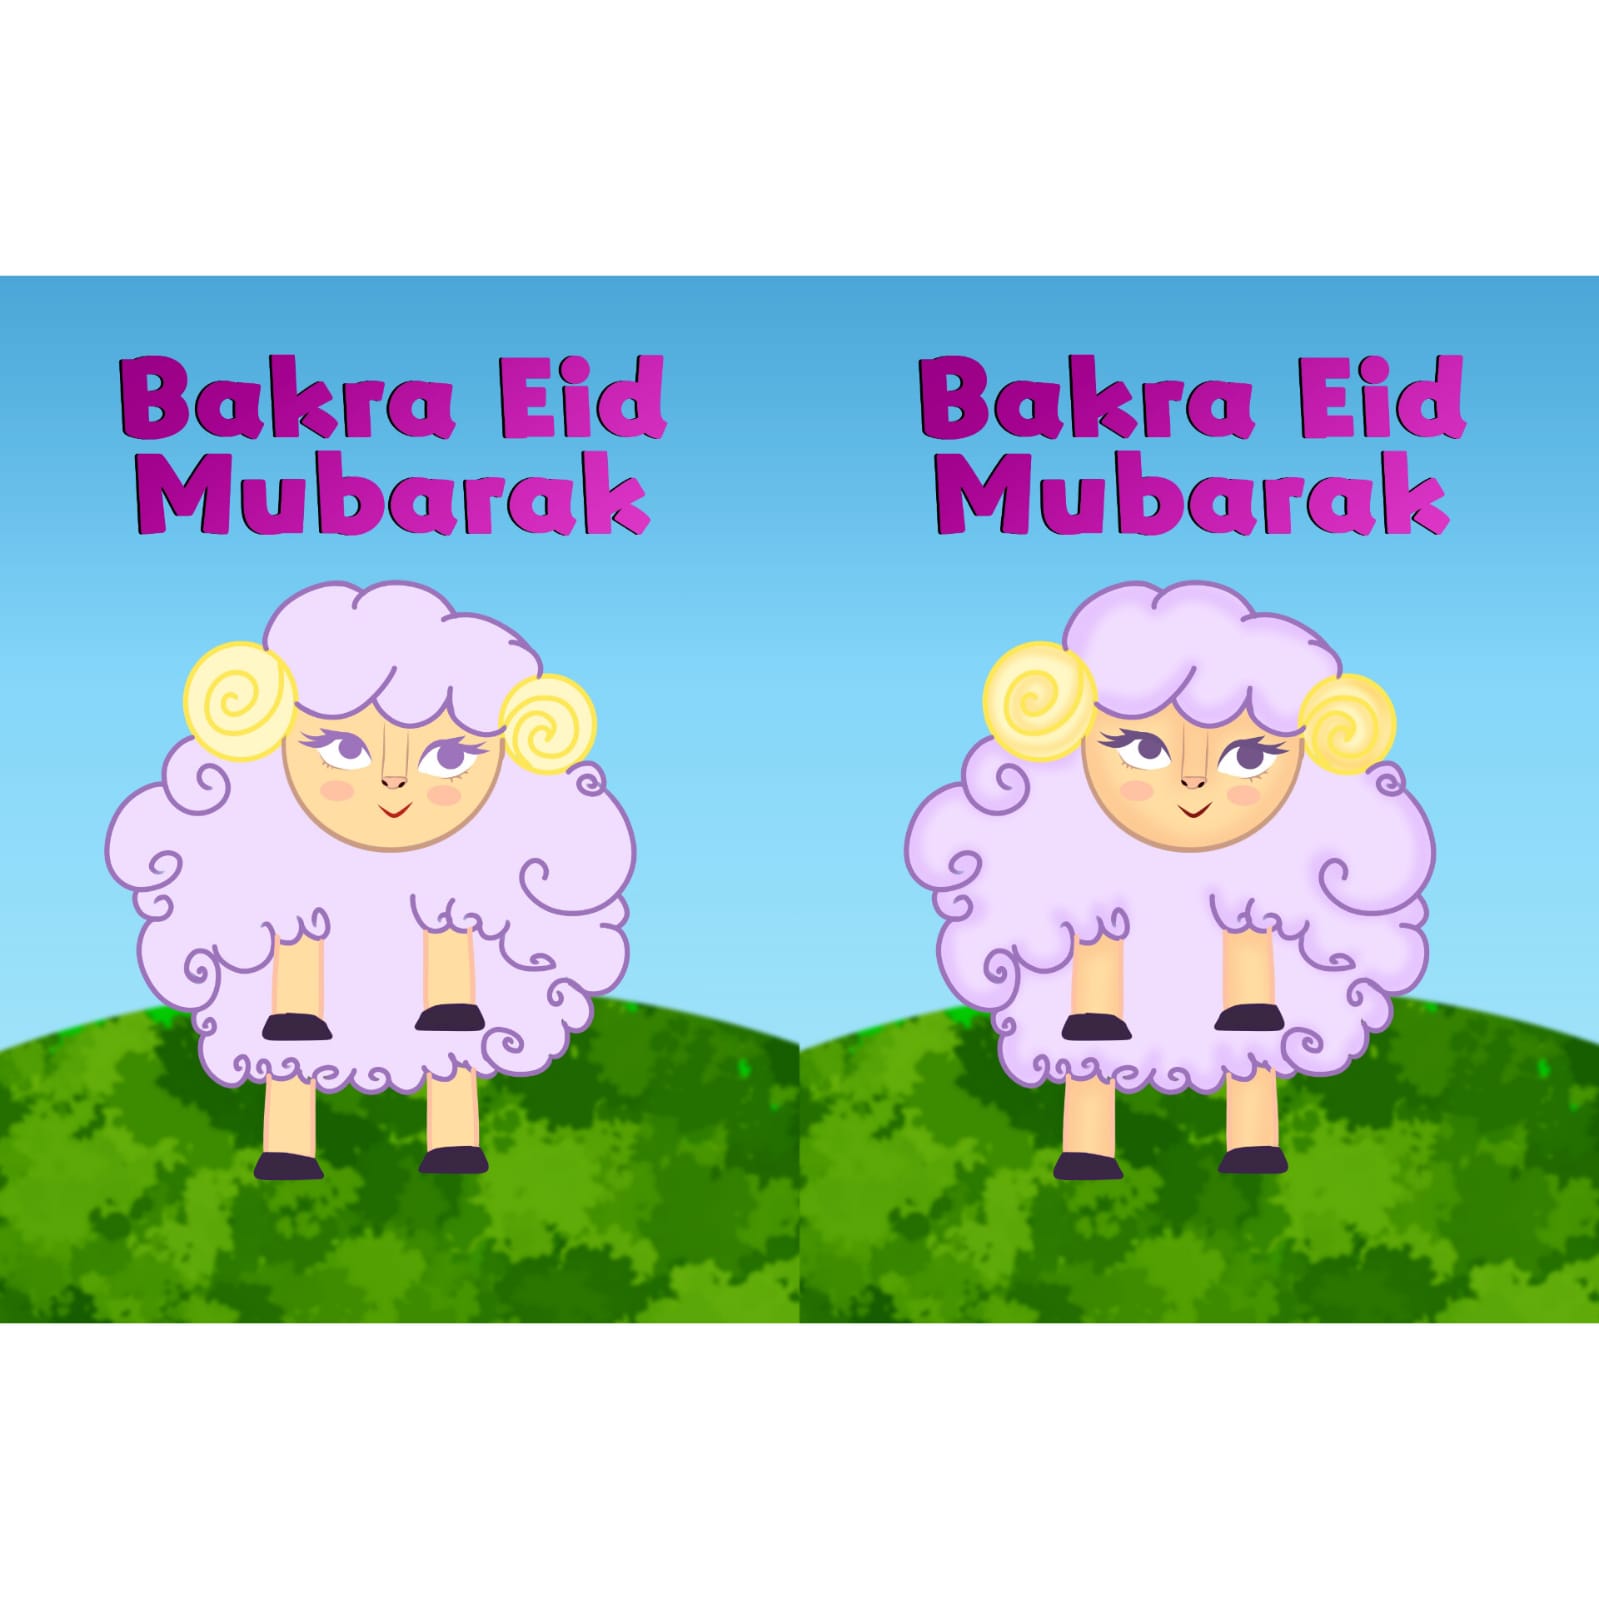
Next i duplicated the text layer and added gradient to it and pulled this layer a little up so the layer behind it looks like its shadow . I also colored the lineart u can see coloring the lineart makes the drawing look very soft and cute this is a great trick if your Painting an illustration for a children's book
Lastly i shaded the sheep and added highlighted stars to its eyes and here we are done 😍❤️ this is the final result
Thank you for your precious time and support ❤️
My Favorite Toy from Childhood
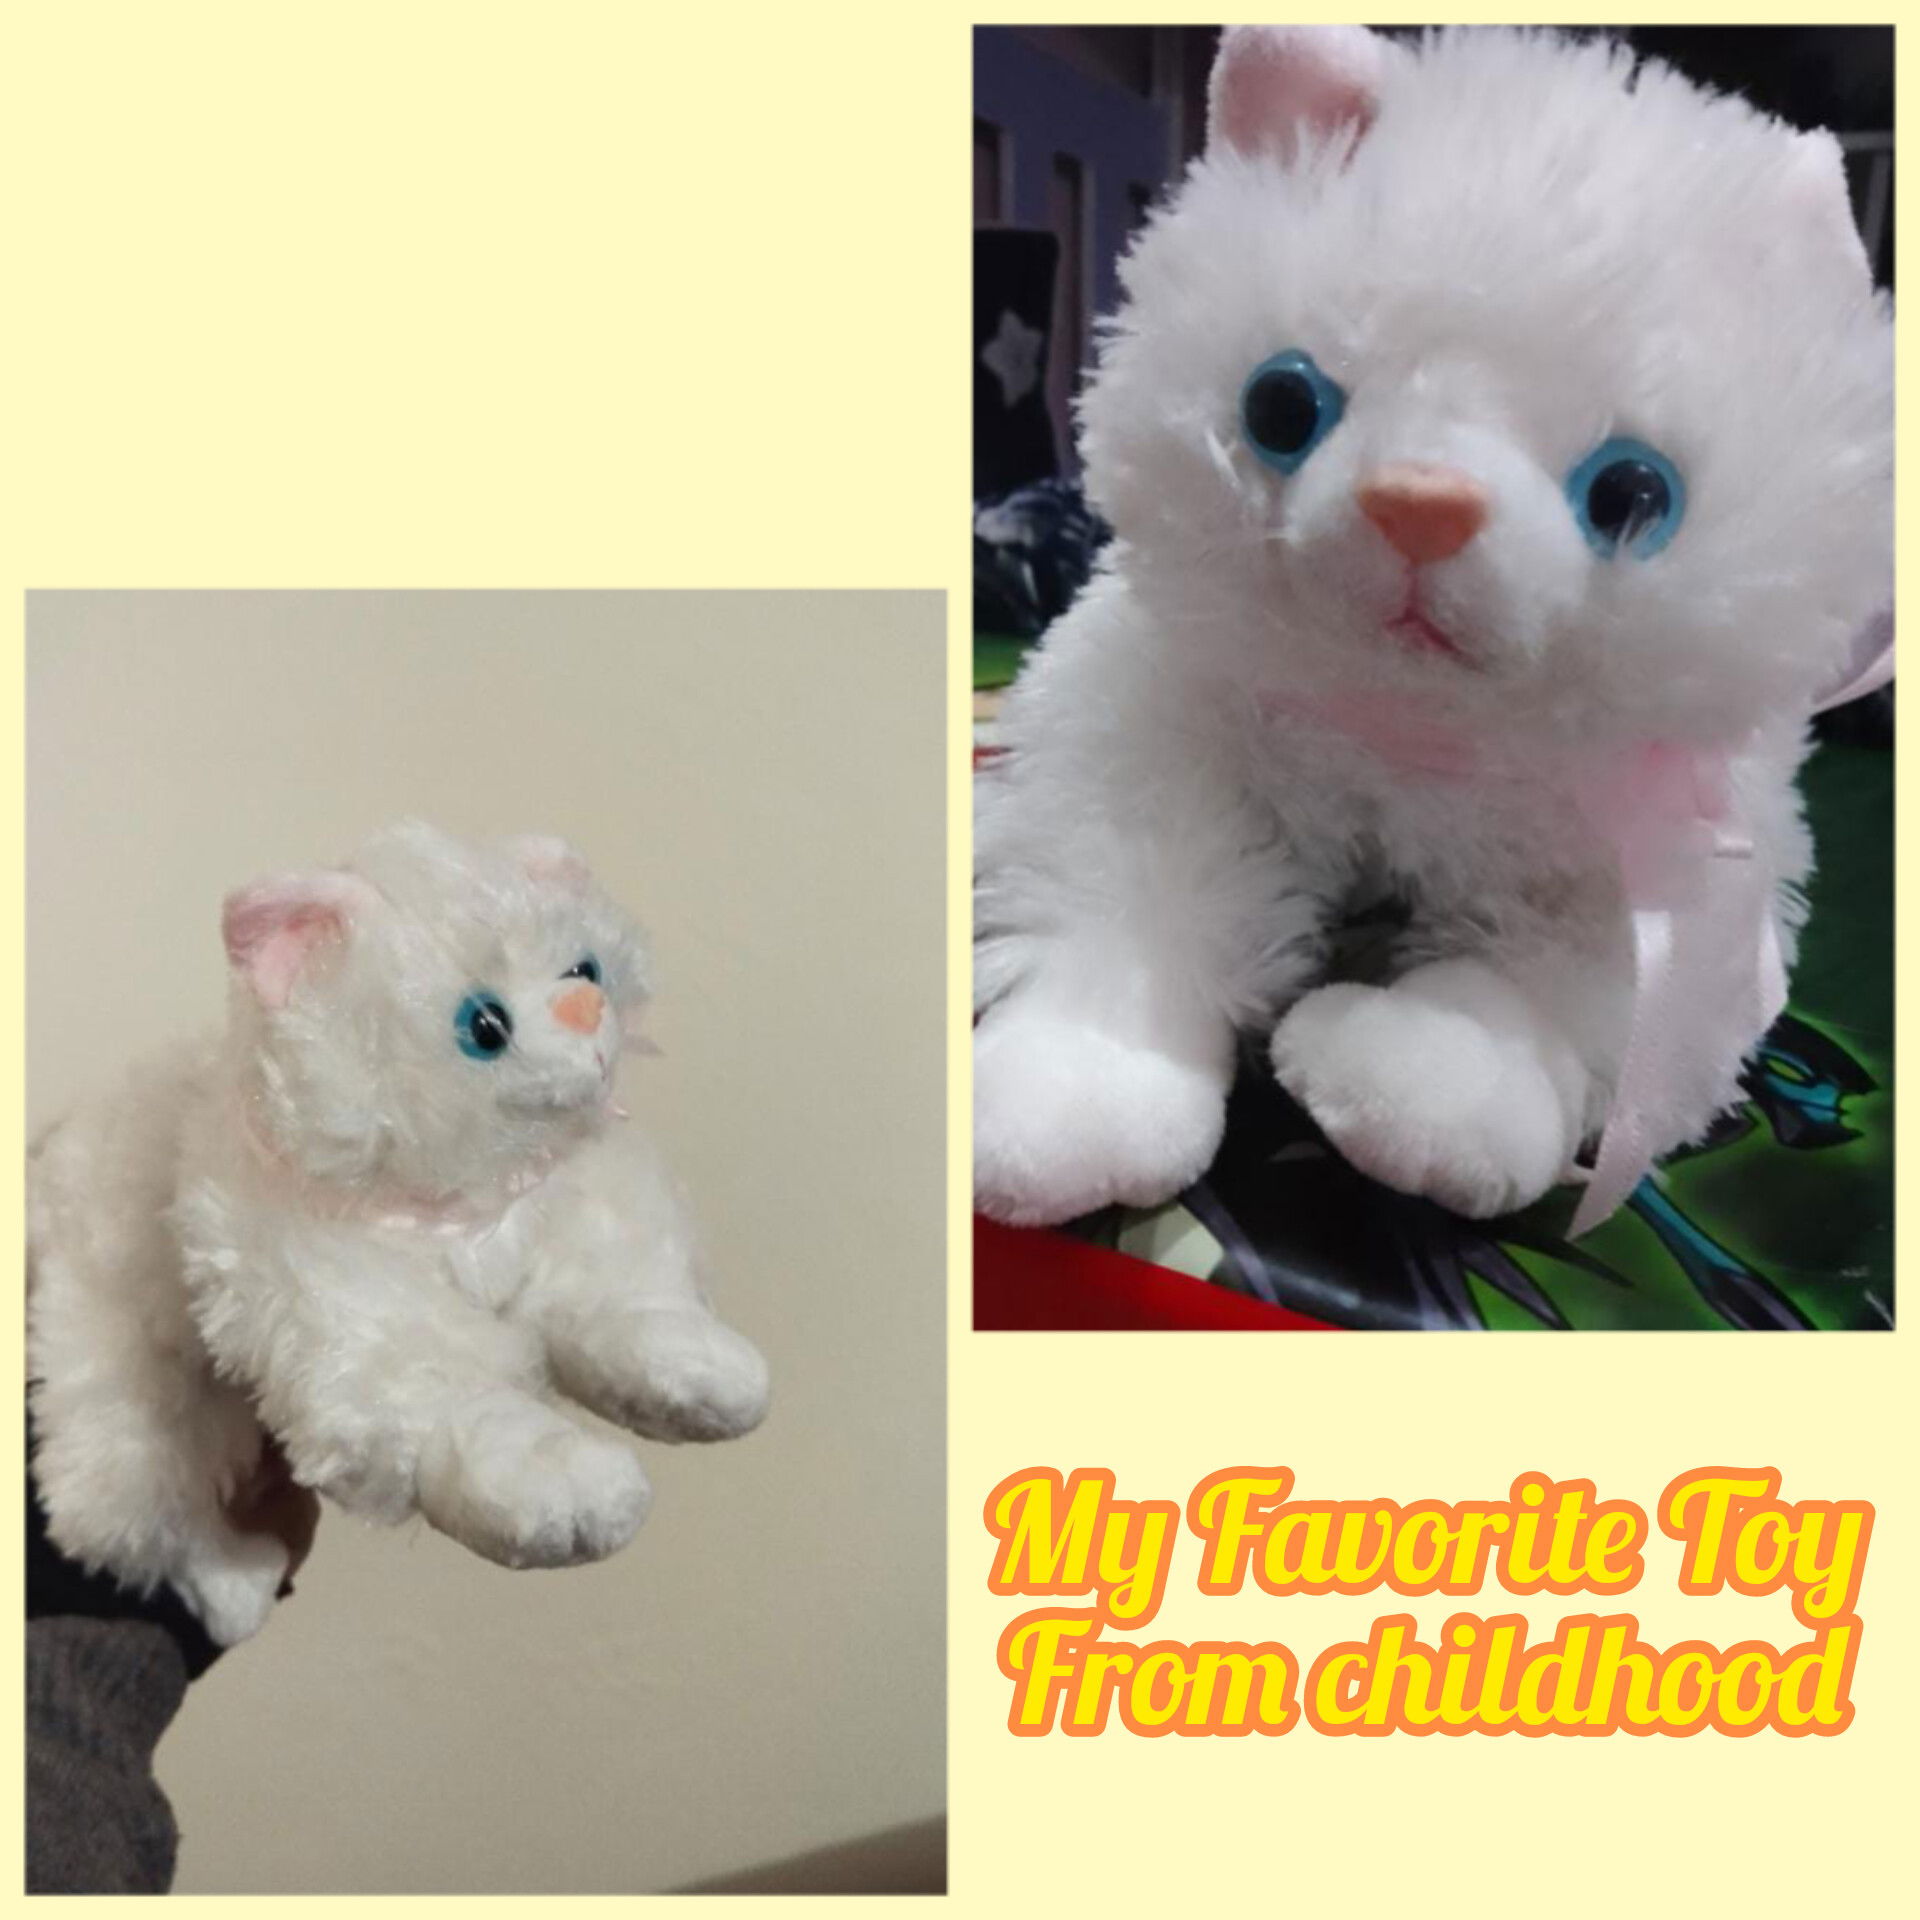
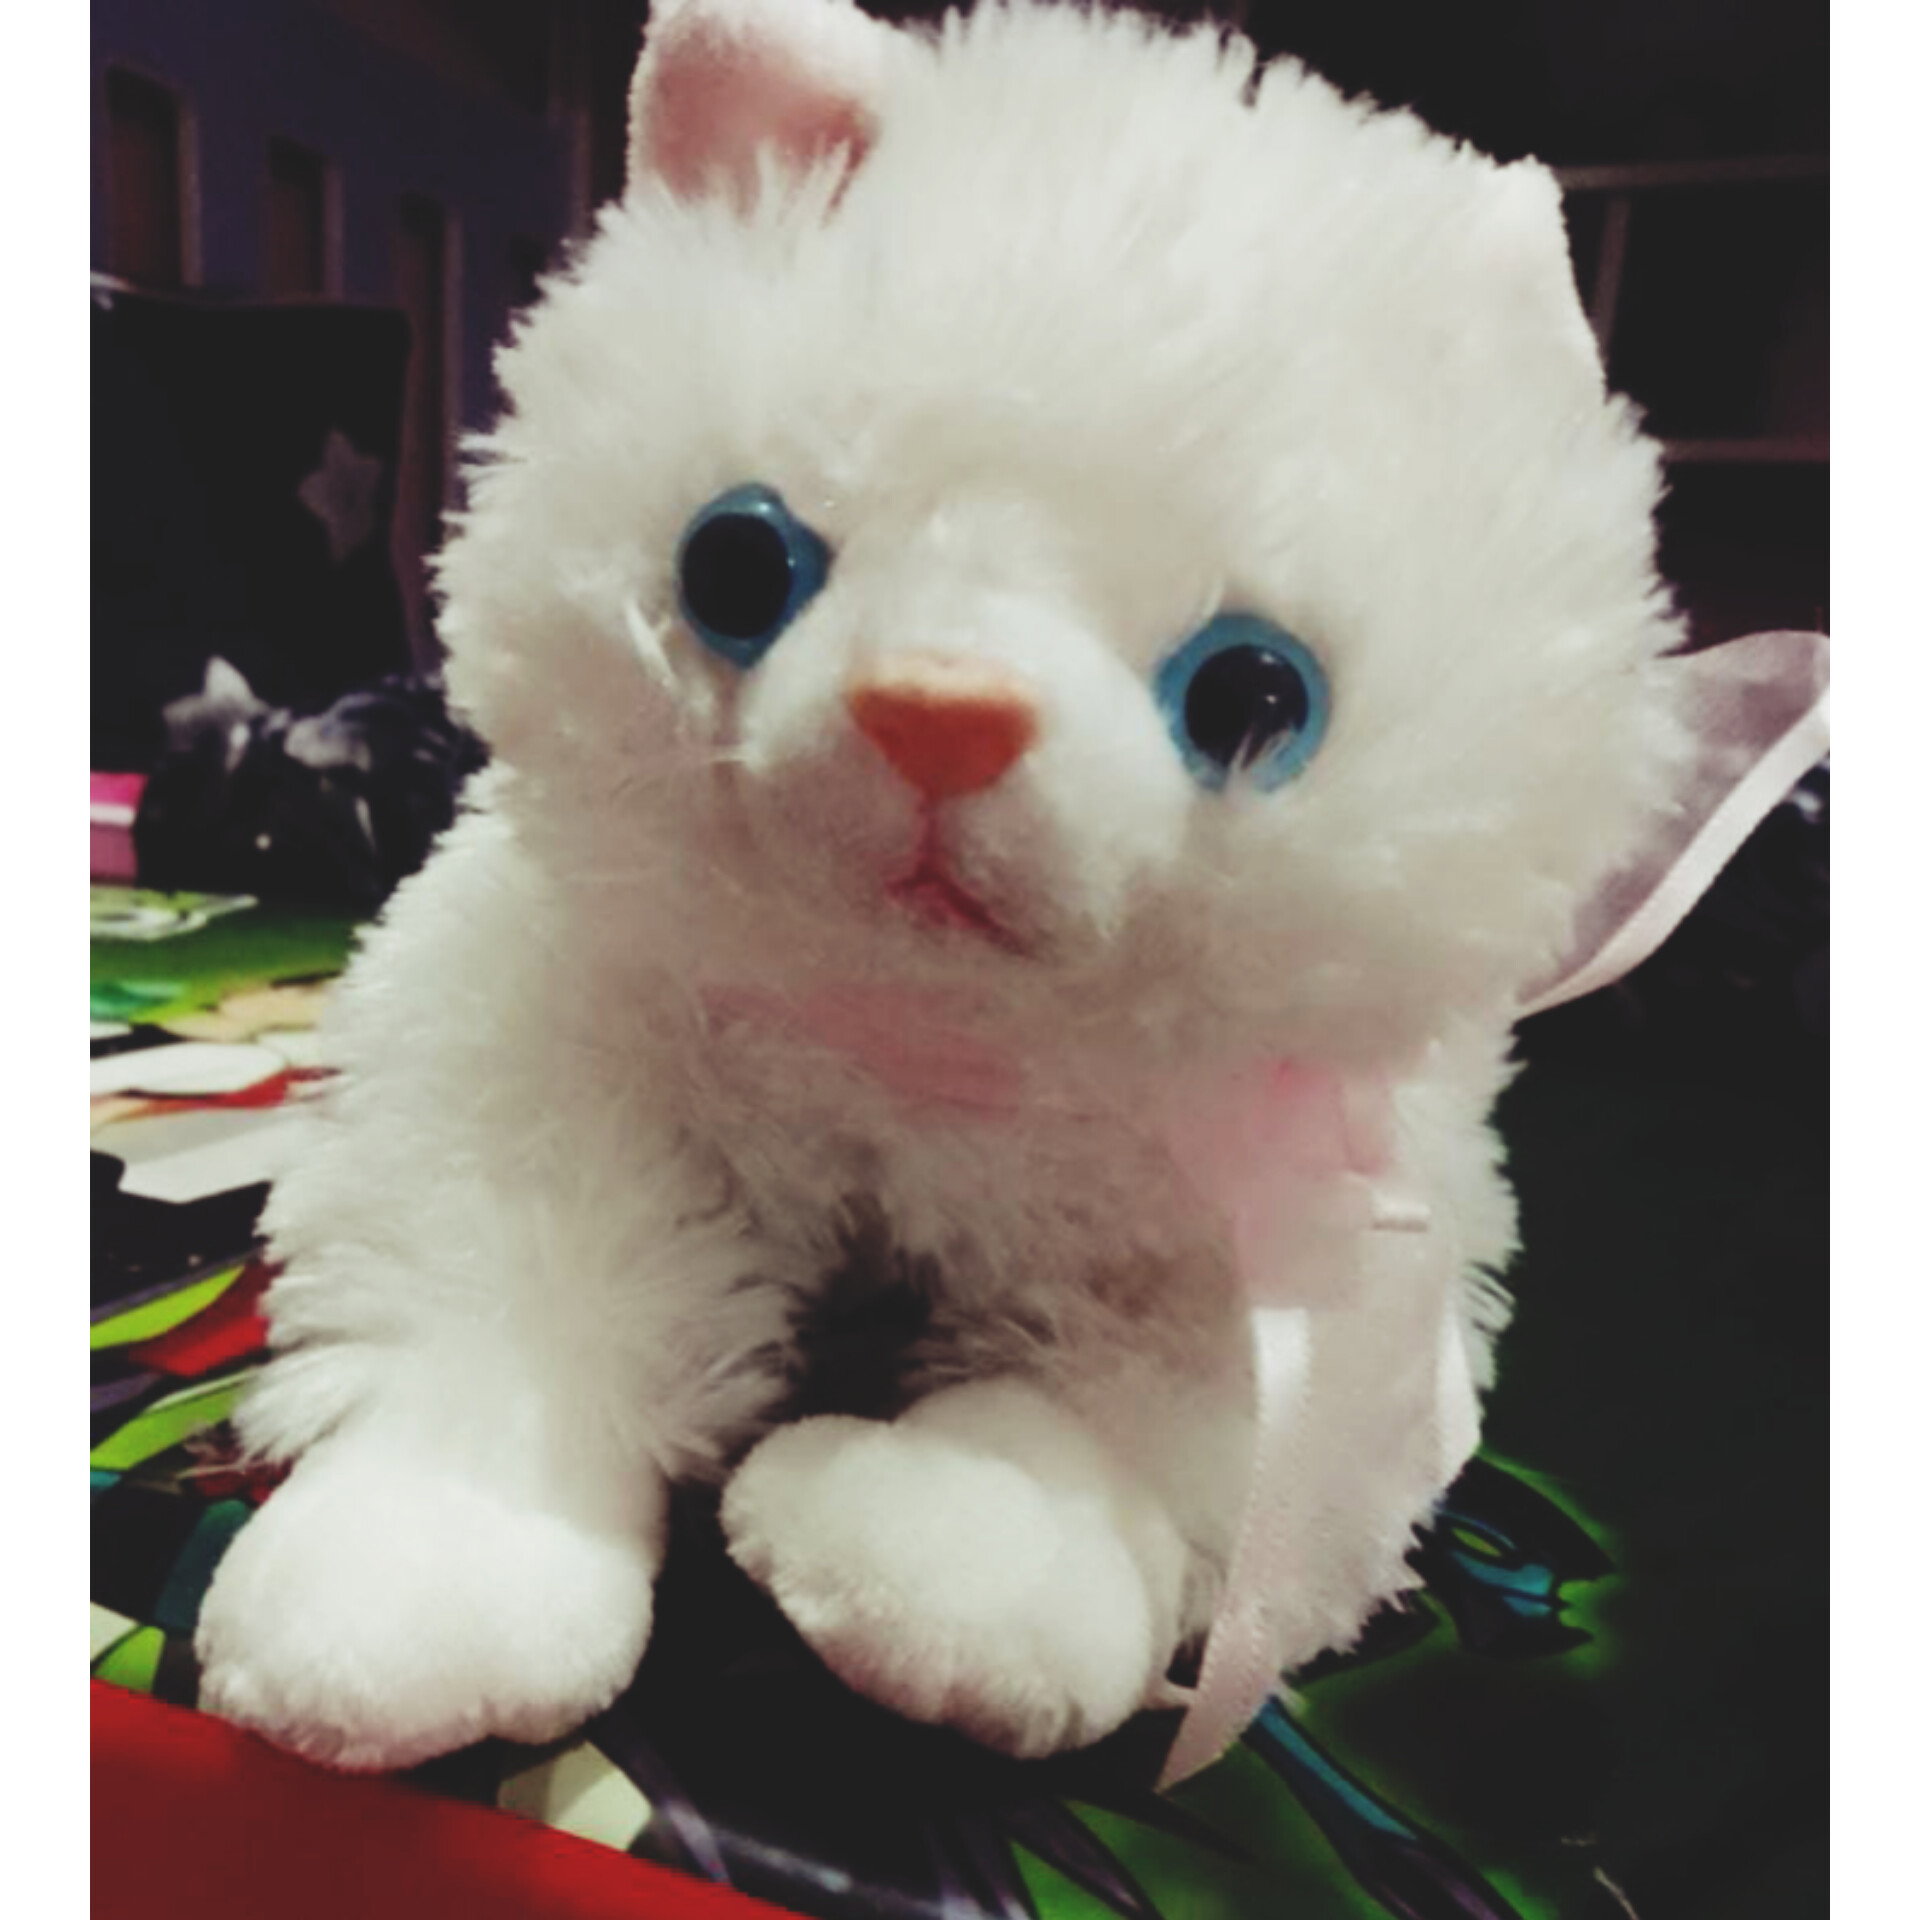
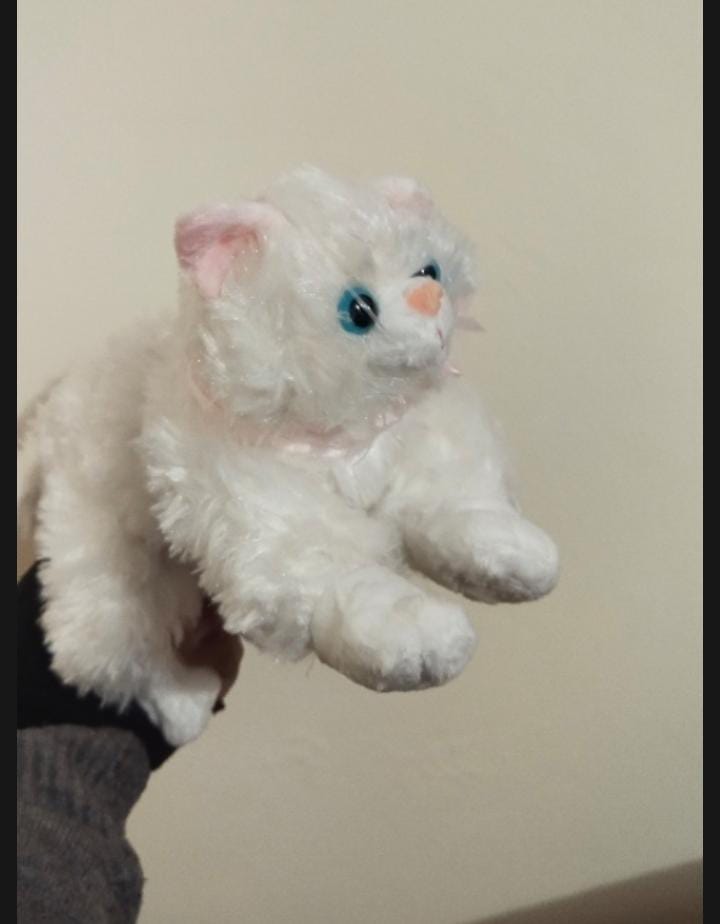
As a kid i was always fond of soft plushie toys . My room was always filled with dolls and teddies .But one specific toy that i couldn't even sleep without was a cat plushie .
I remember i was never allowed to keep a pet until now so instead on my 3rd birthday my dad got me this cat plushie .
This cat plushie was so realistic it was like a persian cat approximately 23 inches long and it had faux fur that made it super soft and cuddly . The eyes of this toy had two lights fitted in which made that eyes glow blue and it had a sound box inside the filling that made a meow sound everytime you petted it it was powered with 3 AAA batteries .
I was always cuddling it to sleep which is why my dad took out its batteries at night i used to cuddle and sleep to it till i was in 8th grade . Talking about this toy brings back so many memories . Like when my younger cousin and i had a fight over it . Apparently my mom dad would give any toy to the guests kids that came to our house because it was rude to not too but this one time i threw a tantrum so hard that i fainted and so they didn't give the toy to my cousin . Remembering that now makes me laugh out loud .
We all have a certain toy that we adore alot and this one is still treasured by my mom
Thank you for your precious time and support ❤️
I Did my little sisters nails for Eid
So i made my Little sisters Nails for eid .Here is a step by step tutorial on how i did it.
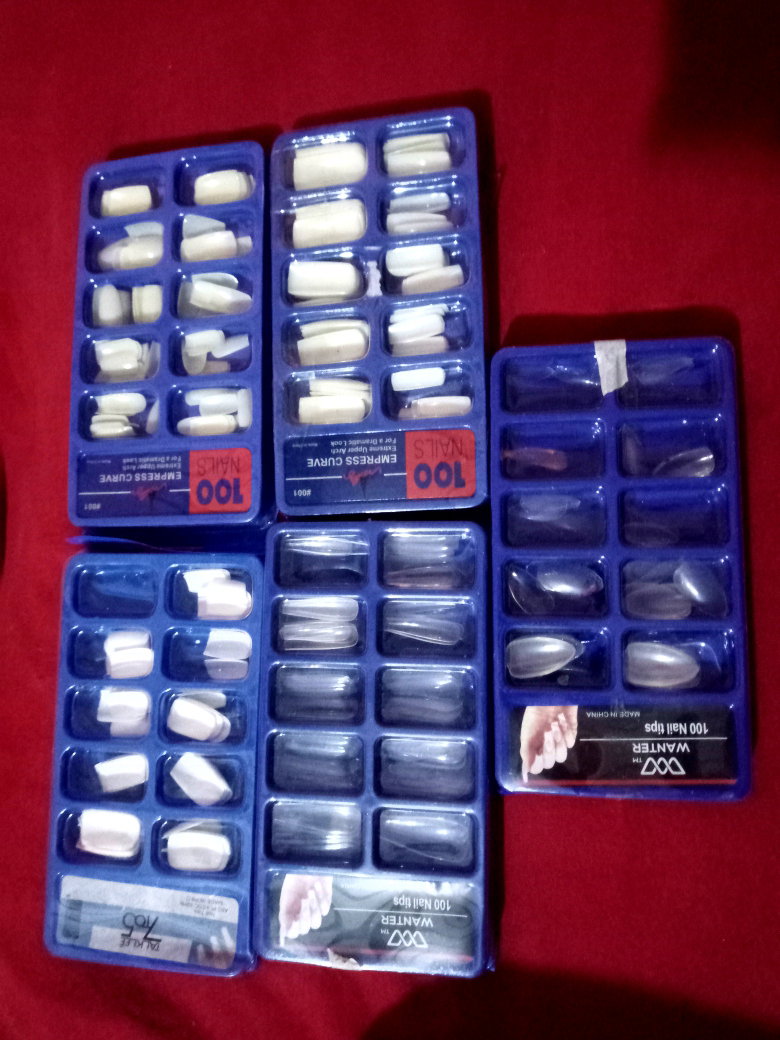
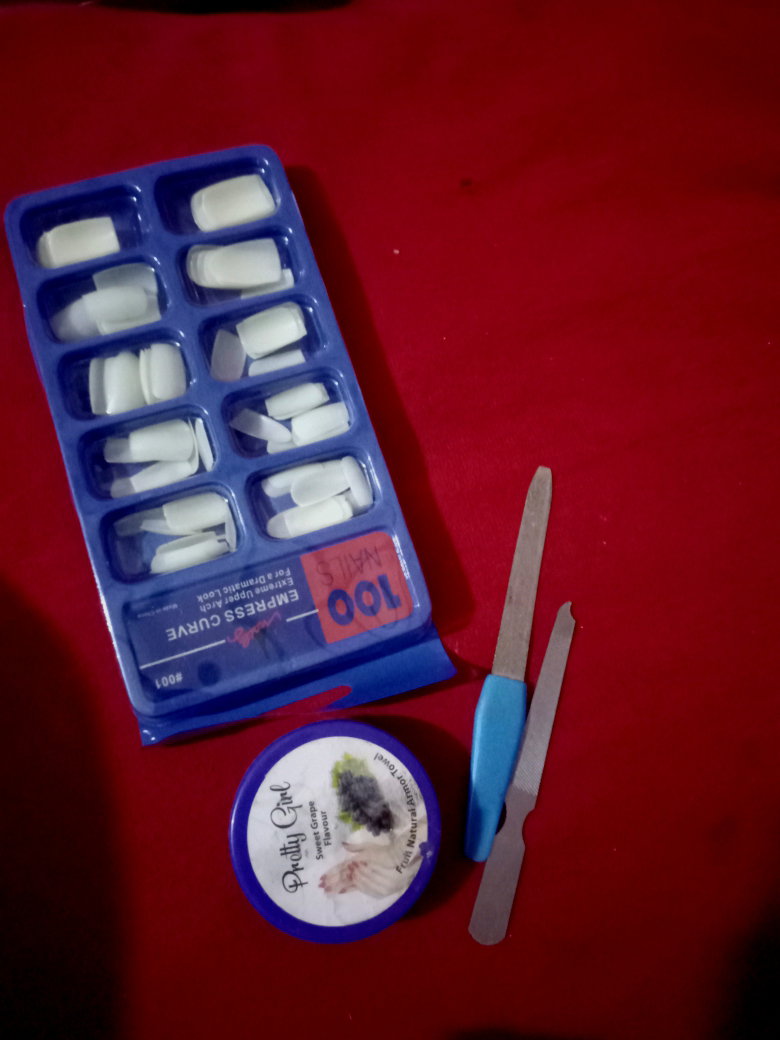
So i love doing stick on nails thats why i always buy extra nail forms so i had different shapes and sizes . My Sister has Summer vacations and she wanted to get her nails done so i did that for her . She chose short square nails that suited her quite alot
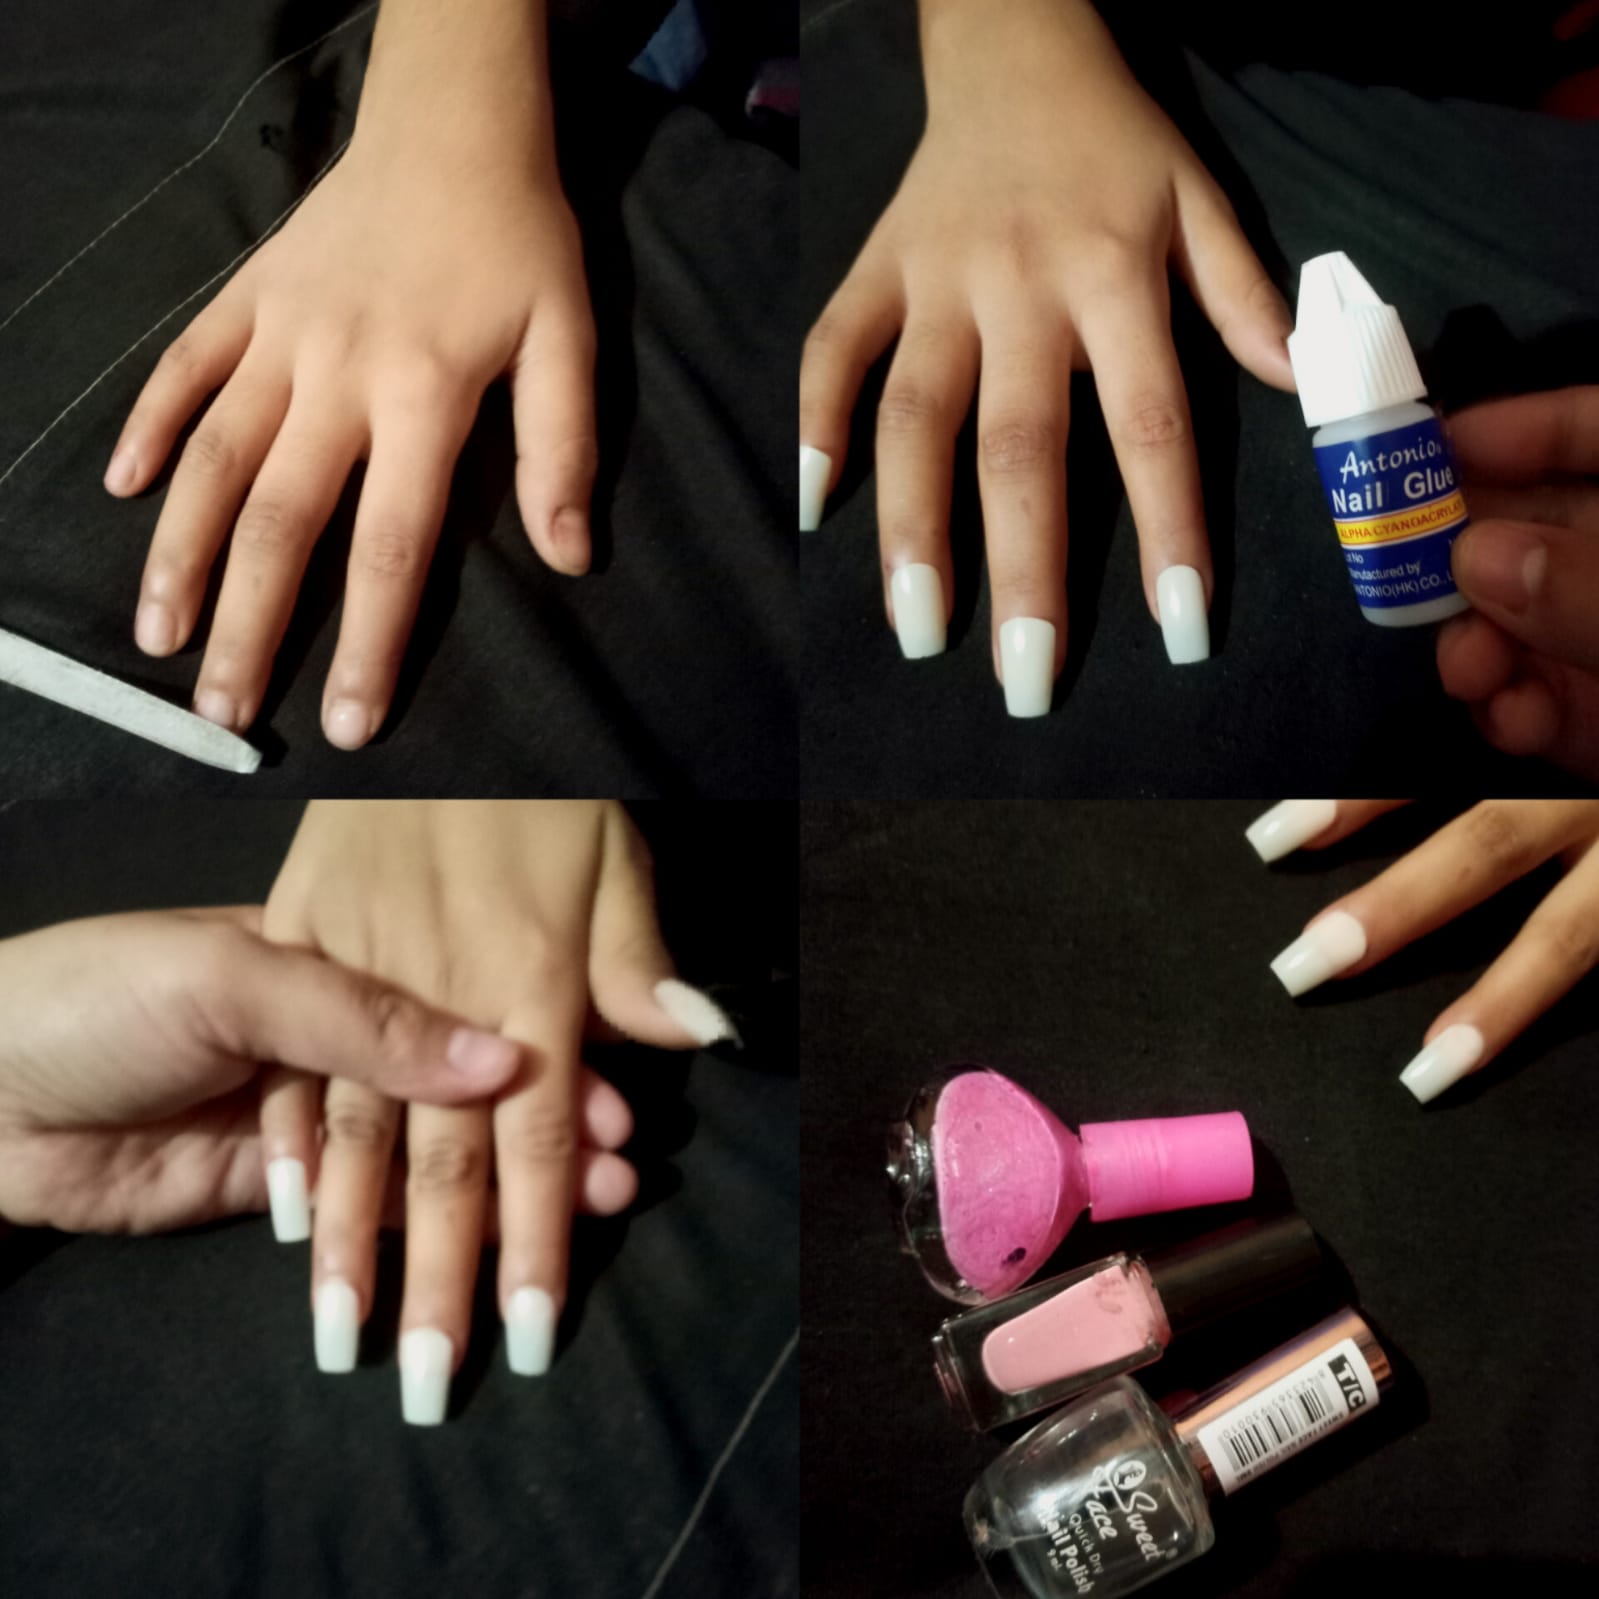
So i took a filer and buffed the inside of the nails and her nail bed next i used this nail polish remover pad to clean the residue off the nails
After that i used nail glue on her buffed nail bed but remember to use just a small drip and make sure its not near the cuticles when u put the nail on top the glue kind of seals the whole nail don't use alot of it as that can damage the cuticles.
After applying the nails i shaped them again and i took out the polishes that i needed .
For her nail design im using a hot pink color and a fairy pink colored top coat with a transparent nail coat
Afterwards she selected her fav nail sticker from my collection and i started off by applying. The fairy pink coat
To her nails after that dried i made hot pink blobs on top of each nail to give it that abstract look
After this step i cut the sticker and damped it with water and applied it on top of the nail so she used pink flower design for her nail. Then i sealed it all up with a top coat
And this is the final look
Thank you for your precious time and support
 @Biyaawnurr