Life saving Hack with Aloe vera
life Changing or life saving hack would be something that most people don't know about and can actually save a life . This one i personally have tried so i approve of this.
Here in Pakistan when ever we have sunny days its Wasp and bee season. As our homes are kinda open mostly like my room opens into a Balcony where we have plants , Its pretty common for wasps too appear outta no where.
So one day i was sitting in my balcony painting a scenery in Sunlight having the time of my life amd out of nowhere a wasp stung my Knee .
I was just baffled and screeching in sheer agony . Now what do you do In such situation? First of all locate the stung area on ur skin squeeze stinger out of it let it bleed a bit .By now your having a feeling that someone has set you arm on fire. Here is the hack fresh aloe Gel pad so i cut open an aloe leaf from my planter cut it in half so it looked like a gel pad and wrapped it around my Arm . Aloe Vera is very very effective in detoxing , inflammation , soothes skin , has properties that repair sun damage on skin , it also is a great moisturizer and i must tell you with in 30 seconds my pain was gone yet my hand did swell a bit i took anti allergy pills for that which my doctor had prescribed . I wish more people knew about this Miraculous plant and its hacks . Another Aloe hack is its a great laxative . You feel Constipated ? Grab aloe gel make a smoothie just put a piece of the washed clear gel and blend it.
Having Acne and skin Break outs ?
Put aloe gel on your skin to repair it and rejuvenate your skin
Your hair are dry and brittle mix some yogurt rice water and aloe gel together apply as a hair mask and get flawless Hair
I can keep writing on How Amazing Aloe vera gel is but i guess this will be where i end it today 😂❤️
Thank you for Reading and for Your support

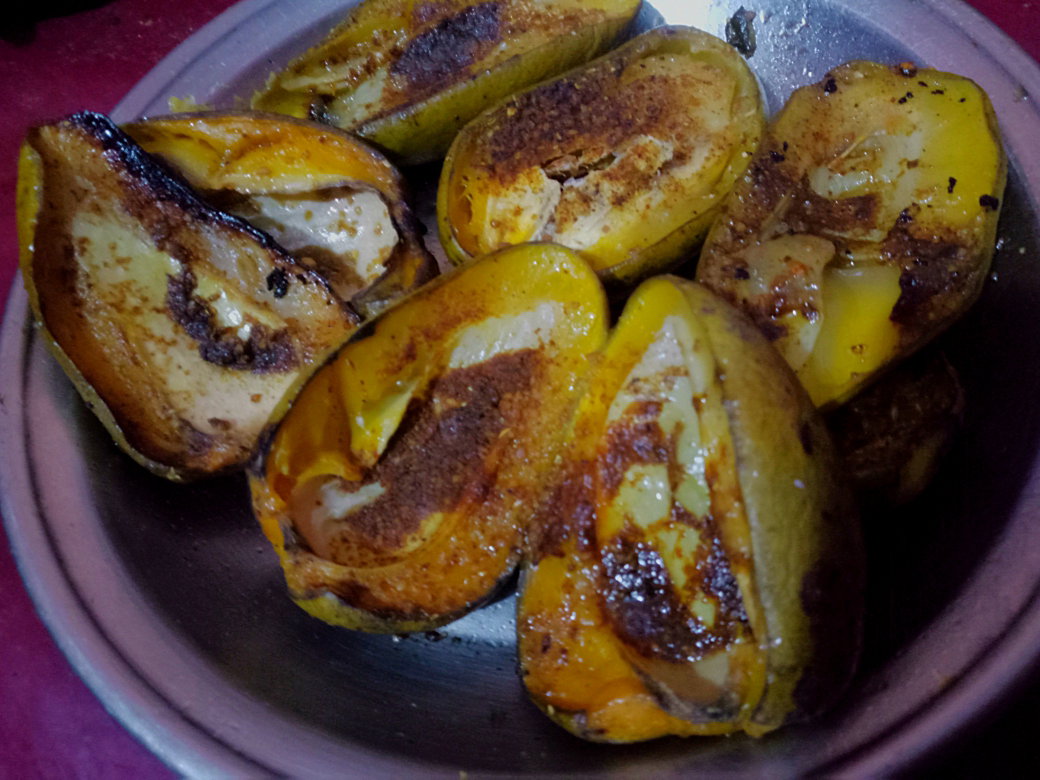
Fried Raw Mangoes
My dad has a thing to buy any fruit thats in Season so When Raw mangoes came he brought a whole Crate full .
Raw mangoes are Sour and kinda crunchy in taste totally opposite of Ripe sweet mangoes but they are delicious both ways.
We usually have them sliced but other times we do fry them a bit to get that juicy sweet tangy flavour out.
Here is the full Recipe.
INGREDIENTS:
• Raw mangoes Sliced
• peprika
• Salt
• coriander powder
• 3 tablespoon oil to fry them
METHOD:
So i washed the raw mangoes throughly and sliced them into fours took the seed out and in a bowl i mixed a teaspoon of peprika , salt. And a tablespoon of coriander powder tossed my mangoes in massaged them like kimchi and let them sit for 5 mints then in a hot pan i added oil and fried them its ready when you feel the mango getting soft and Thats it now you can enjoy it as a side dish while i actually loved eating them with roti in Lunch .
Kinda Just sprained my leg and now im getting the x-ray out .Might take some days off .Need prayerssss
I Became a Sticker Maniac
This week was all about finding my peace of mind . As i was struggling with some issues i wanted to do more creative cute things that could make me feel productive.
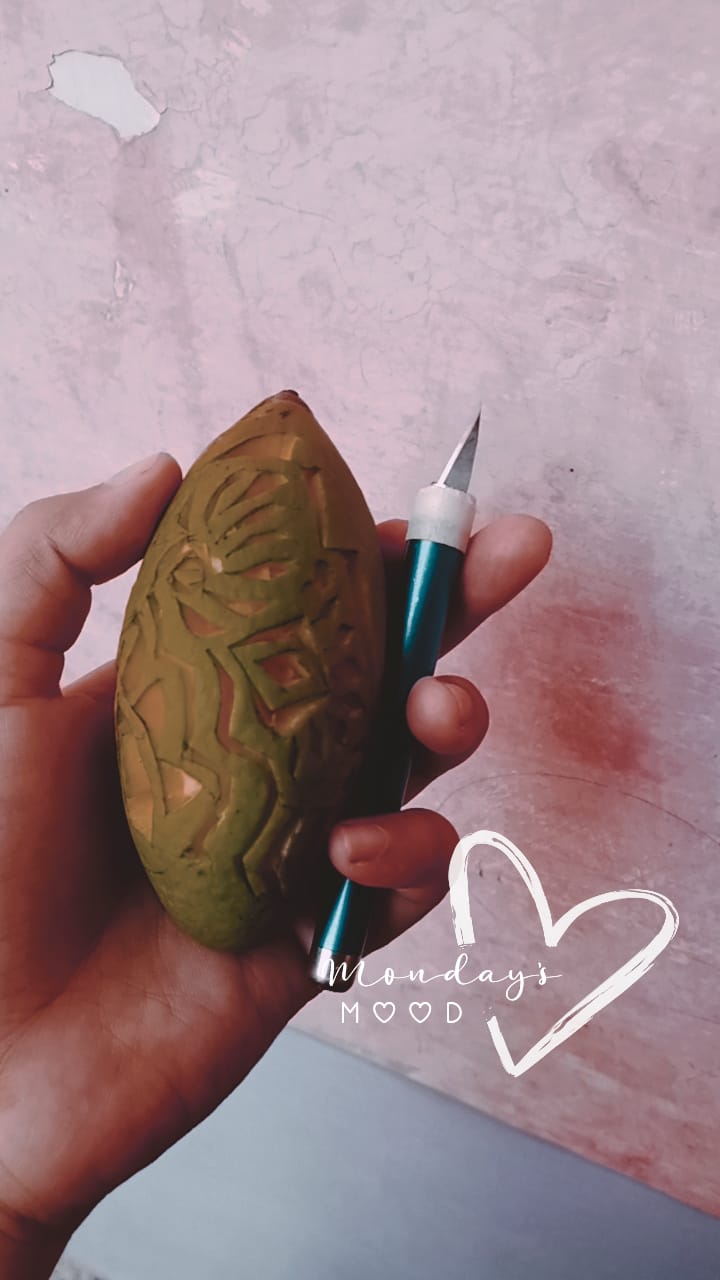
On Monday i made a surgical pen and carved a raw mango . I didn't waste it though instead i kinda ate ot as a salad so like i was practicing my cutting skills and Tbh not so good at it but it was a fun thing to do.
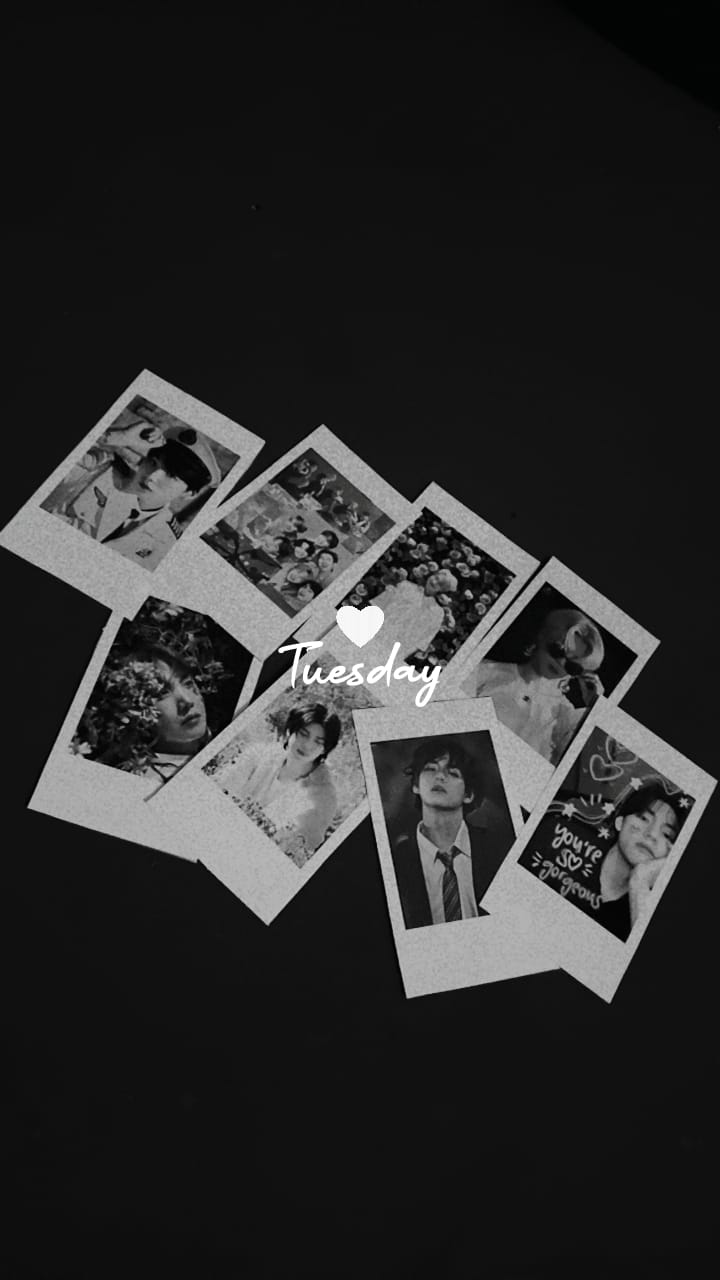
On Tuesday we got our new Epson Printer and my Brother is starting a small business so i was making some product displays for him. One of our Top products are these customizable cut Polaroid stickers and i absolutely loved them.
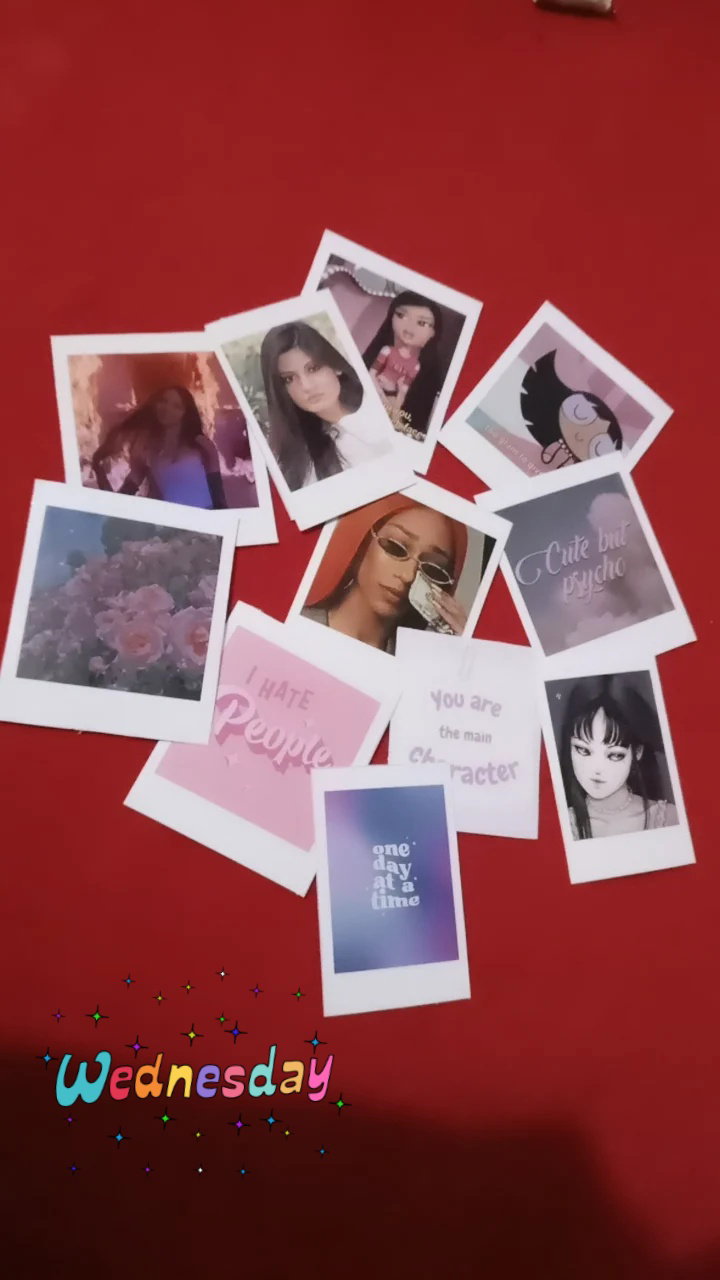
On Wednesday i actually printed some of my type of Polaroid stickers just to show a bit like how they actually are and well i decorated my cupboard with them but thats a different blog 😂
On Thursday i got some hello kitty stickers printed the whole cutting process was a bit hectic . This was our first Order so like it had to be good how ever my brother accidentally printed the sticker in wrong size so i used it to beautify my mini power bank and earpods they looked really cute 😍
On Friday the Clouds were up again and it rained alot so i spent my Day indoors meditating mostly
On Saturday since its Summer we got Ice creams as a treat and also cause it was my cheat days . This one was a strawberry cream popsicle .It was Delicious
On Sunday i actually had a great news My Male cat Shiro Actually had 3 kittens and this is one of them i couldn't photograph the other ones cause they hide alot still but this one actually was taking a nap in my pots as it was hot outside and the Watered pots had wet soil . I gave him milk and came back. TBH i wanted to cuddle him or get him in room but Lets be honest Stray cats are free and they need to be wild and free . If it wants it can follow me my male cat even was allowed to roam out in wild . I just care for them and let them free .Thats my love language.
Thats all for my week how was yours do tell me
Drawing an ice cream cone digitally ( For beginners)
As every week here is this week's Easy Illustration you can draw too. Today we are drawing an ice cream cone
You can use pencil , pen anything im using Medibang paint pro which is a app that can be installed in any device .
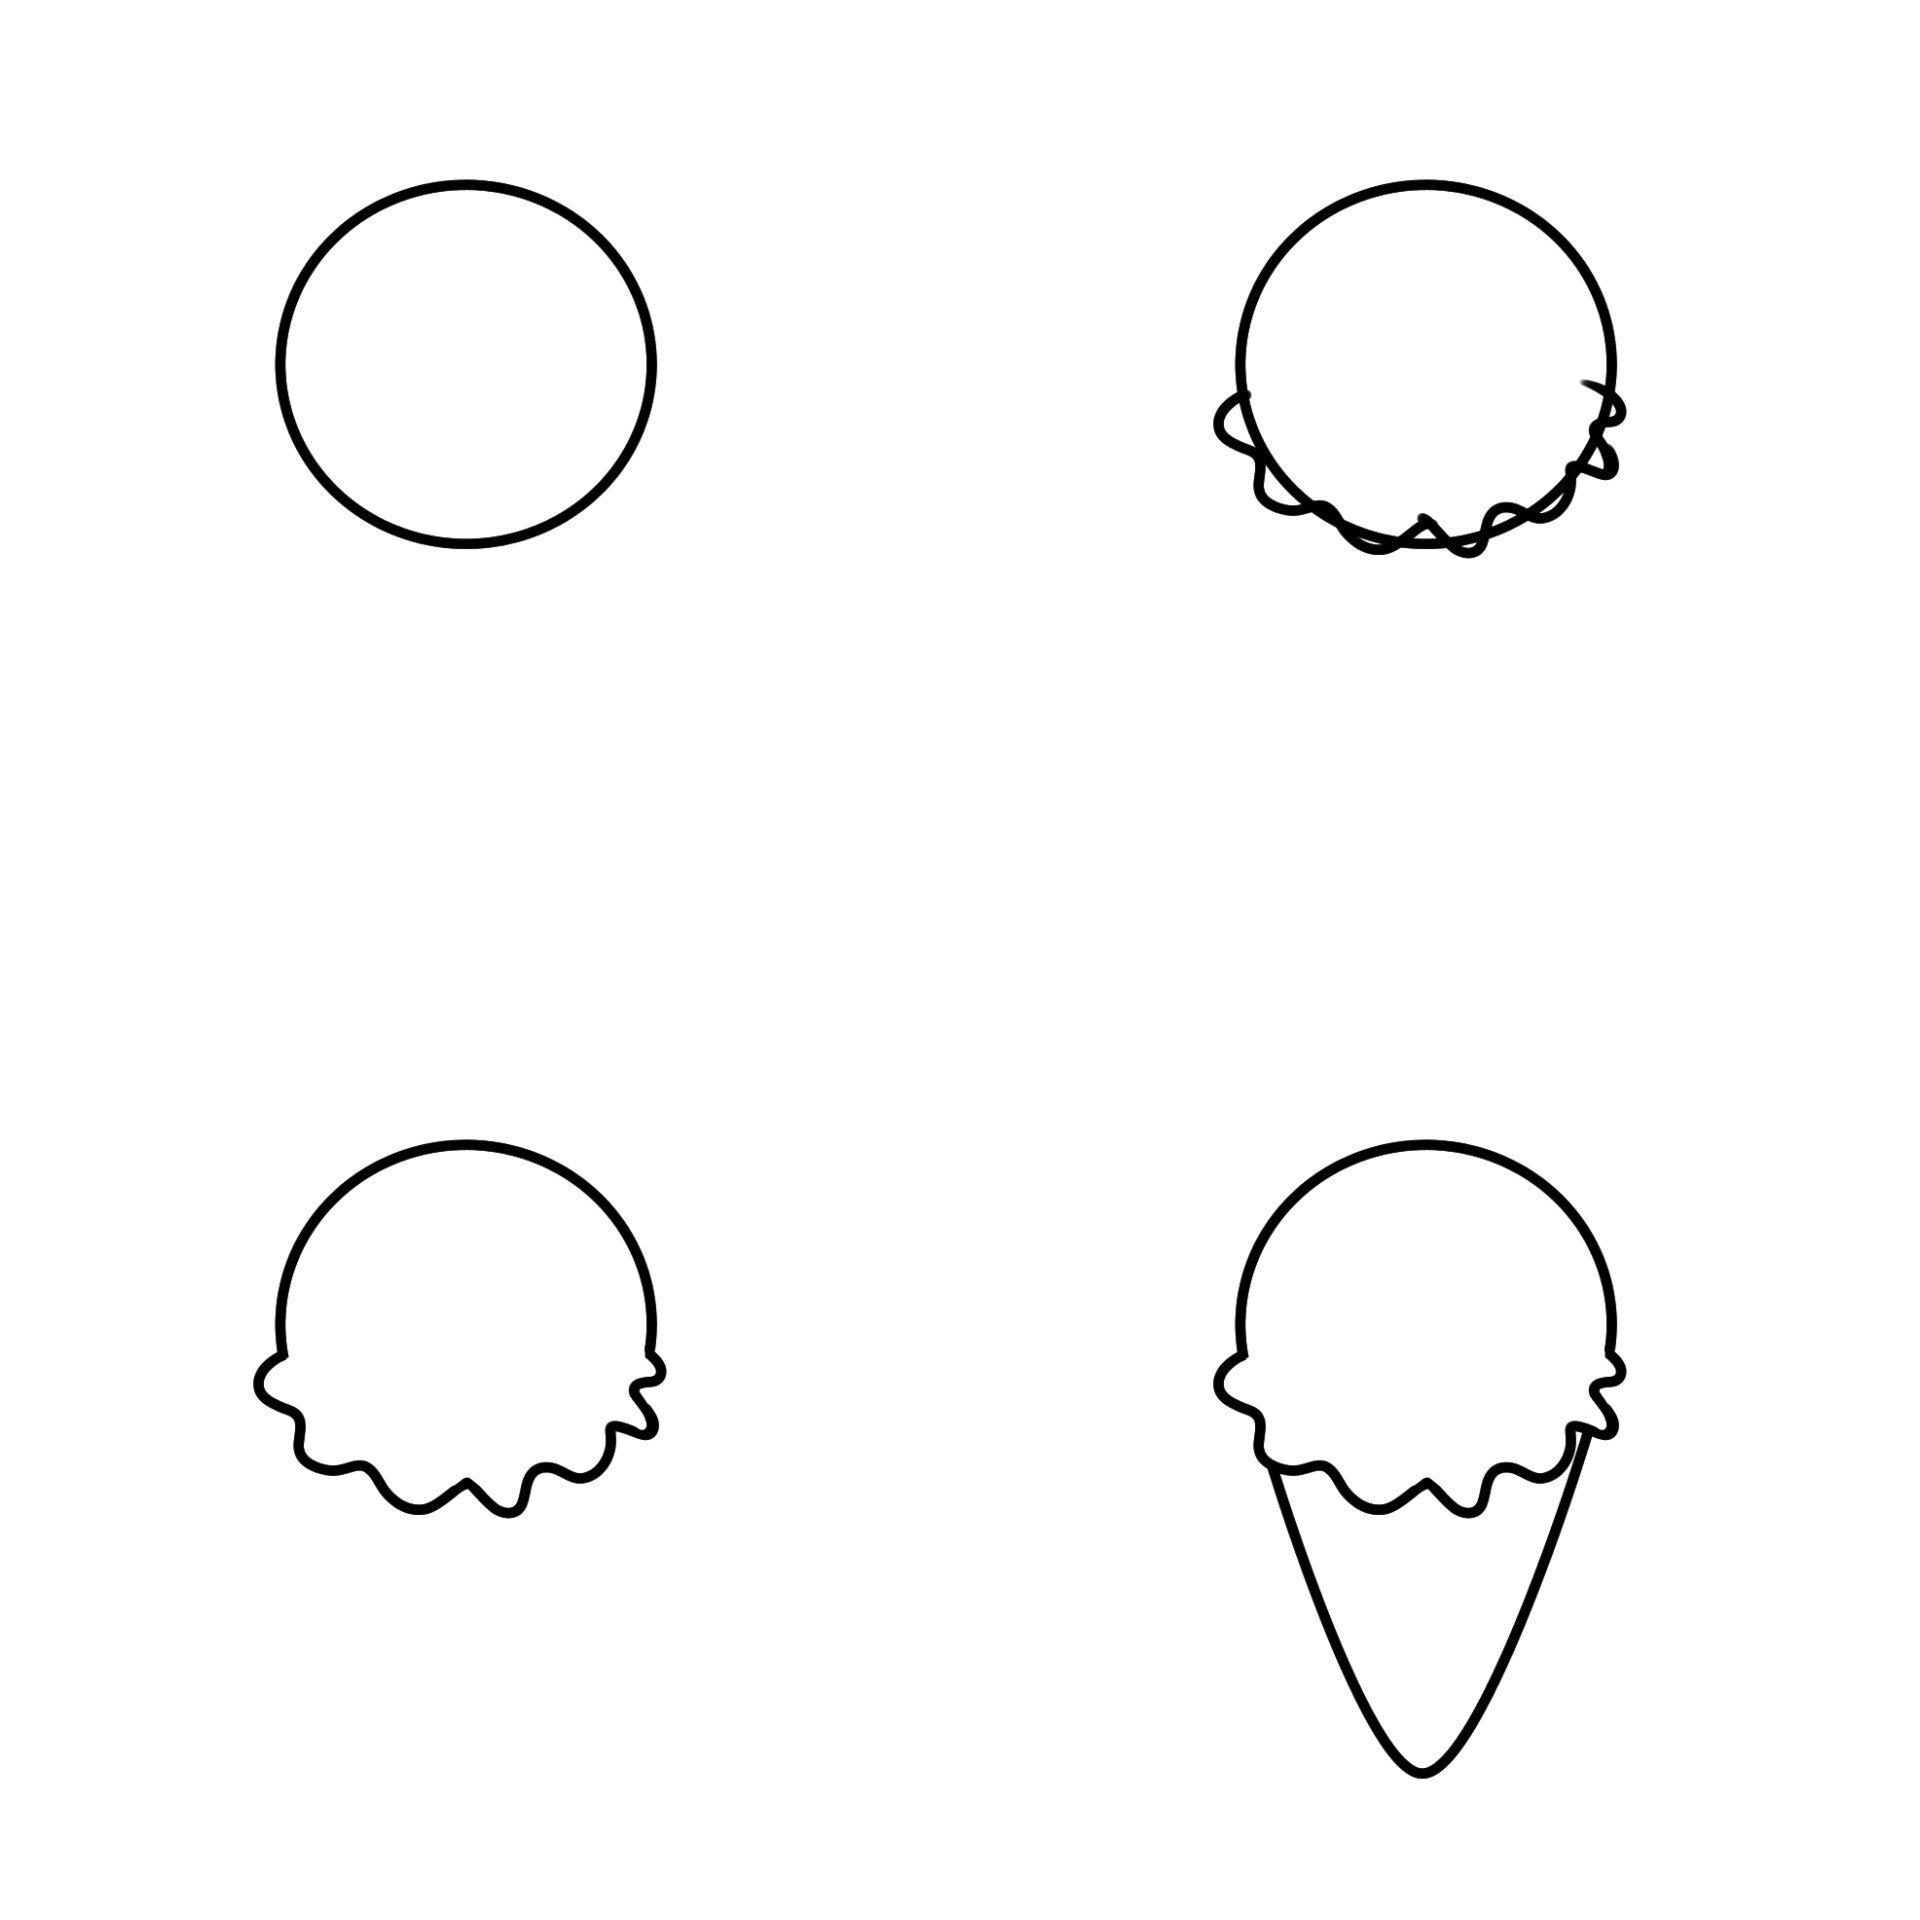
So i drew a circle , then i drew another layer and made some squiggly wavy line . Then i erased the circle so the squiggly lines look connected to it . Added a a curved line that looks like a cone on the bottom
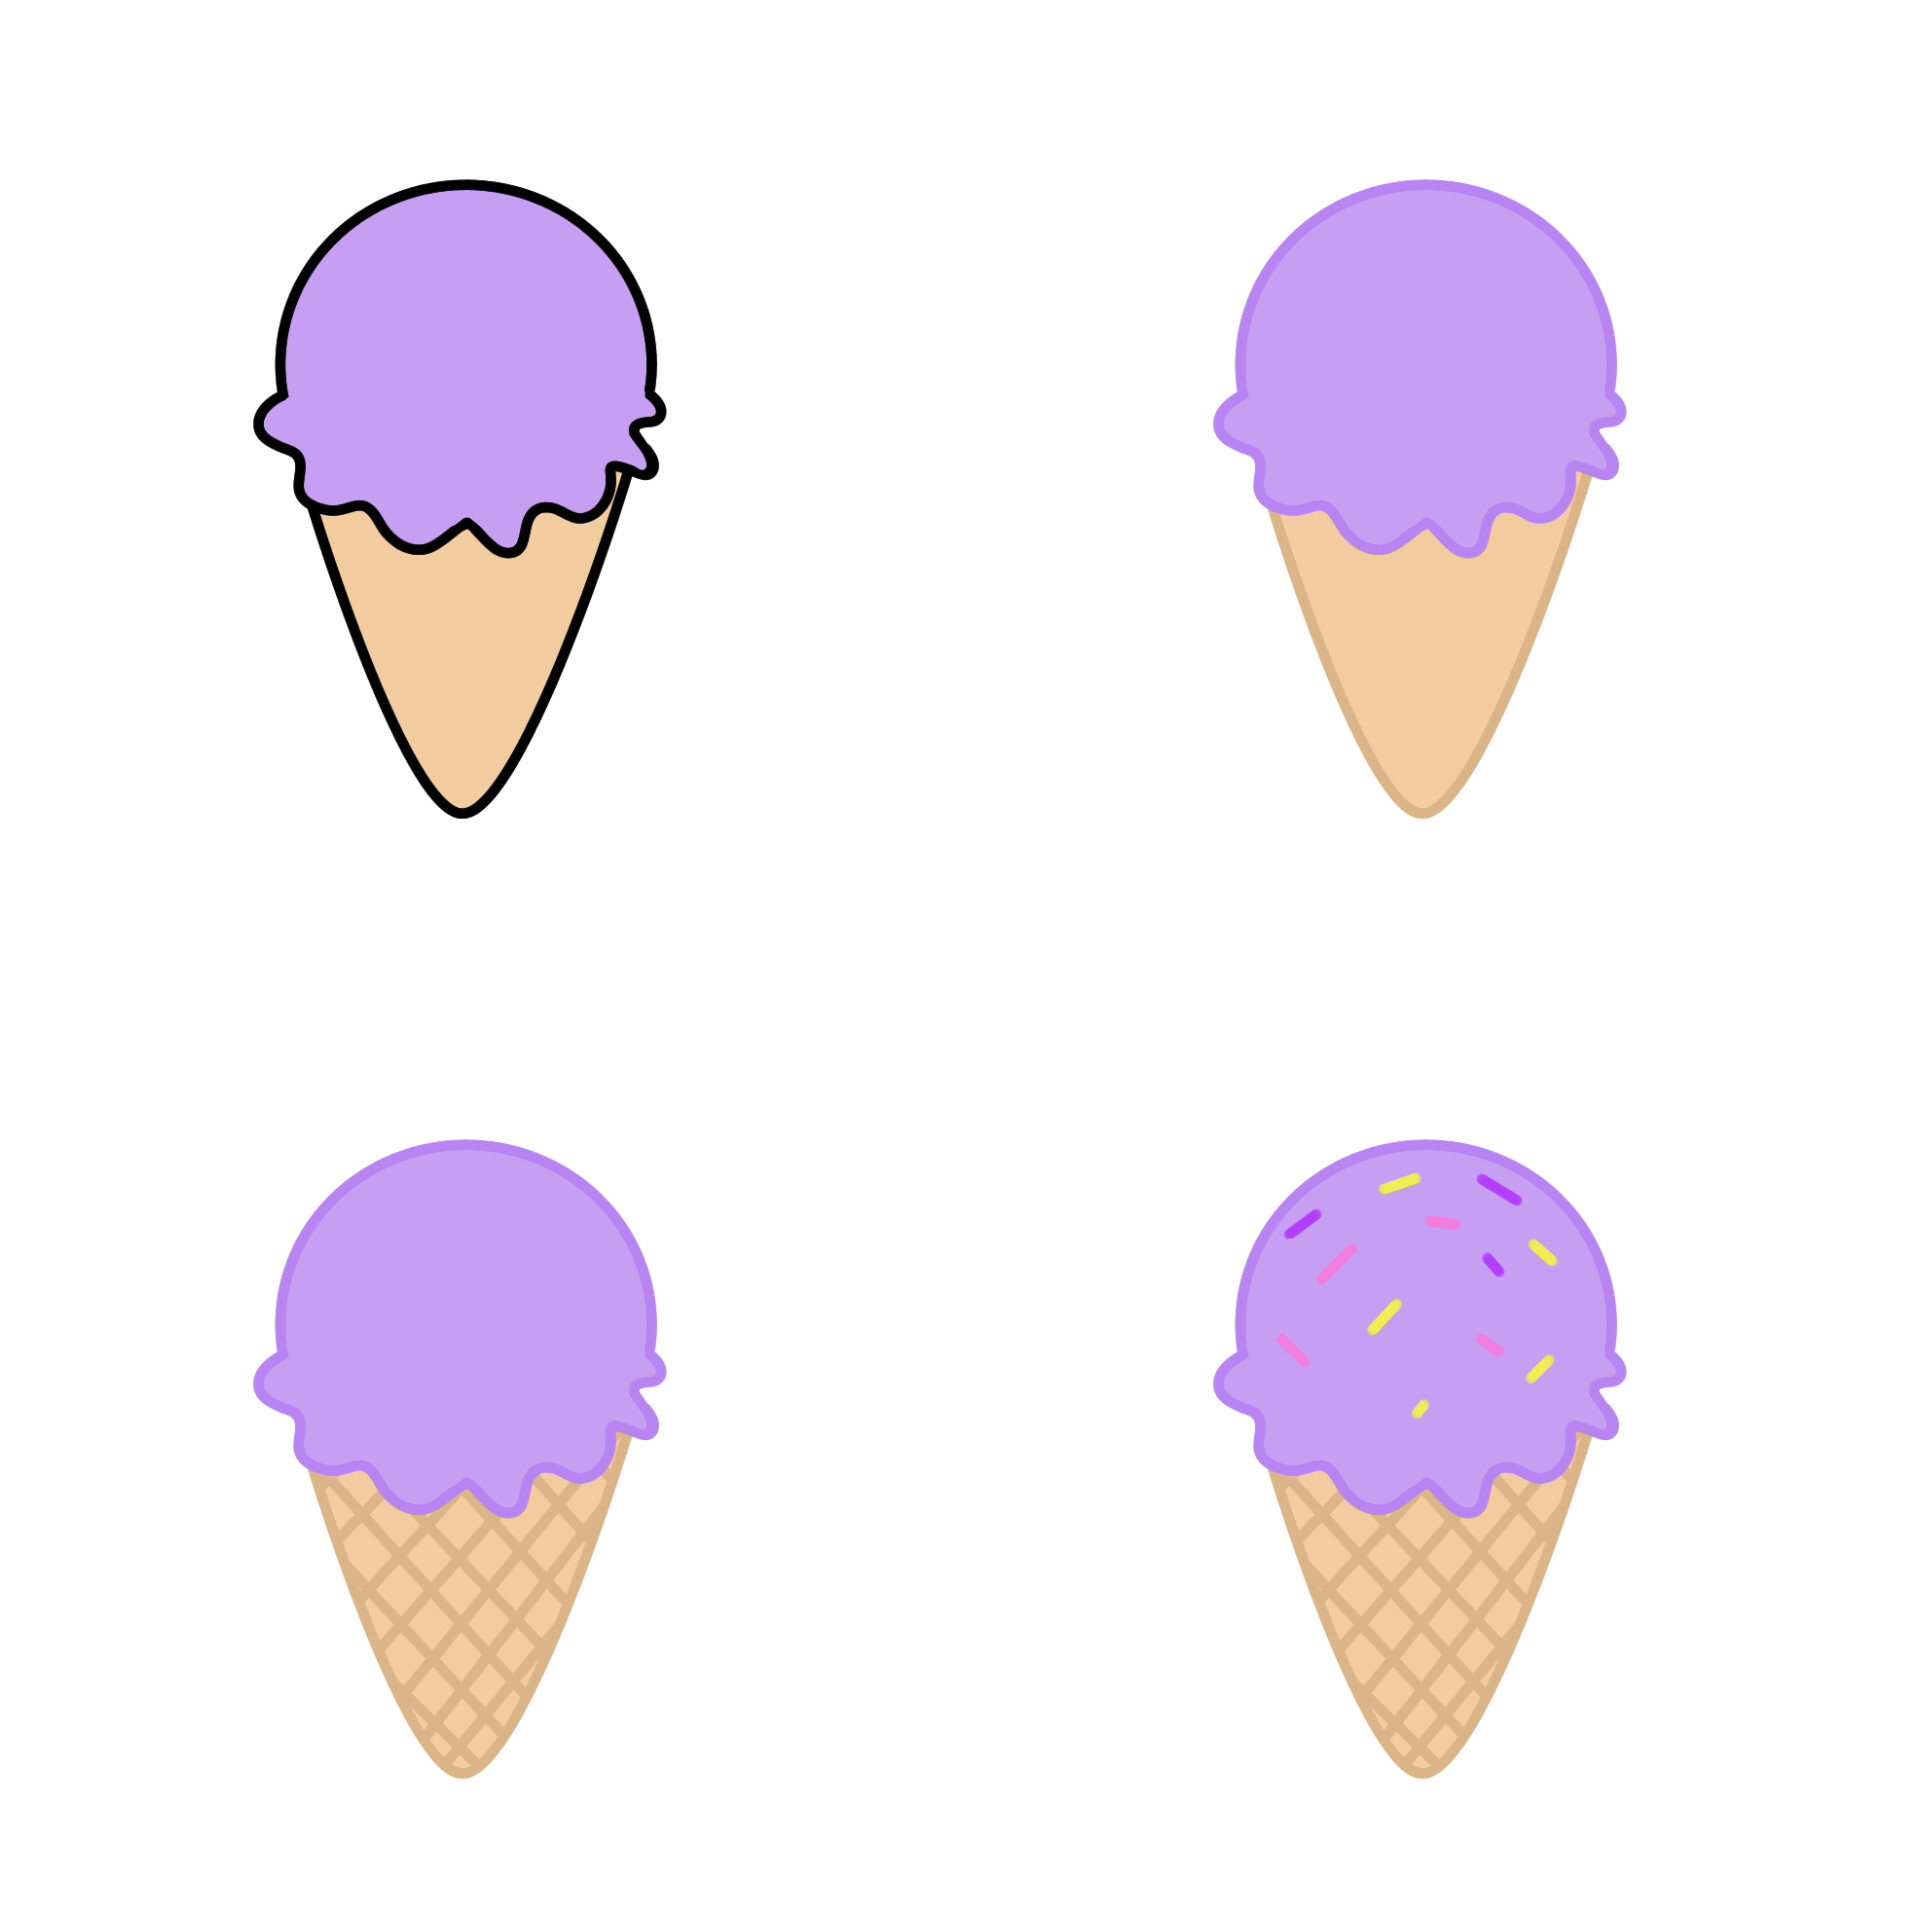
Now i filled basic flat colors in our ice cream cone . Here is a trick to make your illustrations cuter color the lineart from the same color but take a shade darker like the ice cream scoop is purple so i made its lineart purple too .This gives your drawings a very soft pastel look.
Next i added some diagonal line like a grid so it resembles the waffle cone and lastly added colorful sprinkles on top of it
This week im taking it a big further by telling you how to shade your illustrations.
Anywhere the line hits is gonna be highlighted while opposite will have a shadow . However shading can also be to show you shape like the ice cream is more rounder on the scoop so i did that with an airbrush this added some depth to our cone .then i added highlights with a watercolor wet brush and set it to add in color blending mode this gives that shiny glossy finish . I added a gradient to the background and here we are with the finished illustration.
Do comment if you tried Drawing this
Im kinda having an issue with self discipline you know that depressed feeling when you wanna do things but even simple tasks are tough . If any one has tips about it please tell me .i would appreciate an article on this tbh
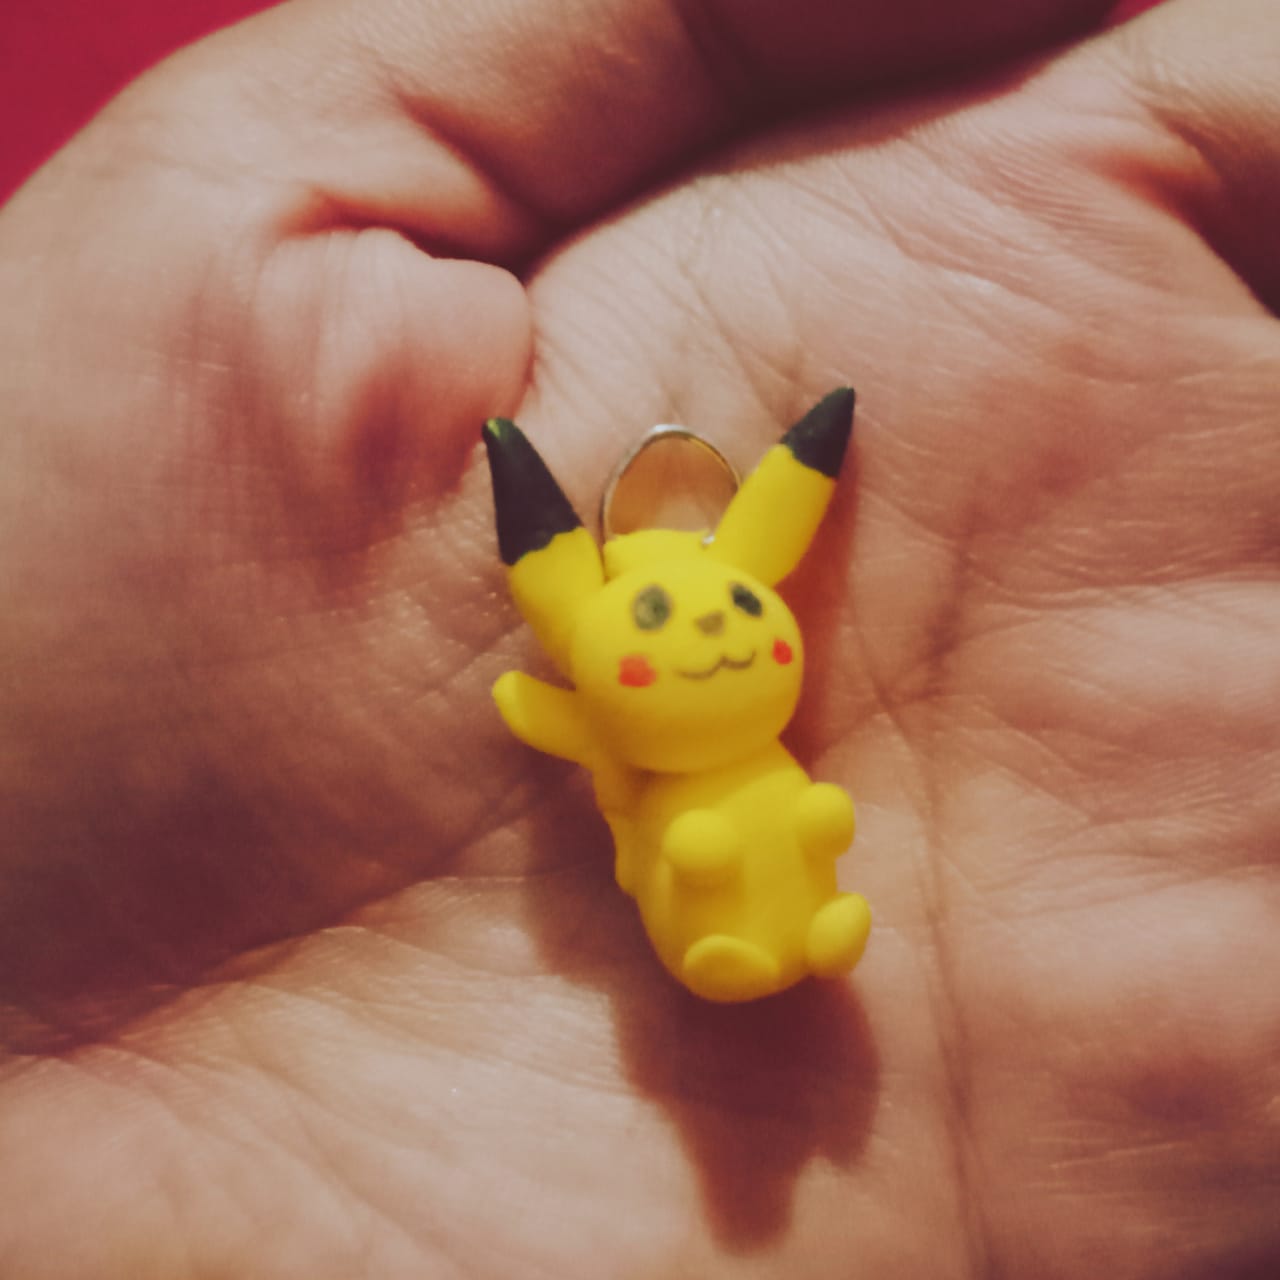
DIY Pikachu charm
Lets do another diy charm project so my sister saw my mini charm and she said i want one too but i want a Pikachu charm since she is a Pokemon fan .
So lets get into it im using super clay fpr this project its an air dry foam kind off clay .
Things i used in this project:
• yellow super clay
• a black marker
• red marker
• a jump ring or eye pin
• clear glue as warnish
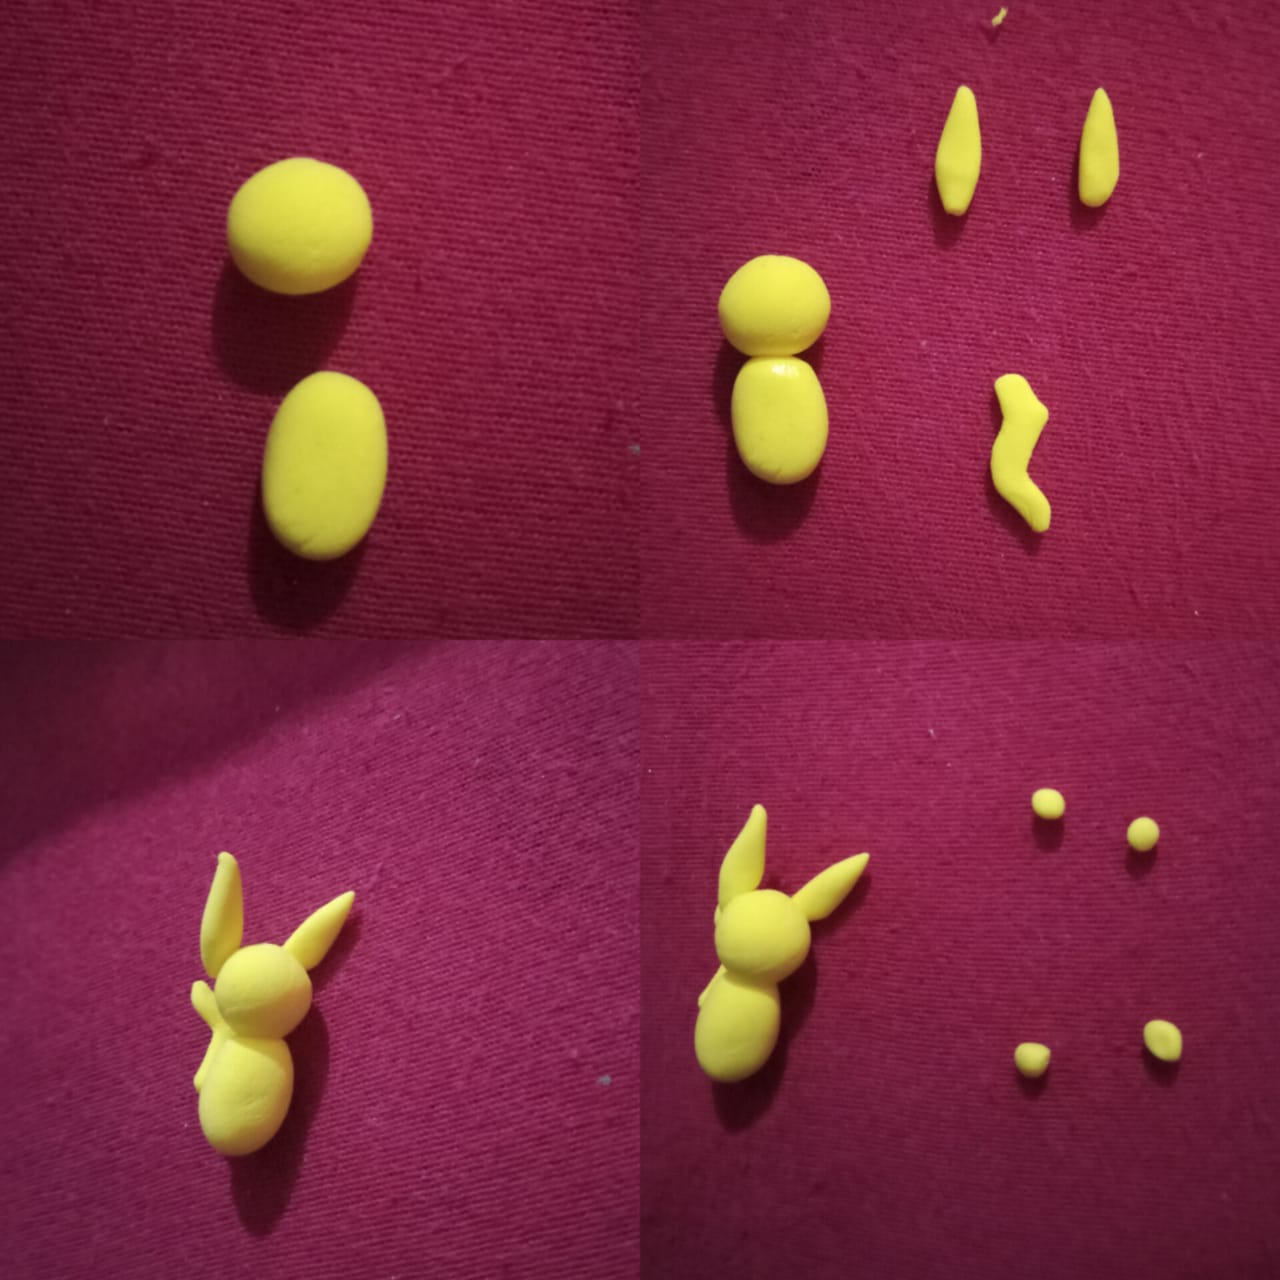
So i made a mini sphere and a oval kind of shape thats flat from the bottom . The sphere will be out Pikachu's head and the oval will be its body base.
Next we know the main features on Pikachu are his long pointy ears and a lightening bolt tail.
So i made a yellow tail in zigzag and two pointy diamond shapes these will be the ear
Stick them to our Pikachu for the hands and feet we 4 mini balls two a bit circular 2 a bit oval. Oval goes for the feet and circular go for hands
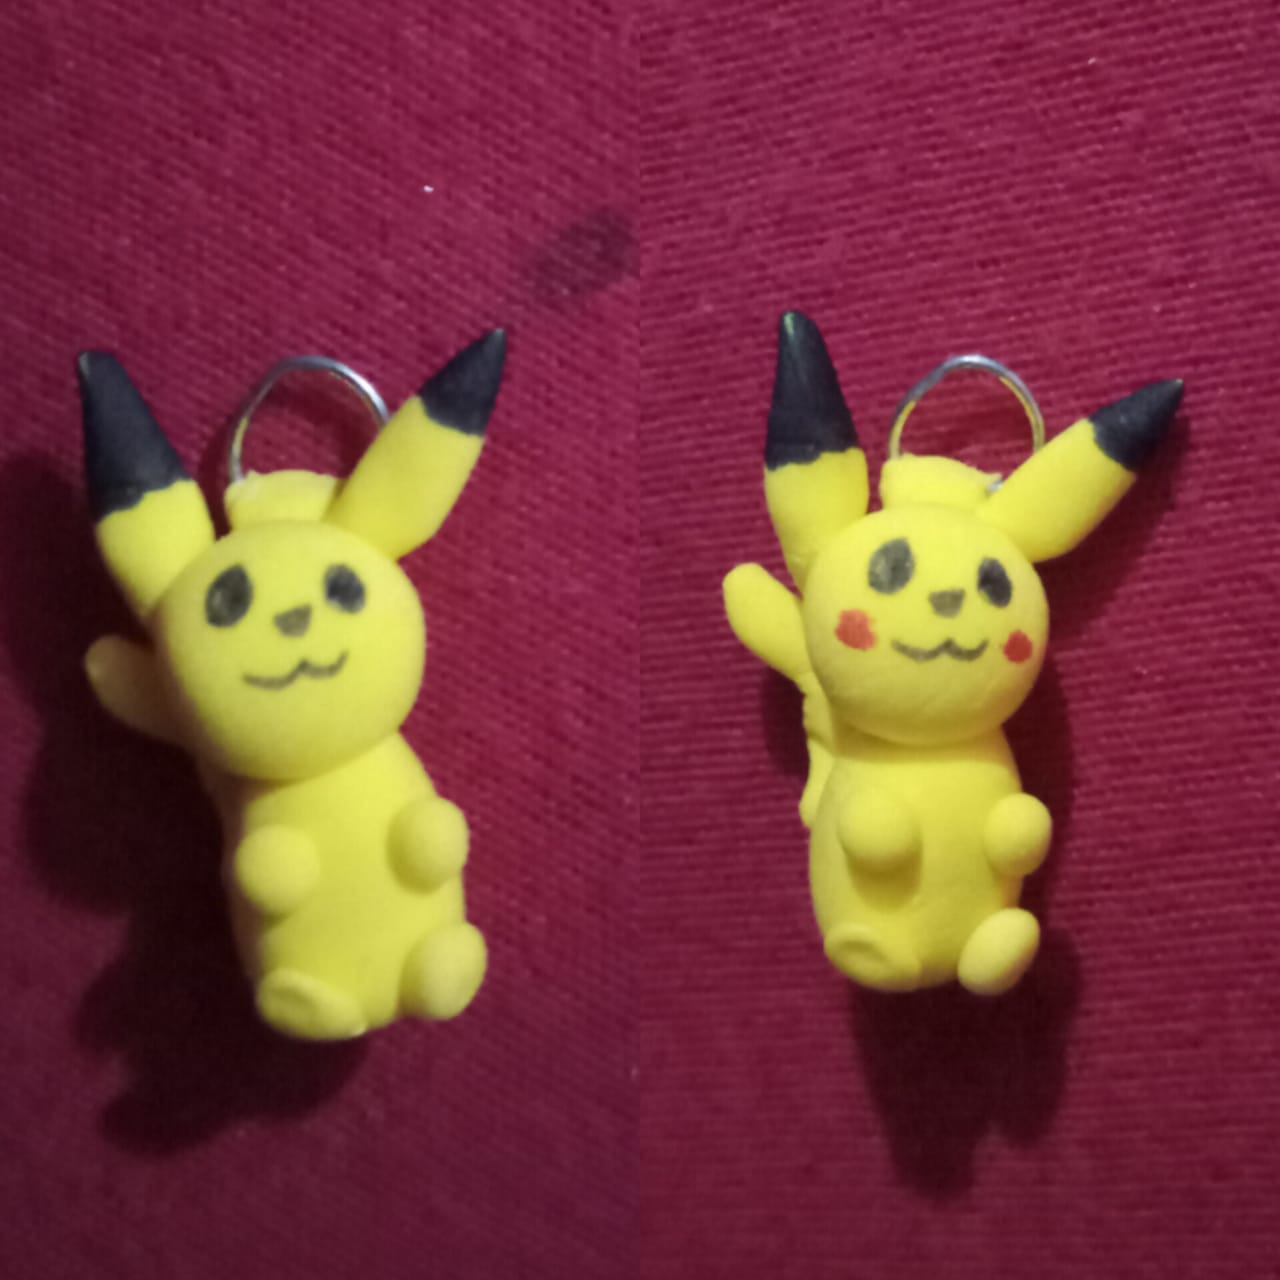
Next i took amy jump ring attached from behind with a strip of clay . I took a marker and made tips of Pikachu's ears black as well as his eyes nose and cute mouth. I used the red marker to make his blush spots .
Afterwards i sealed my charm by warnishing it with clear glue this makes it durable and glossy i did two coats dried them and here is our cute Pikachu charm 😍
Practicing Chibi Portraits
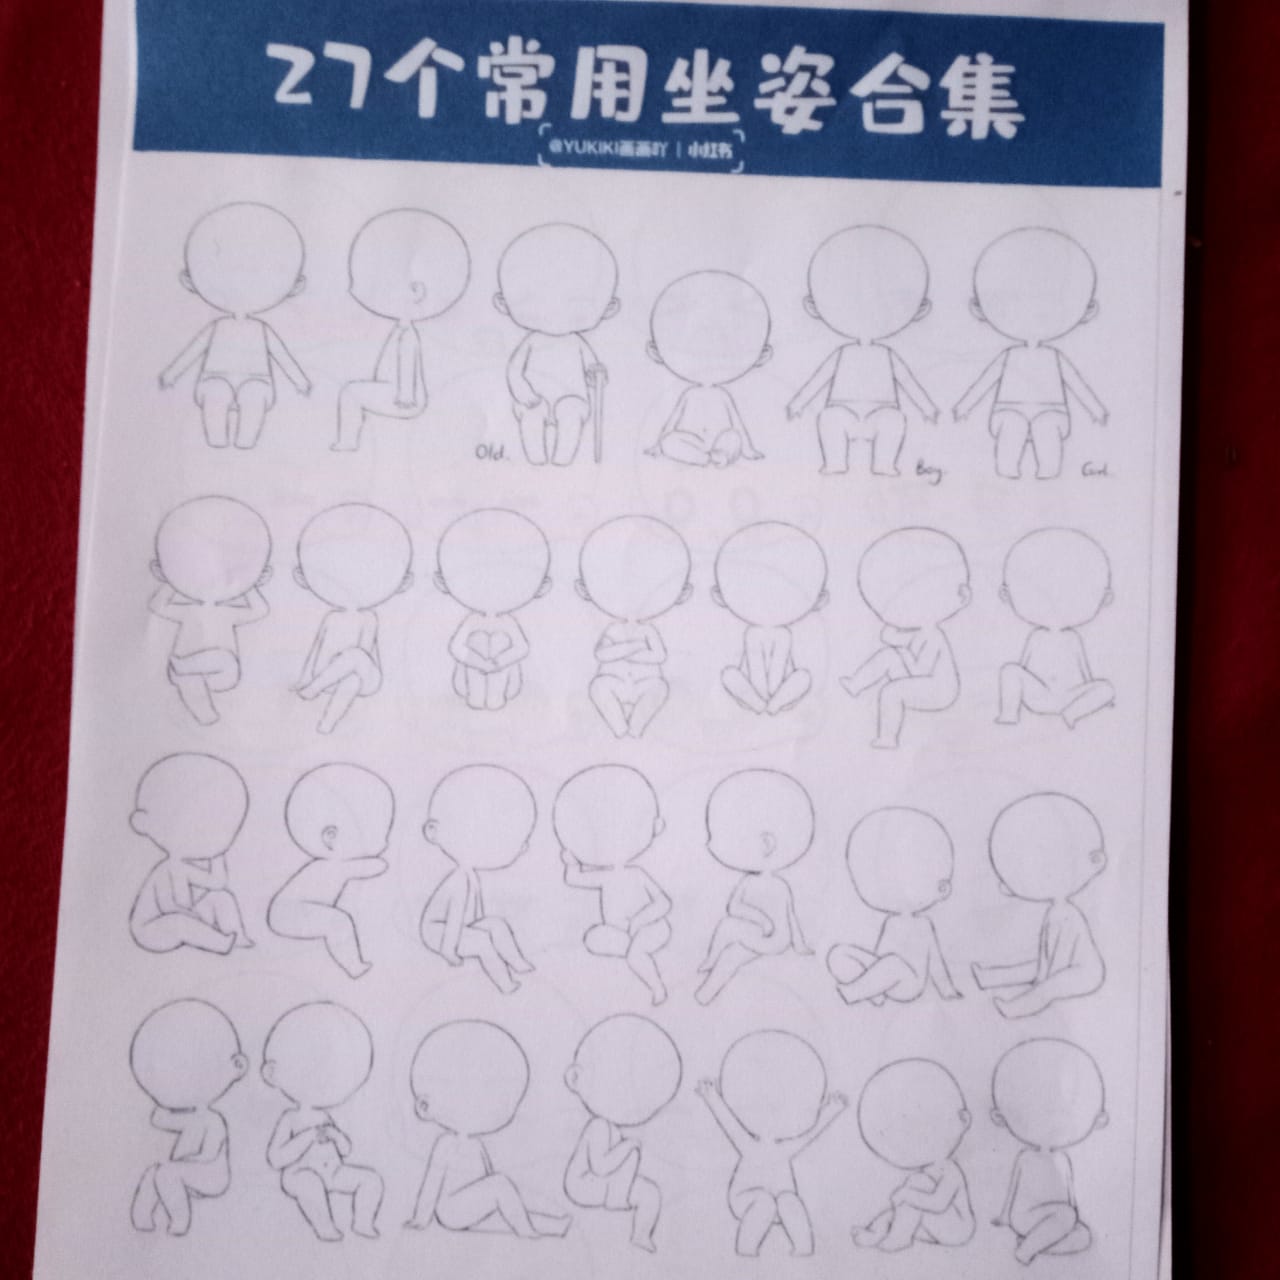
So as i talked about it previously i m practicing to draw kawai characters n for that i used this practice pose sheet its by an artist called Yukki . So in this sheet we have 27 different poses for girls n boys . I took it as a challenge to draw a new Chibi character for 27 days and here is Day one.
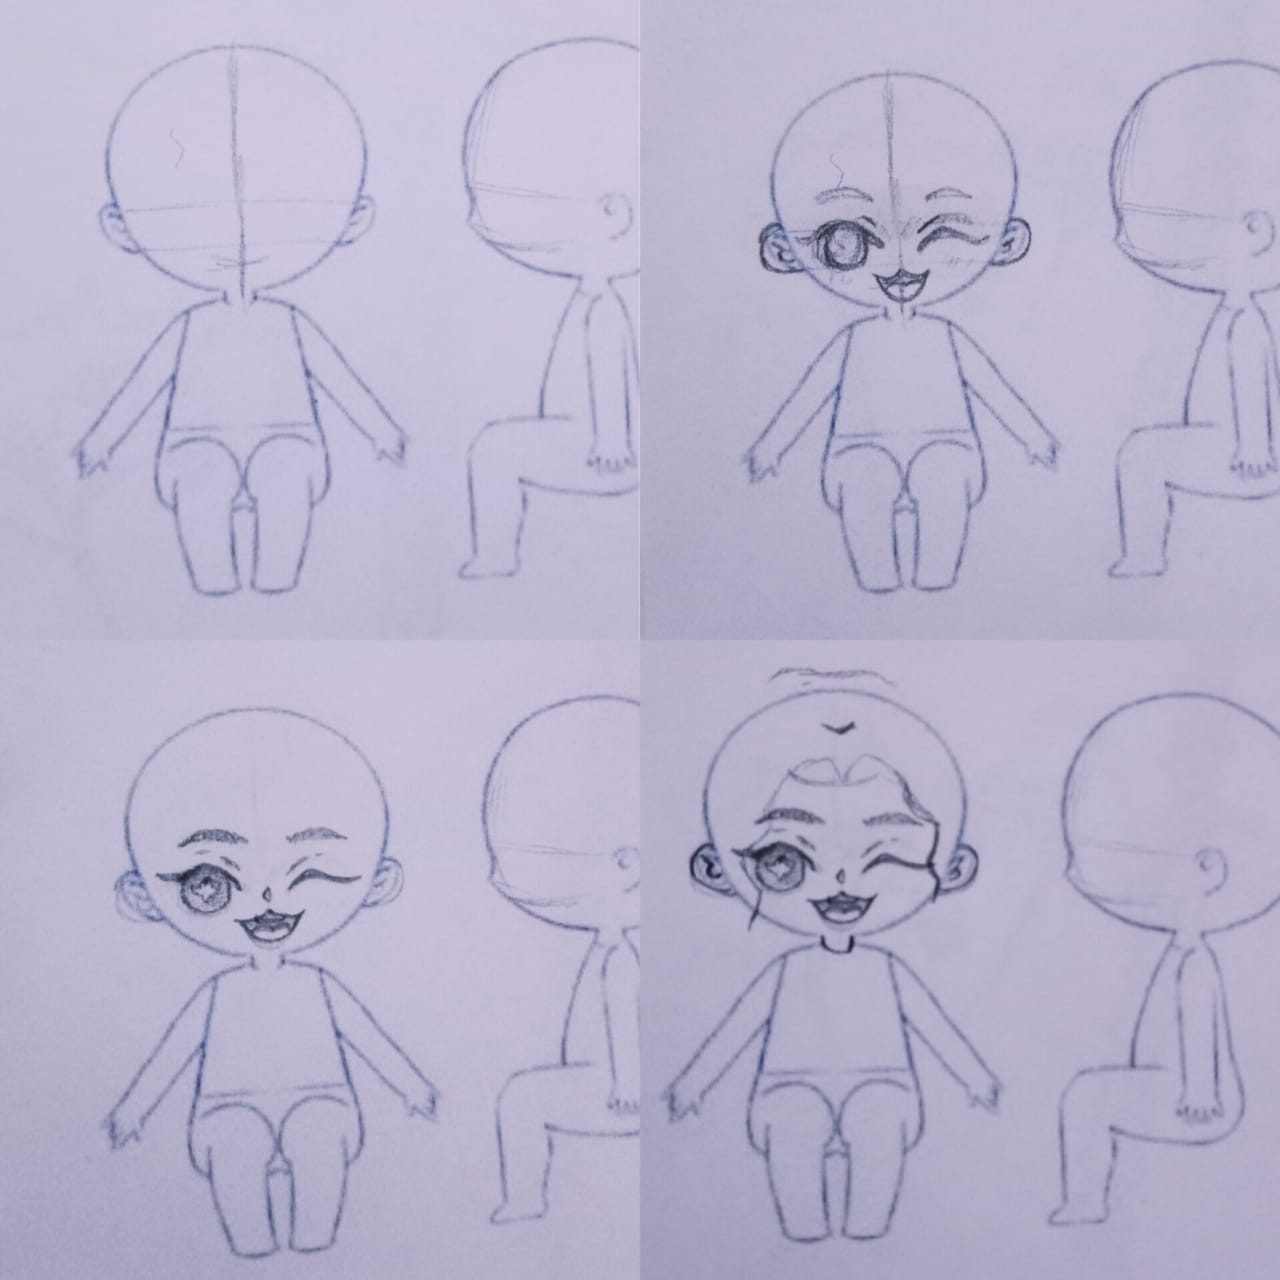
First of all i started by marking the face proportions now you can play with this and discover your own artstyle . Its all about the proportions tbh so i made one eye as a wink and other opened with rounded eyebrows amd a kitty smile.
After that i erase it again and i detail everything again i even made the nose like a little < arrow and teeth like a cat .
Now for the hair i start by the mid way of the head i do a hair section this is gonna be our bangs .
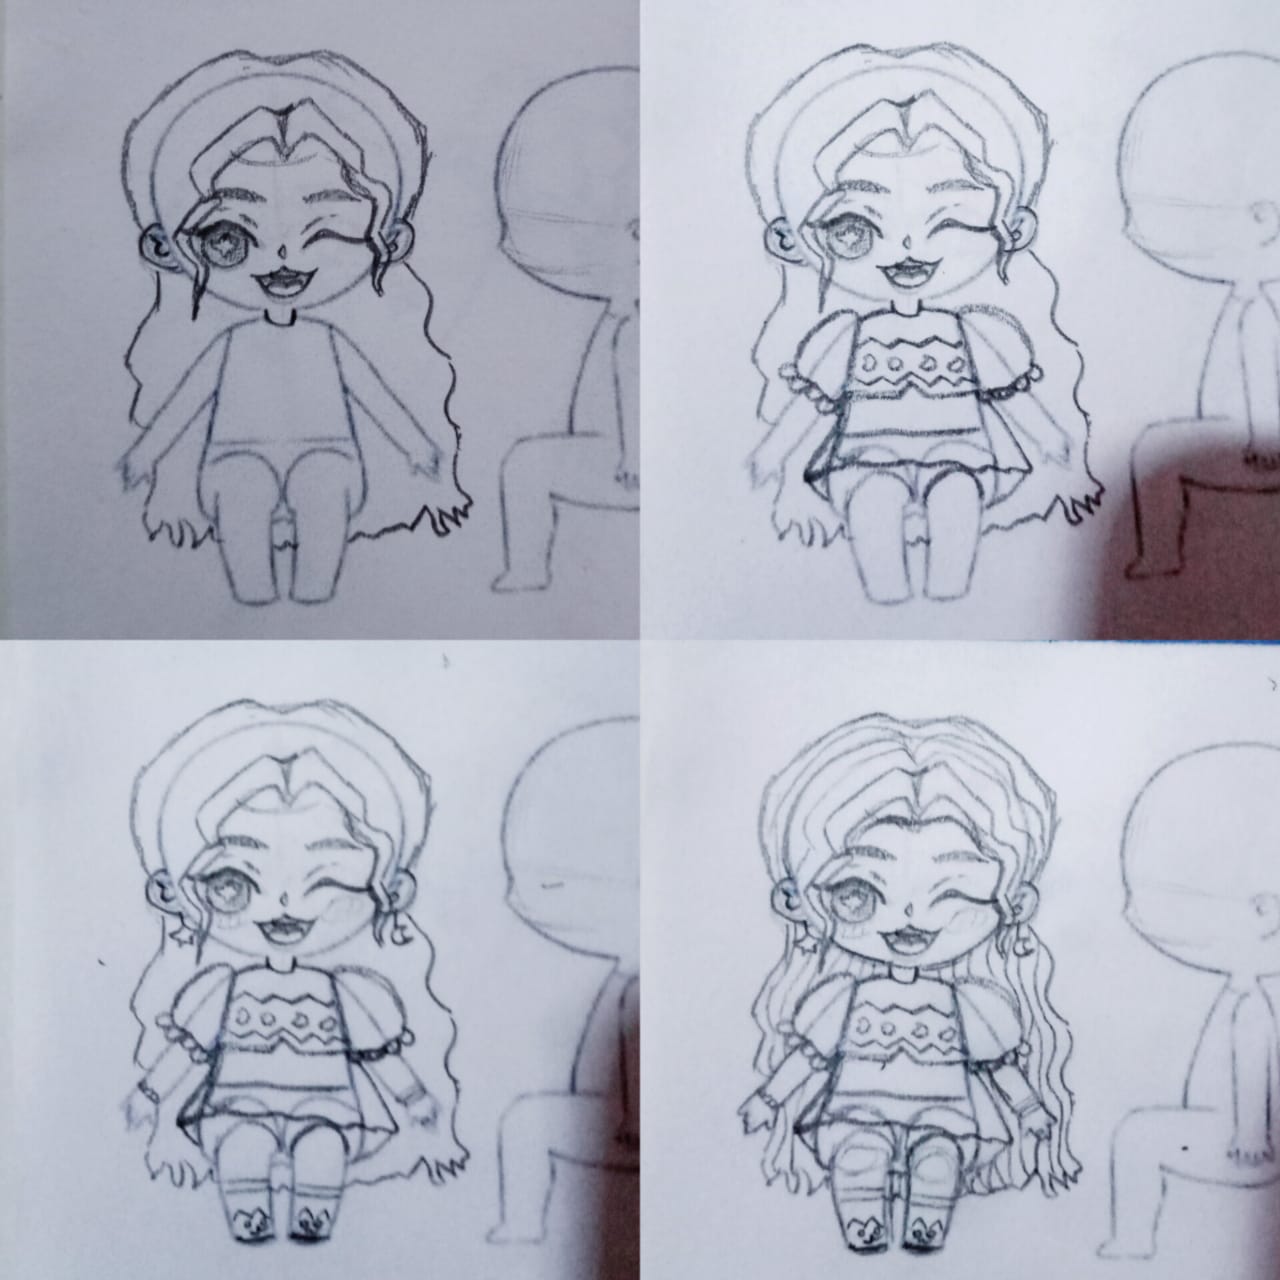
You can see i transitioned the hair by that hair line and added more lines to the hair . I also started drawing her dress here . Its a Frock styled dress with patterns next we do the accessories like earings and stuff
I also made her sandals like a cat because it goes with her overall character too
Here you can see her accessories dress and everything in detail so this is a practice sketch i might turn it into a actual digital art soon.
Splinterlands art contest week #241
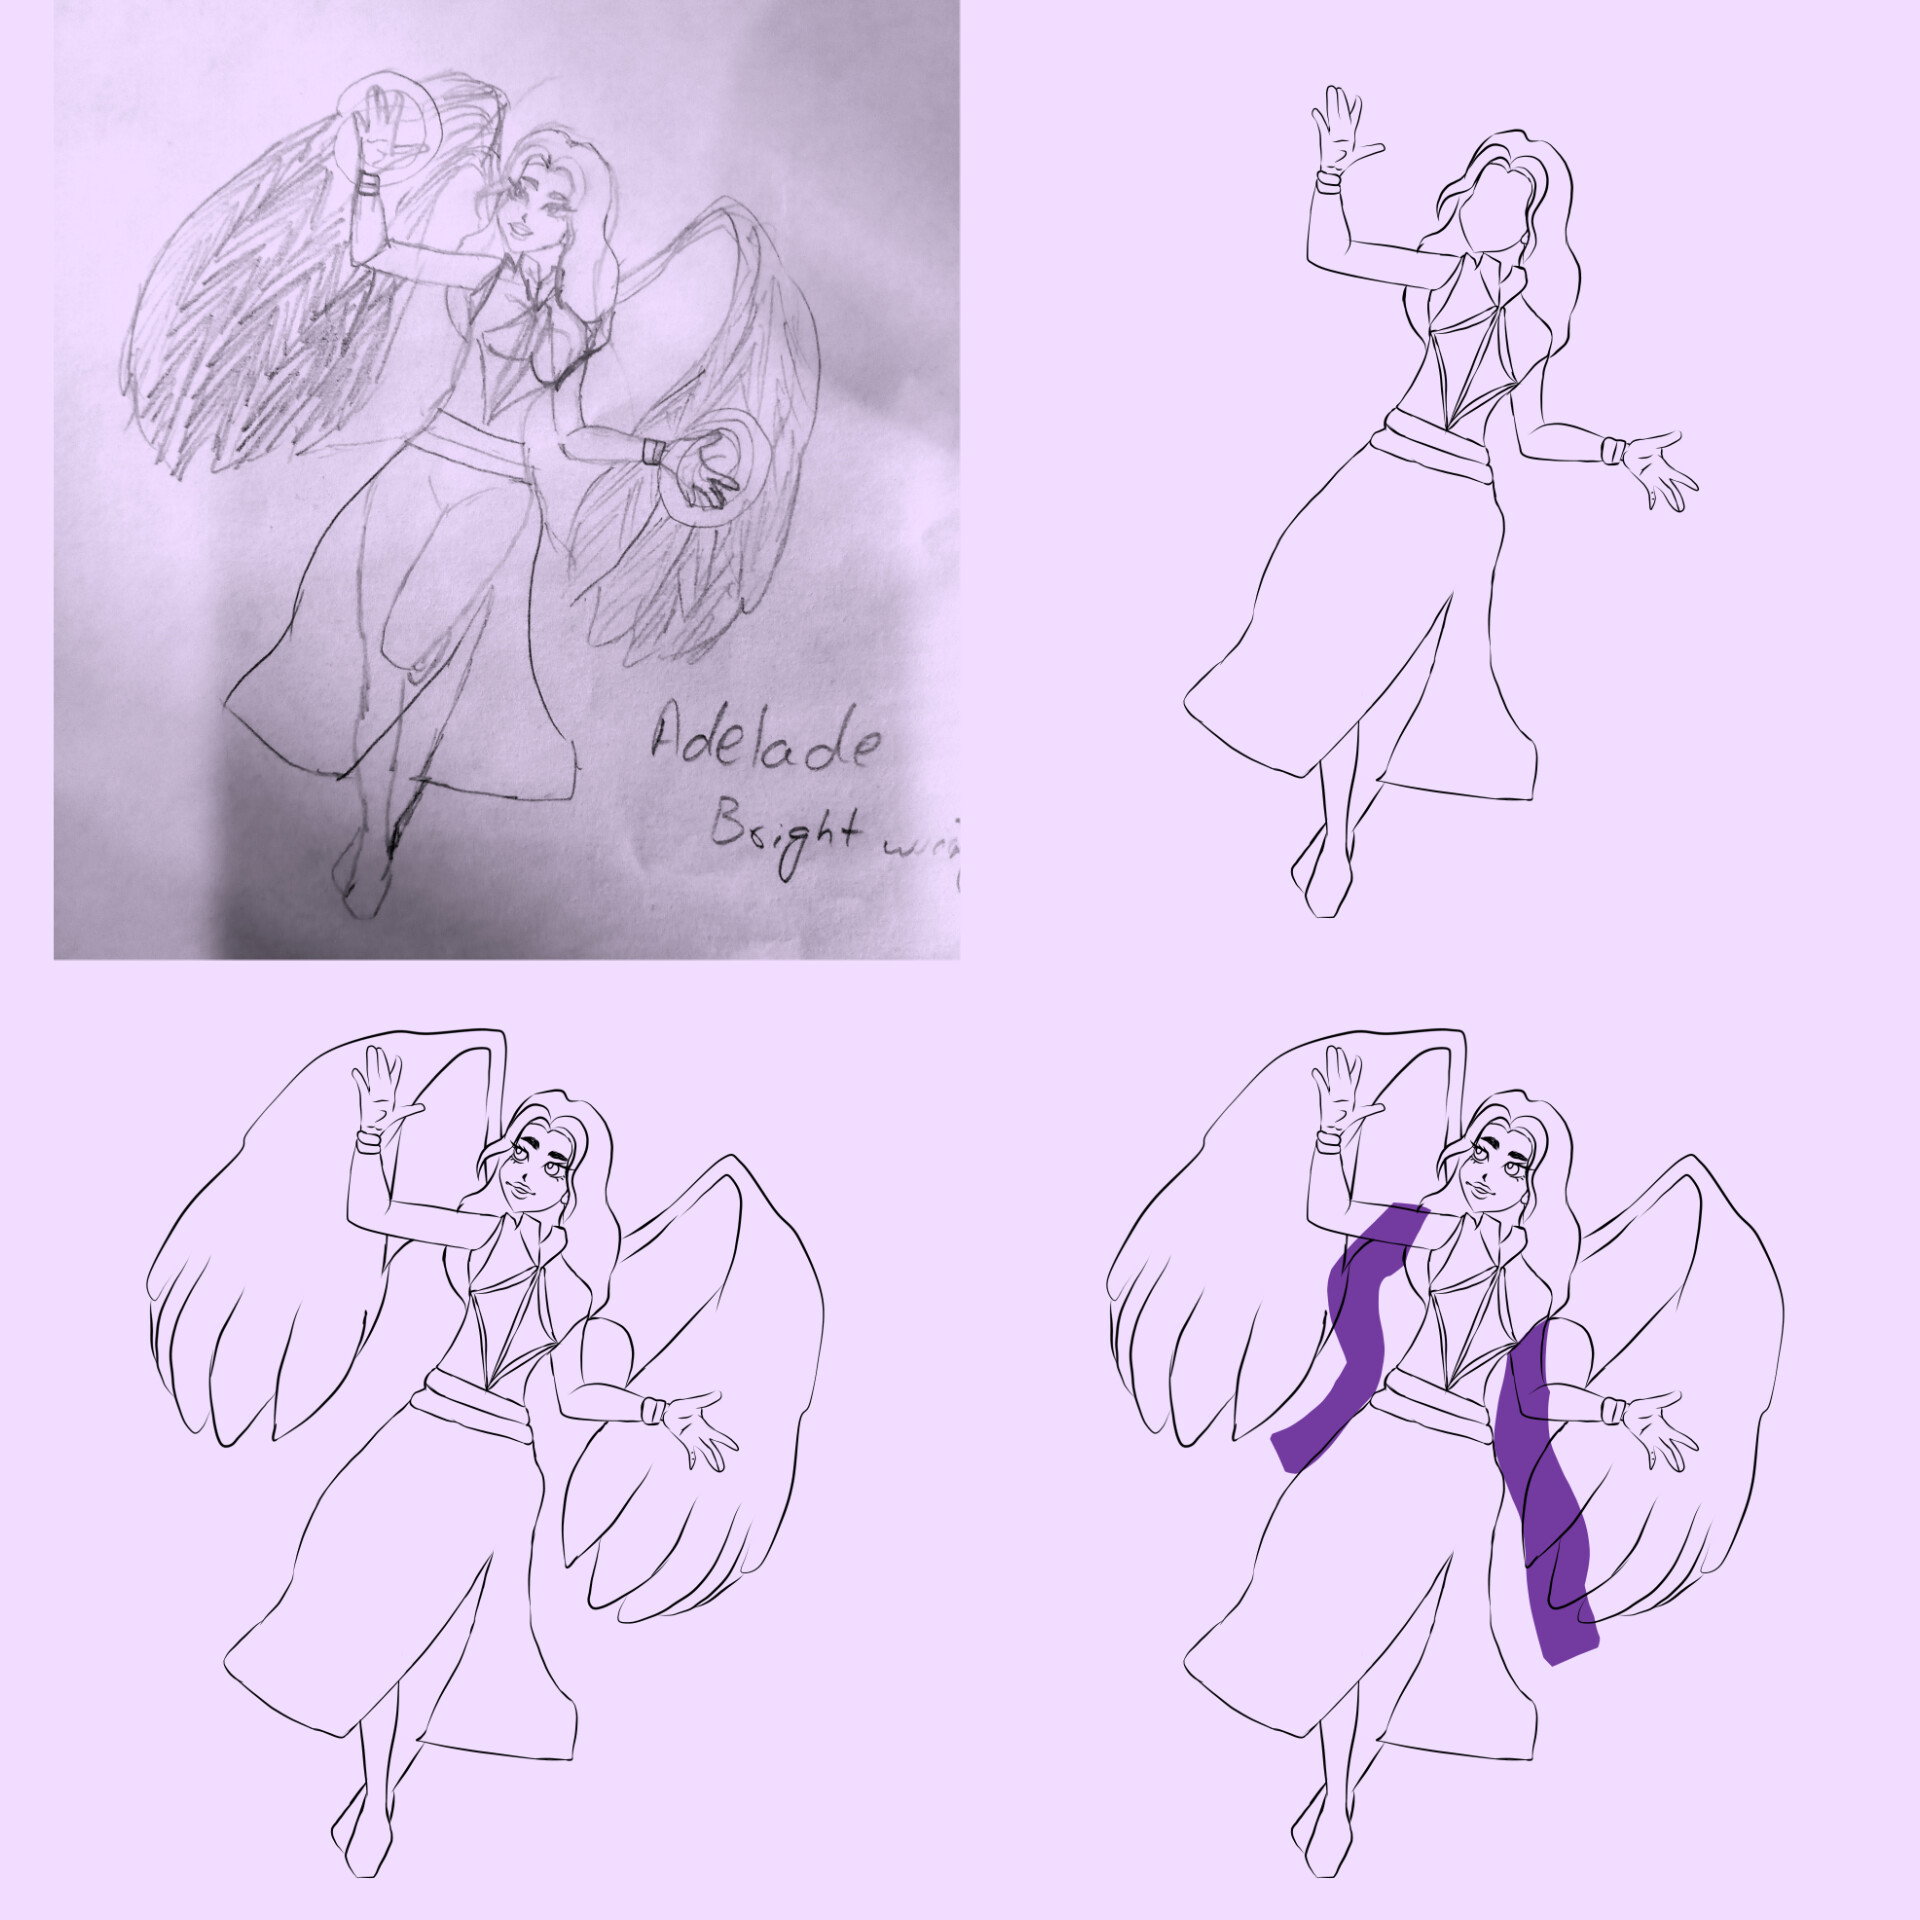
For this week's entry i drew Adelaide Bright Wing .
This time i nade a sketch of how she would look in my style .Tbh the real character was really cute and graceful and i wanted the same feel .
After sketching it i took a picture and Made it into a lineart . For the lineart i used Pen sharp brush in Medibang paint pro i made her dress wings and expressions all on different layers this will help us later when we color the lineart.
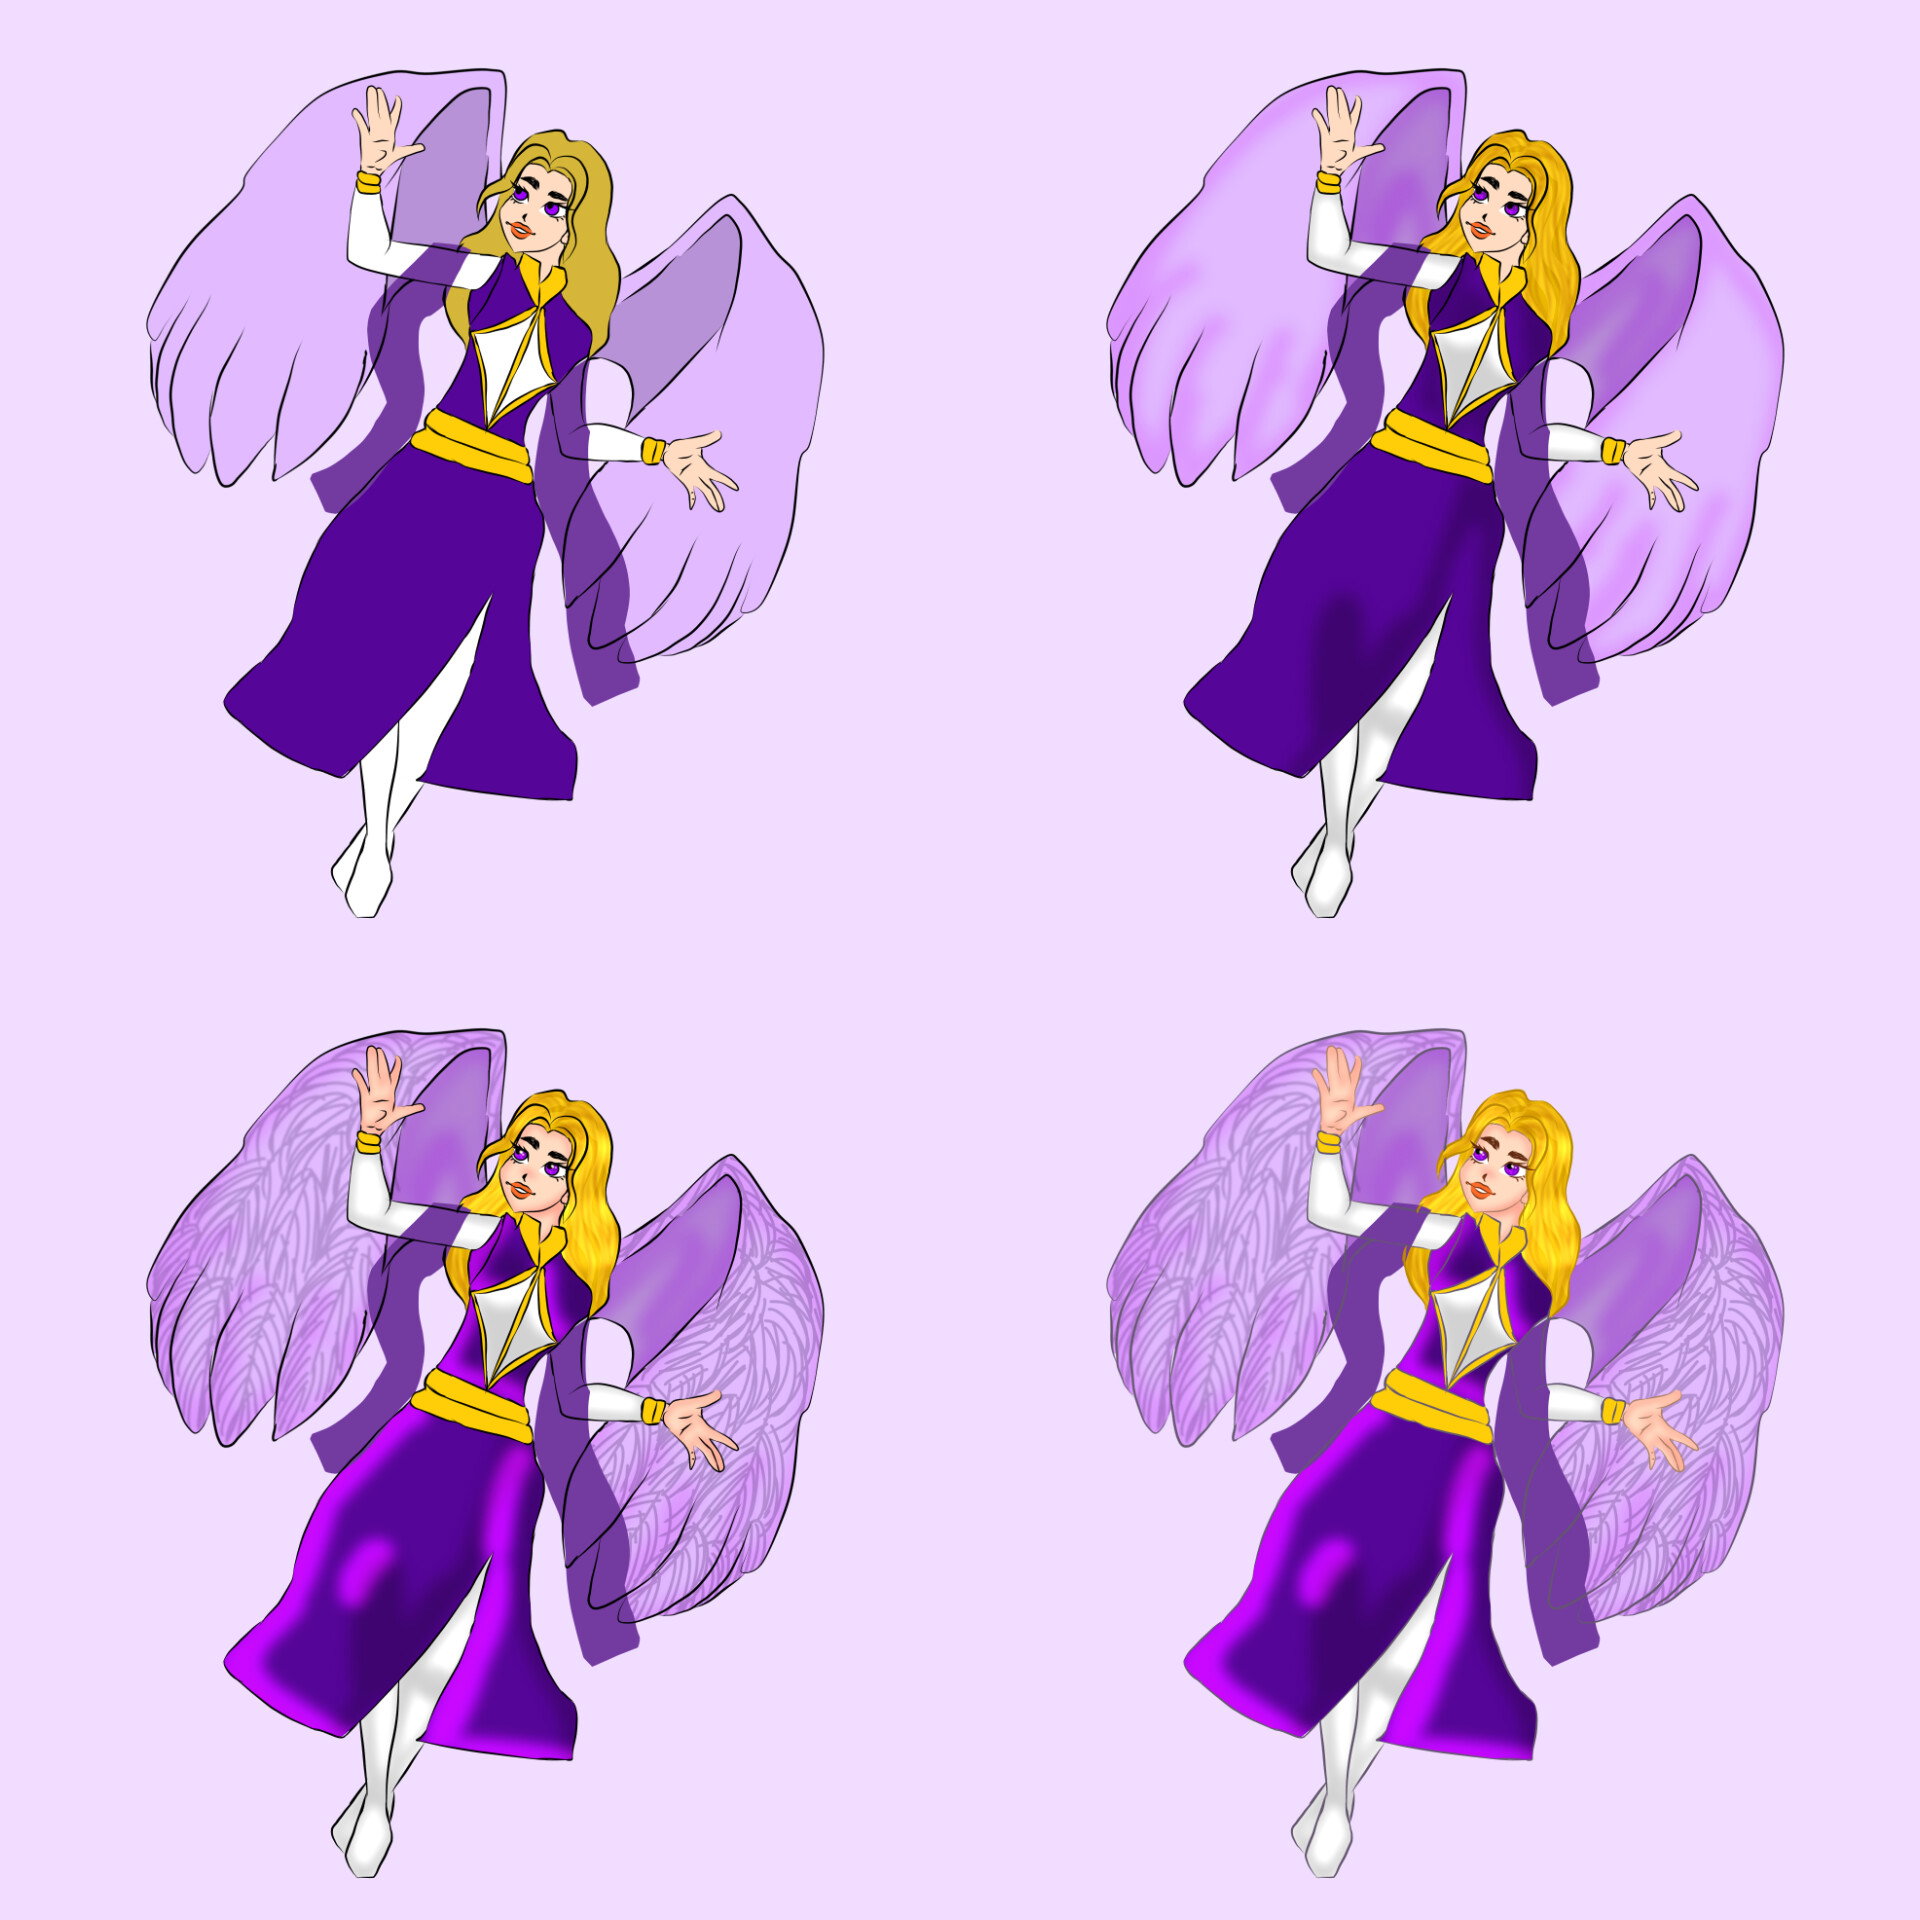
Afterwards i filled my lineart with flat colors . Then i added shadows for the depth in feathers and her dress this shows us what parts light isn't hitting our character .I also shaded her skin
I added more details to the hair too.Next i added highlights to everything including the dress and face and especially the hair . I added pink highlights for the dress and In hair i used a pale yellow highlight but also smudged it so it resembles the hair.
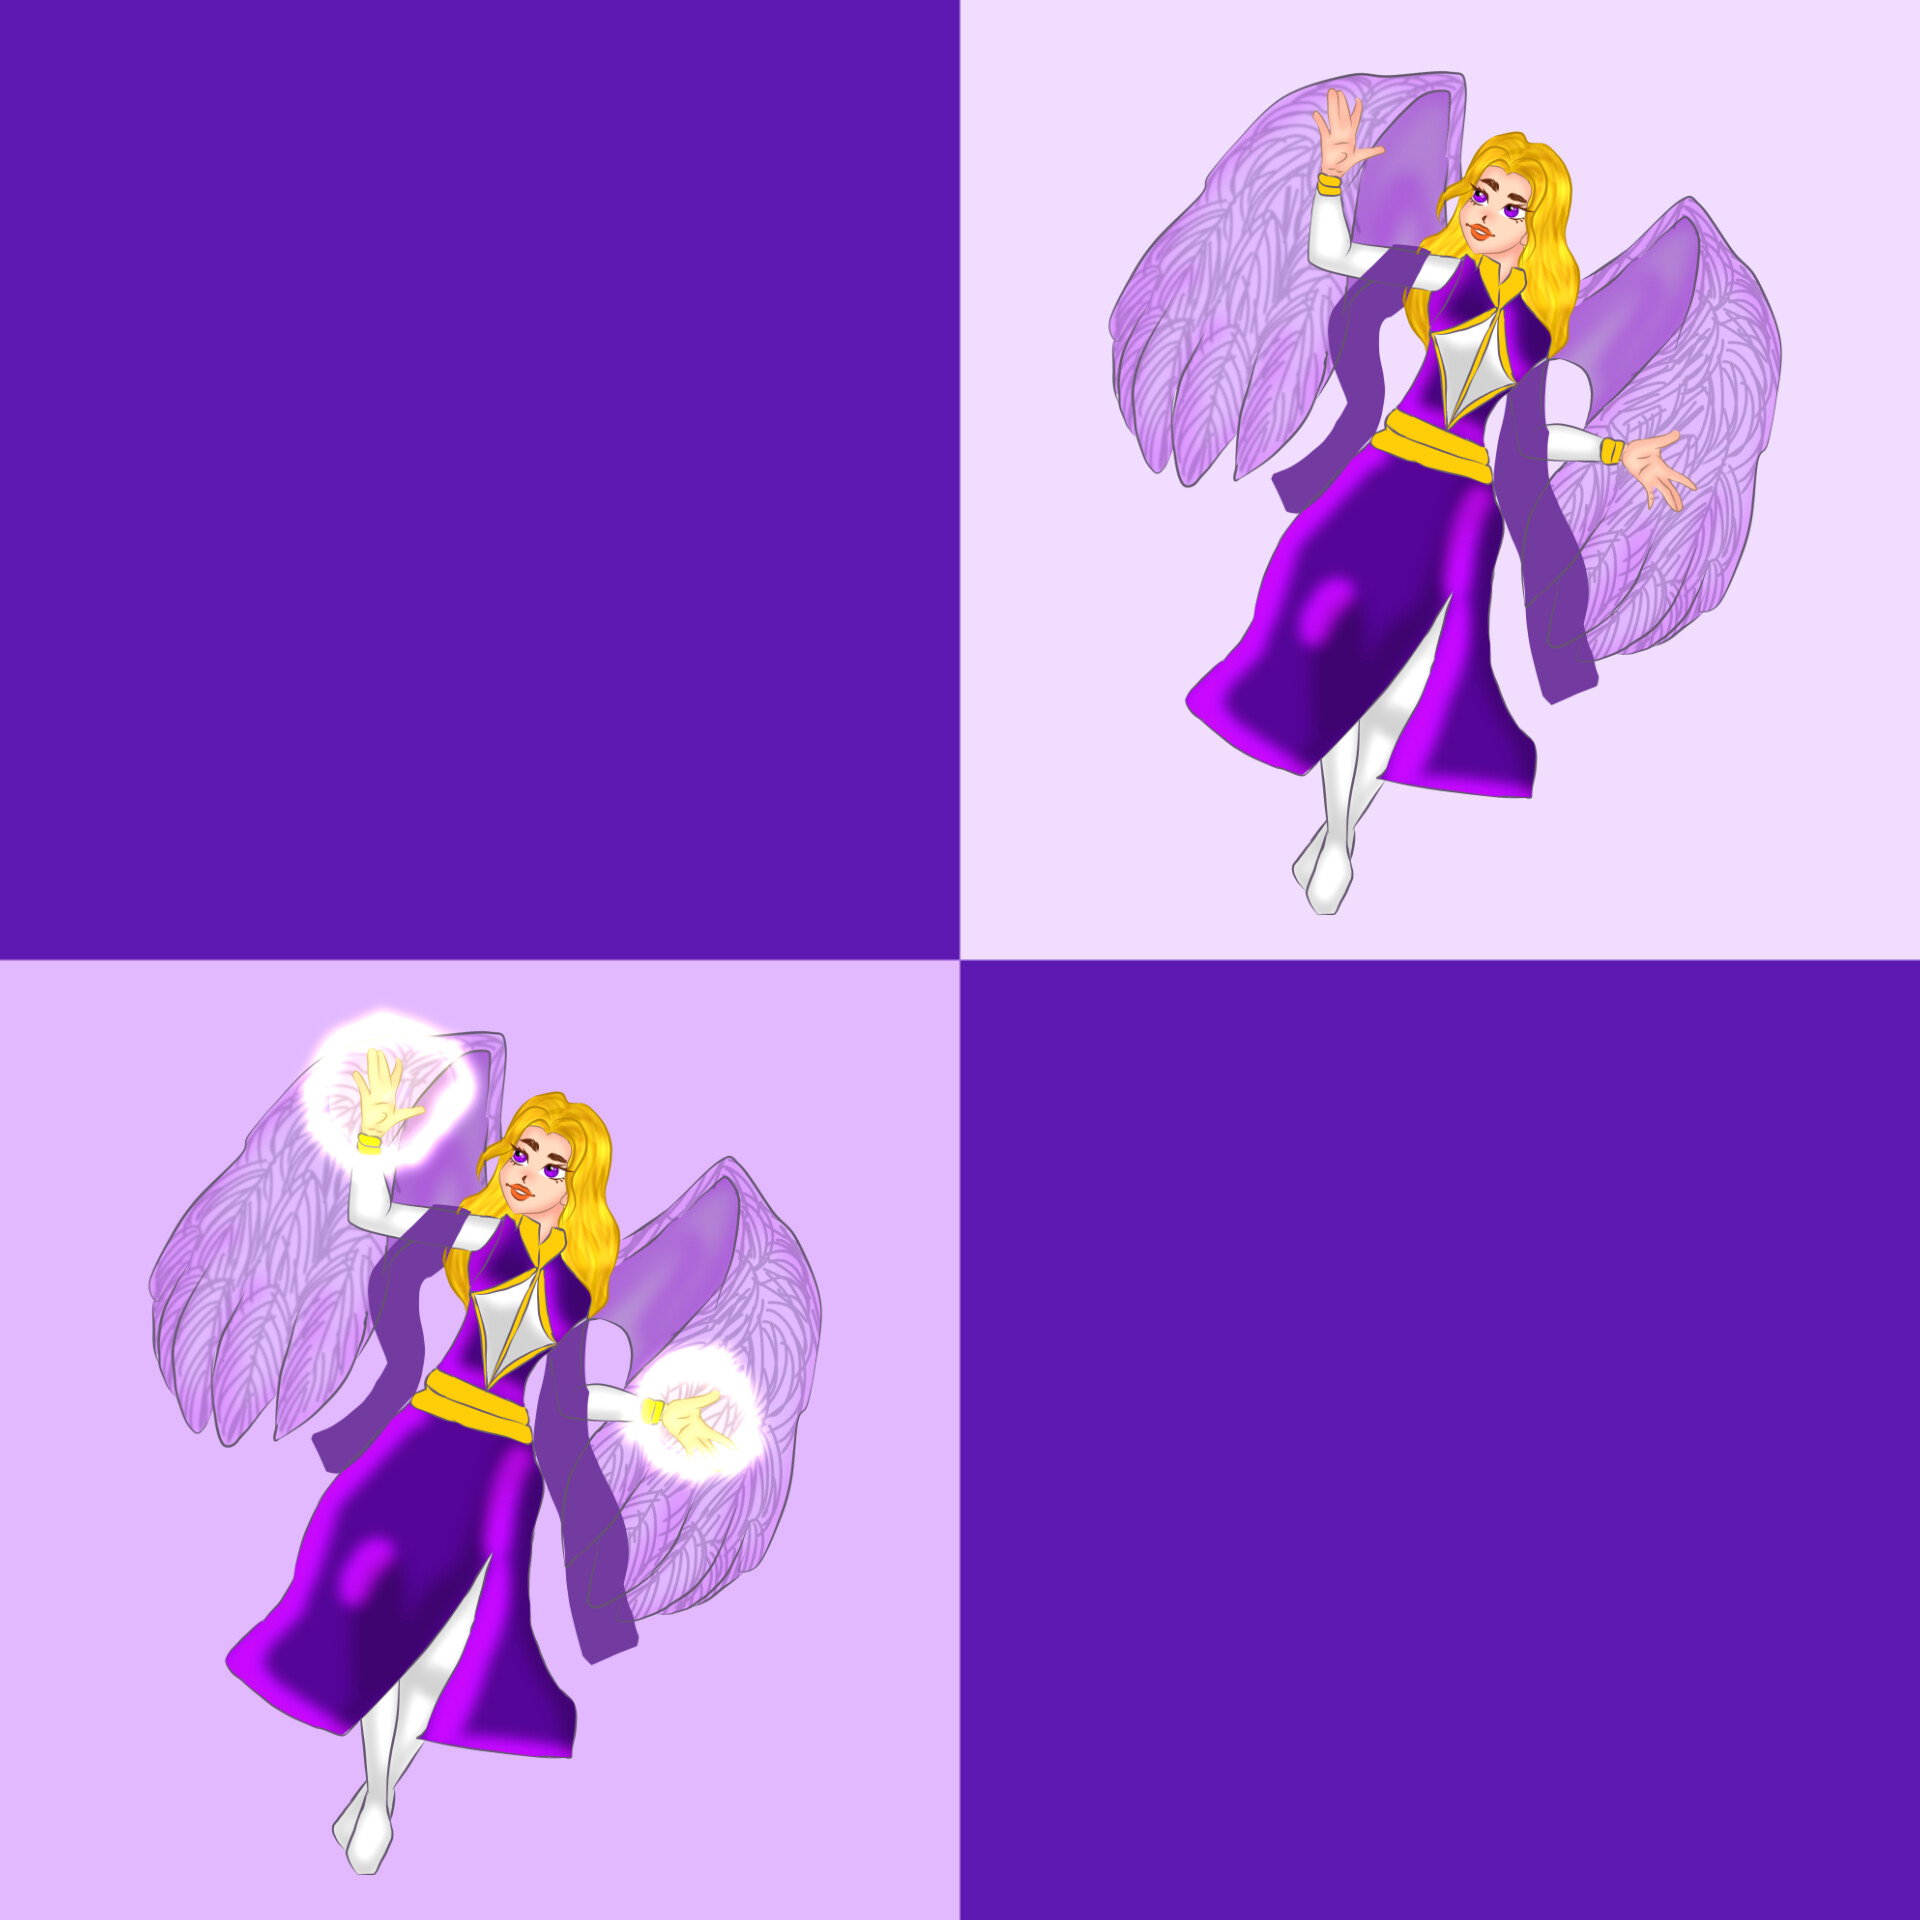
Now for the best part i saved my character in Png transparent as Adelaide was holding bright glowing power in her hands that means there will be more glow added to our character so i clipped a layer on top of my png transparent file and added the glowy powers to her hands then i saw where that light would be reflected n added that with an air brush.
So here is the Final result and tbh this is my best Entry So far ❤️
Weekly Blog Mother's Day edition
This week was a Rough one For Pakistan from Social Media ban to Illegal arrest of PTI Chairman Imran Khan . Pakistani's went through alot. Keeping the sad news and Bad memories apart i spent my days Preparing for Mother's day so this week was almost all about Mother's Day
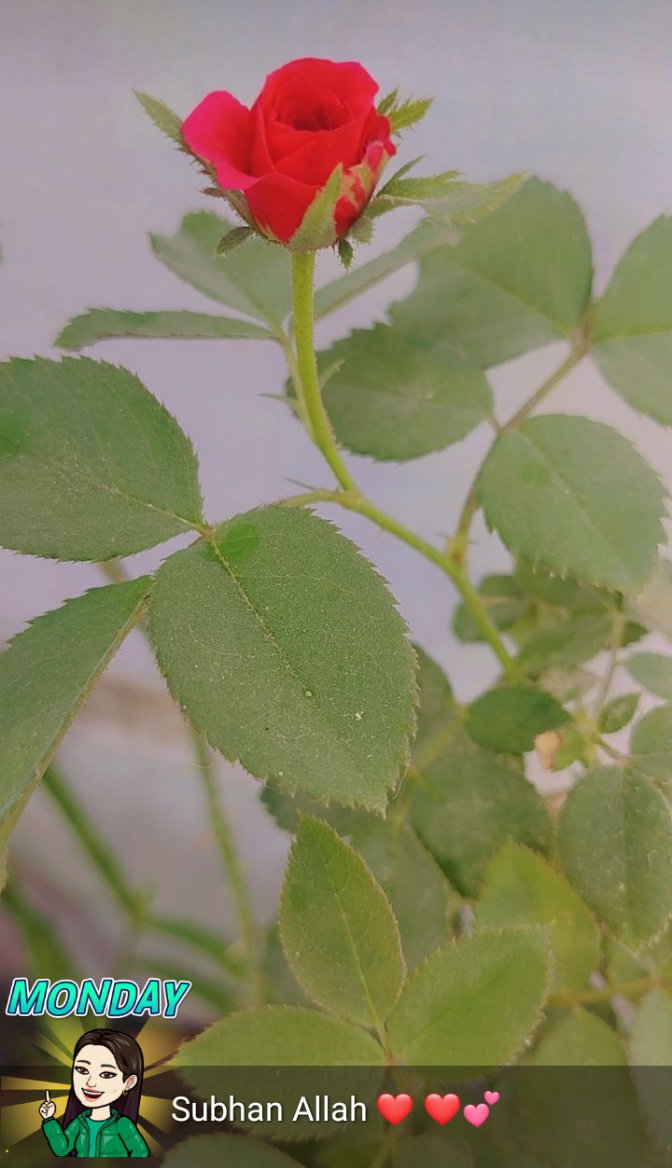
On Monday morning i saw this Beautiful flower Which i photographed and later in evening i cut it and made rose water out of it so my mom can use it in cooking that what it is . Love isn't about expensive gifts and money its about care and noticing the little things that can make the other person happy.
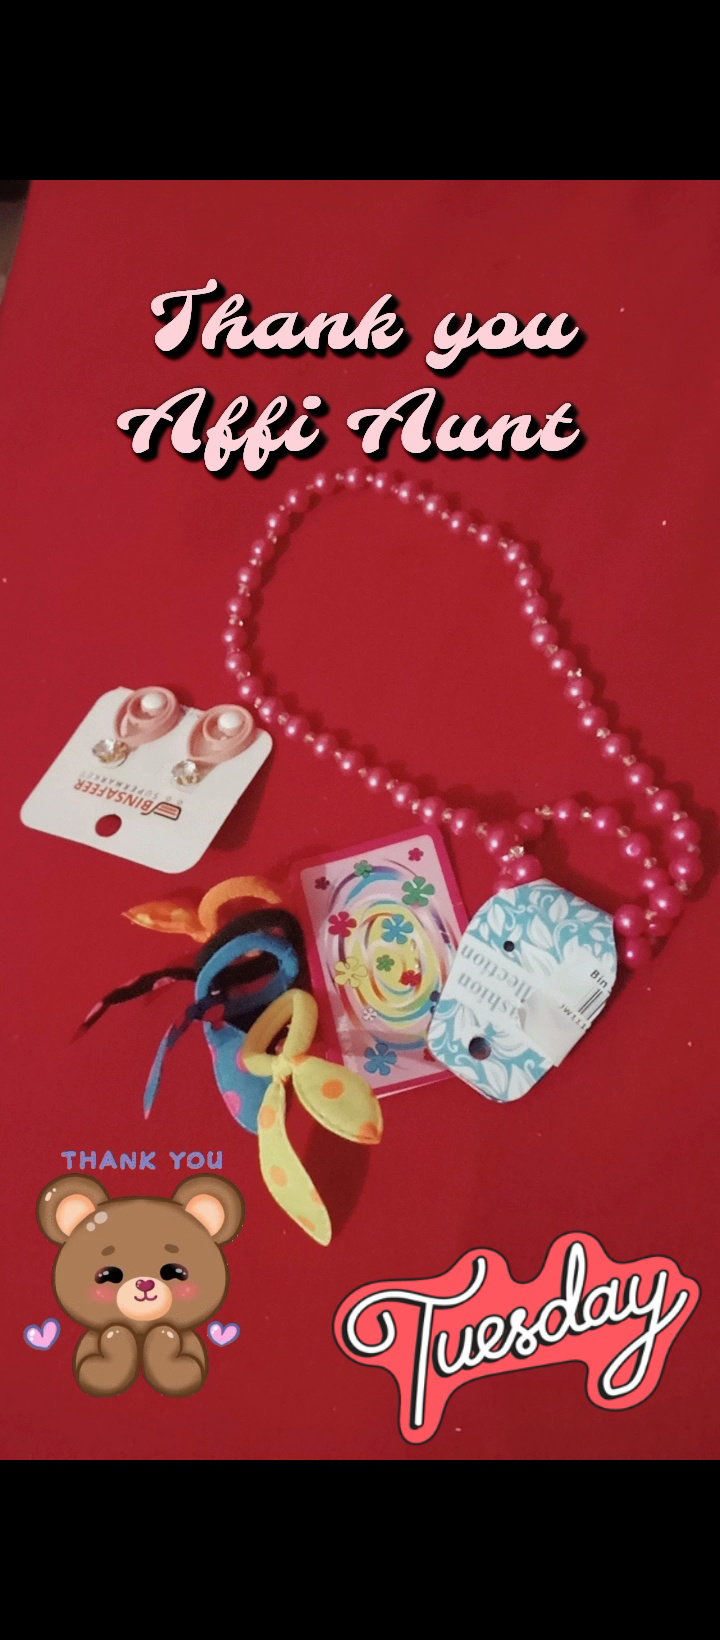
On Tuesday my Aunt sent these cute little gifts for all pur siblings and that just made my day really really happy that she remembered us in her shopping trip. That's another way to love someone to remember them
So on Wednesday i made my mom rest all day and gave her Spa treatment at home i did her skin care and i cooked all the meals for the day and made her her fav red Arbiata Pasta.
On Thursday i painted a Chibi portrait of my mom with a rolling pin in hand cause thats how asian moms are they love you .They cook all day for you But they can also hit you in the head with a rolling pin
On Friday i was packing another gift for her it was a perfume thats shaped like a heart its from Mutual Love and i loved the fragnance too so i packed it for Sunday
So on Saturday we began assembling of all the gifts snd cards we made for mom . Our plan was to surprise her at 12 am Sunday
On 12 am Sunday we celebrated mothers day with our mom this was a customized mother's day cake for my mom i had ordered this like a day ago and the baker was super humble she delivered it on time and Mom absolutely loved her surprise 😍❤️ that was all we ever wanted .Tbh being able to afford happiness for her is all we wanted .
Also Happy Mothers day to all the Mothers put there .Keep loving and caring for the ones who took care of you when you weren't able too ❤️
Chibi Portraits for commission
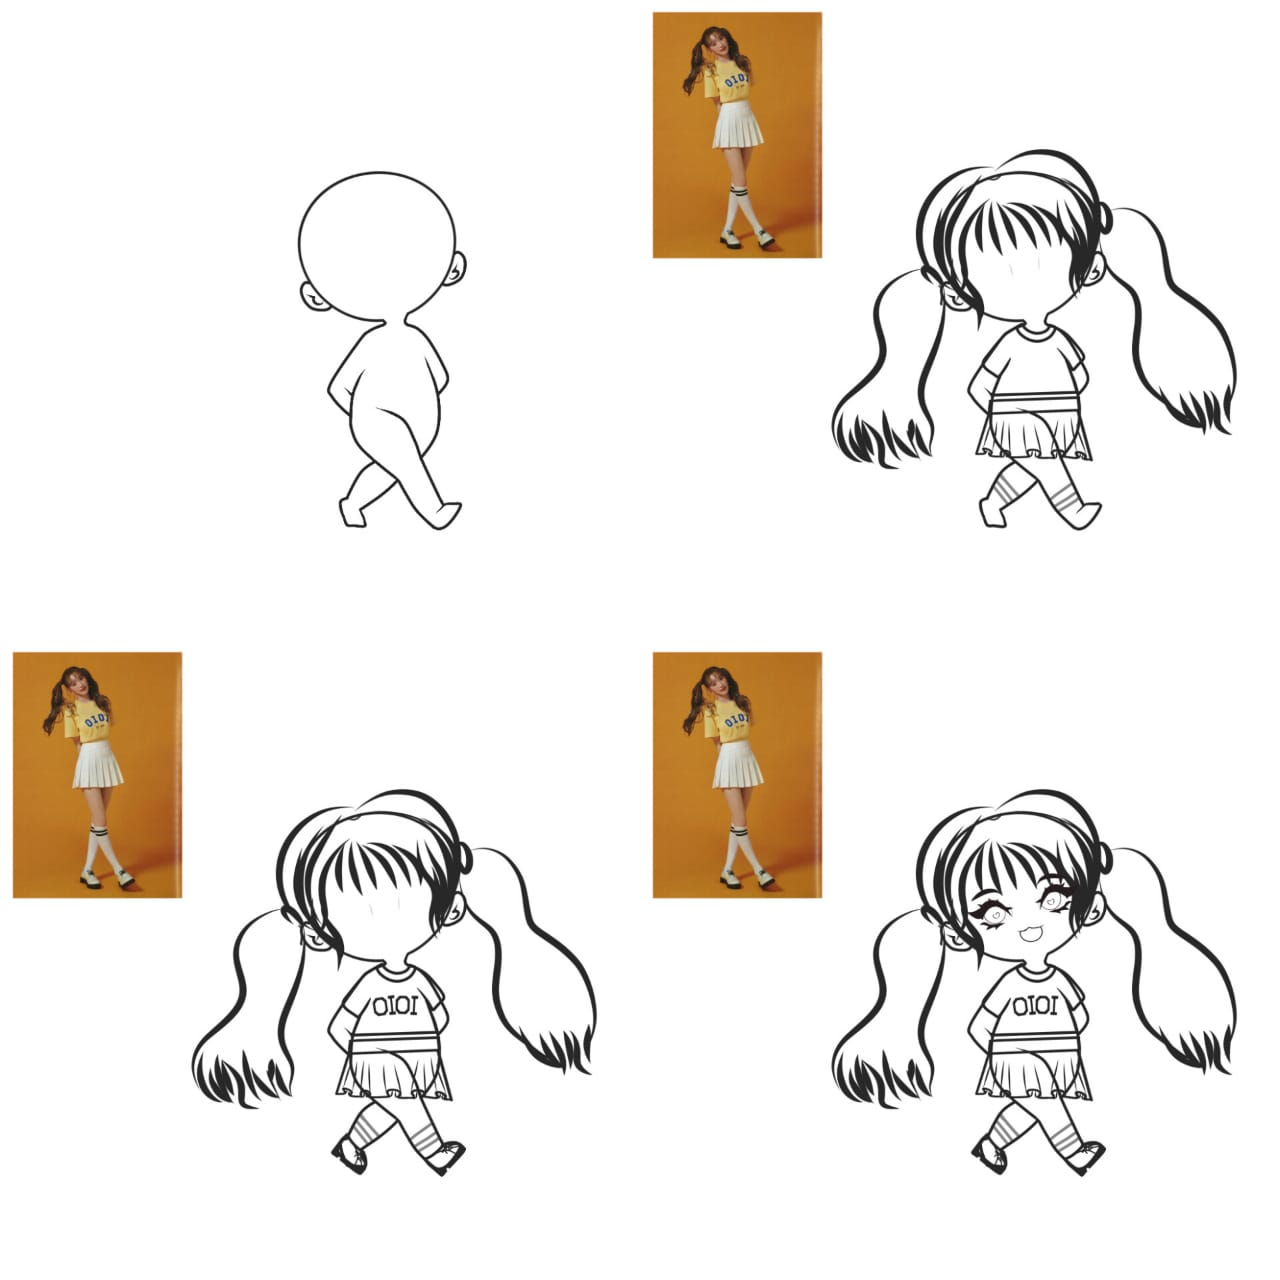
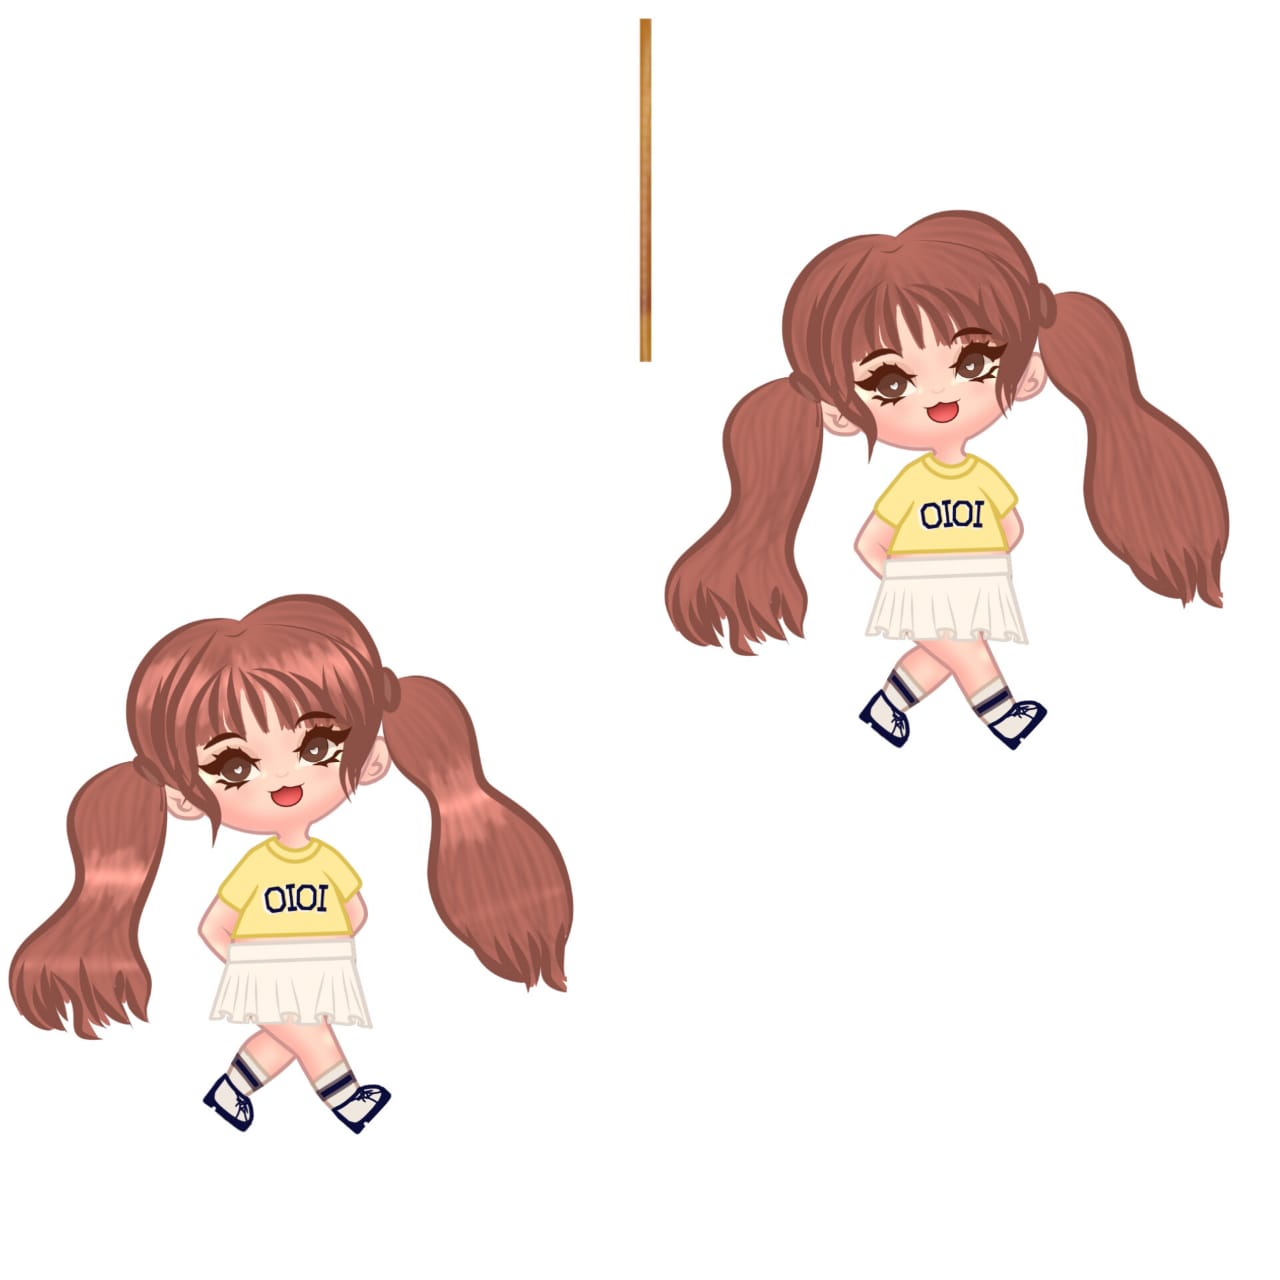
So im practicing drawing chibi kawaii Comissions and also i m making a commission sheet too so i thought i might as well tell how i did this one.
First of all it all starts with a reference i chose a very different pose of a Korean model drew the chibi body according to it. I then made the lineart for her hair shirt and skirt along with the socks .
Next i made more details to the shirt and i made her shoes .If you're a beginner it won't be this refined i have done this with like basic shapes rough line art then the refined one for everything and that's how it is until you learn to do it without the rough sketches.
I then added her eyes and the smile.
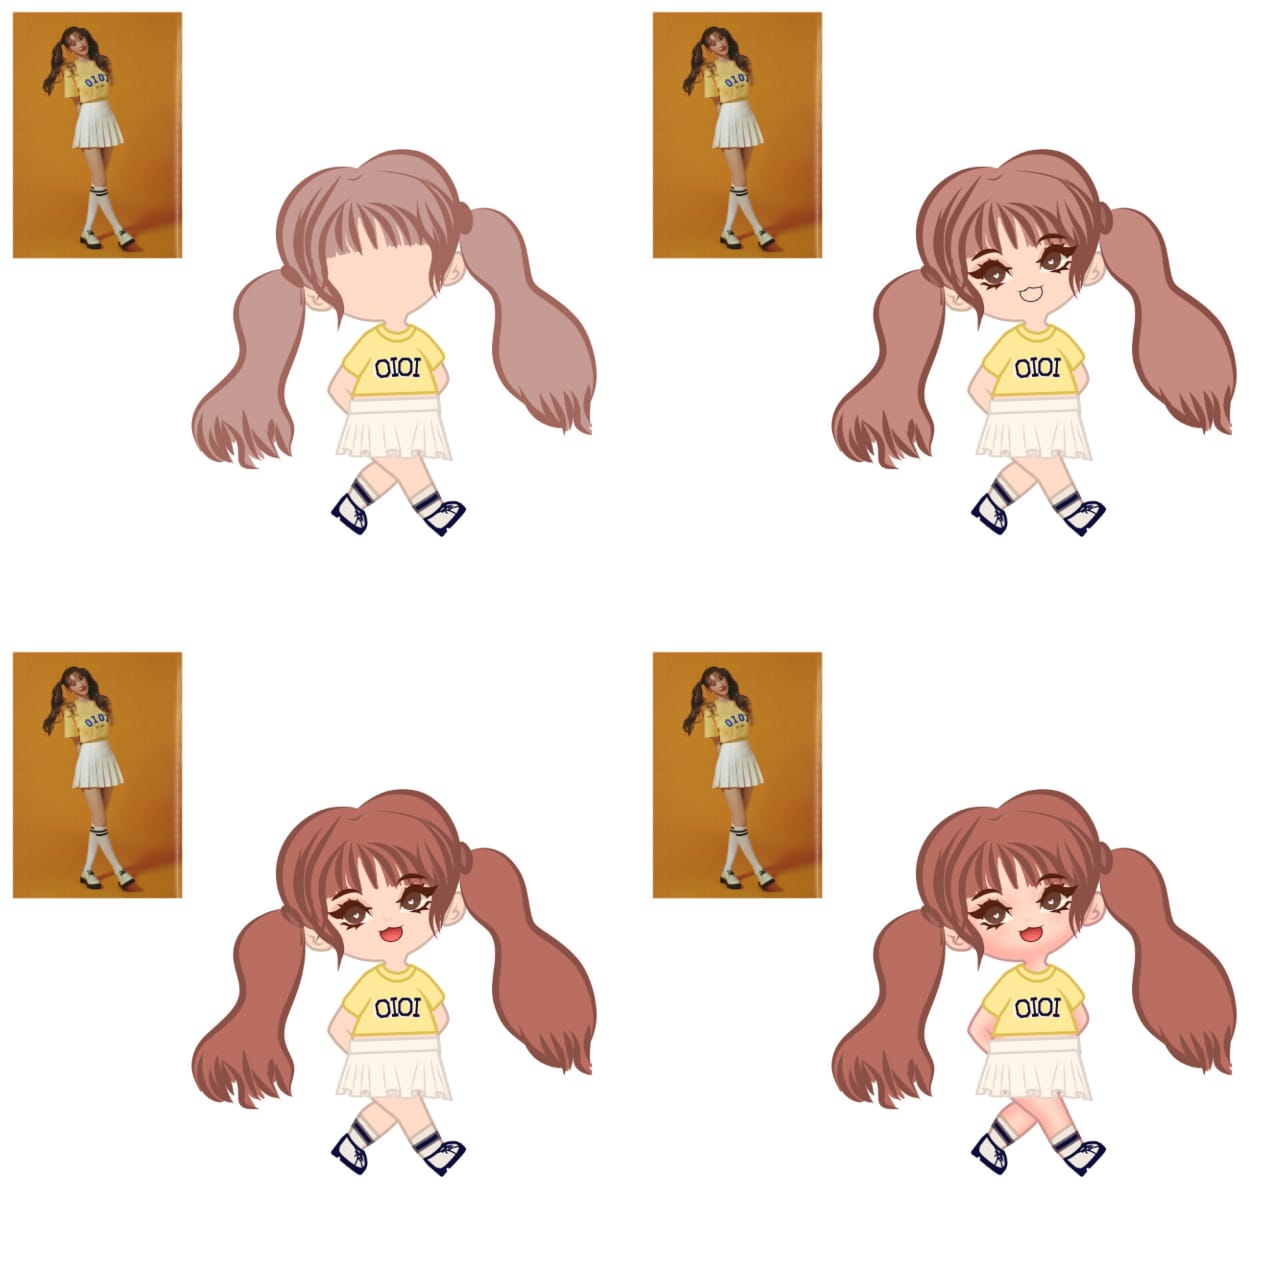
As we all know after the line art process comes the coloring and i colored everything with flat colors and i used a dark color for the line art too like for hair its darker shade of brown for skins its a darker shade to the skin tone .
After that i just zoomed on my reference and colored everything then i realized her hair should be a bit more redish brown so i saturated that a bit.
Now for the shading i added shadows with a dark red color i used an air brush and added it to the skin n everything hair shoes etc and guasian blurred it
Now i added the highlights to the skin so it looks like its gleaming while her hair too i used a water color wet brush to the hair and smudged it set the layer to add in layer blending mode.
Lastly added a yellow gradient background and my chibi characters shadow . Because im making a portfolio right now im drawing its as similar to the reference
I hope you all like it. Thanks for the Support ❤️
Cute DIY charms
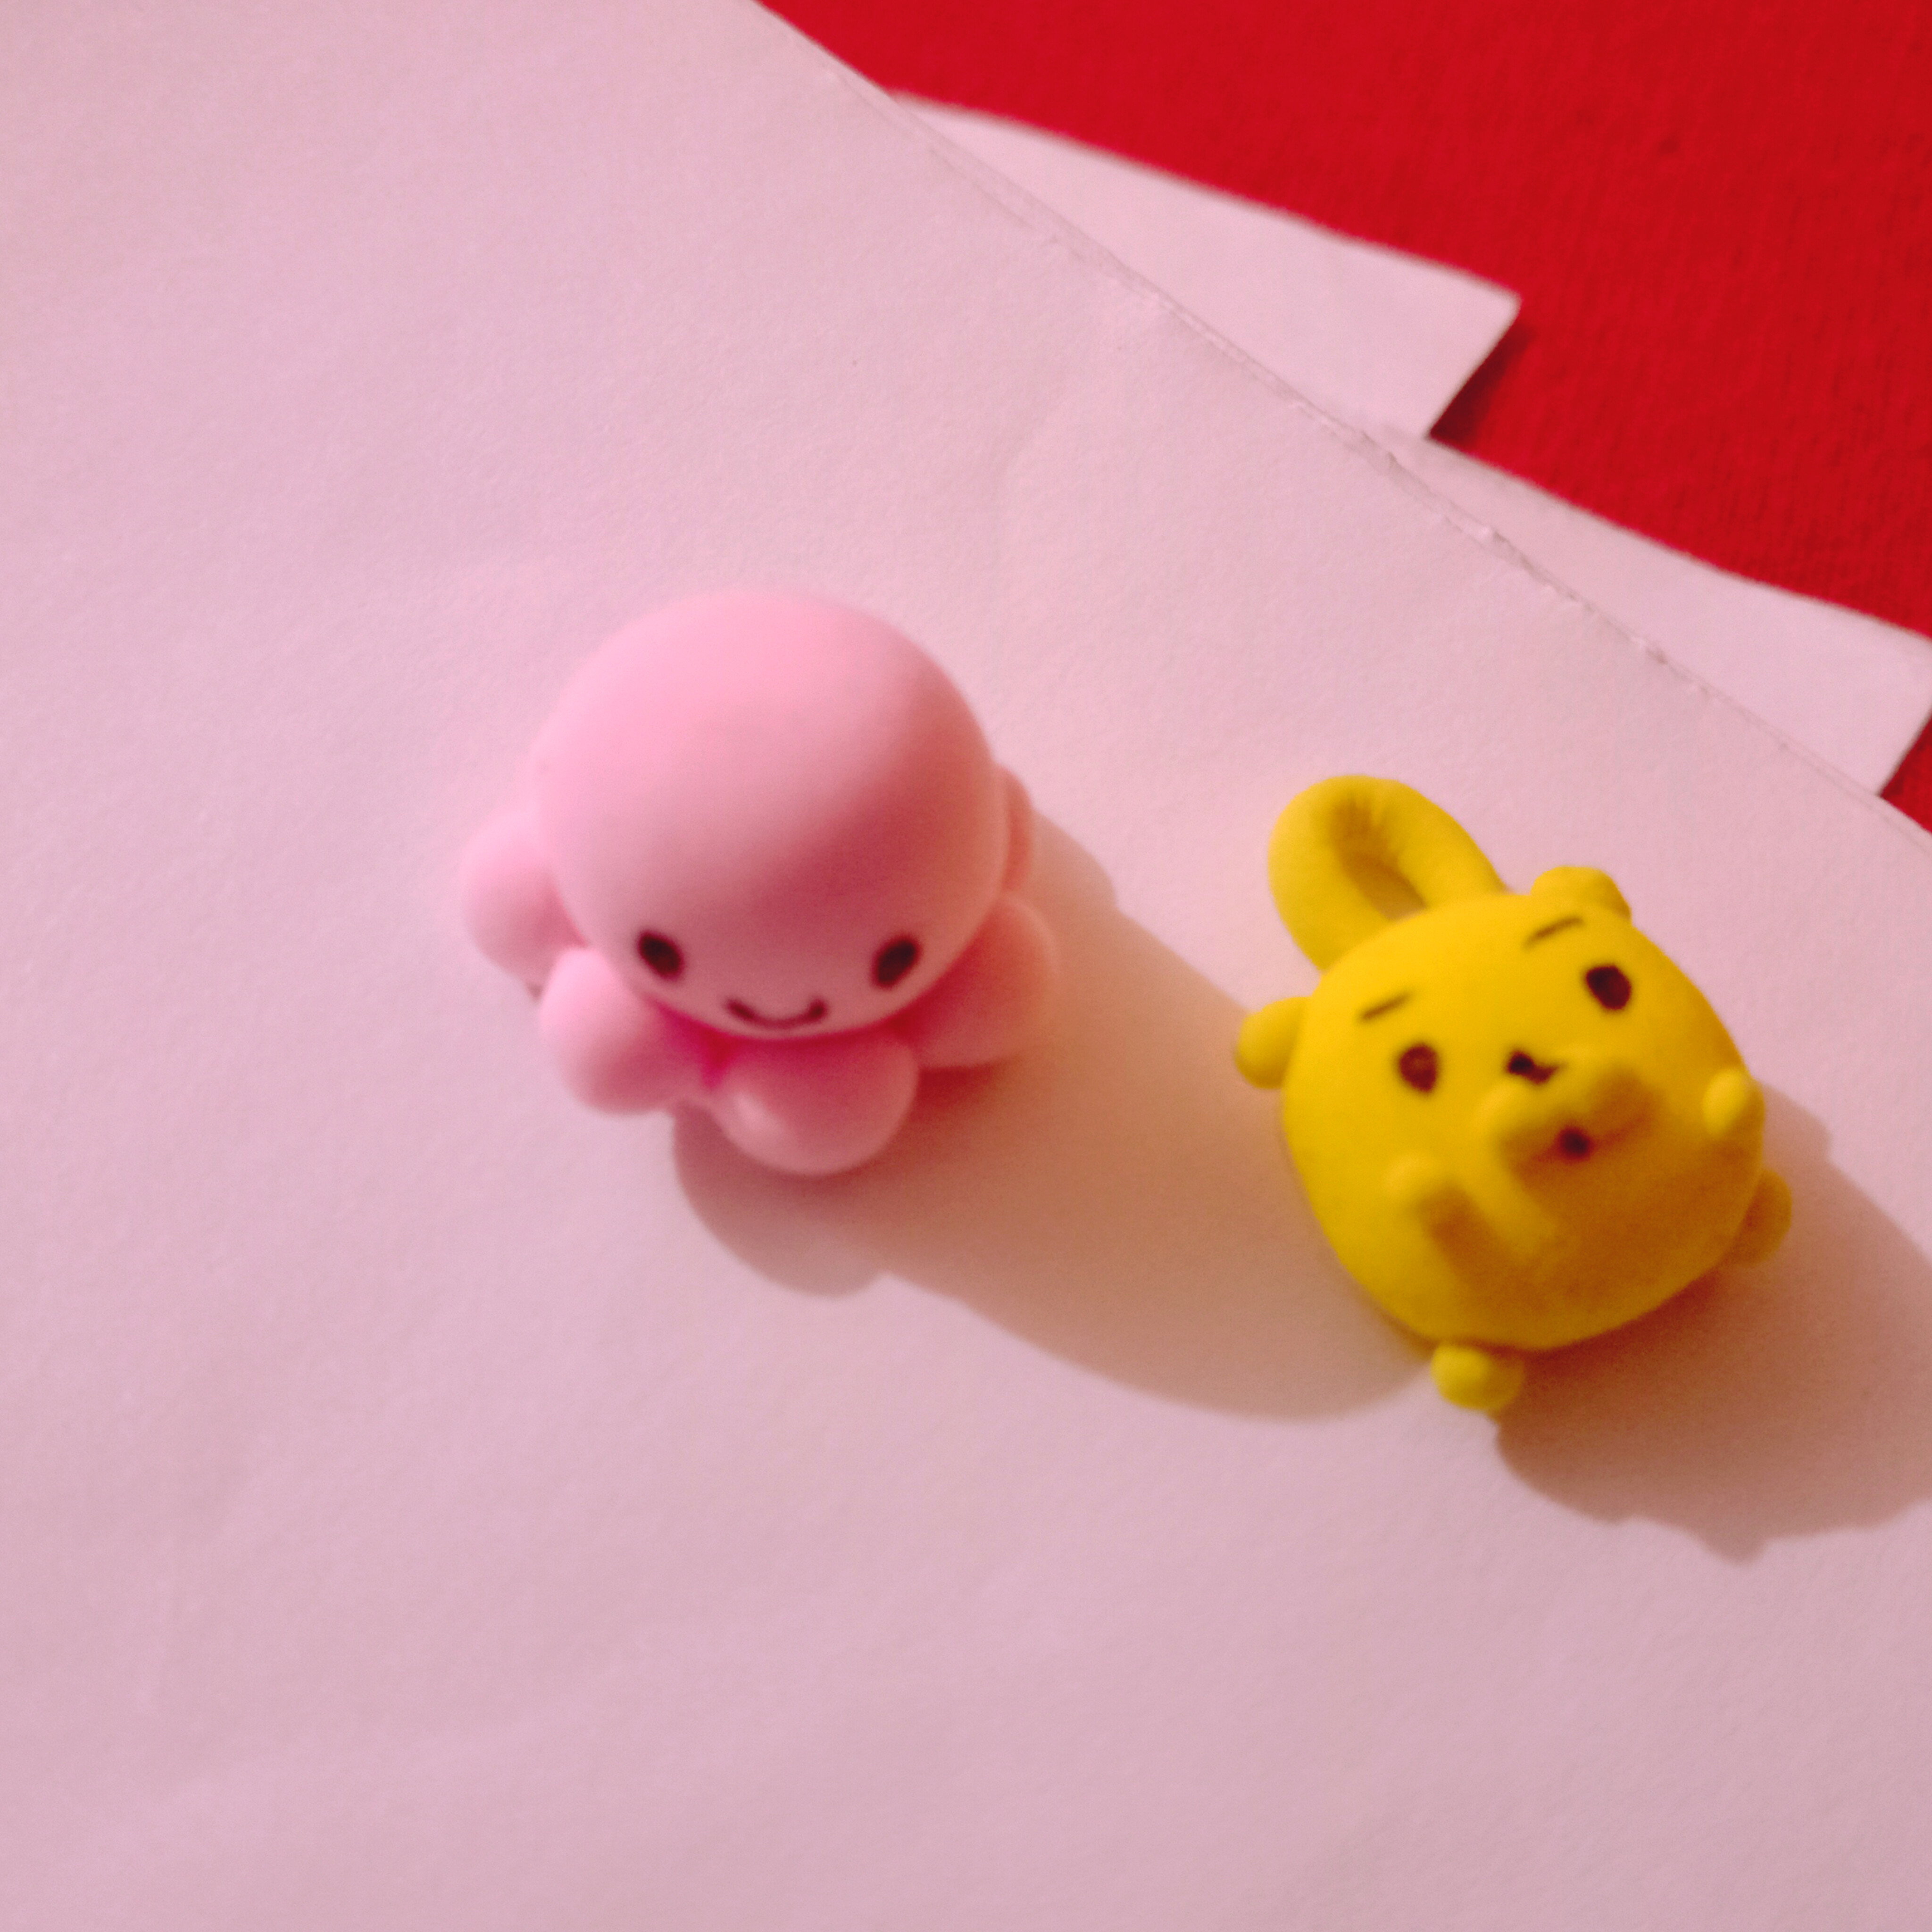
I did another diy .This time i made two mini cute charms . Here is a quick tutorial how you can do it too.
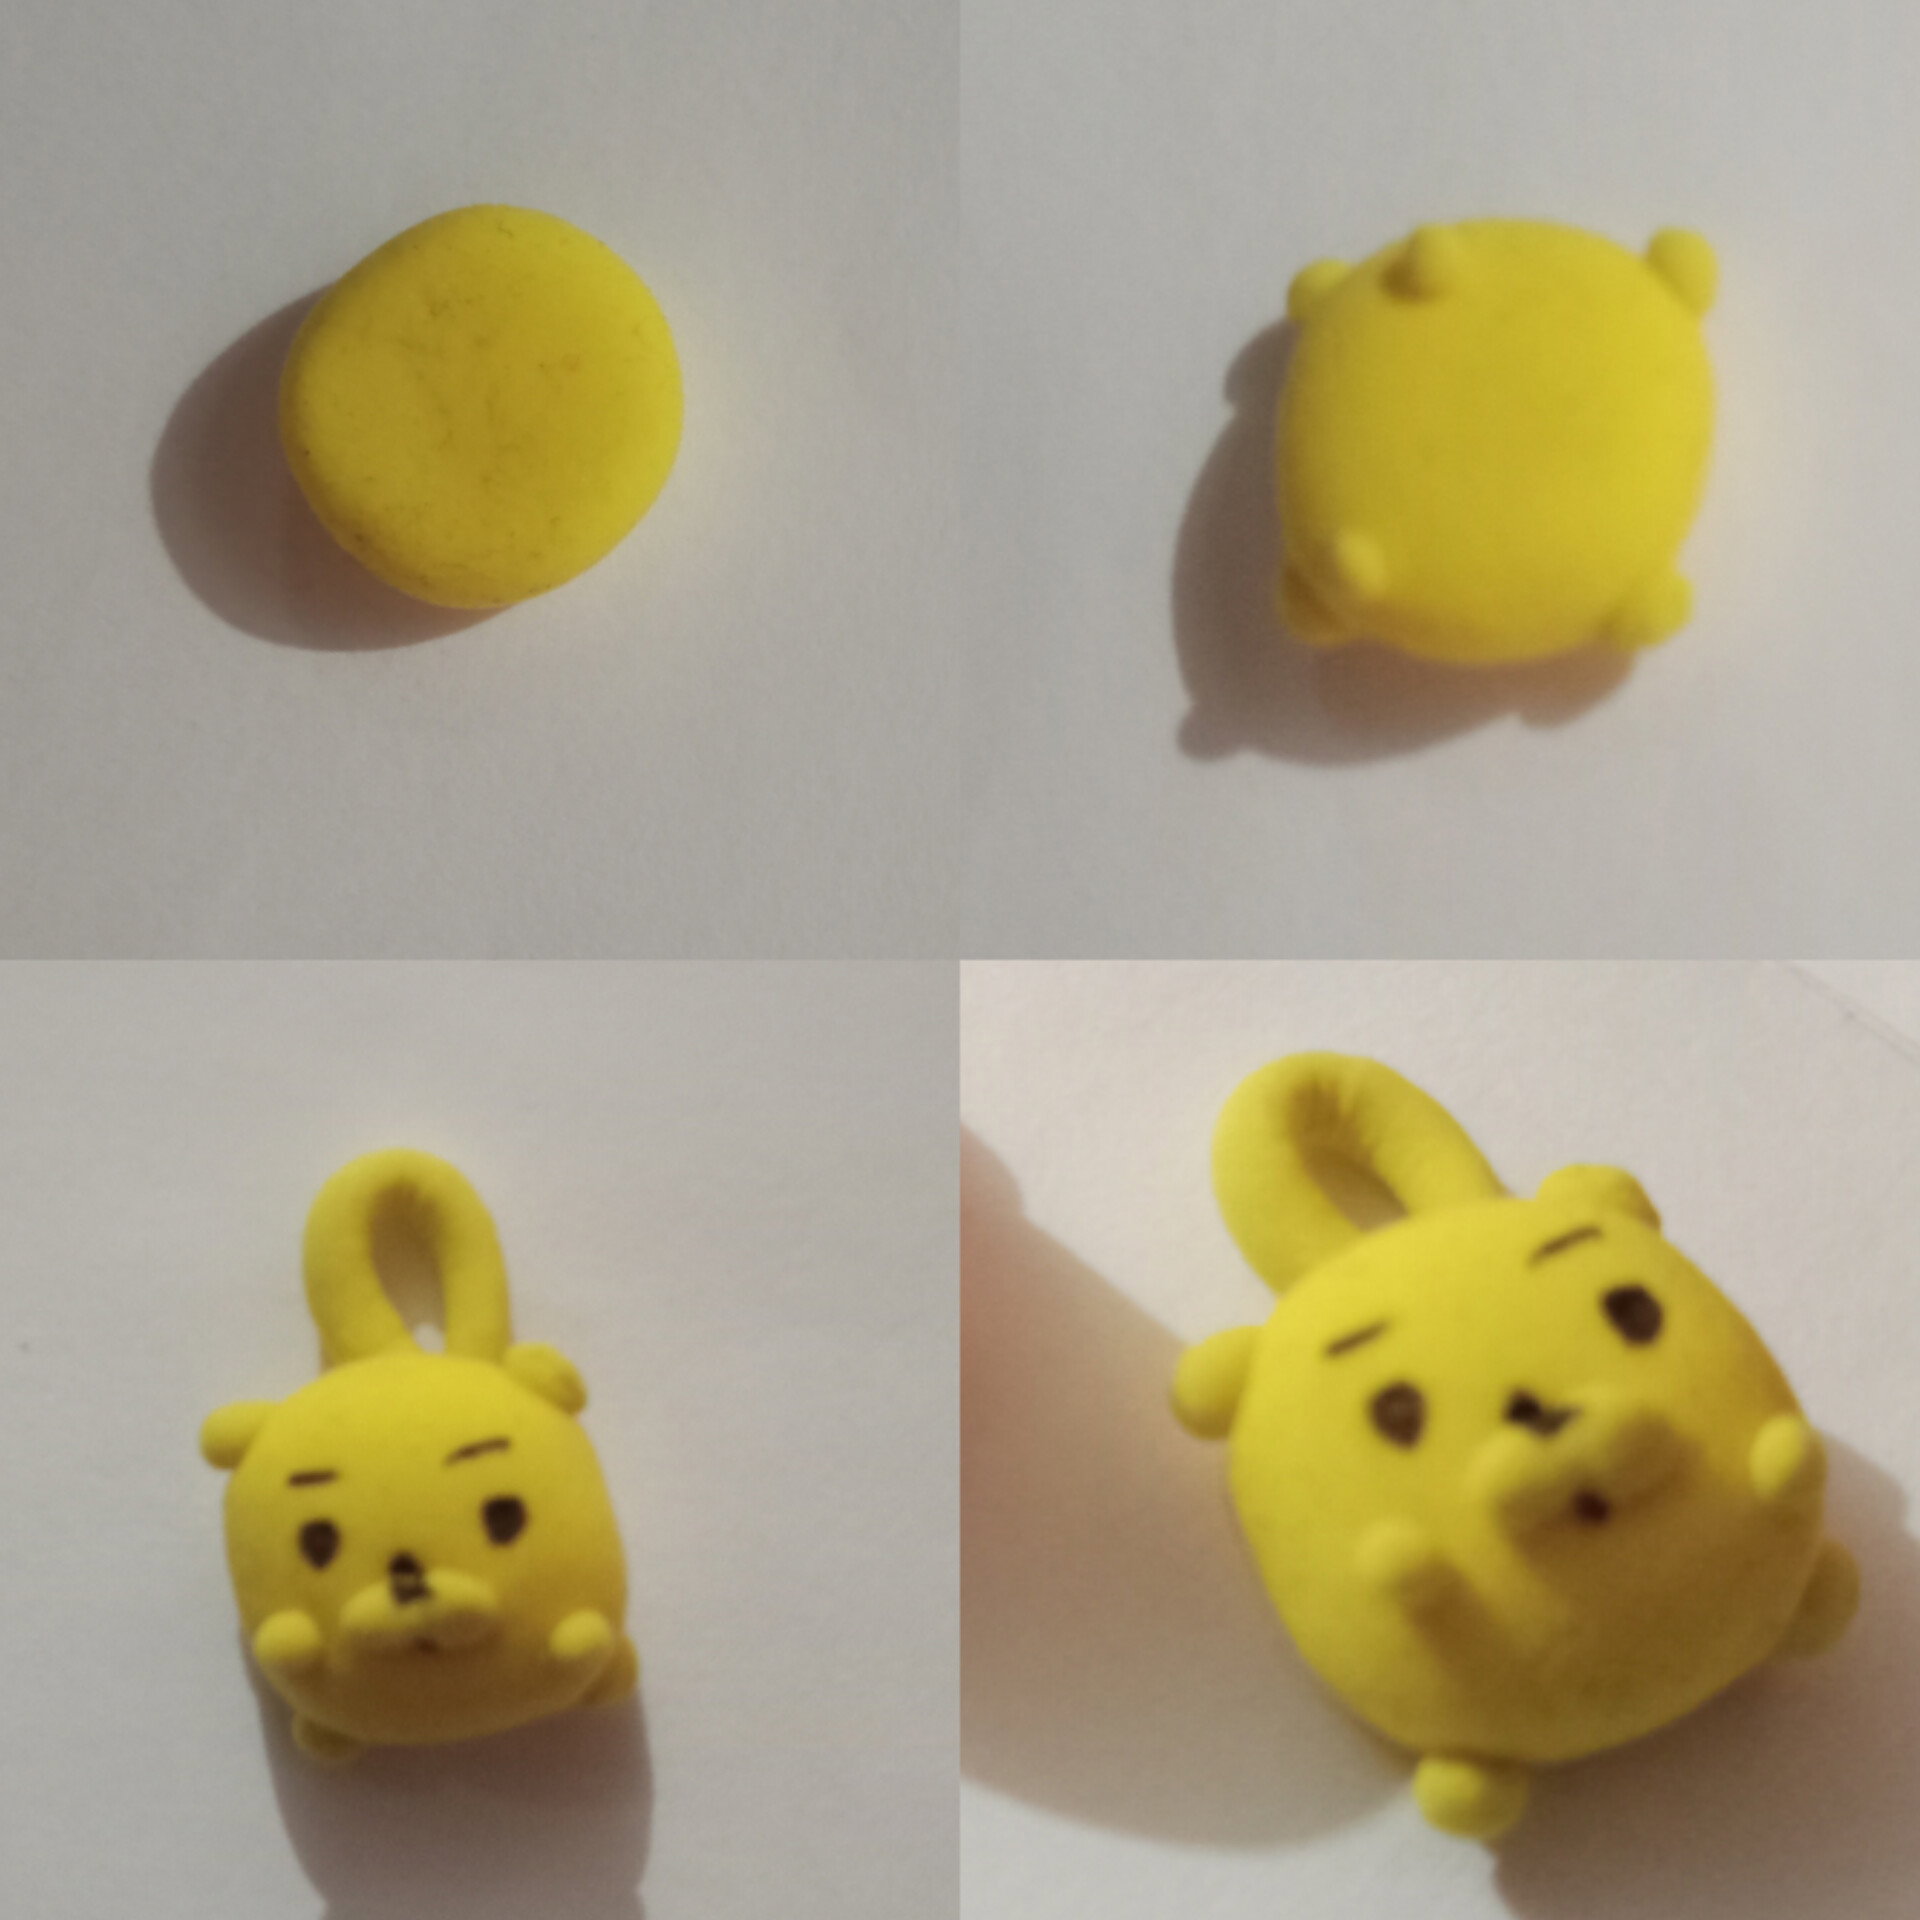
The clay i used is Super clay .Super clay is an air dry clay that is super easy to work with its light in weight just like foam . But also is Fragile so u have to use a warnish coat on it . I use clear glue to seal the things i make it also works just like a warnish.
Okay so first we took Yellow super clay , Formed a mini ball with it. Then we made 4 more tiny balls for the hands n feet and 2 tiny balls for the ears . After wards i added two balls to the mouth too so they look like a dogs Mouth. Added the eyes and details with a fine liner also i added a clay ring to the back like a hoop so i can use it as a charm you can use a Eye hook which is usually used in jewelry making too. This was a character from Adventure called jake the dog and my charm turned out very cute
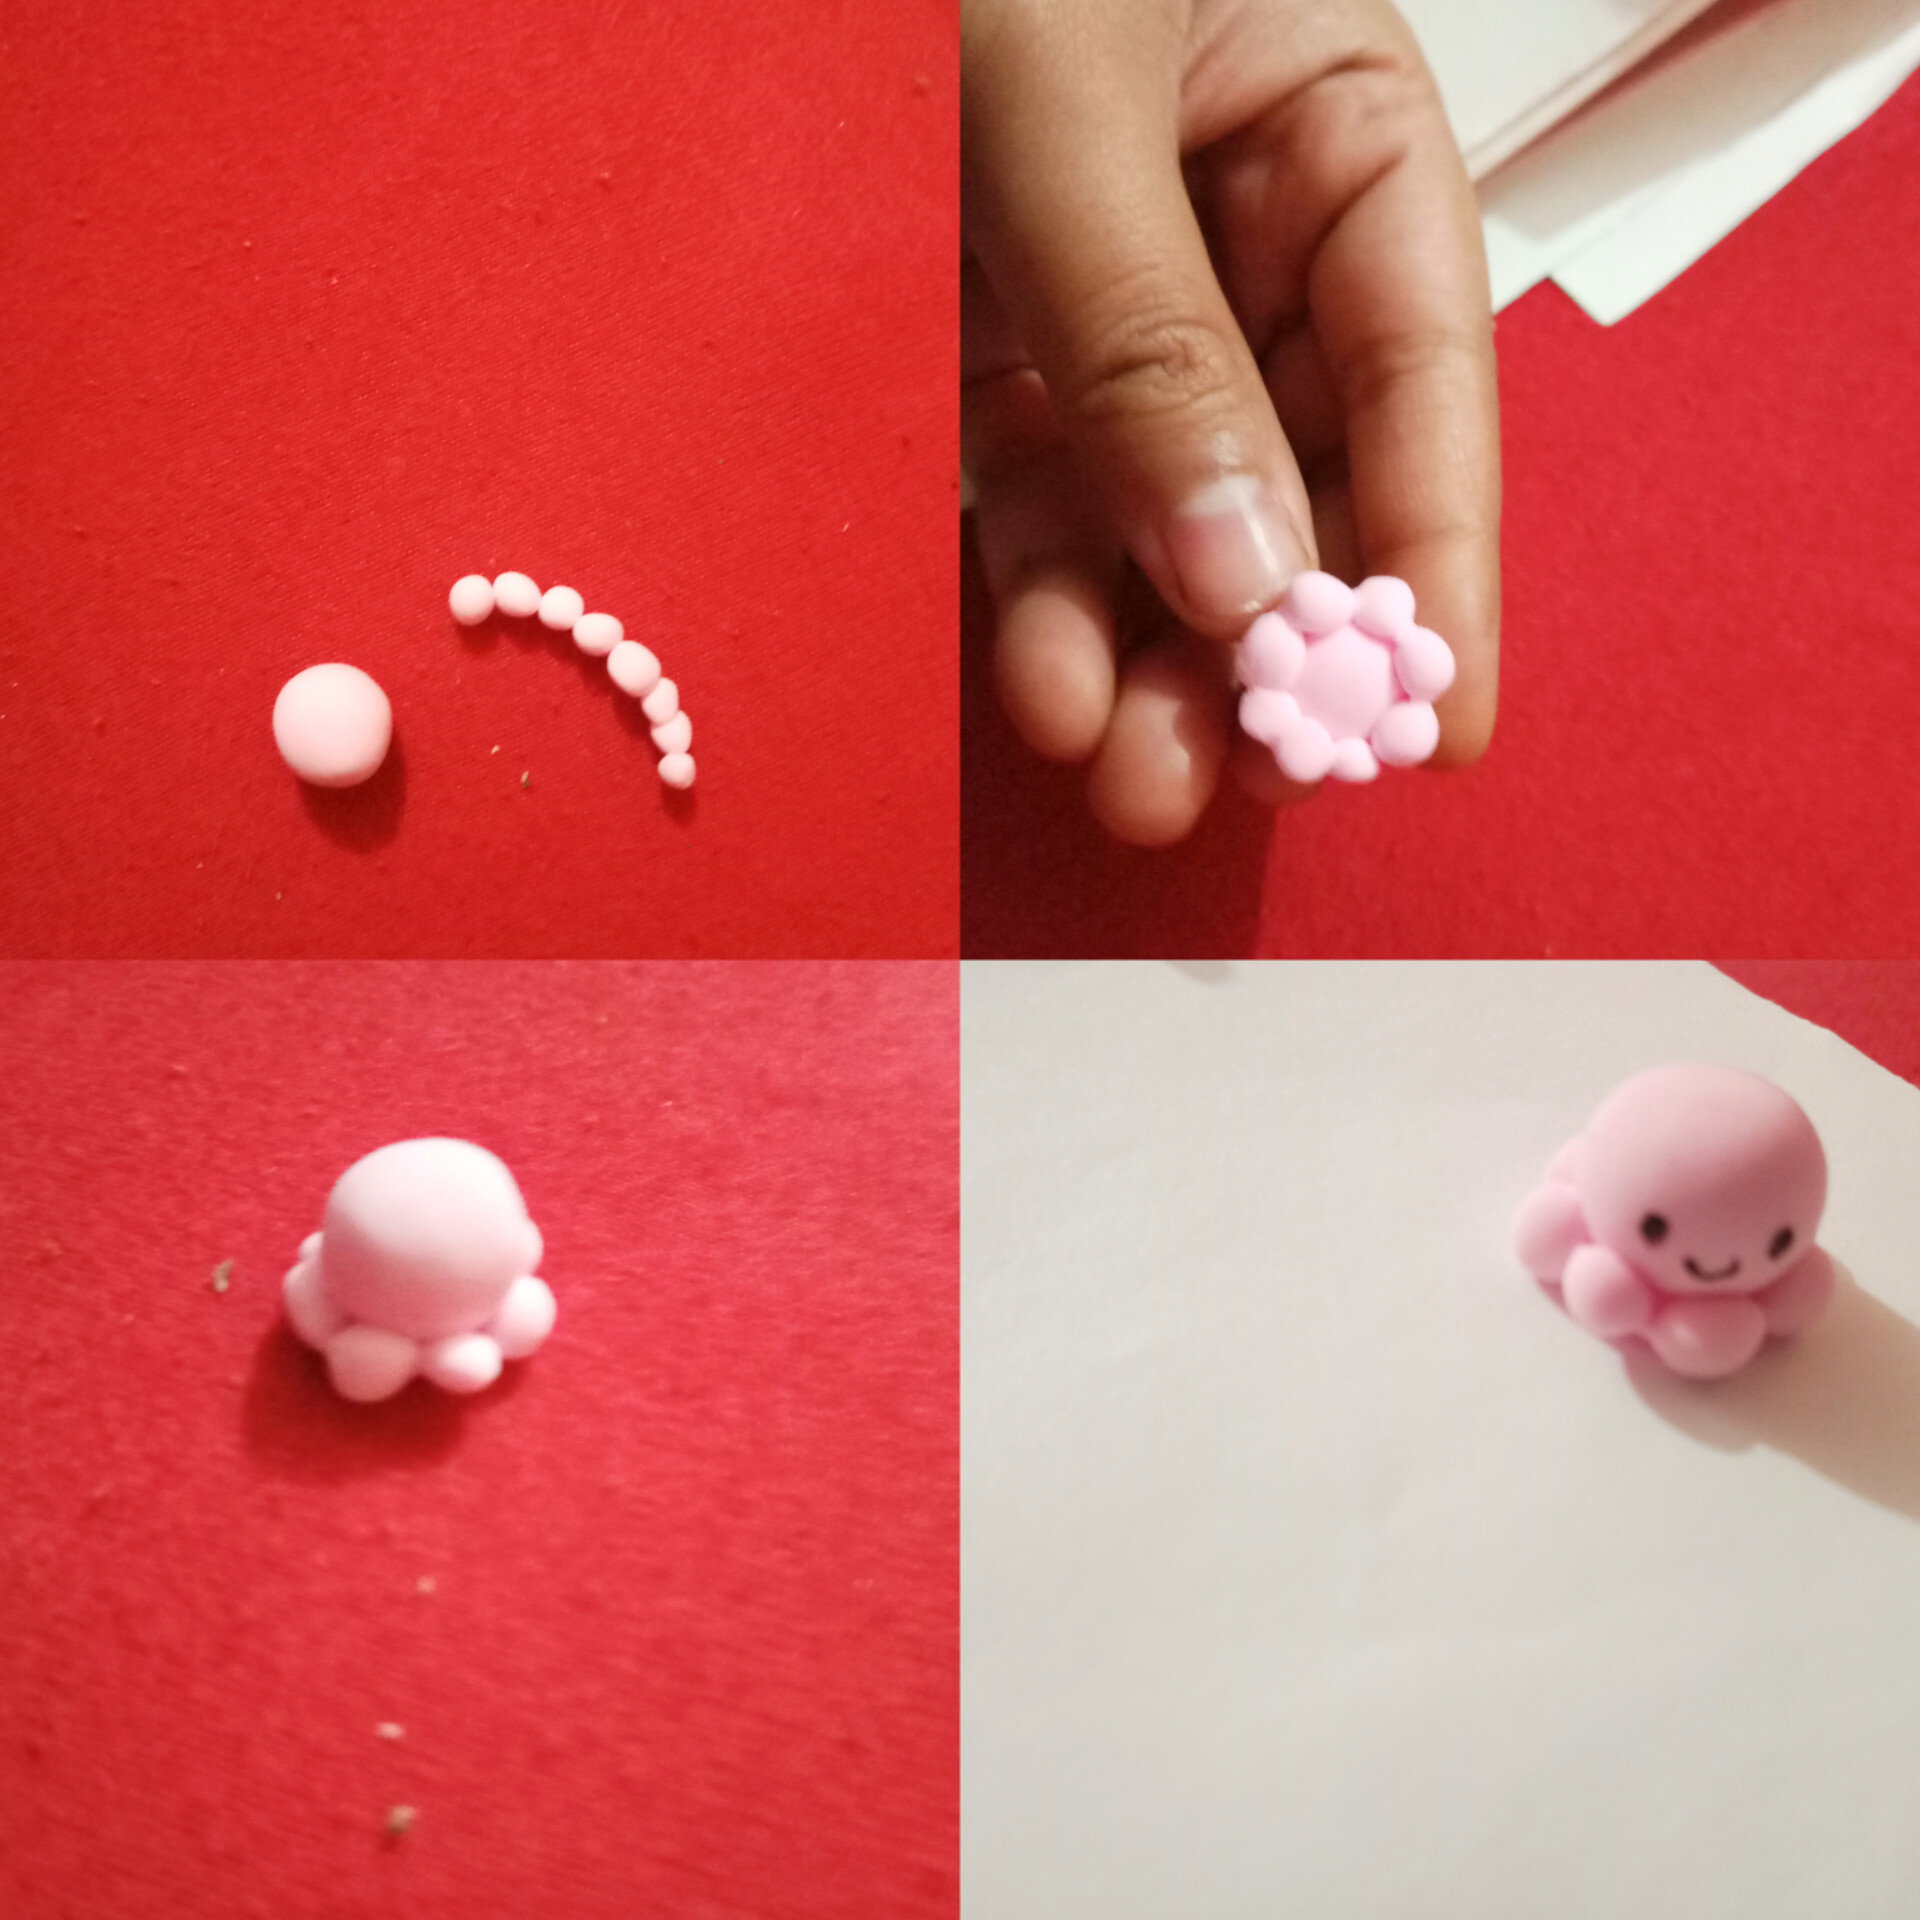
After that i made an Octopus charm this one is just like my octopus plushie . To make it i m using Pink clay and i made a bigger ball with 8 mini balls the big one will be Octopus's head , the 8 mini ones will be its tentacles . Now we attached them so u can see the bottom looks like a 8 petal flower but the top looks like an octopus . Now i added a smile with eyes to it .
I did attach the hoop to my Octopus too .
These charms were made for my art file you can see they perfectly fit the key rings.
You can make keychains similarly . They were super cute and easy to make .
Will be posting another diy tutorial blog here n on eccency soon. If you love miniature cute charms and you wanna make them with kids Don't miss this out Stay tuned ❤️
A Super mom i knew
As a Kid i used to be amazed by the super mom of my class mate . In 5th Standard Romaisa was my seat mate she was the girl with the cutest hair do and the coolest lunch . She always had her Hair in a bob with cute ponytails . Her Lunch was always filled with Chips and Cupcakes that were store bought . I was always jealous of her mostly jealous of her having the coolest most confident mom . Her Mom was a hair stylist at a Hair salon . I always admired her Styled hair and Clothes with all that added to her Charisma.
I became Friends with Romaisa just so i could see her Mom often. To my surprise Romaisa never liked her lunch She always told me your so lucky your mom cooked all this lunch for you in morning. When ever we had a Conversation she always asked me about incidents that involved my mom . One day i invited her to my home and we had dinner at my place i remember my mom making Shami kabab and Fried rice for us which Romaisa Gobbled right away . I thought out of all the Sodas and Store bought Treats fast food she loved Home made food alot. Which was strange for me . When i asked her about it . Romaisa simply weeped . She told me things were different from how i saw it. Her mom was a Single Mother who was working day and night for her good education and lively hood . She hardly had time to spend with her cause all her time was spent making money for her education. Romaisa said she was home always with her Grandma and often stayed late to wait for her mom . Sometimes she came in Midnight even . Often Romaisa feared if she caught into an accident or if she was abducted . She told me how her mom cried some nights looking at her deceased husbands picture . Because the strongest woman are strongest because there is no other options for them. I was just sad .But all this lead to me appreciating my Housewife mom more and even more appreciation for the moms that work hard day and night .To afford A good living .
Must have been a hard Struggle for her . When i saw Romaisa with a broken ankle on the Playground . She had to rush to the School from 2 miles away because she was the only Parent .
As an adult now i realize how Romaisa's mom must have felt . Is Romaisa okay , Did she eat , i hope she doesn't hate me cause i spend less time with her , she is growing fast , when was the last time we had a meal together , when was the last time we went to a picnic .
A Single mother has to care for her child making sure they don't Make them feel neglected also ,they have to work hard to pay the bill . Both duties of a parent are a tough job. No time to get sick No time to relax a constant eye on the phone incase of an emergency . Then again the feeling that you're not giving enough to your Child they need you.
I salute all the Mothers out there and Mostly the Mothers who Play the Father too ❤️
Picture used in this article is taken from Pixabay:
https://pixabay.com/images/id-1807500/

DIY Floral Hair clip with air dry clay
Well as Mothers day is approaching and i did say i will be showing diy tutorials for Clay crafts so here i am .
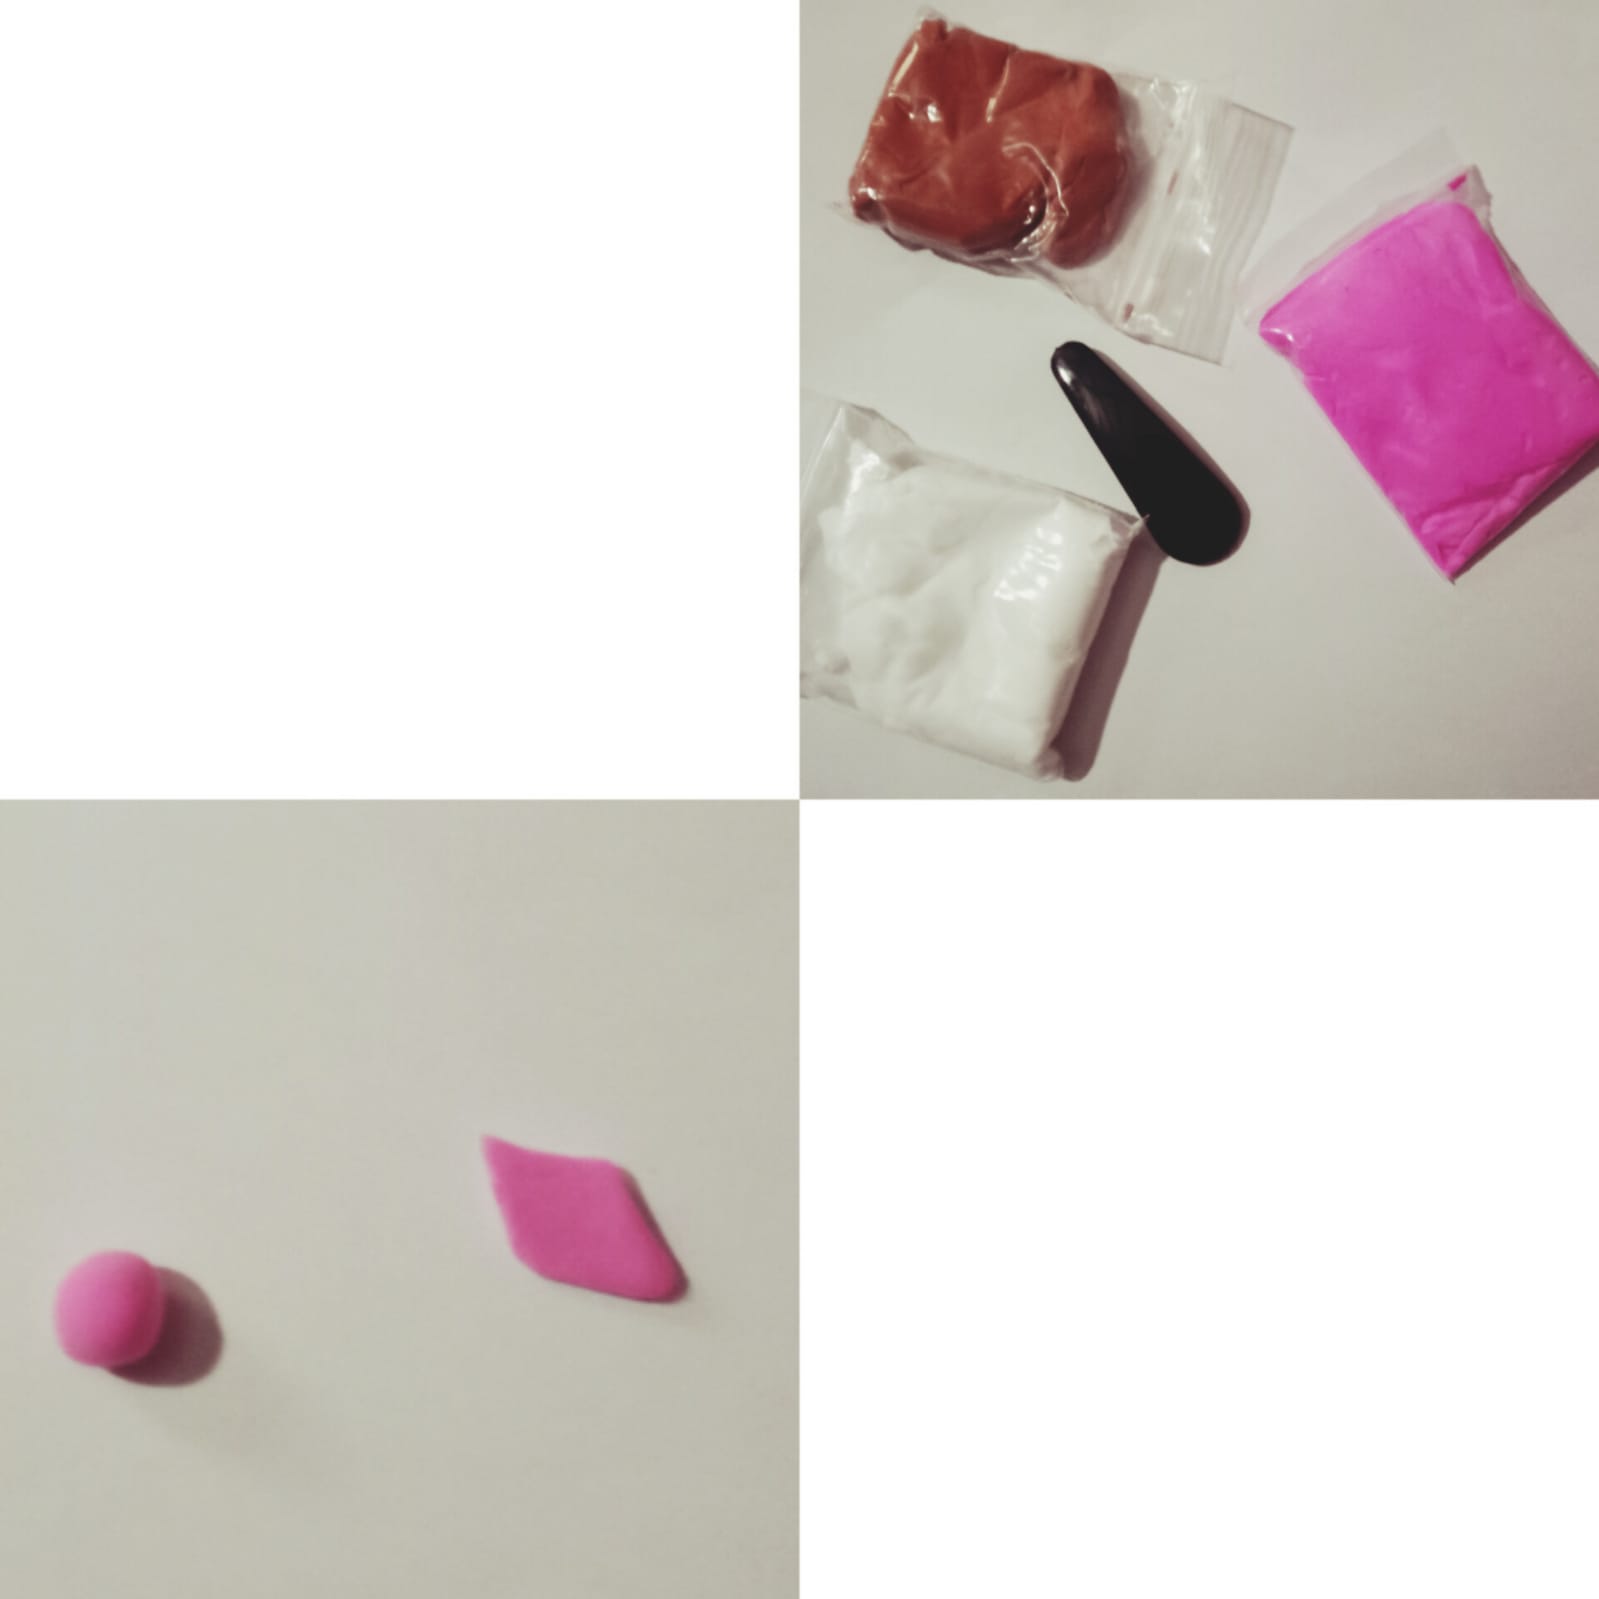
**The things i used in this DIY project is**
°Air dry clay
° Clear Glue
° A tiktak hair clip
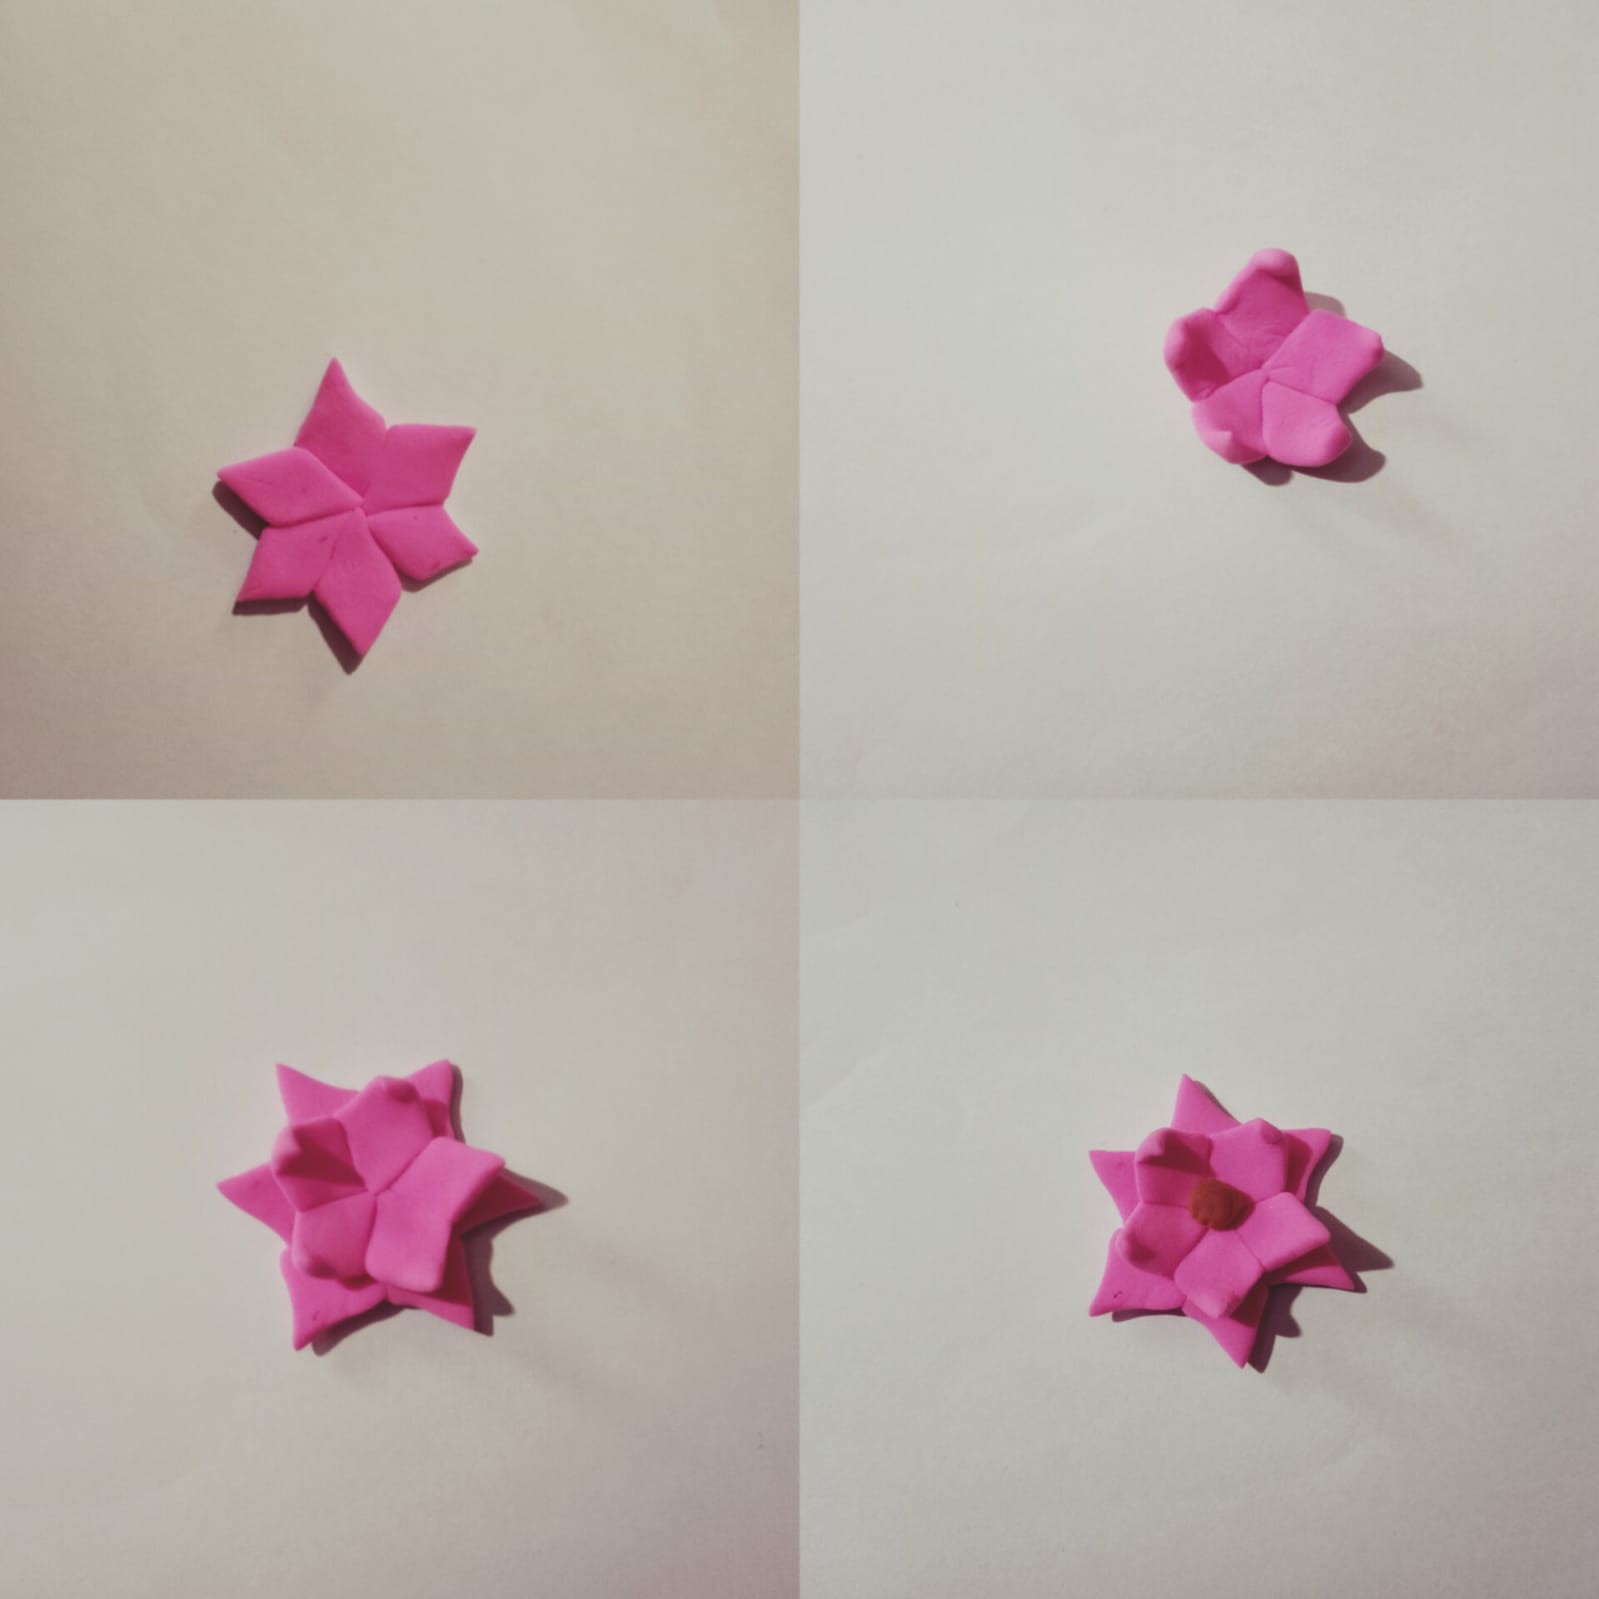
I used pink clay to make this mini ball and shaped it like a diamond these will be the petals of our flower u can shape them differently too its all up to you.
I joined six diamond clay petals this was the flower base on top of it i made a 5 petal flower but curved the petals a little and joined them both now it looks like a 3d flower i put a brown clay ball in the middle so our flower is complete.
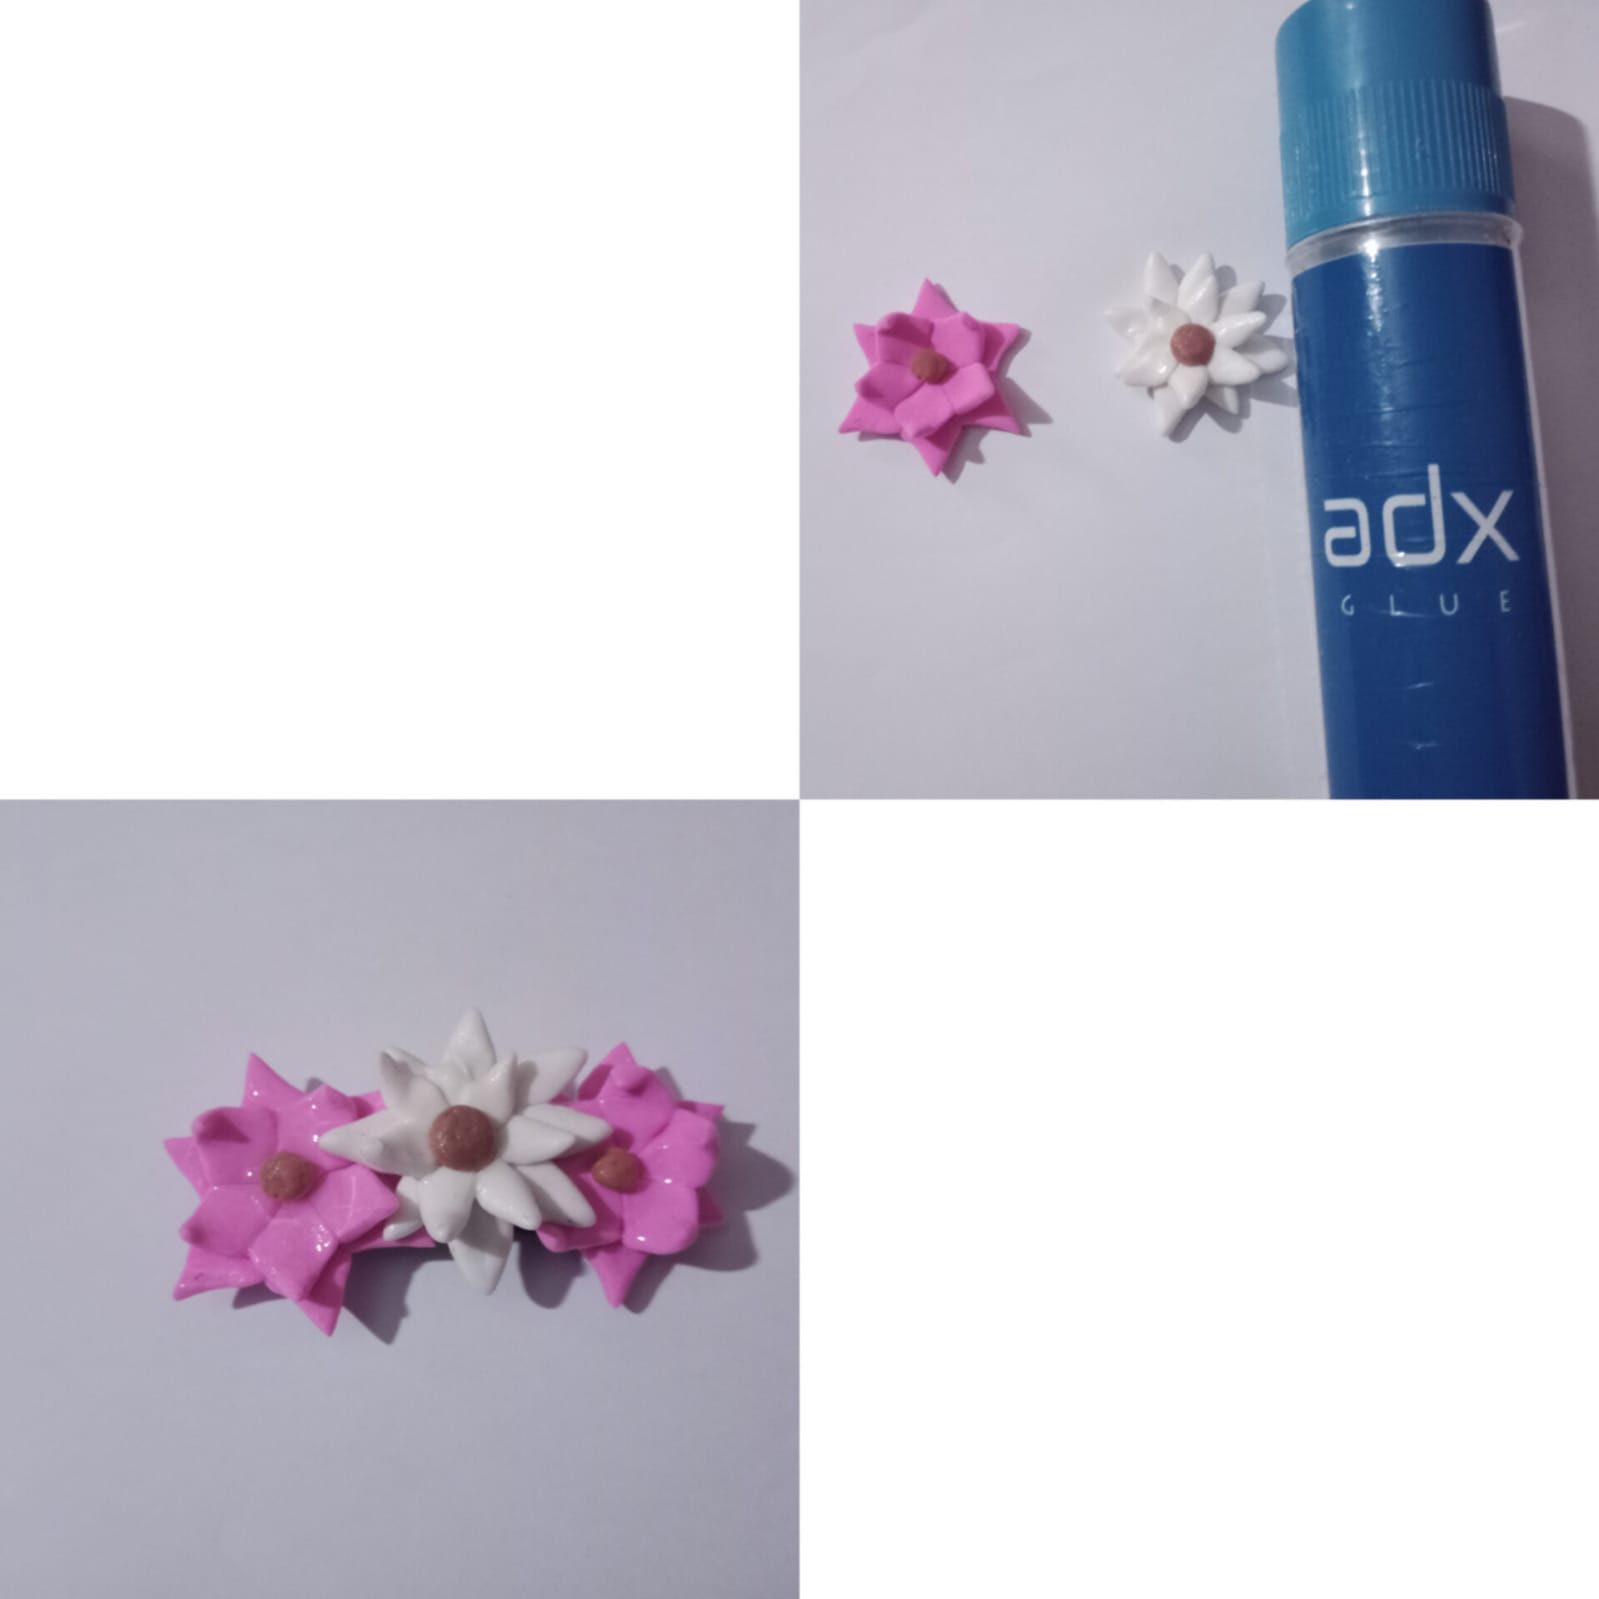
But Air dry clay is fragile so we need to warnish it with clear glue .As you can see the white flower i made previously is a bit glossy that also is because i warnished this .You can also use nail enamel clear coat for the warnish .
After wards i glued all the flowers on the tiktak clip and added a few Green petals to it and gave it to my mom this is what it looked like in her hair ❤️
What should i craft next?
Splinterlands art contest week #240
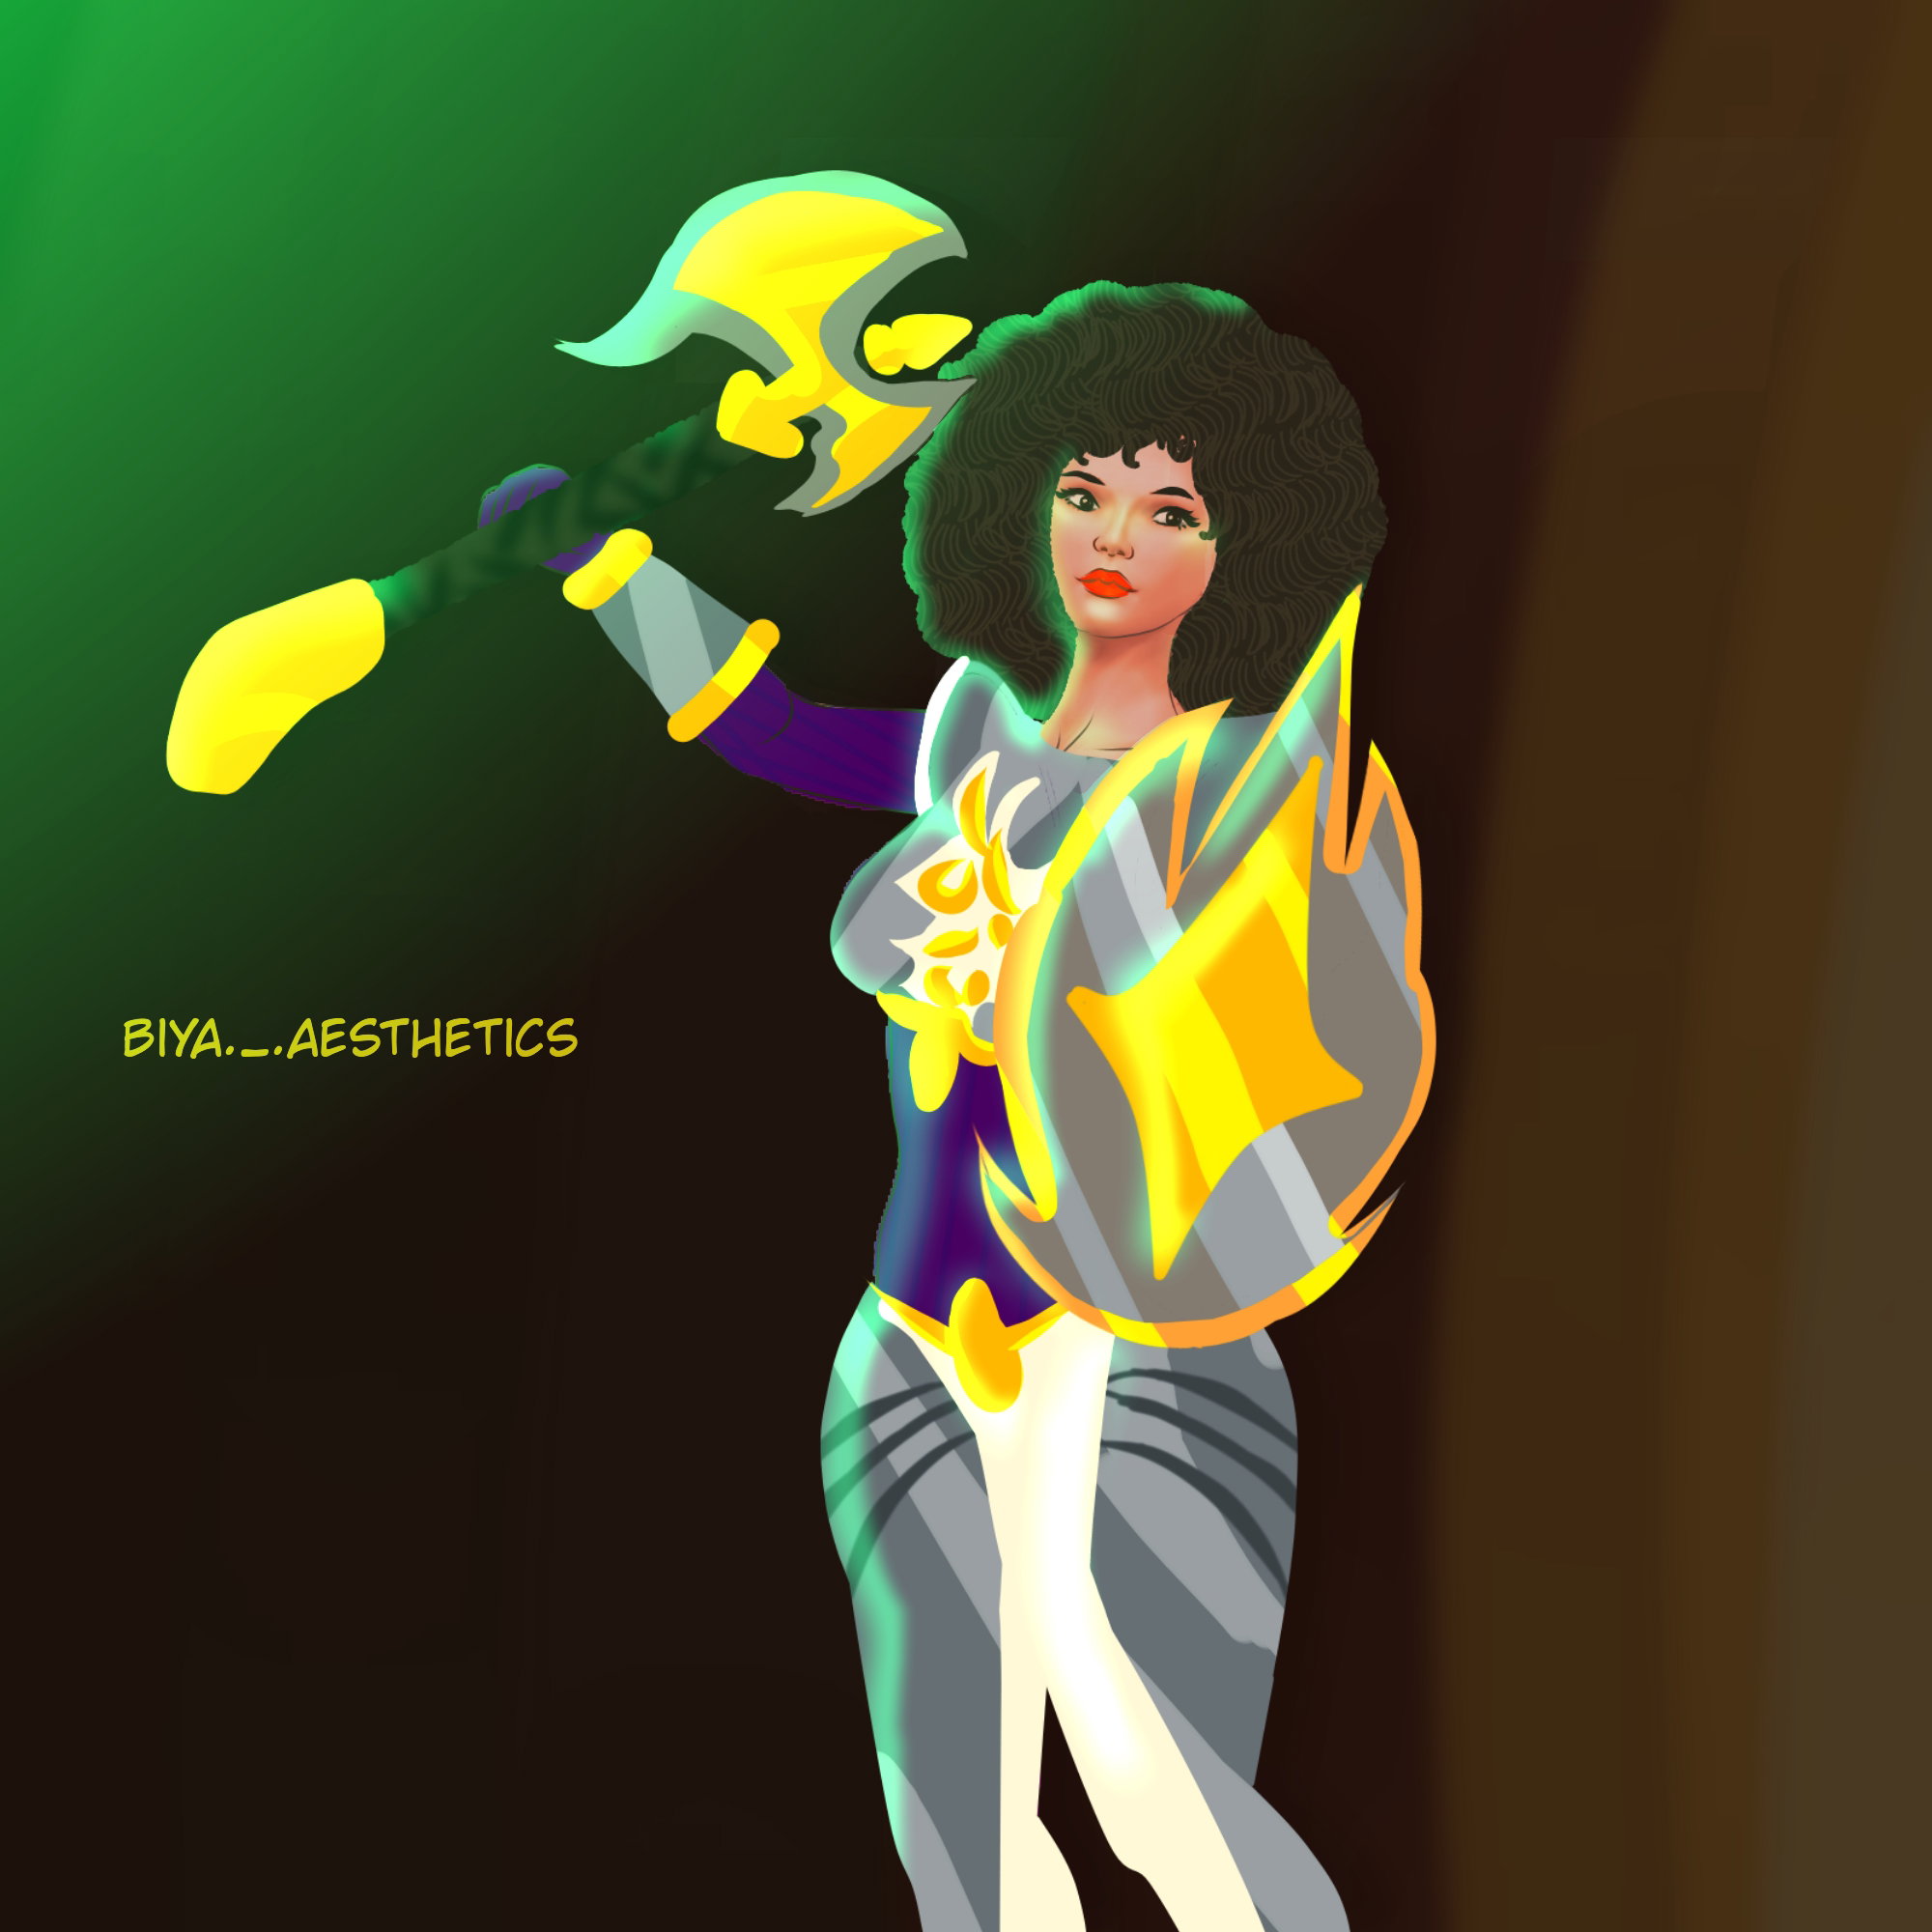
This week for my Entry i tried Drawing Chaos Knight.
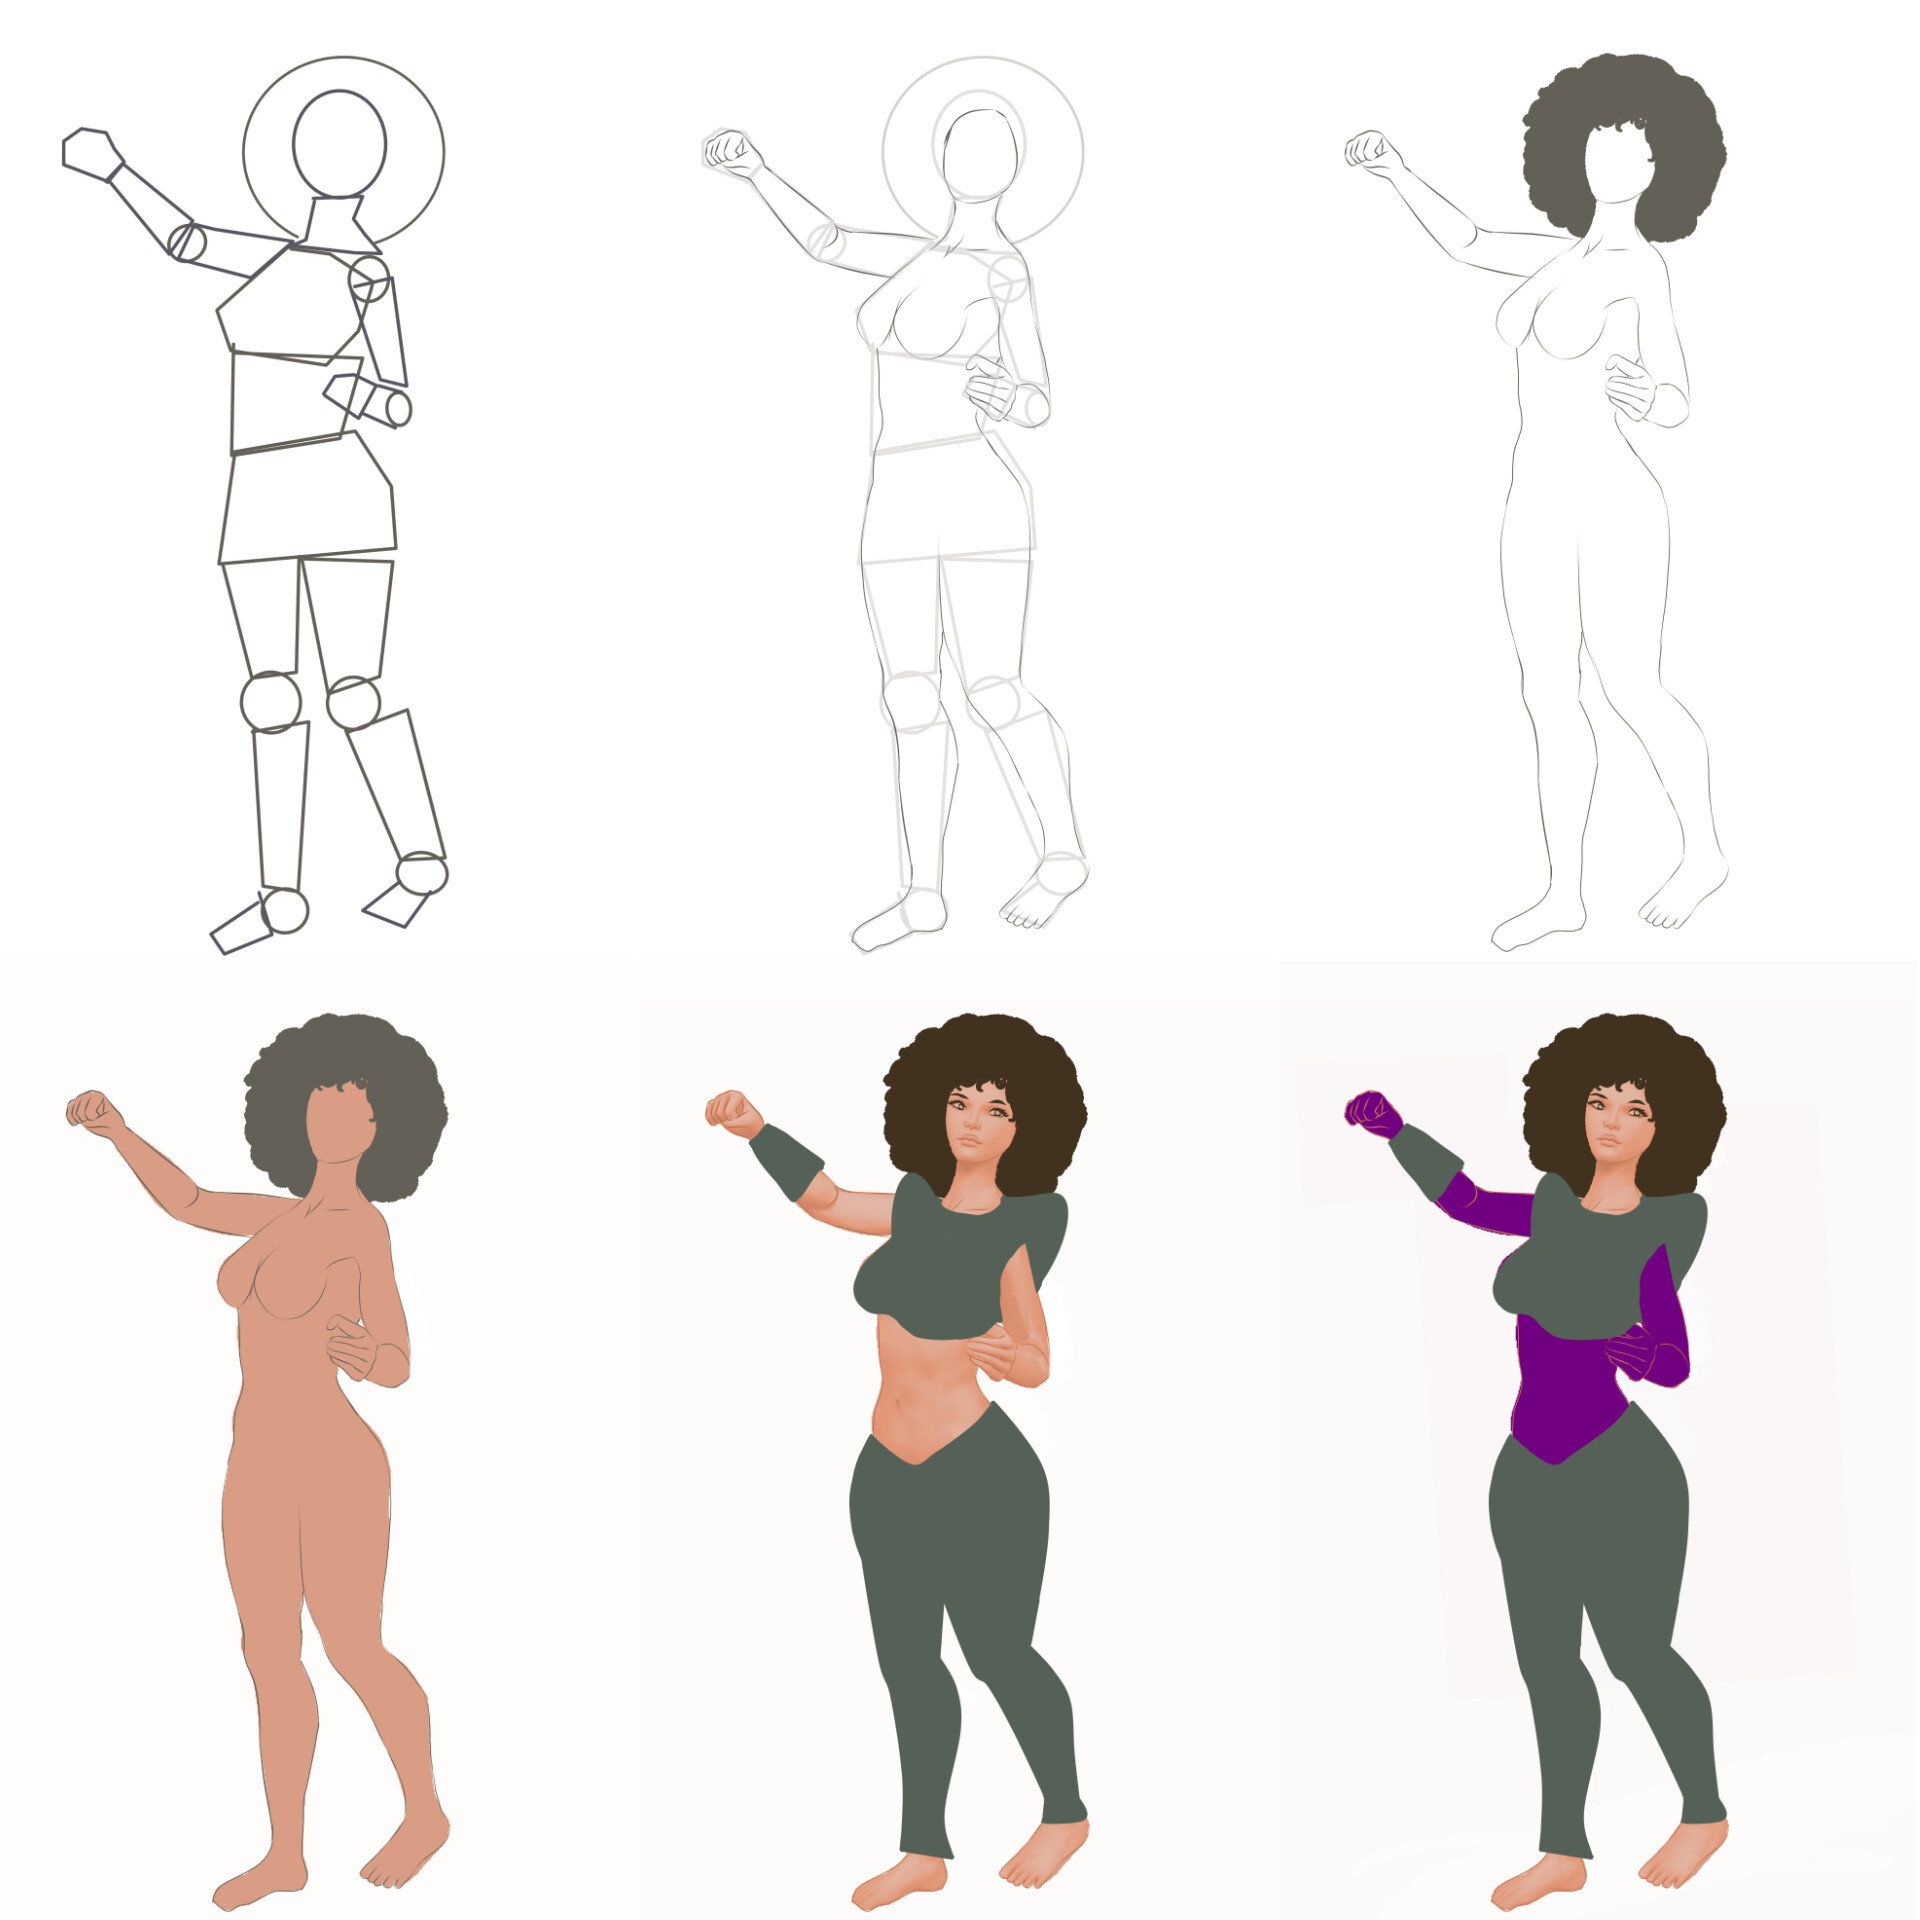
I started with drawing a body shape with help pf Basic shapes i usually do this on a paper but i thought i should do it digitally too . For the Afro i drew a circle over the head like a straw hate this will be the base for the afro.
Then i converted the shapes by connecting them into a body i did this with a pen sharp brush.
I made the afro with a mapping brush cause the gives a curl like effect then i added the flat colors .
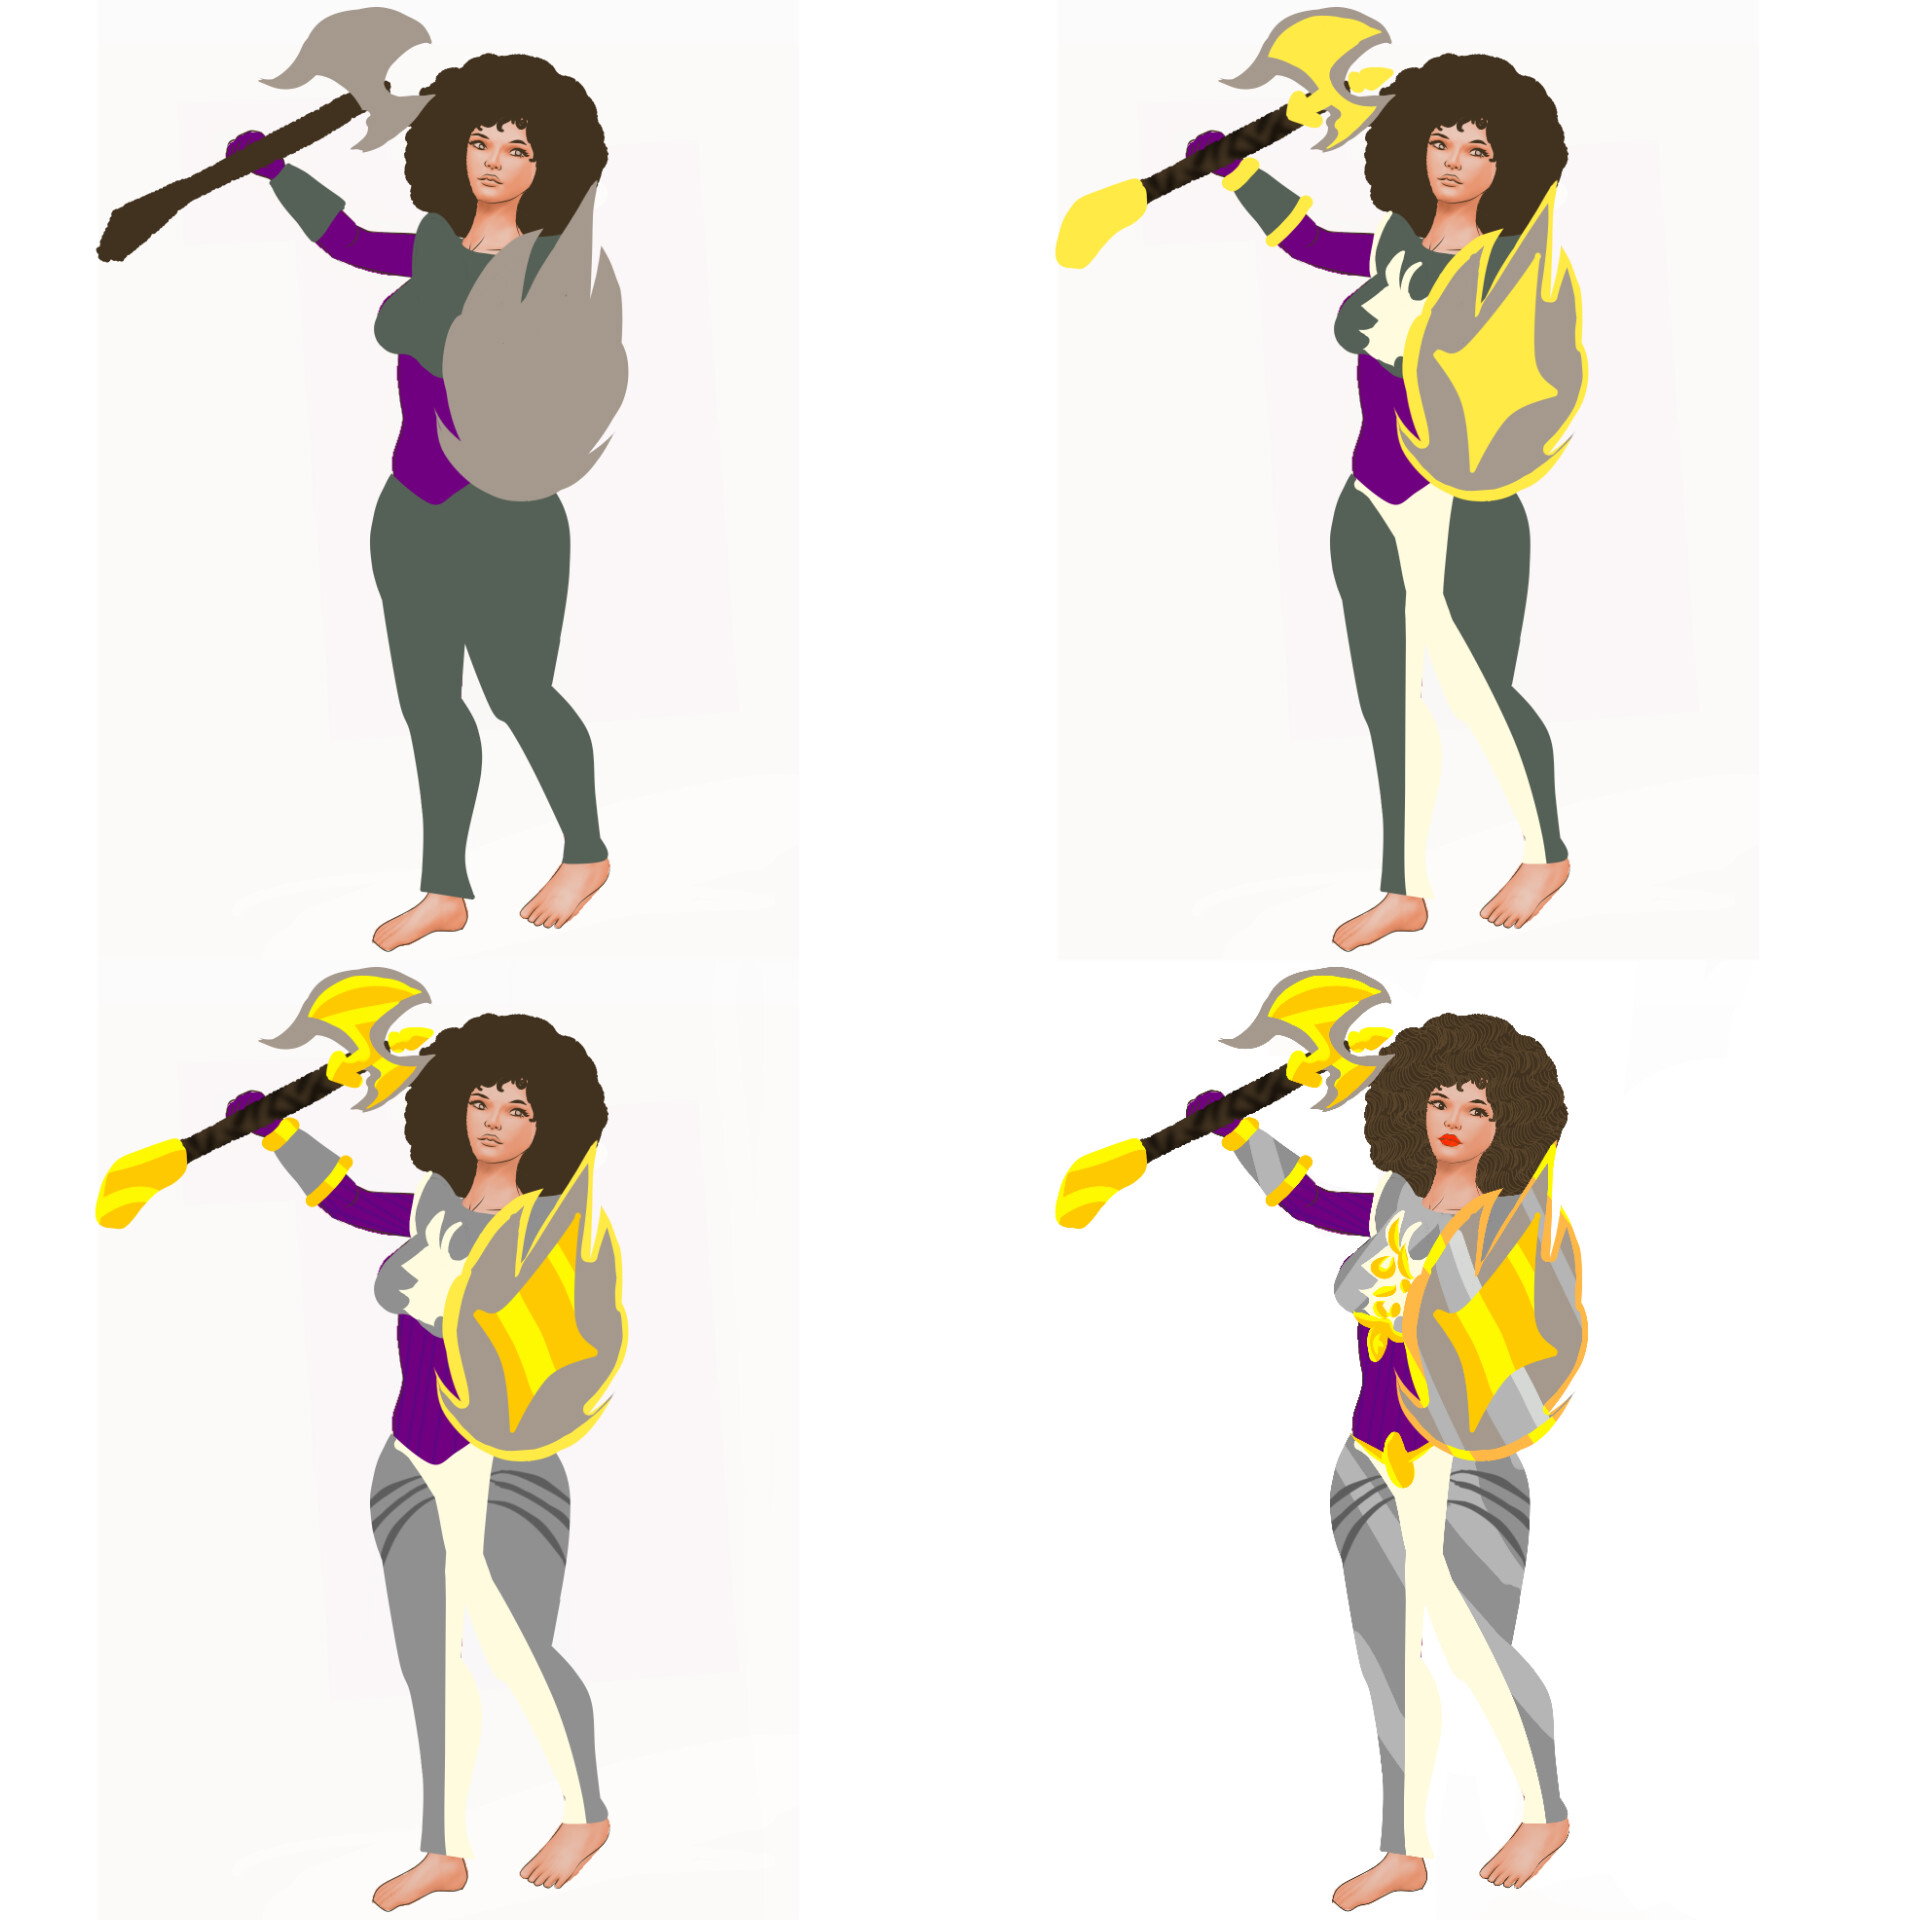
I added highlights shadows to the body and expressions i also added the armor it doesn't look detailed but we will get into that in later steps
Now i added the axe and the shield. Added highlights to them so it gives that iron and gold like look i added detail to the face and hair too.
After wards i made a cave like scene zoomed my character and gave her A green glow from the top view just like the original character .This gives the Character a more Radioactive feel.
This was the final result. This challenge is the reason im going out of my Regular art aesthetic and so I'm able to do more and more new stuff. My drawings are more inclusive. Every week i try to make Different variants of characters so thats why Anyone who takes a part in these challenges is a winner in my opinion ❤️
Life is all about the little Joys
As i previously said i will be doing a weekly blog every week about what i learned new and what happy memories i made in the week .
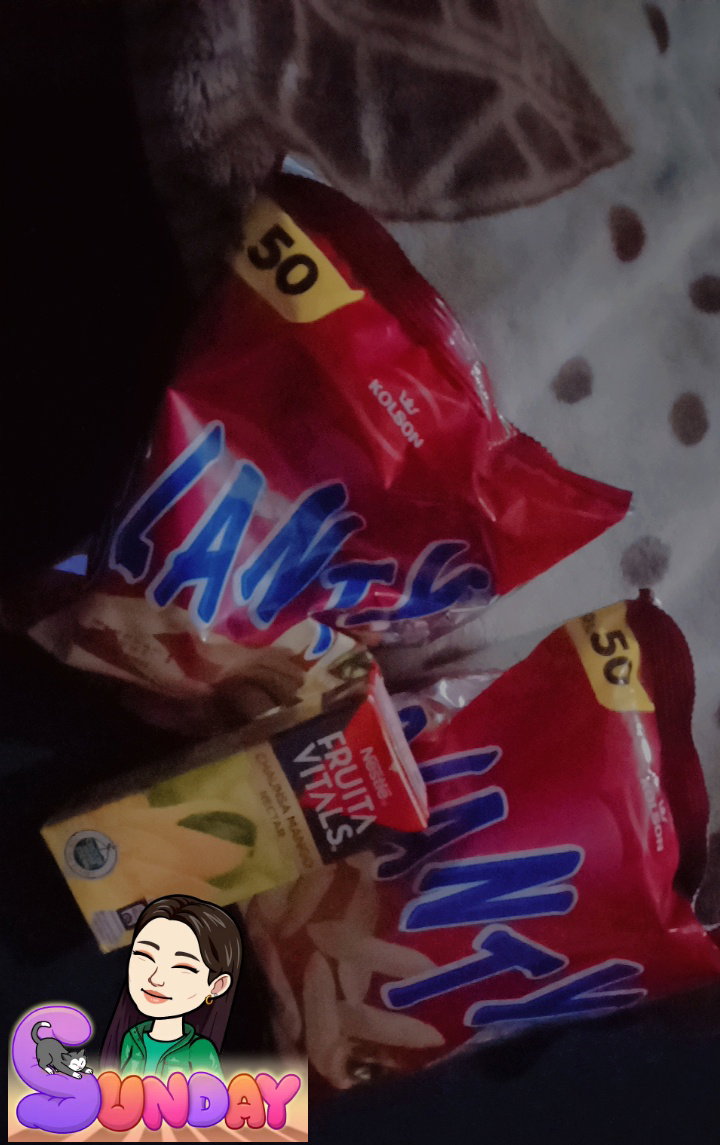
This week i started from Sunday. After Eid we had some snacks leftover so my and my siblings devoured them while watching a horror movie . I love Horror genre how ever watching something in night makes me not wanna go out of the bed 😂 . Btw these are Corn puffs jalapeno flavored but they aren't even spicy for us just a mild peprika flavor for the kids . Also We had Mango juice boxes n they surely were delicious together
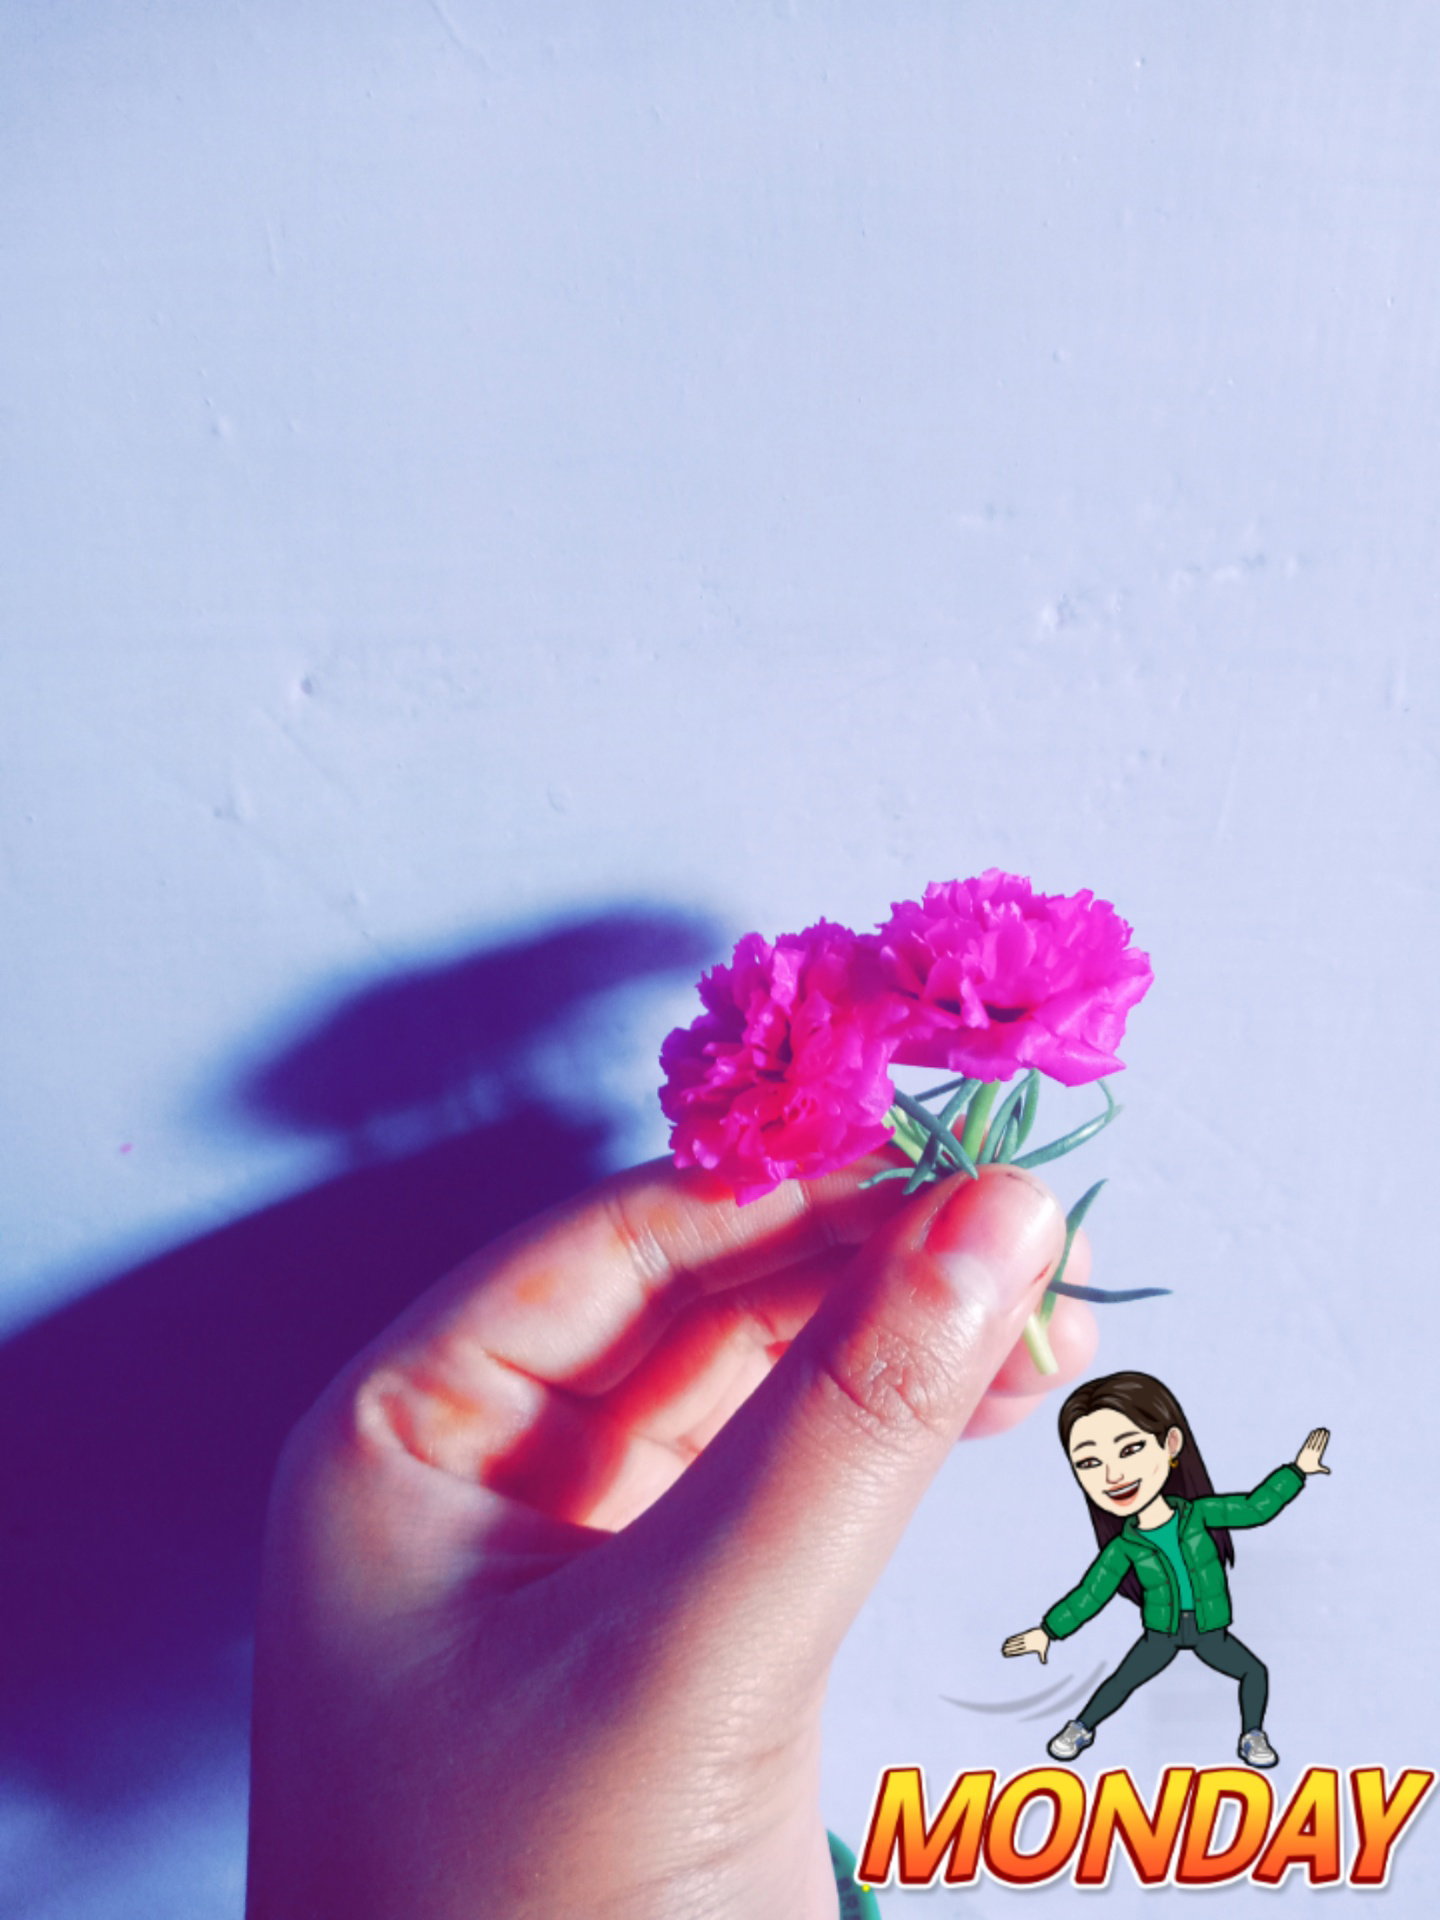
Its had been raining all week so on Monday i was happy to see Vietnamese roses bloom again in my planters well they usually go dry till night n fall so i was driving these two for some more seeds . I just get really happy to see Bright flowers they make my day
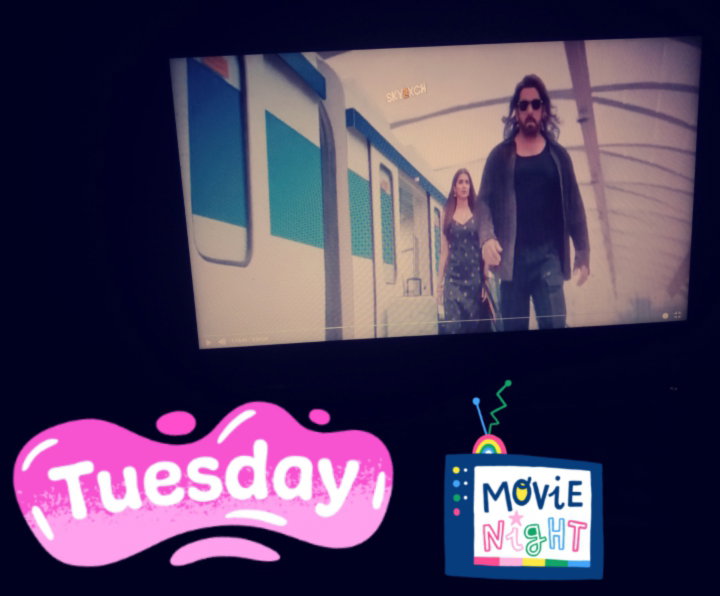
Tuesday was Movie night. Salman Khan's new movie was out .Its called "Kisi ka bhai kisi ki jaan" and i watched it with my mom . As she is a die hard Salman Khan fan .
On Wednesday i got the Clay and made some cute stuff. And i loved these two the most. If u used Linechat you must know who these two are.
On Thursday i experienced a euphoric Sunset the sky was all Peach and Purple and i loved it. It also rained after this . I somehow love gloomy weather like this
On Friday i did an Diy project for mothers day gift .I also will do the Tutorial for this soon Stay tuned
On Saturday i cut raw mango into thin slices and drizzled Sauce of it .I love raw mango with Pink salt . As a kid i used to climb trees just to get my hands on raw mangoes and tbh i still would do that.
In end i just wanna say . This week had all been about Rainy days and family time and I can't be more happy to see my relationships get better with my family .
Drawing a mountain scenery digitally
Well as always i love seeing scenery paintings and digitally drawing something similar.
Working with references doesn't mean you have to copy exactly all like tracing it just adapt what you see add a few changes and learn from it
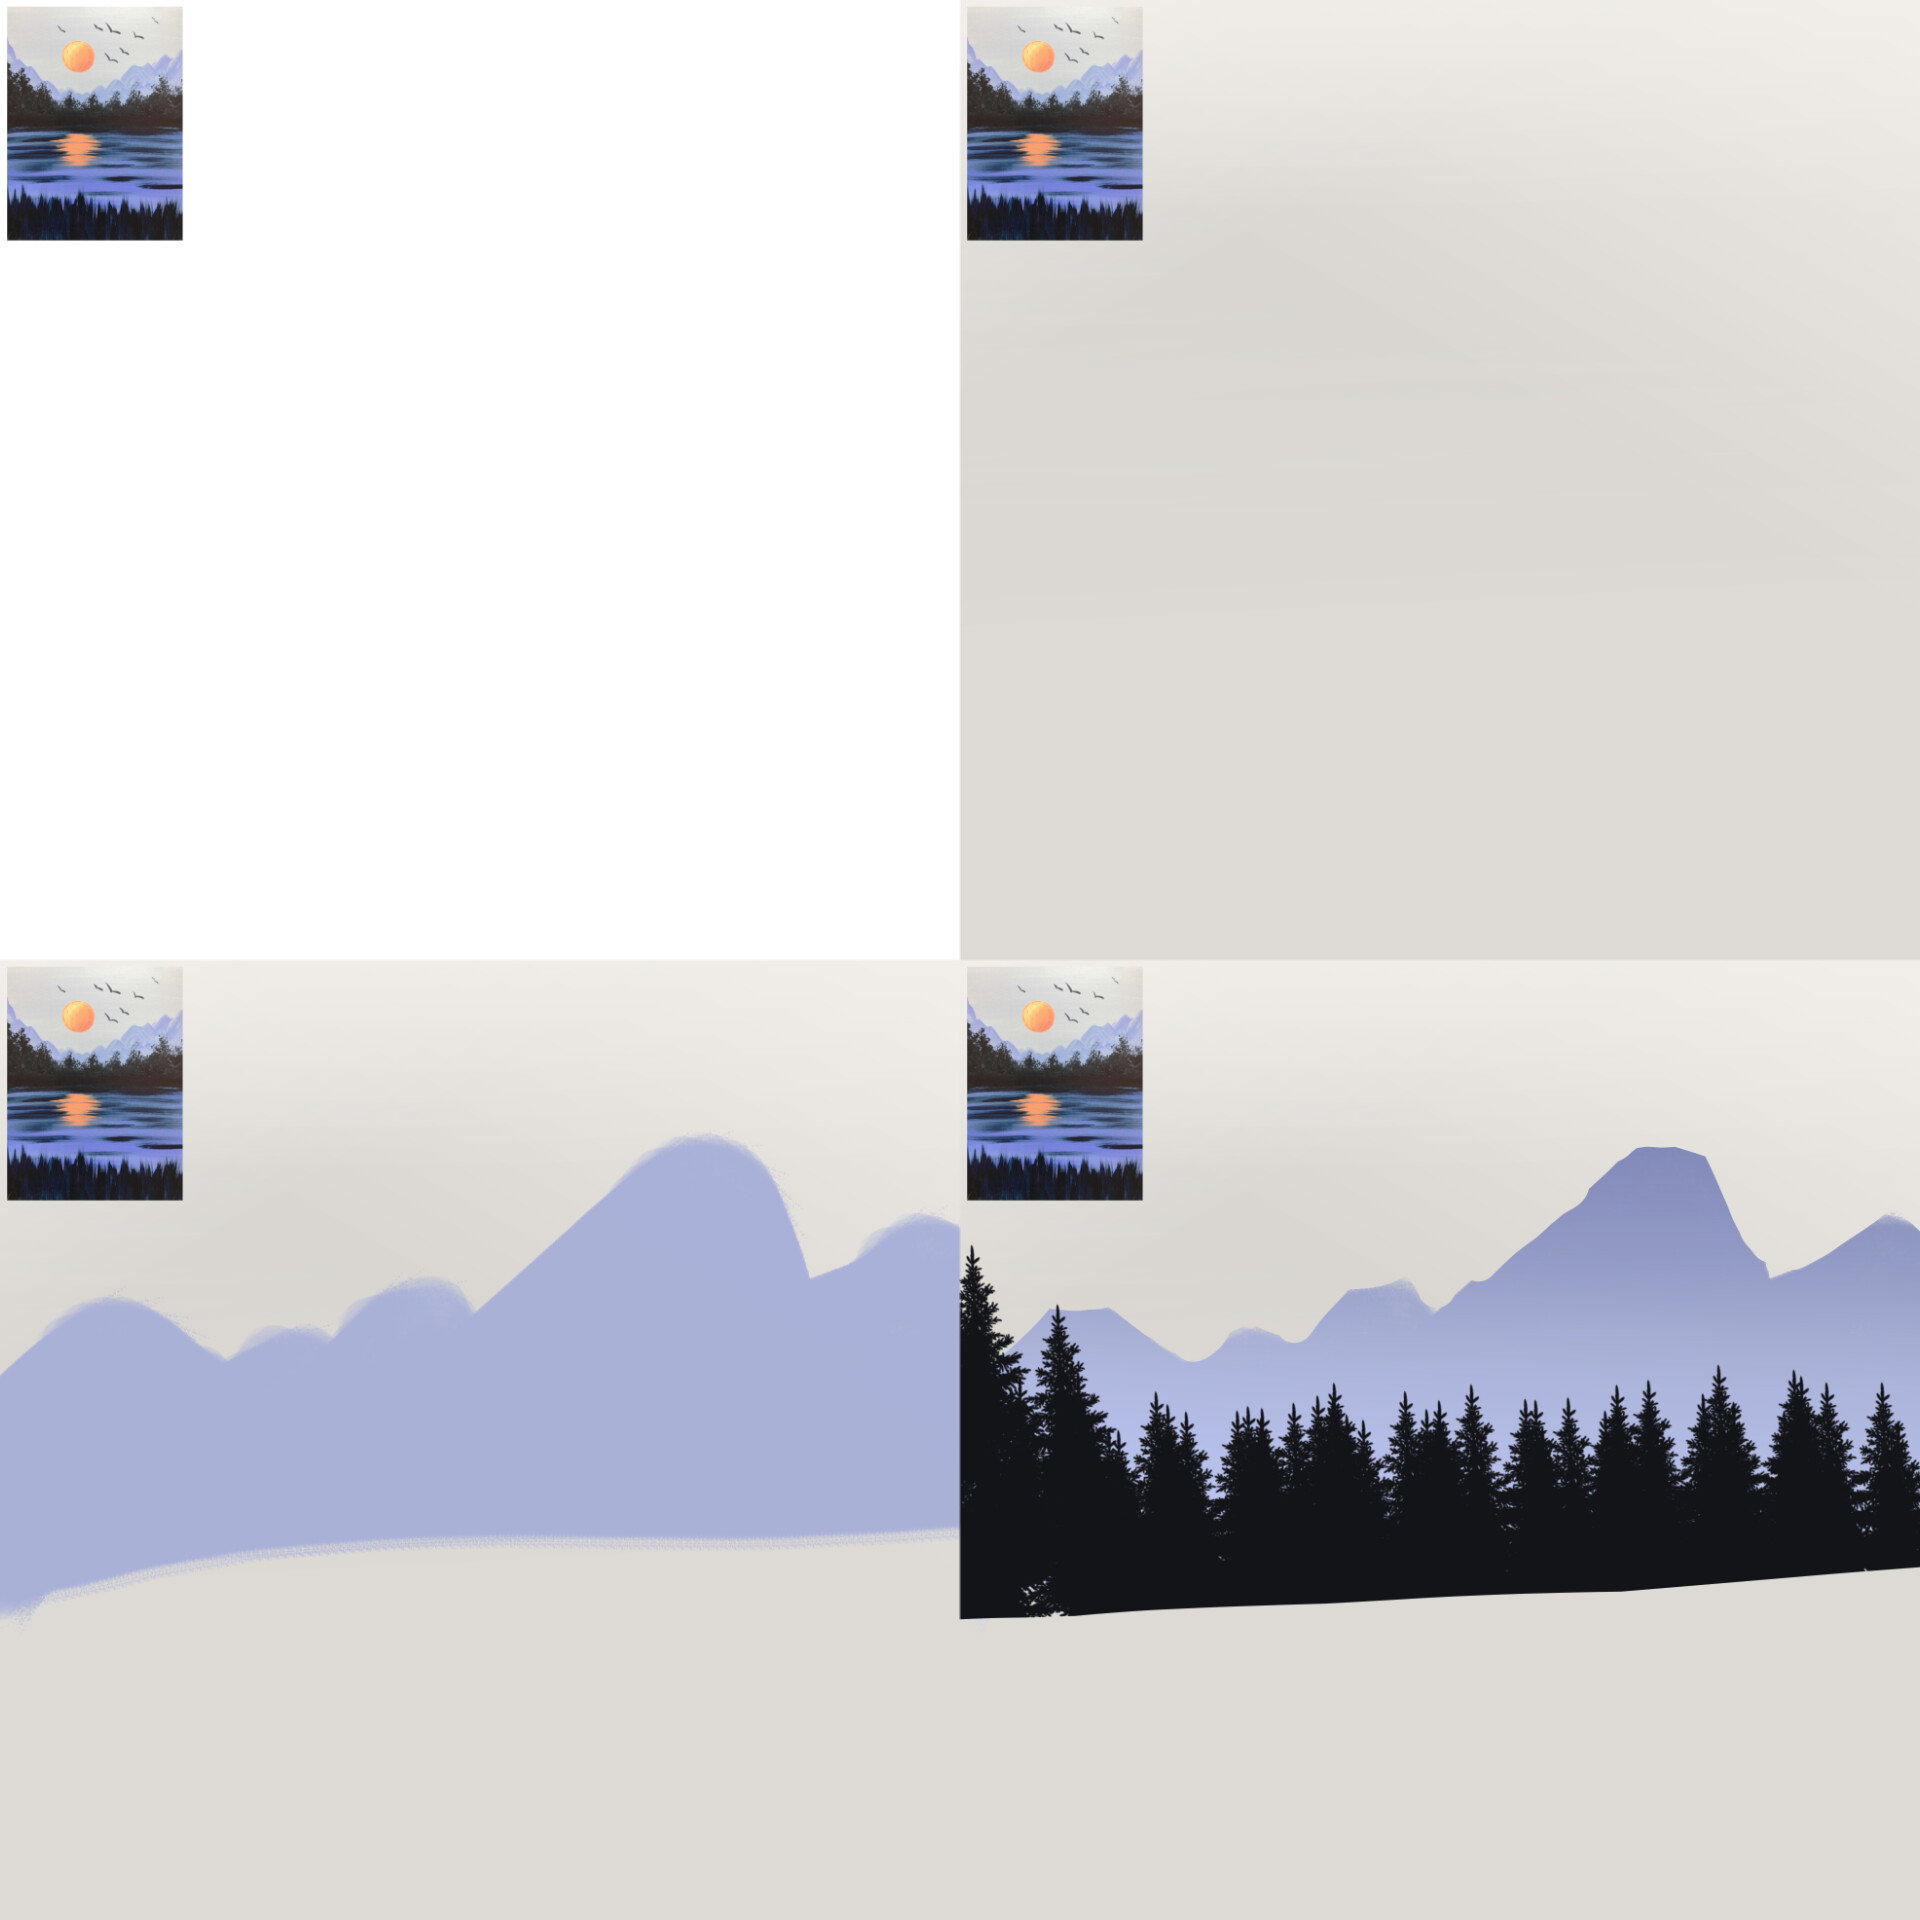
I started with my reference on the top left corner and added a pale grey sky later i added blue mountains with a acrylic brush in Medibang paint pro erased the mountains to make them a bit edgy i added pine trees to. The scene with a brush.
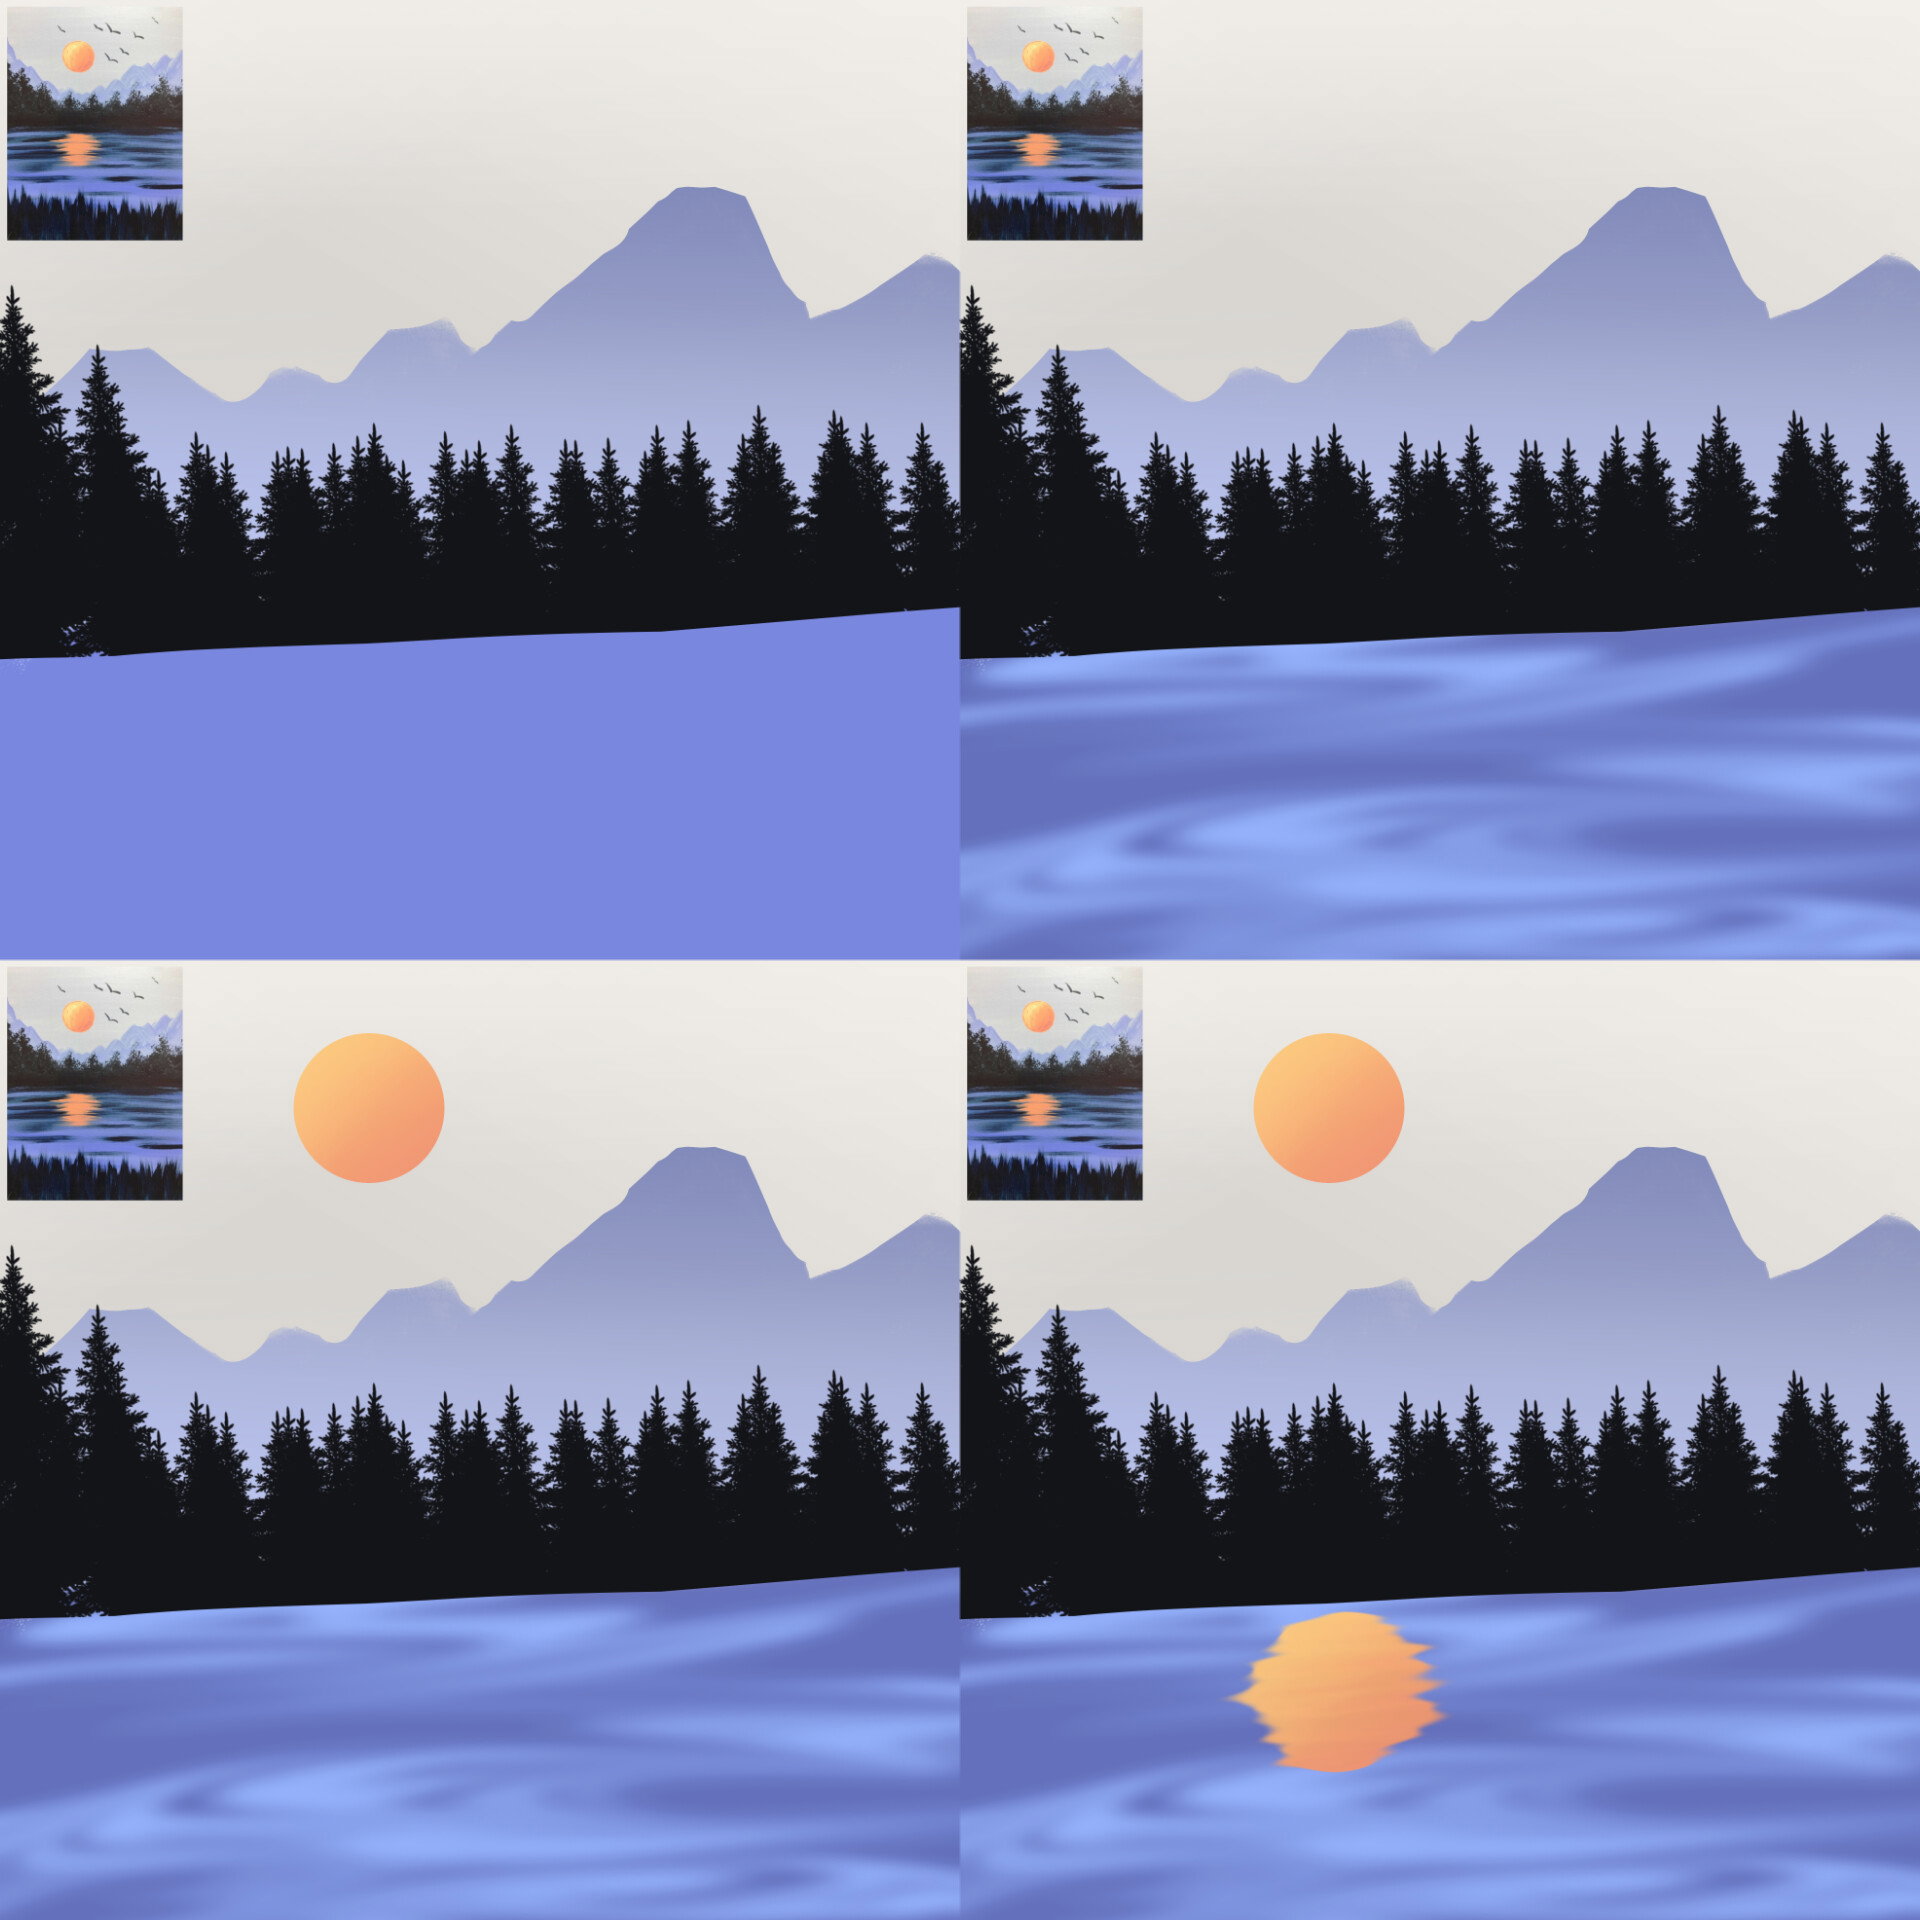
Next i added a blue square under the pine tree layer this will be our lake on top of it i clipped a layer n added water highlights by making it all squiggly with a smudge brush . After this i added a orange circle shaded it into a round gradient ball this is our sun and i duplicated it to my lake just to make it look like a reflection in the lake i smudged this too
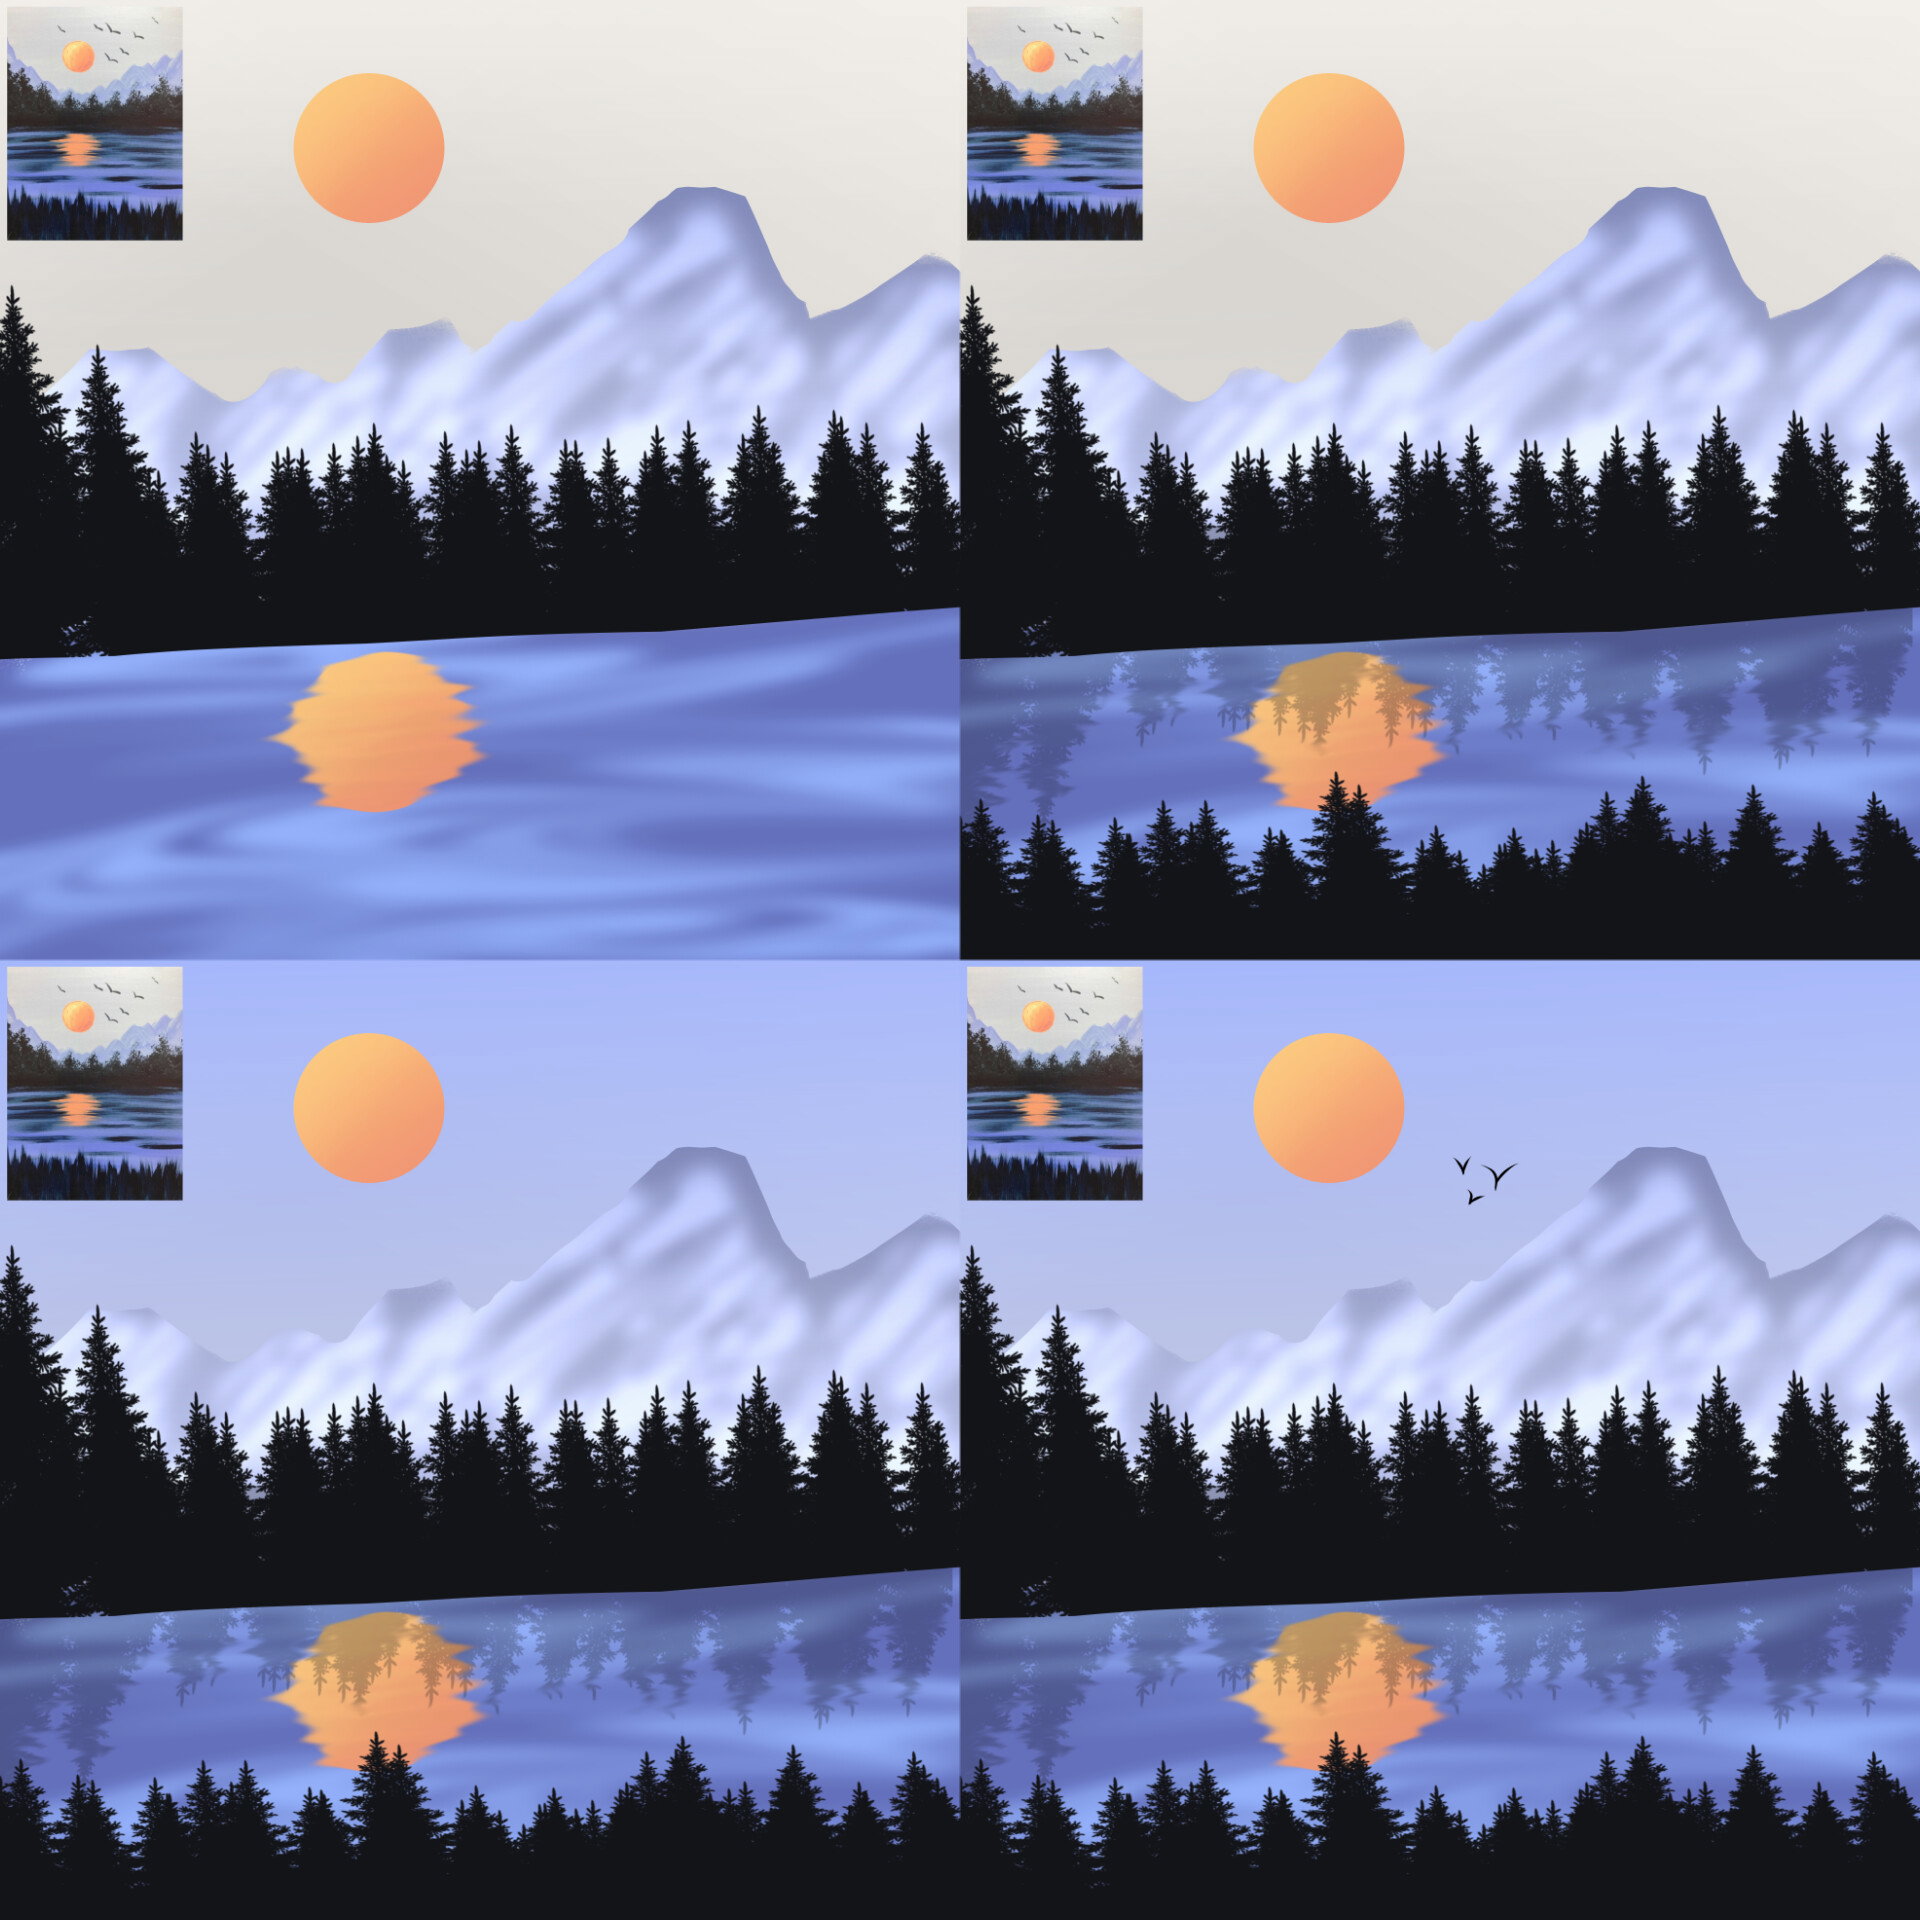
Similarly i added tree shadows made them squiggly in reflection with smudged brush lowered opacity a bit , added a blue gradient cause grey seems bit too odd here , i also shaded the mountains added some highlights over it so they look snow capped. And added some more trees in the front.
I also made some v shapes so they look like birds and here we are done
I hope you liked it .
Some Materialistic things Bring us joy
Materialistic things aren't supposed to be valuable in life but Some materials bring Happiness and joy . For me its mostly things i made with my Siblings.
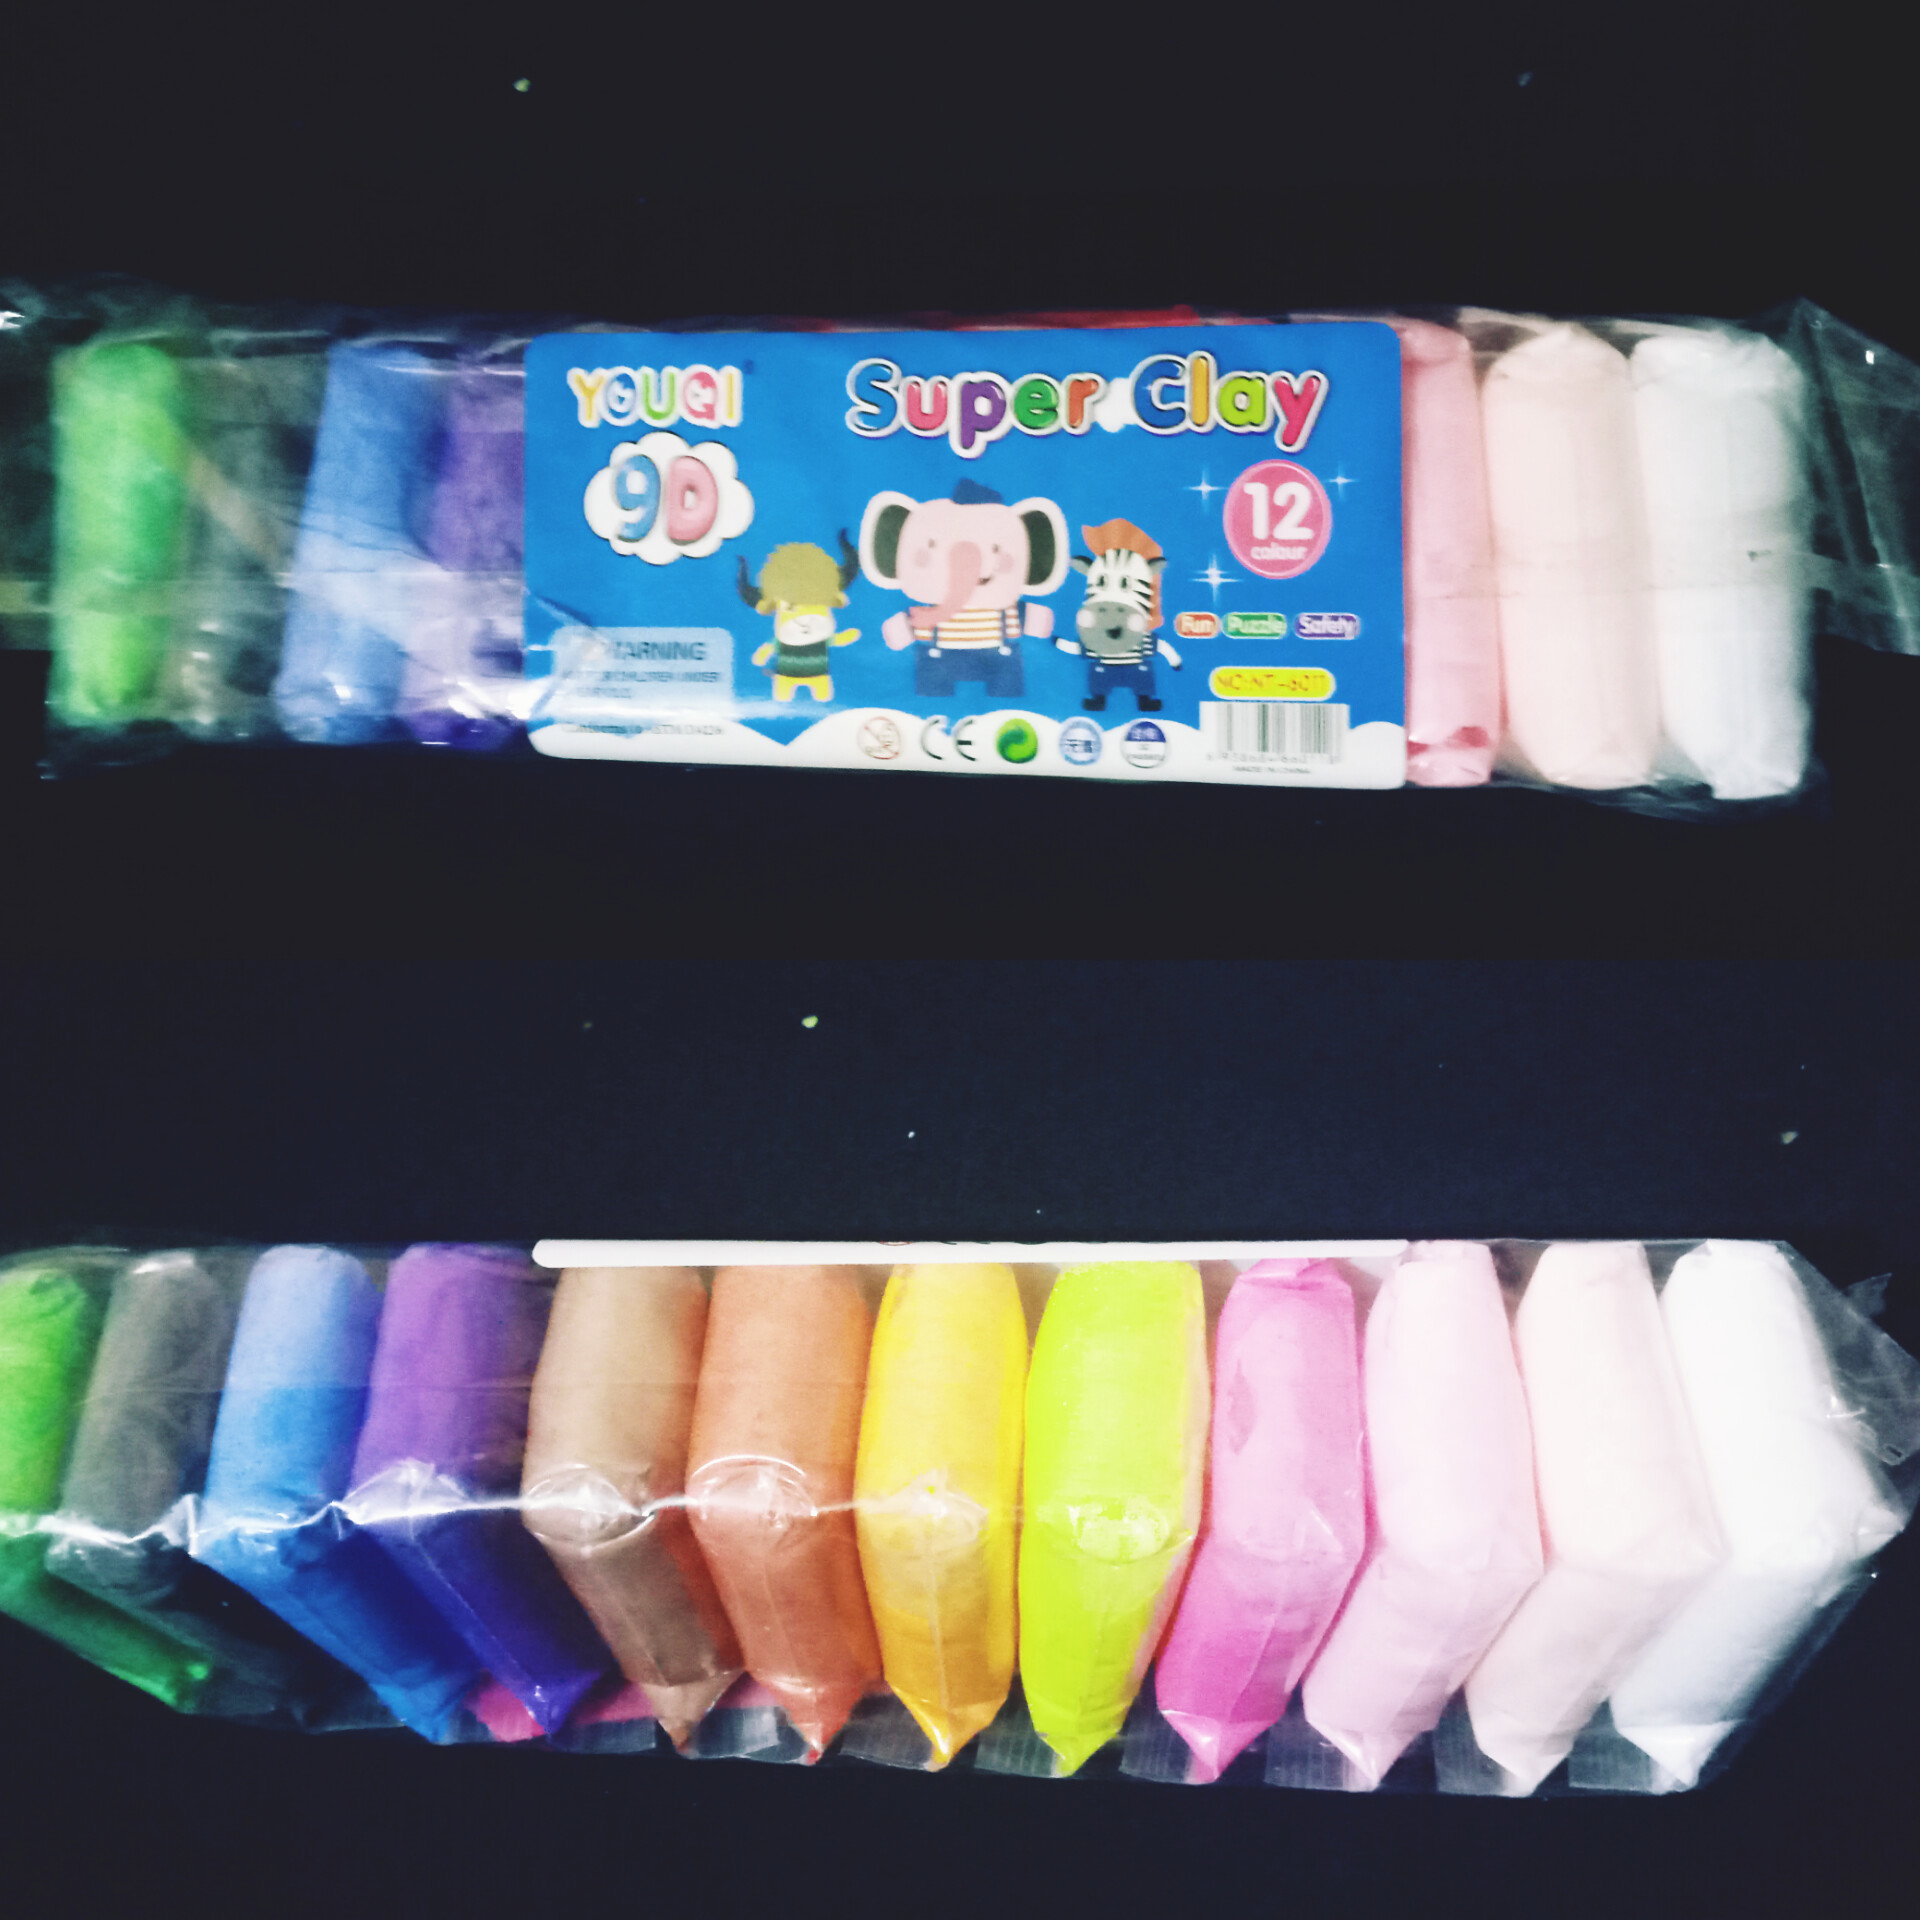
For example i bawl my eyes out if someone crafts something for me. Today i bought clay and decided to craft something cute with my siblings today . So the clay im using is an air dry foam clay called Super clay and its so so good to work with and it dries with a matte finish yet its a more affordable play dough material .
Today i made tons of cute mini stuff .
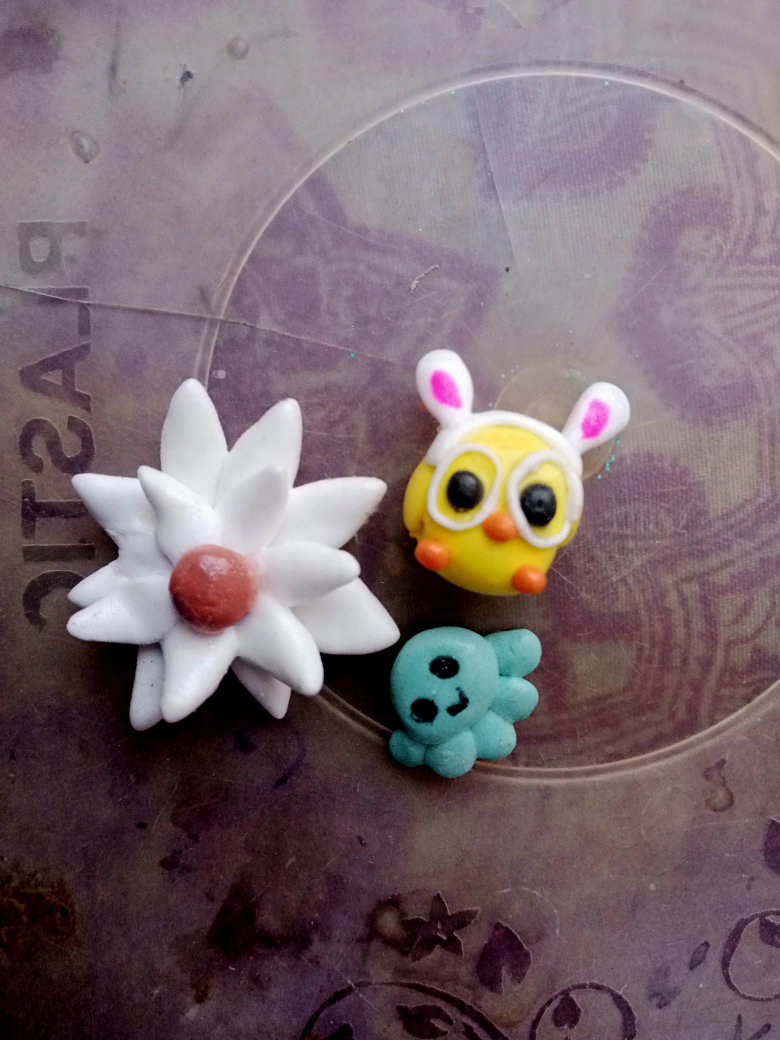
I made this mini octopus plushie look alike this resembles the plushie i have .
I also made a cute little chick with glasses and bunny ears this was really the cutest one .
I also made Brownie and Cony from Linechat characters .
Then i made some flowers i might do a diy with these flowers soon . I made a mini cutsie sun and a Axolotl .
After making it all I actually did a coat of clear pva Glue on top this acts like a warnish.
So these were all made for my Cousins Bday which is soon coming and she loves mini cute dolls.
Should i post a tutorial on how these were made too?
Learn digital art (Lets draw a frog)
Drawing as a beginner doesn't mean you will immediately do art that is all perfect.
As a beginner all your focus should be on how to draw something daily , Practice daily for example every week i post a simple minimal character that i drew using beginner techniques just so people who love art know where to take start from .
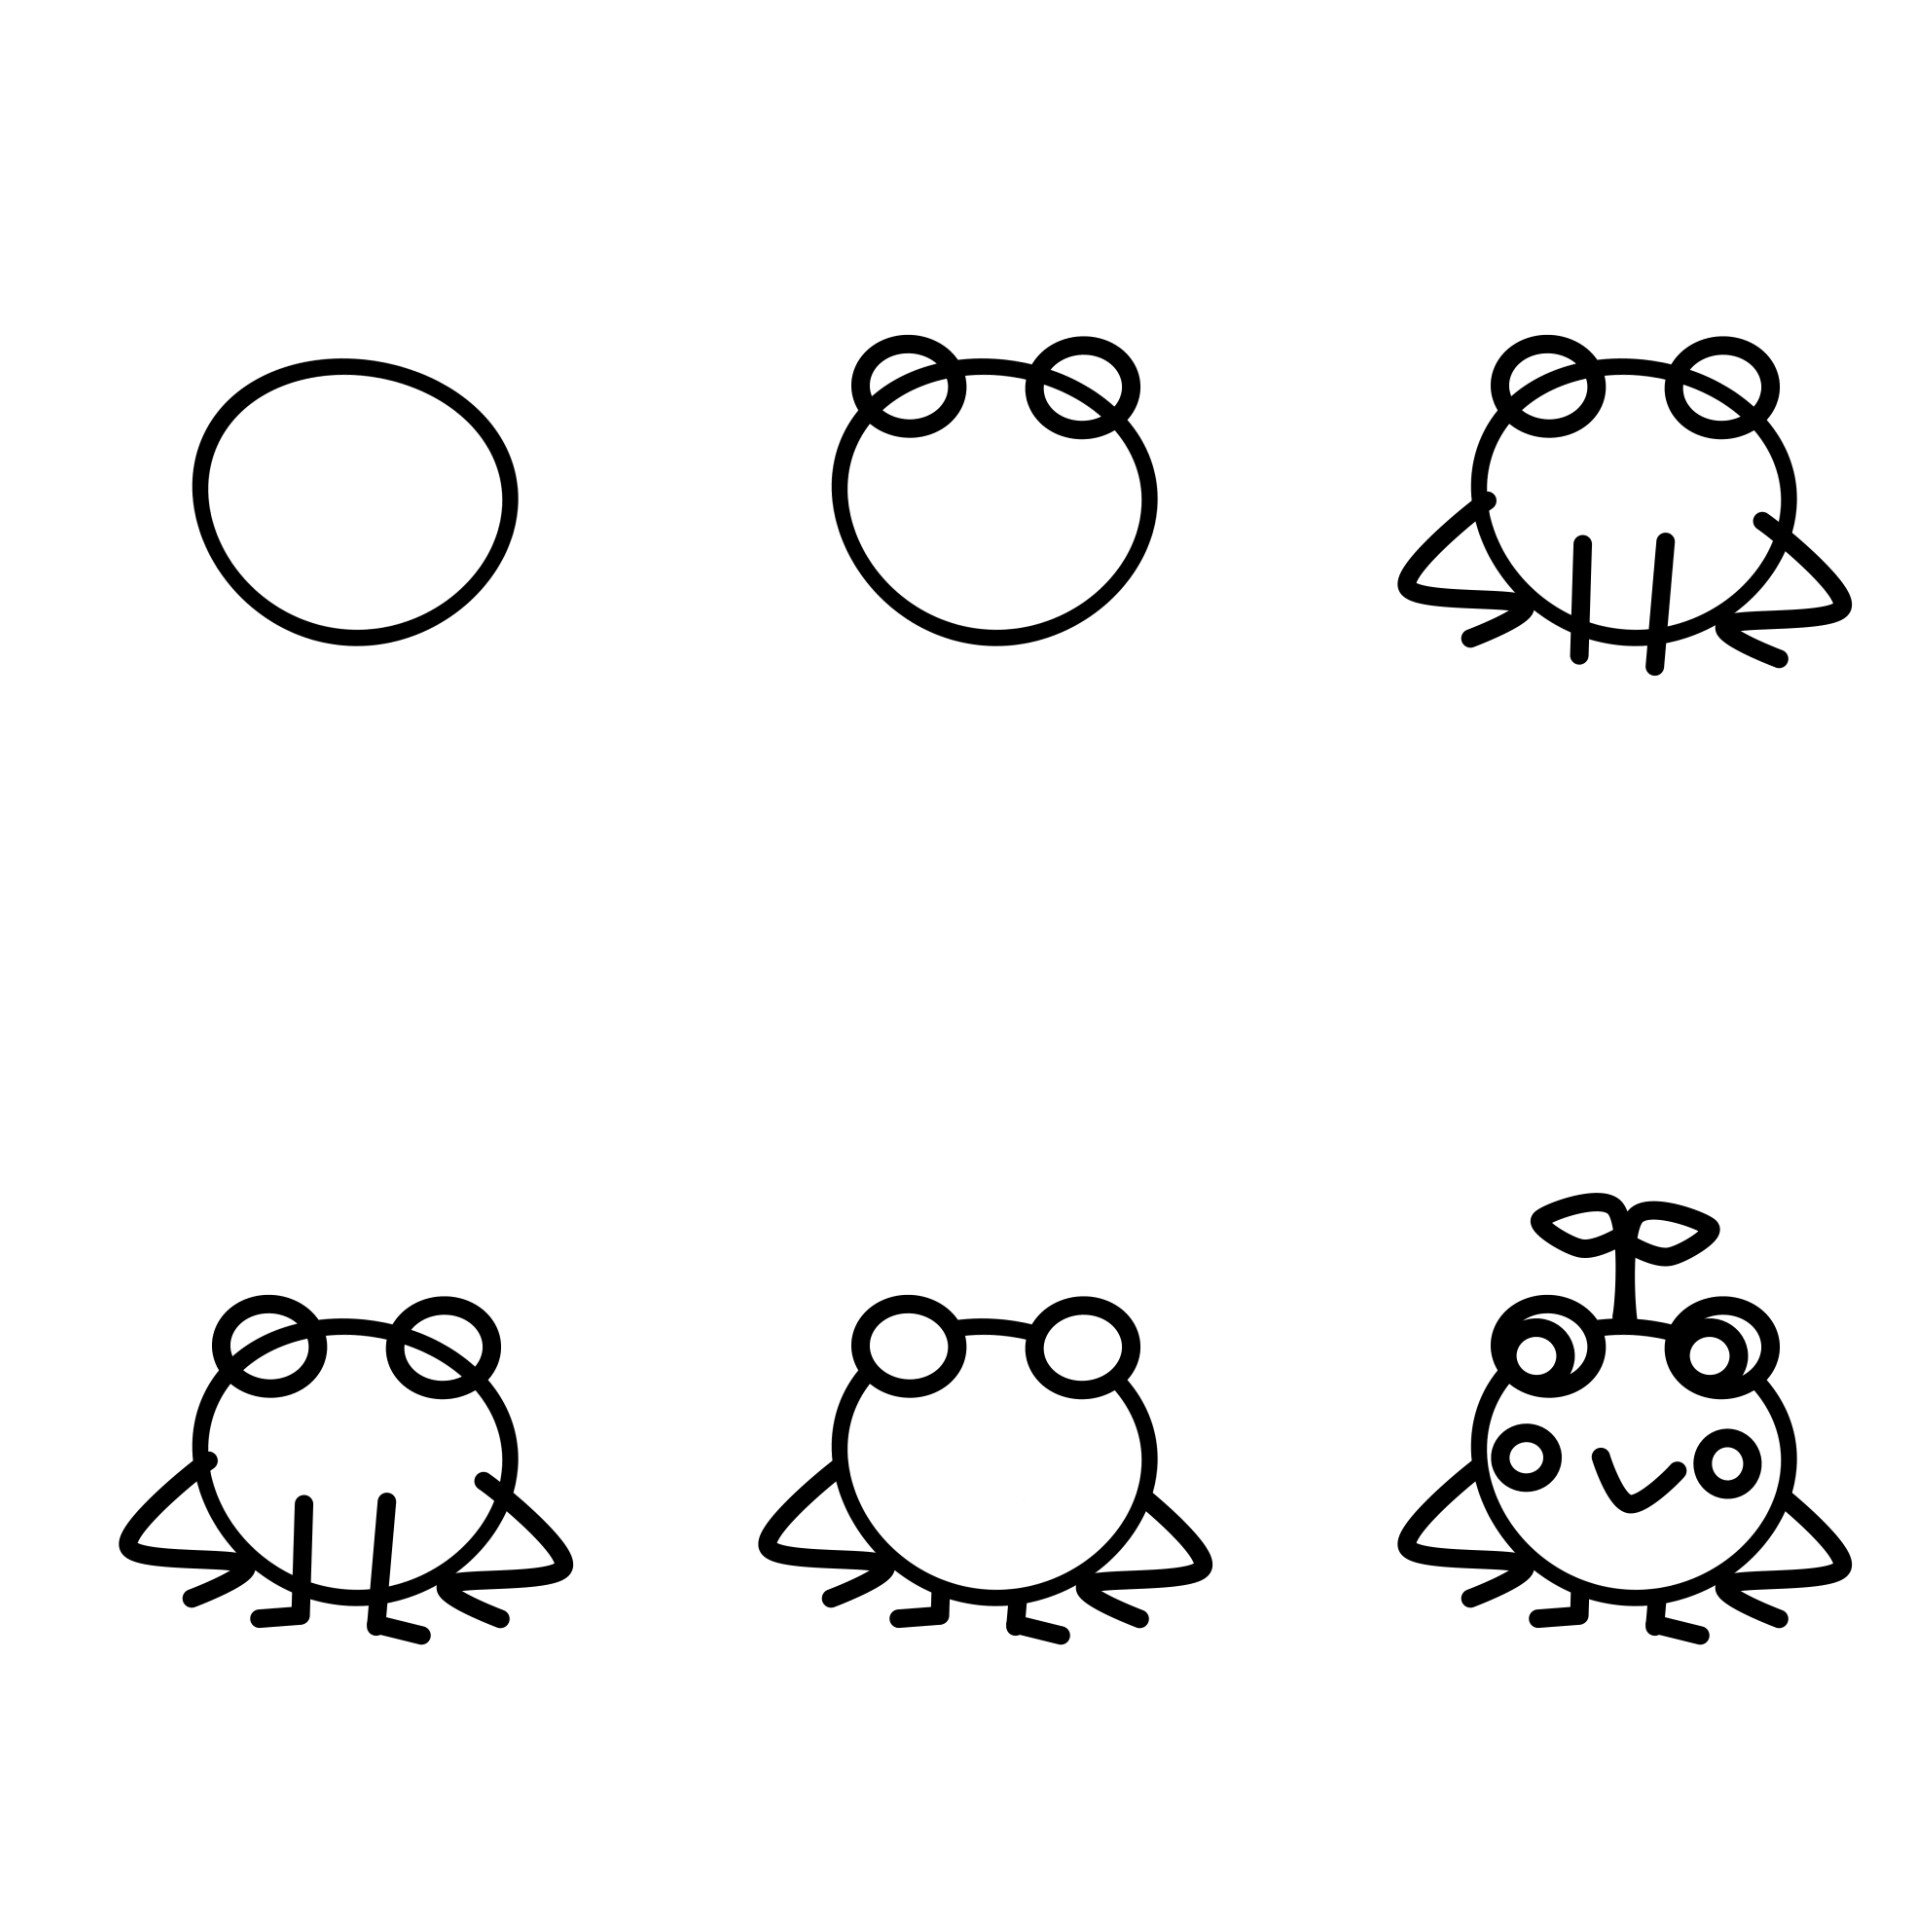
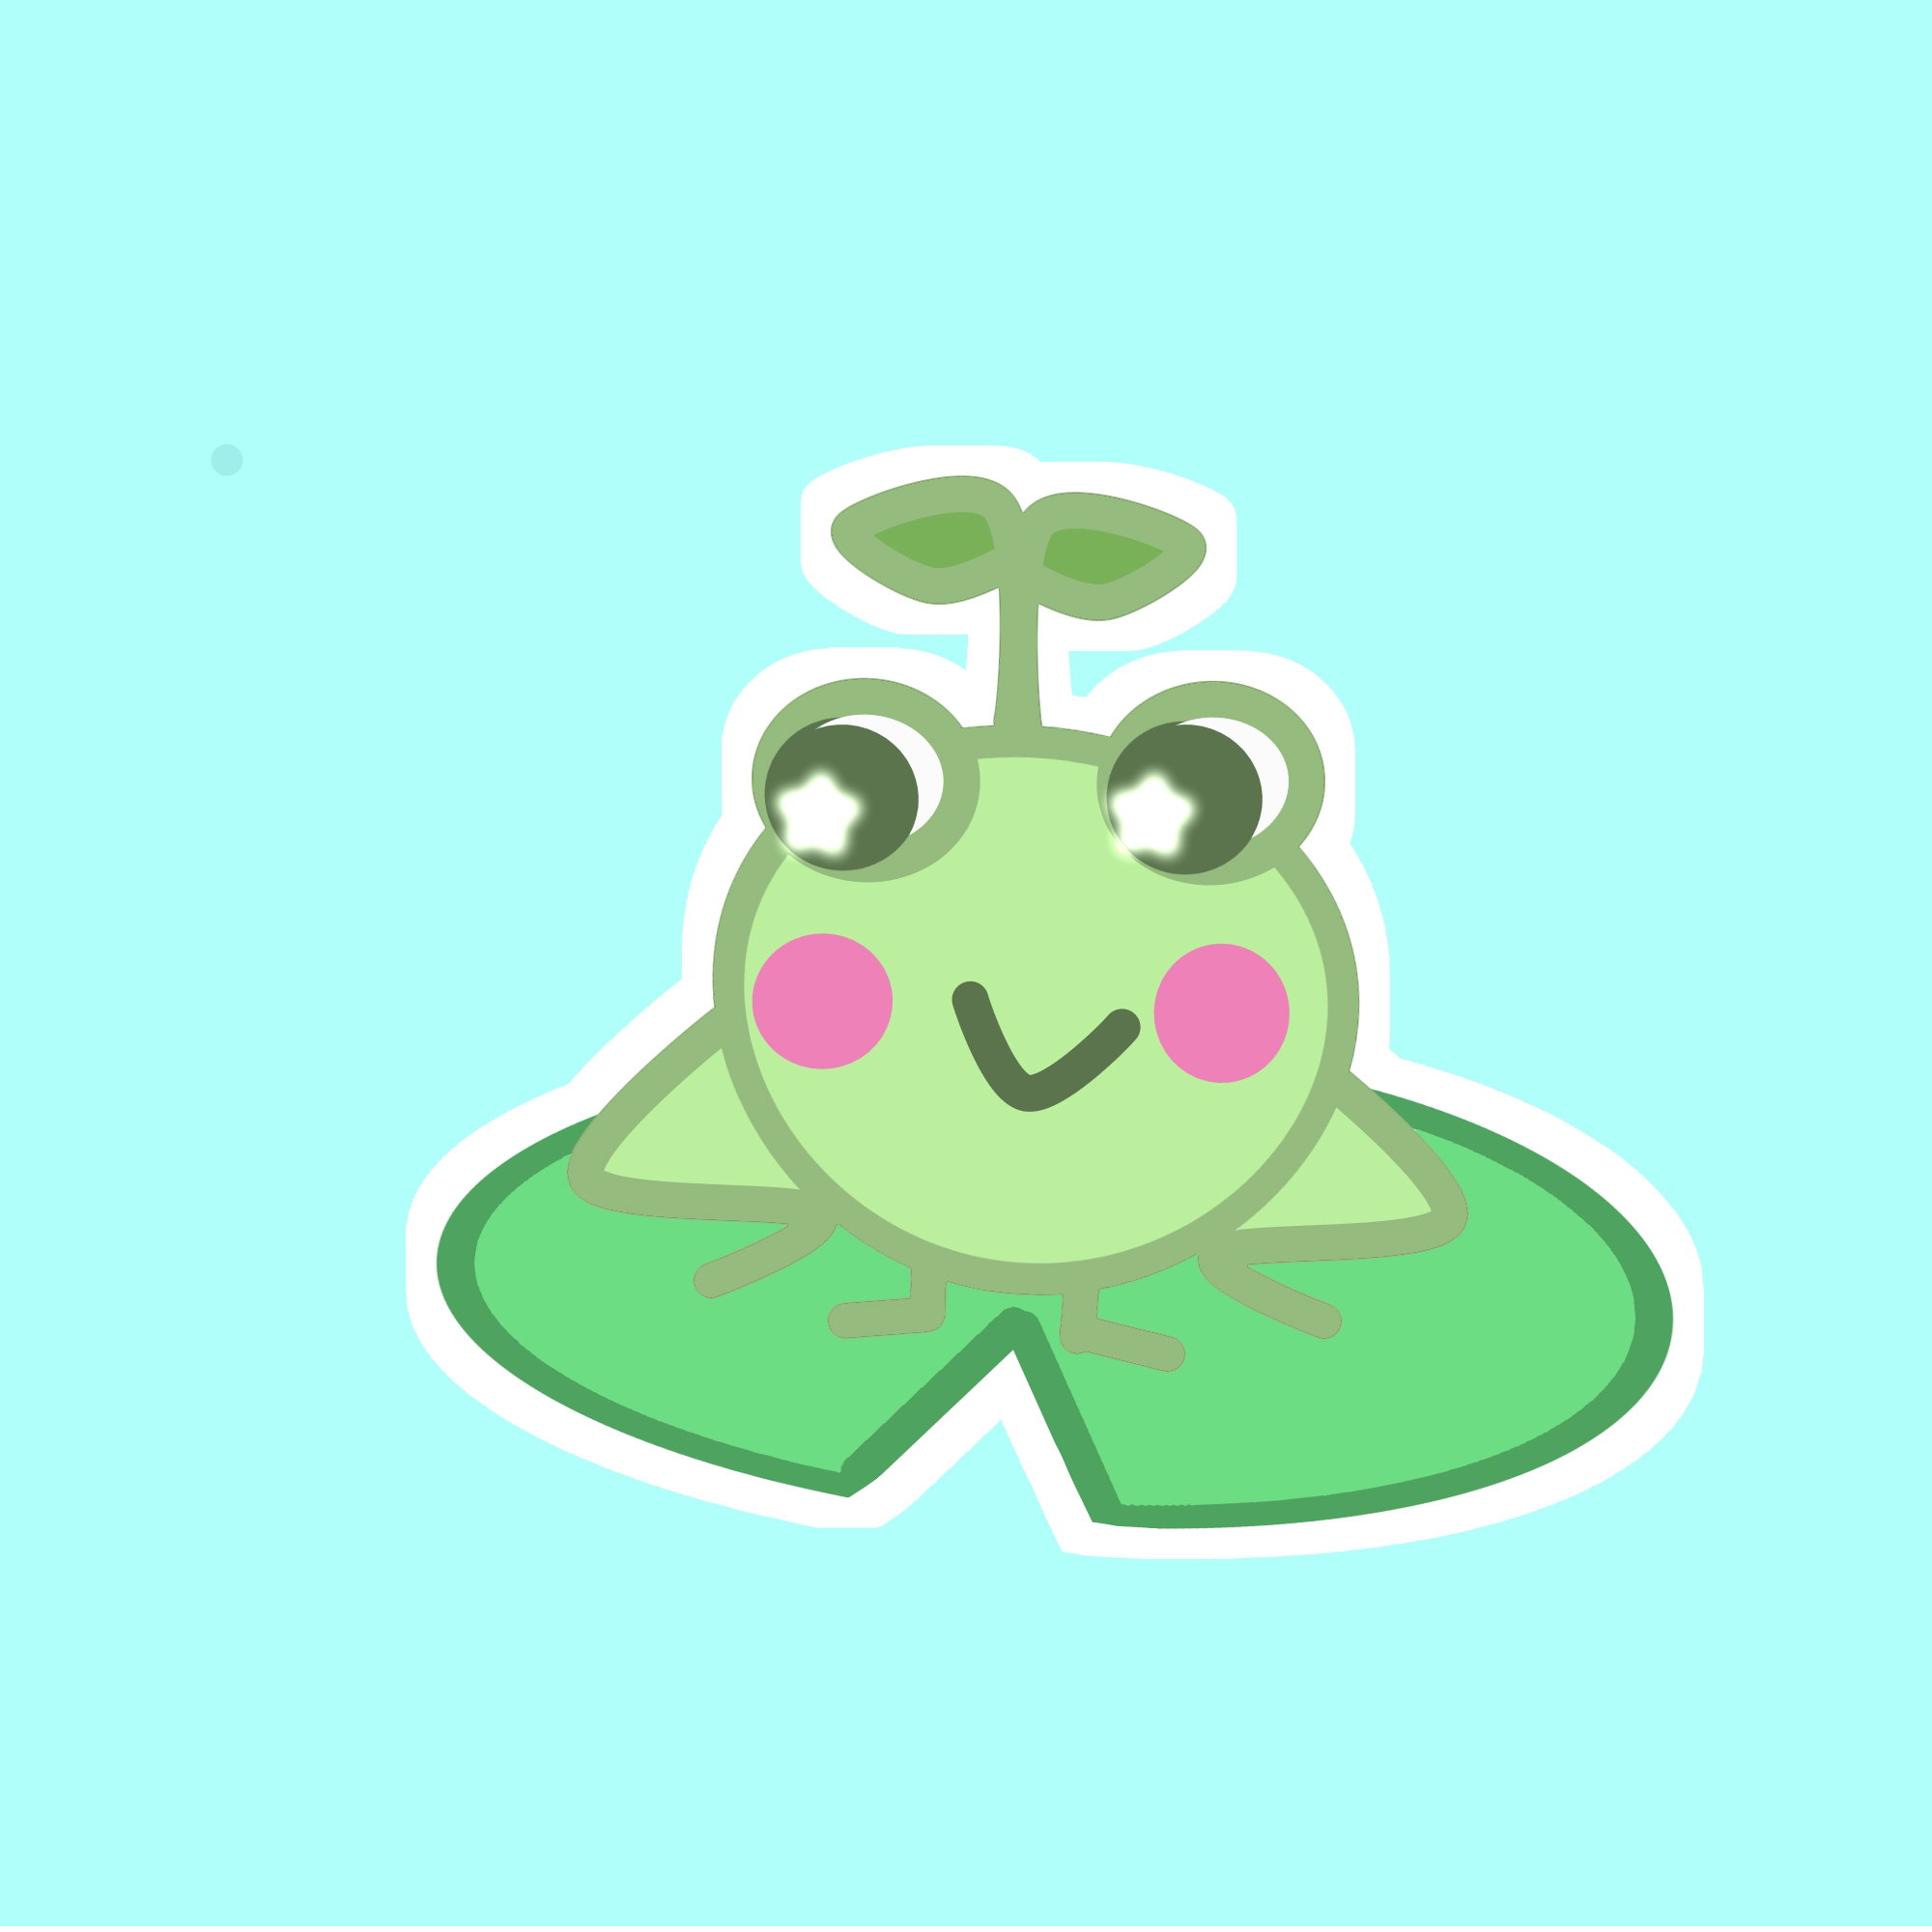
This week i drew this cute little frog
First i drew an oval shape not all shapes need to be all perfect messing with proportion is necessary to develop an art style .
Afterwards i added two circles for the eyes and the legs and the arms .
When ever you draw minimalist characters only give the main details but don't define them just like we did as a kid.
Now i erased the extra lines so the sketch looks more defined . Lastly i added expressions to mr Frog i added a leaf stem too
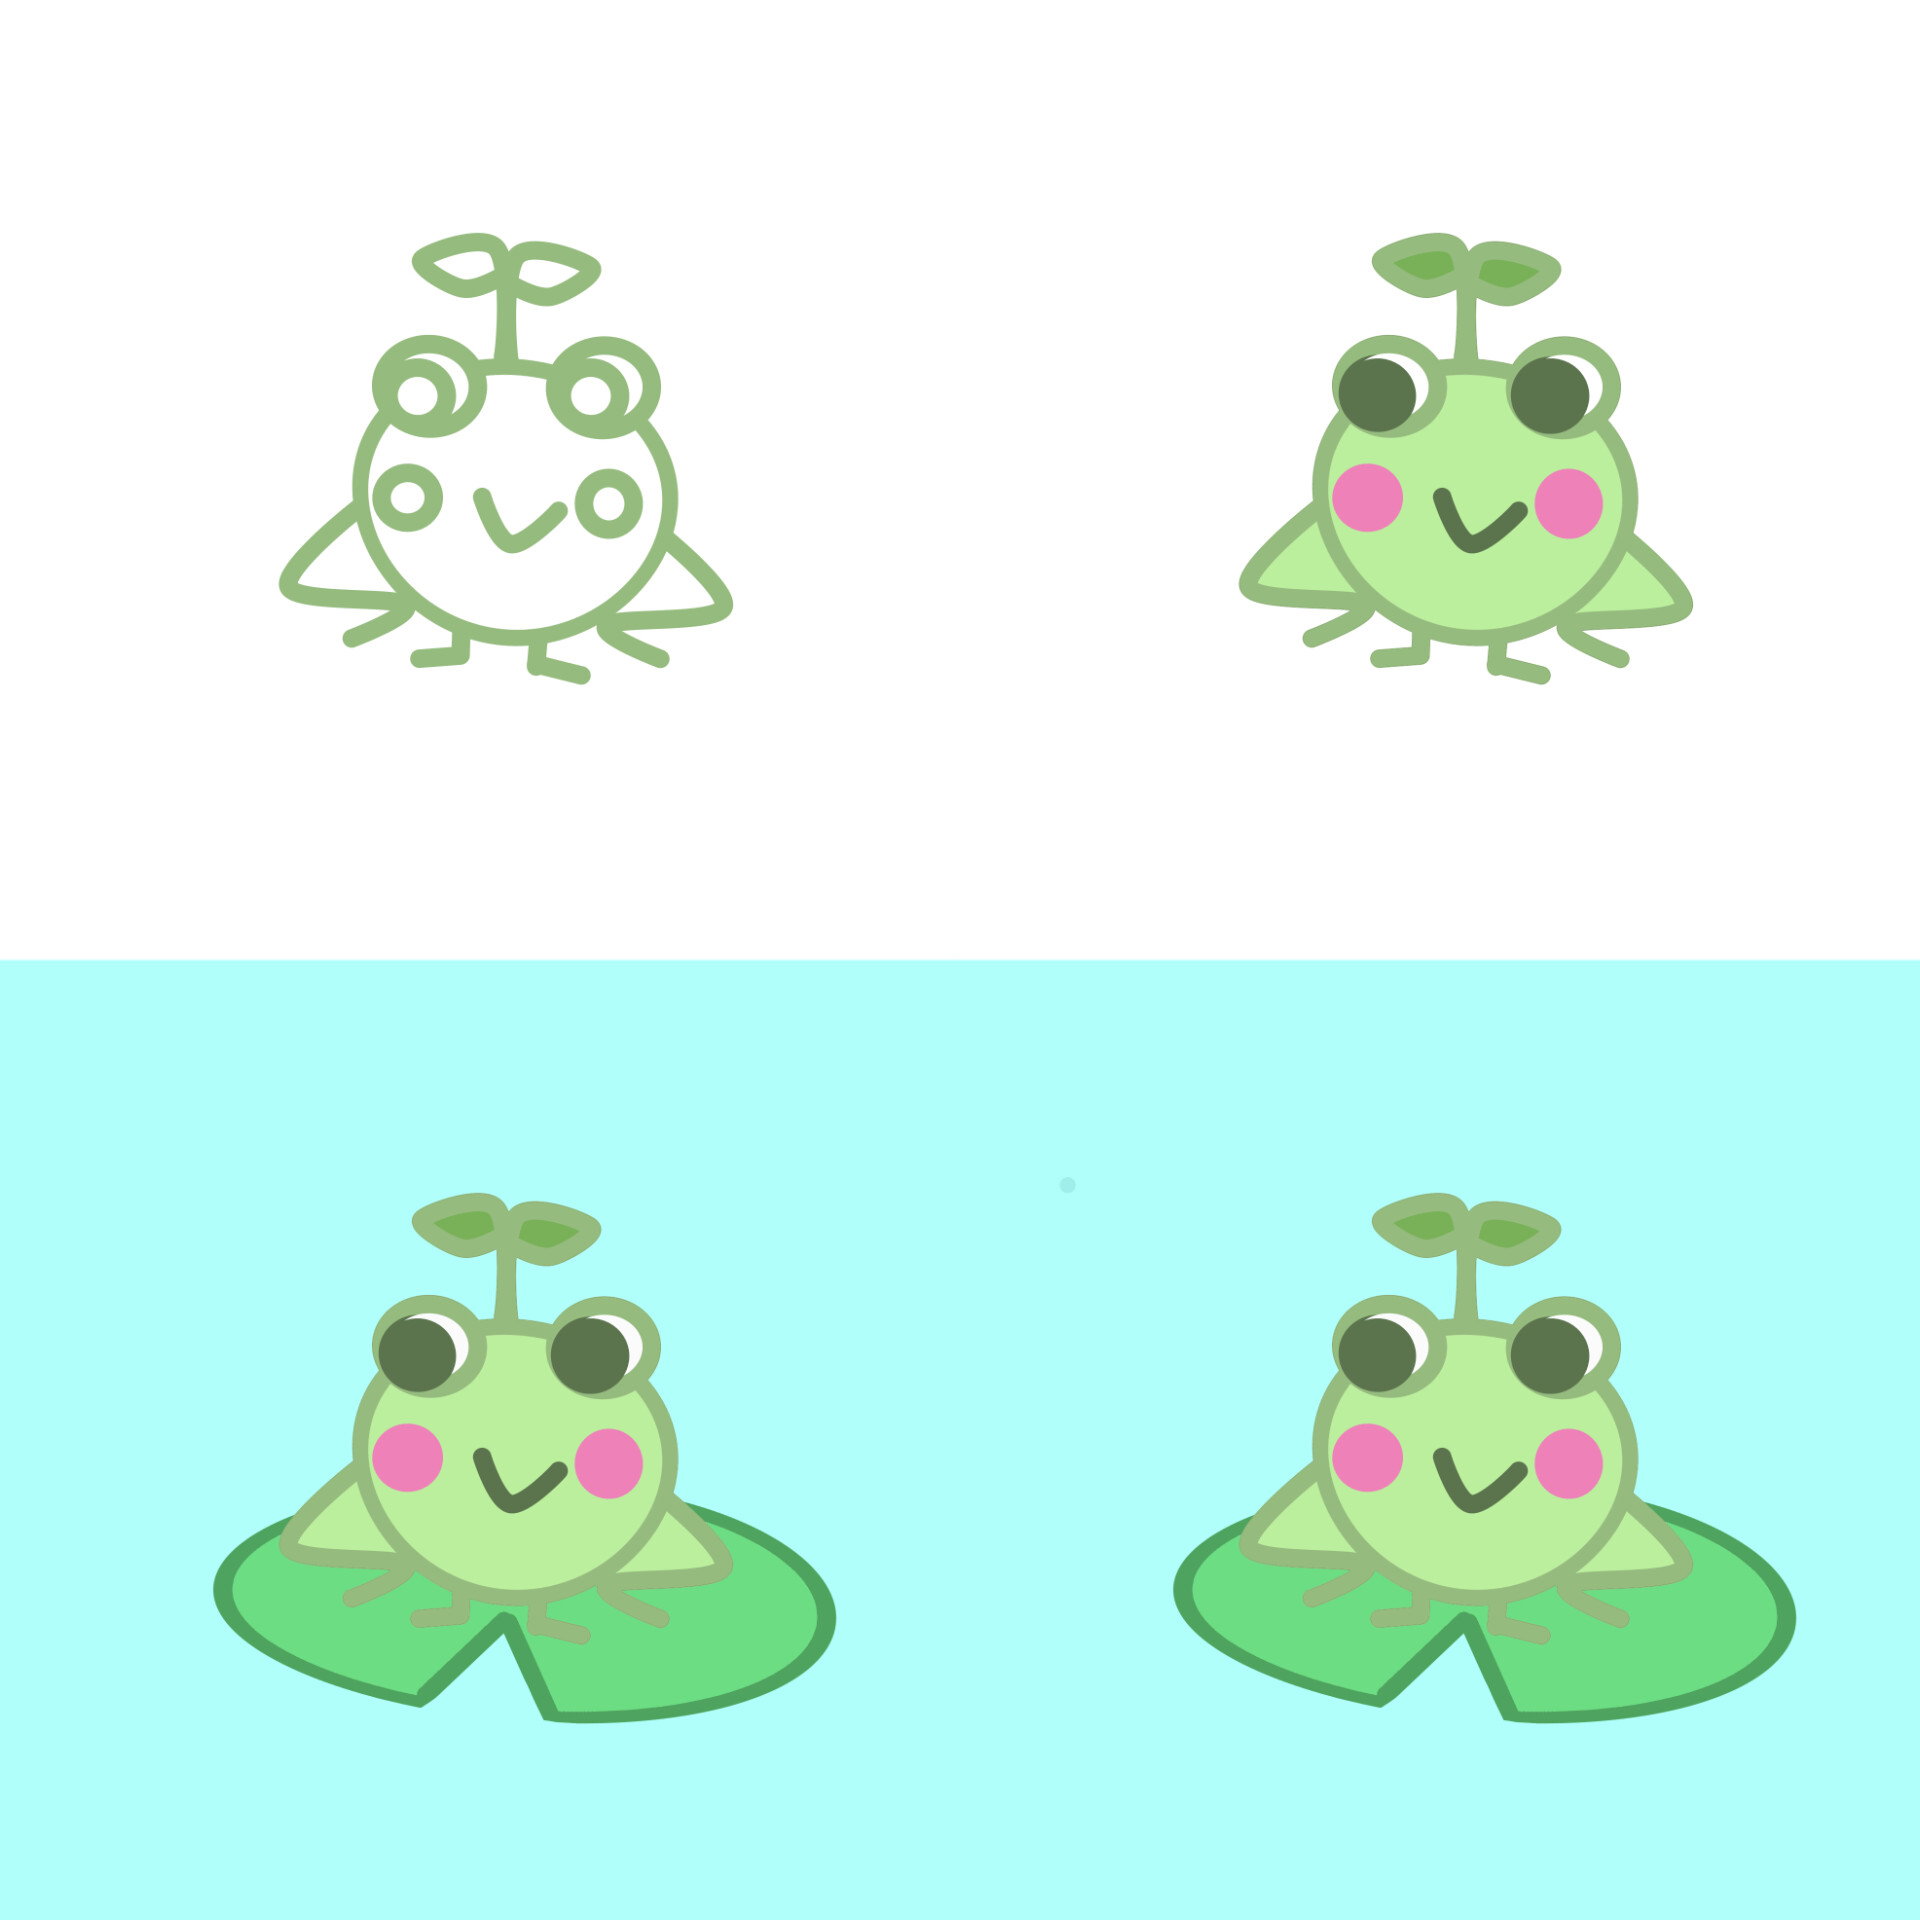
Next i colored the lineart by clipping a colored layer on top . Coloring the lineart with pastel colors gives it a very soft look just like childrens book have .
Fill in the flat colors as a beginner I don't recommend to go into shading .I added a lilly pad too the frog too just for the detail and made the background Turquoise so the frog seems to be in a pond.
Finally i added a star to the eyes just to add highlights and added a border to my character this way it looks like a sticker too .
Thats the final result .
Splinterlands art contest week #239 ( Molten Ash Golem)
For This weeks entry i drew Molten Ash Golem
https://www.splintercards.com/chaos-molten-ash-golem
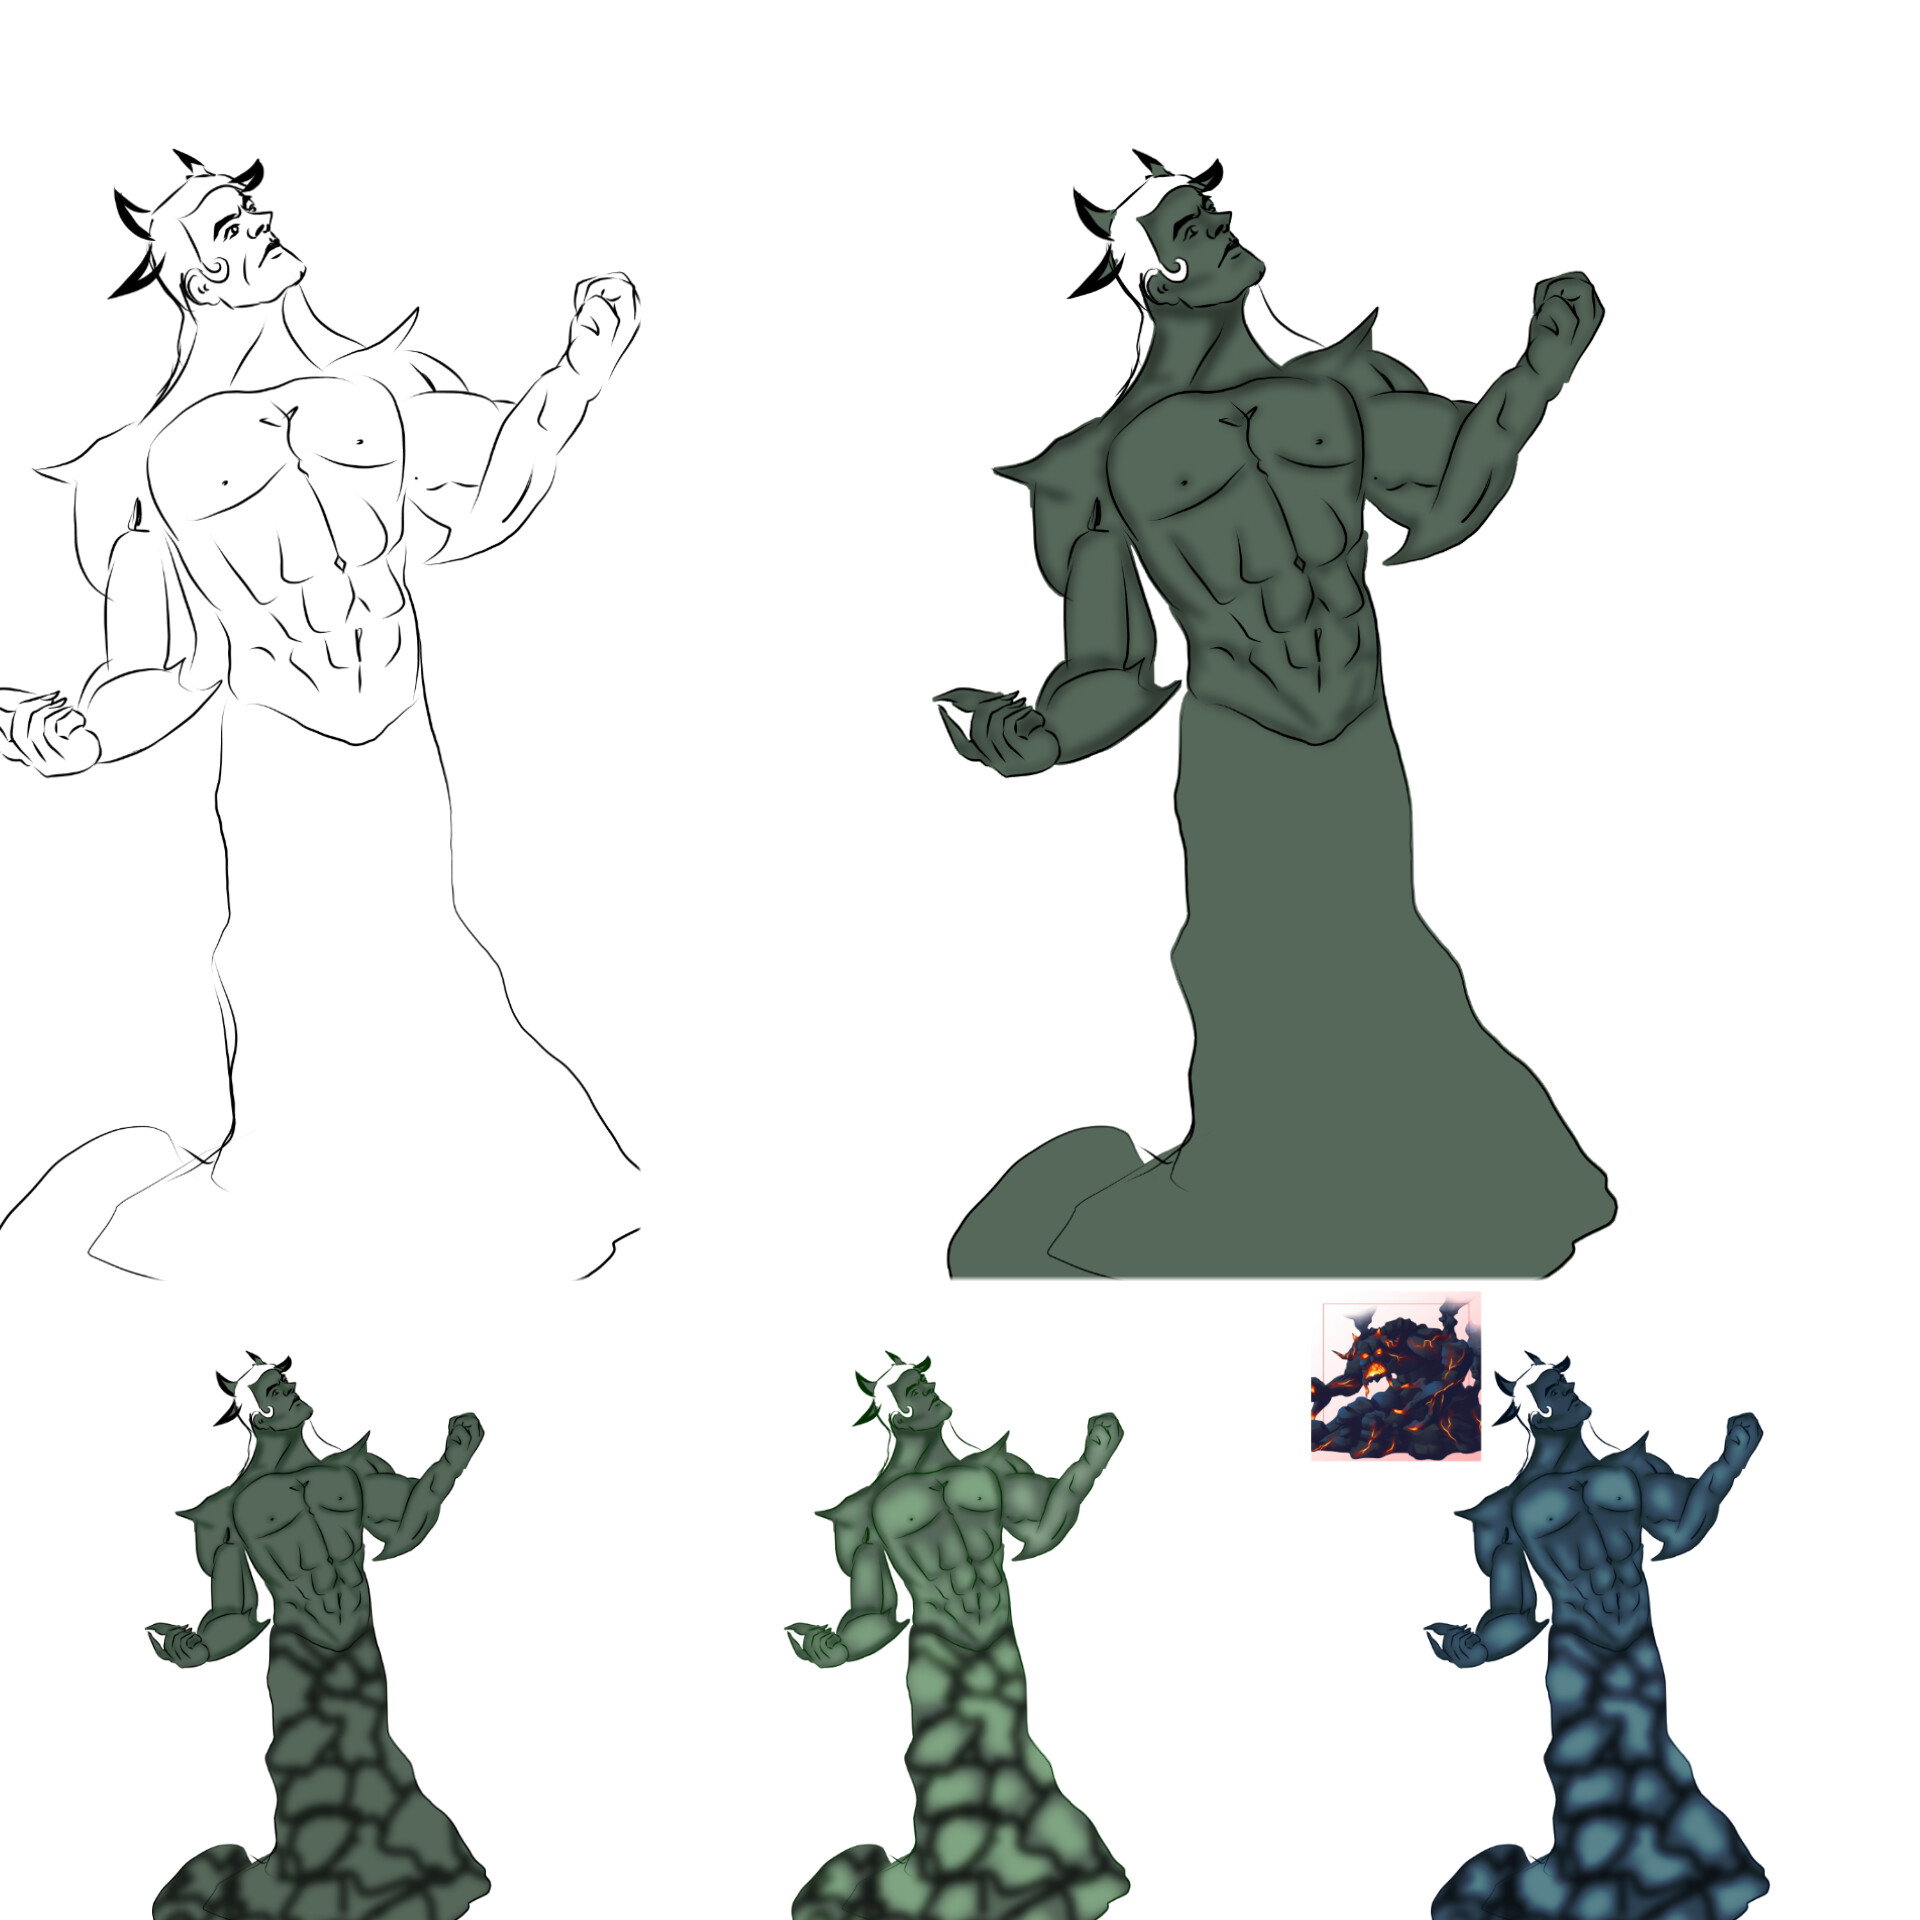
Firstly i just made a quick sketch of a muscular mans torso and just gave him a wide square jaw line which resembled the character some spikes n horns and converted it to a line art .
After that i filled it with a grey color and started putting the shadows over it with a water wet brush later i guassian blurred it
Then i added more shadows to the lower part making it look like a rock .The next step was to highlight the parts that were supposed to have light over them so i made the middle of the rocks shine by setting blending mode on add and guassian blurred it.
Afterwards i corrected the color of the body to a more bluish gray
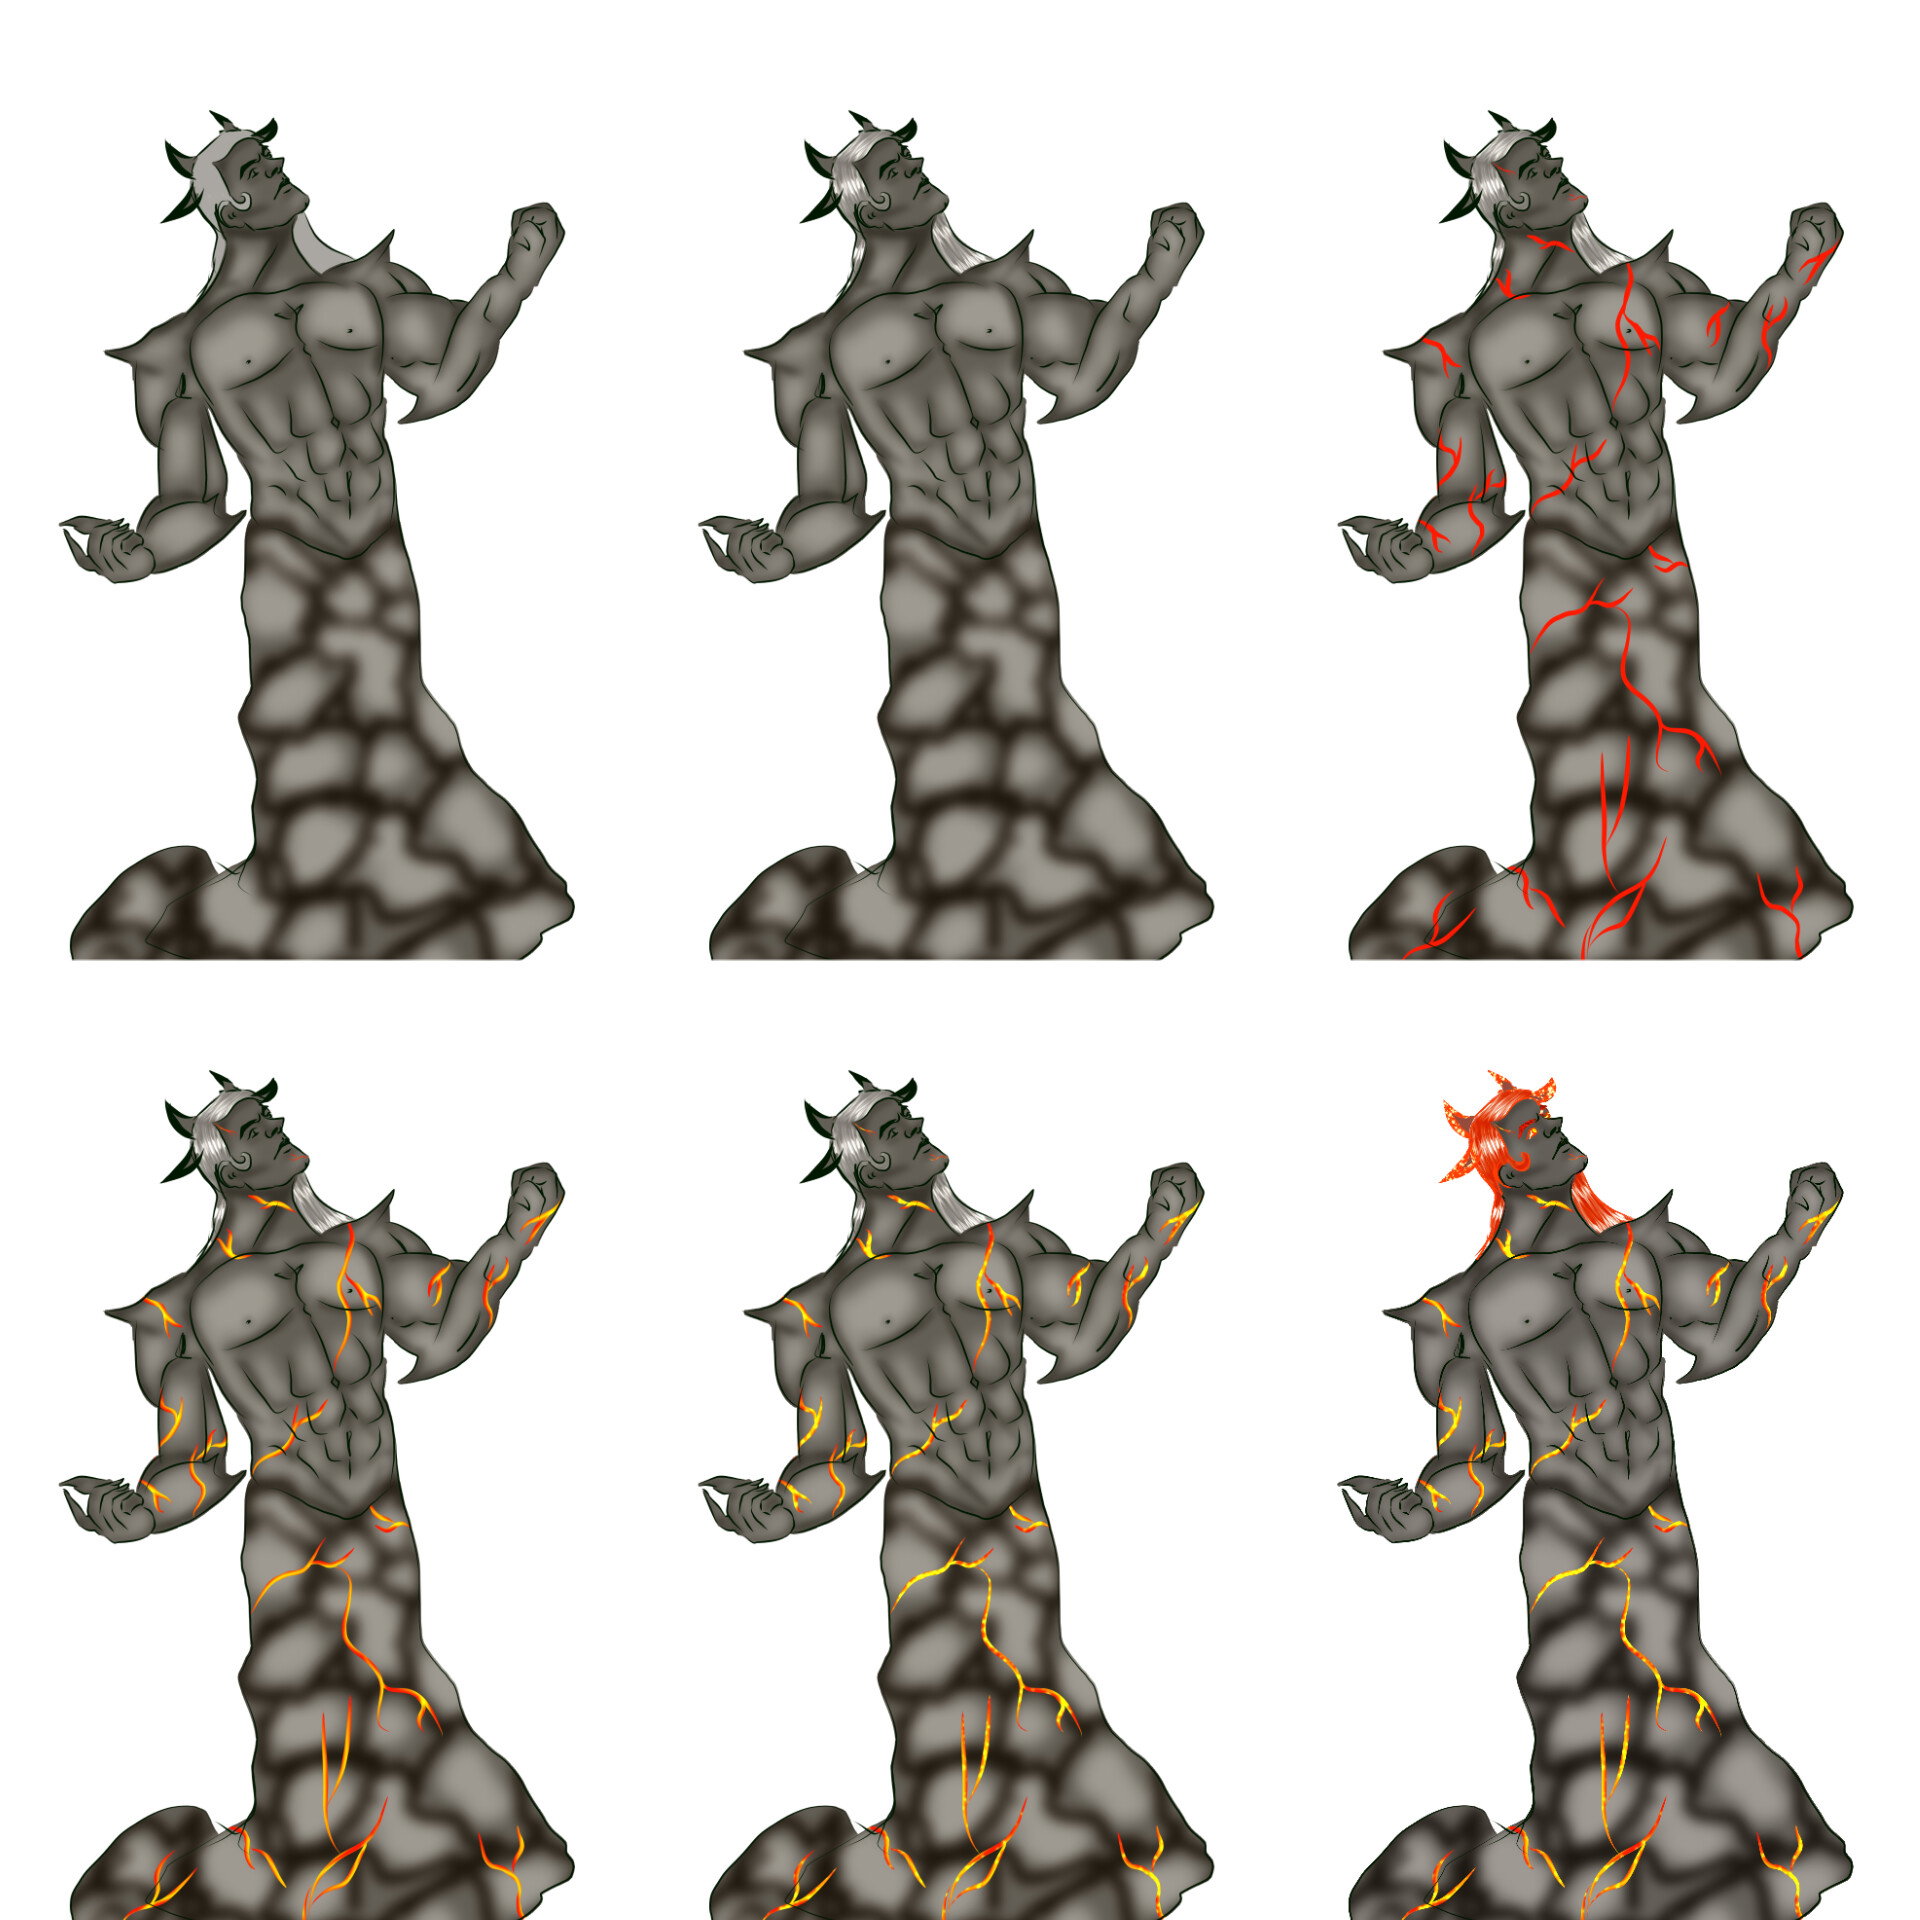
Now i just turned the saturation a bit down for the body and started adding hair and all the hair details.
Next i made random Y shaped squiggly lines these will look like cracks with lava pouring down .So to turn it bit more like lava i clipped another layer set it to add started drawing same squiggly lines over the first red ones with a bright yellow color but not all the way then i guassian blurred it and added another clipped layer set to add . Used a sparkle brush to add ember effect and here u can see it prettying much looks like molten lava
Next i clipped a layer on the hair and made the hair bright orange red
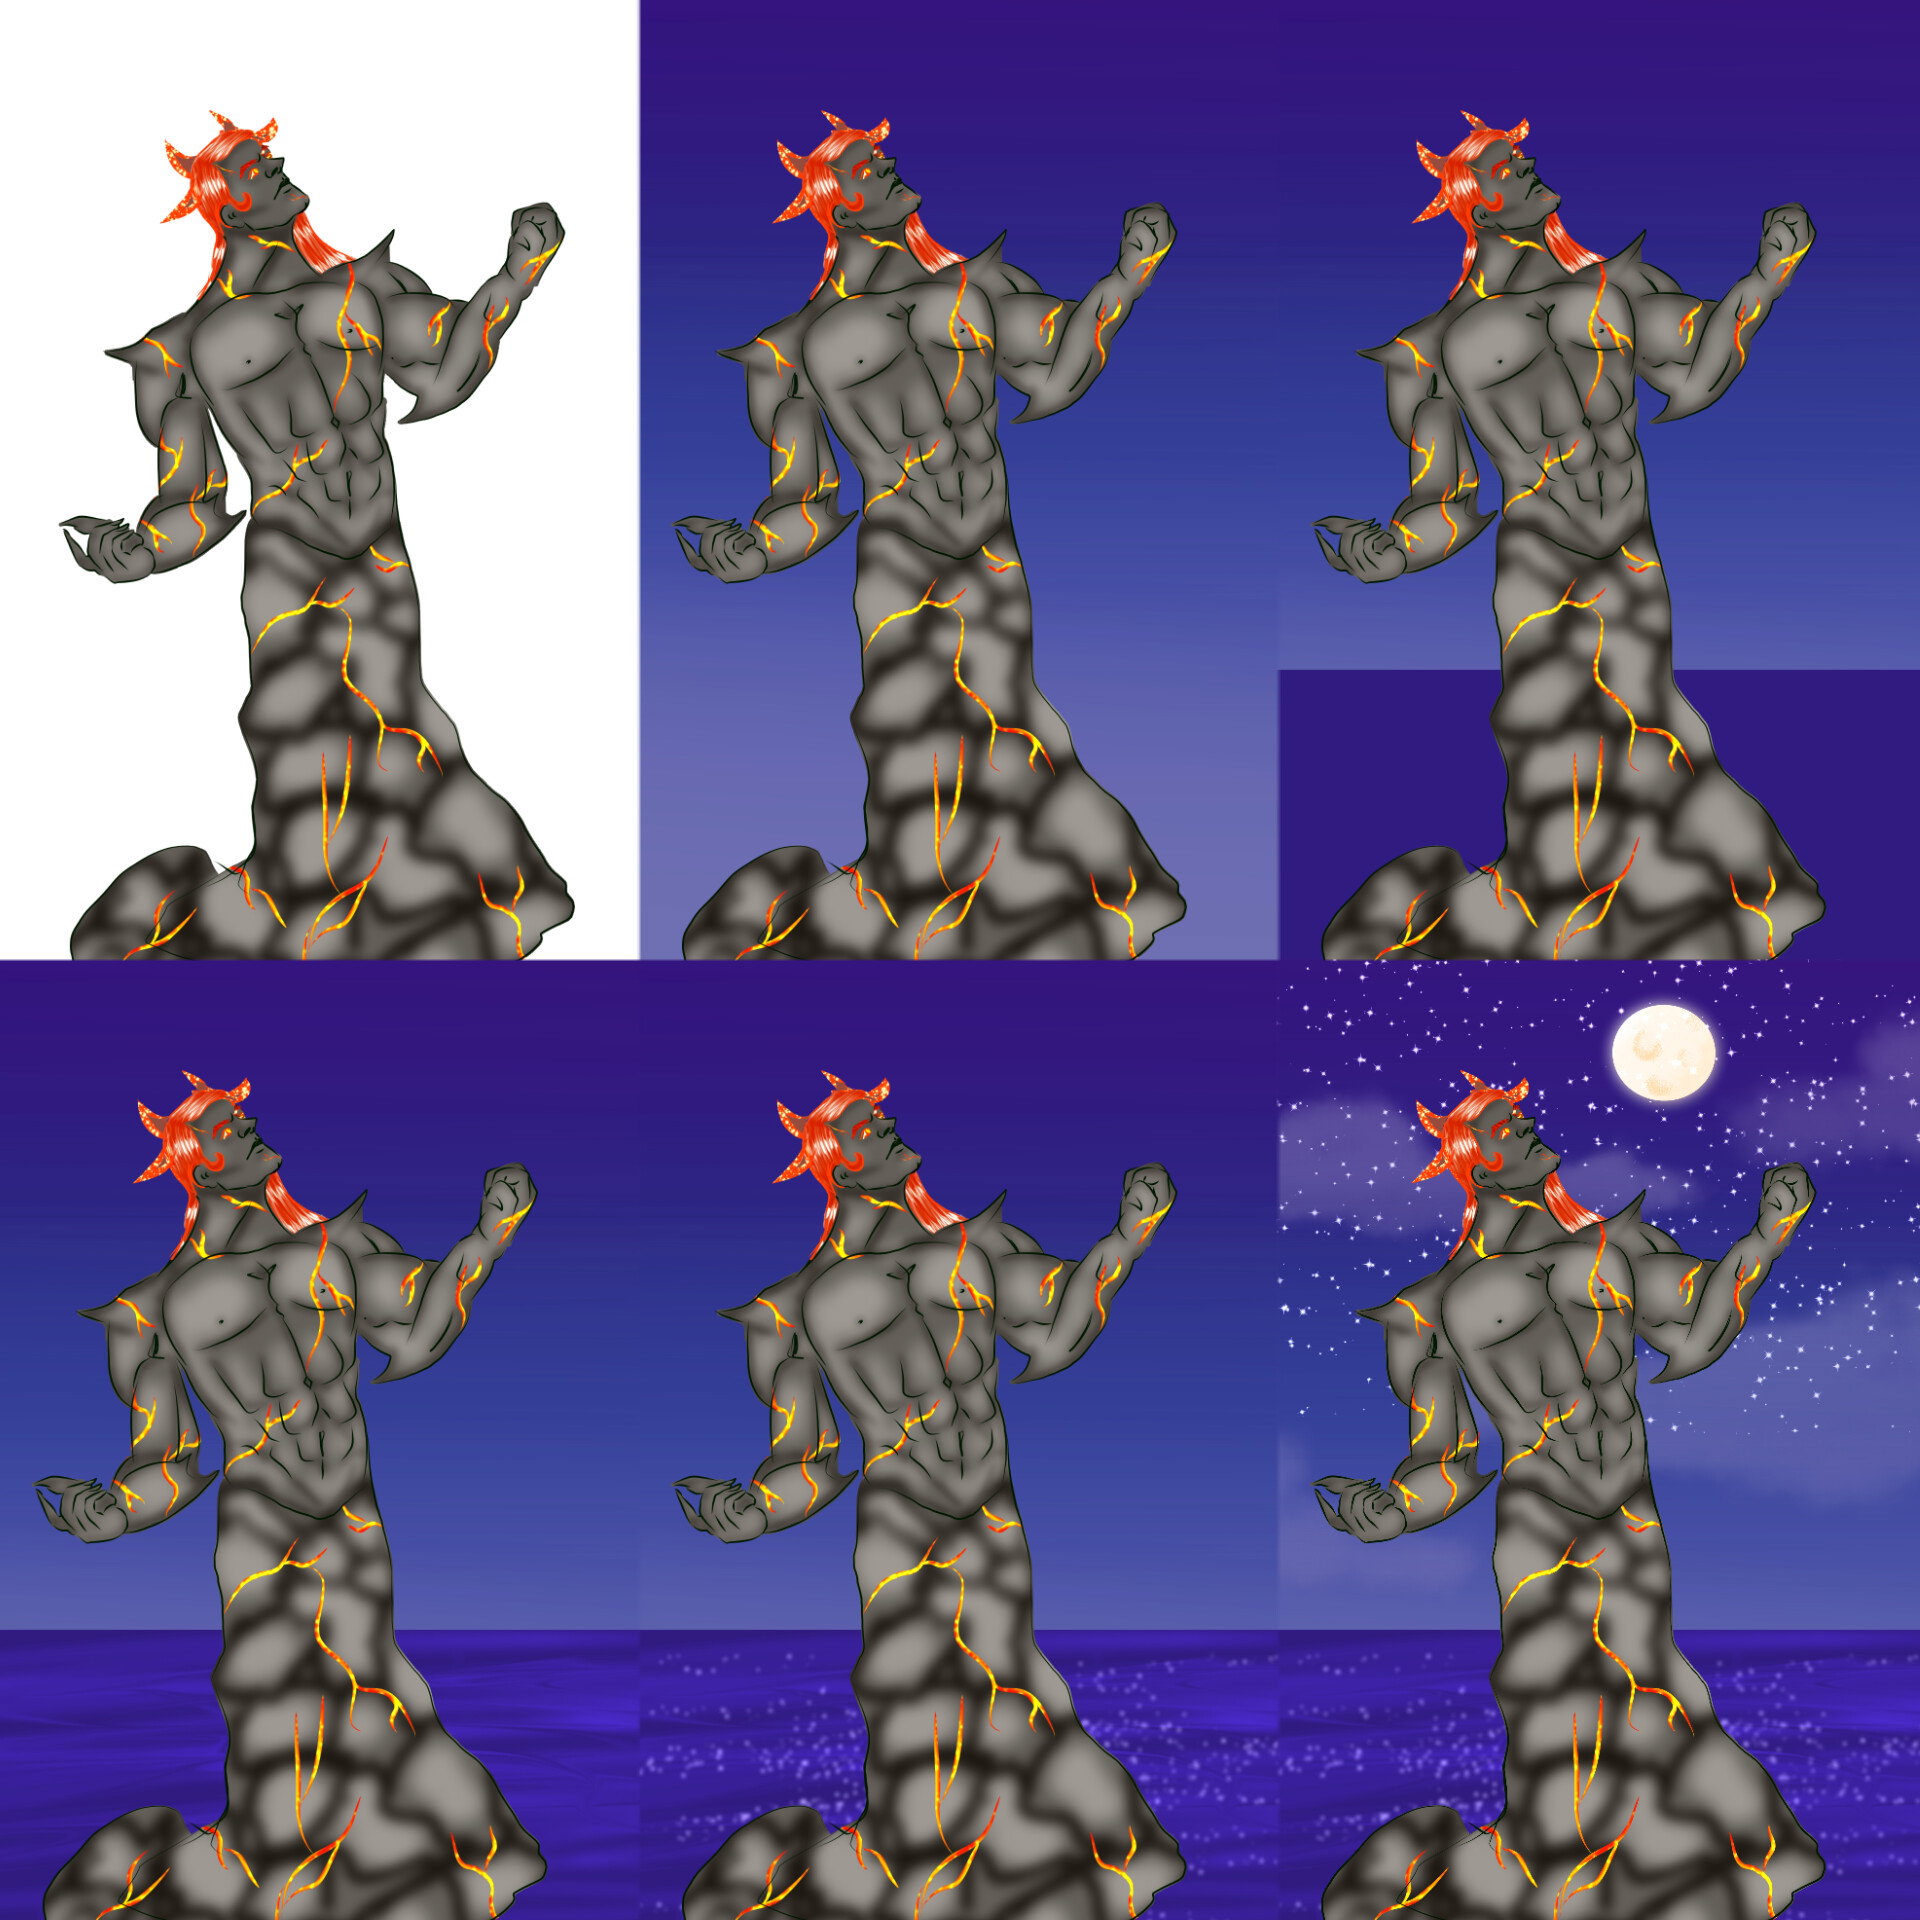
Now my character was pretty much done so i added a blue gradient to the back .I wanted to make a night sky scene as if a mountain on island has errupted and the golem is out . So i made the sea too added stars ,clouds and the moon .
I selected the same blue from background and clipped it as filled over my character set the blending mode to over lay and here is the final result ❤️😍
I added more highlights to him and as you can see this way character blends with the background
Preparations for eid
As muslims we celebrate 2 Festivals Called Eid .
One is Eid ul fitr which is right after the holy month of Ramadan . The second one is Eid ul adha and its on 10th dhul haj .
Here is how i prepared for Eid Ul Fitr . I start a week before eid and here is what we do
1. Clean the whole house
You might think this is unnecessary like we always do clean house but for Eids you have to clean every single spot that means you go through the storage boxes and cupboards everything you haven't used . After that i usually declutter and donate what we don't use but is in good condition .We always have some spare clothes that are not donate able so i just use them as scrapes to scrub the floor while deep cleaning. After the declutter situation i make all the children in house clean doors and windows for extra pocket money. This is a tradition we had as a kid so we knew how to clean and how to manage our funds. While the kids do that me and my mom divide duties like one has to take the cob webs of and the other would mop the floor .One would go clean the bathroom and other would go clean the Kitchen and by cleaning i mean deep cleaning like everything should be spotless. Half day goes by cleaning up but in end its like a brand-new safe space that radiates pure positivity .
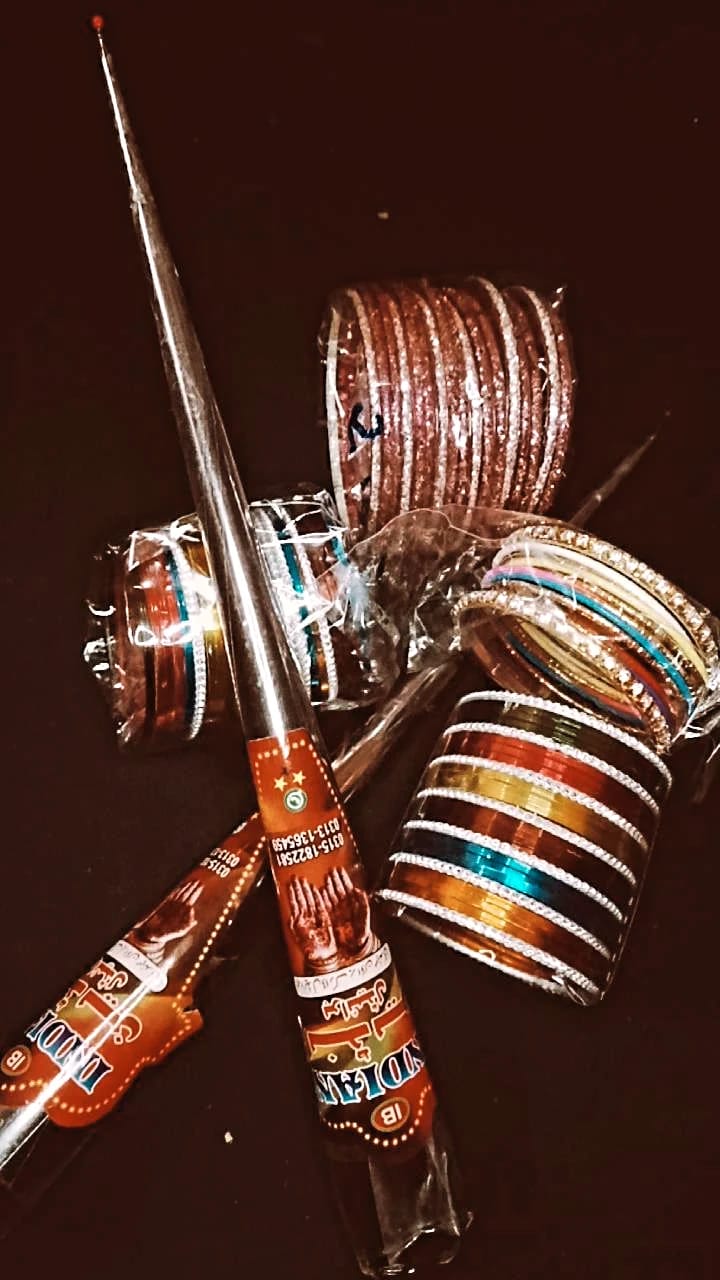
**Buying mehndi and bangles.**
This step is essential cause we usually shop Clothes online now but the local shops and outside streets is all lit up with lamps and everything is so joyful.Since everyone fasts the whole day Nights in Ramadan are magical everyone is out buying things . My dad always takes all the girls out and buys them bangles and makeup accessories .Most importantly Henna cones which we call mehndi .
Its a tradition to have your hands stained on Eid .
Iron the clothes , Safe keeping:
3rd step starts the day before eid i start by keeping everything thats expensive or important away locked in closets . Because On Eid we have Families coming over which means alot of kids would be coming too . Kids are adorable but also curious lil beings and they love hiding things . As a experienced person the best thing is to hide everything thats sharp , expensive pr fragile away from them .
Other thing i do is i iron all the outfits for all 3 days of every member in the house cause on Eid days we won't have enough time to do that .
**Get those ceramic and glass crockery out**
As a Pakistani we only are meant to eat in steal or Plates that aren't from the Dish set . Because expensive crockery is only meant to be used at Festivals when the guest come . As my mom would say these dishes are for the time your inlaws come 😂 anyway .
I wash and dry all the plates and expensive dishes with vinegar and lime water so everything smells fresh and looks spotless.
Time to get those snacks
My brother and dad go out buy Cold beverages and Savoury snacks as well as deserts .
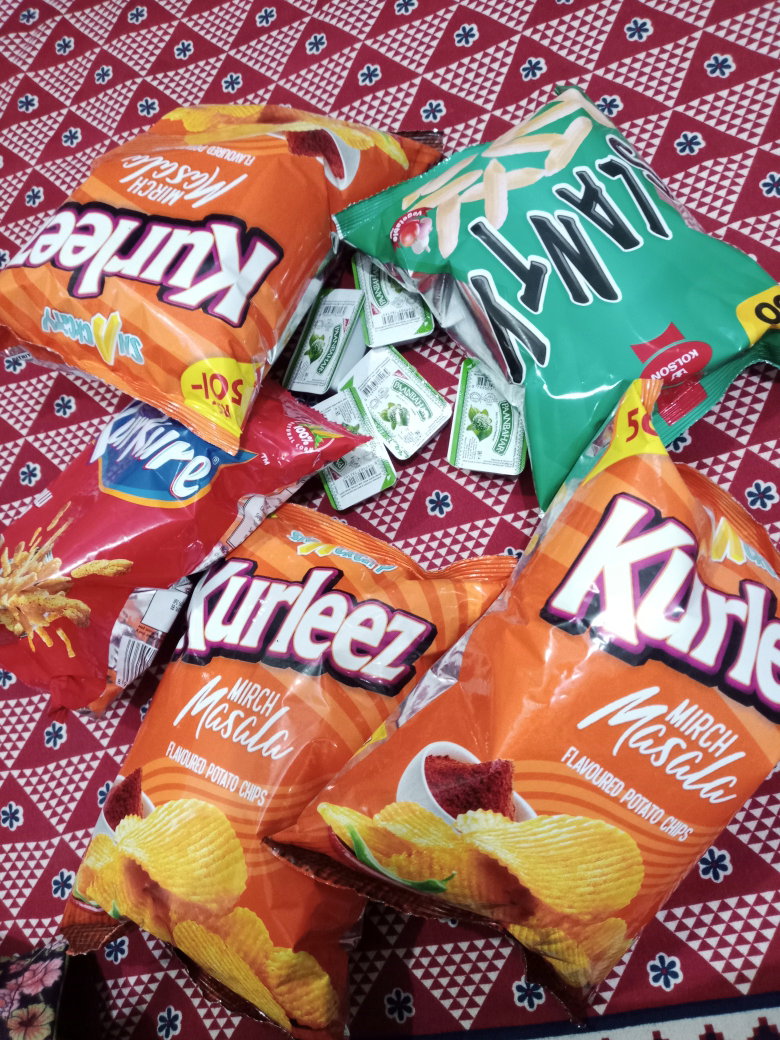
This year we had a list to get Some potato crisps , Nimco mix , corn pops , fried lentils , and Gulab jamuns . Cause on Eid you have everyone coming at you home for just 20 minutes and so you gotta have something to be served quick without a mess
Time to get ready for eid
Last step is skin care because all this deep cleaning had made us stress and now we need to be cute too. I also grab my mom and do her manicure pedicure and her nails after that i put henna on hands of every female in my house and thats it .
Tell me any other things you prepare for too in the comments
Aloo Bhonda
When ever im struggling with "What to cook today?" this is what i do.
Aloo Bhonda are these Yummy Vegan Potato filled balls that melt in your mouth
**Ingredients:**
•Boiled mashed potatoes
• roasted cumin
• salt
• peprika
• chives
• parsley
•chat masala
• Besan (chickpea flour)
• Oil to fry
Method:
I first took 1 cup mashed potatoes and mixed in salt , peprika , roasted cumin , chopped chives ,and chopped parsley . Mix it up and form balls with potato mixture . Next prepare the Besan batter by mixing salt , Besan and water enough to make it a paste like consistency next just dip your potato balls in it and fry them in oil .
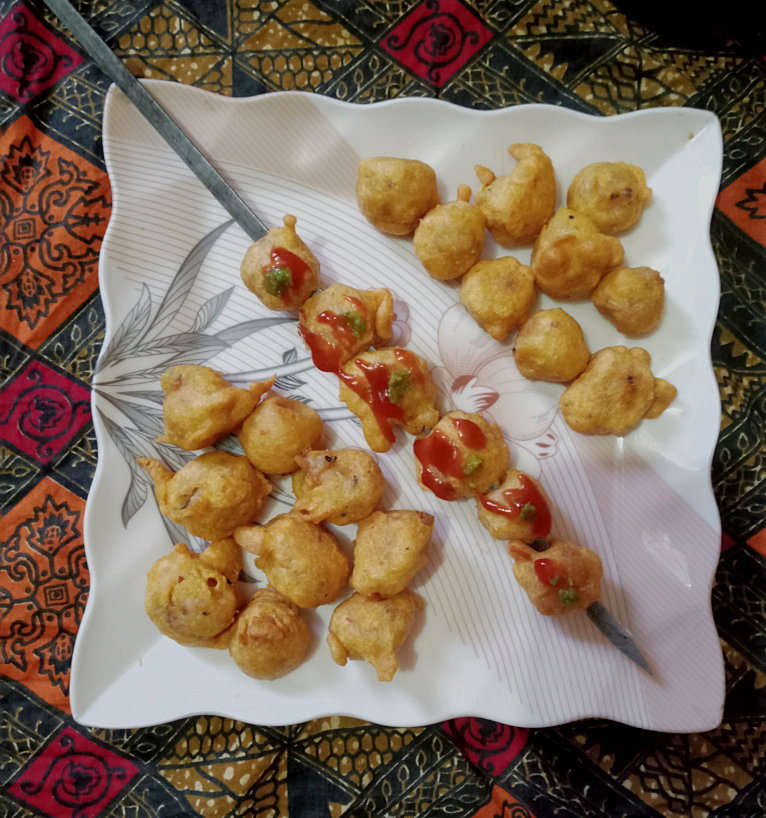
Before serving you can put them on skewers and add siracha on top with some pickled green chilli chutney ❤️
Learning to make 3d posters
These days im doing some 3D posters or wall papers and here is how you can do it too
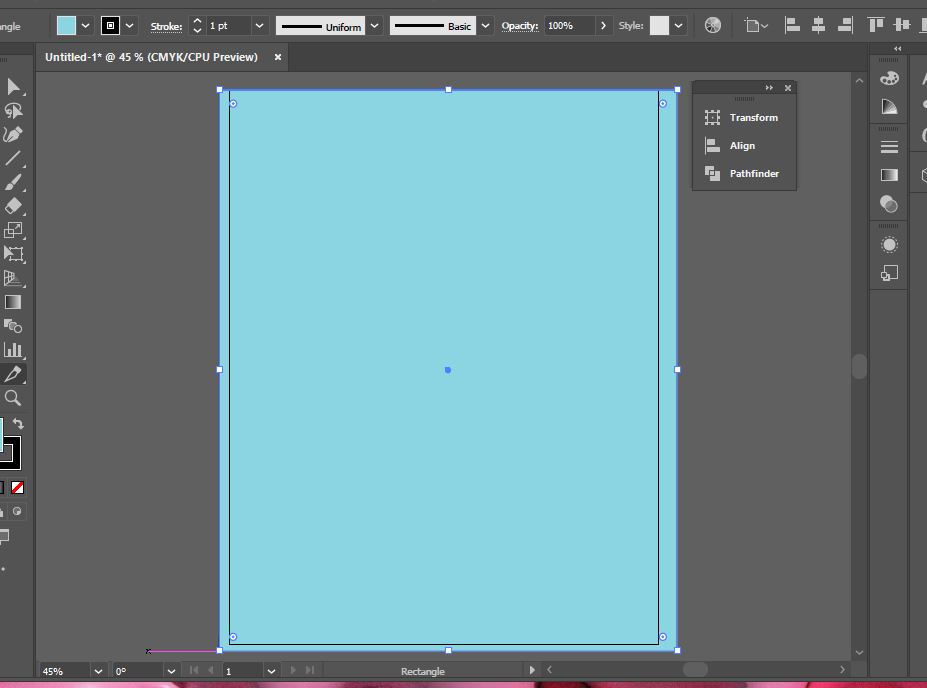
Firstly you need Adobe illustrator and put a shape on your artboard i put a blue square bug enough for the artboard.
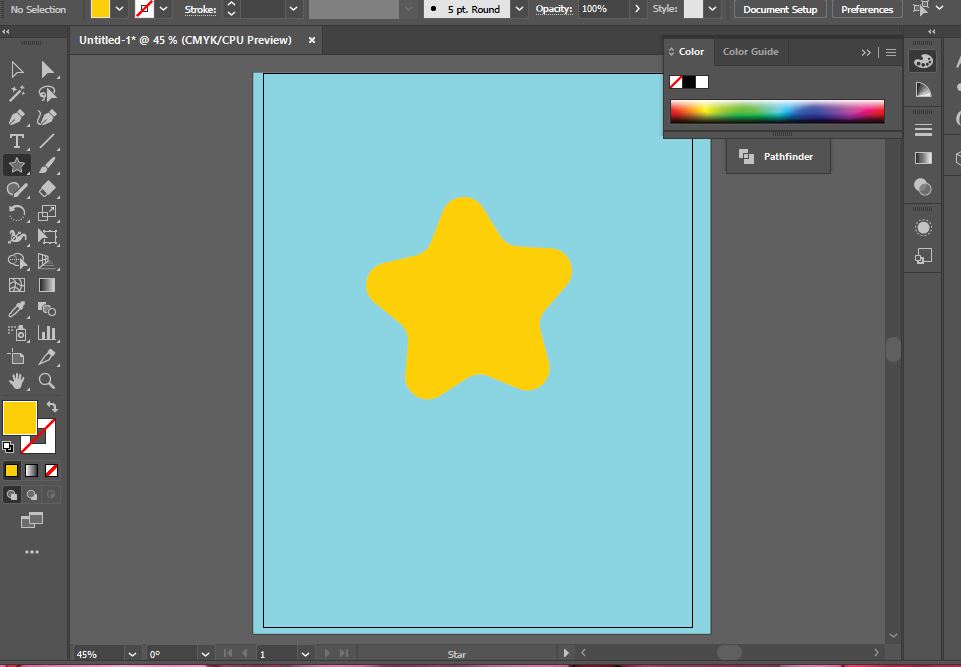
Afterwards i added a rounded star . Mostly i use complementary colors like cyan and Yellow are a great contrast.
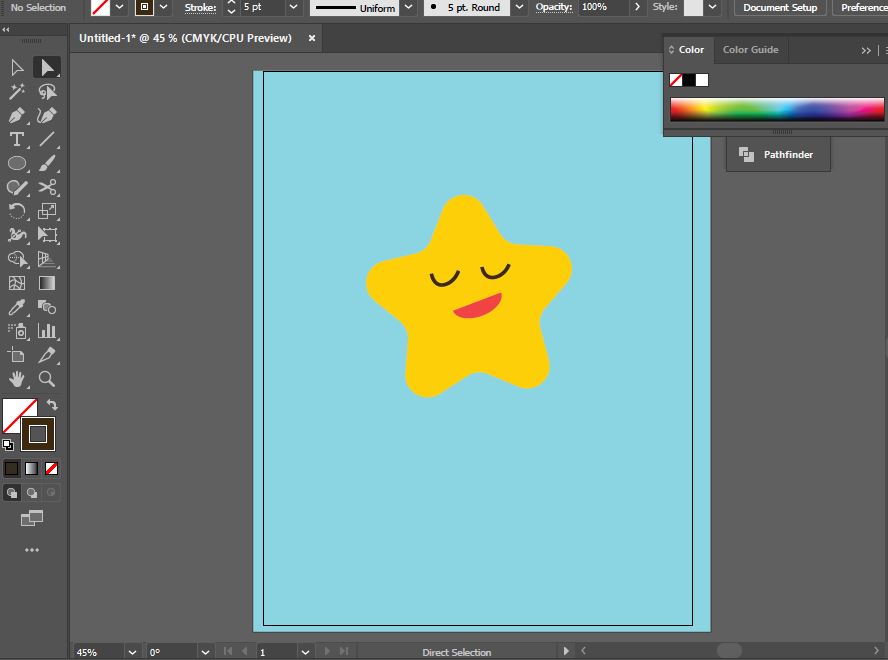
Added some more shapes n lines to make it look like its smiling
Wrote Star pop in middle cause that was my imaginaty concept for this
I grouped the text and the star n the shapes in the star and
Then i selected all the things on the artboard and went to effect menu selected 3d materials choose the inflate option
And there u have it.
You can use many rendering textures n lightening exposure to make it more better .
This was the final result
Eid Mubarak everyone i took some days off because of Eid but soon will be back with alot of recipes and art blogs stay tuned ❤️
Dahi Wadas
Well this one is a vegetarian recipe which means it involves use of dairy .
This dish is for hot hot summers when you don't want to get up n cook in the heated up kitchen
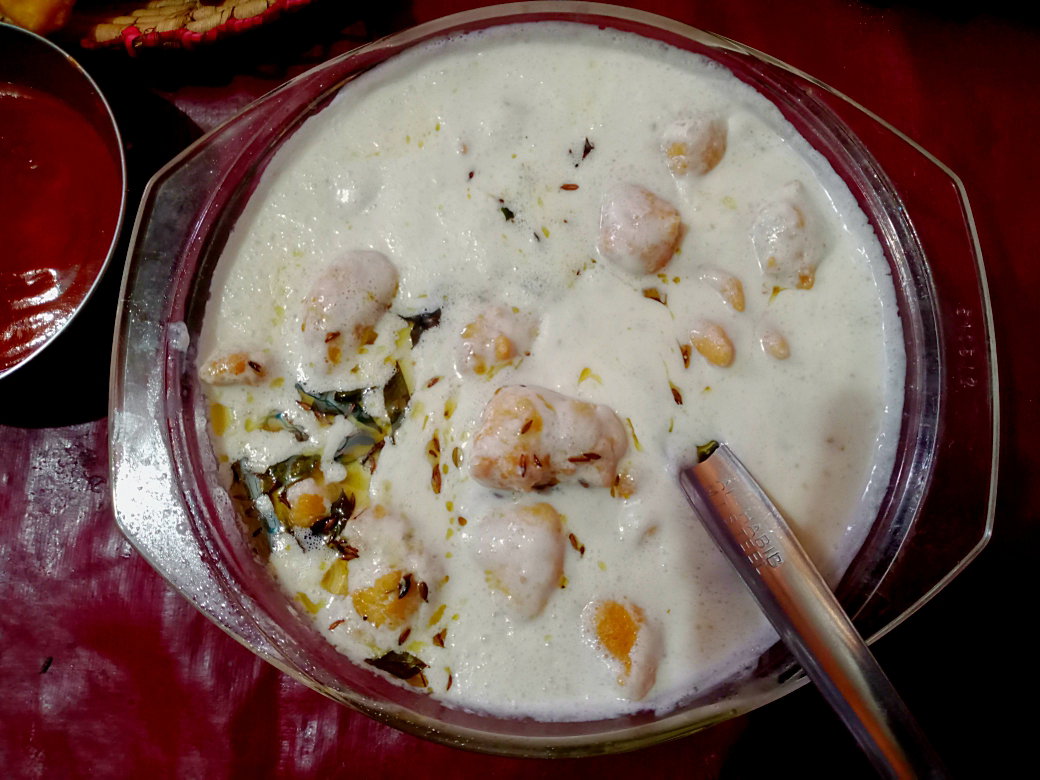
Just get your plain cold Yogurt Beat it up till it had no lumps mix some pickled green chilli chutney thats for the raita
Now for the Wada
We need our vegan protein powder which is Chick pea floor (or as Asians call it besan )
Now mix some crushed coriander seeds ,salt , chilli powder and a pinch of baking soda now mix in you water and make it into a pasty batter
Now scoop the bater with a spoon and fry em and now you can store these in a air tight container you can store these for a week or more
Mix the yogurt raita with these wadas and put some Sizzling oil with cumin seeds and curry leaves on top of them to make it more yummy
These are best serve Cold with a generous amount of Chat masala sprinkled on top ❤️
Drawing a simple Penguin sticker As a beginner
As usual another lesson simply just so people who read me and wanna learn the basics .I would be posting one simple Cute digital artwork that is quick to learn i will keep it easy as possible .
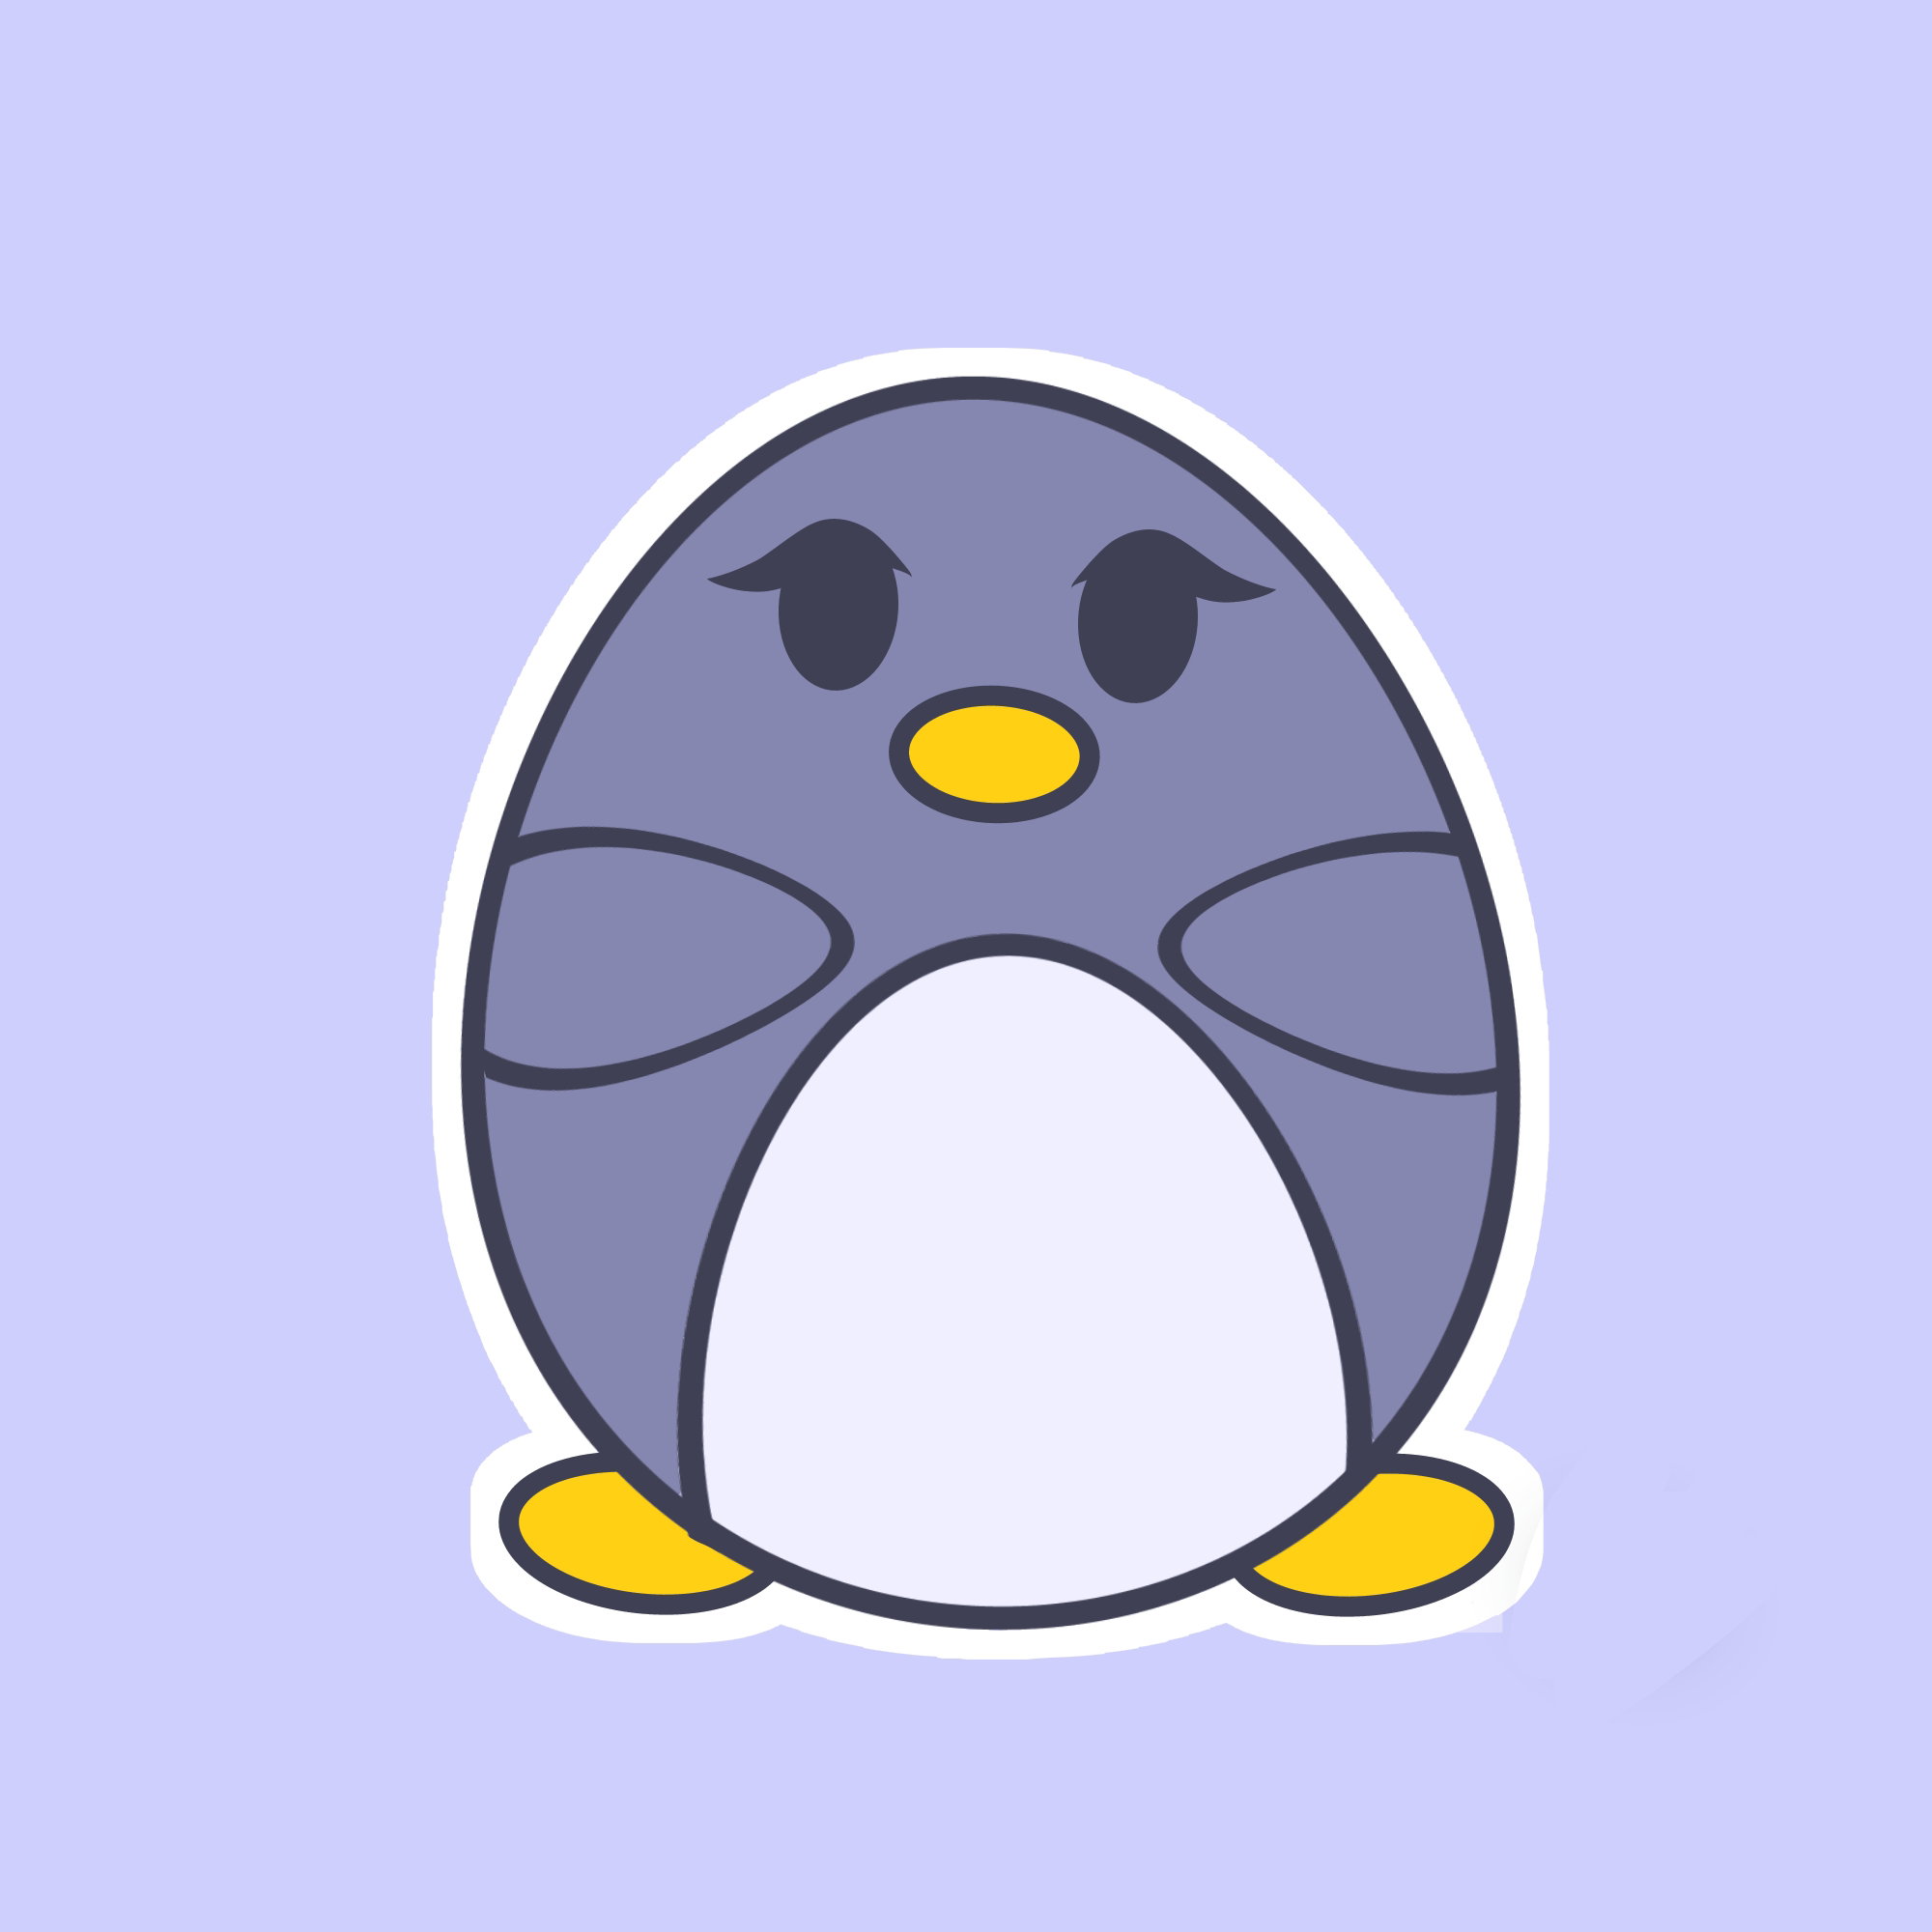
This week i drew a penguin sticker just like last week i drew a cat sticker .Here is how you can make it too
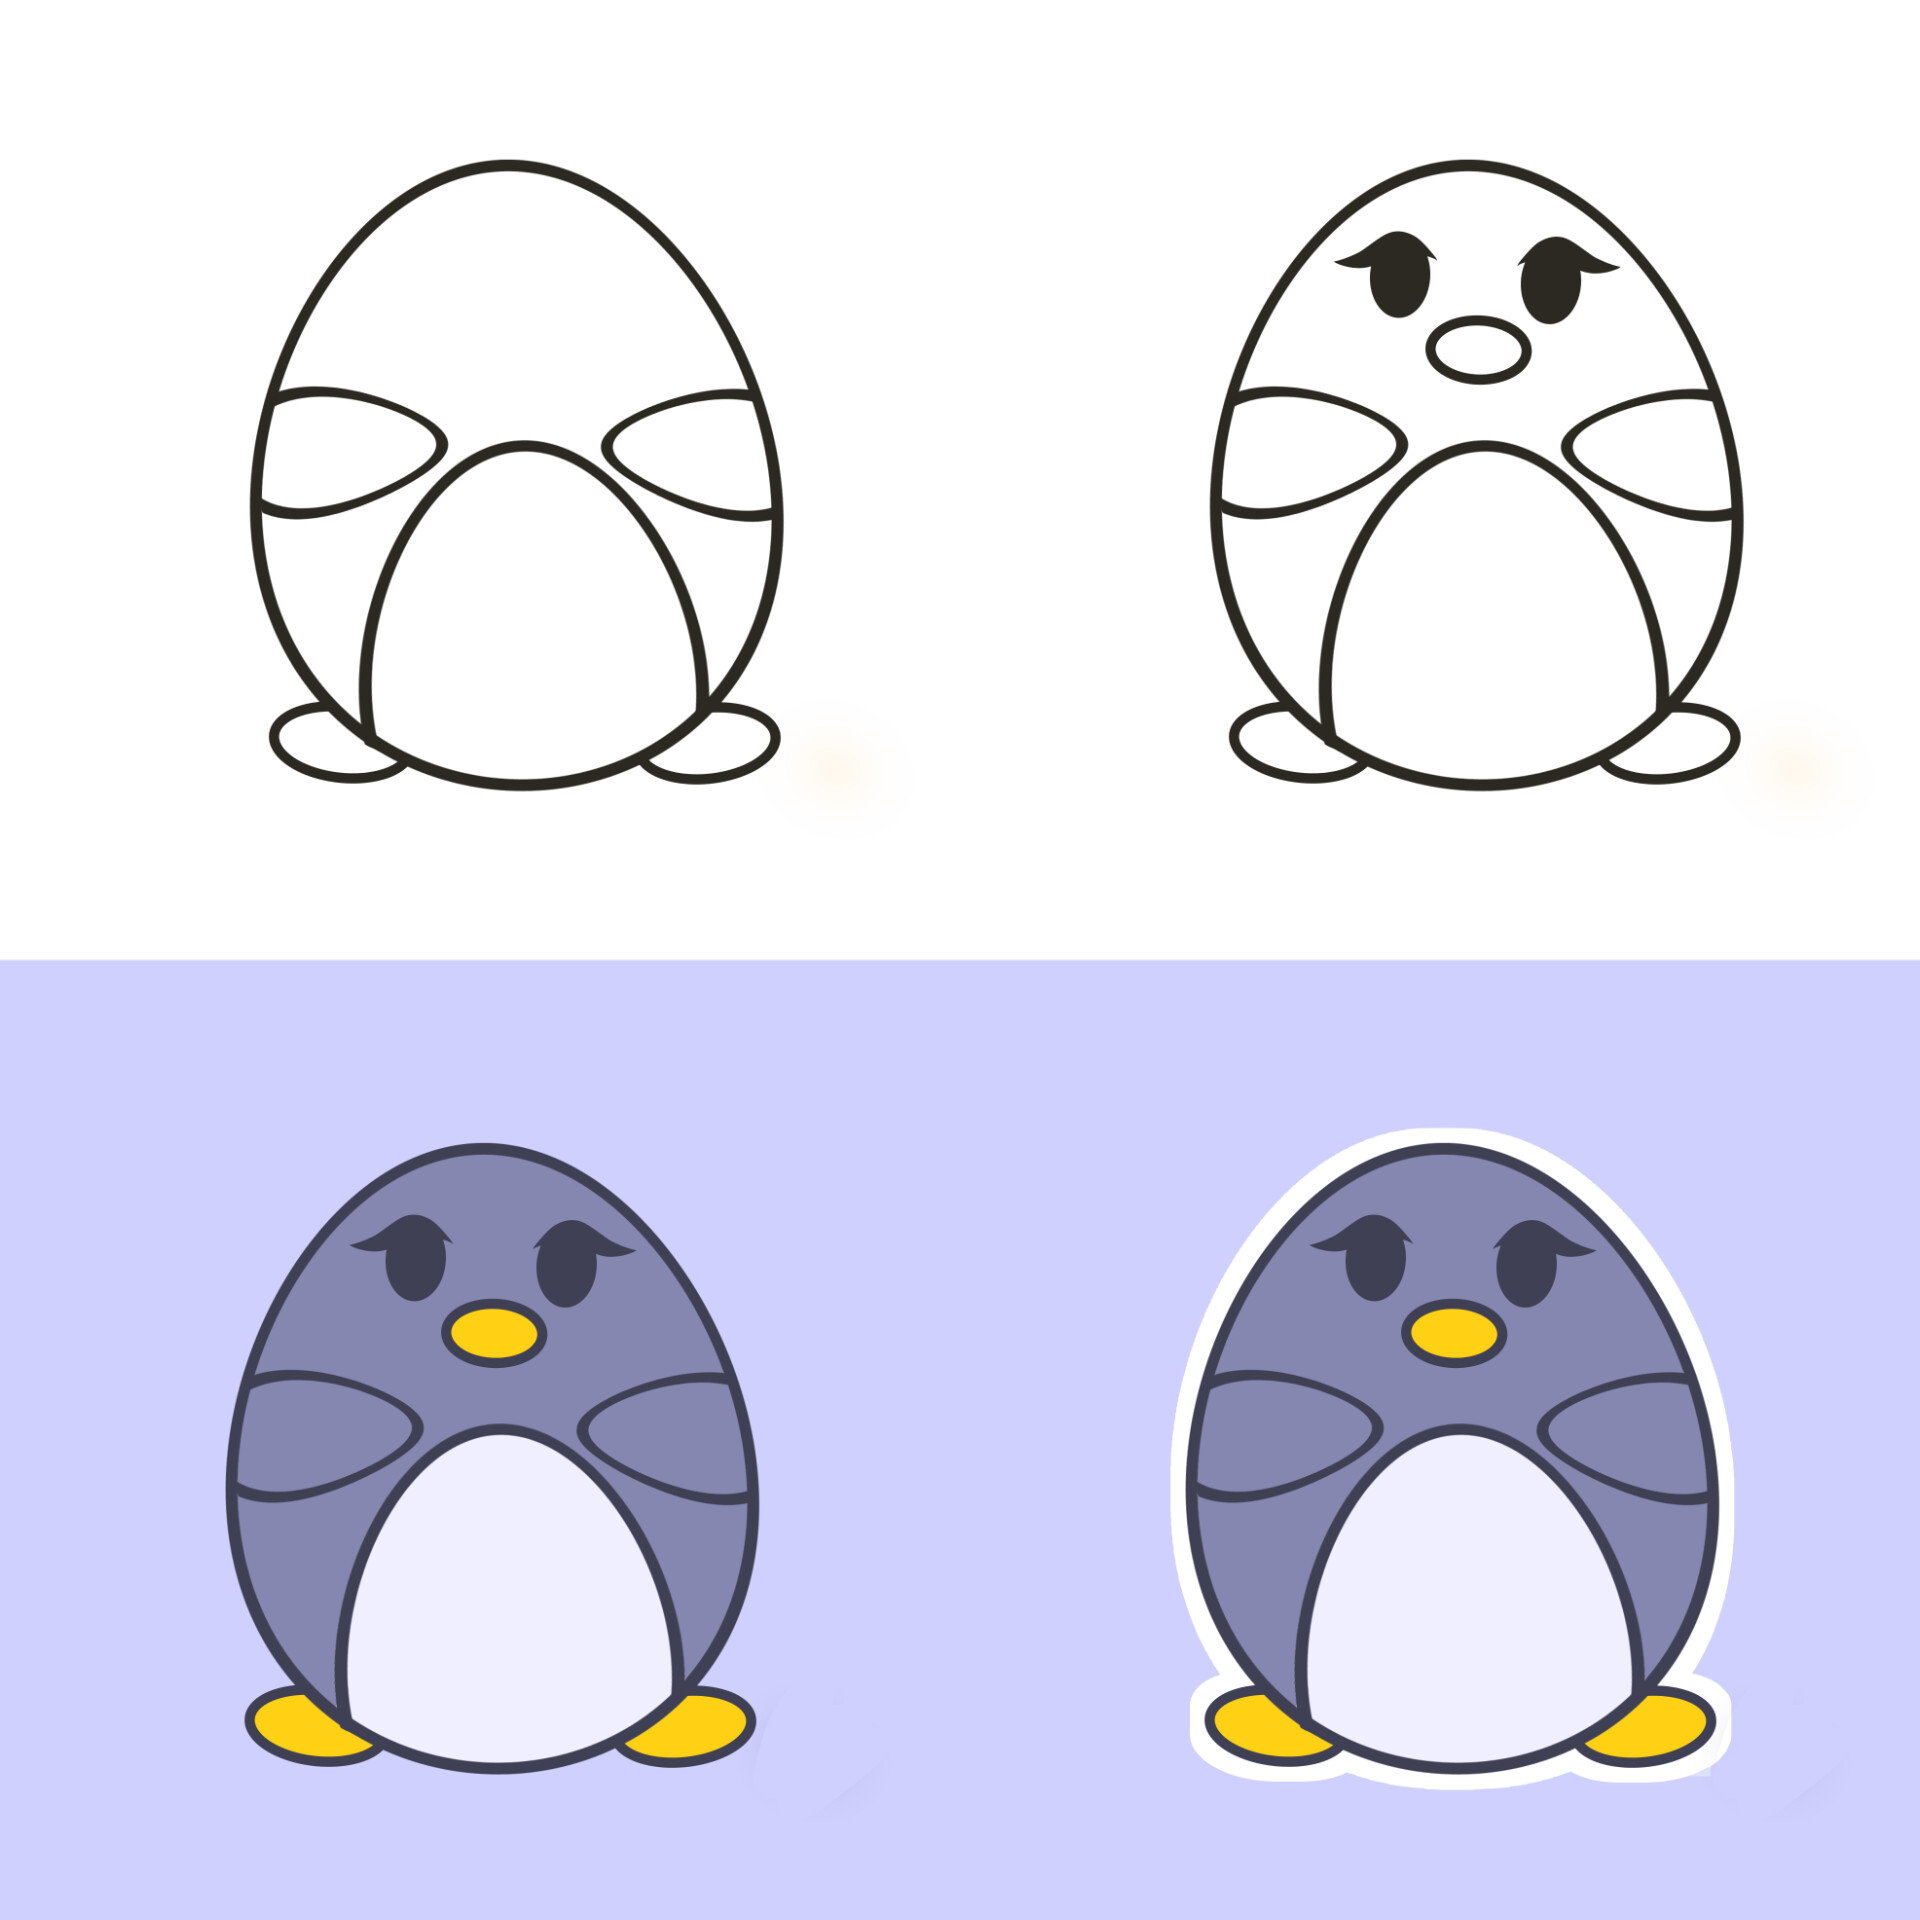
You can draw Characters using variation of shapes .Today i have used an oval as the base of my Character .
Then i added more smaller ovals for the feet and an half oval for his flappers .Also the belly i made them as half oval but i erased the Rest.
Remember as a Beginner always do all the parts in different layers the hands on one , expressions on next , body on one , feet on one .When you are done merge them all together.
Now i added the expressions with a cute rounded triangular beak and for eyes i added a winged liner just to make it cute . I used a sharp point brush for this
.Next i filled the lineart with flat colors and added a basic solid color background but you can see the lineart is colored differently at many places .You can do that by clipping a layer on top of your line art layer and paint over it .When you clip any layer on a layer the clipped layer is only painted on what is drawn on the main layer . Using more than one basic black color on lineart enhances it more .I used soft colors so it looks a bit soft and cute.
At last i selected the background of the character so and added a border on outside kept the px 28 . This way you can turn any illustration into sticker . If you hide the background layer and save it as Png transparent then the sticker will be saved as just that sticker .
I hope this was easy to learn . Drop a comment if anything that is not understandable i would love to explain it ❤️
Splinterlands art contest week #237 (Celestial harpy)
For this week i wanted to make celestial harpy. From Splinterlands cards and like the character has a female body yet is covered in feathers just like a parade dress from Brazilian festivals .
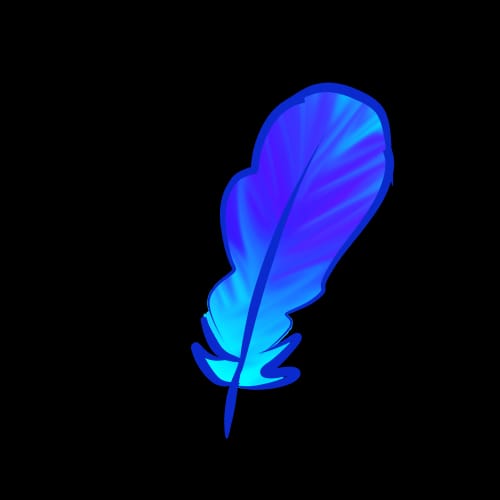
That's why i firstly made a custom brush for the feathers .You can see my previous blog on how i make my custom brushes .
This was the feather that i drew for the brush.
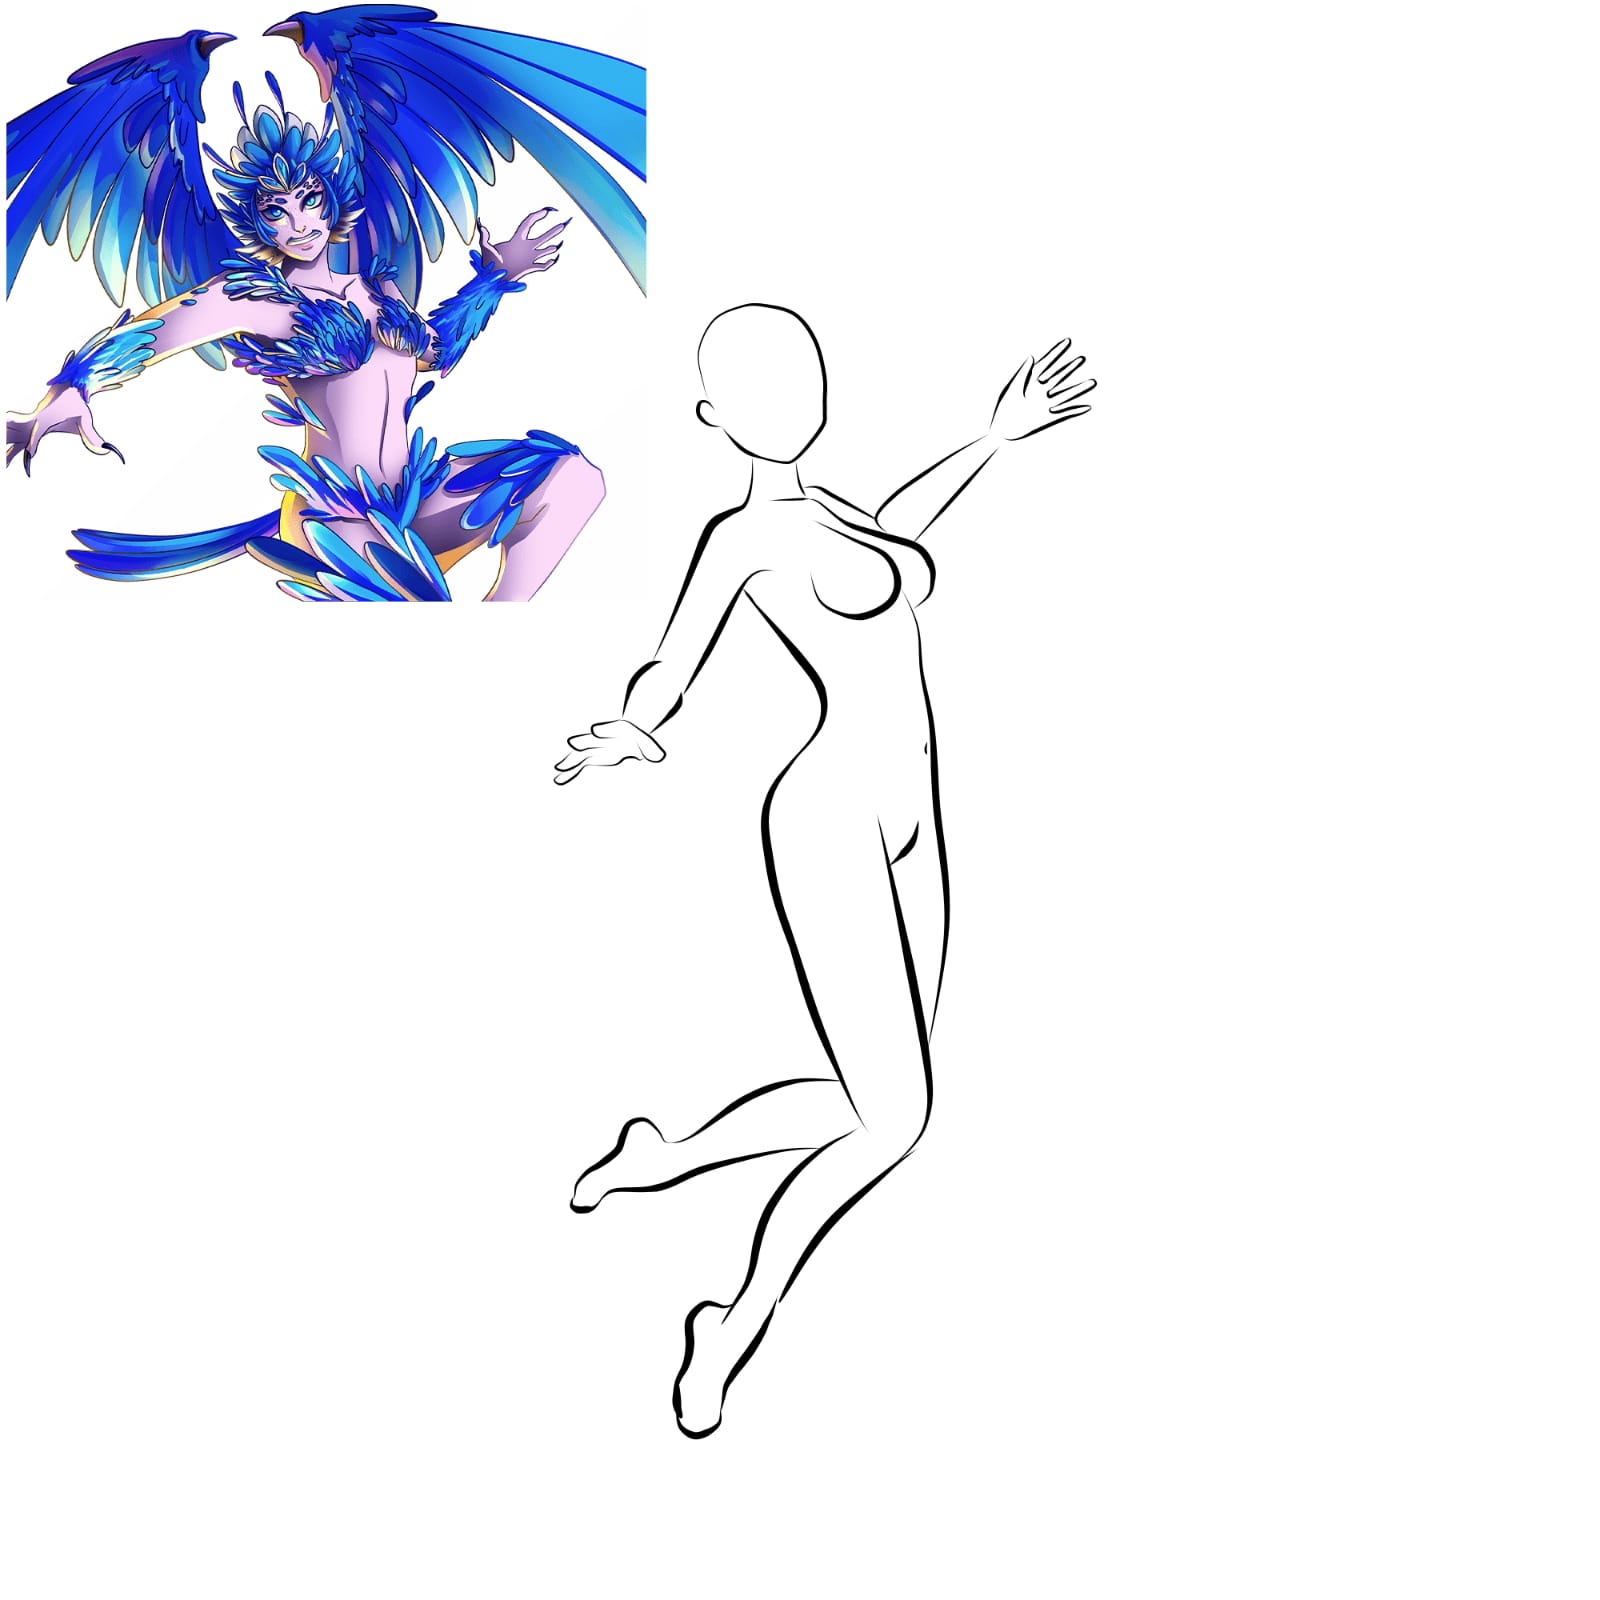
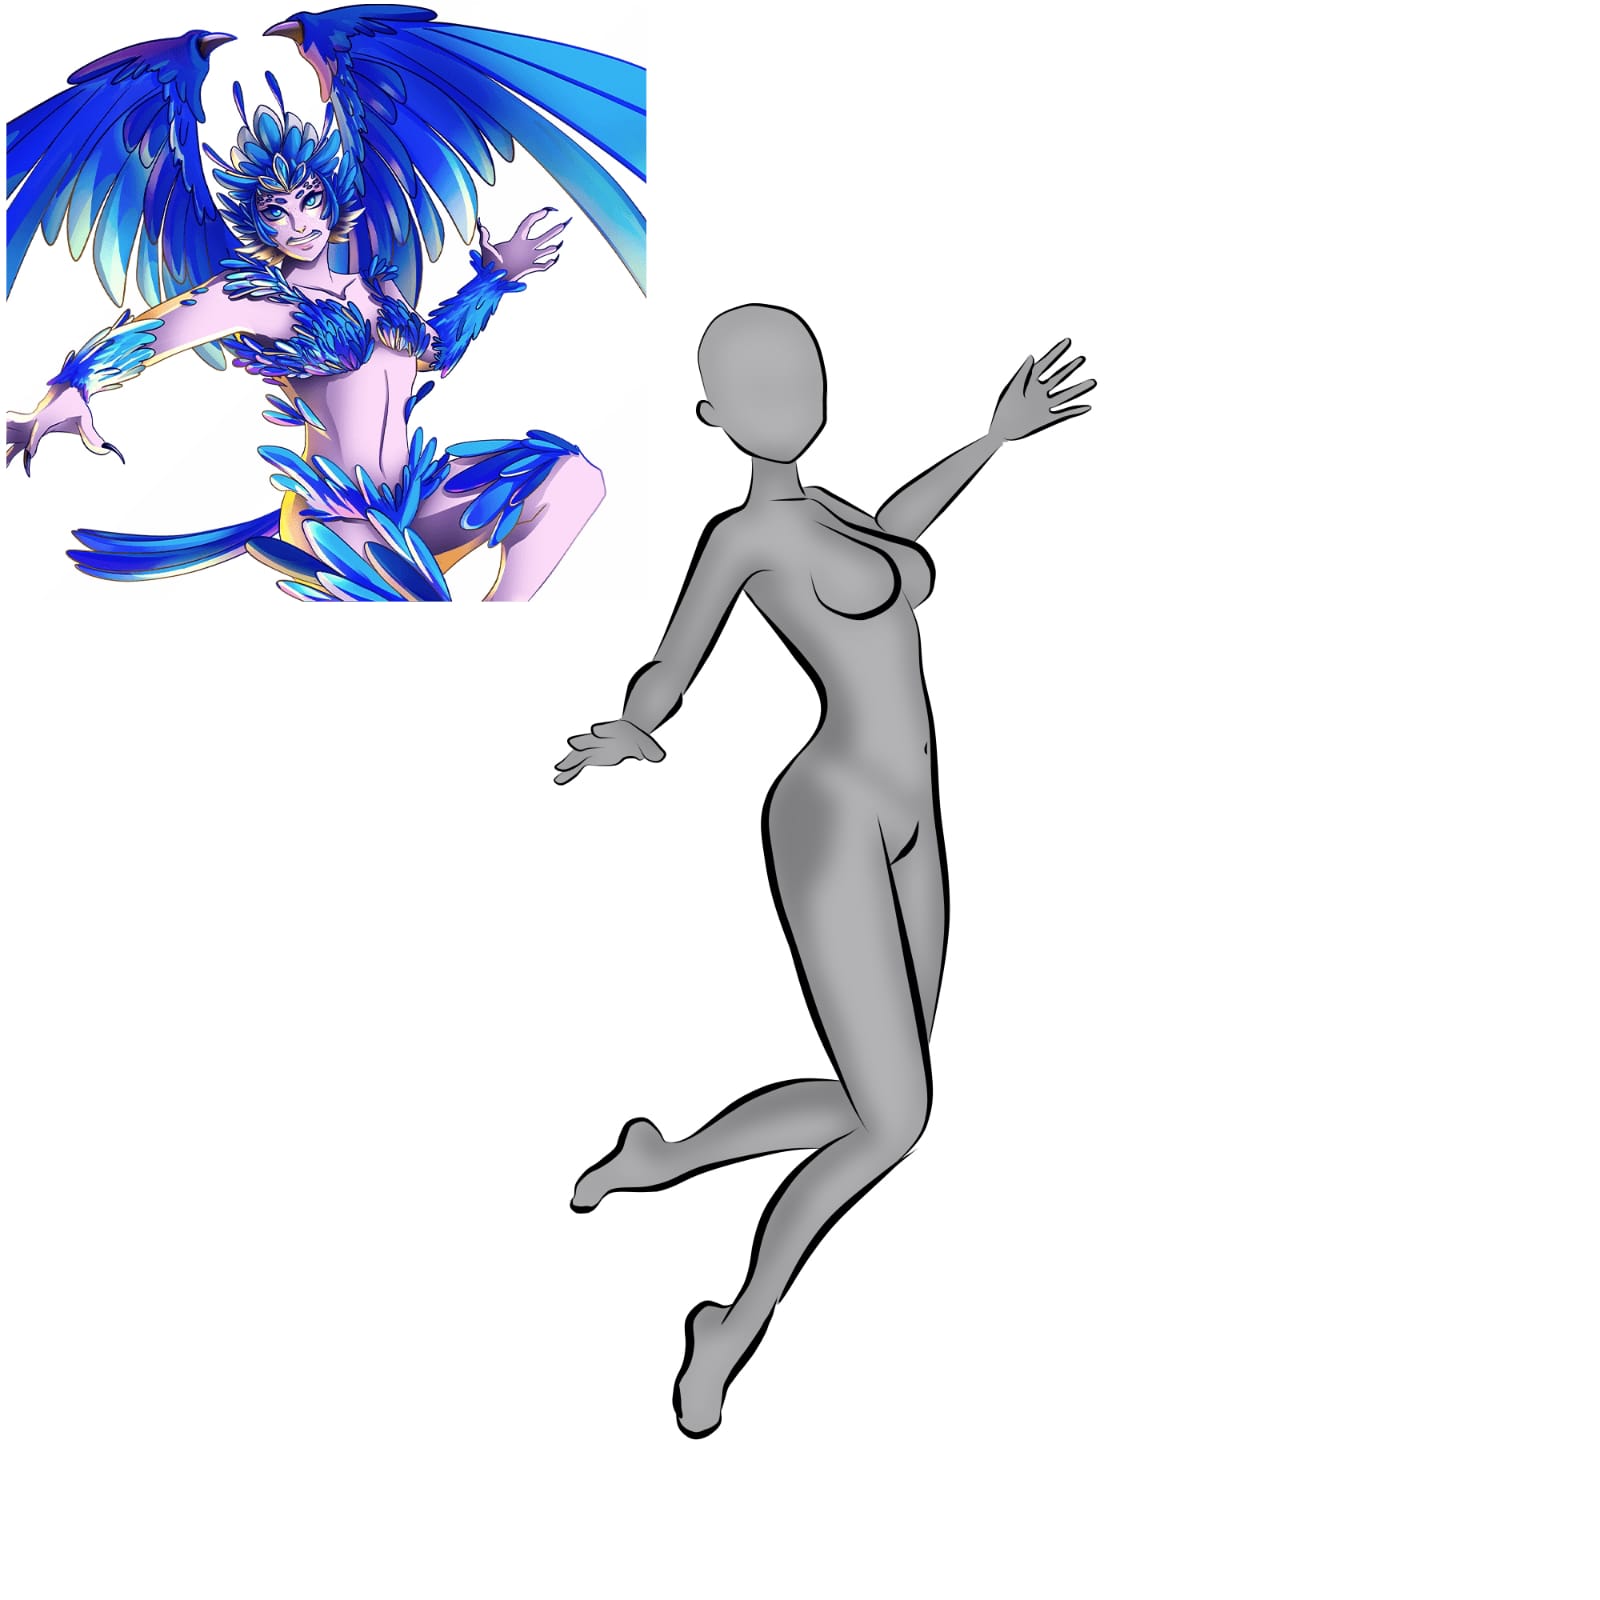
Afterwards i just took the refrence of celestial harpy on my canvas while on one side i began drawing my lineart sketch .While on my laptop i was seeing some pose models and thats how i made this rough sketch .
Next step as always i filled in a solid color and added shadows .
But this time i also am gonna show you how can you change skin color if its not the color u wanted
For this i clipped a new layer on top of the body and added a pink fill set the layer blending mode at overlay .After wards you can see it turned a very pink skin from Grey just like the character
Next i used my brush to draw her feathery dress and basically i erased and re drew alot here its all about What you cut amd what you re draw
Same way i added the head piece some points i made feathers in the front some in back over all i kept erasing redrawing till the feathers fit . As you can see the brush didn't help like magic i still had to fit pieces by my institution but in end brushes do save you time so that's a pro and a con
Now after the head piece i drew her facial expressions because i would have had to re adjust them if i had drawn before so yeap that's one of the things you need to keep in mind
Added more feathers and made her dress like the tail and hands and knees feather bands as well ass i made her nails too its almost done but we need the wings too
For the wings i just drew a Black silhoute with a pen sharp brush and duplicated it filled it horizontally
After wards i added the. Feathers like a pattern and extras feathers over the edges of the wings
Then i colored the eyes and facial expressions while adding gems to the costume because i wanted to give it that sparkly touch too and the character did have gems on top of her head
Added a sky Gradient but i felt its not that cute cause blue doesn't make her stand out
Drew the clouds too overlay them to the sky layer
As i was not satisfied with the sky i made it a bit pink and purple and yes that looked better
Afterwards added some highlights to her with an air brush and set the layer to add
Next i took a purple square and put it over the whole piece overlayed the layer this blends the character with the background
This was the final look.
Things to be grateful for (weekly blog)
I always tend to end up procrastinating and stressing alot and someone told me .Try remembering what one thing made you happy the most in the whole day.
That's why i decided to make a weekly blog of things that made me happiest every week .This includes self care , healing and learning new stuff.
Lets start with Monday
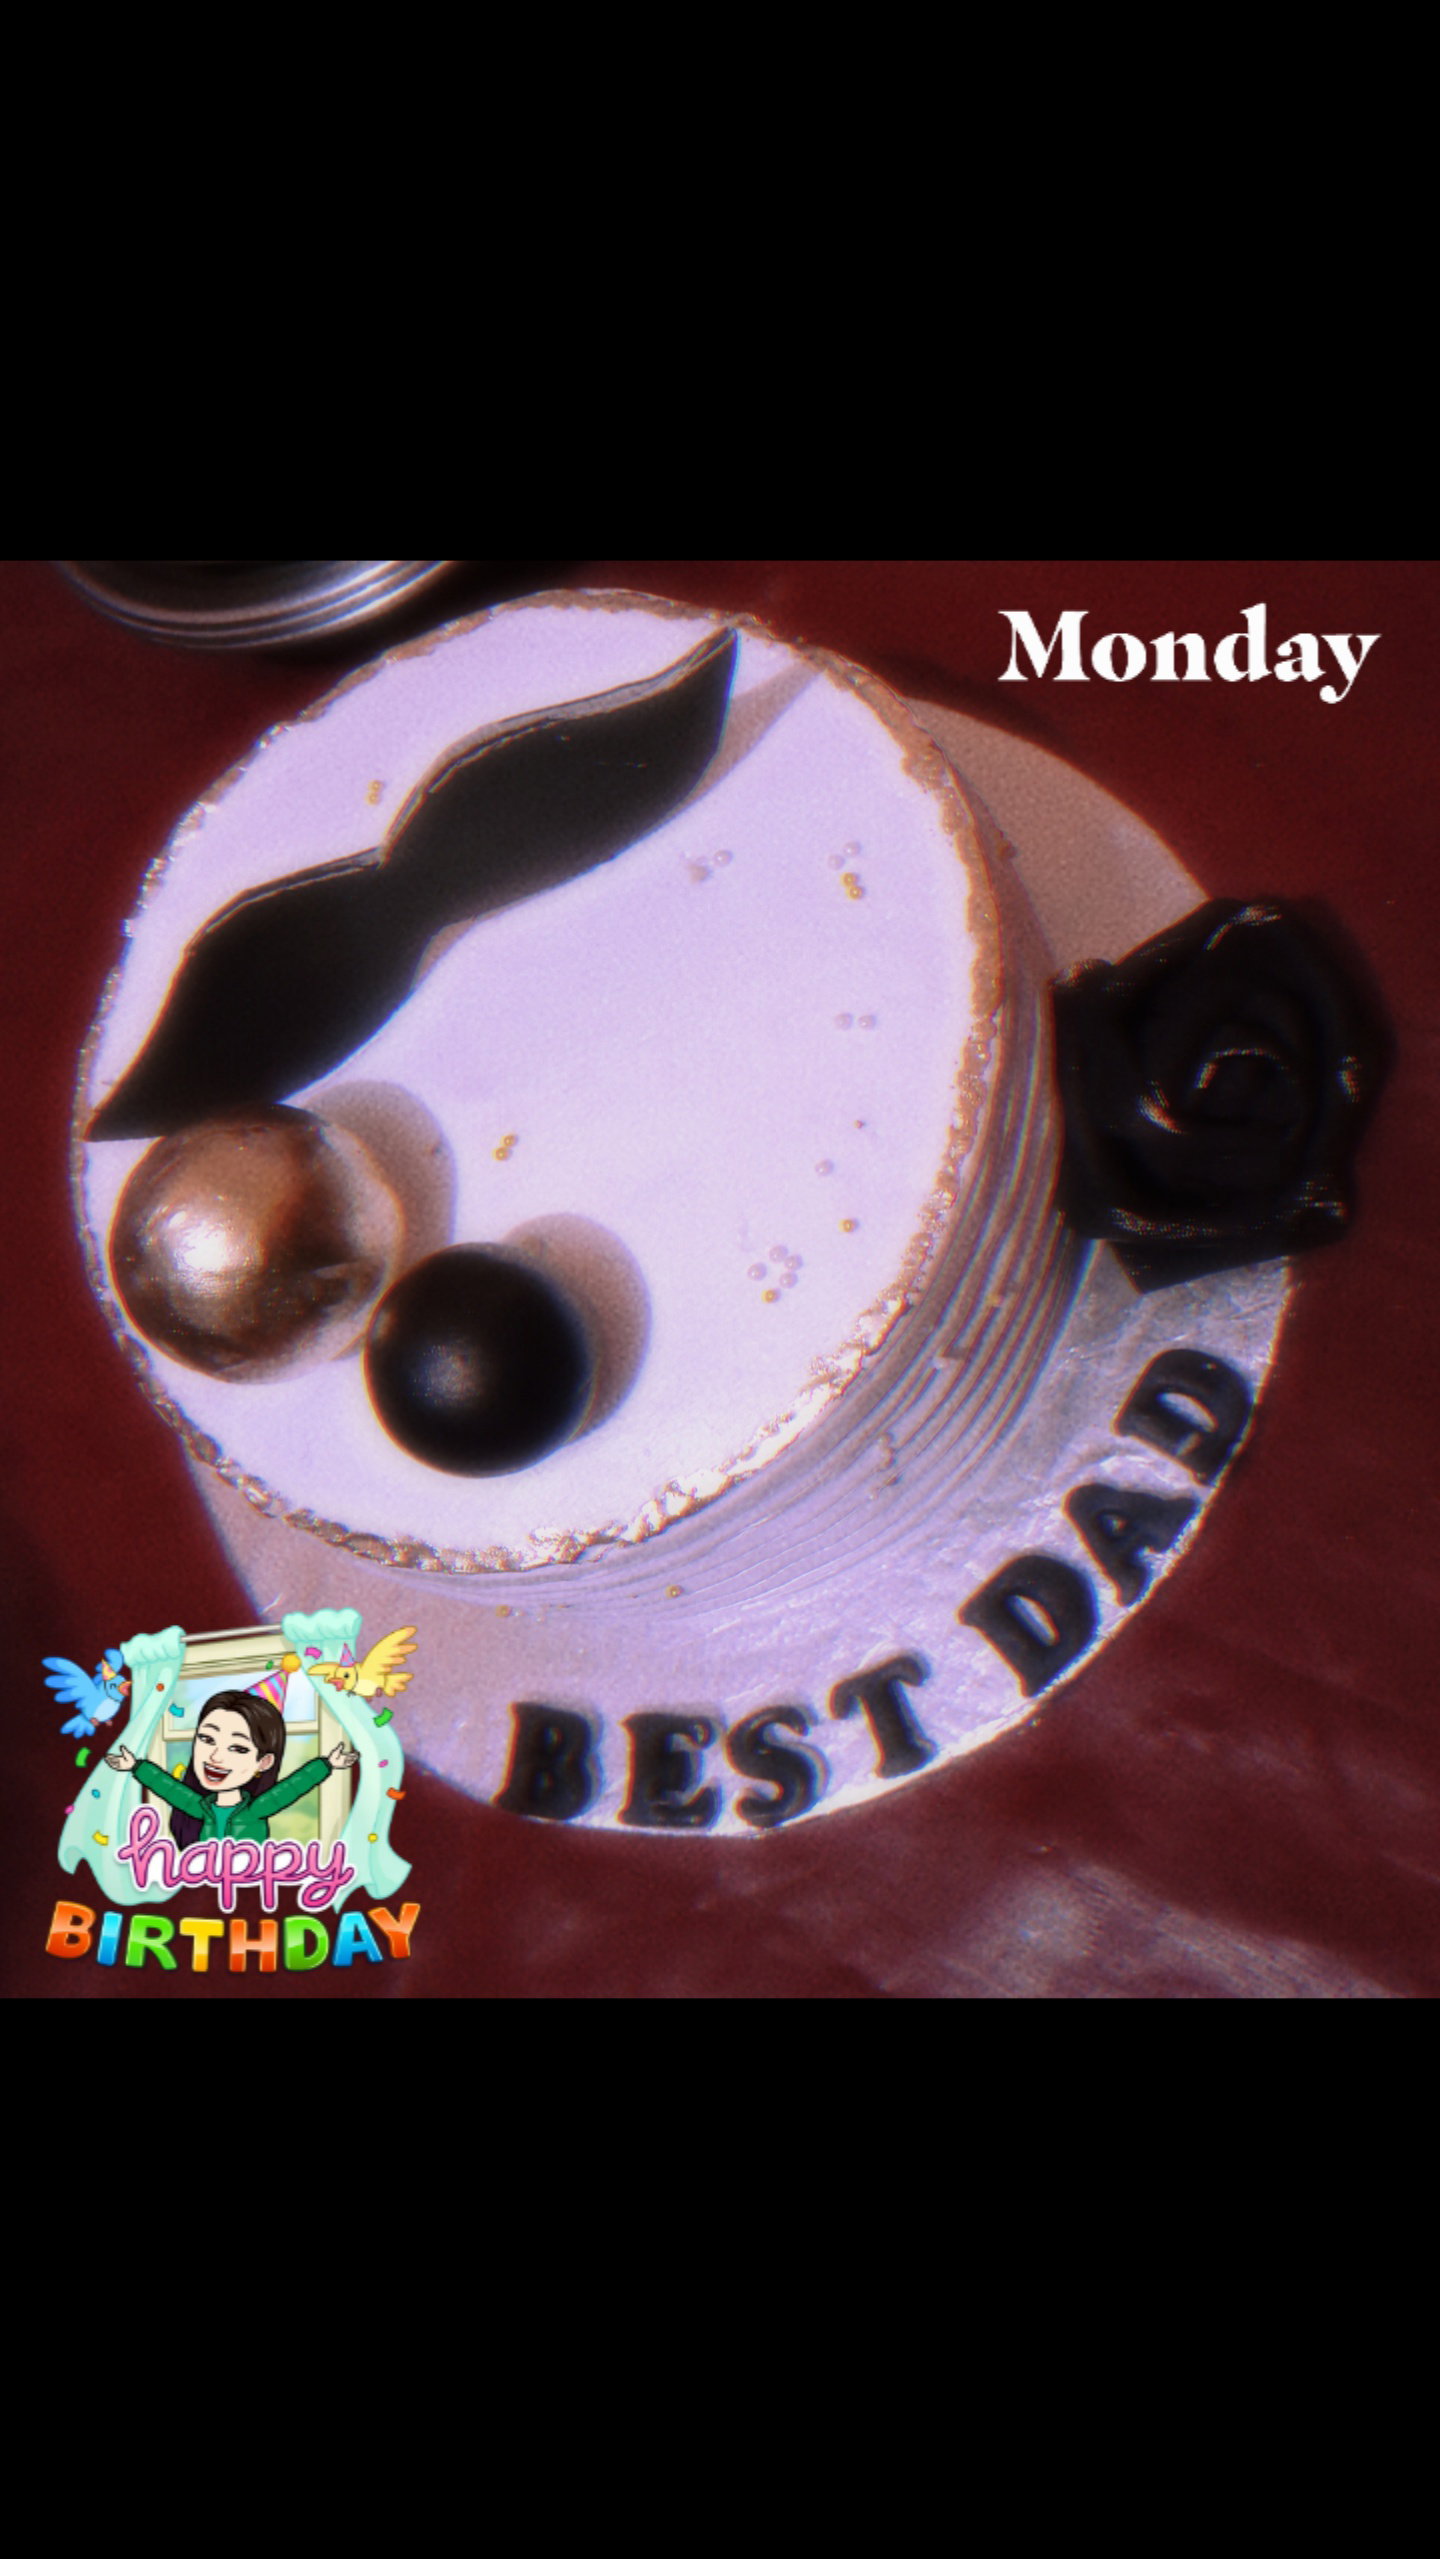
It was my Dads Birthday so we got him a custom made mini cake and it was so cute . This made dad really happy and i had a quality evening iftar with my family ❤️. Spending good time with family is great you just make so many memories .
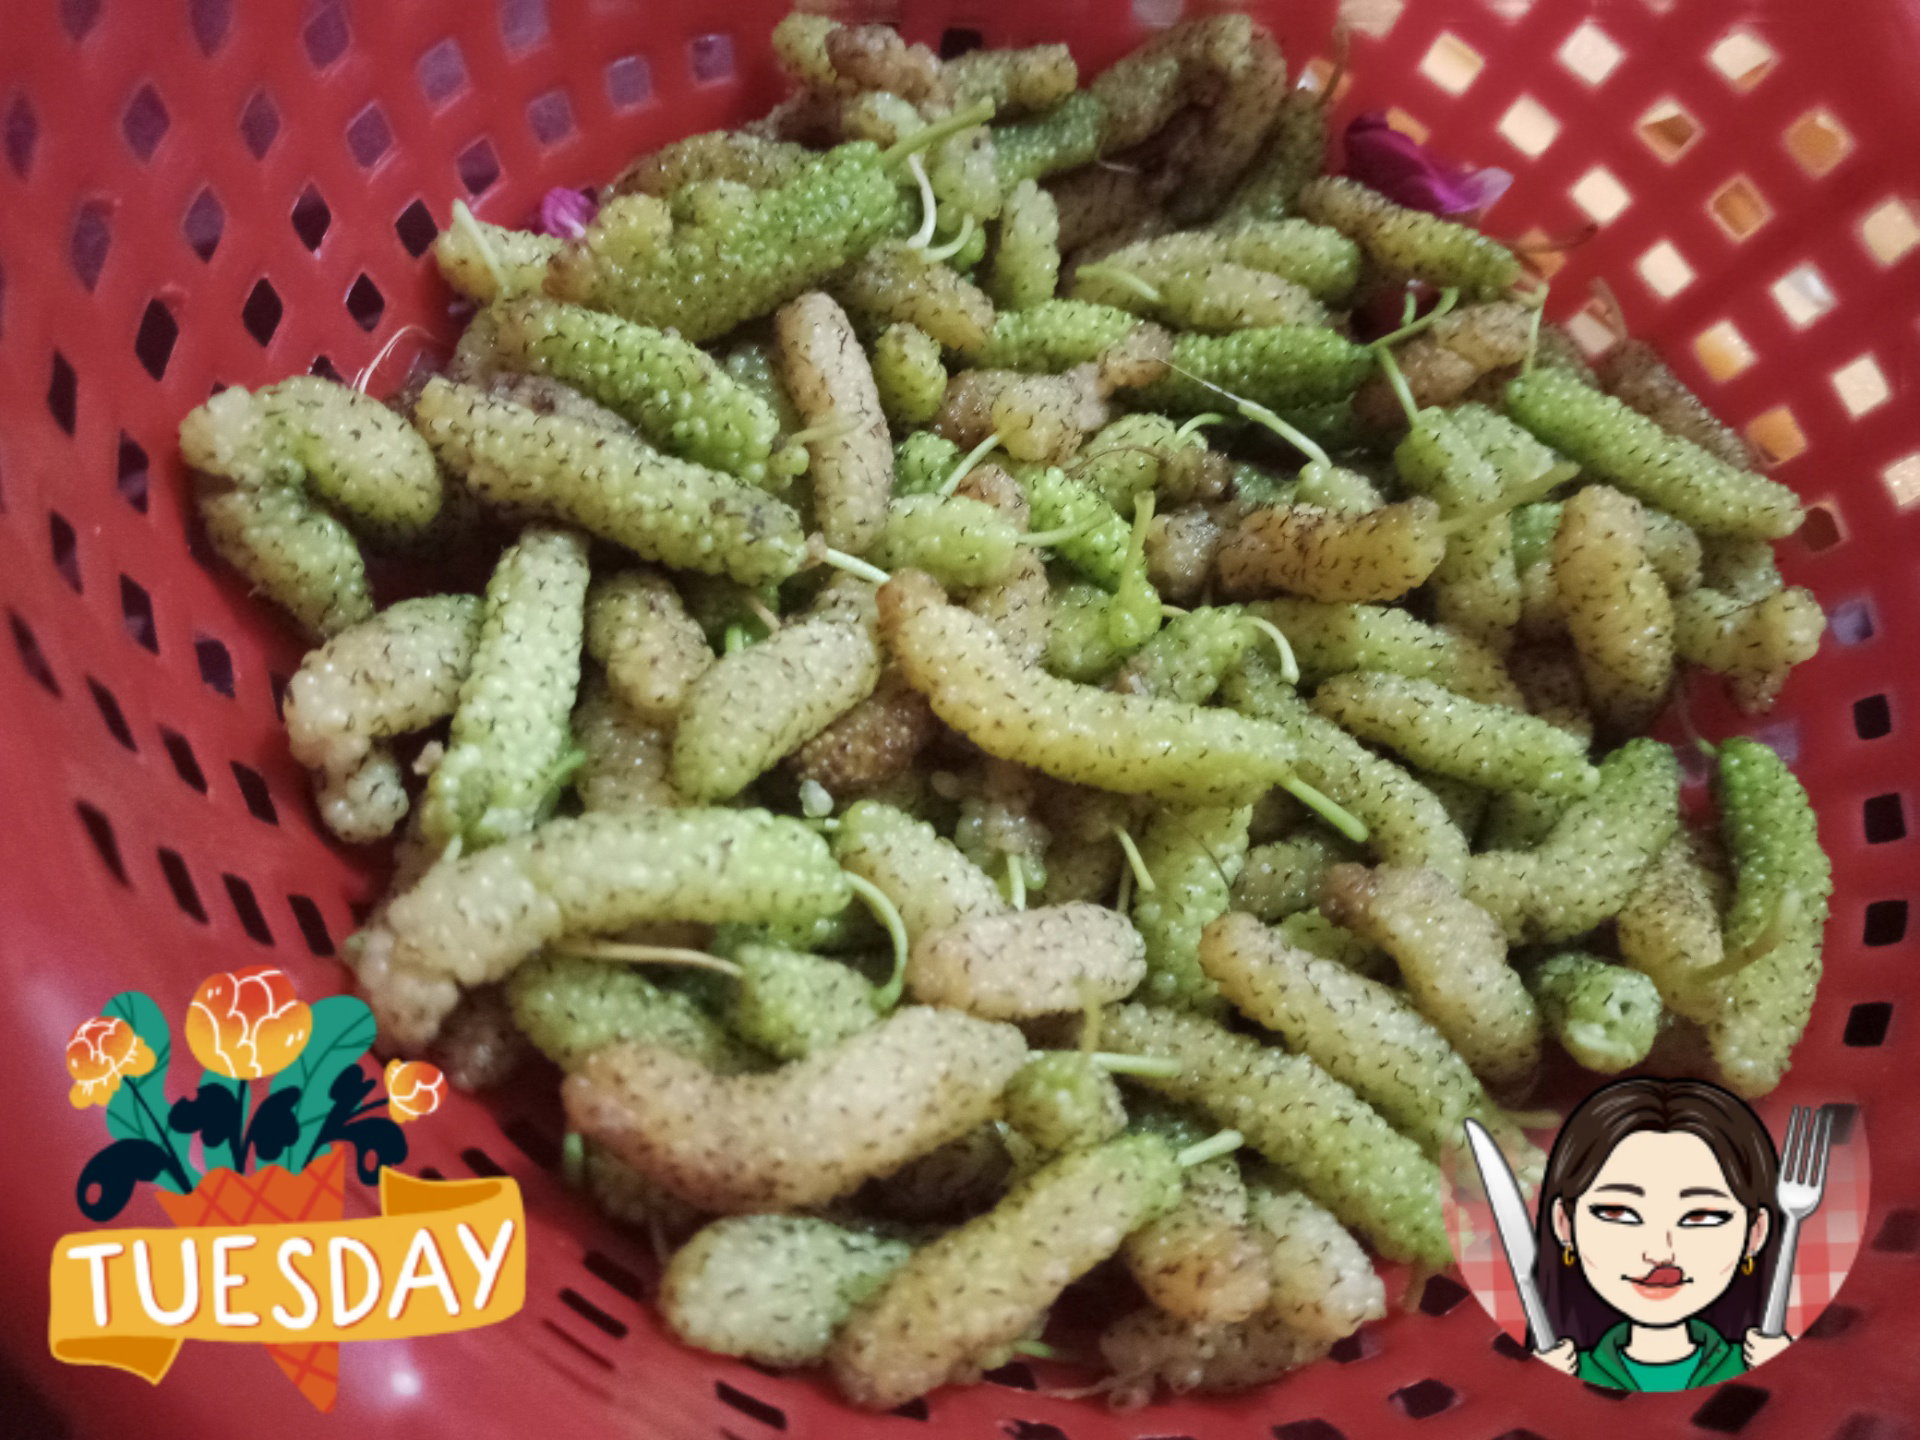
On Tuesday i went out with my brother to get some things and on my way back we saw a mulberry tree and i got some fresh mulberries for iftaar . I told my siblings caterpillars turn into this fruit and they were into it but my dad told them thats a false news 😂 it was fun pranking them and i had a great time eating these earthy sweet fruits.
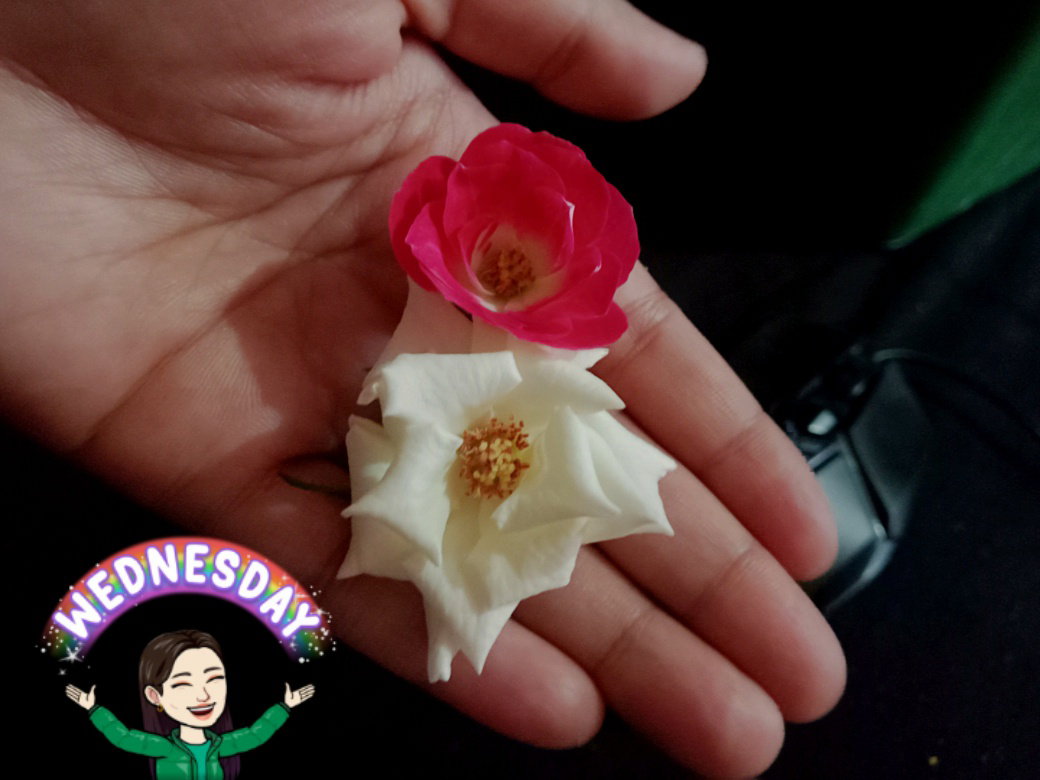
Wednesday was all about me being sick and resting but the one thing that made me happiest was my lil sister bringing me Roses from our garden she gave me these two .It made me smile alot the pain faded for a second .Its all about the efforts you make for your people .later i dried them up for tea .
Thursday was a very rainy day and i went on my roof to check the pots that needed to get some rain and the ones that don't need much water . That's when i saw these flower growing up they look like jasmines but have 5 petals they looked really pretty . The weather the view and the clouds had my heart .
On Friday at 12 o clock i was watering my plants when i saw this beautiful Lemon Butterfly on my lemon plants and i just couldn't keep myself from taking a picture of her she posed well too ❤️😍
On Saturday i was busy with chores so when i got done i just decided to watch a movie .I watched the new Avatar movie .Its always a happy time when you finally relax after a hardworking long day
Sunday which is today was all about self care .I ended up writing the last update of my week and that was i did my nails .I did some skin care too .Its always nice to spend time caring for ourselves remember Self love isn't selfish and its needed
I hope my next week as well as yours brings all of more joys and love in our life❤️
Raita (My all time comfort food)
As you all know in the month of Ramadan Muslims fast for 30 days and let me tell you when you're up all night after the before sunrise meal you just wanna rest ,You don't wanna rest after eating something heavy that can't be digested. So to avoid a heart burn and that nauseated. Heavy feeling all day We eat a light meal full of nutrients and this one is my fav .
This recipe is for the days you have a heated stomach or an upset stomach . We call it Kachumbar salad Raita .
Basically its yogurt and minced veggies made into this yummy dip .
Should be eaten cold with rice or a paratha.
How do we make it?
Its as simple as saying Abc. No cooking no extra dishes or oams involved .
Just take a dicer or grater and mince cucumbers , deseed the tomatoes and mince them too. Take some mint n cilatro mince them too add lil roasted cumin powder some salt and add your preferred yogurt .I m a vegan but if its for heated stomach use dairy yogurt .Nuts heat your stomach more up so either use Oat curd or Normal greek yogurt (make sure it is Cruelty free the person we buy from feeds the calves first then milks the cows so the calves don't starve and its not that bad ). I used plain yogurt because i had acidity i mixed the yogurt with all the veggies .
Then served it with leftover crunchy rice from the bottom of the pot this combination is best when its cold .Yogurt also keeps you hyderated all day as well as the probiotics in it are great to heal stomach diseases.
So there you go another Simple nutritious recipe for Y'all

 @Biyaawnurr