 @totallyNotAUser
edited
more from that month
@totallyNotAUser
edited
more from that month
Building a Discord Bot with discord.js Hello there! Have you ever wanted to **make a Discord bot** with **Node.js**? In this article I am going to tell you how. Requirements **Node.js v12.0.0** or newer **npm**, Node.js's package manager Installing discord.js First, you need to create a directory for your project. Once you created the project's directory, open a terminal/command prompt and run this command: npm install discord.js Alternatively, if you don't want to install discord.js every time you want to create a new bot, you can run the same command with the `-g` flag, to install discord.js globally (might require administrator/root privileges): npm install -g discord.js Creating the main file Now you need to create the main file that contains the code. I will name it `index.js` here. Here's what you need to put in that file for now (you can remove the comments, I added them so that you understand what the code does): const Discord = require("discord.js"); const client = new Discord.Client(); client.once("ready", () => { // when our bot connects to Discord and authenticates console.log("The bot is connected"); }); client.login("token"); // we will add the bot's token later Creating a Discord bot on the Discord Developer Portal New Application If you look at the code above, you will see the word *token* on the last line. This is just a placeholder. We will now create a bot application and insert its token there. First, go to https://discord.com/developers/applications - this is the Developer Portal. You will see something like this at the top:
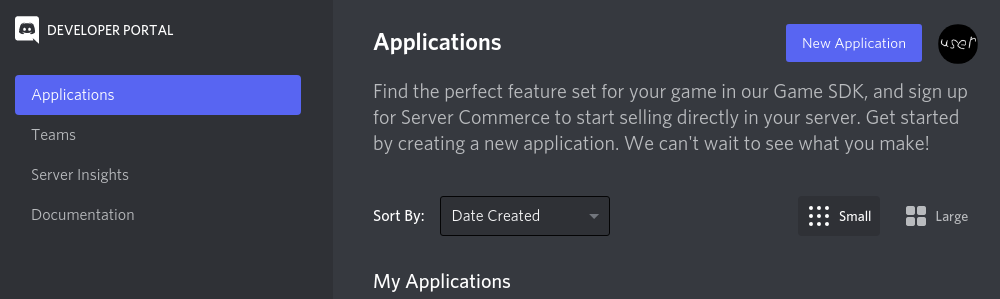
Click on the **New Application** button. A pop-up will appear, it will ask for the name of your bot. Enter a name.
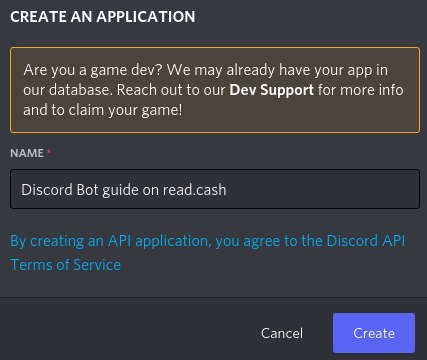
Before you click **Create**, don't forget to read the Discord API ToS. If you don't agree, you should not create an app, I guess. https://discord.com/developers/docs/legal After you create the application, you will be on its page, it will have this sidebar:
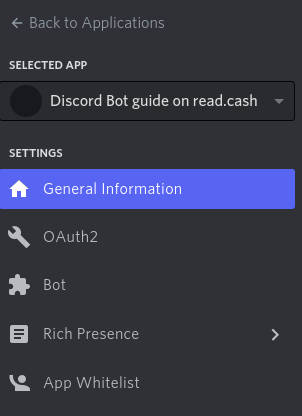
The **General Information** tab has things like name, icon, description, ID, etc. You might want to set the icon (it will be visible when opening the link that adds the bot) and the description (it will be visible in bot's about me). Now head over to the **Bot** tab, and click **Add Bot**. You will see this page:
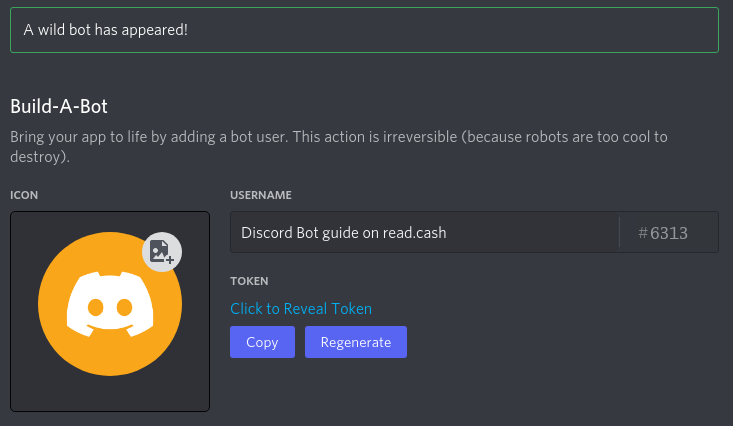
You might want to set the bot's icon; that will be its profile picture. Click **Copy** under **Token**. Now, the token will be in the clipboard, and now you can paste it in the code mentioned earlier. The token must be kept in secret At this point it should be noted how important it is to **keep** the token **in secret**. If anyone malicious gets your token, they can do anything the bot can do. So you should never-ever leak the token. And if you ever do, just click **Regenerate**. This will invalidate the old tokens, and now you will just have to update your code to use the new token. If you will share the bot's code, instead of hard-coding the token, you should use an environment variable, like this: // ... client.login(process.env.TOKEN); You can, of course, replace `TOKEN` with any environment variable name. Their names are usually all uppercase letters, with underscores between words, like this: `DISCORD_TOKEN`. It's up to you to choose the name. In this example I will use `TOKEN`. You need to **set the environment variable** before running the bot, it depends on the operating system: # On Windows (cmd): set TOKEN="my-super-secret-token" # ... and then run the bot in the same cmd # On Windows (powershell): $env:TOKEN="my-super-secret-token" # ... and then run the bot in the same powershell # On Linux: export TOKEN="my-super-secret-token" # ... and then run the bot in the same shell Starting the bot To actually start the bot, you need to run **this command**: node index.js Now it should say "The bot is connected". Adding the bot to a server Now we can add our bot to servers. To get a link that adds the bot, go to the OAuth2 tab in the Developer Portal and scroll down to **OAuth2 URL Generator**. You will see this:
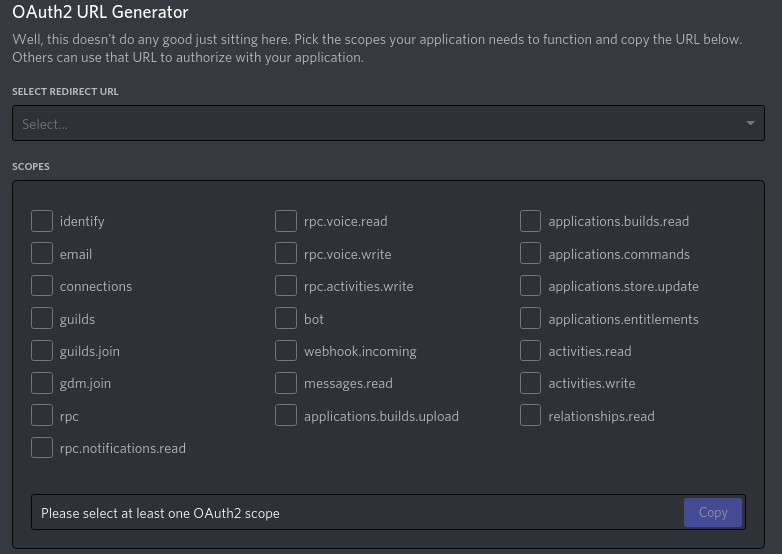
Tick the `bot` checkbox. If you want to add **slash commands** to your bot, also tick the `applications.commands` checkbox. When you tick the `bot` checkbox, another menu will appear below this one. It will just contain checkboxes for the **bot's permissions** (the same ones as a regular user can get). Tick the needed ones, for example "Send Messages" (we will use it in this article). Once you've selected all the needed permissions for the bot, click **Copy** next to the URL, and paste it in a new tab. Authorize the bot to any server you want. Making it interactive Replying to messages To make the bot interactive, we can add event listeners. Let's add an event listener for a message: client.on("message", (msg) => { // ... }); Here, `msg` is a `Message` object, which contains a `reply` method, which, as you can understand by its name, replies to a message. Let's use it: client.on("message", (msg) => { if (msg.content == "does the bot work") { msg.reply("yes, it does"); } });
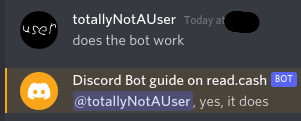
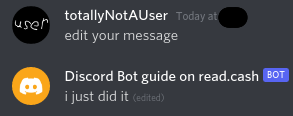
If you don't want to @ mention the sender, you can use `msg.channel.send` instead of `msg.reply`. Editing messages The bot can edit its own messages using the `edit` method of the Message class: client.on("message", (msg) => { // ... else if (msg.content == "edit your message") { msg.reply("i will") .then(() => msg.edit("i just did it")); } });
Reacting to messages The Message class has the `react` method, which allows our bot to react to the message: client.on("message", (msg) => { // ... else if (msg.content == "react to me") { msg.react("🆗"); } });
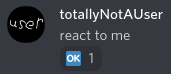
It is also possible to react with custom emojis, by using the format `<:name:id>`, which you can get by typing `\` into the chat box and choosing the custom emoji from the list. Conclusion These are the basics to get you started with discord.js. For further information, see the documentation or the guide website. I might make more articles about discord.js, so don't forget to subscribe if you don't want to miss them. https://discord.js.org/#/docs https://discordjs.guide/ Full code: const Discord = require("discord.js"); const client = new Discord.Client(); client.once("ready", () => { console.log("The bot is connected"); }); client.on("message", (msg) => { if (msg.content == "does the bot work") { msg.reply("yes, it does"); } else if (msg.content == "edit your message") { msg.reply("i will") .then((reply) => reply.edit("i just did it")); } else if (msg.content == "react to me") { msg.react("🆗"); } }); client.login(process.env.TOKEN); Thank you for reading.
No comments yet