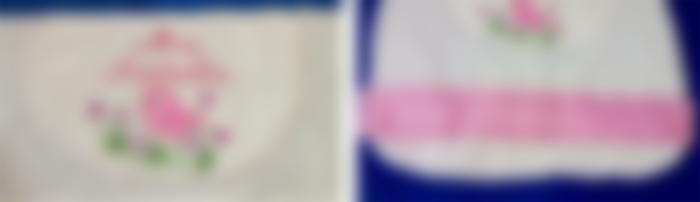
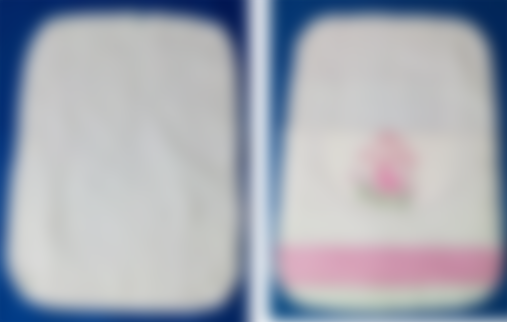
A cute lullaby for Mia Isabella embroidered in cross stitch.

Good morning dear friends of Read.cash, happy beginning of the weekend. Here in Venezuela we have a longer weekend because today is our national day that marks the beginning of our independence. I like this very much because I will be able to enjoy my family and I will also be able to spoil them with something delicious that I plan to make. But I also come to show you a work that I made some time ago for Mía Isabella, who was born. It is a lullaby, or cooing, for those who do not know what a lullaby is, I tell you that some time ago they became very fashionable and moms began to use them to take the baby out of the clinic for the first time.


Elaboration process
The first thing we do is to choose each of the materials that we are going to use, to have in mind what we want to do, what colors the client likes, what design she wants for the embroidery, all this we must be very clear.
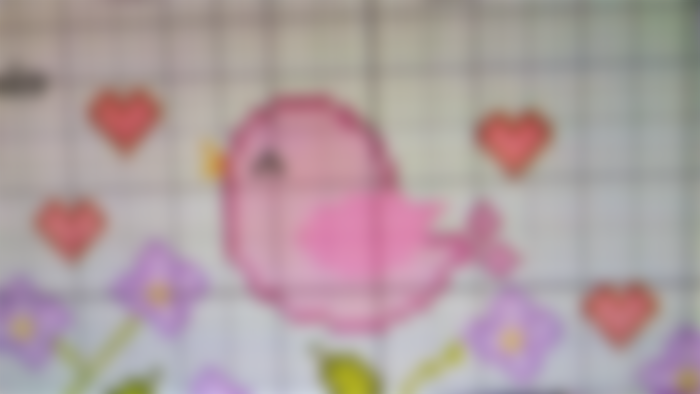
Choosing an embroidery is not easy, nowadays we not only have magazines but also the internet at hand that gives you a wide range of designs, you no longer have to search letter by letter to embroider a name, just type in google the name of the person "Carolina in cross stitch" and you get different types of letters of all sizes and shapes.


Materials
- Etamina or Aida fabric.
- Half a meter of Thousand stripes or poplin fabric.
- Half a meter of wadding.
- Half a meter of lining fabric.
- 1/4 of matching fabric (Vichy).
- 2 meters of lace. - Ribbons.
- Scissors. - Embroidery threads.
- Cross stitch needle #22.


Step 1.
- We are going to cut a semicircle in Etamina fabric, 19 cm high by 28 cm wide and give it a circular shape. Then we start the cross stitch embroidery.
- Remember that for cross stitch embroidery you must take into account the number of squares you are going to use, cut the special fabric for this work called Etamina or Aida, you must leave a margin of two more cm because the fabric tends to fray a little, look for the center of the fabric and the center of the drawing and from there you make the count of the squares.


Step 2.
- Cut out a square in the main fabric measuring 44 cm wide by 36 cm high. We make the rounded shape at the bottom corners (as shown in the picture).
- We mount this fabric on the wadding and cut to give the same shape, place on top of the embroidery that we did previously and fix with thread and needle or pins.

Step 3.
- In this step we are going to fix the crumpled lace around the embroidery, first we do it with needle and thread and then we pass the sewing machine.
- Then we work the fabric to decorate that measures 12 x 45 wide, I used Vichy but you can use unicolor or patterned fabric. Tuck the edges inwards about one cm, iron and sew straight stitch.


Step 4.
- We place the lining fabric and sew only on the top, then we turn this fabric over and arrange everything to baste first with thread and needle, before going through the sewing machine. It is good to fix or baste first by hand so that when you pass the seam there are no imperfections.

Step 5.
- Cut a rectangle in main fabric measuring 44 cm wide by 62 cm high. We divide the work in half and pass the iron, again we do the same and thus divide the fabric into 4 parts as shown in the image.
- We place this fabric on the wadding and cut out the shape, then we fix it to the fabric with needle and thread or with pins, so when we pass the seam with the sewing machine the fabric will not move. We pass the straight seam on these lines that we made with the iron.
- We place the piece that we made previously and we baste them too.


Step 6.
- We make the ruffles or lace that we are going to use to decorate the top of the lullaby. We cut strips of 1.80 cm long by 10 cm wide and make the ruffle system. If you do not like this idea you can change it for embroidered strip.


Step 7.
- We place this ruffle or lace fixing it first by hand, when we are sure that it is well placed and without imperfections we proceed to pass straight and zigzag stitching.
- We place the lining fabric, fix it and pass the straight and zigzag stitching all around, leaving an opening of approximately 7 cm to turn over. Turn over and close the opening with a hidden seam.
- Finally we decorate as we like with matching ribbons.
I hope you liked it, if you want to make it I tell you that on the internet you can find many more models and combinations for both male and female. See you soon friends, take care of yourselves.


This is soooo cute, I remember my friend who is really good at embroidery too ( ◜‿◝ )♡