It seems like you can never have enough starter pots around (except when it's not planting season and they are taking up space). In addition to saving all the ones that come with bought plants I started making my own. It's something real easy to do and they are basically free from recycled trash.
What you need:
Drill (cordless preferred)
Drill bit about 1/4" to 3/8"
Spray paint (cheap)
Suitable plastic container
Start by saving some containers. Not just any containers though you need ones with a few characteristics. First is size. While you can use small things they become a real pain since they are easy to knock over. Something 3" or more in diameter is preferred. Old butter and margarine containers work well. Next is material. You don't want plastic that is too hard and brittle. It will break when you try to drill it. Pill bottles would be an example. You also don't want something too thin as it won't hold up. A cut in half pop bottle for instance. While it may work depending on shape it won't last more than one use. Third is shape. You need ones that either have straight sides or are wider at the top. If they have any kind of ridges they need to run vertically and all the way to the top. If there is any wider spot lower in the container the dirt will stick when you try to remove the plants. Whatever you choose you will want to wash them and if they have any paper labels remove them the best you can.


Once you have some containers saved up it's time to turn them into starer pots. All you need for this is a drill and drill bit. Piece of scrap wood might be useful to drill into if the container bends easily. The size of the drill bit doesn't matter much. It just needs to be big enough to allow water to drain while small enough to not let dirt out easily. Roughly 1/4" for smaller containers and 3/8" for bigger ones. You want to drill 3 or 4 holes around the side near the bottom of the container. Not all the way at the bottom. How far up depends on the size of the container. Small containers 1/4" bigger ones 1/2" or anywhere in between. You want the pot to drain but still hold a bit of water.

When you have those all drilled it's time for painting. Why paint them? Well seedlings don't like certain colors like white and most light colors. The reflectivity burns up the leaves. You want something darker. Black and dark green are good choices. Tomato plants like red but do well in black too. I used to go with different colors but now just go with black since it's still under $1 a can. Now you don't need to paint all containers. If they are already a darker color then you can use it. Really wouldn't need to paint that small country crock container but I might paint the bigger one because of the white on it. You also don't need to pain the bottom or all of the inside. Just about the tope half an inch of the inside although painting that will cover most of the inside with over spray anyway.
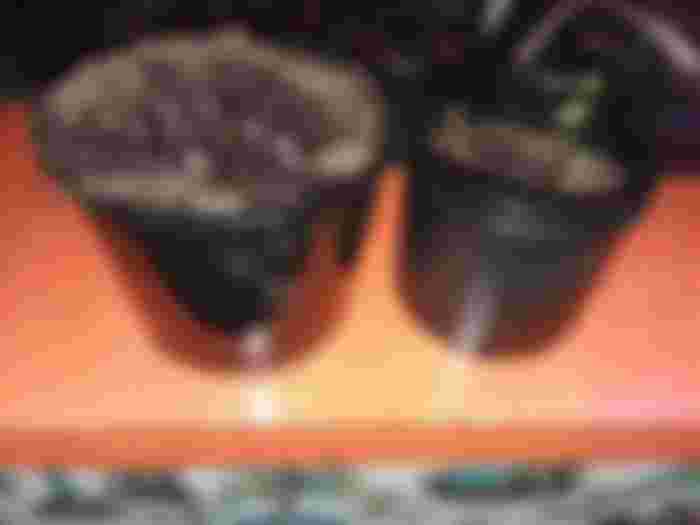

That's it just store them until you are ready to plant and then add dirt and seeds. I've done this with all sorts of containers over the years. Mostly those 2 sizes you see in the photo but I have a bunch of elliptical butter containers somewhere too. I've even used pop bottles with the top cut off in a pinch. Those didn't work too well. In addition to the sharp tops from cutting the plants tended to stick tot he bottom of the bottles. Had to cut them open to get them out. Being clear they worked fine for starting the seeds just a pain to transplant. Containers that stack are better for storing but I love those jars since they are very durable.

...and you will also help the author collect more tips.