I was supposed to be taking a break from making an article today but I feel bored lying in bed, so here I am again guys.
Since I got serious with read.cash last month, July 14 to be exact, I think this one simple yet special article will be helpful and handy. Since I can post article almost every other day now, many also ask me basics of how to make an article in read.cash platform. So here I am, I'll try my best to be able to help those aspiring content creator who really like to jump on board also.
Without further ado, will go directly to the our content for today.
The Header
Note: This is only starts at making article and the basic tools use in creating a more persuading article.
First and foremost, when you open the read.cash app, you'll be automatically on the home page.
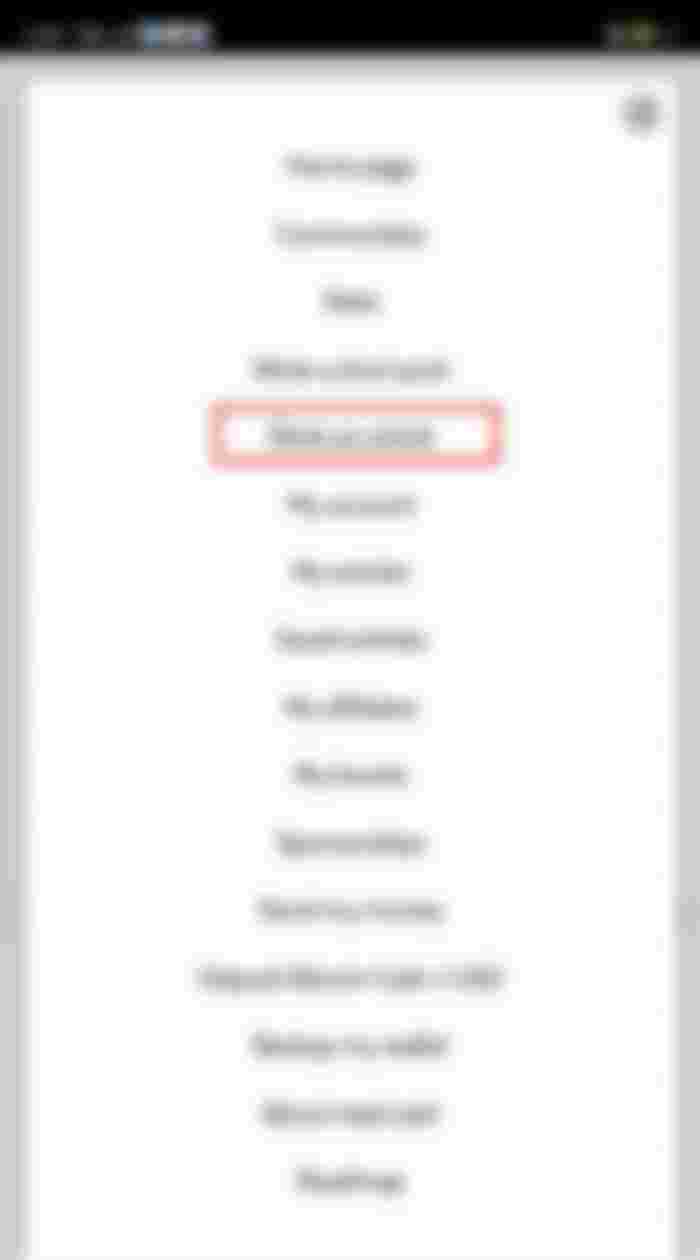
Second is, tap on the three vertical line in the upper right corner of the screen/monitor you're using.


Third, after clicking/tapping on the three white vertical line, there will be a pop up box that will appear and of course, we tap/select on Write an article command box.

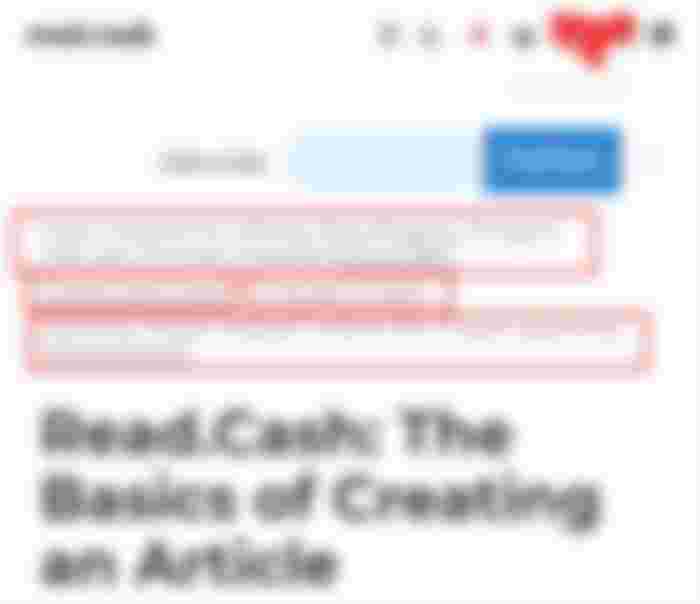
Fourth, after doing the third step, you'll be redirected to the main article maker that looks the same as the image below.


You need to Add a title, next to that is to Add topics, followed by Submit to community, then Add lead image and last is Language.
Note: Never forget to complete the header part, especially the Submit to community, make sure you select those auto-approved communities that are available. On the add topics also, you select up to ten topics. It will look like same as the image below after completing the header.

The Body and Basic Tools
For the main body of the article, we have eight (8) major tools in creating a more persuading and eye catching article guys, that will catch or hint your readers to continue reading down till the end.
Let's begin listing this tools:
Header 1
Header 2
Insert Image
Insert Video/Audio Link
Bullets List View Style
Quote Box Style
Tabloid View Style
Sponsors Box
See image below:


1 & 2. Header 1 and 2
When starting to write the body of the article, at your first tap, the basic tools will pop-up (see image above with numbers). The logo H1 and H2 are for Header 1 and 2. Header is for sub-titles, a title inside the main title. The only difference in this two is that H1 has bigger font size than H2.
3. Insert Image
The third logo which is clearly has an image on it's icon, is the insert image tool. When adding an image, especially when the image is not ours, we must give credit and put the link to it (Mind this always guys) . There are three types or ways of how to add an image link into an article in read.cash:
First and the most common one is adding the link below the image.


Second is, when your done inserting the desired image, you'll just name that picture the name you like and just add the link on the last part or ending portion of the article. Giving all the credits to the rightful owner just like this one for example:
Step 1: Insert image, add desired name


Step 2: Add this on the end part of the article.
Credit to the rightful owners of the images:
Image 1: https://pin.it/6XDli74
Third and last way of adding link to an image is my favorite, it is making the pic clickable and trappable. It only takes three steps to make it:
Step 1: Insert the desire image
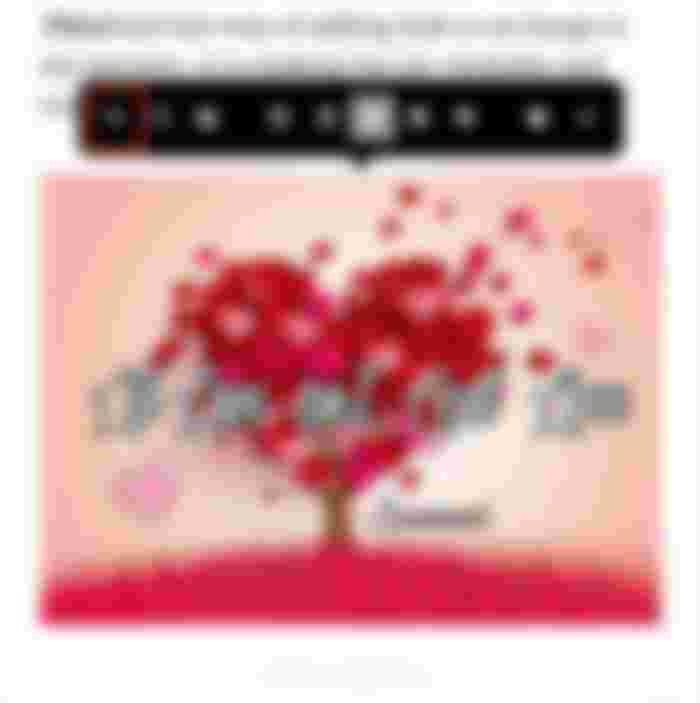
Step 2: tap/click the inserted image, once tap/click it will pop-up another set of tools and settings that look like this image below, and just tap the link 🔗 icon, the one with a red box.

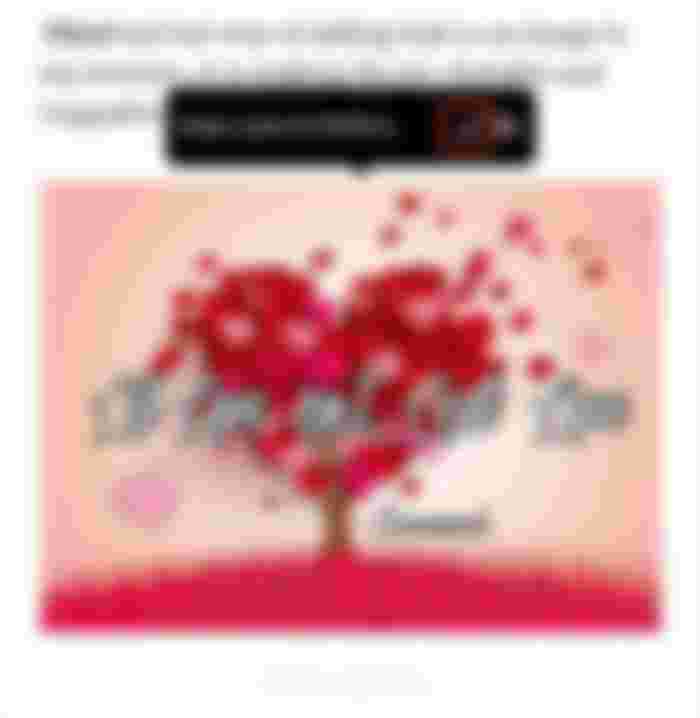
Step 3: After tapping the link 🔗 icon, it will pop-up again another box and then you just have to the paste the link of the image you selected, then click the ☑️. That's it.!

Now let's check and try the end result should be like this guys;
4. Insert Video/Audio Link
This tool is used when your adding a video or an audio to your article, as easy as adding image which I detailed above.
5. Bullets List View Style
It's an editing tool used to add listing with bullets on it, example:
Gorgeous & Beautiful
Handsome and Masculine
But just SINGLES.
Hahaha, read it again singles! (Laughs) just for good vibes guys! Hehe
6. Quote Box Style
This tool with icon of a message box is used for your messages and conversation if your sharing some from your own or from others. Example:
I love y'all my dear readers!!!!
7. Tabloid View Style
This one tool also I used for prompts, commands, notes or reminders and even broadcast. There's two ways also how to use it, Example:
Tap the <> less than and greater than icon first in the pop-up tool box and then type the desired message you want to put in it and result would look like the black image below.


Reminder: Love YourselfTo do this, type the desired word first then highlight the whole sentence you want to be eye catching and easily gets readers attention. It will look like the reminder you see below.
Reminder: Loving Yourself is always a must!
8. Sponsors Box
Lastly, that "$" is for your sponsors box, you just tap it ang put it anywhere you want it in your article and if you forget to add one, you don't have to worry, every article has a sponsorship box after every article before the comments section.
The Most Common Editing Tools
To finish this article, of course we'll never forget the most common tools used in editing your drafted article before prof-reading guys.


Maybe we are all familiar with these editing tool guys in microsoft. The first one is BOLD, the second one is Italic, the third one is UNDERLINED and the fourth one is CENSORED. The other five icons are already tackled earlier on the article guys.
Minimum Time Reading
This one also is vital in making our article. The minimum length of time reading is at 4 minutes, it is around 600 (six hundred) plus words for your article to be qualified as good. This is how to check if your draft article already reach the minimum limit;
Save first your drafted article so that your progress will be recorded.
Tap the three (3) vertical lines in the upper right corner of the screen.
Then select My articles
See the photo below if the time inside the red box reach four (4) minutes and if it does, it's good to go for publishing.


Grammar and Prof-reading
Last but not the least, the most important of them all is the grammar. Me personally ain't good at it, but I'm my best to better my grammar to the top of my capabilities. Then, prof-reading come next before publishing. Checking out errors from periods to comas, and most especially the correct spelling of the words.
Closing Thoughts
I'm just sharing the basics guys, and if you have some questions about something that I didn't explain how it's supposed to be use, then feel free to ask me on the comments section below guys. Goodluck to all of us aspiring content creator, we keep doing what we doing in here y'all. Can't wait to see your next articles guys.!!!
Author's Quote:
"You can start somewhere, somehow, with what you have and what you've learn, and the rest is experience and lessons learned."- Carewind


Hello there buddy!!!!🙋🏽♂️ I'm glad you reach end again, thank y'all for always sharing your day with me, see you on the next one buddies, have a chill vibe day, stay hopeful cause better days are comin', Jah bless.!!! 🙏🙇
Adieux!!!
Read.Cash: The Basics in Creating an Article
Carewind - 20th Article
August 10, 2021 - 09:13pm
My latest Articles for the month:
..

...and you will also help the author collect more tips.

This is very helpful para sa mga new users lods. Good job.